Love this? Save it for later!
Share the inspiration with your friends
“You’ve got five minutes, a hungry kid, and nothing fancy in the fridge—what do you do?” That was me one hectic Thursday afternoon, juggling emails and a never-ending to-do list. Honestly, I wasn’t expecting much when I threw together some chicken tenders with just five ingredients. No complicated marinades, no hours of prep, just simple stuff I had on hand.
The sizzle of the chicken hitting the pan was oddly comforting amid the chaos. My son, who usually snubs anything “too grown-up,” surprised me by devouring every last tender without a single complaint. Maybe you’ve been there—scrambling to make something quick that actually tastes good and gets a thumbs up from the picky eaters. This easy simple chicken tenders kids love recipe became my trusty go-to after that day, and I swear it’s saved more dinners than I can count (plus, it’s perfect for my own cravings, too!).
Let me tell you, it’s not just a recipe; it’s a little kitchen lifesaver. The best part? It uses only five ingredients, all straightforward and familiar, no trips to obscure stores needed. I remember once almost forgetting to season the chicken because I was distracted by a phone call—oops—but it still turned out great! That’s how forgiving and reliable this recipe is. So, whether you’re a busy parent, a newbie cook, or just someone who loves crispy, juicy chicken tenders, this recipe might just become your new favorite.
Why You’ll Love This Recipe
Having tested this easy simple chicken tenders kids love recipe more times than I can count, I can confidently say it’s a crowd-pleaser for all ages. Here’s why it stands out:
- Quick & Easy: Ready in about 20 minutes, this recipe is perfect for last-minute dinners or when you’re short on time.
- Simple Ingredients: You only need five common kitchen staples—no fancy sauces or hard-to-find spices.
- Perfect for Weeknights: Whether it’s school nights, casual dinners, or even packed lunches, these tenders fit right in.
- Crowd-Pleaser: Kids love them crispy on the outside and tender on the inside, and adults usually sneak a few bites, too!
- Unbelievably Delicious: The subtle seasoning and crispy coating create a texture-flavor combo that’s just right.
This recipe isn’t just another fried chicken tender—it’s about fuss-free comfort food made right. The thin coating crisps up perfectly without overpowering the juicy chicken inside. I usually toss in a bit of smoked paprika for a hint of warmth, but the recipe shines even without it. Plus, it doesn’t require marinating, so you can get dinner on the table fast. Honestly, it’s become my trusted secret when I want something satisfying without the stress.
What Ingredients You Will Need
This recipe uses simple, wholesome ingredients that come together to deliver crispy, juicy chicken tenders without any fuss. You probably have these in your pantry already, which makes it even easier to whip up anytime.
- Chicken Tenders: About 1 pound (450g) of boneless, skinless chicken tenders. If you can’t find tenders, thinly sliced chicken breasts work well.
- All-Purpose Flour: 1 cup (120g). This forms the base of the crispy coating. I like King Arthur flour for consistent results.
- Eggs: 2 large, beaten. They help the coating stick to the chicken, creating that perfect crunch.
- Panko Breadcrumbs: 1 cup (100g). These Japanese-style breadcrumbs give an unbeatable crispy texture. You can substitute with regular breadcrumbs but panko is worth it if you have it.
- Seasoning Blend: 1 teaspoon salt, 1/2 teaspoon black pepper, and 1/2 teaspoon garlic powder. Feel free to add a pinch of smoked paprika or dried herbs if you like a little extra flavor.
If you want to make this gluten-free, swap the all-purpose flour and panko for almond flour and gluten-free breadcrumbs. For a dairy-free version, this recipe is already perfect as is! I usually recommend using fresh, high-quality chicken tenders from the butcher or trusted brand for best texture and flavor.
Equipment Needed
- Large Mixing Bowls: For the flour, egg wash, and breadcrumb stations. Having three separate bowls makes the coating process smoother and less messy.
- Shallow Baking Dish or Plate: To hold the coated tenders before cooking.
- Nonstick Skillet or Cast Iron Pan: I prefer cast iron because it retains heat so well, helping the tenders get that golden crust.
- Tongs: For turning the tenders without breaking the coating.
- Paper Towels: For draining excess oil after frying.
If you don’t have a cast iron pan, a heavy-bottomed nonstick skillet works just fine. For an oven-baked version, a wire rack and baking sheet are handy to keep tenders crispy. I learned the hard way that overcrowding the pan leads to soggy tenders, so using a pan that fits your batch size comfortably is key.
Preparation Method
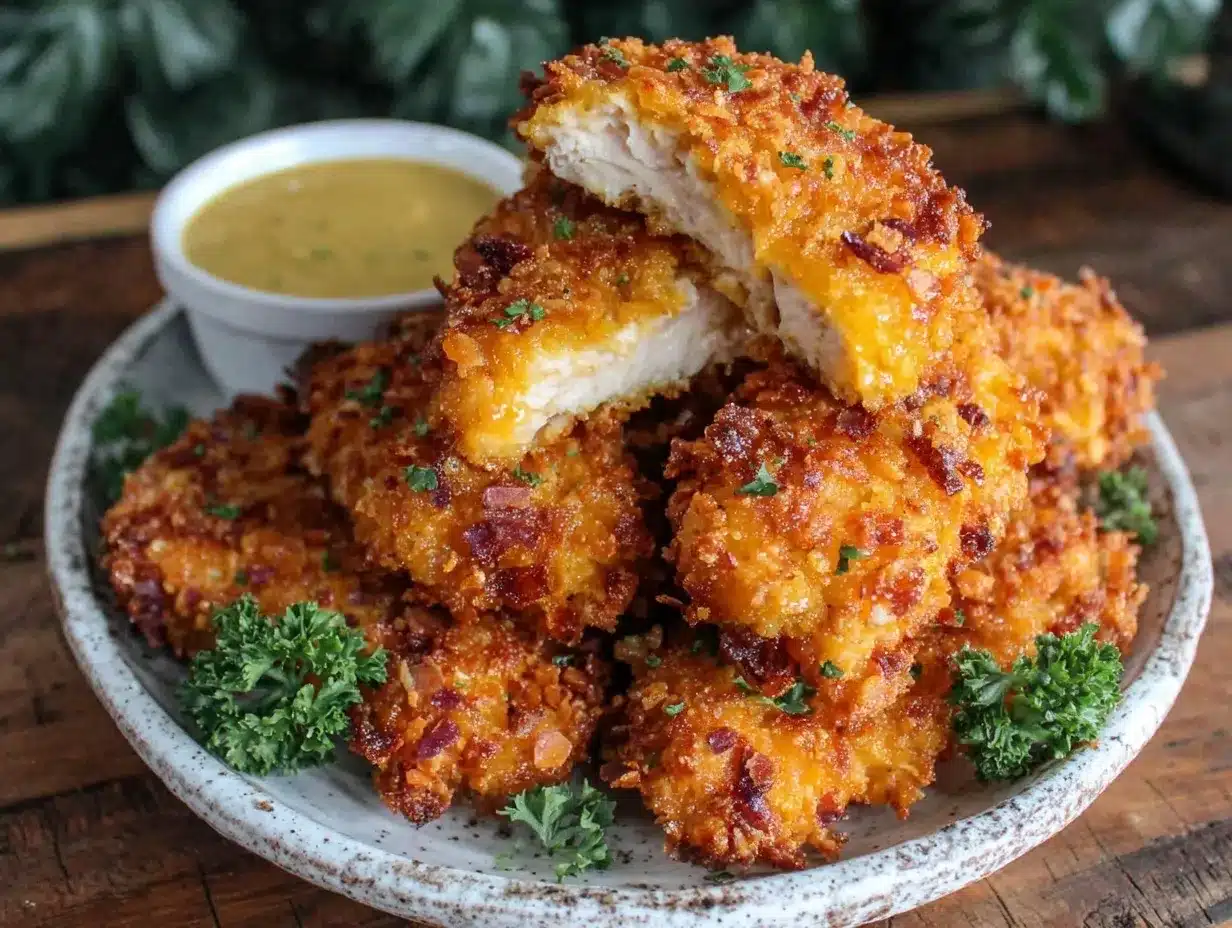
- Prep the Ingredients (5 minutes): Pat the chicken tenders dry with paper towels. This step is crucial for crispy coating because moisture can make the breading soggy.
- Set Up Coating Stations (5 minutes): In one bowl, place the flour mixed with salt, pepper, and garlic powder. In the second bowl, beat the eggs. In the third, add the panko breadcrumbs.
- Coat the Chicken (10 minutes): One by one, dredge each tender in the flour mixture, shaking off excess. Then dip into the beaten eggs, and finally press into the panko breadcrumbs, ensuring they’re fully coated. For extra crispiness, you can double-dip by repeating the egg and breadcrumb step—but honestly, one is enough for most.
- Heat the Pan (3 minutes): Add about 1/4 inch (6mm) of vegetable oil (or your preferred frying oil with a high smoke point) to a large skillet over medium heat. The oil should shimmer but not smoke.
- Fry the Tenders (8-10 minutes): Carefully place the tenders in the hot oil without crowding the pan. Cook for about 3-4 minutes each side, turning once, until golden brown and cooked through (internal temp 165°F/74°C). If the oil gets too hot, turn down the heat slightly to prevent burning.
- Drain and Rest (2 minutes): Transfer cooked tenders to a plate lined with paper towels to drain excess oil. Let them rest for a minute or two; the crust firms up and stays crispy.
- Serve Warm: Serve immediately with your favorite dipping sauces—it’s a game-changer.
Pro tip: If you don’t have a thermometer, test the oil by dropping a small piece of bread into the pan; it should sizzle and turn golden in about 30 seconds. I once forgot to heat the oil properly, and the tenders soaked it up like sponges—definitely not what you want!
Cooking Tips & Techniques
Cooking these easy simple chicken tenders kids love is straightforward, but a few tricks make all the difference:
- Dry Chicken is Key: Always pat your chicken dry before dipping. It helps the flour stick better and keeps the coating crispy.
- Don’t Overcrowd the Pan: Give each tender room to fry properly. Crowding lowers the oil temperature and leads to soggier tenders.
- Use Medium Heat: Too high, and the coating burns before the chicken cooks. Too low, and you get greasy tenders. Medium heat keeps it just right.
- Consistent Size: Try to select tenders that are similar in size or slice chicken breasts evenly. This ensures they cook through at the same rate.
- Breadcrumb Pressing: Press the panko gently but firmly onto the chicken to create an even crust that won’t fall off during frying.
- Multitask Smart: While the tenders cook, you can whip up a quick homemade dipping sauce or prep a side salad for a complete meal.
One time, I flipped a tender too early, and the crust fell off right into the oil. Lesson learned: patience is everything here! Also, if you prefer to bake these, preheat the oven to 425°F (220°C) and bake on a wire rack for about 15-20 minutes, flipping halfway through for that crispy finish.
Variations & Adaptations
Feel free to customize this recipe to suit your family’s tastes or dietary needs:
- Spicy Kick: Add 1/2 teaspoon cayenne pepper or chili powder to the flour mix for a mild heat that’s still kid-friendly.
- Gluten-Free Option: Substitute all-purpose flour and panko with gluten-free flour blend and gluten-free breadcrumbs or crushed cornflakes.
- Herb-Infused: Mix dried Italian herbs or fresh chopped parsley into the breadcrumb coating for a fresh, aromatic twist.
- Oven-Baked Version: For a lighter option, bake the coated tenders on a wire rack at 425°F (220°C) for 15-20 minutes, flipping once.
- Cheesy Crust: Add 1/4 cup grated Parmesan cheese to the panko for a savory boost.
I once made a batch with smoked paprika and lemon zest in the flour mix—unexpected but delicious! It’s a fun way to change things up without complicating the process.
Serving & Storage Suggestions
Serve these chicken tenders warm for the best crispiness. They pair beautifully with classic dips like honey mustard, ketchup, ranch, or even a homemade garlic aioli. For sides, think crunchy carrot sticks, creamy mashed potatoes, or a fresh green salad to balance the meal.
Leftovers? Store cooked tenders in an airtight container in the refrigerator for up to 3 days. To reheat, place them on a wire rack in a 375°F (190°C) oven for 8-10 minutes to restore that crispy texture. Avoid microwaving if you want to keep them crunchy.
Overnight, the flavors settle nicely, making these tenders a perfect addition to packed lunches or quick snack plates. Just reheat as above, and they’ll taste almost as good as fresh.
Nutritional Information & Benefits
Per serving (about 4-5 tenders): approximately 280 calories, 18g protein, 15g carbohydrates, and 14g fat. This recipe offers a good protein boost from the chicken, making it satisfying and filling for kids and adults alike.
The simple seasoning avoids excess sodium or additives, and using panko breadcrumbs keeps the coating light and crispy rather than heavy. You can swap vegetable oil for olive oil for a heart-healthier fat profile if frying at moderate temperatures.
Gluten-free and dairy-free friendly options make this recipe accessible for many dietary needs, and it’s a great way to encourage kids to enjoy homemade food without the processed additives found in store-bought nuggets.
Conclusion
This easy simple chicken tenders kids love recipe is a lifesaver for busy days and picky eaters. It’s fast, fuss-free, and delicious—what more could you want? I love that it’s adaptable, forgiving, and uses ingredients you already have on hand, making it a staple in my kitchen.
Give it a try, tweak it to your taste, and watch it become a family favorite. If you make it your own or have a twist you love, let me know in the comments—I’m always excited to hear how you put your stamp on this recipe. Happy cooking, and here’s to many crispy, juicy bites ahead!
FAQs
Can I bake these chicken tenders instead of frying?
Yes! Bake them at 425°F (220°C) on a wire rack for 15-20 minutes, flipping halfway through. This keeps them crispy without the extra oil.
What can I use if I don’t have panko breadcrumbs?
Regular breadcrumbs work fine, or crushed cornflakes for extra crunch. Just keep in mind the texture will be slightly different.
How do I know when the chicken tenders are fully cooked?
Use a meat thermometer to check for an internal temperature of 165°F (74°C). The outside should be golden brown and the juices clear.
Can I prepare the chicken tenders ahead of time?
You can coat the chicken and refrigerate it for up to 1 hour before frying. Avoid coating too far in advance to keep the breading from getting soggy.
What dipping sauces go well with these chicken tenders?
Classic choices like honey mustard, ranch, ketchup, or barbecue sauce are all great. For a twist, try a garlic aioli or a spicy sriracha mayo.
Pin This Recipe!

Easy Simple Chicken Tenders Kids Love 5 Ingredient Recipe Made Perfect

A quick and easy chicken tenders recipe using just five simple ingredients, perfect for busy weeknights and picky eaters. Crispy on the outside and juicy on the inside, these tenders are a family favorite.
- Prep Time: 10 minutes
- Cook Time: 10 minutes
- Total Time: 20 minutes
- Yield: 4 servings 1x
- Category: Main Course
- Cuisine: American
Ingredients
- 1 pound boneless, skinless chicken tenders (or thinly sliced chicken breasts)
- 1 cup all-purpose flour (120g)
- 2 large eggs, beaten
- 1 cup panko breadcrumbs (100g)
- 1 teaspoon salt
- 1/2 teaspoon black pepper
- 1/2 teaspoon garlic powder
- Optional: pinch of smoked paprika or dried herbs
Instructions
- Pat the chicken tenders dry with paper towels to ensure a crispy coating.
- Set up three bowls: one with flour mixed with salt, pepper, and garlic powder; one with beaten eggs; and one with panko breadcrumbs.
- Dredge each tender in the flour mixture, shaking off excess.
- Dip the floured chicken into the beaten eggs.
- Press the chicken into the panko breadcrumbs until fully coated. For extra crispiness, double-dip by repeating the egg and breadcrumb step (optional).
- Heat about 1/4 inch of vegetable oil in a large skillet over medium heat until shimmering but not smoking.
- Carefully place the tenders in the hot oil without overcrowding the pan.
- Fry for 3-4 minutes per side until golden brown and cooked through (internal temperature 165°F/74°C). Adjust heat as needed to prevent burning.
- Transfer cooked tenders to a plate lined with paper towels to drain excess oil and let rest for 1-2 minutes.
- Serve warm with your favorite dipping sauces.
Notes
Pat chicken dry before coating to ensure crispiness. Do not overcrowd the pan to maintain oil temperature and avoid soggy tenders. Medium heat is best to cook chicken through without burning the coating. For a gluten-free version, substitute flour and panko with almond flour and gluten-free breadcrumbs. Oven-bake option: 425°F (220°C) for 15-20 minutes on a wire rack, flipping halfway through.
Nutrition
- Serving Size: About 4-5 chicken te
- Calories: 280
- Fat: 14
- Carbohydrates: 15
- Protein: 18
Keywords: chicken tenders, easy chicken recipe, kids recipe, quick dinner, crispy chicken, 5 ingredient recipe


