Love this? Save it for later!
Share the inspiration with your friends
My sister-in-law, Jen, wasn’t trying to impress anyone. I’d stopped by her house on a random Tuesday in October to drop off a Halloween costume my son had outgrown, and the smell of butter and something savory hit me before I even got through the front door. She was standing in her kitchen, flour dusted on her favorite old sweatshirt, wrapping strips of crescent roll dough around hot dogs like it was the most ordinary thing in the world. Her kids were bouncing around the island, and she just kept rolling, not even looking up.
“Oh, these? They’re just for the school party tomorrow,” she said when I asked. Just for the school party. I mean, she was making these adorable little mummies with tiny mustard eyes, and she acted like it was no big deal. Honestly, I stood there watching her for a good ten minutes, and she didn’t even realize I was taking mental notes. That’s the thing about the best recipes—they come from people who don’t think they’re doing anything special. You know that feeling when you see something so simple and clever that you can’t believe you never thought of it yourself?
I grabbed a hot dog and helped her finish the last tray, and the whole time I was thinking about how perfect these would be for Halloween night. They’re fun, they’re fast, and honestly, they’re the kind of thing that makes kids (and let’s face it, adults too) actually excited to sit down and eat before the sugar rush begins. I’ve been making spooky mummy hot dogs ever since, and every single time, I think about Jen in her messy kitchen, completely unfazed by the fact that she was creating something magical.
Why You’ll Love This Recipe
Let me tell you, after making these spooky mummy hot dogs for three Halloweens in a row, I’ve got the process down to a science. And the best part? They’re almost impossible to mess up. Here’s why this recipe is going to become your go-to for every spooky gathering:
- Quick & Easy: From start to table in under 25 minutes. Seriously, you can whip these up while the kids are still arguing over costumes.
- Simple Ingredients: You only need three things—hot dogs, crescent roll dough, and mustard. Chances are you’ve got all of them in your kitchen right now.
- Perfect for Halloween: Whether it’s a school party, a neighborhood gathering, or just a fun dinner before trick-or-treating, these little guys steal the show every single time.
- Crowd-Pleaser: I’ve yet to meet a kid (or adult, honestly) who can resist a hot dog wrapped in buttery, flaky dough. They disappear faster than candy on Halloween night.
- Unbelievably Adorable: The mummy look is just too cute. Those little mustard eyes peeking out from the dough wraps—it’s impossible not to smile.
What makes these different from every other hot dog recipe out there? It’s the technique. Most people just wrap the dough in straight lines, but I’ve learned that a slightly uneven, haphazard wrap gives the mummies a more authentic “bandaged” look. It’s the imperfections that make them perfect. And honestly, this recipe isn’t just good—it’s the kind that makes you feel like a Halloween hero without breaking a sweat. Perfect for impressing a room full of sugar-crazed kids without any stress.
What Ingredients You Will Need
This recipe uses the simplest ingredients to create something that looks way more impressive than it actually is. Honestly, that’s the beauty of spooky mummy hot dogs—they’re all about presentation, not complicated cooking. Here’s what you’ll need to grab:
- Hot dogs: 1 package (8 count) standard-size hot dogs. I prefer beef hot dogs for the best flavor, but any variety works. If you’re feeding a crowd, grab two packages. (Pro tip: look for the shorter, thicker hot dogs—they hold the dough better and look more mummy-like.)
- Crescent roll dough: 1 can (8 ounces) refrigerated crescent roll dough. I’m partial to Pillsbury, but store brands work fine too. Just make sure it’s the sheet-style dough, not the perforated triangles—you want to cut your own strips for the best mummy look.
- Yellow mustard: For the eyes. You could use ketchup or even candy eyes if you’re feeling fancy, but mustard gives that perfect mummy-yellow glow. I like French’s for its bright color.
- Optional dipping sauces: Ketchup, ranch dressing, or even a spicy sriracha mayo for the adults. The kids will probably just eat them plain, but having options never hurts.
That’s it. Three main ingredients and a few dipping sauces. You probably already have the mustard in your fridge door, and the crescent rolls are a pantry staple in my house during October. I always keep an extra can in the fridge just in case—because once you make these once, you’ll get requests.
One thing I’ve learned the hard way: don’t try to use the low-fat crescent roll dough. It doesn’t brown as nicely, and the texture is a little off. The full-fat version gives you that golden, flaky crust that makes these so irresistible. Also, if you’re feeding a crowd with dietary restrictions, there are gluten-free crescent roll options out there—just check the refrigerated section of your grocery store.
For the hot dogs, I’ve tried everything from all-beef to turkey to plant-based options. The all-beef ones hold their shape best and have the most flavor, but the plant-based ones work surprisingly well if you’re cooking for vegetarians. Just make sure to wrap them tightly so the filling doesn’t dry out.
Equipment Needed
You don’t need a fancy kitchen to make these spooky mummy hot dogs—that’s part of the charm. Here’s what I use every single time:
- Baking sheet: A standard half-sheet pan works perfectly. Line it with parchment paper for easy cleanup—trust me, the dough can get sticky.
- Sharp knife or pizza cutter: For cutting the crescent roll dough into strips. A pizza cutter makes this faster, but a regular knife works just fine.
- Pastry brush (optional): If you want to brush the dough with melted butter or an egg wash for extra golden color. I skip this most of the time because the crescent rolls brown nicely on their own.
- Small bowl: For the mustard “eyes.” You’ll dip a toothpick or the end of a chopstick to dot the eyes on.
- Toothpick or skewer: For applying the mustard eyes. A toothpick gives you the most control.
That’s really all you need. I’ve made these in a friend’s tiny apartment kitchen with a dull knife and a cookie sheet that was way too small, and they still turned out adorable. Don’t overthink the equipment—just work with what you’ve got.
One tip: if you’re making a big batch (like 24 or more), having two baking sheets helps you rotate them through the oven faster. But one sheet will do the job if you’re just making a single batch for a family dinner.
Preparation Method
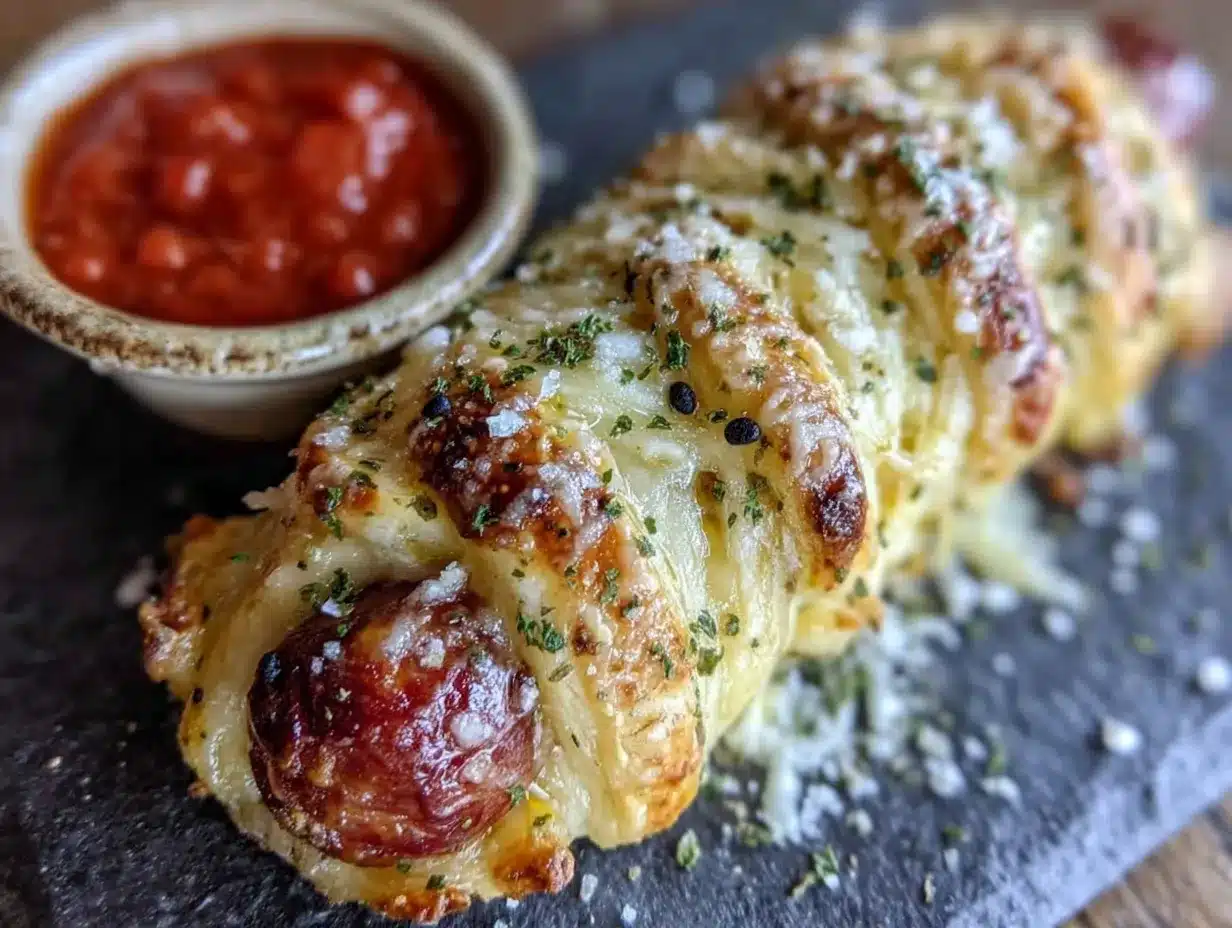
Alright, let’s get into the fun part. Making spooky mummy hot dogs is almost as entertaining as eating them. I’ve made these so many times that I can practically do it in my sleep, but I’ll walk you through every step so yours turn out perfect on the first try.
- Preheat your oven to 375°F (190°C). Line a baking sheet with parchment paper or a silicone baking mat. Getting the oven hot before you start wrapping ensures the dough puffs up immediately when it hits the heat.
- Prepare the crescent roll dough. Open the can carefully—I’ve had those things pop open on me more times than I’d like to admit. Unroll the dough onto a cutting board. If you’re using the perforated triangle sheets, press the seams together gently to create one solid rectangle. Use a sharp knife or pizza cutter to cut the dough lengthwise into thin strips, about 1/4 to 1/2 inch wide. You should get about 8 to 10 strips per can.
- Wrap the hot dogs. Take one hot dog and start wrapping a strip of dough around it, leaving a small gap near the top for the “face.” Don’t wrap too tightly—the dough needs room to expand as it bakes. Leave a little space between each wrap so the hot dog peeks through. This gives the mummy that authentic bandaged look. I like to wrap at a slight angle, overlapping the dough a bit, for a more textured appearance.
- Place on the baking sheet. Arrange the wrapped hot dogs on the prepared baking sheet, leaving about an inch of space between each one. They won’t spread much, but you want the hot air to circulate for even browning.
- Bake for 12 to 15 minutes. Keep an eye on them around the 10-minute mark. You want the dough to be golden brown and puffy, and the hot dogs should be heated through. If you like a darker, crispier crust, let them go the full 15 minutes. I’ve accidentally left them in for 17 minutes before, and they were still delicious—just a little more golden.
- Add the eyes. While the mummies are still warm, dip a toothpick into yellow mustard and dot two small eyes near the top of each mummy. You want the eyes to be close together for that cute, slightly confused mummy expression. If the mustard is too thick, you can thin it with a drop of water. I’ve also used candy eyes before, and they’re adorable, but they tend to fall off if you’re transporting the mummies.
- Let them cool slightly. Give the mummies about 5 minutes to cool on the baking sheet before serving. The dough will set up a bit, making them easier to handle. Serve warm with your favorite dipping sauces.
One thing I learned the hard way: don’t over-wrap the hot dogs. I tried to make them look extra “bandaged” one year, and the dough was so thick in the middle that it didn’t cook through properly. Less is more here—a few strategic wraps are way more effective than covering the entire hot dog.
Also, if the dough strips are too long, just trim them. You don’t need to use every inch of dough on each hot dog. I usually have a few scraps left over, which I bake separately as little dough bites—bonus snack for the cook!
Cooking Tips & Techniques
After making these spooky mummy hot dogs for countless Halloween parties, school events, and even a few random Tuesday dinners, I’ve picked up some tricks that make the process smoother and the results better. Let me share what I’ve learned:
Keep the dough cold. Crescent roll dough is much easier to work with when it’s cold. If your kitchen is warm, pop the dough in the fridge for 10 minutes before cutting the strips. Warm dough gets sticky and tears easily, which is frustrating when you’re trying to make those perfect little wraps.
Don’t skip the parchment paper. I know, I know—it’s an extra step. But the first time I made these directly on a greased baking sheet, the dough stuck in all the wrong places, and the mummies lost their shape when I tried to move them. Parchment paper makes cleanup a breeze and keeps the mummies intact.
Make the eyes stand out. If you’re using mustard, let the mummies cool for just a minute or two before adding the eyes. If the dough is too hot, the mustard will spread into weird blobs instead of staying as neat dots. I’ve had a few mummies with “runny” eyes, and honestly, it just made them look more Halloween-y, so don’t stress too much.
Batch cooking strategy. If you’re making a large batch, wrap all the hot dogs first, then bake them in batches. This keeps the process organized and prevents the dough from sitting out too long. I usually wrap two trays’ worth while the first tray bakes, and by the time the first batch is done, the second batch is ready to go in.
One of my biggest failures? I once tried to make these with puff pastry instead of crescent rolls. The puff pastry didn’t wrap as neatly, and the texture was too flaky—it fell apart when the kids tried to eat them. Stick with crescent roll dough for the best results. It has just the right amount of stretch and holds its shape perfectly.
Variations & Adaptations
One of the reasons I love this recipe is how easy it is to change up. Here are some variations I’ve tried over the years, each with its own fun twist:
Cheesy Mummy Hot Dogs: Before wrapping the hot dogs, slice them lengthwise (not all the way through) and stuff a thin strip of cheddar or mozzarella cheese inside. The cheese melts as the dough bakes, creating a gooey, delicious surprise. My kids go crazy for these.
Spicy Mummy Dogs: For the adults, brush the hot dogs with a little sriracha or hot sauce before wrapping. You can also mix a pinch of cayenne into the mustard for the eyes. These have a nice kick without being overwhelming.
Breakfast Mummy Sausages: Swap the hot dogs for breakfast sausage links and use the same wrapping technique. Serve them with maple syrup for dipping—it’s a fun Halloween morning treat that feels special without much effort.
Veggie Mummies: For a meatless version, use vegetarian hot dogs or even pre-cooked carrot “hot dogs” (roasted carrots marinated in a savory broth). The dough wrapping works the same way, and they’re surprisingly satisfying.
Gluten-Free Option: There are gluten-free crescent roll doughs available now, and they work perfectly for this recipe. Just check the package for any adjustments in baking time. I’ve used the brand from my local health food store, and the texture was spot-on.
I’ve also experimented with different “eye” options. Candy eyes are cute, but they can be hard to find in October (everyone’s buying them!). Small dots of ketchup work in a pinch, or you can use black sesame seeds for a more subtle look. Honestly, the mustard eyes are my favorite—they’re just so perfectly mummy-like.
Serving & Storage Suggestions
These spooky mummy hot dogs are best served warm, straight from the oven. The crescent roll dough is at its flakiest and most buttery when it’s fresh, and the hot dogs are perfectly heated through. I like to arrange them on a platter with a bowl of ketchup and a bowl of mustard in the center for dipping. They look amazing on a Halloween-themed plate or even a black serving tray.
For a Halloween party spread, pair them with other spooky snacks like pumpkin-shaped pizza bites or ghost banana pops. The combination of savory and sweet is always a hit. For drinks, a simple punch or apple cider works perfectly—keep it easy so you can enjoy the party too.
Storage: If you have leftovers (which honestly, is rare in my house), let the mummies cool completely, then store them in an airtight container in the refrigerator for up to 3 days. The dough will soften a bit, but they’re still delicious.
Reheating: To bring back that fresh-from-the-oven texture, reheat them in a 350°F oven for about 5 minutes. The microwave works in a pinch (30 seconds on high), but the dough won’t be as crispy. I’ve also reheated them in an air fryer at 350°F for 3 minutes, and they came out perfectly golden.
One thing I’ve noticed: the flavors actually meld together nicely after a day or two in the fridge. The mustard eyes soak into the dough slightly, giving the mummies a subtle tanginess that’s really pleasant. So don’t throw away leftovers—they make a great lunch the next day.
Nutritional Information & Benefits
Let’s be real—these spooky mummy hot dogs are a treat, not a health food. But if you’re curious about what’s in them, here’s a rough estimate per mummy (based on standard ingredients):
- Calories: Approximately 220-250 per mummy
- Protein: 8-10 grams
- Carbohydrates: 18-22 grams
- Fat: 12-15 grams
- Sodium: 550-650 mg
These numbers will vary depending on the brand of hot dogs and crescent rolls you use. If you’re looking to lighten them up, try turkey hot dogs and reduced-fat crescent roll dough. The taste is still great, and you’ll save about 50 calories per mummy.
On the positive side, hot dogs do provide a decent amount of protein, which helps keep everyone full and satisfied before the candy frenzy begins. And honestly, sometimes the best thing you can do for your family is make something that brings them together and puts smiles on their faces. These mummy hot dogs do exactly that.
If you’re cooking for someone with dietary restrictions, note that crescent rolls contain gluten, dairy, and eggs. There are allergen-friendly alternatives available, but you’ll need to check the labels carefully. For a dairy-free version, use dairy-free crescent roll dough and skip any butter wash.
Conclusion
These spooky mummy hot dogs are more than just a Halloween snack—they’re a memory in the making. Every time I make them, I think about Jen in her messy kitchen, completely casual about creating something that would become a tradition in my own home. That’s the beauty of simple recipes: they have a way of sticking with you.
I hope you give these a try, whether it’s for a Halloween party, a school event, or just a fun dinner with the family. Don’t be afraid to make them your own—add cheese, swap the hot dogs for sausages, or experiment with different eye expressions. The best recipes are the ones that evolve with you.
I’d love to hear how yours turn out! Drop a comment below and let me know if your kids loved them, if you tried a fun variation, or if you have any questions. And if you’re looking for more Halloween inspiration, check out our easy Halloween dessert ideas for the perfect sweet finish. Happy Halloween, and happy cooking!
Frequently Asked Questions
Can I make these spooky mummy hot dogs ahead of time?
Yes! You can assemble the wrapped hot dogs up to 24 hours in advance and store them in the refrigerator on the baking sheet, covered with plastic wrap. When you’re ready to serve, just bake them as directed. You may need to add 2-3 minutes to the baking time since they’ll be starting from cold.
Can I freeze these mummy hot dogs?
Absolutely. Freeze the baked and cooled mummies on a baking sheet until solid, then transfer them to a freezer-safe bag or container. They’ll keep for up to 2 months. To reheat, bake from frozen at 350°F for 10-12 minutes, or until heated through.
What can I use instead of crescent roll dough?
You can use puff pastry cut into strips, though the texture will be flakier and less sturdy. Pizza dough also works in a pinch—just roll it out thin and cut into strips. The baking time may vary, so keep an eye on them.
How do I keep the dough from unraveling during baking?
Make sure you’re wrapping the dough snugly but not too tight. The dough will expand slightly as it bakes, which actually helps it grip the hot dog. If you’re worried, place the wrapped hot dogs seam-side down on the baking sheet.
Can I use different types of hot dogs?
Definitely! Beef, turkey, chicken, or plant-based hot dogs all work well. Just avoid the extra-long hot dogs, as they’re harder to wrap evenly. Cocktail sausages or mini hot dogs are great for bite-sized mummies—just reduce the baking time to 8-10 minutes.
Pin This Recipe!
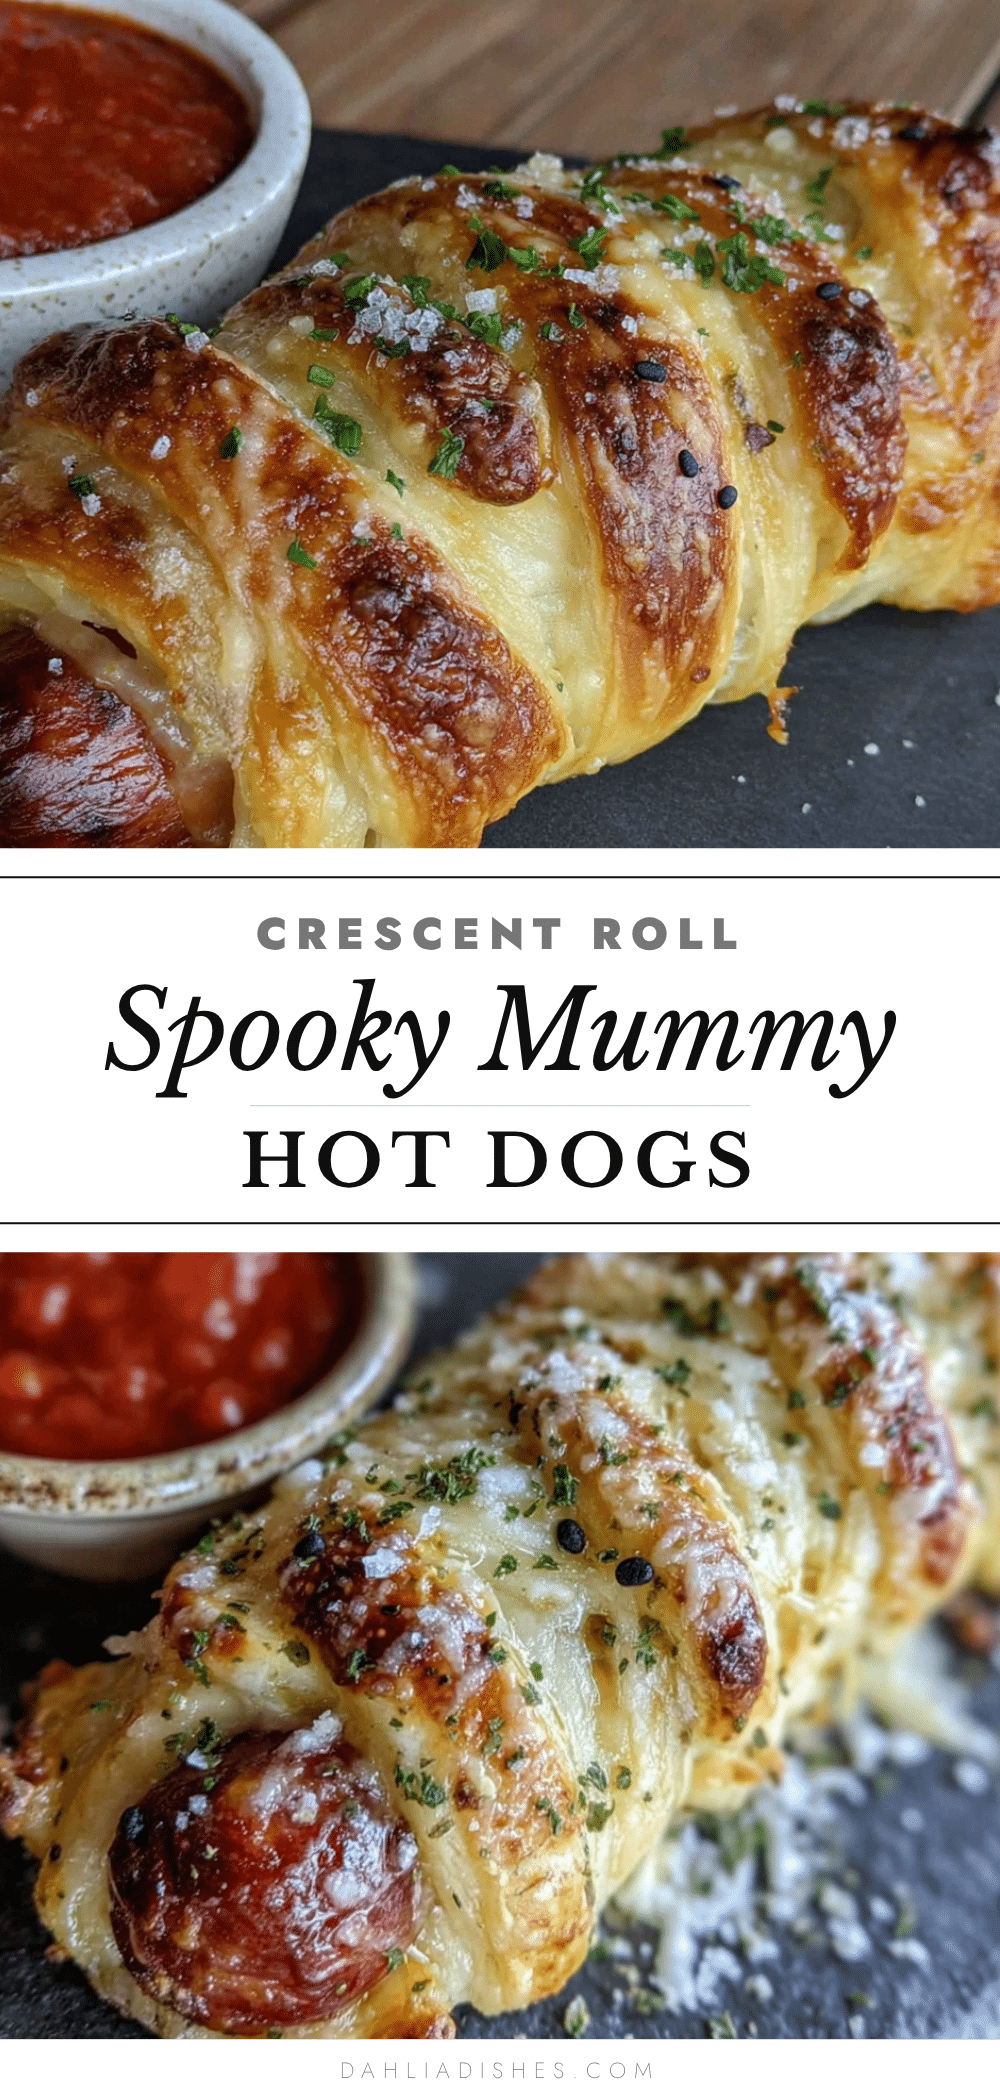
Spooky Mummy Hot Dogs: Easy Crescent Roll Recipe

Adorable and easy-to-make mummy hot dogs wrapped in crescent roll dough, perfect for Halloween parties, school events, or a fun family dinner. Ready in under 25 minutes with just three simple ingredients.
- Prep Time: 10 minutes
- Cook Time: 15 minutes
- Total Time: 25 minutes
- Yield: 8 servings 1x
- Category: Appetizer
- Cuisine: American
Ingredients
- 1 package (8 count) standard-size hot dogs (preferably beef)
- 1 can (8 ounces) refrigerated crescent roll dough (sheet-style, not perforated triangles)
- Yellow mustard (for the eyes)
- Optional: ketchup, ranch dressing, or sriracha mayo for dipping
Instructions
- Preheat your oven to 375°F (190°C). Line a baking sheet with parchment paper or a silicone baking mat.
- Open the can of crescent roll dough carefully. Unroll the dough onto a cutting board. If using perforated triangle sheets, press the seams together gently to create one solid rectangle. Use a sharp knife or pizza cutter to cut the dough lengthwise into thin strips, about 1/4 to 1/2 inch wide (8 to 10 strips per can).
- Take one hot dog and start wrapping a strip of dough around it, leaving a small gap near the top for the ‘face.’ Don’t wrap too tightly—leave a little space between each wrap so the hot dog peeks through. Wrap at a slight angle, overlapping the dough a bit, for a more textured mummy look.
- Arrange the wrapped hot dogs on the prepared baking sheet, leaving about an inch of space between each one.
- Bake for 12 to 15 minutes, until the dough is golden brown and puffy and the hot dogs are heated through. For a darker, crispier crust, bake the full 15 minutes.
- While the mummies are still warm, dip a toothpick into yellow mustard and dot two small eyes near the top of each mummy, close together for a cute expression.
- Let the mummies cool for about 5 minutes on the baking sheet before serving. Serve warm with your favorite dipping sauces.
Notes
Keep the dough cold for easier handling. Don’t over-wrap the hot dogs—a few strategic wraps are more effective. For a golden crust, you can brush the dough with melted butter or an egg wash before baking, but it’s optional. The mummies can be assembled up to 24 hours in advance and stored in the refrigerator. To freeze, bake and cool completely, then freeze for up to 2 months. Reheat in a 350°F oven for 5 minutes or in an air fryer at 350°F for 3 minutes.
Nutrition
- Serving Size: 1 mummy hot dog
- Calories: 235
- Sugar: 4
- Sodium: 600
- Fat: 13.5
- Saturated Fat: 4.5
- Carbohydrates: 20
- Protein: 9
Keywords: Halloween, mummy hot dogs, crescent roll recipe, easy appetizer, spooky snacks, kid-friendly, hot dog recipe


