Love this? Save it for later!
Share the inspiration with your friends
The neighborhood Halloween block party was in six hours and I’d completely forgotten. Everyone else would be bringing elaborate homemade treats—I’d seen the sign-up sheet weeks ago. My neighbor Karen was famous for her ghost-shaped meringues. Another family always brought those intricate cake pops that look like eyeballs. I had a package of cream cheese, some butter, and a vague memory of a cookie recipe I’d been meaning to try. Honestly, I panicked. I mean, you can’t show up to a Halloween party empty-handed, right?
So I did what any semi-desperate person would do. I grabbed a mixing bowl and started throwing things together. The idea for a black cat cookie cake just sort of happened—I had black food coloring from a failed attempt at galaxy cupcakes last year, and I figured, why not make it look like something? The whole thing came together in about 25 minutes flat. I didn’t even have time to overthink it. I just baked, decorated, and ran out the door with this slightly lopsided cookie cake shaped like a cat.
And here’s the thing—it won. People actually voted for it. Karen’s meringue ghosts were beautiful, but everyone kept coming back to grab another slice of this spooky black cat Halloween cookie cake. There was something about the way the chocolate chips peeked through the dark cookie, or maybe it was the fact that it tasted like a giant, soft-baked chocolate chip cookie but looked like a proper Halloween centerpiece. I don’t know. But I’ve been making it every October since, and it never fails to get that same delighted reaction.
Why You’ll Love This Recipe
Let me tell you why this spooky black cat Halloween cookie cake has become my go-to for every fall gathering. It’s not just another Halloween dessert—it’s the one that actually delivers on both looks and taste.
- Quick & Easy: From start to finish, you’re looking at about 30 minutes. No chilling dough, no complicated piping. Just mix, shape, bake, and decorate.
- Simple Ingredients: You probably have most of these in your pantry right now. Butter, sugar, flour, eggs, vanilla, chocolate chips—the usual suspects.
- Perfect for Halloween: This is the kind of showstopper that looks like you spent hours on it. The black cat shape is instantly recognizable and totally festive.
- Crowd-Pleaser: Kids love the spooky shape, adults love the classic cookie flavor. It’s a win-win.
- Unbelievably Delicious: The texture is this perfect balance—crispy edges, soft and chewy center. And the chocolate chips add little pockets of melty goodness in every bite.
What makes this recipe different from the dozens of other Halloween desserts out there? It’s the shape, honestly. Most cookie cakes are round or rectangular. But shaping it into a cat silhouette? That’s what makes people stop and take a second look. Plus, I’ve perfected the ratio of black food coloring so you get that deep, spooky color without any bitter aftertaste. I learned that the hard way after one too many batches that tasted like artificial coloring.
This isn’t just another cookie recipe. It’s the kind of dessert that makes kids’ eyes go wide when they see it on the dessert table. It’s the thing people ask for year after year. And honestly? It’s the easiest way to look like a Halloween hero without breaking a sweat.
What Ingredients You Will Need
This spooky black cat Halloween cookie cake uses simple, everyday ingredients to create something that feels special. Most of these are pantry staples, which makes this recipe perfect for those last-minute Halloween cravings.
- Unsalted butter, softened (1 cup / 2 sticks) — I prefer using unsalted so I can control the salt level. Let it sit out for about 30 minutes before starting.
- Granulated sugar (3/4 cup) — Regular white sugar gives the cookies that perfect crispy edge.
- Light brown sugar, packed (3/4 cup) — This adds moisture and that subtle caramel flavor that makes chocolate chip cookies so addictive.
- Large eggs (2, room temperature) — Room temperature eggs incorporate better into the batter. If you forgot to take them out, place them in warm water for 5 minutes.
- Vanilla extract (2 teaspoons) — Pure vanilla makes a difference here. I’m partial to Nielsen-Massey, but any good quality brand works.
- All-purpose flour (2 1/4 cups) — Spoon and level your flour for the most accurate measurement. Scooping directly can pack in too much.
- Baking soda (1 teaspoon) — Make sure it’s fresh! Expired baking soda won’t give you the right spread.
- Salt (1/2 teaspoon) — Don’t skip this. Salt balances the sweetness and enhances the chocolate flavor.
- Black gel food coloring (1-2 teaspoons) — Gel coloring is key here. Liquid food coloring will mess with the consistency and won’t give you that deep, true black. I like Americolor Super Black.
- Semi-sweet chocolate chips (1 1/2 cups) — You can also use dark chocolate or milk chocolate chips depending on your preference. I’ve even used white chocolate chips for a contrast effect.
- Optional for decoration: Candy eyes, black licorice for whiskers, or a small amount of orange frosting for a pumpkin accent.
Ingredient Tips: For the black food coloring, start with 1 teaspoon and add more until you reach your desired shade. Different brands vary in intensity. If you’re worried about the taste, look for natural black food coloring made from vegetable charcoal—it has a neutral flavor and gives a beautiful dark color.
Substitution Options: If you’re dairy-free, use vegan butter sticks (not tub margarine) for the best texture. For a gluten-free version, swap the all-purpose flour with a 1:1 gluten-free baking flour blend. I’ve tested this with King Arthur’s Measure for Measure and it works beautifully.
Equipment Needed
You don’t need anything fancy to make this spooky black cat Halloween cookie cake. Here’s what you’ll want to have on hand:
- Large mixing bowl — Any bowl will do, but a wide one makes mixing easier.
- Electric hand mixer or stand mixer — You can cream the butter and sugar by hand, but it’ll take some elbow grease. I’ve done it both ways, and the mixer is definitely faster.
- Rubber spatula — For scraping down the sides and folding in the chocolate chips.
- Baking sheet — A standard half-sheet pan works perfectly. Line it with parchment paper for easy removal.
- Parchment paper — Non-stick and makes cleanup a breeze.
- Sharp knife or pizza cutter — For shaping the cat silhouette after baking.
- Cooling rack — Essential for letting the cookie cake cool evenly before decorating.
- Small offset spatula — Optional but handy for smoothing frosting or adding details.
If you don’t have a pizza cutter, a sharp chef’s knife works just fine. And if you’re short on cooling racks, you can let the cookie cake cool directly on the baking sheet—just give it a few extra minutes.
Preparation Method
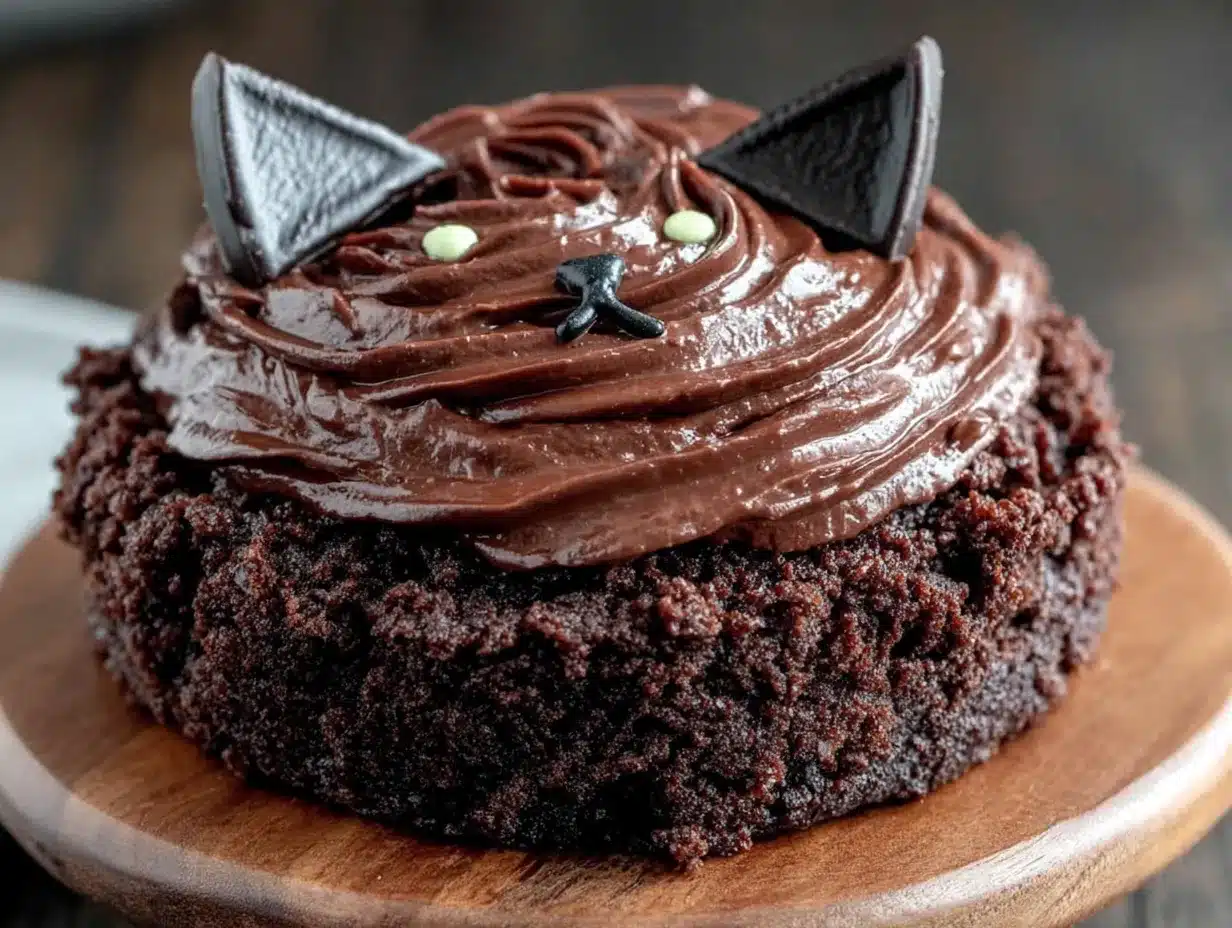
Let me walk you through how to make this spooky black cat Halloween cookie cake. I’ve made this so many times I could do it in my sleep, but I’ll share all the little tricks I’ve picked up along the way.
- Preheat your oven to 350°F (175°C). Line a large baking sheet with parchment paper. This is non-negotiable—the parchment paper makes sure your cookie cake comes off without any drama.
- Cream the butter and sugars together. In your large mixing bowl, beat the softened butter, granulated sugar, and brown sugar together until light and fluffy. This takes about 2-3 minutes with an electric mixer on medium speed. You want it to look pale and almost doubled in volume. I usually scrape down the sides halfway through to make sure everything’s incorporated.
- Add the eggs and vanilla. Crack in the eggs one at a time, beating well after each addition. Then add the vanilla extract. The mixture might look a little curdled at this point—don’t worry, that’s normal. It’ll come together once you add the dry ingredients.
- Add the black food coloring. This is where the magic happens. Add 1 teaspoon of black gel food coloring and mix until the color is evenly distributed. If it’s not dark enough for your liking, add more in 1/4 teaspoon increments. I usually end up using about 1 1/2 teaspoons. The color will deepen slightly as it bakes, so don’t go overboard.
- Mix the dry ingredients. In a separate bowl, whisk together the flour, baking soda, and salt. This ensures the baking soda and salt are evenly distributed throughout the flour.
- Combine wet and dry ingredients. Gradually add the flour mixture to the butter mixture, mixing on low speed until just combined. Be careful not to overmix—you want to stop as soon as you don’t see any more streaks of flour. Overmixing will make your cookie cake tough.
- Fold in the chocolate chips. Use your rubber spatula to gently fold in the chocolate chips. Make sure they’re evenly distributed throughout the dough. The dough will be thick and slightly sticky—that’s exactly what you want.
- Shape the cookie cake. Transfer the dough onto your prepared baking sheet. Using your hands (lightly greased or dusted with flour), shape the dough into a rough cat silhouette. Think of a rounded head at the top, two pointed ears, and a wider body below. Don’t stress about making it perfect—the rustic look is part of the charm. The dough should be about 1/2 inch thick.
- Bake for 15-18 minutes. Place the baking sheet in the preheated oven and bake until the edges are set and lightly golden. The center might still look slightly soft—that’s okay. It will continue to set as it cools. For a softer, chewier cookie cake, aim for 15 minutes. For crispier edges, go with 18 minutes.
- Cool completely. Let the cookie cake cool on the baking sheet for 10 minutes, then carefully transfer it to a cooling rack. Let it cool completely before decorating. This usually takes about 30 minutes.
- Decorate your black cat. Once cooled, you can add candy eyes, pipe on some whiskers with black licorice, or even add a small orange frosting pumpkin next to the cat. I like to keep it simple—just the candy eyes and maybe a little smile made from a thin strip of black licorice.
Pro tip: If the cookie cake spreads more than you’d like during baking, you can use a sharp knife to trim the edges into a cleaner cat shape while it’s still slightly warm. I’ve done this more times than I care to admit!
Cooking Tips & Techniques
After making this spooky black cat Halloween cookie cake what feels like a hundred times, I’ve gathered some wisdom that’ll save you from my early mistakes.
The biggest mistake I see people make? Using liquid food coloring. I tried it once because I was out of gel, and the dough turned into a sticky mess. The cookie cake spread weirdly and ended up tasting faintly of chemicals. Never again. Gel food coloring is non-negotiable here. It gives you that deep black color without adding extra liquid that messes with the dough’s consistency.
Timing is everything. I’ve learned that pulling the cookie cake out when the center still looks slightly underdone is the secret to that perfect chewy texture. If you wait until the whole thing looks golden brown, it’ll be too crisp. Trust the slight jiggle in the center—it’ll set up beautifully as it cools.
Here’s a trick for even spreading: Wet your hands slightly before shaping the dough. The moisture prevents the dough from sticking to your fingers and helps you smooth out any uneven spots. Just don’t use too much water—you don’t want to add extra moisture to the dough.
Multitasking strategy: While the cookie cake is baking, I like to get my decorating supplies ready. Arrange the candy eyes, cut the licorice into whisker-length pieces, and maybe whip up a quick batch of orange frosting if I’m feeling fancy. That way, once the cookie cake is cool, I can decorate it in under two minutes.
One more thing: If you’re making this ahead of time, bake the cookie cake but wait to decorate until just before serving. The candy eyes can soften if they sit on the cookie cake for too long, and nobody wants a droopy-eyed black cat.
Variations & Adaptations
One of the things I love about this spooky black cat Halloween cookie cake is how easy it is to adapt. Here are some variations I’ve tried over the years:
Gluten-Free Version: Substitute the all-purpose flour with a 1:1 gluten-free baking flour blend. I’ve had the best results with King Arthur’s Measure for Measure. The texture will be slightly more tender, but the flavor is just as good. Add an extra tablespoon of flour if the dough feels too sticky.
Vegan Adaptation: Use vegan butter sticks and replace the eggs with flax eggs (1 tablespoon ground flaxseed mixed with 3 tablespoons water per egg). The texture will be a bit denser, but it still holds together beautifully. I’ve brought this version to a vegan Halloween party and it was gone in minutes.
Flavor Twists: Swap the semi-sweet chocolate chips for white chocolate chips for a spooky contrast—the white chips look like little ghost eyes peeking out of the black cookie. Or try peanut butter chips for a salty-sweet combination that’s absolutely addictive. I once made a version with butterscotch chips and it tasted like a grown-up Halloween treat.
Shape Variations: Don’t limit yourself to a cat! You can shape the dough into a ghost, a bat, or even a pumpkin. Just adjust the shape slightly and add appropriate decorations. I’ve made a bat version with pretzel stick wings that was a huge hit.
Spooky Sprinkle Edition: Before baking, press some orange and black sprinkles into the top of the dough. It adds a festive crunch and makes the cookie cake look even more Halloween-ready.
Serving & Storage Suggestions
This spooky black cat Halloween cookie cake is best served at room temperature. I like to place it on a festive cake stand or a black platter to really make the cat shape pop. If you’re bringing it to a party, transfer it carefully on the parchment paper and then slide it onto your serving dish.
What to serve with it: A glass of cold milk is the classic pairing, but it’s also amazing with a scoop of vanilla ice cream on the side. For an adult gathering, try it with a warm apple cider or even a pumpkin spice latte. The rich, buttery cookie balances beautifully with something cold or creamy.
Storage instructions: Leftover cookie cake (if there is any!) can be stored in an airtight container at room temperature for up to 3 days. I’ve found that placing a slice of bread in the container helps keep the cookie soft—the bread absorbs excess moisture and the cookie stays chewy. Just don’t forget to replace the bread every day.
Freezer tips: You can freeze the baked, undecorated cookie cake for up to 3 months. Wrap it tightly in plastic wrap, then in aluminum foil. When you’re ready to serve, thaw it at room temperature for about an hour, then decorate. The cookie tastes just as fresh as the day you baked it.
Reheating: If you want that just-baked warmth, pop individual slices in the microwave for 10-15 seconds. Or place the whole cookie cake in a 300°F oven for 5 minutes. The chocolate chips will get melty again, and the edges will crisp up slightly.
One thing I’ve noticed is that the flavors actually develop overnight. The cookie cake tastes even better the next day—the chocolate chips have had time to settle into the dough, and the overall flavor becomes more rounded. So don’t be afraid to make it a day ahead!
Nutritional Information & Benefits
Let’s be real—this is a treat, not a health food. But that doesn’t mean it’s without its redeeming qualities. Here’s a rough estimate of what you’re looking at per serving (assuming 12 servings):
| Nutrient | Amount Per Serving |
|---|---|
| Calories | 380 |
| Total Fat | 18g |
| Saturated Fat | 11g |
| Cholesterol | 55mg |
| Sodium | 220mg |
| Total Carbohydrates | 52g |
| Dietary Fiber | 2g |
| Sugars | 35g |
| Protein | 4g |
Health highlights: The dark chocolate chips contain antioxidants called flavonoids, which are good for heart health. The butter provides vitamin A, and the eggs offer protein and B vitamins. Plus, making this at home means you know exactly what’s going into it—no preservatives, no artificial flavors (except the food coloring, of course).
Dietary considerations: This recipe contains gluten, dairy, and eggs. For a gluten-free version, see the variations section above. For a dairy-free version, use vegan butter and dairy-free chocolate chips. The vegan adaptation is also egg-free.
I personally love that this recipe lets me indulge in a Halloween tradition without feeling like I’m eating something completely processed. It’s homemade, it’s made with love, and honestly, a little treat now and then is good for the soul.
Conclusion
This spooky black cat Halloween cookie cake has become a staple in my fall baking rotation, and I have a feeling it’ll become one in yours too. It’s quick enough for last-minute Halloween parties, impressive enough to be the centerpiece of your dessert table, and delicious enough that people will ask for the recipe every single time.
What I love most about this recipe is how forgiving it is. The shape doesn’t have to be perfect. The decoration doesn’t have to be fancy. It’s the kind of recipe that lets you have fun and experiment—whether that means trying different shapes, swapping in different chips, or going wild with the decorations. And honestly? That’s what baking should be about.
So go ahead—give this spooky black cat Halloween cookie cake a try. Make it for your kids, your coworkers, your Halloween party guests, or just for yourself on a cozy October evening. And when you do, I’d love to hear about it. Drop a comment below and tell me how your cat turned out, or share your own twist on the recipe. Did you add orange frosting? Make it into a ghost? I want to see your creations!
Happy Halloween, and happy baking! May your cookies be spooky, your chocolate chips melty, and your black cat the star of the party.
Frequently Asked Questions
Can I make this cookie cake ahead of time?
Absolutely! Bake the cookie cake up to 2 days in advance and store it in an airtight container at room temperature. Just wait to add the candy eyes and decorations until right before serving so they stay fresh and perky.
Why did my cookie cake spread too much?
This usually happens if the butter was too soft or the dough wasn’t chilled enough. Next time, make sure your butter is softened but still cool to the touch. If your kitchen is warm, pop the shaped dough in the fridge for 15 minutes before baking to help it hold its shape.
Can I use natural black food coloring?
Yes! Look for black food coloring made from vegetable charcoal. It gives a beautiful dark color without any chemical aftertaste. Just be aware that natural colors might not be as intense as artificial ones, so you may need to use a bit more.
How do I get a cleaner cat shape?
After baking and while the cookie cake is still slightly warm, use a sharp knife or pizza cutter to trim the edges into a more defined cat silhouette. The warmth makes it easier to cut cleanly. Let it cool completely before decorating.
Can I freeze the cookie cake dough instead of baking it?
Definitely! Shape the dough into a disc, wrap it tightly in plastic wrap, and freeze for up to 3 months. When you’re ready to bake, let it thaw in the refrigerator overnight, then shape and bake as directed. You may need to add 2-3 minutes to the baking time since the dough will be cold.
Pin This Recipe!
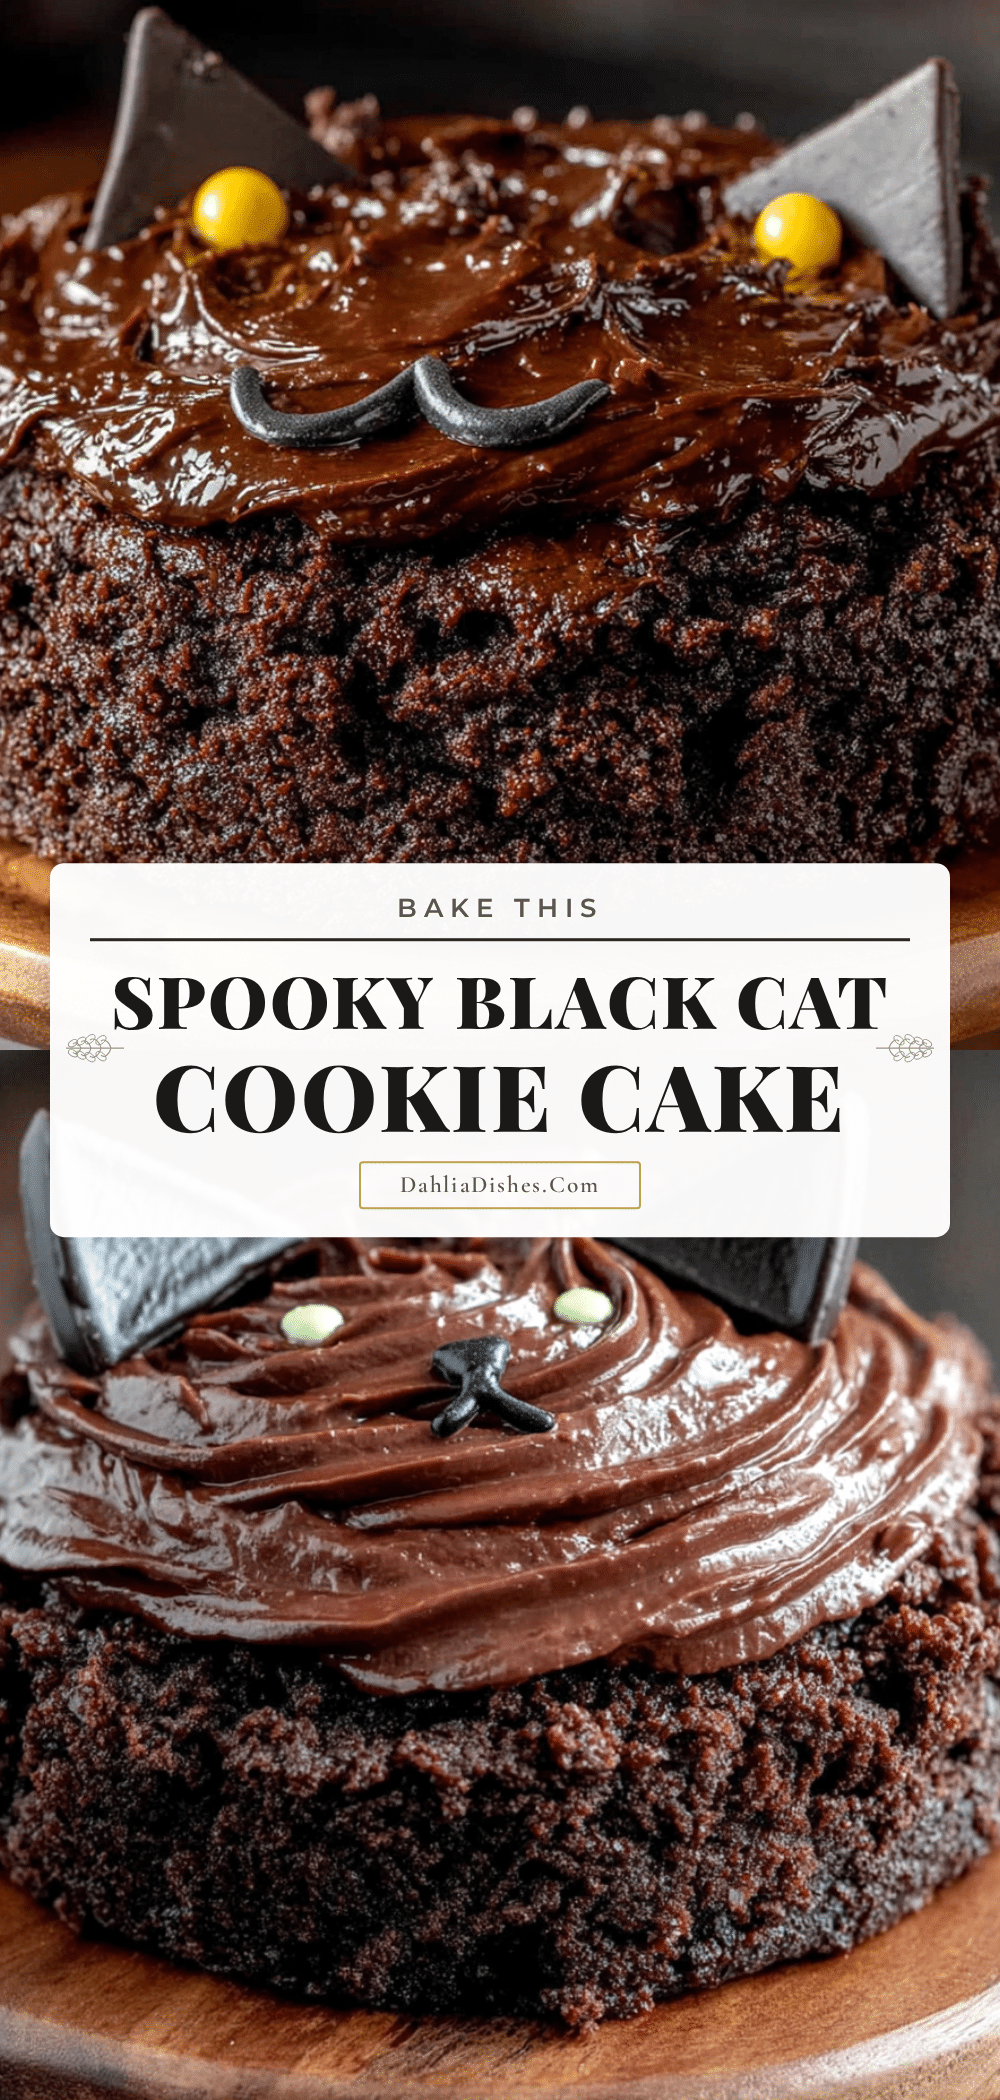
Spooky Black Cat Halloween Cookie Cake – Easy 30-Min Recipe
A quick and easy Halloween dessert that looks like a spooky black cat and tastes like a giant, soft-baked chocolate chip cookie. Perfect for last-minute parties and guaranteed to be a crowd-pleaser.
- Prep Time: 10 minutes
- Cook Time: 15-18 minutes
- Total Time: 30 minutes
- Yield: 12 servings 1x
- Category: Dessert
- Cuisine: American
Ingredients
- 1 cup (2 sticks) unsalted butter, softened
- 3/4 cup granulated sugar
- 3/4 cup packed light brown sugar
- 2 large eggs, room temperature
- 2 teaspoons vanilla extract
- 2 1/4 cups all-purpose flour
- 1 teaspoon baking soda
- 1/2 teaspoon salt
- 1–2 teaspoons black gel food coloring
- 1 1/2 cups semi-sweet chocolate chips
- Optional: candy eyes, black licorice for whiskers, orange frosting for pumpkin accent
Instructions
- Preheat your oven to 350°F (175°C). Line a large baking sheet with parchment paper.
- In a large mixing bowl, beat the softened butter, granulated sugar, and brown sugar together until light and fluffy, about 2-3 minutes with an electric mixer on medium speed.
- Add the eggs one at a time, beating well after each addition. Then add the vanilla extract.
- Add 1 teaspoon of black gel food coloring and mix until evenly distributed. Add more in 1/4 teaspoon increments until desired shade is reached (about 1 1/2 teaspoons total).
- In a separate bowl, whisk together the flour, baking soda, and salt.
- Gradually add the flour mixture to the butter mixture, mixing on low speed until just combined. Do not overmix.
- Fold in the chocolate chips with a rubber spatula until evenly distributed.
- Transfer the dough onto the prepared baking sheet. Using lightly greased or floured hands, shape the dough into a rough cat silhouette (rounded head, two pointed ears, wider body) about 1/2 inch thick.
- Bake for 15-18 minutes, until edges are set and lightly golden. Center may still look slightly soft.
- Let the cookie cake cool on the baking sheet for 10 minutes, then carefully transfer to a cooling rack to cool completely (about 30 minutes).
- Once cooled, decorate with candy eyes, black licorice whiskers, or other desired decorations.
Notes
Use gel food coloring, not liquid, to avoid a sticky dough and chemical taste. For a cleaner cat shape, trim edges with a sharp knife while slightly warm. The cookie cake tastes even better the next day as flavors develop. Store in an airtight container at room temperature for up to 3 days.
Nutrition
- Serving Size: 1 slice (1/12 of coo
- Calories: 380
- Sugar: 35
- Sodium: 220
- Fat: 18
- Saturated Fat: 11
- Carbohydrates: 52
- Fiber: 2
- Protein: 4
Keywords: Halloween cookie cake, black cat cookie cake, spooky dessert, chocolate chip cookie cake, easy Halloween recipe, 30-minute recipe


