Love this? Save it for later!
Share the inspiration with your friends
Introduction
The neighborhood bake sale was in less than two hours and I’d completely forgotten. Everyone else was hauling out multi-layer cakes and fancy cupcakes that looked like they took all weekend. I had exactly one small mixing bowl, a bag of basic pantry staples, and zero time for anything too complicated. Honestly, the pressure was on, and my mind was racing — what could I whip up that was both simple and special? That’s when the idea struck: soft chewy sugar cookies, but with a back-to-school twist.
I grabbed my trusty rolling pin (the one with the little chip from last year’s holiday cookie frenzy) and started mixing. The pencil-shaped royal icing decorations weren’t planned either — I’d meant to pipe simple dots, but my neighbor’s kid wandered in mid-icing and insisted I make pencils. So, there I was, balancing a piping bag with shaky hands, trying to create tiny edible pencils while the clock ticked down. Maybe you’ve been there — that frantic, last-minute scramble that somehow turns into something unexpectedly wonderful.
And guess what? Those sugar cookies not only survived the bake sale—they won a quiet fan club for their soft, chewy texture and that playful pencil icing. It’s why I keep making this recipe every September, and why I think you’ll love it too. Let me tell you, it’s a humble little recipe that’s more than just a cookie; it’s a small celebration of back-to-school chaos and sweetness in one bite.
Why You’ll Love This Recipe
Trying to find a cookie recipe that’s quick, fun, and perfect for back-to-school? Here’s why my Soft Chewy Back-to-School Sugar Cookies with Pencil Royal Icing stand out:
- Quick & Easy: This recipe comes together in about 30 minutes, which is perfect for those hectic mornings or last-minute party needs.
- Simple Ingredients: You won’t need a special trip to the store—basic pantry staples like flour, sugar, and butter do the trick.
- Perfect for Back-to-School Events: Whether it’s a classroom party, a bake sale, or a family snack, these cookies bring a little joy to those busy days.
- Crowd-Pleaser: Kids love the soft, chewy texture, and the cute pencil icing makes them extra fun to eat.
- Unbelievably Delicious: The combination of tender dough and sweet royal icing is just irresistible—trust me, I’ve tested this one a dozen times.
This recipe isn’t just another sugar cookie. The secret is in the balance between chewiness and softness, plus the whimsical pencil icing that adds a touch of nostalgia and fun. It’s like comfort food with a playful school-day spirit baked right in. Honestly, it’s the kind of treat that makes you pause, savor, and smile. Perfect for impressing the kiddos or even surprising your colleagues at the office.
What Ingredients You Will Need
This recipe uses simple, wholesome ingredients to create soft, chewy cookies with an adorable pencil-themed royal icing. Most are pantry staples, and substitutions are easy if needed.
- For the Sugar Cookies:
- 2 ¾ cups (345 g) all-purpose flour, sifted
- 1 teaspoon baking soda
- ½ teaspoon baking powder
- ½ teaspoon salt
- 1 cup (227 g) unsalted butter, softened (I prefer Land O Lakes for great texture)
- 1 ½ cups (300 g) granulated sugar
- 1 large egg, room temperature
- 2 teaspoons pure vanilla extract
- ¼ cup (60 ml) whole milk (feel free to use almond milk for dairy-free)
- For the Pencil Royal Icing:
- 3 cups (360 g) powdered sugar, sifted
- 2 large egg whites (use pasteurized if preferred)
- 1 teaspoon fresh lemon juice
- Food coloring gel in yellow, pink, brown, and black (AmeriColor gels work well)
Feel free to swap all-purpose flour for a gluten-free blend like Bob’s Red Mill 1-to-1 if needed. For the royal icing, if you prefer to avoid raw egg whites, meringue powder is a great alternative. If you’re making these in the fall, a pinch of cinnamon or nutmeg in the dough adds warmth, but keep it classic for the school theme.
Equipment Needed

- Mixing bowls (one large for dough, one medium for icing)
- Electric mixer or stand mixer (a handheld mixer works fine too)
- Measuring cups and spoons
- Rolling pin (a smooth wooden or silicone one is easiest)
- Pencil-shaped cookie cutters or a small rectangle cutter and knife for custom shapes
- Parchment paper or silicone baking mats
- Piping bags with small round tips (size #2 or #3) for icing details
- Cooling racks
If you don’t have a pencil-shaped cutter, no worries—I’ve used a small sharp knife to shape rectangles and then hand-drew pencil tips with icing. For budget-friendly baking, silicone mats are a great investment and last forever. Personally, I keep a set of disposable piping bags around for quick cleanup, but reusable ones work just as well (just remember to wash them thoroughly!).
Preparation Method
- Preheat your oven to 350°F (175°C) and line baking sheets with parchment paper or silicone mats. This helps cookies bake evenly and prevents sticking. (Time: 10 minutes prep)
- Mix dry ingredients: In a medium bowl, whisk together the flour, baking soda, baking powder, and salt. Set aside.
- Cream the butter and sugar: Using an electric mixer, beat the softened butter and granulated sugar on medium speed until light and fluffy, about 3-4 minutes. This step is key for soft cookies.
- Add egg and vanilla: Beat in the egg and vanilla extract until fully combined. The mixture might look a little curdled but that’s okay.
- Combine wet and dry: Gradually add the dry ingredients to the wet mixture, alternating with milk. Start and end with the flour mixture. Mix just until combined—overmixing can make cookies tough.
- Chill the dough: Cover the dough with plastic wrap and refrigerate for at least 30 minutes. This makes the dough easier to roll and helps cookies hold their shape.
- Roll and cut shapes: Lightly flour your work surface and roll the dough to about ¼ inch (6 mm) thickness. Use your pencil-shaped cookie cutters or cut rectangles and triangles for the pencil tip. Transfer shapes to baking sheets with a spatula.
- Bake: Bake cookies for 8-10 minutes, or until edges are just starting to turn golden. The centers should still look soft. Let cookies cool on the baking sheet for 5 minutes before transferring to a wire rack to cool completely.
- Prepare royal icing: In a clean bowl, beat egg whites and lemon juice until foamy. Gradually add powdered sugar and beat on low speed until mixture holds stiff peaks, about 5-7 minutes. Divide icing into separate bowls and tint with food coloring gels: yellow for the pencil body, pink for the eraser, brown for the wood tip, and black for the graphite line.
- Decorate: Using piping bags and fine tips, outline and fill the pencil shapes. Start with the yellow body, add the pink eraser on one end, brown wood tip on the other, and a thin black line to mimic the graphite. Let icing dry completely, ideally overnight, before stacking or packaging.
Pro tip: If your dough gets too soft while working, pop it back in the fridge for 10 minutes. I once rushed this and ended up with cookies that spread too much—lesson learned. Also, when piping the graphite line, don’t worry about perfection; the charm is in the handmade look.
Cooking Tips & Techniques
Making soft chewy sugar cookies that hold their shape can be tricky, but here are some tips I’ve picked up:
- Don’t skip chilling the dough. It’s tempting to bake right away, but chilling prevents spreading and helps you get those crisp pencil edges.
- Use room temperature butter and eggs. This helps the dough mix evenly and creates a tender crumb.
- Measure flour carefully. Too much flour makes cookies dry and crumbly. Spoon and level your flour for best results.
- Beat the butter and sugar well. This step traps air and contributes to that soft, chewy texture.
- For royal icing, beat until stiff peaks form. This ensures the icing will dry hard and hold its shape for piping detailed pencil decorations.
- Practice your piping on parchment first. If you’re nervous about the pencil icing, try piping the shapes and lines on scrap paper to get a feel.
- Let the icing dry fully. I’ve learned the hard way that rushing this step can cause smudging or broken designs.
Multitasking tip: While the dough chills, mix up your royal icing so you can pipe right after baking. It saves time and keeps everything fresh. Honestly, you’ll feel like a pro in no time.
Variations & Adaptations
You can easily tweak this recipe to suit different needs or tastes:
- Gluten-Free: Swap all-purpose flour for a 1:1 gluten-free baking blend. The texture stays chewy and soft.
- Vegan: Use vegan butter and substitute the egg with flax egg (1 tbsp flaxseed meal + 3 tbsp water). For royal icing, try a powdered sugar and aquafaba (chickpea water) mix instead of egg whites.
- Flavor Twists: Add a teaspoon of almond extract or a pinch of cinnamon to the dough for extra warmth.
- Decorations: Instead of pencil shapes, try apples or mini chalkboards for other back-to-school themes.
- Alternative Icing: Swap royal icing for a simple glaze made from powdered sugar and milk for a quicker finish.
Once, I made these cookies as stars and moons with glittery icing for a nighttime school event—just swapped the shapes and colors, but kept the chewiness that everyone loved.
Serving & Storage Suggestions
These cookies are best served at room temperature so you get that perfect chewy bite. Arrange them on a colorful plate for a festive back-to-school snack table.
Pair with a cold glass of milk, a cup of warm apple cider, or even a simple iced tea for an afternoon treat. They make a charming addition to lunchboxes or class parties.
Store baked and iced cookies in an airtight container at room temperature for up to 5 days. If you want to keep them longer, freeze un-iced cookies for up to 3 months and decorate after thawing.
Reheat gently in a microwave for 10-15 seconds if you like them warm, but honestly, fresh from the jar is my favorite way. Over time, the royal icing may soften, but the flavors mellow beautifully.
Nutritional Information & Benefits
Each cookie (based on 24 servings) contains approximately:
| Calories | 150 |
|---|---|
| Fat | 7g |
| Carbohydrates | 22g |
| Sugar | 14g |
| Protein | 1g |
While these sugar cookies are a treat, using real butter and fresh eggs adds wholesome goodness compared to processed alternatives. The royal icing is naturally low-fat but high in sugar, so enjoy in moderation.
For those with dietary restrictions, the recipe adapts well to gluten-free and vegan needs without sacrificing texture or taste.
Personally, I appreciate this recipe as a way to bring a little sweetness and comfort to busy school days without fuss or stress.
Conclusion
Soft Chewy Back-to-School Sugar Cookies with Pencil Royal Icing aren’t just a cookie—they’re a little moment of sweetness amid the back-to-school hustle. Whether you’re racing against the clock like I was or planning ahead, this recipe strikes the perfect balance of simplicity, fun, and flavor.
Feel free to make it your own with different shapes, flavors, or colors. I keep coming back to this recipe because it’s reliable, delicious, and brings a smile every time I make it.
If you try it, I’d love to hear how your pencil cookies turned out or any creative spins you put on the icing! Drop a comment below or share your photos—you know I’m always excited to see your kitchen wins.
Here’s to sweet beginnings and soft, chewy treats that make school days a little brighter!
FAQs about Soft Chewy Back-to-School Sugar Cookies with Pencil Royal Icing
Can I make these sugar cookies ahead of time?
Absolutely! The cookie dough can be made and refrigerated for up to 48 hours before baking. Decorated cookies keep well in an airtight container for up to 5 days.
What if I don’t have pencil-shaped cookie cutters?
No problem! Use a small rectangle cutter or cut shapes freehand with a knife. You can always adjust the royal icing to highlight the pencil look.
Is it okay to use powdered egg whites instead of fresh for the royal icing?
Yes, powdered egg whites or meringue powder work great and are safer for those avoiding raw eggs.
How do I get my sugar cookies soft and chewy instead of crisp?
Key steps include using softened butter, not overbaking, chilling the dough, and including a bit of milk in the recipe. Baking until edges are just golden keeps centers soft.
Can I use this royal icing for other cookie decorations?
Definitely! The royal icing recipe is versatile and perfect for detailed piping on all kinds of cookies, from holidays to everyday treats.
Pin This Recipe!
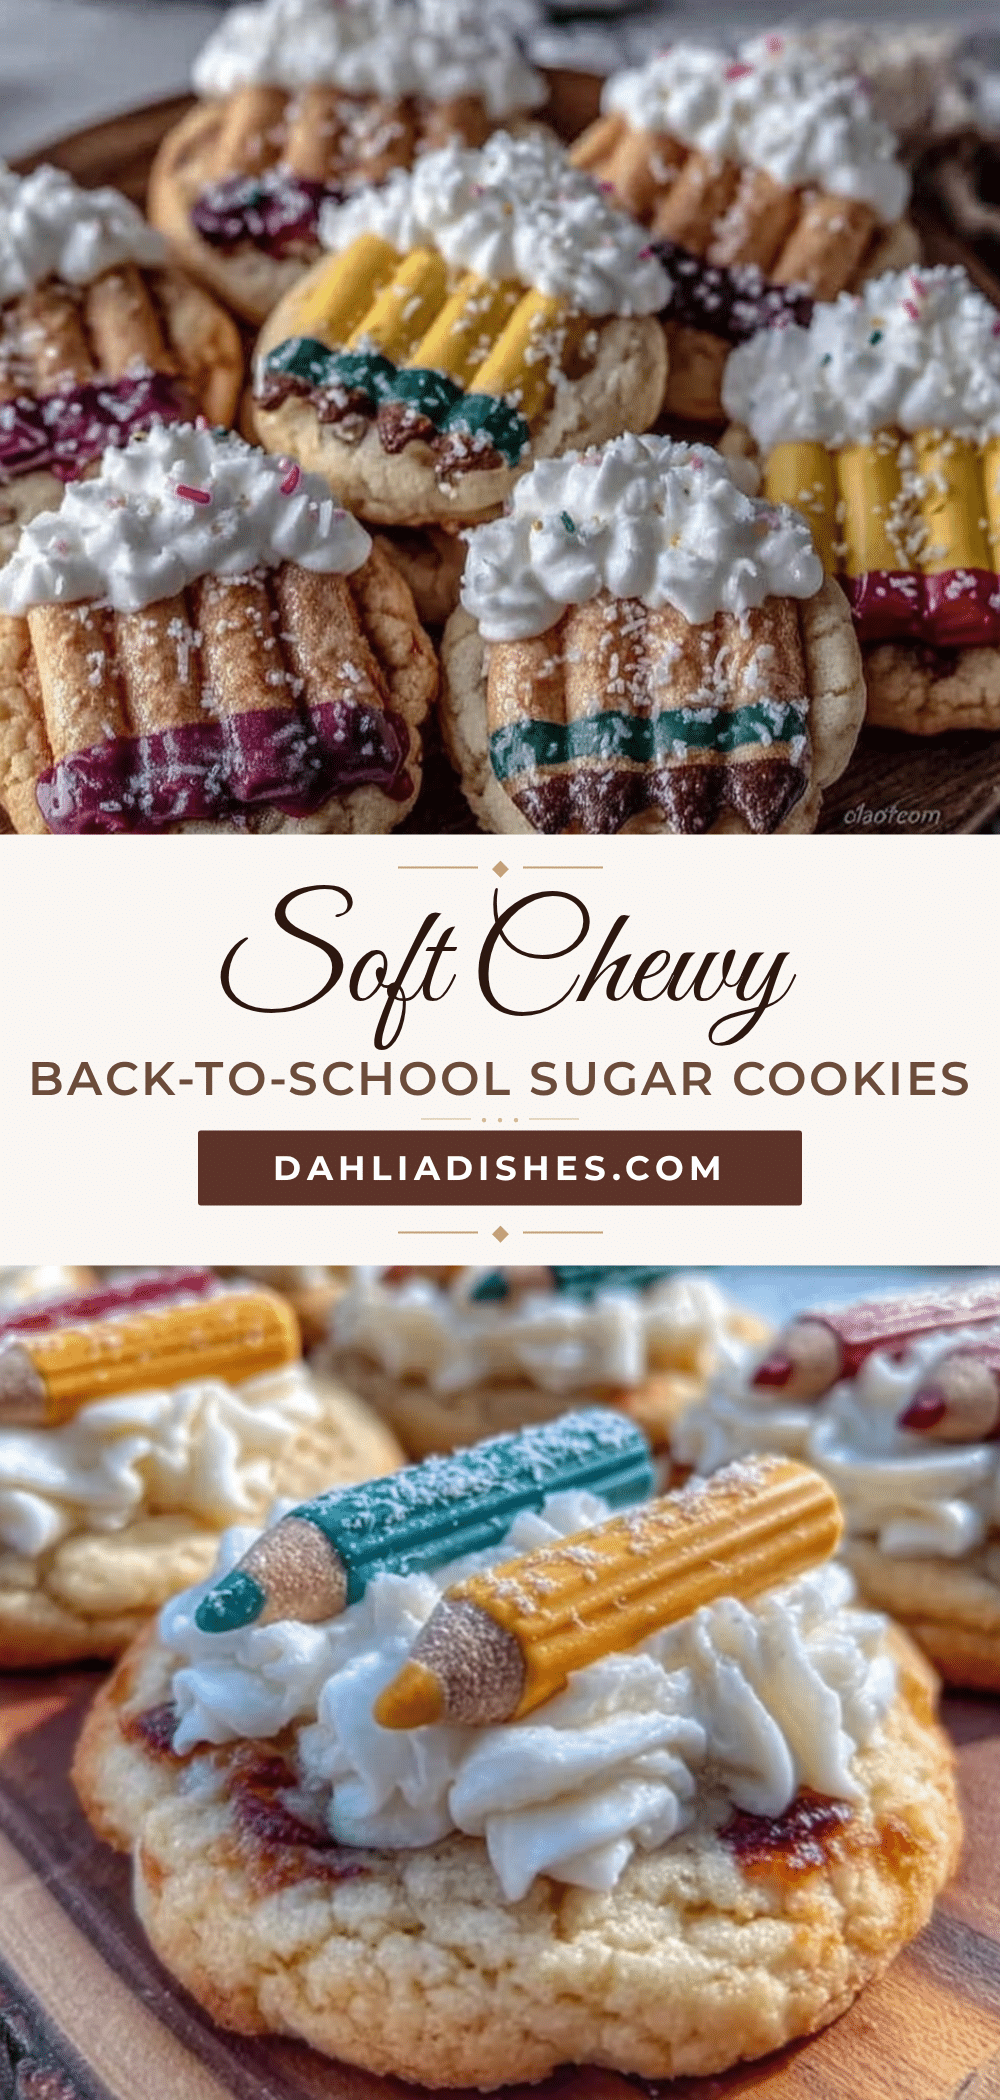
Soft Chewy Back-to-School Sugar Cookies with Pencil Royal Icing Recipe

These soft, chewy sugar cookies feature a playful back-to-school pencil theme with detailed royal icing decorations. Perfect for bake sales, classroom parties, or a fun snack.
- Prep Time: 40 minutes
- Cook Time: 10 minutes
- Total Time: 50 minutes
- Yield: 24 servings 1x
- Category: Dessert
- Cuisine: American
Ingredients
- 2 ¾ cups (345 g) all-purpose flour, sifted
- 1 teaspoon baking soda
- ½ teaspoon baking powder
- ½ teaspoon salt
- 1 cup (227 g) unsalted butter, softened
- 1 ½ cups (300 g) granulated sugar
- 1 large egg, room temperature
- 2 teaspoons pure vanilla extract
- ¼ cup (60 ml) whole milk (or almond milk for dairy-free)
- 3 cups (360 g) powdered sugar, sifted (for royal icing)
- 2 large egg whites (pasteurized if preferred, for royal icing)
- 1 teaspoon fresh lemon juice (for royal icing)
- Food coloring gel in yellow, pink, brown, and black (for royal icing)
Instructions
- Preheat your oven to 350°F (175°C) and line baking sheets with parchment paper or silicone mats.
- In a medium bowl, whisk together the flour, baking soda, baking powder, and salt. Set aside.
- Using an electric mixer, beat the softened butter and granulated sugar on medium speed until light and fluffy, about 3-4 minutes.
- Beat in the egg and vanilla extract until fully combined.
- Gradually add the dry ingredients to the wet mixture, alternating with milk. Start and end with the flour mixture. Mix just until combined.
- Cover the dough with plastic wrap and refrigerate for at least 30 minutes.
- Lightly flour your work surface and roll the dough to about ¼ inch (6 mm) thickness. Use pencil-shaped cookie cutters or cut rectangles and triangles for the pencil tip. Transfer shapes to baking sheets with a spatula.
- Bake cookies for 8-10 minutes, or until edges are just starting to turn golden. Let cookies cool on the baking sheet for 5 minutes before transferring to a wire rack to cool completely.
- Prepare royal icing: In a clean bowl, beat egg whites and lemon juice until foamy. Gradually add powdered sugar and beat on low speed until mixture holds stiff peaks, about 5-7 minutes.
- Divide icing into separate bowls and tint with food coloring gels: yellow for the pencil body, pink for the eraser, brown for the wood tip, and black for the graphite line.
- Using piping bags and fine tips, outline and fill the pencil shapes. Start with the yellow body, add the pink eraser on one end, brown wood tip on the other, and a thin black line to mimic the graphite.
- Let icing dry completely, ideally overnight, before stacking or packaging.
Notes
Chill dough for at least 30 minutes to prevent spreading and help cookies hold shape. Use room temperature butter and eggs for best texture. Beat butter and sugar well to trap air for softness. For royal icing, beat until stiff peaks form to hold shape. Practice piping on parchment before decorating cookies. Let icing dry fully, ideally overnight, to avoid smudging. Dough can be refrigerated up to 48 hours before baking. Store decorated cookies in airtight container up to 5 days; freeze un-iced dough up to 3 months.
Nutrition
- Serving Size: 1 cookie
- Calories: 150
- Sugar: 14
- Fat: 7
- Carbohydrates: 22
- Protein: 1
Keywords: sugar cookies, back-to-school cookies, royal icing, pencil cookies, soft chewy cookies, bake sale, classroom party