Love this? Save it for later!
Share the inspiration with your friends
This was supposed to be a fancy pinwheel appetizer for a grown-up brunch I was hosting last spring. I had the turkey laid out, the cream cheese softening, and this whole vision of elegant spirals on a platter. Then my five-year-old wandered in, grabbed a half-rolled piece, and announced it was “the best lunch ever.” I stood there with flour on my jeans (don’t ask), realizing my sophisticated party food had just been demoted to kindergarten cuisine. And honestly? It was a relief.
The thing is, I’d been overthinking lunch packing for months. I’d bought those bento boxes with the little compartments, watched countless videos of moms making cucumber bunnies, and felt that familiar knot of mom-guilt every time I threw a plain sandwich in a bag. You know that feeling when you’re trying so hard to be Pinterest-perfect but you’re really just trying to get out the door without forgetting a snack? That was me. Every. Single. Morning.
So when my son declared the turkey roll-up his new favorite, something clicked. I didn’t need to make origami out of fruit leather. I just needed a fun, fast, and actually-eaten lunch. This bento box came together from that happy accident—a failed appetizer that became our go-to. I’ve been making some version of it for nearly a year now, and it’s the only lunch that comes back empty every single time. No negotiations, no trading with friends, just a clean box and a happy kid. Let me tell you, that’s a win I’ll take.
Why You’ll Love This Recipe
Let’s be real for a second—packing lunch for a kindergartner can feel like a high-stakes game you didn’t sign up for. You want it to be nutritious, but you also want it to actually get eaten. You want it to be cute, but you have approximately four minutes to make it. This turkey roll-ups bento box is the answer to that very specific struggle.
- Fast to Assemble: We’re talking under 10 minutes from start to finished lunch box. I’ve timed myself. That’s less time than it takes to argue about putting on shoes.
- No Cooking Required: Zero heat, zero stovetop, zero waiting for anything to cool. Just assembly and done.
- Kid-Approved Texture: The soft turkey, creamy cheese, and crunchy veggies hit all the right notes for little eaters who are picky about texture.
- Perfect for Lunchbox Pressure: Whether it’s the first day of school or the hundredth, this lunch travels well and stays fresh until noon.
- Endlessly Customizable: Swap in whatever your kid actually likes—because let’s face it, we all have that one vegetable they’ll tolerate.
What makes this different from every other roll-up recipe out there? It’s built for real kindergarten life. I tested this with actual five and six-year-olds (including my own tiny food critic), and the feedback was unanimous: it’s fun to eat, easy to hold, and doesn’t fall apart in their lunchbox. Plus, the cream cheese layer acts as a glue that keeps everything together, so you’re not finding sad, separated ingredients at pickup time.
This isn’t just lunch—it’s the kind of meal that makes your kid feel special without making you feel exhausted. That’s the sweet spot, right there.
What Ingredients You Will Need
This recipe uses simple, everyday ingredients that you probably already have in your fridge. The beauty of this bento box is that it’s more about assembly than cooking, so the quality of your ingredients really shines through.
- Turkey slices: 4-5 slices, deli-style. I prefer oven-roasted turkey breast for its mild flavor and tender texture. Look for slices that are large and thin but not so thin they tear when you roll them. Applegate and Boar’s Head are my go-to brands for clean ingredients.
- Cream cheese: 3 tablespoons, softened to room temperature. This acts as the “glue” for your roll-ups. Full-fat works best for holding everything together, but reduced-fat works in a pinch (just make sure it’s really soft).
- Tortilla or flatbread: 1 large flour tortilla (8-inch) or 1 flatbread wrap. I use whole wheat for extra fiber, but plain flour works great too. For gluten-free, try a brown rice tortilla—just warm it slightly first so it doesn’t crack.
- Cheese stick: 1 mozzarella or cheddar cheese stick, cut into thin strips. This adds a fun “surprise” inside the roll-up and gives kids that stringy cheese pull they love.
- Cucumber: 1/4 cup, cut into matchsticks or small rounds. English cucumbers are best since they have fewer seeds and a milder flavor. If your kid is anti-cucumber, try thinly sliced bell pepper instead.
- Cherry tomatoes: 4-5, halved or quartered depending on size. These add a pop of color and sweetness. For younger kids, you might want to quarter them to avoid choking hazards.
- Grapes: 1/2 cup, red or green, halved lengthwise. Grapes are a lunchbox staple for a reason—they stay fresh, don’t get mushy, and kids love them. Always cut them lengthwise for safety.
- Baby carrots: 1/4 cup, or about 5-6 mini carrots. These add crunch and are easy for little hands to grab. If your kid struggles with raw carrots, try steaming them for 2 minutes to soften slightly.
- Pretzel sticks: A small handful, about 10-12 sticks. These add a salty crunch and are great for dipping. Plus, they’re fun to eat one by one.
- Hummus or ranch dip: 2 tablespoons, in a small container. This is optional but highly recommended. It gives kids something to dip their veggies and roll-ups into, which makes eating more interactive and fun.
For the cream cheese spread, I sometimes add a pinch of garlic powder or a sprinkle of everything bagel seasoning for a little extra flavor. Just be sure to ask your kid first—mine is firmly in the “plain cream cheese only” camp, so I save the fancy stuff for my own lunch.
Equipment Needed
You don’t need a lot of fancy gear to put this together. Here’s what actually gets used in my kitchen on bento box mornings:
- Bento box or lunch container: I use a three-compartment bento box, but any container with dividers works. The compartments keep wet and dry foods separate, which is key for preventing soggy roll-ups. My favorite is the Bentgo Kids box—it’s durable, dishwasher-safe, and the compartments are the perfect size for little portions.
- Small mixing bowl: For softening and spreading the cream cheese. A cereal bowl works fine.
- Butter knife or offset spatula: For spreading the cream cheese evenly on the tortilla. An offset spatula gives you more control, but a regular butter knife does the job.
- Cutting board: A medium-sized wooden or plastic board for assembling the roll-ups. I prefer one with a juice groove to catch any drips.
- Sharp knife: For cutting the roll-ups into pinwheels and slicing fruits and veggies. A serrated knife works best for tomatoes.
- Small cookie cutters (optional): If you want to get fancy, star or heart-shaped cutters make fun shapes out of cheese slices or cucumber rounds. My son loves his dinosaur-shaped cucumber slices, even though they take an extra 30 seconds.
- Small silicone cups or muffin liners: These are great for holding dips or small items like grapes and keep everything neat in the lunchbox.
If you don’t have a bento box, a regular lunch container with small silicone cups or reusable containers works perfectly. I’ve even used a muffin tin in a pinch—just put each item in its own cup and you’re good to go. The key is keeping things separate so the roll-ups stay firm and the fruit doesn’t get soggy.
Preparation Method
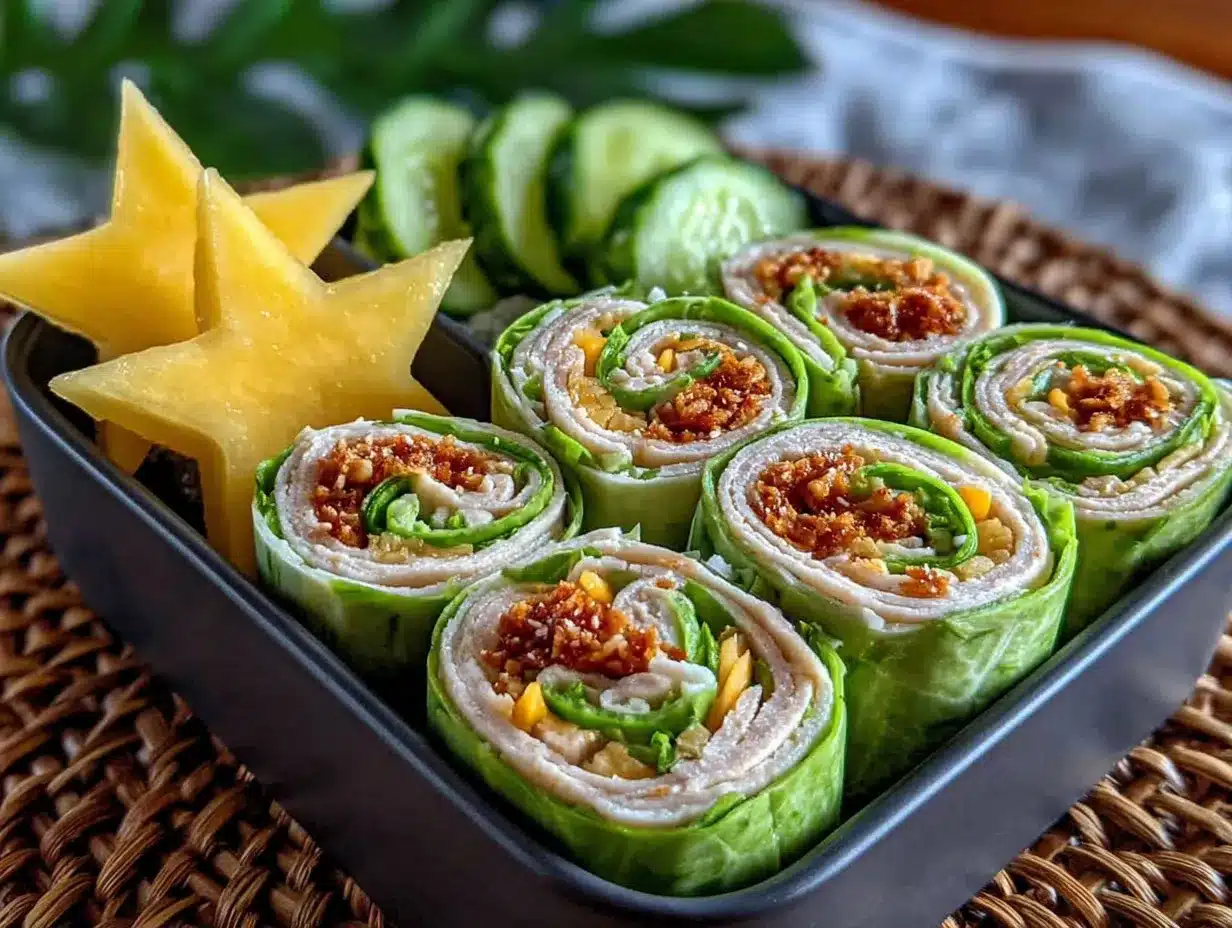
Let me walk you through how I put this together on a typical school morning. I’ve got this down to a science now, but I’ll include the little hiccups I’ve learned from along the way.
- Soften the cream cheese: Take your cream cheese out of the fridge about 10 minutes before you start, or microwave it for 10-15 seconds until it’s spreadable but not hot. I learned the hard way that hot cream cheese makes the tortilla soggy and the roll-ups fall apart. You want it soft, not melted.
- Prepare your tortilla: Lay the tortilla flat on your cutting board. If it’s a little stiff, microwave it for 5-8 seconds to make it more pliable. This is especially important for whole wheat or gluten-free tortillas, which tend to crack when rolled cold.
- Spread the cream cheese: Using your butter knife or offset spatula, spread the softened cream cheese evenly over the entire surface of the tortilla. Leave about a half-inch border around the edges so it doesn’t squish out when you roll. I like to go a little thicker on one end—that becomes the “glue” that seals the roll.
- Layer the turkey: Place the turkey slices flat over the cream cheese, overlapping them slightly so there are no gaps. You want a solid layer of turkey that covers the whole tortilla. If your slices are small, just use more of them—it’s better to have too much turkey than a bare spot.
- Add the cheese strips: Lay the cheese stick strips in a line along one edge of the tortilla (the edge you’ll start rolling from). This puts the cheese in the center of each pinwheel and makes a nice visual surprise when you cut them.
- Roll it up tight: Starting from the edge with the cheese strips, roll the tortilla tightly but gently. Use your fingers to keep it snug as you go. When you reach the end, press down firmly to seal the edge. The cream cheese should hold it closed—if it doesn’t, add a tiny dab more cream cheese to the edge before sealing.
- Chill (optional but helpful): Wrap the roll in plastic wrap or parchment paper and pop it in the fridge for 5-10 minutes while you prep the other ingredients. This makes slicing much cleaner. If you’re in a rush (and who isn’t?), you can skip this step—just slice carefully with a serrated knife.
- Slice into pinwheels: Using a sharp knife, slice the roll into 1-inch thick rounds. You should get about 6-8 pinwheels depending on how tight you rolled. If the edges look messy, just trim the very ends off—those are the cook’s snack, obviously.
- Prep the fruits and veggies: Wash and cut your cucumber into matchsticks or rounds, halve the cherry tomatoes, cut the grapes lengthwise, and arrange the baby carrots. I like to cut everything while the roll is chilling so it all comes together at once.
- Assemble the bento box: Place the turkey roll-up pinwheels in the largest compartment. Arrange the cucumber, tomatoes, grapes, carrots, and pretzel sticks in the other compartments. If you’re including a dip, put it in a small silicone cup or the smallest compartment. Close the lid and you’re done!
One thing I’ve learned: don’t overfill the compartments. Kids get overwhelmed by too much food, and honestly, they’d rather have a smaller portion they finish than a huge lunch they ignore. I aim for about 4-5 pinwheels, a handful of each fruit and veggie, and a small handful of pretzels. That’s plenty for a hungry kindergartner.
Cooking Tips & Techniques
After making these roll-ups approximately 847 times (I may be exaggerating, but only slightly), I’ve picked up a few tricks that make the process smoother and the results better.
The cream cheese temperature trick: This is the single most important tip I can give you. Cold cream cheese tears the tortilla and creates lumps. Hot cream cheese makes everything soggy. Room temperature, slightly softened cream cheese is the Goldilocks zone. I set mine out when I’m making coffee in the morning, and by the time I’m ready to assemble, it’s perfect.
Rolling without the crack: If your tortilla cracks when you roll it, you’re probably rolling too tight or your tortilla is too cold. Warm it for a few seconds in the microwave, and roll gently but firmly. Think of it like rolling a sleeping bag—snug but not strangling.
The soggy roll-up problem: If your roll-ups are getting soggy by lunchtime, the culprit is usually too much moisture somewhere. Pat your turkey slices dry with a paper towel before layering. Don’t use flavored cream cheese spreads (they have more water content). And make sure your cucumber matchsticks are patted dry too. A little attention to moisture makes a huge difference.
My biggest failure: I once tried to make these the night before for an early morning field trip. Big mistake. The cream cheese made the tortilla soggy overnight, and the pinwheels were basically mush by morning. These are best made fresh, or at most a few hours ahead. If you need to prep the night before, cut all your fruits and veggies, but assemble the roll-ups in the morning. Your future self will thank you.
Multitasking like a pro: While the cream cheese is softening, wash and cut your produce. While the roll is chilling, portion out your pretzels and dip. Every minute counts in the morning rush, and a little sequencing goes a long way.
Variations & Adaptations
One of the best things about this bento box is how flexible it is. Here are some variations I’ve tried (and my kid has approved or rejected):
The No-Dairy Version: Swap the cream cheese for hummus or avocado mash. Both spread beautifully and hold the roll together just as well. Use dairy-free cheese sticks or skip the cheese entirely. My son actually prefers the avocado version—it’s creamier and a little bit sweet.
The Gluten-Free Option: Use a large gluten-free tortilla or a lettuce leaf for wrapping. Lettuce wraps are actually fantastic for this—they’re lighter and add a nice crunch. Just make sure to pat the lettuce dry first so it doesn’t make everything watery.
The Protein-Packed Version: Add a thin layer of peanut butter or almond butter under the cream cheese for extra protein and staying power. I’ve also used sliced ham instead of turkey, or even leftover grilled chicken strips rolled inside. Just keep the pieces small enough for little hands.
The Picky Eater Adaptation: If your kid hates all vegetables (I feel your pain), try hiding them inside the roll-up. Finely grated carrot or zucchini mixed into the cream cheese disappears completely. Or use bell pepper strips instead of cucumber—they’re sweeter and less intimidating.
The Seasonal Swap: In summer, I use fresh strawberries instead of grapes and add a few blueberries for color. In fall, sliced apple wedges (tossed in lemon juice to prevent browning) replace the cucumber. The beauty of a bento box is that you can swap any component without changing the whole meal.
The Fun Shape Version: Use a star-shaped cookie cutter to cut the turkey slices before rolling. Or cut the finished pinwheels into fun shapes with small cutters. It takes an extra minute but makes lunch feel like a party. My son’s current favorite is dinosaur-shaped cucumber slices alongside his roll-ups.
Serving & Storage Suggestions
These turkey roll-up bento boxes are best served at room temperature, which is perfect for packed lunches. By the time lunch rolls around, everything will have come to a nice, kid-friendly temperature. No one wants cold, hard cream cheese—trust me, I’ve tried.
For the most appealing presentation, arrange the food in separate compartments so colors pop and textures stay distinct. I like to put the pinwheels in the center compartment with the colorful fruits and veggies surrounding them. It’s like a little edible rainbow that makes kids excited to open their lunchbox.
Storage tips: If you’re packing these for later in the day, keep the bento box refrigerated until you’re ready to leave. The roll-ups will stay fresh for about 4-6 hours in a cool lunchbox. I use an ice pack in my son’s lunch bag during warmer months, and everything stays perfectly chilled until noon.
What not to do: Don’t freeze these. The cream cheese gets grainy and the tortilla turns into a sad, soggy mess. These are strictly a make-fresh or make-a-few-hours-ahead situation. Also, don’t pack the dip directly on top of the roll-ups—use a small container or silicone cup to keep everything separate.
How flavors develop: Interestingly, the roll-ups actually taste better after about an hour in the fridge. The flavors meld together, the cream cheese firms up, and everything just comes together. So if you can make these 30-60 minutes before packing, you’ll get the best results. Just don’t go beyond 4-5 hours or the texture starts to suffer.
What to serve alongside: A small container of apple slices, a yogurt tube, or a homemade muffin are great additions. I sometimes throw in a note or a sticker for a fun surprise. My son says the notes are his favorite part—even more than the roll-ups, which is saying something.
Nutritional Information & Benefits
This bento box provides a balanced mix of protein, healthy fats, carbohydrates, and fiber to keep your kindergartner fueled through a busy morning of learning and play. Here’s an approximate breakdown for the full lunch:
- Calories: Approximately 380-420 calories per serving
- Protein: 22-25 grams (from turkey, cheese, and cream cheese)
- Carbohydrates: 35-40 grams (from tortilla, fruit, and pretzels)
- Fiber: 5-7 grams (from whole wheat tortilla, carrots, and cucumber)
- Fat: 15-18 grams (from cream cheese, cheese, and turkey)
The turkey provides lean protein that supports muscle growth and keeps little bellies full. The cream cheese and cheese stick offer calcium for growing bones and healthy teeth. The colorful fruits and veggies deliver a range of vitamins—vitamin C from the tomatoes and grapes, vitamin A from the carrots, and antioxidants from the cucumber.
This lunch is naturally low in added sugars (the only sweetness comes from the fruit) and can easily be made gluten-free or dairy-free with simple substitutions. It’s also nut-free if you skip any nut-based spreads, making it school-safe for classrooms with allergy restrictions.
I love that this lunch feels indulgent and fun but is actually packed with good-for-you ingredients. My son thinks he’s getting a treat, and I know he’s getting a balanced meal. That’s a win-win in my book.
Conclusion
This turkey roll-ups bento box has honestly changed our school mornings. What started as a failed appetizer turned into a lunch that my kindergartner actually looks forward to eating. No more trading, no more half-eaten sandwiches, no more guilt about what’s in the lunchbox. Just a happy kid and a clean container at pickup time.
The best part? You can make this your own. Swap in whatever your kid loves, use whatever you have in the fridge, and don’t stress about making it perfect. Some days my roll-ups are a little lopsided, and some days I forget the dip. It still gets eaten. That’s the real measure of success.
I’d love to hear how your version turns out. What fillings did your kid love? What fruits and veggies made the cut? Drop a comment below and share your bento box wins—I read every single one and love getting new ideas. And if you’re looking for more lunch inspiration, try our easy pasta salad lunchbox or our no-cook lunch ideas for kids for more make-ahead options.
Happy packing, friends. You’ve got this.
Frequently Asked Questions
Can I make these turkey roll-ups the night before?
I don’t recommend it. The cream cheese makes the tortilla soggy overnight, and the texture just isn’t the same. If you need to prep ahead, cut your fruits and veggies the night before, but assemble the roll-ups in the morning. It only takes about 5 minutes, I promise.
How do I keep the roll-ups from unrolling in the lunchbox?
Make sure you spread the cream cheese all the way to the edge of the tortilla before rolling. That cream cheese acts like glue. You can also wrap each roll-up in a small piece of parchment paper or place them seam-side down in the bento box to keep them secure.
What if my kid doesn’t like cream cheese?
No problem at all! Try using hummus, avocado mash, or even a thin layer of peanut butter (if your school allows nuts). Soft goat cheese or ricotta also work well. The key is using something spreadable that will hold the roll together.
How many pinwheels should I pack for a kindergartner?
I usually pack 4-5 pinwheels for my five-year-old, along with a good mix of fruits, veggies, and a small treat. Every kid is different, though. Start with 3-4 and see how much comes back. You can always adjust based on your child’s appetite.
Can I use different meats besides turkey?
Absolutely! Ham, roast beef, or even sliced grilled chicken all work great. Just make sure the slices are thin and flexible enough to roll without cracking. Leftover rotisserie chicken shredded and mixed with a little cream cheese is actually one of our favorite variations.
Pin This Recipe!
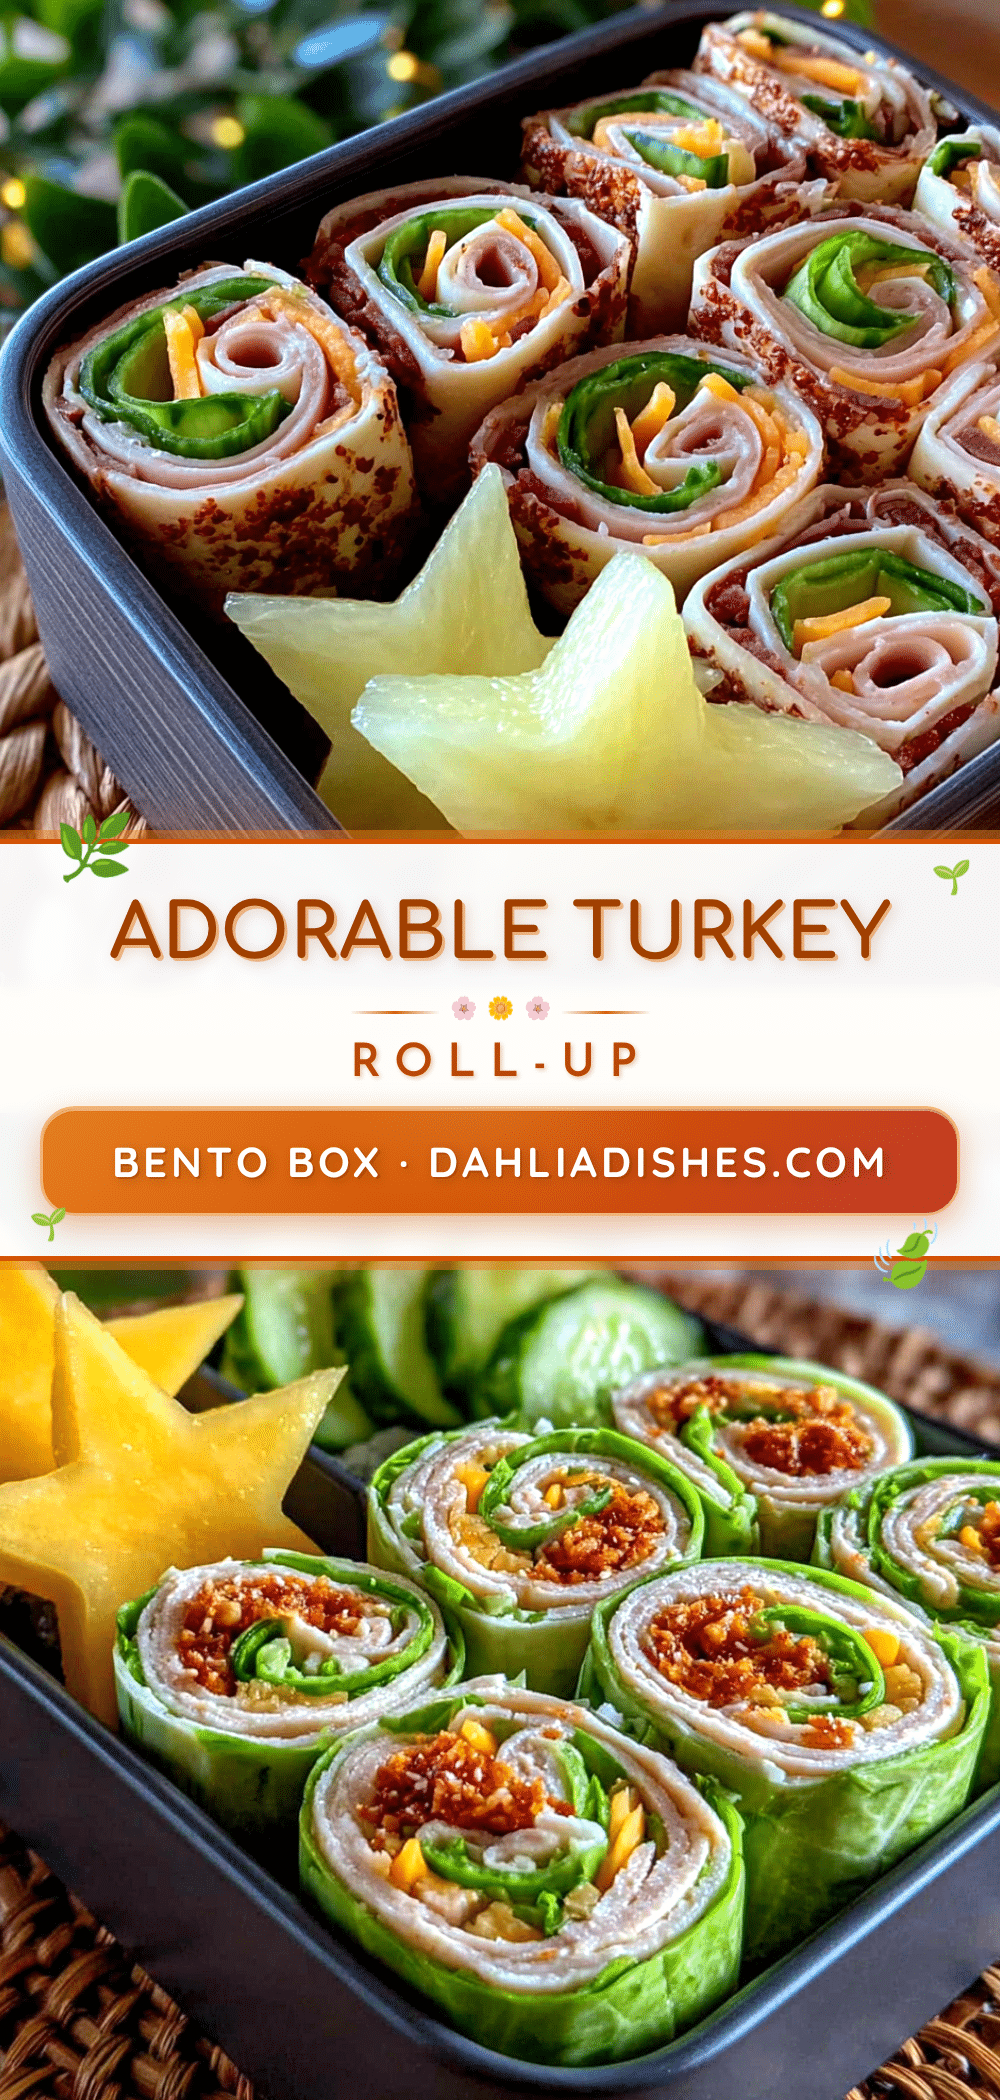
Easy Turkey Roll-Ups Bento Box for Kindergarten Lunch

A quick, no-cook bento box featuring turkey and cream cheese roll-ups, fresh fruits, veggies, and pretzels. Perfect for kindergarten lunches, this kid-approved meal comes together in under 10 minutes and returns an empty box every time.
- Prep Time: 10 minutes
- Cook Time: 0 minutes
- Total Time: 10 minutes
- Yield: 1 serving 1x
- Category: Lunch
- Cuisine: American
Ingredients
- 4–5 slices deli turkey (oven-roasted preferred)
- 3 tablespoons cream cheese, softened
- 1 large flour tortilla (8-inch) or flatbread wrap
- 1 mozzarella or cheddar cheese stick, cut into thin strips
- 1/4 cup cucumber, cut into matchsticks or small rounds
- 4–5 cherry tomatoes, halved or quartered
- 1/2 cup red or green grapes, halved lengthwise
- 1/4 cup baby carrots (about 5–6 mini carrots)
- 10–12 pretzel sticks
- 2 tablespoons hummus or ranch dip (optional)
Instructions
- Soften the cream cheese: Take cream cheese out of the fridge 10 minutes before starting, or microwave for 10-15 seconds until spreadable but not hot.
- Prepare the tortilla: Lay tortilla flat on a cutting board. If stiff, microwave for 5-8 seconds to make pliable.
- Spread cream cheese: Using a butter knife or offset spatula, spread softened cream cheese evenly over the entire tortilla, leaving a half-inch border around the edges.
- Layer turkey: Place turkey slices flat over the cream cheese, overlapping slightly to cover the whole tortilla.
- Add cheese strips: Lay cheese stick strips in a line along one edge of the tortilla (the edge you’ll start rolling from).
- Roll it up: Starting from the edge with the cheese strips, roll the tortilla tightly but gently. Press down firmly to seal the edge.
- Chill (optional): Wrap the roll in plastic wrap or parchment paper and refrigerate for 5-10 minutes for cleaner slicing.
- Slice into pinwheels: Using a sharp knife, slice the roll into 1-inch thick rounds (about 6-8 pinwheels). Trim ends if desired.
- Prep fruits and veggies: Wash and cut cucumber, halve cherry tomatoes, cut grapes lengthwise, and arrange baby carrots.
- Assemble bento box: Place turkey roll-up pinwheels in the largest compartment. Arrange cucumber, tomatoes, grapes, carrots, and pretzel sticks in other compartments. Add dip in a small silicone cup if using. Close lid.
Notes
For best results, use room temperature cream cheese to avoid soggy tortillas. Make roll-ups fresh; do not prepare the night before as cream cheese makes tortilla soggy. Pat turkey slices and cucumber dry to prevent sogginess. Roll-ups taste better after 1 hour in the fridge but should not be stored longer than 4-5 hours. For dairy-free, substitute cream cheese with hummus or avocado mash. For gluten-free, use a large gluten-free tortilla or lettuce wrap.
Nutrition
- Serving Size: 1 bento box
- Calories: 400
- Sugar: 12
- Sodium: 800
- Fat: 16
- Saturated Fat: 8
- Carbohydrates: 38
- Fiber: 6
- Protein: 24
Keywords: turkey roll-ups, bento box, kindergarten lunch, no-cook lunch, kid-friendly lunch, easy lunchbox, turkey pinwheels


