Love this? Save it for later!
Share the inspiration with your friends
It was 10:47 PM on a rainy Tuesday in late October, and I was staring into my fridge with the kind of desperation that only comes from realizing you forgot to plan dinner for the next day’s Halloween party at your kid’s school. I didn’t have anything remotely festive—no themed cookie cutters, no orange sprinkles, no pre-made anything that screamed “spooky season.” But I had a pack of hot dogs, a can of crescent rolls that had been hiding in the back of the fridge for way too long, and a vague memory of seeing something online once. Honestly, I almost just ordered pizza and called it a night. But something about the rain tapping against the window and the half-empty bag of candy corn on the counter made me stubborn. So I grabbed the hot dogs, ripped open the crescent roll can (you know that pop sound that scares you every single time), and started wrapping.
What came out of the oven twenty minutes later was ridiculous. I mean, genuinely silly-looking little mummies with their little bandages all puffed up and golden. But my daughter saw them the next morning and absolutely lost her mind. She told me they were the best thing I’d ever made, and honestly? She might have been right. Not because they’re fancy or complicated—because they’re not—but because they made her laugh. That’s the thing about this Easy Mummy Hot Dogs Halloween Dinner Platter. It’s not about impressing anyone with your knife skills. It’s about creating something that makes people smile before they even take a bite. And maybe you’ve been there, scrambling for a Halloween dinner idea that doesn’t involve a drive-thru or a full-on culinary meltdown. This platter is for those nights.
I’ve made this platter every Halloween since that rainy Tuesday, and let me tell you, it never gets old. The kids devour it, the adults sneak a few when no one’s looking, and the whole thing comes together in under thirty minutes. It’s the kind of recipe that saves you when you need it most, and honestly, it’s the reason I actually look forward to Halloween dinner now instead of dreading it.
Why You’ll Love This Recipe
Let me be real with you for a second. I’ve tested a lot of Halloween recipes over the years—some that required specialty cake pans, others that called for food coloring that stained my countertops for weeks. This Easy Mummy Hot Dogs Halloween Dinner Platter is none of those things. It’s the recipe I turn to when I want something fun without the fuss. After years of trial and error in my own kitchen (and one particularly tragic batch of mummies that fell apart because I didn’t seal the dough properly), I’ve perfected this method so you don’t have to learn the hard way.
- Quick & Easy: From fridge to table in under 25 minutes. Seriously, you can make this after work, between homework and soccer practice, or when the doorbell starts ringing for trick-or-treaters.
- Simple Ingredients: You only need four main ingredients—hot dogs, crescent roll dough, cheese, and mustard. No special trips to a fancy grocery store required.
- Perfect for Halloween Parties: Whether it’s a classroom celebration, a family dinner before trick-or-treating, or a spooky movie night, this platter fits right in.
- Crowd-Pleaser: I’ve served these to picky eaters, adults who claim they’re “too old for themed food,” and everyone in between. They disappear every single time.
- Unbelievably Fun: There’s something about the little bandage wraps and the mustard eyes that makes everyone smile. It’s comfort food with a costume on.
What makes this recipe different from the dozens of other mummy hot dog versions out there? It’s the technique. I learned through trial and error that the way you wrap the dough matters—too loose and the bandages fall off, too tight and the dough doesn’t puff up properly. I also figured out the perfect bake time that gives you golden, flaky bandages without burning the hot dogs. This isn’t just another version; it’s the version I’ve tested until I got it exactly right. And when you bite into one of these, with the flaky dough giving way to that salty, juicy hot dog, you’ll understand why this platter has become my most-requested Halloween recipe.
What Ingredients You Will Need
This recipe uses simple, everyday ingredients to create something that feels special. The beauty of this Easy Mummy Hot Dogs Halloween Dinner Platter is that you probably already have most of these in your kitchen right now. Here’s what you need and why each ingredient matters:
- Hot dogs (1 package, 8 count): Use your favorite brand—beef, turkey, or even plant-based options work great here. I personally prefer all-beef hot dogs for their flavor and snap, but any variety will work. Look for standard-size hot dogs, not the jumbo ones, because they wrap more easily and cook through at the same rate as the dough.
- Crescent roll dough (1 can, 8 ounces): This is the magic ingredient. The dough creates the perfect “bandage” effect when wrapped around the hot dogs. I recommend Pillsbury Original Crescent Rolls for the best texture and flavor, but store-brand versions work too. Just make sure you get the sheet-style crescent dough if you can find it—it saves you the step of pressing the perforations together.
- American cheese slices (4 slices, cut in half): The cheese goes under the dough wraps to create a little “mummy body” effect. You can use cheddar, provolone, or even mozzarella if that’s what you have. For a more dramatic mummy look, use white cheese like provolone or mozzarella.
- Mustard (for eyes): Yellow mustard works best because it gives those classic mummy “eyes” that pop against the golden dough. You can use a squeeze bottle or just dip a toothpick for precision. If you’re not a mustard fan, try small dots of ketchup or even black sesame seeds.
- Cooking spray or butter (for greasing): A light coating on your baking sheet ensures the mummies don’t stick and helps the dough brown beautifully.
- Optional garnishes: Fresh parsley or chives for a “grass” effect on the platter, or a small bowl of ketchup for dipping. You can also add some pretzel sticks to look like “bones” on the side of the platter.
For the dipping sauce, I like to mix equal parts ketchup and mustard for a fun “blood and bandage” theme, but plain ketchup or your favorite dipping sauce works just fine. The key is keeping it simple—this recipe is about fun, not fuss.
Equipment Needed
You don’t need a fancy kitchen to pull off this Easy Mummy Hot Dogs Halloween Dinner Platter. Here’s what you’ll need:
- Baking sheet (half-sheet size or similar): A standard 13×18-inch baking sheet works perfectly. If you don’t have one, any rimmed baking sheet will do. I’ve used everything from a cookie sheet to a jelly roll pan—they all work.
- Parchment paper or silicone baking mat: This makes cleanup a breeze and prevents the dough from sticking. If you don’t have either, you can grease the baking sheet well with cooking spray.
- Knife and cutting board: For cutting the cheese slices in half. Nothing fancy needed—a regular kitchen knife works fine.
- Small bowl: For the mustard “eyes” if you’re using a toothpick to apply them. Alternatively, a squeeze bottle makes the eyes even easier.
- Toothpick or small skewer: For applying the mustard eyes with precision. A toothpick is perfect for this.
- Cooling rack (optional): If you want the mummies to stay crispy on the bottom, place them on a cooling rack after baking. It’s not essential, but it helps.
I’ll be honest—my first time making these, I didn’t have parchment paper and ended up scrubbing melted cheese off my baking sheet for twenty minutes. Learn from my mistakes and use parchment paper. It’s worth it.
Preparation Method
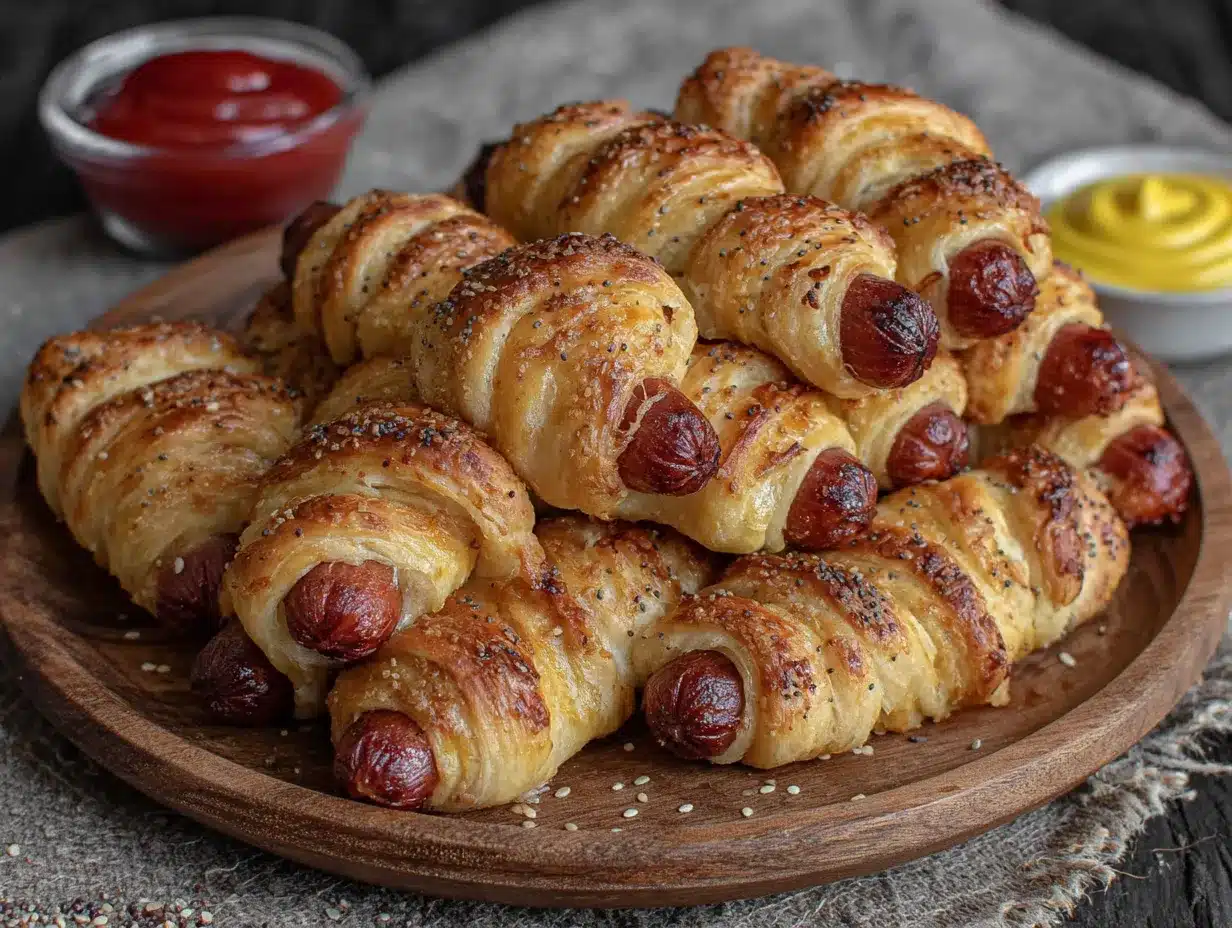
Alright, let’s get to the fun part. Here’s how to make this Easy Mummy Hot Dogs Halloween Dinner Platter step by step. I’ve included all the little details I wish someone had told me the first time I made these.
Step 1: Preheat your oven to 375°F (190°C). Line a baking sheet with parchment paper or a silicone baking mat. This is non-negotiable—trust me on the cleanup thing.
Step 2: Prepare your hot dogs. Pat the hot dogs dry with a paper towel. This helps the dough stick better. If your hot dogs are very wet, the dough can slide off during baking. I learned this the hard way when my first batch looked more like sad, half-wrapped burritos than mummies.
Step 3: Cut the cheese slices. Take 4 slices of American cheese and cut each one in half, giving you 8 rectangular pieces. Each piece should be about the same width as your hot dog. Place one cheese piece on top of each hot dog, pressing it gently so it sticks.
Step 4: Prepare the crescent roll dough. Open the can of crescent rolls—careful, that pop sound still gets me every time! Unroll the dough and separate it along the perforated lines. You should have 8 triangles. If you’re using the sheet-style dough, cut it into 8 long strips about 1 inch wide.
Step 5: Wrap the mummies. Take one triangle of dough and stretch it slightly. Starting at the wide end, wrap the dough around the hot dog, slightly overlapping as you go. Leave a small gap near the top of the hot dog for the “face” area. The cheese should peek out a little from under the dough wraps. Don’t wrap too tightly—you want the dough to puff up and create those nice bandage-like ridges. Repeat with all 8 hot dogs.
Step 6: Arrange on the baking sheet. Place the wrapped mummies on the prepared baking sheet, spacing them about 2 inches apart. They’ll puff up a bit during baking, so give them room to breathe.
Step 7: Bake for 12-15 minutes. Bake until the dough is golden brown and puffed, and the hot dogs are heated through. The cheese might ooze out a little—that’s totally fine and actually looks kind of creepy-cool. Keep an eye on them after the 12-minute mark because ovens vary. You want the dough golden, not burnt.
Step 8: Add the eyes. Let the mummies cool for 2-3 minutes on the baking sheet. Then, using a toothpick or the tip of a squeeze bottle, add two small dots of mustard for eyes. You can also use ketchup if you prefer, but mustard gives a more “mummy” look with its yellow color.
Step 9: Assemble the platter. Arrange the mummies on a large serving platter. You can add some “grass” using fresh parsley or chives around the edges. Add a small bowl of ketchup or your favorite dipping sauce in the center or off to the side. If you want to get extra creative, arrange some pretzel sticks to look like bones or add some candy corn around the edges.
Step 10: Serve immediately. These are best enjoyed warm, right after they come out of the oven. The dough is flaky, the cheese is melty, and the hot dog is juicy. It’s pure comfort food magic.
Cooking Tips & Techniques
After making these mummies more times than I can count, I’ve picked up a few tricks that make the process smoother and the results better. Here are my best tips:
Don’t overwork the dough. Crescent roll dough is delicate. When you’re wrapping the mummies, handle the dough as little as possible. If you stretch it too much, it can tear or become too thin to puff up properly. Gentle hands, people.
Seal the ends. Make sure the ends of the dough are tucked under the hot dog slightly. This prevents them from unrolling during baking. I learned this after one particularly tragic batch where half my mummies came out looking like they’d been in a fight and lost their bandages.
Use room temperature dough. If your crescent roll dough is straight from the fridge, it can crack when you try to stretch it. Let it sit at room temperature for about 10 minutes before you start wrapping. This makes it much more pliable.
Space them out. I know it’s tempting to crowd the baking sheet, but give those mummies room. They expand as they bake, and if they’re too close together, they’ll steam instead of getting crispy and golden.
Watch the cheese. If you’re using American cheese, it melts quickly and can ooze out from under the dough. That’s fine—it adds to the creepy effect. But if you’re using a harder cheese like cheddar, it might not melt as much, so you’ll get a cleaner look. Both work, just different vibes.
Make ahead tip. You can wrap the mummies up to a few hours ahead of time and keep them in the fridge on the baking sheet. Just add a few extra minutes to the baking time since they’ll be cold. This is a lifesaver if you’re hosting a party and want to minimize last-minute prep.
Double batch strategy. If you’re feeding a crowd, make two batches. Trust me, one batch of eight mummies disappears fast. I’ve seen grown adults eat three of these without blinking.
Variations & Adaptations
One of the best things about this Easy Mummy Hot Dogs Halloween Dinner Platter is how adaptable it is. Here are some variations I’ve tried and loved:
Vegetarian/Vegan Version: Use plant-based hot dogs and vegan crescent roll dough (some brands are accidentally vegan, but check the label). Use vegan cheese slices or skip the cheese altogether. The wrapping technique stays the same, and they turn out just as cute.
Spicy Mummies: Brush the hot dogs with a little sriracha or hot sauce before wrapping. You can also add a thin slice of jalapeño under the cheese for an extra kick. My husband loves this version—he says it gives the mummies “attitude.”
Cheese-Stuffed Mummies: Instead of putting the cheese on top, slice the hot dog lengthwise (not all the way through) and stuff a thin strip of cheese inside. The cheese will melt out of the center as it bakes, creating a gooey surprise in every bite.
Breakfast Mummies: Swap the hot dogs for breakfast sausages or even cooked sausage links. Serve them with maple syrup for dipping. It’s a fun twist for a Halloween morning breakfast before school.
Pizza Mummies: Before wrapping, brush the hot dogs with a little pizza sauce and sprinkle with Italian seasoning. Use mozzarella cheese instead of American. Serve with warm marinara sauce for dipping. These are always a hit at our house.
Gluten-Free Option: Use gluten-free crescent roll dough or even gluten-free puff pastry sheets. The texture will be slightly different, but the concept works the same. Just check the baking time on the gluten-free dough package and adjust accordingly.
I once tried a version where I used bacon instead of dough to wrap the mummies. It was delicious, but honestly, it was a mess. The bacon didn’t cook through in the same time as the hot dog, and the grease made everything soggy. Stick with the crescent roll dough—it’s the star of the show for a reason.
Serving & Storage Suggestions
This platter is best served warm and fresh, but here’s how to make the most of it:
Serving Temperature: Serve these mummies warm, right after they come out of the oven. The dough is at its flakiest, the cheese is perfectly melty, and the hot dog is juicy. If they cool down too much, the dough can get a bit soft. A quick 10-second zap in the microwave brings them back to life.
Presentation Ideas: Arrange the mummies on a large black or dark-colored platter for maximum spooky effect. Add some “grass” using fresh chives or parsley around the edges. You can also scatter some candy corn, pretzel sticks (to look like bones), or even a few plastic spider rings around the platter for extra Halloween flair. A small bowl of ketchup in the center with a “blood” label adds to the theme.
What to Serve With Them: These mummies are hearty enough to be a meal on their own, but they pair well with other Halloween-themed sides. Try serving them with “witch’s fingers” (carrot sticks with almond slivers for nails), “monster mash” (mashed potatoes with green food coloring), or a simple side salad. For drinks, a pitcher of “witches’ brew” (limeade with dry ice for a smoky effect) is always a hit with kids.
Storage Instructions: If you have leftovers (unlikely, but possible), store them in an airtight container in the refrigerator for up to 3 days. The dough will soften, but they’re still tasty. To reheat, pop them in the oven at 350°F for 5-7 minutes, or microwave for 20-30 seconds. The oven method gives you crisper dough.
Freezing Instructions: You can freeze the unbaked wrapped mummies. Arrange them on a baking sheet and freeze until solid, then transfer to a freezer bag. They’ll keep for up to 2 months. To bake, add 5-7 minutes to the baking time since they’re frozen. I’ve done this for last-minute Halloween parties, and it works like a charm.
Flavor Development: Honestly, these are best fresh. The magic is in the contrast between the hot, flaky dough and the juicy hot dog. Leftovers are fine, but they don’t have the same wow factor. Make only what you think you’ll eat in one sitting, and save any extra unbaked mummies in the fridge for the next day.
Nutritional Information & Benefits
Let’s be real—this is a fun, indulgent Halloween treat, not a health food. But here’s the breakdown so you know what you’re working with:
Per serving (2 mummies, without dipping sauce):
- Calories: Approximately 380-420
- Protein: 12-15g
- Fat: 24-28g
- Carbohydrates: 28-32g
- Fiber: 1g
- Sugar: 6-8g
- Sodium: 900-1100mg
Health Considerations: If you’re watching your sodium intake, look for low-sodium hot dogs and reduced-sodium crescent roll dough. You can also use turkey or chicken hot dogs for a leaner option. For a lower-carb version, skip the crescent roll dough and wrap the hot dogs in thin slices of cheese or even bacon (though that adds fat and sodium).
Potential Allergens: This recipe contains wheat (crescent roll dough), dairy (cheese), and may contain soy depending on the hot dog brand you choose. For a dairy-free version, use dairy-free cheese or skip the cheese altogether. For a gluten-free version, use gluten-free crescent roll dough or puff pastry.
Ingredient Benefits: Hot dogs provide protein and iron, while the crescent roll dough offers carbohydrates for quick energy. The cheese adds calcium and a little extra protein. It’s not a superfood by any stretch, but as an occasional treat, it fits into a balanced diet just fine. And honestly, the biggest benefit is the joy it brings to the table—that counts for something too.
Conclusion
This Easy Mummy Hot Dogs Halloween Dinner Platter has become a tradition in my house, and I have a feeling it’ll become one in yours too. It’s the kind of recipe that saves you when you’re short on time, low on energy, and running out of ideas. It’s proof that you don’t need fancy ingredients or complicated techniques to create something that makes people smile. All you need is a pack of hot dogs, a can of crescent rolls, and a little bit of creativity.
I love this recipe because it reminds me that cooking doesn’t always have to be serious. Sometimes it’s okay to make food that’s purely for fun—food that makes kids laugh and adults feel like kids again. That rainy Tuesday night when I was staring into my fridge, feeling defeated, I had no idea I was stumbling onto a recipe that would become a yearly tradition. But that’s the beauty of cooking, isn’t it? The best recipes often come from the most unlikely moments.
So go ahead and make these mummies your own. Add extra cheese, use different dipping sauces, arrange them on a spooky platter with all the Halloween trimmings. And when you do, I’d love to hear about it. Drop a comment below and tell me how your mummies turned out—did the kids love them? Did the adults sneak a few? Did you come up with a variation I haven’t tried yet? Share your photos, your stories, your happy Halloween dinner moments. Because honestly, that’s what this is all about—making memories, one silly little mummy hot dog at a time.
Happy Halloween, and happy cooking!
Frequently Asked Questions
Can I make these mummy hot dogs ahead of time?
Yes! You can wrap the mummies up to a few hours ahead of time and keep them in the fridge on the baking sheet. Just add a few extra minutes to the baking time since they’ll be cold. You can also freeze the unbaked wrapped mummies for up to 2 months—just bake straight from frozen, adding 5-7 minutes to the baking time.
What if I don’t have crescent roll dough?
No problem! You can use puff pastry sheets cut into strips, or even refrigerated pizza dough. If using puff pastry, the bake time might be slightly longer. You can also use refrigerated biscuit dough, flattened and cut into strips—it gives a different texture but works great.
Can I use a different type of cheese?
Absolutely! Provolone, mozzarella, cheddar, or even pepper jack all work well. Just keep in mind that harder cheeses like cheddar won’t melt as much as American cheese, so the “mummy” effect might look a bit different. For a dairy-free option, skip the cheese or use a dairy-free cheese slice.
How do I keep the dough from unrolling during baking?
Make sure you tuck the ends of the dough under the hot dog slightly before baking. Also, don’t wrap too loosely—the dough should be snug but not tight. If you’re still having trouble, you can secure the end of the dough with a tiny dab of water or egg wash to help it stick.
Can I make these in an air fryer?
Yes! Preheat your air fryer to 350°F (175°C). Place the wrapped mummies in the basket in a single layer (you may need to work in batches). Cook for 8-10 minutes, or until the dough is golden brown and the hot dogs are heated through. The air fryer gives them an extra crispy texture that’s really nice.
Pin This Recipe!
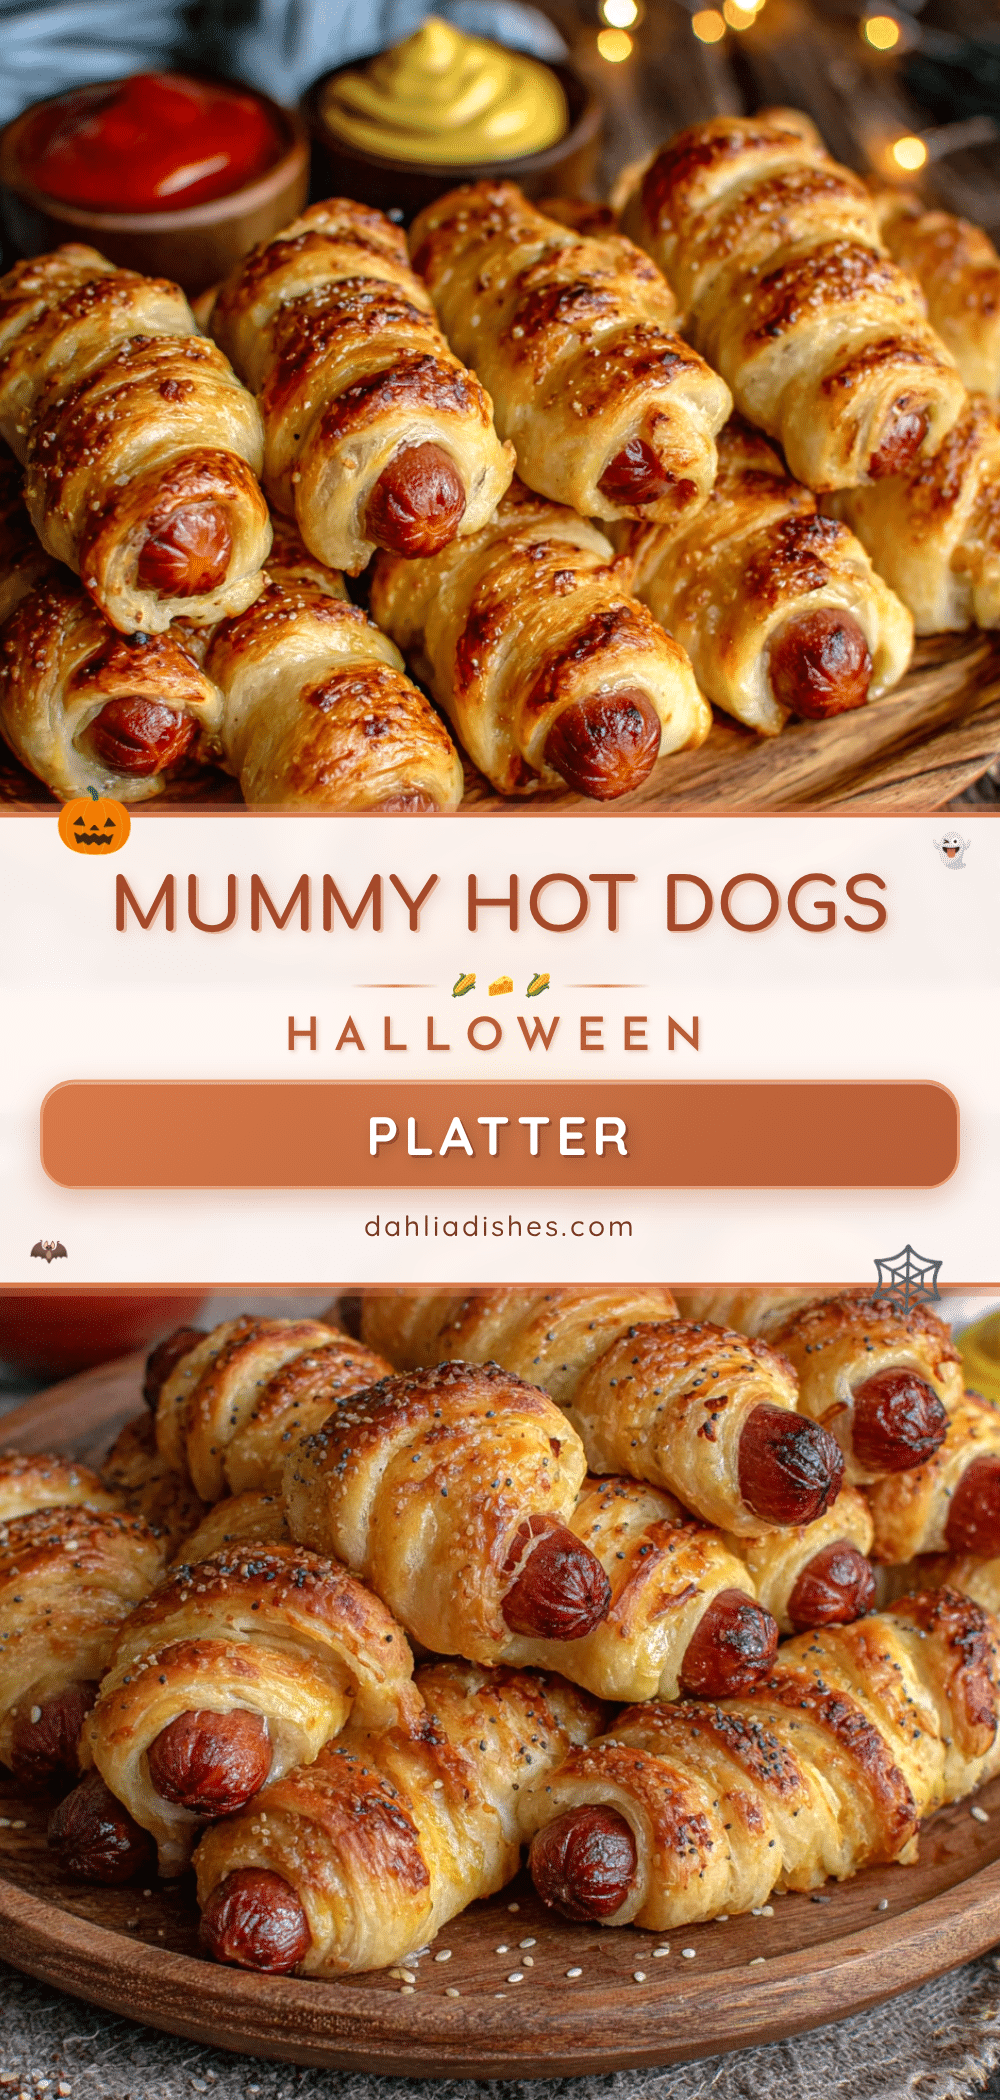
Easy Mummy Hot Dogs: Best Halloween Dinner Platter

A fun and easy Halloween dinner platter featuring hot dogs wrapped in crescent roll dough to look like mummies, with cheese and mustard eyes. Ready in under 30 minutes, it’s a crowd-pleaser that brings smiles to kids and adults alike.
- Prep Time: 10 minutes
- Cook Time: 15 minutes
- Total Time: 25 minutes
- Yield: 4 servings (2 mummies per serving) 1x
- Category: Main Course
- Cuisine: American
Ingredients
- 1 package (8 count) hot dogs
- 1 can (8 ounces) crescent roll dough
- 4 slices American cheese, cut in half
- Mustard (for eyes)
- Cooking spray or butter (for greasing)
- Optional: fresh parsley or chives for garnish, ketchup for dipping
Instructions
- Preheat oven to 375°F (190°C). Line a baking sheet with parchment paper or a silicone baking mat.
- Pat hot dogs dry with a paper towel.
- Cut 4 slices of American cheese in half to make 8 rectangular pieces. Place one piece on top of each hot dog, pressing gently.
- Open the can of crescent rolls and separate into 8 triangles. If using sheet-style dough, cut into 8 long strips about 1 inch wide.
- Take one triangle of dough, stretch slightly, and wrap around the hot dog starting at the wide end, slightly overlapping. Leave a small gap near the top for the face. Repeat with all hot dogs.
- Arrange wrapped mummies on the prepared baking sheet, spacing about 2 inches apart.
- Bake for 12-15 minutes until dough is golden brown and puffed, and hot dogs are heated through.
- Let cool for 2-3 minutes, then add two small dots of mustard for eyes using a toothpick or squeeze bottle.
- Arrange on a serving platter. Garnish with parsley or chives for grass, and serve with ketchup or dipping sauce.
- Serve immediately.
Notes
For best results, use room temperature dough to prevent cracking. Seal ends of dough by tucking under the hot dog to prevent unrolling. Make ahead: wrap mummies up to a few hours ahead and refrigerate; add a few extra minutes to baking time. Freeze unbaked wrapped mummies for up to 2 months; bake from frozen, adding 5-7 minutes.
Nutrition
- Serving Size: 2 mummies
- Calories: 400
- Sugar: 7
- Sodium: 1000
- Fat: 26
- Saturated Fat: 10
- Carbohydrates: 30
- Fiber: 1
- Protein: 14
Keywords: Halloween, mummy hot dogs, easy dinner, kid-friendly, party food, crescent roll, hot dog recipe


