Love this? Save it for later!
Share the inspiration with your friends
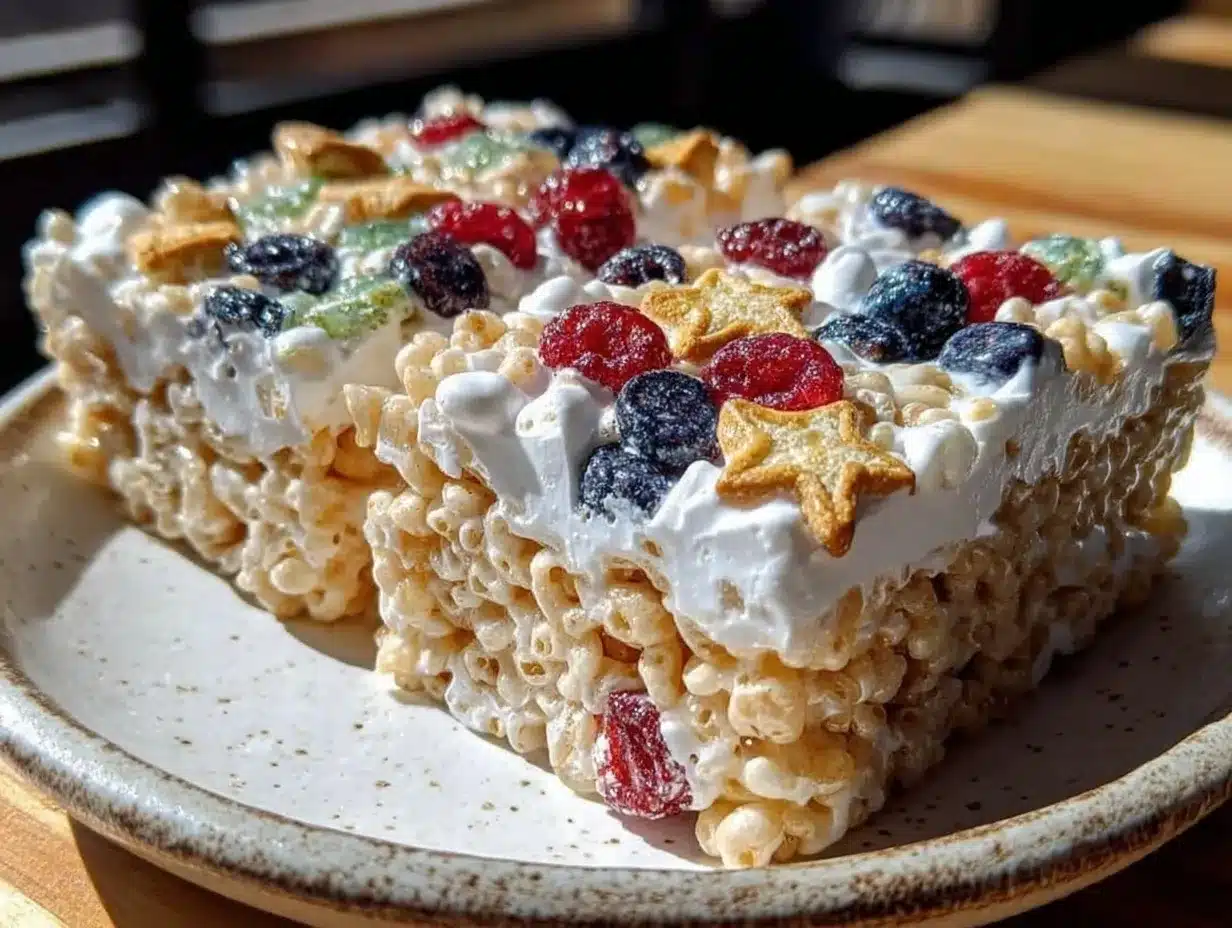
“I never thought a last-minute idea at a July 4th block party would turn into my go-to patriotic dessert,” my friend Jenna confessed one sweltering summer afternoon as we mixed marshmallows and cereal in her cramped kitchen. Honestly, the story behind this Easy 5-Ingredient Rice Krispie Flag No-Bake Treat is as delightful as the treat itself.
It all happened when Jenna realized she forgot to bring a dessert to the neighborhood cookout. With only a handful of ingredients and a ticking clock, she threw together a simple batch of Rice Krispie treats, sprucing them up with red, white, and blue touches. The sizzle of melted butter and marshmallows filled the air, and the familiar smell instantly brought a wave of nostalgia for summer childhoods spent outdoors.
You know that feeling when you’re pressed for time but still want to impress? That’s exactly what happened here. Despite the chaos—half the marshmallows stuck to the bowl, and a curious pup trying to snag a snack—Jenna’s creation was an unexpected star. This recipe stuck with me because it’s not just fast and fuss-free, but it captures the spirit of celebration in every bite. Maybe you’ve been there too, needing a quick patriotic dessert that’s fun, festive, and loved by all ages.
Let me tell you, this Easy 5-Ingredient Rice Krispie Flag No-Bake Treat is one of those rare recipes that’s perfectly simple yet totally satisfying. It’s that perfect blend of crispy, chewy, and colorful that makes you want to grab another piece before anyone else does. So, if you’re ready for a sweet, no-bake delight that’s as easy as it is eye-catching, keep reading—I promise you won’t regret it.
Why You’ll Love This Recipe
Honestly, I’ve tried a bunch of patriotic desserts over the years, and this Easy 5-Ingredient Rice Krispie Flag No-Bake Treat is hands down one of my favorites. It’s super approachable even if you’re not a kitchen pro, and it always gets rave reviews at parties and casual family gatherings.
- Quick & Easy: Comes together in under 15 minutes—perfect for last-minute celebrations or when you just don’t want to turn on the oven.
- Simple Ingredients: You likely have everything in your pantry right now: marshmallows, butter, Rice Krispies cereal, and a few decorations for the flag design.
- Perfect for Patriotic Holidays: Whether it’s Independence Day, Memorial Day, or just a summer BBQ, this recipe fits right in with the holiday vibe.
- Crowd-Pleaser: Kids love the colorful layers, and adults appreciate the nostalgic flavors and easy prep.
- Unbelievably Delicious: The buttery marshmallow base mixed with crispy cereal is the ultimate comfort snack turned festive dessert.
What makes this recipe stand out? Well, the magic lies in the no-bake method paired with the vibrant, layered look of the flag. Instead of just mixing everything together, you build it in stripes of classic white marshmallow, bright red candies, and a sprinkle of blue treats, which creates that iconic American flag look without any fuss. Plus, it’s one of those recipes that lets you get creative—maybe swap out the candies or add a sprinkle of edible glitter for a little extra sparkle.
It’s not just about looks, though. This recipe has that perfect chewy, crispy texture combo that makes you close your eyes after the first bite. It’s a sweet little celebration on a plate, and honestly, it’s been my go-to for impressing guests without breaking a sweat.
What Ingredients You Will Need
This recipe uses simple, wholesome ingredients to deliver a bold flavor and satisfying texture without the fuss. Most are pantry staples, and the few extras for decoration are easy to find or substitute.
- Unsalted butter (3 tablespoons, melted) – adds richness and helps the marshmallows melt smoothly. I usually use Land O’ Lakes for consistency.
- Marshmallows (10 ounces, about 40 large or 4 cups mini) – the gooey base. Campfire brand works great, but any store brand does the trick.
- Rice Krispies cereal (6 cups, about 180 grams) – the crispy element that gives this treat its name. You can use a gluten-free version if needed.
- Red candies (about 1 cup) – I use red M&Ms or red jelly beans for the flag’s stripes. In summer, fresh raspberries can be a fun swap for a natural twist.
- Blue sprinkles or candies (1/2 cup) – blue sanding sugar, blue M&Ms, or edible stars work perfectly for the flag’s stars section.
If you want to play with substitutions, you can use almond butter instead of regular butter for a nuttier flavor, or swap out the red and blue candies with dried cranberries and blueberries for a healthier version. For a dairy-free option, try using vegan butter and marshmallows that don’t contain gelatin.
Equipment Needed
- Large mixing bowl: For combining melted butter and marshmallows.
- Wooden spoon or silicone spatula: Essential for stirring the hot marshmallow mixture without scratching your bowl.
- 9×13-inch baking pan: To press and shape the treats into a flag shape. I find a glass pan works best for even pressing.
- Non-stick spray or butter: To grease the pan and prevent sticking.
- Measuring cups and spoons: For precise ingredient amounts.
If you don’t have a 9×13 pan, a square or slightly smaller pan works fine; you just might adjust the layers a bit. Personally, I keep a small offset spatula handy—it helps spread the cereal mixture evenly without squishing the marshmallows too much. Budget-wise, most of these are kitchen basics, so no need for specialty gadgets here.
Preparation Method
- Prepare your pan: Lightly grease a 9×13-inch baking pan with butter or non-stick spray. This makes removing the treats easier later. (5 minutes)
- Melt butter and marshmallows: In a large mixing bowl, microwave the butter for about 30 seconds until melted. Add marshmallows and microwave in 30-second bursts, stirring between each, until fully melted and smooth. Alternatively, melt on the stovetop over low heat, stirring constantly. (5-7 minutes)
- Add cereal: Quickly fold in 6 cups of Rice Krispies cereal, stirring gently but thoroughly to coat every bit in that sticky marshmallow mixture. The mixture should be thick but spreadable. (2 minutes)
- Form the white base layer: Press two-thirds of the mixture evenly into the bottom of your prepared pan using a buttered spatula or wax paper to avoid sticking. This forms the white stripes of the flag. (5 minutes)
- Create the red stripes: Mix the remaining one-third of the cereal mixture with your red candies (reserve some candies for topping). Press this red mixture carefully in three even stripes across the top of the white base. Don’t press too hard or you’ll lose the crisp texture. (5 minutes)
- Add the blue section: In one corner of the pan, sprinkle a generous handful of blue sprinkles or candies to mimic the stars area. You can gently press them into the cereal for better sticking but keep it light. (2 minutes)
- Set and cool: Let the pan sit at room temperature for about 30 minutes until firm, or pop it in the fridge for 15 minutes if you’re impatient. This step helps everything hold its shape when cutting. (30 minutes)
- Cut and serve: Use a sharp knife (warmed under hot water and dried) to slice the treats into flag-sized squares or rectangles. Serve on a colorful platter and watch them disappear fast! (5 minutes)
Pro tip: If your marshmallows start to harden while you’re working, just microwave for a few seconds to soften again. It’s better to work swiftly but gently to keep that perfect chewy-crispy texture.
Cooking Tips & Techniques
Making these Easy 5-Ingredient Rice Krispie Flag No-Bake Treats is about timing and gentle handling. Here are some tips I’ve picked up after many batches:
- Don’t rush the melting: Melt marshmallows slowly to avoid burning or drying out. A scorched batch will taste off and be tough to mix.
- Lightly grease your spatula or hands: It prevents the sticky marshmallow from clinging, making pressing the mixture easier and less messy.
- Use the right cereal: Classic Rice Krispies give you that perfect crunch, but puffed rice or gluten-free cereals can work too—just expect a slightly different texture.
- Layer carefully: Press the base layer evenly but not too firmly to keep fluffiness. When adding colored layers, be delicate to maintain the flag’s distinct stripes.
- Multitask smartly: Prep your candies and sprinkles before melting marshmallows; once marshmallows are hot, you need to work fast.
- Storage matters: Keep treats in an airtight container at room temperature for up to 3 days. Refrigeration can make them hard.
One time, I got distracted by a phone call mid-prep and forgot about the marshmallows melting in the microwave—let’s just say it was a sticky situation! Lesson learned: stay focused and keep those marshmallows moving.
Variations & Adaptations
This recipe is surprisingly flexible, so you can make it fit your preferences and dietary needs:
- Gluten-Free: Use gluten-free crispy rice cereal and check candy labels for hidden gluten.
- Vegan Version: Swap butter for coconut oil, use vegan marshmallows, and find dairy-free candy options. It’s just as tasty but plant-based.
- Flavor Twist: Add a teaspoon of vanilla or almond extract to the melted marshmallow for subtle flavor depth.
- Healthy Swap: Replace candies with fresh fruit like sliced strawberries and blueberries for natural color and sweetness.
- Seasonal Adaptation: For winter holidays, swap the flag colors for red and green candies or sprinkles to keep the festive spirit alive year-round.
Personally, I once swapped red candies for chopped dried cherries, which gave a juicy pop and made the treat feel a bit more grown-up. It was a hit at a summer picnic!
Serving & Storage Suggestions
These no-bake treats are best served at room temperature, so take them out of the fridge about 15 minutes before serving. Arrange them on a bright white or red platter to make those flag colors pop visually.
They’re fantastic alongside classic picnic fare like crispy garlic chicken or a fresh summer salad. For drinks, a cold lemonade or iced tea pairs beautifully with the sweet, crunchy texture.
Store leftovers in an airtight container at room temperature for up to 3 days. Refrigerating can cause them to harden, which makes them less enjoyable to eat. If you want to freeze them, wrap individual pieces well in plastic wrap and place in a sealed container; thaw at room temperature before serving.
Over time, the marshmallow softens a bit, making the treat chewier—some folks love that texture shift, but if you prefer crispness, enjoy them fresh!
Nutritional Information & Benefits
Each serving of this Easy 5-Ingredient Rice Krispie Flag No-Bake Treat (about one square) contains approximately:
| Calories | 150 |
|---|---|
| Fat | 4g |
| Carbohydrates | 28g |
| Sugar | 18g |
| Protein | 1g |
While this treat is definitely a sweet indulgence, it does offer a quick energy boost thanks to the carbohydrate content. The butter provides a bit of healthy fat, and if you use fruit or natural candy alternatives, you can add some antioxidants and fiber to the mix.
For those with dietary restrictions, this recipe is flexible enough to fit gluten-free and vegan needs with simple swaps, making it a welcoming dessert option for many. Just a heads-up: it contains marshmallows which typically have gelatin, so check labels carefully for vegetarian or vegan alternatives.
From a wellness perspective, this recipe reminds me that treats can be simple and joyful without complicated ingredients or lengthy prep. It’s comfort food that’s easy on your time and effort, so you can focus on making memories.
Conclusion
If you’re looking for a fun, festive dessert that’s easy to make and sure to impress, this Easy 5-Ingredient Rice Krispie Flag No-Bake Treat is a winner. Whether you’re new to no-bake desserts or a seasoned pro, this recipe is straightforward and adaptable for all kinds of celebrations.
I love this recipe because it brings a little celebration into the kitchen without any stress. Plus, it has that nostalgic charm that makes you smile with every bite. Remember, you can tweak the colors and candies to suit your style, so feel free to make it your own.
Give this recipe a try, and I’d love to hear how your version turned out—drop a comment or share your photos! Here’s to easy, delicious, and festive treats that bring everyone together.
FAQs
Can I make this Easy 5-Ingredient Rice Krispie Flag No-Bake Treat ahead of time?
Yes! You can prepare and store these treats in an airtight container at room temperature for up to 3 days. Just avoid refrigeration if you want to keep that perfect chewy texture.
What if I don’t have red and blue candies?
No worries! You can substitute with fresh fruit like strawberries and blueberries, colored sprinkles, or even edible food coloring mixed into white chocolate chips for the flag colors.
Is there a way to make this recipe gluten-free?
Absolutely. Simply use a certified gluten-free crispy rice cereal and check that your candies don’t contain gluten ingredients.
How do I prevent the treats from sticking to my hands when pressing?
Lightly grease your hands or spatula with butter or non-stick spray before pressing the mixture into the pan. Wax paper works well too for pressing evenly without sticking.
Can I add other flavors to the marshmallow mixture?
Yes! Adding a teaspoon of vanilla or almond extract to the melted marshmallows gives a nice flavor boost without changing the texture.
Pin This Recipe!
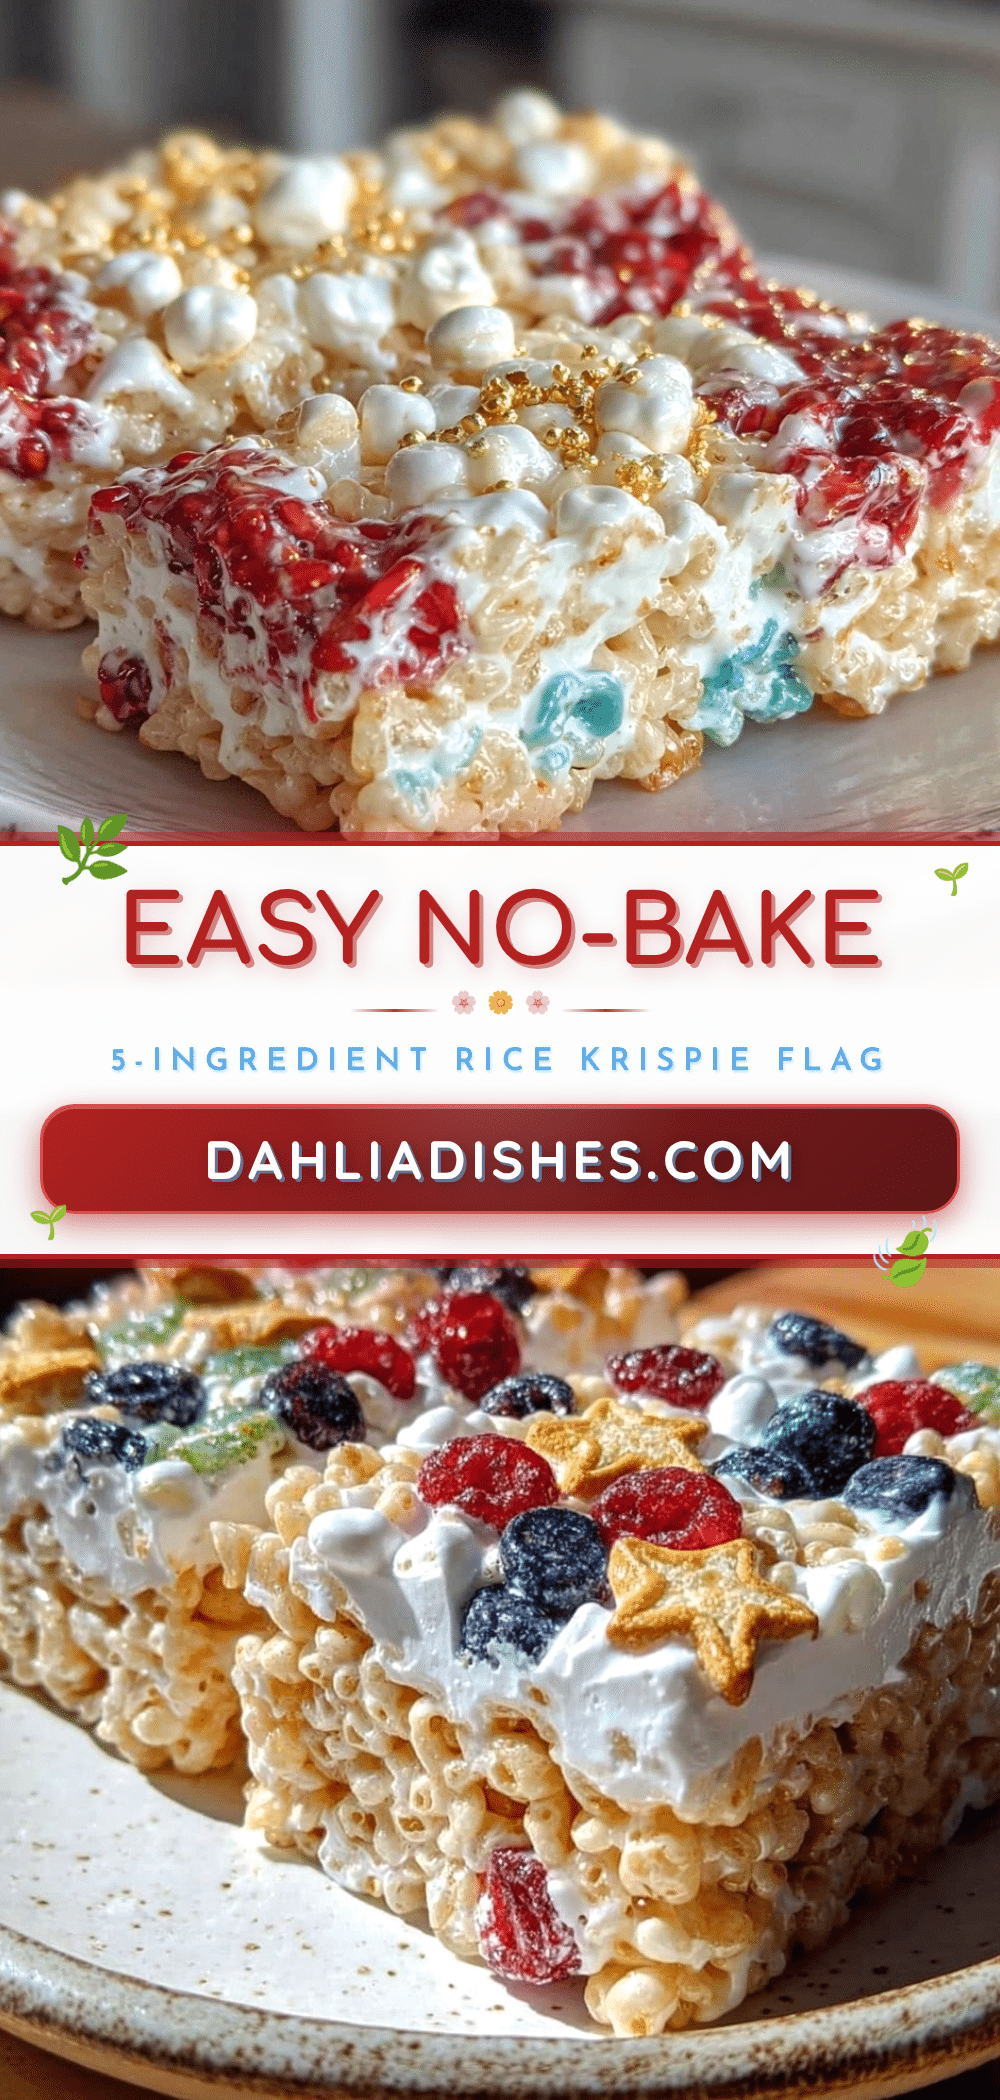
Easy 5-Ingredient Rice Krispie Flag No-Bake Treat Recipe for Perfect Patriotic Dessert
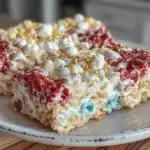
A quick and festive no-bake Rice Krispie treat decorated to look like an American flag, perfect for patriotic holidays and last-minute celebrations.
- Prep Time: 10 minutes
- Cook Time: 10 minutes
- Total Time: 40 minutes
- Yield: 12 servings 1x
- Category: Dessert
- Cuisine: American
Ingredients
- 3 tablespoons unsalted butter, melted
- 10 ounces marshmallows (about 40 large or 4 cups mini)
- 6 cups Rice Krispies cereal (about 180 grams)
- 1 cup red candies (e.g., red M&Ms or red jelly beans)
- 1/2 cup blue sprinkles or candies (e.g., blue sanding sugar, blue M&Ms, edible stars)
Instructions
- Lightly grease a 9×13-inch baking pan with butter or non-stick spray.
- In a large mixing bowl, microwave the butter for about 30 seconds until melted. Add marshmallows and microwave in 30-second bursts, stirring between each, until fully melted and smooth. Alternatively, melt on the stovetop over low heat, stirring constantly.
- Quickly fold in 6 cups of Rice Krispies cereal, stirring gently but thoroughly to coat every bit in the marshmallow mixture.
- Press two-thirds of the mixture evenly into the bottom of the prepared pan to form the white stripes of the flag.
- Mix the remaining one-third of the cereal mixture with red candies and press carefully in three even stripes across the top of the white base.
- In one corner of the pan, sprinkle a generous handful of blue sprinkles or candies to mimic the stars area, pressing lightly to stick.
- Let the pan sit at room temperature for about 30 minutes until firm, or refrigerate for 15 minutes if desired.
- Use a sharp knife warmed under hot water and dried to slice the treats into flag-sized squares or rectangles. Serve.
Notes
Melt marshmallows slowly to avoid burning. Lightly grease spatula or hands to prevent sticking. Store treats in an airtight container at room temperature for up to 3 days; refrigeration can harden them. Warm knife before cutting for clean slices. Variations include using almond butter, vegan butter, or fresh fruit for candy substitutes.
Nutrition
- Serving Size: One square treat
- Calories: 150
- Sugar: 18
- Fat: 4
- Carbohydrates: 28
- Protein: 1
Keywords: Rice Krispie treats, no-bake dessert, patriotic dessert, 4th of July, easy dessert, quick treat, flag dessert