Love this? Save it for later!
Share the inspiration with your friends
There used to be a tiny bakery tucked behind a vintage shop in the town where I grew up — a place called The Crooked Whisk. They made the most unsettlingly perfect witch finger cookies every October. When they closed their doors three years ago — just a handwritten sign on the door saying “Gone to bake elsewhere” — I honestly felt a little lost. Those cookies were my Halloween tradition. The almond-scented dough, the creepy little almond nail, the way they looked like they’d crawled straight out of a fairy tale. After twelve tries — twelve, let me tell you — I finally cracked it. My first batch that actually worked came out on a Tuesday night, and I may have texted a photo to my sister at 11 PM. She said they looked “disturbingly real,” which is the highest compliment a witch finger cookie can get.
These aren’t just any sugar cookies. They’re the kind that makes people at your Halloween party do a double-take. You know that feeling when you bring a dish to a gathering and it just disappears? That’s these cookies. They’re creepy, they’re delicious, and they’re surprisingly easy to pull off. I mean, honestly, the hardest part is not laughing when your guests hesitate before taking that first bite. I’ve been making these for years now, and they never fail to steal the show. The dough is soft, the almond flavor is just right, and that little almond sliver pretending to be a fingernail? Pure genius. This is the recipe that made me the “Halloween cookie person” in my friend group — and I wear that title with pride.
Why You’ll Love This Recipe
Let me tell you why these witch finger cookies are about to become your new Halloween tradition. I’ve tested this recipe more times than I care to admit — including one memorable batch where I forgot the almond extract and ended up with cookies that just looked like sad, pale fingers. Not my finest moment. But this version? It’s bulletproof.
- Quick & Easy: Comes together in under an hour, including chilling time. Perfect for last-minute Halloween party prep or a fun afternoon baking session with the kids.
- Simple Ingredients: No fancy grocery trips needed. Butter, sugar, flour, eggs, almond extract, and a bag of whole almonds. That’s it. You probably have most of this in your kitchen right now.
- Perfect for Halloween Gatherings: These are the ultimate party trick. They’re creepy enough to impress, but delicious enough that people actually want to eat them. Great for potlucks, costume parties, or just scaring your coworkers.
- Crowd-Pleaser: Kids love the gross-out factor, adults love the nostalgia, and everyone loves the buttery almond flavor. I’ve watched grown men hesitate before biting into one — and then reach for seconds.
- Unbelievably Delicious: The texture is perfect — crisp on the outside, tender on the inside. The almond extract gives them that authentic marzipan-like flavor that makes these cookies so distinctive.
What makes these different from other witch finger recipes? It’s the technique. I spent months perfecting the dough consistency so the fingers hold their shape during baking without cracking or puffing up. The secret is a slightly firmer dough that chills properly — trust me, I learned the hard way. And that almond nail? It stays put if you press it in at just the right angle. This isn’t just another Halloween cookie recipe — it’s the one that’ll have people asking for the recipe before the party’s over.
These cookies are the kind that make you feel like a baking genius. They’re comfort food with a creepy twist — familiar sugar cookie goodness hiding in a ghoulish disguise. Perfect for impressing your Halloween guests without spending all day in the kitchen.
What Ingredients You Will Need
This recipe uses simple, wholesome ingredients to deliver that perfect balance of creepy and delicious. Most of these are pantry staples, so you probably already have everything except maybe the almond extract and whole almonds.
For the Cookie Dough
- 1 cup unsalted butter, softened (adds richness and tenderness; I prefer Land O’Lakes for consistent results)
- 1 cup granulated sugar (provides sweetness and helps with browning)
- 1 large egg, room temperature (binds the dough and adds structure)
- 1 teaspoon vanilla extract (enhances the overall flavor profile)
- 1 teaspoon almond extract (this is the secret ingredient — gives the cookies that authentic marzipan-like flavor)
- 2 ¾ cups all-purpose flour (use a good brand like King Arthur for consistent results)
- 1 teaspoon baking powder (helps the cookies puff slightly without losing their shape)
- ½ teaspoon salt (balances the sweetness and enhances flavors)
For the Decoration
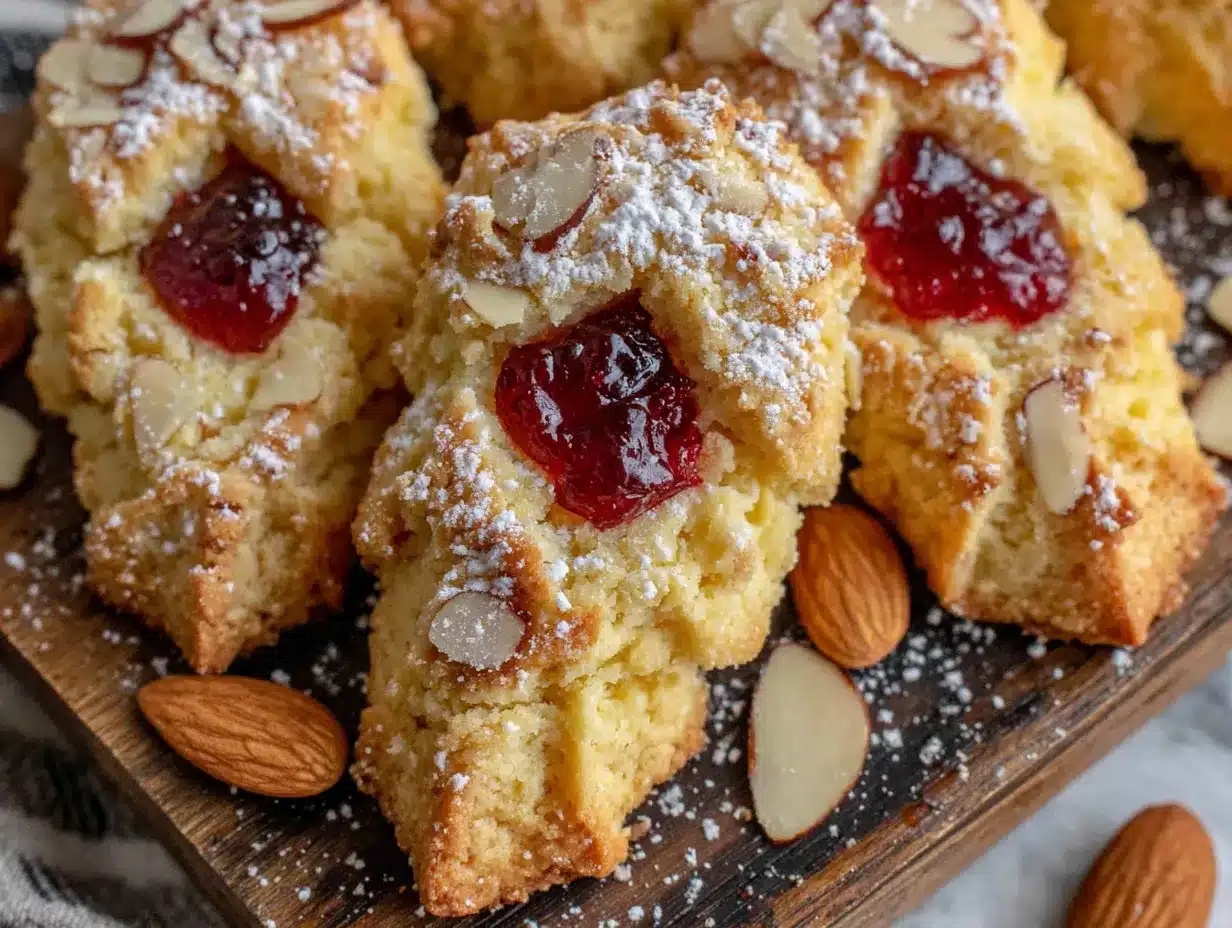
- 1 cup whole almonds (unblanched, with skins on — these become the fingernails)
- Red food coloring (gel works best for a vibrant, bloody look at the nail base)
- Green food coloring (optional, for a ghoulish tint to the dough — I’ve done both versions)
- Powdered sugar (for dusting, if you want a “dusty” witch finger look)
A quick note on the almond extract: don’t skip it. I tried making these once with just vanilla, and they tasted like regular sugar cookies shaped like fingers — which is fine, but not nearly as convincing. The almond extract is what gives these cookies that slightly exotic, almost creepy flavor that makes people think of old-fashioned candy shops and fairy tales. I recommend Nielsen-Massey for the best quality, but any brand works.
For the almonds, look for whole almonds with the skins still on. The brown skin makes them look more like real fingernails. If you only have blanched almonds, they’ll work too — just toast them lightly first to add some color. And for the food coloring, gel colors are much more concentrated than liquid drops, so you’ll get a deeper, more realistic “blood” color with less product.
Equipment Needed
You don’t need any fancy equipment for these cookies — that’s part of their charm. Here’s what you’ll need:
- Electric mixer (handheld or stand mixer both work; I’ve used my trusty KitchenAid for years, but a hand mixer works just fine)
- Large mixing bowls (at least two — one for wet ingredients, one for dry)
- Baking sheets (I prefer light-colored ones for even browning; dark sheets can over-brown the bottoms)
- Parchment paper (non-stick and makes cleanup a breeze; silicone baking mats also work)
- Small knife (for scoring knuckle lines into the dough fingers)
- Measuring cups and spoons (accurate measurements matter for this dough)
- Plastic wrap (for chilling the dough)
- Small brush (for applying food coloring at the nail base)
- Wire cooling rack (essential for getting that perfect crisp exterior)
If you don’t have a pastry brush, a clean fingertip works surprisingly well for dabbing on the red food coloring. I’ve done it that way more times than I’d like to admit. And if you’re using a dark baking sheet, just keep an eye on the cookies — they’ll brown faster.
Preparation Method
Alright, let’s get to the fun part. I’ve broken this down into clear steps so you don’t miss anything. Trust me, following these exactly will save you from the mistakes I made in those first twelve batches.
- Cream the butter and sugar. In a large bowl, beat the softened butter and granulated sugar together until light and fluffy — about 3-4 minutes with an electric mixer on medium speed. You want it pale and airy. Scrape down the sides of the bowl halfway through. This step is crucial for tender cookies.
- Add the wet ingredients. Beat in the egg, vanilla extract, and almond extract until well combined. The mixture might look a little curdled at this point — don’t panic, that’s normal. It’ll come together when you add the flour. Make sure your egg is at room temperature to prevent the butter from seizing up.
- Mix the dry ingredients. In a separate bowl, whisk together the all-purpose flour, baking powder, and salt. This ensures the baking powder is evenly distributed — nobody wants a cookie with a pocket of baking powder in it.
- Combine wet and dry. Gradually add the dry ingredients to the wet mixture, mixing on low speed until just combined. Don’t overmix! Stop as soon as you don’t see any more streaks of flour. Overmixing develops gluten and makes tough cookies — and nobody wants a tough witch finger.
- Chill the dough. Wrap the dough in plastic wrap and refrigerate for at least 30 minutes. This is non-negotiable. I learned this the hard way when my first batch spread into weird, puffy blobs that looked more like alien tentacles than witch fingers. Chilling solidifies the butter and prevents spreading. You can chill it for up to 24 hours if you’re prepping ahead.
- Preheat and prepare. Preheat your oven to 325°F (163°C). Line your baking sheets with parchment paper. While the oven heats, take the dough out of the fridge and let it sit at room temperature for about 5 minutes — just enough to make it workable without getting soft.
- Shape the fingers. Pinch off a small piece of dough — about the size of a walnut — and roll it into a log shape about 3-4 inches long. One end should be slightly thicker (the “palm” end) and the other end should taper to a point (the “fingertip”). Place it on the prepared baking sheet. Repeat with the remaining dough, spacing the fingers about 2 inches apart. They don’t spread much, but give them room to breathe.
- Add the fingernails. Press a whole almond firmly into the tapered end of each finger. The pointed tip of the almond should face outward, and the flat end should be nestled into the dough. Press gently but firmly — you want it to stay put during baking. I’ve had almonds pop off mid-bake, and it’s frustrating.
- Score the knuckles. Using a small knife, gently score 2-3 lines across each finger to create knuckle marks. Don’t cut too deep — just a shallow indent about ¼-inch deep. These lines will open up slightly during baking, creating that realistic wrinkly finger look.
- Bake. Bake for 12-15 minutes, or until the cookies are just set and the edges are barely starting to turn golden. The centers should still look slightly soft. They’ll firm up as they cool. I usually check at the 12-minute mark and go from there.
- Cool completely. Let the cookies cool on the baking sheet for 5 minutes, then transfer them to a wire cooling rack. Don’t try to move them too soon — they’re fragile when warm. Let them cool completely before decorating.
- Add the “blood.” Once the cookies are completely cool, use a small brush to dab a tiny amount of red food coloring at the base of each almond “fingernail.” This creates the illusion of blood pooling around the nail. A little goes a long way — you want it to look creepy, not like a crime scene.
- Optional ghoulish tint. If you want green witch fingers, add a few drops of green food coloring to the dough before chilling. I’ve done both versions, and honestly, the natural pale color is creepier. But green is fun for kids’ parties.
Cooking Tips & Techniques
After making these cookies more times than I can count, I’ve picked up a few tricks that make the process smoother and the results more impressive. Let me share what I’ve learned — including some failures so you don’t have to repeat them.
Don’t skip the chilling step. I know I said this already, but it’s worth repeating. Warm dough spreads. Spread dough makes puffy, unrecognizable fingers. I once tried to rush the process by popping the dough in the freezer for 10 minutes instead of the fridge for 30 — it was unevenly chilled and still spread. Patience pays off here.
Use your hands for shaping. I know it’s messy, but nothing beats your hands for shaping these cookies. The warmth of your palms helps smooth out cracks and create that organic, slightly irregular finger shape. If the dough gets too sticky, dust your hands lightly with flour. If it gets too warm, pop it back in the fridge for 5 minutes.
Vary the finger shapes. For maximum creepiness, don’t make all the fingers identical. Make some thicker, some thinner, some slightly crooked. A few bent at the “knuckle” look especially realistic. I always make a few that look like they’ve been broken and healed wrong — those are always the ones people comment on.
Watch the almond placement. The almond should be pressed in at a slight angle, not straight on. Real fingernails grow at an angle, and this small detail makes a huge difference in realism. Also, make sure the almond is pointing in a natural direction — don’t have it sticking out sideways.
Bake on the lower rack. For even baking without over-browning the bottoms, place your baking sheet on the lower third of the oven. This gives the bottoms a chance to set before the tops brown too much. I learned this after a batch where the tops were golden but the bottoms were practically burnt.
My biggest failure? The time I forgot to add the almond extract. The cookies looked perfect — creepy, realistic, beautiful — but they tasted like plain sugar cookies. Everyone still ate them, but they weren’t the same. That almond flavor is what makes these cookies memorable. Don’t forget it like I did.
Variations & Adaptations
One of the best things about this recipe is how adaptable it is. I’ve tried several variations over the years, and here are my favorites:
Dietary Variations
Gluten-Free Version: Substitute the all-purpose flour with a 1:1 gluten-free baking flour blend. I’ve used Bob’s Red Mill with great results — just add an extra tablespoon of flour since gluten-free blends tend to absorb liquid differently. The texture will be slightly more crumbly, but they’ll still look convincingly creepy.
Vegan Version: Replace the butter with vegan butter (I like Miyoko’s) and use a flax egg (1 tablespoon ground flaxseed mixed with 3 tablespoons water, let sit for 5 minutes). The flavor will be slightly different, but the texture holds up surprisingly well. Just expect a slightly less tender cookie.
Flavor Twists
Chocolate Witch Fingers: Replace ¼ cup of the flour with unsweetened cocoa powder. These look like dirt-covered witch fingers and taste like chocolate shortbread. I made these for a Halloween party once and they were gone before the plain ones.
Spiced Pumpkin Fingers: Add ½ teaspoon pumpkin pie spice and ¼ cup pumpkin puree to the dough. Reduce the butter by 2 tablespoons to compensate for the moisture. These have a lovely fall flavor and a slightly orange tint that’s perfect for autumn.
Different Cooking Methods
Air Fryer Method: Preheat your air fryer to 300°F (150°C). Place the shaped fingers in the basket in a single layer — you’ll need to work in batches. Cook for 8-10 minutes, checking at the 8-minute mark. The air fryer gives them a slightly crispier exterior and softer interior. Just be careful not to overcrowd the basket.
Serving & Storage Suggestions
These cookies are at their best when served at room temperature, which makes them perfect for parties. I like to arrange them on a black platter or a wooden board lined with parchment — the contrast makes the fingers stand out even more. For maximum creepiness, scatter a few loose almonds around the platter as if the “nails” have fallen off.
What to serve alongside: These pair beautifully with a warm apple cider, pumpkin spice latte, or even a glass of cold milk. If you’re hosting a Halloween party, set them out alongside other spooky treats like ghost-shaped meringues or caramel apples. They also make a great addition to a Halloween dessert charcuterie board.
Storage tips: Store the undecorated cookies in an airtight container at room temperature for up to 5 days. Don’t add the red food coloring until just before serving — it can bleed into the cookie over time and look messy. If you’ve already decorated them, they’ll still be fine for 2-3 days, but the color might start to spread.
Freezer instructions: You can freeze the shaped, unbaked fingers on a baking sheet until solid, then transfer them to a freezer bag. Bake directly from frozen, adding 2-3 minutes to the baking time. I do this every year — I make a double batch and freeze half for last-minute Halloween gatherings. The texture is just as good as fresh.
Reheating: These cookies are best at room temperature, but if you want that just-baked warmth, pop them in a 300°F (150°C) oven for 3-4 minutes. Don’t microwave them — they’ll get soft and lose their crisp texture.
Nutritional Information & Benefits
Let’s be honest — these are cookies, not health food. But here’s what you’re looking at per cookie (based on 24 cookies):
| Nutrient | Amount Per Cookie |
|---|---|
| Calories | 165 |
| Total Fat | 9g |
| Saturated Fat | 5g |
| Cholesterol | 28mg |
| Sodium | 85mg |
| Total Carbohydrates | 20g |
| Sugars | 9g |
| Protein | 2g |
The almonds do add a small amount of healthy fats and vitamin E, so there’s that. These cookies are vegetarian and can easily be made gluten-free or vegan with the substitutions mentioned above. They contain dairy, eggs, gluten, and tree nuts (almonds), so keep that in mind if you’re serving guests with allergies.
I personally see these as a once-a-year treat — they’re part of the Halloween fun, not an everyday snack. But honestly, a cookie that brings this much joy to a party is worth every calorie.
Conclusion
These witch finger cookies are more than just a Halloween treat — they’re a conversation starter, a party trick, and a memory maker all rolled into one. The first time I brought them to a gathering, people literally stopped mid-conversation to look at them. That’s the power of a good creepy cookie.
I encourage you to make these your own. Play with the colors, try different almond placements, experiment with the knuckle lines. The beauty of this recipe is that even the “imperfect” batches look delightfully grotesque. I’ve had batches where the fingers cracked in weird ways, and they ended up looking even more realistic.
Honestly, this recipe has become one of my favorite traditions. Every October, I pull out my mixing bowl, crank up some spooky music, and spend an afternoon turning butter and sugar into something delightfully disturbing. It never gets old. And the look on people’s faces when they realize the “fingernails” are actually almonds? Pure gold.
So go ahead — give these a try. Tag me when you do, because I genuinely love seeing how people interpret this recipe. Whether you make them perfectly creepy or hilariously misshapen, they’ll be a hit. Happy Halloween, and happy baking!
Frequently Asked Questions
Can I make these cookies ahead of time?
Absolutely! You can make the dough up to 3 days ahead and keep it refrigerated. You can also freeze the shaped, unbaked fingers for up to 3 months. Just bake them straight from frozen, adding a couple of minutes to the baking time.
Why did my cookies spread too much?
This usually happens when the dough isn’t chilled enough. Make sure you chill it for at least 30 minutes, and if your kitchen is warm, pop the shaped cookies back in the fridge for 10 minutes before baking. Also, make sure your butter isn’t too soft when you start.
Can I use something other than almonds for the fingernails?
Sure! Sliced almonds work in a pinch, though they’re smaller. You can also use candy corn for a sweeter, more colorful option, or even white chocolate chips for a more cartoonish look. But whole almonds with the skin on give the most realistic effect.
How do I get the red food coloring to look like blood?
Use gel food coloring rather than liquid drops — it’s more concentrated and gives a deeper, more realistic red. Apply it with a small brush or even a clean fingertip, and only put a tiny amount at the base of the almond. A little goes a long way for that creepy effect.
Can kids help make these cookies?
Definitely! Kids love shaping the fingers and pressing in the almonds. Just supervise the knife work for scoring the knuckles — or do that part yourself. This is a great Halloween baking activity that gets everyone involved in the spooky fun.
Pin This Recipe!
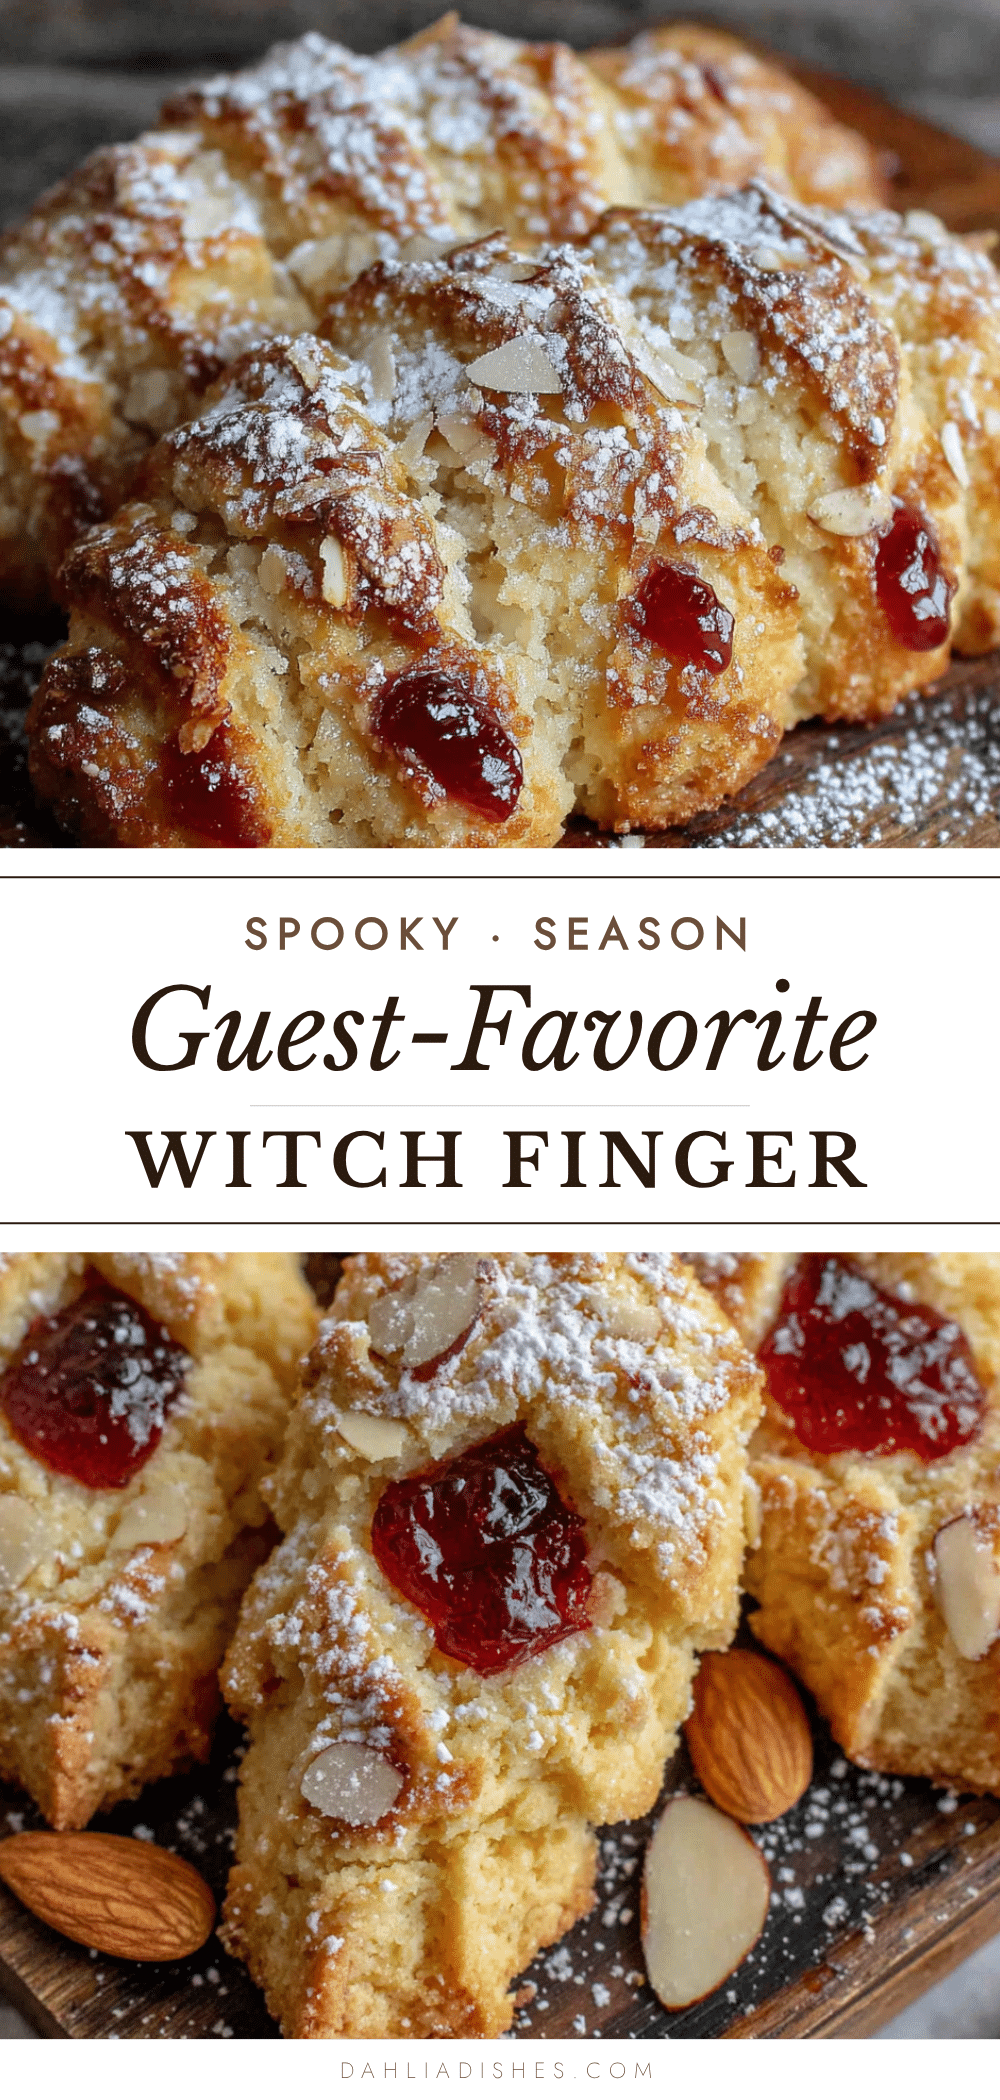
Best Witch Finger Cookies: Easy Halloween Treat
These creepy, delicious witch finger cookies are the perfect Halloween treat. Made with a buttery almond dough and topped with an almond fingernail, they’re sure to be a hit at any spooky gathering.
- Prep Time: 20 minutes
- Cook Time: 15 minutes
- Total Time: 1 hour 5 minutes (including chilling)
- Yield: 24 cookies 1x
- Category: Dessert
- Cuisine: American
Ingredients
- 1 cup unsalted butter, softened
- 1 cup granulated sugar
- 1 large egg, room temperature
- 1 teaspoon vanilla extract
- 1 teaspoon almond extract
- 2 ¾ cups all-purpose flour
- 1 teaspoon baking powder
- ½ teaspoon salt
- 1 cup whole almonds (unblanched, with skins on)
- Red food coloring (gel works best)
- Green food coloring (optional)
- Powdered sugar (for dusting, optional)
Instructions
- Cream the butter and sugar together until light and fluffy, about 3-4 minutes.
- Beat in the egg, vanilla extract, and almond extract until well combined.
- In a separate bowl, whisk together the flour, baking powder, and salt.
- Gradually add the dry ingredients to the wet mixture, mixing on low speed until just combined.
- Wrap the dough in plastic wrap and refrigerate for at least 30 minutes.
- Preheat oven to 325°F (163°C) and line baking sheets with parchment paper.
- Pinch off walnut-sized pieces of dough and roll into 3-4 inch logs, tapering one end to form a fingertip.
- Press a whole almond firmly into the tapered end of each finger for the fingernail.
- Use a small knife to score 2-3 shallow lines across each finger for knuckles.
- Bake for 12-15 minutes until just set and edges are barely golden.
- Cool on the baking sheet for 5 minutes, then transfer to a wire rack to cool completely.
- Once cool, dab a small amount of red food coloring at the base of each almond to create a ‘blood’ effect.
- Optional: Add green food coloring to the dough before chilling for a ghoulish tint.
Notes
Don’t skip the chilling step to prevent spreading. For best results, use gel food coloring for the ‘blood’ effect. Store undecorated cookies in an airtight container for up to 5 days. Freeze shaped unbaked fingers for up to 3 months.
Nutrition
- Serving Size: 1 cookie
- Calories: 165
- Sugar: 9
- Sodium: 85
- Fat: 9
- Saturated Fat: 5
- Carbohydrates: 20
- Fiber: 1
- Protein: 2
Keywords: witch finger cookies, Halloween cookies, almond cookies, spooky treats, easy Halloween recipe


