Love this? Save it for later!
Share the inspiration with your friends
My teenage nephew asked why I couldn’t just melt the marshmallows with the white chocolate at the same time. I started to explain why that wouldn’t work — then stopped. Honestly, I had never questioned the order of operations. Every recipe I had ever read said to melt the marshmallows first, then stir in any extras. But he just looked at me, waiting for a real reason. I didn’t have one.
So I tried it his way. And let me tell you, it was one of those kitchen moments where you wish no one was watching, because you know you’re about to prove yourself wrong. The white chocolate melted into the marshmallow butter mixture without seizing. It was silky. It was smooth. It was, I hate to admit, better than my usual method.
That afternoon turned into a full-blown experiment. We added candy corn at the last minute — because what else screams fall? — and pressed everything into a pan. The result was these ridiculously good Easy Candy Corn White Chocolate Rice Krispie Treats. They are sweet, crunchy, and have that little pop of chewy candy corn in every bite.
Maybe you’ve been there — holding onto a cooking rule just because it’s always been done that way. This recipe taught me to listen to the kid in the kitchen. And now I make these every October. They’re that good.
Why You’ll Love This Recipe
These aren’t your average marshmallow treats. They are richer, creamier, and have a festive look that makes people smile. I’ve tested this recipe about six times to get the candy corn to white chocolate ratio exactly right. Here is why it works so well.
- Quick & Easy : You need about 15 minutes of active time. Perfect for last-minute Halloween parties or a fun afternoon baking session with kids.
- Simple Ingredients : Four main ingredients — butter, marshmallows, white chocolate chips, and Rice Krispies cereal. Plus candy corn for the magic.
- Perfect for Fall Gatherings : These treats show up at my Halloween party, my neighbor’s harvest dinner, and my son’s school bake sale. They fit everywhere.
- Crowd-Pleaser : Kids love the candy corn crunch. Adults love the white chocolate richness. Everyone reaches for a second square.
- Unbelievably Delicious : The white chocolate adds a creamy vanilla note that plain marshmallow treats just don’t have. It’s next-level comfort food.
What makes this recipe different from the rest is the technique. Melting the white chocolate with the marshmallows creates an ultra-smooth, creamy base that coats every piece of cereal perfectly. No dry spots. No clumps. Just pure, buttery sweetness.
This recipe isn’t just good — it is the kind that makes you close your eyes after the first bite. It’s nostalgic but better. Familiar but surprising. And honestly, it makes your whole kitchen smell like a candy shop.
What Ingredients You Will Need
This recipe uses simple, pantry-friendly ingredients that come together in minutes. Each one plays a specific role in creating the perfect texture and flavor. Here is everything you need.
For the Treat Base
- 3 tablespoons unsalted butter (plus extra for greasing the pan) — I use salted butter in a pinch, just reduce the added salt. Land O’Lakes is my go-to brand for consistent flavor.
- 1 package (10 ounces) regular marshmallows — Mini marshmallows melt faster, but regular ones work fine. Jet-Puffed brand melts evenly and gives the best texture.
- 1 cup white chocolate chips — Use high-quality chips like Ghirardelli or Guittard. They melt smoother and taste creamier than generic store brands. Do not use white melting wafers — they have a different consistency.
- 6 cups Rice Krispies cereal — Generic puffed rice cereal works too, but Rice Krispies hold their crunch longer. Measure lightly — don’t pack the cup.
For the Festive Touch
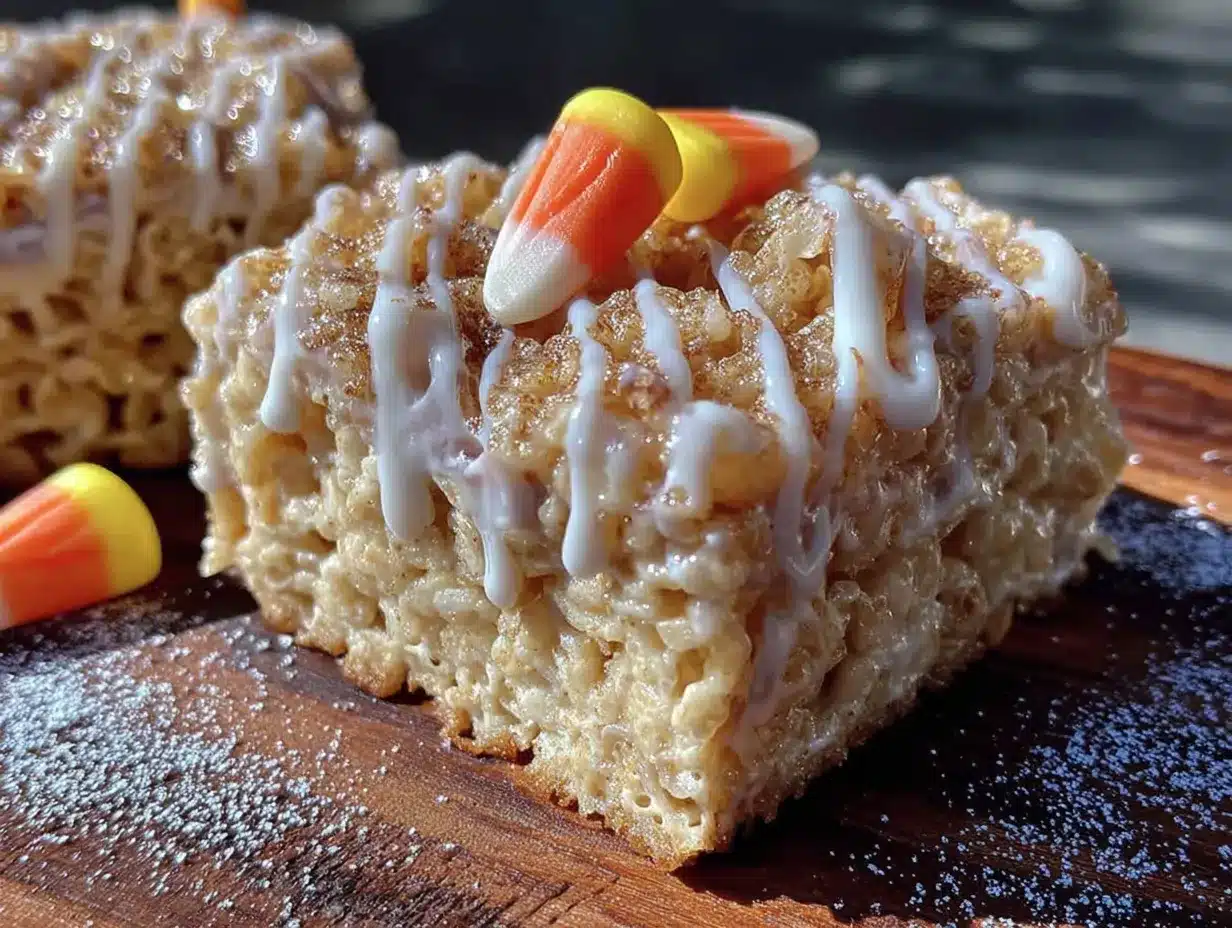
- 1 cup candy corn — Regular candy corn works best. Avoid the autumn mix with pumpkins and Indian corn — they have different textures and don’t distribute as evenly. Brach’s is my favorite brand for soft, chewy candy corn.
Ingredient Selection Tip: Look for white chocolate chips that list cocoa butter as an ingredient, not palm oil. The cocoa butter helps the chocolate melt smoothly into the marshmallow mixture. If you only have white chocolate bars, chop them into small, even pieces before melting.
Substitution Guidance: For a dairy-free version, use vegan butter and dairy-free white chocolate chips. The texture will be slightly softer but still delicious. You can also swap the candy corn for chopped dried apricots or white chocolate-covered pretzels for a different flavor profile.
Equipment Needed
You don’t need fancy tools for this recipe. Most of these items are already in your kitchen. Here is what I use every time.
- 9×13-inch baking pan — A metal pan works best for even cooling. Glass pans work too, but the treats take longer to set. I prefer a non-stick metal pan for easy release.
- Large pot or Dutch oven — You need a pot big enough to stir the cereal without spilling. A 5-quart pot is perfect. Avoid non-stick pots — the sugar mixture can scratch the coating.
- Silicone spatula — A heat-resistant spatula is essential for stirring the hot marshmallow mixture. Wooden spoons work too, but the sticky mixture clings to them.
- Parchment paper — Line your pan with parchment paper, leaving overhang on two sides. This makes lifting the treats out so much easier. Wax paper will melt — don’t use it.
- Sharp knife — A chef’s knife gives clean cuts. A serrated knife works too but can crush the treats. Spray the blade with non-stick cooking spray for perfect slices.
Budget-Friendly Options: If you don’t have a 9×13 pan, use a 10×15 jelly roll pan for thinner treats. Or divide the mixture between two 8×8 pans for thicker squares. I’ve used both — the thinner treats are great for lunchboxes.
Preparation Method
Follow these steps carefully, and you will have perfect treats every time. The key is working quickly once the marshmallow mixture is ready.
- Prepare the pan. Line a 9×13-inch baking pan with parchment paper, leaving about 2 inches of overhang on the long sides. Lightly grease the parchment and the exposed pan edges with butter. This prevents sticking and makes cleanup effortless.
- Measure the cereal. Pour 6 cups of Rice Krispies cereal into a large mixing bowl. Set it near the stove so you can add it quickly later. Do not crush the cereal — keep the puffs whole for the best texture.
- Melt the butter. In a large pot over medium-low heat, melt 3 tablespoons of unsalted butter. Swirl the pot occasionally to prevent browning. You want the butter just melted — not sizzling or browned. This takes about 2 minutes.
- Add the marshmallows. Pour the entire 10-ounce bag of marshmallows into the melted butter. Stir constantly with a silicone spatula until the marshmallows are about halfway melted. This takes about 3 minutes. The mixture will look lumpy and stringy at first — that’s normal.
- Add the white chocolate chips. Pour 1 cup of white chocolate chips into the partially melted marshmallows. Continue stirring over low heat. The white chocolate will melt into the marshmallow mixture, creating a smooth, creamy base. This takes another 2 to 3 minutes. Watch carefully: if the mixture starts to bubble or steam aggressively, remove the pot from the heat immediately. You want gentle melting, not boiling.
- Remove from heat. Once the marshmallows and white chocolate are fully melted and smooth, take the pot off the stove. The mixture should be thick, glossy, and pale cream in color. Stir in 1/4 teaspoon of vanilla extract if you want extra depth — optional but lovely.
- Add the cereal. Pour the Rice Krispies cereal into the pot. Fold gently with the spatula until all the cereal is coated in the marshmallow mixture. Do not overmix — about 15 folds is enough. Overmixing crushes the cereal and makes the treats dense.
- Add the candy corn. Sprinkle 1 cup of candy corn over the top of the cereal mixture. Fold gently 3 or 4 times to distribute the candy corn throughout. You want some pieces visible on the surface for a pretty presentation.
- Press into the pan. Scrape the mixture into the prepared pan. Use the spatula or lightly buttered hands to press the mixture evenly into the pan. Do not press too hard — firm, even pressure is enough. Pressing too hard makes the treats rock hard.
- Cool and set. Let the treats cool at room temperature for at least 1 hour. Do not refrigerate — the moisture from the fridge can make the treats sticky and soft. The treats are ready when they feel firm to the touch.
- Cut and serve. Lift the treats out of the pan using the parchment overhang. Place on a cutting board. Use a sharp knife sprayed with non-stick spray to cut into squares. I cut 24 squares for standard servings or 12 larger squares for generous portions.
Sensory Cue: When you fold the cereal into the marshmallow mixture, listen for the sound. It should be a gentle rustle, not a crunching sound. If you hear crunching, you are pressing too hard.
Cooking Tips & Techniques
I have made these treats more times than I care to count. Here are the lessons I learned the hard way so you don’t have to.
Low heat is your friend. The biggest mistake people make is cranking up the heat to melt the marshmallows faster. High heat scorches the sugar and makes the mixture grainy. Keep the burner on medium-low. Patience pays off here.
Don’t walk away. The marshmallow mixture goes from perfectly melted to burnt in about 30 seconds. Stay at the stove. Stir constantly. I learned this the morning of a Halloween party — burnt marshmallow smell is impossible to cover up.
Butter your spatula. Before you press the mixture into the pan, rub a little butter on your spatula. The sticky mixture won’t cling to it. Same goes for your hands if you prefer pressing by hand. Game changer.
Timing matters. Work quickly once the marshmallow mixture is ready. It starts to set as it cools. If the mixture gets too stiff to spread, microwave it for 10 seconds to soften it. This trick saved me more than once.
For clean cuts. Spray your knife with non-stick cooking spray between every cut. Wipe the blade clean after each row. This gives you perfect, bakery-style squares without ragged edges.
One more thing: If your candy corn is rock hard (stale bags happen), microwave it for 5 seconds to soften it before folding it in. Fresh candy corn is soft and chewy — stale candy corn is crunchy in a bad way.
Variations & Adaptations
This base recipe is incredibly flexible. Here are some ways I’ve changed it up depending on the season or who I’m feeding.
Halloween Candy Swap
Replace the candy corn with chopped Reese’s Pieces or M&M’s. The chocolate coating holds up well in the marshmallow mixture. I did this for a Halloween party and the treats disappeared in ten minutes.
Fall Harvest Version
Fold in 1/2 cup of dried cranberries and 1/2 cup of chopped pecans along with the candy corn. The tart cranberries balance the sweetness, and the pecans add a nice crunch. This version is great for Thanksgiving dessert tables.
Chocolate Drizzle Finish
Melt 1/2 cup of dark chocolate chips and drizzle it over the cooled treats. Let the chocolate set before cutting. The slight bitterness of dark chocolate cuts through the sweetness beautifully. My friend Sarah calls this the “adult version.”
Gluten-Free Option
Use certified gluten-free puffed rice cereal. Rice Krispies are made with malt flavoring which contains gluten, so check the label. Nature’s Path Organic Crispy Rice Cereal is a reliable gluten-free alternative.
Extra Creamy Texture
Add 1/4 cup of sweetened condensed milk to the marshmallow mixture before adding the cereal. This makes the treats softer and almost fudge-like. They won’t hold their shape as firmly, but the texture is incredible.
Serving & Storage Suggestions
These treats are best served at room temperature. The texture is perfectly chewy and the candy corn stays soft. If you serve them straight from the fridge, the candy corn gets hard and the treats lose their bounce.
Presentation ideas: Arrange the squares on a white platter for maximum color contrast. Sprinkle a few extra candy corn pieces around the plate for a festive look. For Halloween parties, I cut them into small bite-sized squares and serve them in mini cupcake liners.
Complementary pairings: These treats pair wonderfully with a hot cup of apple cider or a pumpkin spice latte. The sweetness of the treats balances the warmth of the drinks. For a dessert board, serve them alongside caramel apples and pumpkin cookies.
Storage instructions: Store the treats in an airtight container at room temperature for up to 5 days. Place a sheet of parchment paper between layers to prevent sticking. Do not store them in the refrigerator — the moisture makes them sticky and the candy corn gets hard.
Freezer instructions: These treats freeze beautifully for up to 3 months. Wrap each square individually in plastic wrap, then place them in a freezer-safe bag. Thaw at room temperature for about 30 minutes before serving. The texture is slightly softer after freezing but still delicious.
Flavor development note: These treats actually taste better the next day. The flavors meld together overnight, and the texture evens out. If you can resist eating them immediately, make them a day ahead.
Nutritional Information & Benefits
These treats are a sweet indulgence, and I believe in enjoying them in moderation. Here is the estimated nutritional breakdown for one standard square (based on 24 servings).
| Nutrient | Amount Per Serving |
|---|---|
| Calories | 185 |
| Total Fat | 6g |
| Saturated Fat | 3.5g |
| Carbohydrates | 32g |
| Sugar | 22g |
| Protein | 2g |
| Sodium | 115mg |
Health perspective: While this is definitely a treat, there are small benefits to note. The white chocolate contains calcium from milk solids. The Rice Krispies provide iron and B vitamins from fortification. And honestly, the joy of sharing these with loved ones is a benefit in itself.
Dietary considerations: These treats contain dairy (butter and white chocolate) and gluten (Rice Krispies contain malt flavoring). They are nut-free if you use the basic recipe. For a vegan version, use vegan butter, vegan marshmallows, and dairy-free white chocolate.
Frequently Asked Questions
Can I use mini marshmallows instead of regular ones?
Yes, mini marshmallows work great and actually melt faster. Use 6 cups of mini marshmallows instead of the 10-ounce bag. The texture will be the same.
Why did my treats turn out hard?
You likely pressed the mixture too firmly into the pan or overheated the marshmallow mixture. Use gentle pressure and low heat. The treats should feel light and airy, not dense.
Can I make these treats in advance?
Absolutely. Make them up to 2 days ahead and store them in an airtight container at room temperature. They actually taste better the next day after the flavors meld.
Can I freeze these treats?
Yes, they freeze well for up to 3 months. Wrap each square individually in plastic wrap, then place them in a freezer bag. Thaw at room temperature for 30 minutes before serving.
What can I use instead of candy corn?
Try chopped Reese’s Pieces, M&M’s, or dried cranberries. For a savory-sweet twist, use salted pretzel pieces. Each swap gives the treats a completely different personality.
Conclusion
These Easy Candy Corn White Chocolate Rice Krispie Treats are the kind of recipe that becomes a tradition. They are simple enough to make on a random Tuesday but special enough to bring to every fall gathering. The white chocolate makes them creamy. The candy corn makes them festive. And the whole process takes less than 20 minutes.
I love that this recipe came from my nephew questioning the way I do things. It reminded me that cooking rules are meant to be tested, not just followed. Sometimes the best discoveries happen when you let go of what you think you know.
I would love to hear how these turn out for you. Did you try a variation? Did your kids help make them? Drop a comment below and share your experience. And if you love them as much as I do, save this recipe for next fall — trust me, you will want to make them again.
Happy baking, friends. Your kitchen is about to smell amazing.
Pin This Recipe!
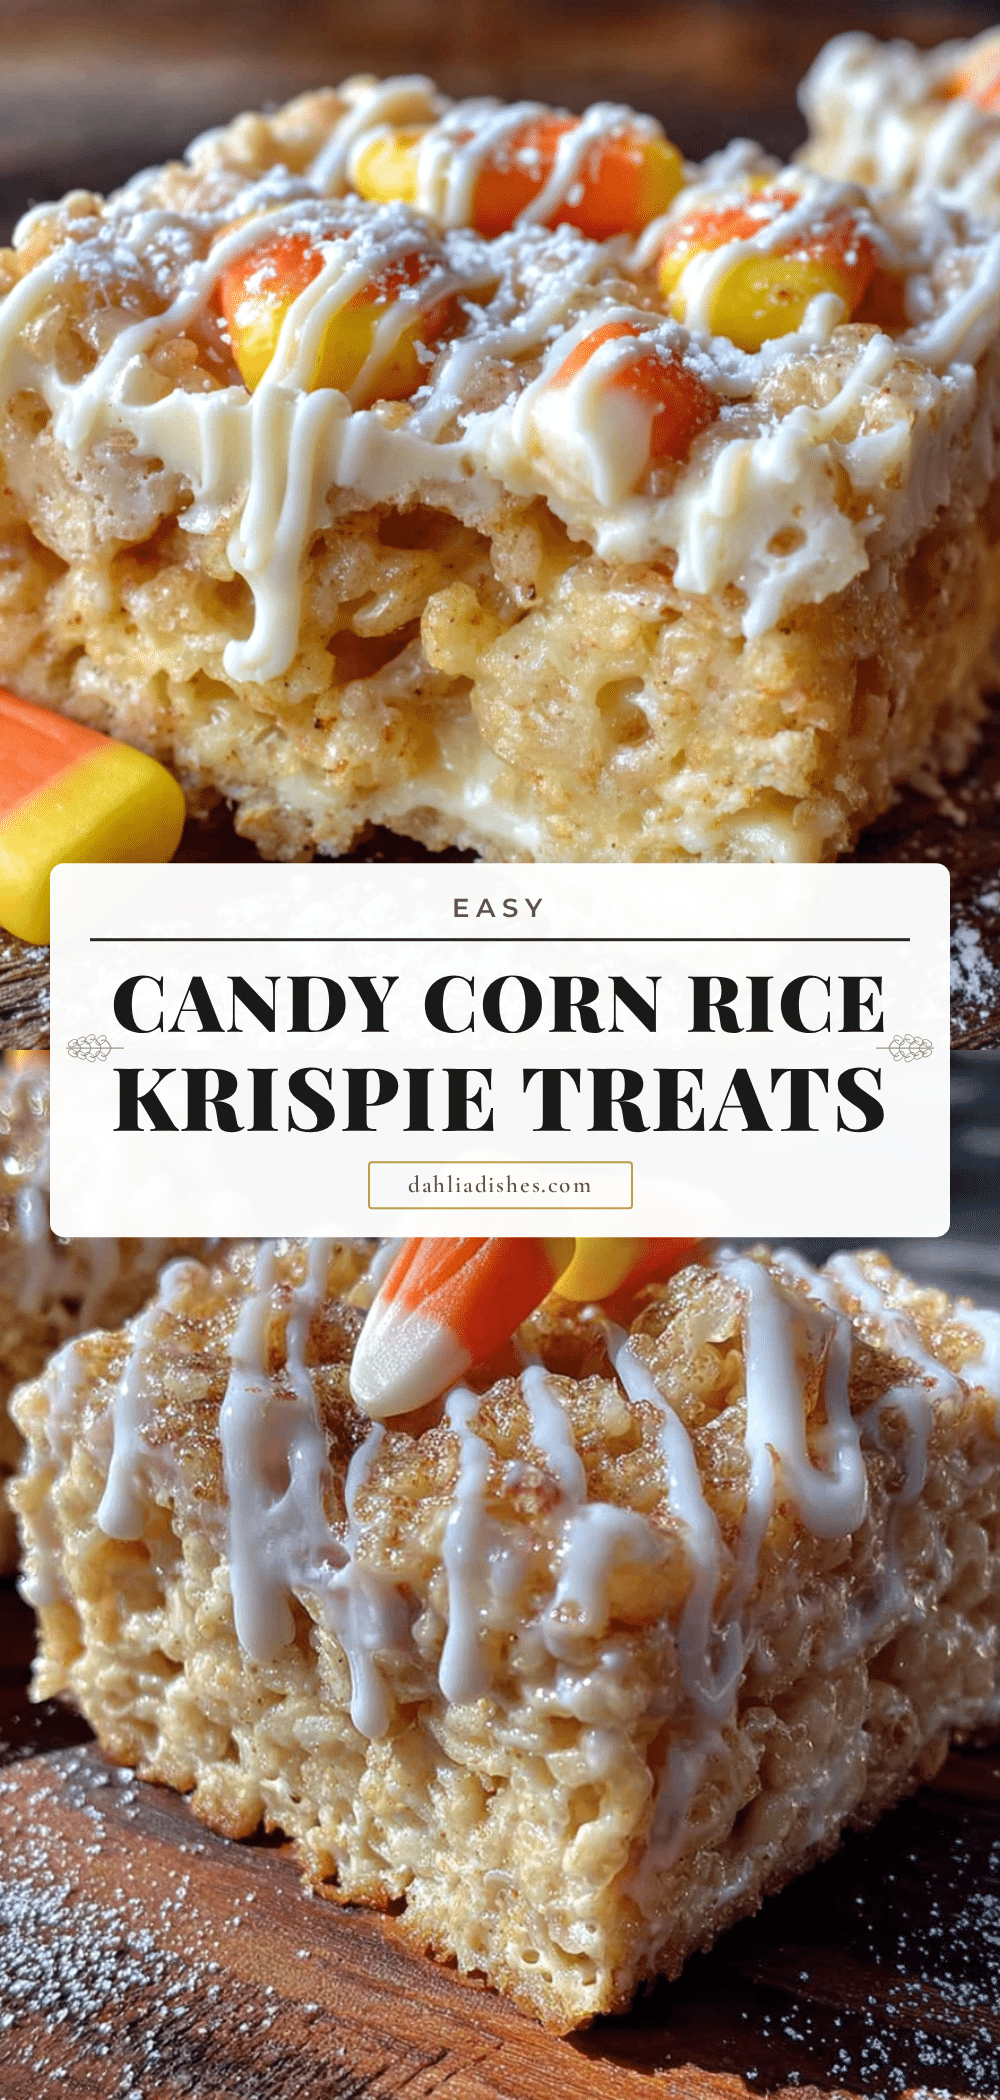
Best Easy Candy Corn White Chocolate Rice Krispie Treats Recipe

These Easy Candy Corn White Chocolate Rice Krispie Treats are sweet, crunchy, and have that little pop of chewy candy corn in every bite. They are richer, creamier, and have a festive look that makes people smile.
- Prep Time: 15 minutes
- Cook Time: 10 minutes
- Total Time: 25 minutes
- Yield: 24 servings 1x
- Category: Dessert
- Cuisine: American
Ingredients
- 3 tablespoons unsalted butter (plus extra for greasing the pan)
- 1 package (10 ounces) regular marshmallows
- 1 cup white chocolate chips
- 6 cups Rice Krispies cereal
- 1 cup candy corn
Instructions
- Prepare the pan. Line a 9×13-inch baking pan with parchment paper, leaving about 2 inches of overhang on the long sides. Lightly grease the parchment and the exposed pan edges with butter.
- Measure the cereal. Pour 6 cups of Rice Krispies cereal into a large mixing bowl. Set it near the stove so you can add it quickly later. Do not crush the cereal.
- Melt the butter. In a large pot over medium-low heat, melt 3 tablespoons of unsalted butter. Swirl the pot occasionally to prevent browning. This takes about 2 minutes.
- Add the marshmallows. Pour the entire 10-ounce bag of marshmallows into the melted butter. Stir constantly with a silicone spatula until the marshmallows are about halfway melted. This takes about 3 minutes.
- Add the white chocolate chips. Pour 1 cup of white chocolate chips into the partially melted marshmallows. Continue stirring over low heat until the white chocolate melts into the marshmallow mixture, creating a smooth, creamy base. This takes another 2 to 3 minutes. Watch carefully: if the mixture starts to bubble or steam aggressively, remove the pot from the heat immediately.
- Remove from heat. Once the marshmallows and white chocolate are fully melted and smooth, take the pot off the stove. Stir in 1/4 teaspoon of vanilla extract if desired.
- Add the cereal. Pour the Rice Krispies cereal into the pot. Fold gently with the spatula until all the cereal is coated. Do not overmix — about 15 folds is enough.
- Add the candy corn. Sprinkle 1 cup of candy corn over the top of the cereal mixture. Fold gently 3 or 4 times to distribute the candy corn throughout.
- Press into the pan. Scrape the mixture into the prepared pan. Use the spatula or lightly buttered hands to press the mixture evenly into the pan. Do not press too hard.
- Cool and set. Let the treats cool at room temperature for at least 1 hour. Do not refrigerate.
- Cut and serve. Lift the treats out of the pan using the parchment overhang. Place on a cutting board. Use a sharp knife sprayed with non-stick spray to cut into squares. I cut 24 squares for standard servings or 12 larger squares for generous portions.
Notes
Low heat is your friend. Don’t walk away from the stove. Butter your spatula before pressing. Work quickly once the marshmallow mixture is ready. For clean cuts, spray your knife with non-stick cooking spray between every cut. If your candy corn is stale, microwave it for 5 seconds to soften it before folding it in. These treats actually taste better the next day.
Nutrition
- Serving Size: 1 square
- Calories: 185
- Sugar: 22
- Sodium: 115
- Fat: 6
- Saturated Fat: 3.5
- Carbohydrates: 32
- Protein: 2
Keywords: candy corn, white chocolate, Rice Krispie treats, Halloween, fall, easy, no-bake


