Love this? Save it for later!
Share the inspiration with your friends
My niece had sworn off anything “Halloween-themed” for three years. She was ten, then eleven, then twelve. Too old for spooky cookies, she said. Too mature for decorated cupcakes. Then last October, I caught her—mid-afternoon, standing at my kitchen counter, a smear of white chocolate on her chin, shoving one of these ghost pretzel bites into her mouth like she was afraid I might confiscate it. I didn’t say a word. I just watched, smiled, and let her finish the whole batch.
That’s the thing about these little guys. They sneak up on you. They look silly and simple—which they are—but there is something about the salty-sweet-crunchy-creamy combo that makes grown adults hover around the snack table like they’re guarding a treasure. I made them originally because I needed a last-minute treat for a school party. I had a bag of pretzels, some white melting wafers, and a vague Pinterest memory of something cute. I honestly didn’t expect them to become the most-requested Halloween recipe in my house.
But here we are. Three Halloweens later, and I can’t show up to any October gathering without a container of these ghost pretzel bites. They take maybe twenty minutes. They use four ingredients. And they look so stinking adorable that people actually gasp when they see them. Maybe you’ve been there—needing something quick that still feels special? Something that impresses without stressing? That’s exactly what these are. Let me show you how easy they are.
Why You’ll Love This Recipe
Let me be honest with you—I have tested a lot of “easy” Halloween treats over the years. Some turned out amazing. Others melted into sad puddles of regret in my fridge. These ghost pretzel bites? They’ve been a consistent winner every single time. Here is why they stand out from the crowd:
- Quick & Easy: You can have these finished and set in under twenty minutes. No baking, no complicated steps, no waiting around for dough to chill. Perfect for last-minute school parties or when you realize tomorrow is Halloween and you have nothing prepared.
- Simple Ingredients: You need exactly four things—pretzels, white chocolate, candy eyeballs, and a tiny bit of coconut oil. That’s it. No fancy grocery store trips required.
- Perfect for Halloween: These work for classroom treats, office parties, trick-or-treat bags, or just a fun afternoon activity with kids. They look festive without being over-the-top.
- Crowd-Pleaser: I have watched picky eaters, adults who “don’t do sweets,” and even my diet-conscious sister-in-law go back for seconds. The salty-sweet balance is genuinely addictive.
- Unbelievably Delicious: There is something magical about that crunch of pretzel followed by the creamy white chocolate and the tiny bit of chew from the candy eyes. It sounds simple, but the texture combo is next-level snack territory.
What makes these different from all the other ghost pretzel recipes out there? It is the little tricks I have learned from making these dozens of times. I use a specific ratio of chocolate to pretzel so the ghost shape holds perfectly. I add a tiny bit of coconut oil to thin the chocolate just enough for smooth dipping without it running everywhere. And I have figured out exactly when to place the eyes so they stay put without sliding off. This isnt just another version—it is the version I turn to every single year.
Honestly, these ghost pretzel bites are the kind of recipe that makes you feel like a kitchen hero with almost zero effort. They are comfort food reimagined for the holiday season—fun, fast, and full of that warm, nostalgic feeling that Halloween should bring.
What Ingredients You Will Need
This recipe uses simple, wholesome ingredients to deliver bold flavor and that perfect salty-sweet combination. You probably already have most of these in your pantry, which is one of the reasons I love making these on a whim.
- Mini pretzel twists (about 60 pieces) – Look for the classic mini twists, not the sticks or the big ones. The shape matters here because the twisted sections create natural little arms for your ghosts. I prefer the brand Snyder’s of Hanover for their sturdy texture that holds up well during dipping.
- White melting wafers (12 ounces or about 340 grams) – These are different from white chocolate chips. Melting wafers contain a bit of oil already, so they melt smoother and set harder. If you can only find white chocolate chips, that works too—just add a teaspoon of coconut oil or shortening to help them melt smoothly. Ghirardelli white melting wafers are my go-to for the creamiest finish.
- Coconut oil (1 teaspoon) – This is optional but highly recommended. It thins the melted chocolate just enough so it coats the pretzels evenly without being too thick. It also helps the chocolate set with a nice, smooth shine. Refined coconut oil works best since it has no coconut flavor.
- Candy eyeballs (about 60 pieces) – The small ones, about 6mm or 7mm, work perfectly for ghost faces. You can find these at craft stores, baking supply shops, or online. I like the Wilton brand because the adhesive backing sticks well to the chocolate without sliding.
That is genuinely it. Four ingredients. No food coloring, no special extracts, no complicated decorations. The beauty of these ghost pretzel bites is in their simplicity—the white chocolate creates the ghost shape, the pretzel gives it structure and crunch, and the candy eyes bring the whole thing to life.
If you want to get creative, you could also have some black piping gel or melted dark chocolate on hand to draw tiny mouths on your ghosts. I personally prefer them without mouths—they look cuter and more ghost-like to me. But I know some people love adding a little “boo” expression to each one.
One quick sourcing tip: buy your candy eyeballs ahead of time. Every year around mid-October, they sell out everywhere. I learned this the hard way when I was driving to three different stores at 8 PM on Halloween eve. Now I stock up in September.
Equipment Needed
The equipment list for these ghost pretzel bites is refreshingly short. You do not need a stand mixer, a food processor, or any fancy kitchen gadget. Here is what you will need:
- Microwave-safe bowl – A medium-sized glass or ceramic bowl works perfectly for melting the white chocolate. I use a Pyrex measuring cup because the spout makes dipping easier, but any microwave-safe bowl will do.
- Baking sheet – A standard half-sheet pan lined with parchment paper or a silicone baking mat. The parchment is crucial—it prevents the ghosts from sticking and makes cleanup a breeze.
- Small spoon or fork – For dipping the pretzels into the melted chocolate. A small offset spatula also works well if you have one. I actually prefer using my fingers for the dipping process—it gives me more control—but a fork is cleaner if you are making these with kids.
- Parchment paper or silicone baking mat – Either works. Parchment is disposable and easy, while silicone mats are reusable and eco-friendly. I use both depending on what I have on hand.
- Toothpick – Optional, but helpful for adjusting the candy eyeballs if they slide out of place. I always keep one nearby just in case.
If you do not have a microwave, you can melt the white chocolate using a double boiler on the stovetop. Just bring an inch of water to a simmer in a small saucepan, place a heatproof bowl on top, and stir the wafers until smooth. It takes a few extra minutes but works just as well.
A quick tip on maintenance: if you use a silicone mat, wash it by hand with warm soapy water and let it air dry completely before storing. Chocolate residue can be stubborn if you let it sit too long.
Preparation Method
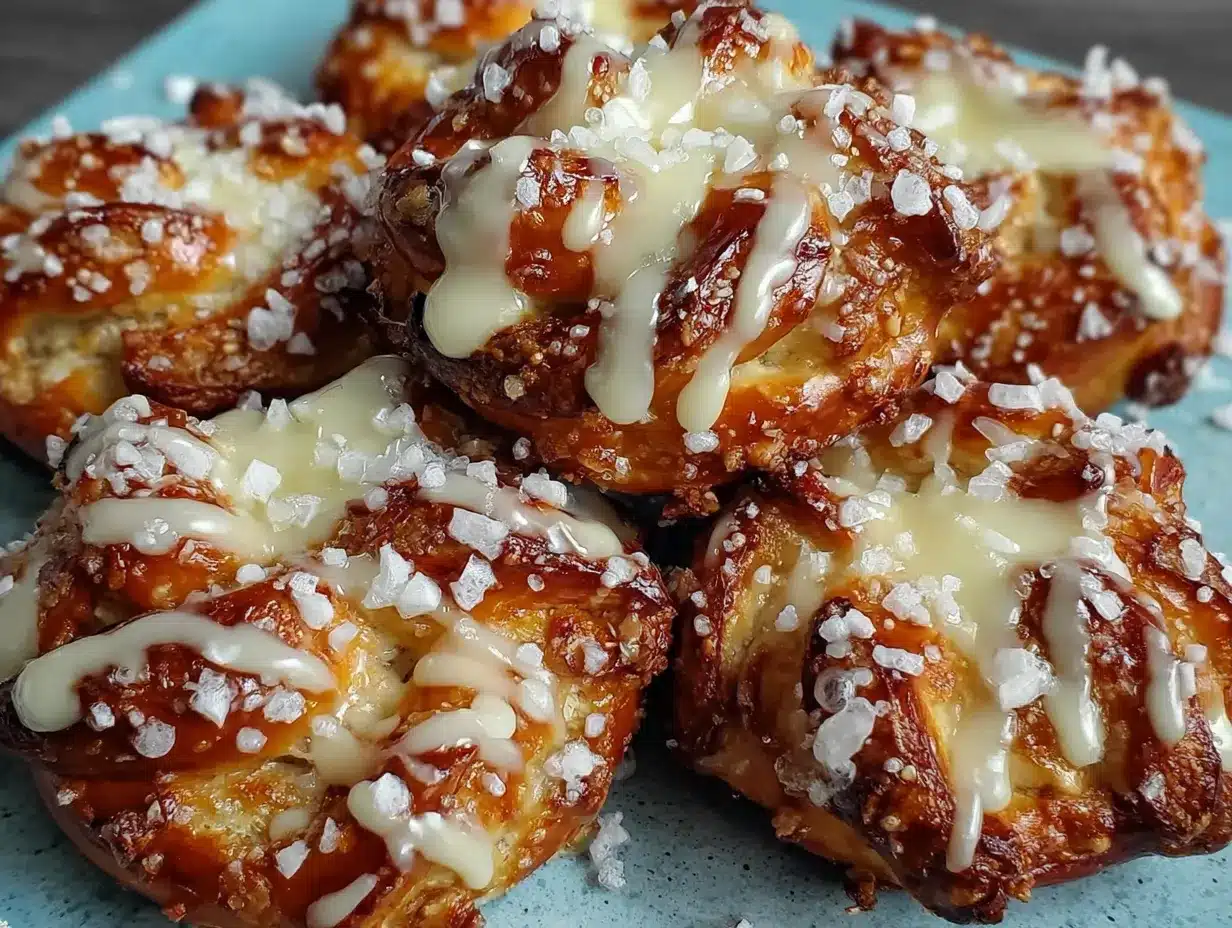
Making these ghost pretzel bites is almost embarrassingly easy. I have timed myself, and from start to finish, it takes about fifteen minutes of active work plus another ten minutes for the chocolate to set. Here is exactly how I do it:
- Set up your workspace. Line a baking sheet with parchment paper or a silicone baking mat. Make sure it fits flat in your refrigerator. Open your bag of mini pretzel twists and arrange about sixty of them in a single layer near your work area. Have your candy eyeballs ready in a small bowl.
- Melt the white chocolate. Place your white melting wafers in a microwave-safe bowl. Add 1 teaspoon of coconut oil. Microwave in 30-second intervals at 50% power, stirring well after each interval. White chocolate is notoriously finicky—it can seize and turn grainy if overheated. I learned this the hard way my first time. Now I never go above 50% power and I stir thoroughly between each interval. It usually takes about 90 seconds total, but your microwave may vary. The chocolate should be completely smooth and runny, like thick cream.
- Dip the pretzels. This is the fun part. Hold a mini pretzel twist by one of its loops and dip the other half into the melted white chocolate. You want to submerge about two-thirds of the pretzel, leaving the bottom loop exposed. Let the excess chocolate drip back into the bowl for a few seconds. The chocolate should coat the pretzel evenly without pooling too thickly at the bottom. Place the dipped pretzel on your prepared baking sheet, chocolate side up. Repeat with the remaining pretzels, working in batches of about ten at a time so the chocolate doesn’t set before you add the eyes.
- Add the candy eyes. This step requires a bit of timing. You want to place the candy eyeballs while the chocolate is still wet but not so wet that they slide right off. I usually wait about 30 seconds after placing each dipped pretzel on the sheet. The chocolate should be slightly tacky but not liquid. Place two candy eyeballs on the rounded top of the chocolate-dipped portion, pressing them in gently. They should look like little ghost faces peeking out from the chocolate. If an eye slides, use a toothpick to nudge it back into place.
- Let them set. Once all your ghost pretzel bites are assembled, place the baking sheet in the refrigerator for 10 to 15 minutes. The white chocolate needs to set completely so the ghosts hold their shape. Do not skip this step—I once tried to rush and ended up with smudged ghosts and chocolate fingerprints everywhere.
- Serve or store. Once the chocolate is firm and matte, your ghost pretzel bites are ready. Gently peel them off the parchment paper. They should release easily. If they stick, give them another few minutes in the fridge.
A few important notes: Work in batches if your kitchen is warm. White chocolate softens quickly at room temperature, and the ghosts can lose their shape if you take too long. I keep my air conditioning on or work near an open window if the weather is warm. Also, do not overcrowd your baking sheet. Leave about an inch between each ghost so they do not touch while setting.
You will notice that the chocolate-dipped portion naturally forms a rounded ghost shape on top of the pretzel. The twisted pretzel arms stick out on the sides, making the ghost look like it is floating. It is honestly adorable every single time.
Cooking Tips & Techniques
After making these ghost pretzel bites roughly forty-seven times over the past three years, I have collected a few tricks that make the process smoother and the results prettier. Let me share what I have learned through trial and error.
Temperature matters more than you think. White chocolate is sensitive. If your kitchen is hot and humid, the chocolate will take forever to set and the ghosts will look droopy. On the flip side, if your chocolate gets too cold while you are working, it will thicken and become hard to dip. I keep my bowl of melted chocolate over a warm (not hot) bowl of water to maintain the right consistency. If it starts to thicken, a quick 10-second zap in the microwave brings it back.
Do not skip the coconut oil. I know it seems like an extra step, but that one teaspoon makes a world of difference. Without it, the white chocolate is too thick and creates clumpy ghosts with uneven coating. With it, the chocolate flows smoothly and sets with a beautiful, glossy finish. I have tried making these without the oil, and the ghosts looked lumpy and sad. Never again.
Work in small batches. I learned this the hard way during my second attempt. I dipped all sixty pretzels at once, then tried to add the eyes. By the time I got to the last twenty, the chocolate had already set, and the eyes would not stick. Now I dip and decorate in batches of ten. It takes a little longer, but every single ghost gets perfect eyes that stay put.
Use the right pretzel shape. Mini twists are non-negotiable here. I tried using pretzel sticks once, thinking I could just dip the end and make ghost pops. It did not work. The sticks did not have the same visual structure, and the ghosts looked like weird white blobs on sticks. The twisted shape of mini pretzels creates those adorable little ghost arms that make these treats so recognizable.
Let the chocolate set completely. I know it is tempting to sneak one early, but trust me on this. Under-set chocolate is soft and sticky, and the ghosts will lose their shape the moment you touch them. Give them the full 15 minutes in the fridge. When they are ready, they should release from the parchment with a clean, satisfying pop.
One mistake I still make occasionally is letting the chocolate get too hot. Burnt white chocolate smells awful and turns grainy. If that happens, there is no saving it—you have to start over. So go slow with the microwave. Patience pays off here.
Variations & Adaptations
One of the best things about these ghost pretzel bites is how easy they are to customize. Over the years, I have experimented with different variations, and some of them have become new favorites in their own right.
Dark Chocolate Ghosts: For a less sweet version, swap the white chocolate for dark or semi-sweet melting wafers. The dark chocolate pairs beautifully with the salty pretzel, and the ghosts look dramatic and moody. My brother-in-law, who claims to hate white chocolate, devoured an entire batch of these dark chocolate versions. Use the same melting method and add a teaspoon of coconut oil for smoothness.
Colored Ghosts: Add a drop or two of gel food coloring to the melted white chocolate for a fun twist. Purple, orange, or green ghosts look fantastic for Halloween. Just make sure you use gel coloring, not liquid, because liquid can seize the chocolate. I made a batch of purple ghosts last year for a friend’s Halloween party, and they were a huge hit with the kids.
Gluten-Free Option: Most mini pretzel twists contain gluten, but gluten-free pretzels are widely available now. Look for brands like Glutino or Snyder’s of Hanover gluten-free pretzels. The texture is slightly different—a bit more crumbly—but the ghosts turn out just as cute and tasty.
Flavor Twists: Before dipping, sprinkle a tiny pinch of flaky sea salt, cinnamon sugar, or crushed freeze-dried raspberries over the wet chocolate. The salt version is my personal favorite—it enhances the salty-sweet dynamic and makes the ghosts taste even more addictive. For a peppermint twist around the holidays, crush up some candy canes and sprinkle them on top.
Monster Eyes: Instead of the standard candy eyeballs, try using different sizes or colors of eyes. I found a pack of glow-in-the-dark candy eyes online one year, and they were a massive hit. You can also use mini M&Ms or chocolate chips for a different look, though they won’t have that classic ghost expression.
I once tried making these with milk chocolate instead of white chocolate, thinking they would taste like chocolate-covered pretzels. They did taste good, but they did not look like ghosts anymore. The brown chocolate just looked like blobs. So if you want the ghost aesthetic, stick with white or add a white chocolate drizzle on top of the milk chocolate base.
Serving & Storage Suggestions
These ghost pretzel bites are best served at room temperature. The chocolate should be firm but not hard, and the pretzel should have a satisfying crunch. I usually take them out of the fridge about five minutes before serving so they warm up just slightly.
For presentation, I like to arrange them on a white platter or a dark-colored cake stand. The contrast makes the ghosts pop. You can also stack them in a clear glass jar tied with a Halloween ribbon for a cute gift. I have given these as teacher gifts, hostess gifts, and even as little party favors for my niece’s friends. Everyone loves receiving a jar full of homemade ghosts.
These pair beautifully with warm apple cider, hot chocolate, or a cup of coffee. The salty-sweet flavor complements the warmth of the drinks perfectly. If you are serving them at a party, set them out alongside other Halloween treats like caramel apples or pumpkin cookies. They add a fun, whimsical touch to any dessert table.
Storage: Keep your ghost pretzel bites in an airtight container at room temperature for up to one week. Do not refrigerate them once they have set—the fridge can introduce moisture that makes the chocolate bloom (develop white streaks). If your kitchen is warm, store them in a cool, dark pantry instead. I have kept them for up to ten days, and they still tasted fresh and crunchy.
Freezing: You can freeze these for up to three months. Place them in a single layer in a freezer-safe container, separated by parchment paper, so they do not stick together. To thaw, let them sit at room temperature for about 15 minutes. The texture remains excellent—I tested this last year when I made a double batch and froze half for Thanksgiving. They were just as good as fresh.
One note on flavor development: these actually taste better after a day or two. The flavors meld together, and the chocolate sets into that perfect snap. So do not feel like you have to serve them immediately. Making them a day ahead actually yields better results.
Nutritional Information & Benefits
Let me be real with you—these ghost pretzel bites are a treat, not a health food. But knowing what is in them helps you enjoy them mindfully. Here is the approximate nutritional breakdown for one ghost pretzel bite (based on a batch of 60):
- Calories: Approximately 55-65 calories per piece
- Carbohydrates: About 8-9 grams
- Fat: About 2.5-3 grams
- Protein: About 1 gram
- Sugar: About 5-6 grams
- Sodium: About 80-100 milligrams
These numbers will vary depending on the specific brands you use and how much chocolate coats each pretzel. If you use dark chocolate instead of white, the sugar content drops slightly and the antioxidant content goes up. Dark chocolate contains flavonoids that are good for heart health.
The pretzels themselves provide a small amount of iron and B vitamins from the enriched flour. And the white chocolate offers calcium from the milk solids. But honestly, the main benefit here is the joy they bring. These treats are about fun, celebration, and making memories with the people you love.
For those with dietary concerns: these are not gluten-free unless you use gluten-free pretzels. They contain dairy from the white chocolate. They are nut-free as written, but always check labels if allergies are a concern. Each piece is small enough that having two or three feels satisfying without going overboard.
I personally see these as a once-a-year indulgence. Halloween comes around for a few weeks, and these ghost pretzel bites make those weeks a little more magical. Everything in moderation, right?
Conclusion
These ghost pretzel bites have become a non-negotiable part of my Halloween tradition. They are the treat I bring to every party, the recipe I share with every friend who asks for something easy, and the snack that makes my niece forget she is “too old” for Halloween fun. There is something genuinely special about a recipe that delivers so much joy with so little effort.
I hope you give these a try. Customize them however you like—add sprinkles, use different chocolate, make them spooky or cute. That is the beauty of such a simple recipe. It becomes yours the moment you start making it. Maybe you will discover that dark chocolate ghosts are your thing, or that adding a pinch of cinnamon makes them taste like fall in a bite.
I would love to hear how yours turn out. Drop a comment below and let me know if your family loved them as much as mine does. Did you try any fun variations? Did the kids help you make them? Share your ghost stories—I read every single comment and I genuinely love hearing about your kitchen adventures.
Until next time, happy haunting and happy snacking. These little ghosts are waiting to steal the show at your next Halloween gathering. Go make some magic.
Frequently Asked Questions
Can I use white chocolate chips instead of melting wafers?
Yes, you can, but you will need to add a teaspoon of coconut oil or shortening to help them melt smoothly. White chocolate chips contain stabilizers that make them thicker when melted. The coconut oil thins them out so they coat the pretzels evenly. Just melt them slowly at 50% power in the microwave, stirring frequently.
How do I keep the candy eyes from sliding off?
Timing is everything. Let the dipped pretzel sit for about 30 seconds before placing the eyes. The chocolate should be slightly tacky but not liquid. If the eyes slide, use a toothpick to nudge them back into place. Working in small batches of ten pretzels at a time helps you stay ahead of the setting chocolate.
Can I make these ghost pretzel bites ahead of time?
Absolutely. In fact, they taste better after a day or two because the flavors meld together. Store them in an airtight container at room temperature for up to a week. You can also freeze them for up to three months. Just thaw at room temperature for about 15 minutes before serving.
Why did my white chocolate seize and turn grainy?
White chocolate is sensitive to heat and moisture. It seizes when it gets too hot or when even a tiny drop of water gets into the bowl. Always melt it at 50% power in 30-second intervals, stirring well between each. Make sure your bowl and utensils are completely dry. If it does seize, unfortunately there is no saving it—you have to start over with fresh chocolate.
Can I use gluten-free pretzels for this recipe?
Yes, gluten-free mini pretzel twists work perfectly. Brands like Glutino and Snyder’s of Hanover make gluten-free versions that have a similar shape and crunch. The texture is slightly more delicate, so handle them gently during dipping. The ghosts will turn out just as cute and delicious.
Pin This Recipe!
Easy Ghost Pretzel Bites: Best White Chocolate Treat

These ghost pretzel bites are a quick, four-ingredient Halloween treat that combines salty pretzels with creamy white chocolate and candy eyes. They take about 20 minutes to make and are perfect for parties, school treats, or a fun activity with kids.
- Prep Time: 15 minutes
- Cook Time: 0 minutes
- Total Time: 25 minutes (including 10 minutes setting time)
- Yield: 60 pieces 1x
- Category: Dessert
- Cuisine: American
Ingredients
- 60 mini pretzel twists (about 6 ounces)
- 12 ounces white melting wafers (about 340 grams)
- 1 teaspoon coconut oil (refined, optional but recommended)
- 60 candy eyeballs (6mm or 7mm)
Instructions
- Line a baking sheet with parchment paper or a silicone baking mat. Arrange about 60 mini pretzel twists in a single layer near your work area. Have the candy eyeballs ready in a small bowl.
- Place the white melting wafers and 1 teaspoon of coconut oil in a microwave-safe bowl. Microwave in 30-second intervals at 50% power, stirring well after each interval, until completely smooth and runny (about 90 seconds total).
- Hold a mini pretzel twist by one loop and dip the other half into the melted white chocolate, submerging about two-thirds of the pretzel. Let excess chocolate drip back into the bowl. Place the dipped pretzel on the prepared baking sheet, chocolate side up. Repeat with remaining pretzels, working in batches of about 10 at a time.
- Wait about 30 seconds after placing each dipped pretzel on the sheet, then gently press two candy eyeballs onto the rounded top of the chocolate-dipped portion. Use a toothpick to adjust if they slide.
- Place the baking sheet in the refrigerator for 10 to 15 minutes, until the chocolate is firm and matte.
- Gently peel the ghost pretzel bites off the parchment paper. Serve at room temperature or store as directed.
Notes
Work in small batches of 10 pretzels at a time to keep the chocolate from setting before adding eyes. If your kitchen is warm, keep the bowl of melted chocolate over a warm (not hot) bowl of water to maintain consistency. For best results, let the chocolate set completely in the fridge—do not skip this step. These taste even better after a day or two.
Nutrition
- Serving Size: 1 piece
- Calories: 60
- Sugar: 6
- Sodium: 90
- Fat: 3
- Saturated Fat: 2
- Carbohydrates: 9
- Protein: 1
Keywords: ghost pretzel bites, Halloween treats, white chocolate pretzels, easy Halloween recipe, no-bake dessert, salty sweet snack, ghost pretzels, Halloween party food


