Love this? Save it for later!
Share the inspiration with your friends
My nephew claimed he hated eggs. For three solid years. Every family brunch, every Easter gathering, every time a deviled egg tray made its rounds—he’d scrunch up his nose and announce it like a badge of honor. “I don’t eat eggs.” We all just nodded and moved on. Then last October, I was testing Halloween appetizers for a neighborhood potluck, and I set a tray of these spooky spiderweb deviled eggs on the counter to snap a photo. I turned around to grab my phone, and there he was. Seven years old, standing on his tiptoes, one hand already reaching for the tray. He’d eaten three before I even got the camera out. I didn’t say a word. I just handed him a napkin and let him prove himself wrong.
That’s the thing about these spooky spiderweb deviled eggs, honestly. They’re not just cute—they’re the kind of recipe that sneaks up on you. The kind that makes a kid who “doesn’t like eggs” suddenly become the biggest fan at the table. Maybe you’ve got a picky eater at home who turns up their nose at anything that looks too “grown-up.” Or maybe you’re just tired of the same old Halloween snacks that are all sugar and no substance. Either way, this recipe is about to change your October game plan.
I kept making them after that day, you know. Not just for Halloween parties, but for regular Tuesday lunches when the kids came over after school. The spiderweb design is surprisingly simple to pull off—a little trick with a toothpick and some black olive paste—but it looks like you spent way more time than you actually did. And that’s my favorite kind of recipe to share. The one that makes you look like a kitchen wizard without all the stress. Let me walk you through it.
Why You’ll Love This Recipe
Let’s be real for a second—feeding a family on a budget while trying to keep everyone happy is no small feat. These spooky spiderweb deviled eggs check every box. They’re affordable, they’re fun, and honestly, they’re the kind of thing that makes kids forget they’re eating something nutritious. I’ve tested this recipe with my own crew, and here’s why it’s become a staple in our October rotation:
- Budget-Friendly Ingredients: Eggs, mayo, mustard, and olives. That’s it. No fancy grocery runs, no specialty items that cost a small fortune. You probably have most of this in your fridge right now.
- Quick & Easy: From start to finish, you’re looking at about 30 minutes. The eggs boil while you prep the filling, and the spiderweb design takes maybe two minutes per egg. Perfect for busy weeknights or last-minute Halloween party prep.
- Kid-Approved Magic: I’ve watched kids who “don’t like eggs” devour these. Something about the spiderweb design makes them feel like they’re eating a treat, not a “healthy snack.” And honestly, I’m not about to argue with results.
- Crowd-Pleaser for All Ages: Adults love them too. They’re nostalgic, they’re clever, and they taste just like classic deviled eggs—which, let’s face it, is already a potluck champion.
- Perfect for Halloween or Any Spooky Gathering: Whether it’s a classroom party, a family movie night, or a full-on costume bash, these eggs fit right in. They’re portable, they don’t need reheating, and they always get photographed before anyone takes a bite.
What makes this version different from every other deviled egg recipe out there? It’s the texture, honestly. I’ve perfected the filling ratio so it’s creamy but not runny, smooth but with just enough body to hold its shape. And the spiderweb design? It’s not just a gimmick—it actually adds a subtle briny flavor from the black olives that complements the yolk mixture perfectly. This isn’t just another Halloween recipe. It’s the one you’ll come back to year after year.
What Ingredients You Will Need
This recipe uses simple, everyday ingredients to create something that looks way more complicated than it actually is. Most of these are pantry staples, which means you can whip up a batch of these spooky spiderweb deviled eggs without a special trip to the store. Here’s what you’ll need:
- 6 large eggs (room temperature works best for even cooking, but cold eggs are fine too—just add a minute to the boil time)
- 3 tablespoons mayonnaise (I prefer Hellmann’s or Duke’s for that classic creamy texture, but any brand works)
- 1 teaspoon yellow mustard (adds that tangy kick and that familiar yellow hue—you can use Dijon for a milder flavor)
- 1 teaspoon white vinegar (just a splash to brighten the filling and cut through the richness)
- Salt and black pepper to taste (start with a pinch of each and adjust from there)
- Paprika for garnish (smoked paprika adds a lovely depth, but sweet paprika works beautifully too)
- 2 tablespoons black olives, finely chopped (for the spiderweb design—use canned sliced olives for convenience, or whole pitted olives that you chop yourself)
- 1 tablespoon olive brine (optional, but this is my secret trick—a tiny splash in the filling adds a briny pop that makes people ask “what’s in this?”)
Ingredient selection tips: Look for eggs that are at least a week old—they peel much easier than super fresh ones. I know that sounds backwards, but it’s true. If you’re using farm-fresh eggs, add a teaspoon of baking soda to the boiling water to help with peeling. For the olives, I recommend Lindsay or any brand of pitted black olives. Steer clear of the pre-sliced ones that are too thin—you want olives you can chop into a paste for the web design.
Substitution guidance: If you’re out of yellow mustard, Dijon or even a pinch of dry mustard powder will work. Greek yogurt can replace half the mayo for a lighter filling, though it will be slightly less rich. For a dairy-free version, use vegan mayo—it works surprisingly well here. And if black olives aren’t your thing, you can use finely chopped roasted red pepper or even a tiny bit of black sesame seeds mixed with a drop of water to create the web paste.
Equipment Needed
You don’t need any fancy gadgets for these spooky spiderweb deviled eggs. Most of this stuff is already in your kitchen, which is part of what makes this recipe so accessible. Here’s what you’ll need:
- Medium saucepan (for boiling the eggs—any pot will do, but one with a tight-fitting lid helps)
- Mixing bowl (medium-sized, for mashing the yolks and mixing the filling)
- Fork or potato masher (a fork works perfectly for breaking up the yolks—I actually prefer it because you can control the texture better)
- Piping bag or zip-top bag (for piping the filling into the egg whites—a zip-top bag with the corner snipped off works like a charm)
- Toothpick (this is your spiderweb tool—a wooden toothpick is ideal because it’s sturdy enough to drag through the olive paste without bending)
- Small knife or piping tip (for creating the spiderweb design—a small round piping tip works beautifully, but a toothpick is all you really need)
- Serving platter (something with a slight lip to keep the eggs from sliding around—I use a white platter for that classic Halloween contrast)
Budget-friendly tip: You really don’t need a fancy piping set. A simple zip-top bag does the exact same job. And if you don’t have a toothpick, a skewer or even the tip of a paperclip (clean, obviously) will work for the spiderweb design. I’ve used a bobby pin in a pinch—don’t tell anyone.
Preparation Method

Making these spooky spiderweb deviled eggs is easier than you think. I’ve broken it down into clear steps so you can follow along without any guesswork. Take your time with the first batch—once you get the hang of the spiderweb design, it goes fast.
- Boil the eggs. Place the eggs in a single layer in your saucepan and cover them with cold water by about an inch. Bring the water to a rolling boil over high heat. Once it’s boiling hard, cover the pot, turn off the heat, and let the eggs sit for exactly 12 minutes. This gives you hard-boiled eggs with fully set yolks—no green ring around the yolk, I promise.
- Ice bath time. While the eggs are sitting, fill a bowl with ice water. When the 12 minutes are up, use a slotted spoon to transfer the eggs straight into the ice bath. Let them chill for at least 5 minutes. This stops the cooking immediately and makes peeling so much easier. I’ve skipped this step before when I was in a hurry, and I regretted every second of peeling those stubborn shells.
- Peel the eggs. Gently tap each egg on the counter to crack the shell all over, then roll it between your palms to loosen the shell. Start peeling from the wider end—there’s usually an air pocket there that gives you a good starting point. Rinse the peeled eggs under cool water to remove any tiny shell fragments.
- Slice and scoop. Using a sharp knife, slice each egg in half lengthwise. Gently pop out the yolks into your mixing bowl. Arrange the egg white halves on your serving platter, cut side up. If any of the whites tear, don’t worry—just use them for the filling and save the prettier ones for the final presentation.
- Make the filling. Add the mayonnaise, yellow mustard, white vinegar, and a pinch of salt and pepper to the bowl with the yolks. Mash everything together with a fork until smooth and creamy. Taste it—this is important. Adjust the salt, pepper, or mustard to your liking. If the filling seems too thick, add a tiny splash of olive brine or another teaspoon of mayo. If it’s too thin, add another yolk if you have one, or just chill it for 10 minutes to firm up.
- Pipe the filling. Spoon the yolk mixture into a piping bag or a zip-top bag. If using a zip-top bag, squeeze the filling into one corner, then snip off about 1/4 inch from the tip. Pipe the filling into each egg white half, mounding it slightly in the center. You want a nice rounded dome—this gives you a good surface for the spiderweb design.
- Create the spiderweb. This is the fun part. Take your finely chopped black olives and press them through a fine-mesh strainer to remove excess liquid, or just pat them dry with a paper towel. You want a paste-like consistency. Using a small knife or the tip of a toothpick, place a tiny dot of olive paste in the center of each filled egg. Then, using a clean toothpick, drag thin lines outward from the center dot to the edges of the filling—like drawing spokes on a wheel. Space them evenly, about 6 to 8 spokes per egg. Then, starting from the center, drag the toothpick in a gentle curve from one spoke to the next, connecting them in a spiral pattern. You’re basically drawing a web. It doesn’t have to be perfect—imperfect webs look more authentic anyway.
- Final touches. Lightly dust the eggs with paprika. I like to use a fine-mesh strainer for even distribution. Let the eggs rest in the fridge for at least 15 minutes before serving. This helps the filling set and makes the spiderweb design hold its shape better.
A note from personal experience: The first time I tried the spiderweb design, I used too much olive paste and it smeared everywhere. Less is more here. You just need a tiny dot in the center and the lightest touch when dragging the lines. Think of it like drawing with a very delicate pen. And if you mess up? Just wipe the filling clean and start over. No one has to know.
Cooking Tips & Techniques
After making these spooky spiderweb deviled eggs more times than I can count, I’ve picked up a few tricks that make the process smoother. Some of these I learned the hard way—like the time I tried to pipe the filling while it was still warm and ended up with a runny mess. Learn from my mistakes, friends.
Perfect hard-boiled eggs every time. The key is not to overcook them. Twelve minutes off the heat is my magic number. If you’re at high altitude, add a minute. If your eggs are straight from the fridge, add 30 seconds to the boil time. And please, please don’t skip the ice bath. It’s not just for peeling—it also stops the green ring from forming around the yolk. You want that bright yellow color for the spiderweb contrast.
Make the filling ahead. You can prepare the yolk mixture up to two days in advance and store it in a piping bag in the fridge. When you’re ready to assemble, just let it sit at room temperature for 10 minutes so it softens enough to pipe smoothly. This is a lifesaver when you’re hosting a Halloween party and need to prep things in advance.
The toothpick technique. For the spiderweb design, use a fresh toothpick for each egg. Once the olive paste starts to build up on the toothpick, the lines get messy. I keep a little cup of water nearby and dip the toothpick to clean it between eggs. Also, drag the lines gently—you’re not trying to cut through the filling, just create a visual pattern on the surface.
Common mistake alert. Don’t overmix the filling. I know it’s tempting to keep stirring until it’s perfectly smooth, but overmixing can make it gluey. Stop as soon as the ingredients are combined and the texture looks creamy. A few tiny lumps are fine—they add character. And don’t add too much mayo. You want the filling to hold its shape when piped, not spread out like a puddle.
Variations & Adaptations
One of the best things about this recipe is how easy it is to tweak. I’ve tried several variations over the years, and here are my favorites. Feel free to mix and match based on what your family likes or what you have on hand.
Spicy Southwest Version: Add 1/4 teaspoon of cumin and a tiny pinch of cayenne pepper to the yolk mixture. Top each finished egg with a sliver of pickled jalapeño instead of the olive web. The smoky heat pairs surprisingly well with the creamy filling. My brother-in-law, who claims he “doesn’t do spicy,” ate six of these before admitting he liked them.
Herb & Chive Twist: Stir 1 tablespoon of finely chopped fresh chives and 1 teaspoon of fresh dill into the filling. Skip the olive web and instead top each egg with a tiny sprig of dill or a few chive pieces arranged to look like little spider legs. This version is lighter and fresher—perfect for spring Halloween parties or if you’re serving these alongside a green salad.
Bacon Lover’s Dream: Crumble two slices of crispy bacon and mix half into the filling. Use the remaining bacon bits to sprinkle over the finished eggs instead of the olive web. You can still do a spiderweb design with a tiny bit of bacon fat mixed with paprika for color, but honestly, the bacon speaks for itself. This version disappears fastest at any gathering.
Dairy-Free Adaptation: Use vegan mayo and skip the mustard if it contains any dairy derivatives. The olive web works perfectly with this version. I’ve served these to a crowd with mixed dietary needs, and no one could tell the difference. Just make sure your mustard is dairy-free—most yellow mustards are, but it’s worth checking the label.
Gluten-Free Note: This recipe is naturally gluten-free, as long as your mustard and mayo are certified gluten-free. Most standard brands are, but if you’re cooking for someone with celiac disease, double-check the labels. The olives are naturally gluten-free, so you’re good there.
Serving & Storage Suggestions
These spooky spiderweb deviled eggs are best served chilled, straight from the fridge. The cold filling contrasts beautifully with the creamy texture, and the spiderweb design stays crisp and defined. I like to arrange them on a white platter in a circular pattern, with the spiderwebs facing outward for maximum visual impact. If you’re feeling extra festive, scatter a few plastic spiders around the platter or add a small sign that says “Enter the Web.”
What to serve with them: These eggs pair wonderfully with other Halloween-themed appetizers. Try them alongside spooky mummy pizza bites for a full savory spread, or serve them with a bowl of creamy pumpkin soup for a cozy Halloween dinner. For drinks, a crisp apple cider (spiked or not) complements the briny olive notes perfectly. If you’re doing a full party menu, these eggs are also great with ghostly guacamole dip and crunchy veggie sticks.
Storage instructions: Store any leftover eggs in an airtight container in the refrigerator for up to two days. The filling may soften slightly over time, but the flavor actually improves as the ingredients meld. Do not freeze these—the texture of the egg whites becomes rubbery and the filling separates. Trust me, I tried it once during a particularly ambitious meal prep session. Not worth it.
Reheating note: These are served cold, so no reheating needed. If you’ve stored them and the filling seems a bit firm, let them sit at room temperature for 10 minutes before serving. This takes the chill off without compromising the texture.
Flavor development: Honestly, these eggs taste even better the next day. The flavors have time to meld, and the olive brine in the filling becomes more pronounced. I often make them a day ahead for parties, and they’re always a hit. Just wait to do the spiderweb design until right before serving—the olive paste can bleed into the filling if it sits too long.
Nutritional Information & Benefits
Let’s talk about what’s actually in these spooky spiderweb deviled eggs. Each egg half (based on the full recipe with 6 eggs, making 12 halves) contains approximately:
- Calories: 65
- Protein: 5g
- Fat: 4.5g
- Carbohydrates: 1g
- Fiber: 0g
- Sugar: 0.5g
These numbers will vary slightly depending on the exact brands you use, but overall, these are a nutrient-dense snack that fits well into most diets. Eggs are a fantastic source of high-quality protein and contain all nine essential amino acids. They’re also rich in choline, which supports brain health—perfect for growing kids (and let’s be honest, adults too).
The black olives add a small amount of healthy monounsaturated fats and a touch of iron. And the mayonnaise, while not a health food, provides vitamin E and helps your body absorb the fat-soluble vitamins from the eggs. If you’re watching your sodium, you can use low-sodium olives or reduce the added salt. The mustard and vinegar already provide plenty of flavor.
Dietary considerations: This recipe is naturally low-carb, keto-friendly, and gluten-free. It contains eggs and mayonnaise (which typically contains eggs), so it’s not suitable for those with egg allergies. For a vegan version, you’d need to use a completely different base—but that’s a recipe for another day.
Conclusion
These spooky spiderweb deviled eggs have become a non-negotiable part of my Halloween season. They’re the recipe that proved my nephew wrong about eggs, the appetizer that always gets photographed before anyone takes a bite, and the snack that makes me feel like I’ve got my act together even when I’m scrambling to get everything ready. Honestly, if you make one new recipe this October, let it be this one.
I’d love to hear how yours turn out. Did your kids help with the spiderweb design? Did you try one of the variations? Did you find your own trick for perfect peeling? Drop a comment below and share your experience—I read every single one, and I always pick up new ideas from you all. And if you snap a photo, tag me on social media. There’s nothing better than seeing these little webs come to life in your kitchen.
Go ahead, give them a try. Your family is going to love them. And who knows—you might just convert a picky eater or two along the way.
Frequently Asked Questions
Can I make these spiderweb deviled eggs a day ahead?
Absolutely. You can prepare the eggs and filling up to two days in advance. Store the peeled egg whites and filling separately in the refrigerator. Assemble and pipe the filling, then add the spiderweb design just before serving for the best visual effect. The olive paste can bleed into the filling if it sits too long.
How do I get perfectly peeled hard-boiled eggs every time?
Use eggs that are at least a week old—fresh eggs are harder to peel. After boiling, transfer them immediately to an ice bath for at least 5 minutes. Crack the shell gently all over, then roll the egg between your palms to loosen the shell. Starting peeling from the wider end where the air pocket is usually helps.
What can I use instead of black olives for the spiderweb design?
If you’re not a fan of olives, you can use finely chopped roasted red pepper, a tiny bit of black sesame seeds mixed with a drop of water, or even a dab of balsamic glaze. For a completely different look, try using finely chopped fresh chives arranged in a web pattern—it’s more subtle but very pretty.
How long do these deviled eggs last in the fridge?
Store them in an airtight container in the refrigerator for up to two days. The texture is best within the first 24 hours. Do not freeze them—the egg whites become rubbery and the filling separates when thawed. If you’re making them for a party, aim to serve them within a day of preparation.
Can I use a different type of mustard?
Yes, you can substitute Dijon mustard for a milder, more sophisticated flavor. Spicy brown mustard adds a nice kick. If you’re out of mustard entirely, you can use a pinch of dry mustard powder mixed with a teaspoon of water. The mustard adds tang and helps balance the richness of the mayo and yolks, so don’t skip it entirely.
Pin This Recipe!
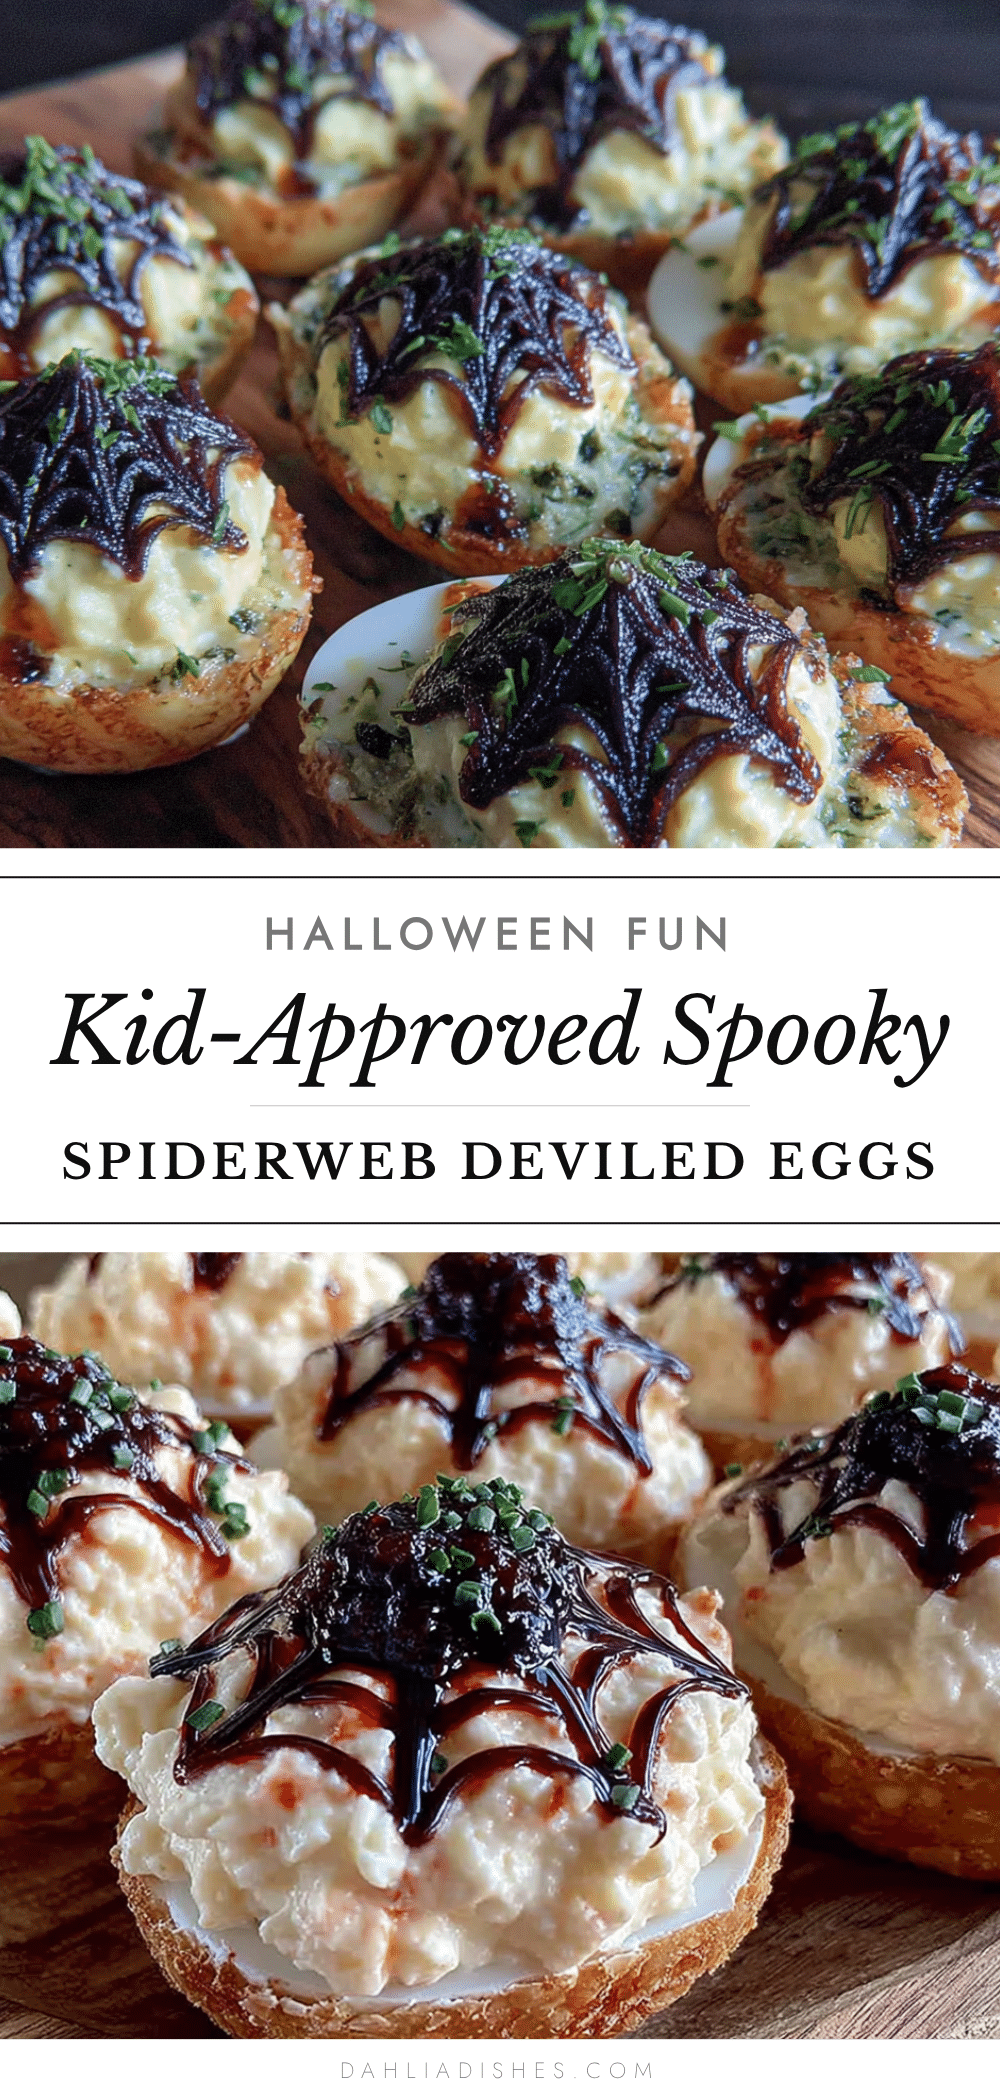
Spooky Spiderweb Deviled Eggs: Best Kid-Approved Recipe

These spooky spiderweb deviled eggs are a fun, kid-approved Halloween appetizer that turns picky eaters into fans. With a creamy filling and a simple olive paste spiderweb design, they’re budget-friendly, quick to make, and perfect for any spooky gathering.
- Prep Time: 15 minutes
- Cook Time: 12 minutes
- Total Time: 30 minutes
- Yield: 12 deviled egg halves 1x
- Category: Appetizer
- Cuisine: American
Ingredients
- 6 large eggs
- 3 tablespoons mayonnaise
- 1 teaspoon yellow mustard
- 1 teaspoon white vinegar
- Salt and black pepper to taste
- Paprika for garnish
- 2 tablespoons black olives, finely chopped
- 1 tablespoon olive brine (optional)
Instructions
- Place the eggs in a single layer in a medium saucepan and cover with cold water by about an inch. Bring to a rolling boil over high heat. Cover, turn off the heat, and let sit for exactly 12 minutes.
- While the eggs sit, fill a bowl with ice water. Transfer the eggs to the ice bath and let chill for at least 5 minutes.
- Gently tap each egg on the counter to crack the shell all over, then roll between your palms to loosen. Peel starting from the wider end. Rinse under cool water to remove shell fragments.
- Slice each egg in half lengthwise. Gently pop out the yolks into a mixing bowl. Arrange the egg white halves on a serving platter, cut side up.
- Add mayonnaise, yellow mustard, white vinegar, and a pinch of salt and pepper to the yolks. Mash with a fork until smooth and creamy. Adjust seasoning to taste. If too thick, add a splash of olive brine or extra mayo; if too thin, chill for 10 minutes.
- Spoon the yolk mixture into a piping bag or zip-top bag. If using a zip-top bag, squeeze filling into one corner and snip off about 1/4 inch from the tip. Pipe filling into each egg white half, mounding slightly in the center.
- Press finely chopped black olives through a fine-mesh strainer or pat dry with a paper towel to form a paste. Place a tiny dot of olive paste in the center of each filled egg. Using a clean toothpick, drag thin lines outward from the center to the edges (6-8 spokes). Then, starting from the center, drag the toothpick in a gentle curve from one spoke to the next, connecting them in a spiral pattern to create a web.
- Lightly dust the eggs with paprika using a fine-mesh strainer. Refrigerate for at least 15 minutes before serving.
Notes
Use eggs that are at least a week old for easier peeling. For the spiderweb design, use a fresh toothpick for each egg and clean it between eggs to avoid smearing. The filling can be made up to two days ahead and stored in the fridge. Assemble and add the spiderweb design just before serving for best visual effect.
Nutrition
- Serving Size: 2 deviled egg halves
- Calories: 130
- Sugar: 1
- Sodium: 200
- Fat: 9
- Saturated Fat: 2.5
- Carbohydrates: 2
- Protein: 10
Keywords: spiderweb deviled eggs, Halloween deviled eggs, kid-friendly deviled eggs, spooky appetizer, easy Halloween recipe


