Love this? Save it for later!
Share the inspiration with your friends
My nephew Leo asked why I couldn’t just use black cocoa powder in the cupcake batter instead of all that gel food coloring. I started to explain why that wouldn’t work—then stopped. Honestly? I had no good reason. I’d just always done it the messy way, with my fingers stained black for days and that faint chemical aftertaste I’d convinced myself no one noticed. So I tried it his way. And let me tell you, the kid was right. Those cupcakes came out of the oven the richest, darkest black I’d ever seen, with this deep, almost Oreo-like flavor that the gel stuff never gave us. I stood there holding the baking sheet, feeling equal parts proud and ridiculous.
That was last October, and these Spooky Black Velvet Ghost Cupcakes have been my Halloween go-to ever since. There’s something about that first bite—the way the tender, dark crumb gives way to that tangy cream cheese frosting, all piled high and swirled into little ghost shapes. It’s the kind of treat that makes kids (and, okay, adults) do that little happy wiggle in their chair. Maybe you’ve been there, staring at a Pinterest-perfect Halloween dessert and wondering if it’s actually doable without a pastry degree. I promise you, this one is. It looks impressive, but it’s really just a solid black velvet cupcake recipe with a clever frosting trick.
The best part? These little ghosts are as fun to make as they are to eat. I mean, how often do you get to pipe little ghost faces and feel like a total kitchen witch? They’ve become our official Halloween night tradition—the thing we make while waiting for trick-or-treaters to start showing up. And every year, Leo reminds me about the time he taught his aunt how to make better cupcakes. He’s never letting me forget it.
Why You’ll Love This Recipe
These Spooky Black Velvet Ghost Cupcakes aren’t just another Halloween dessert. They’re the kind that makes people stop and say, “Wait, you made these?” Here’s why they’re worth every minute in the kitchen:
- Naturally Dark Color: No neon gel food coloring needed. Black cocoa powder gives you that gorgeous, deep black crumb with a subtle chocolate flavor that’s absolutely addictive.
- Simple Ingredients: You probably have most of this in your pantry already. No weird stabilizers or specialty extracts here.
- Perfect for Halloween Parties: These little ghosts are the star of any spooky spread. They’re cute without being fussy, which is exactly what you want when you’re juggling a house full of excited kids.
- Crowd-Pleaser: I’ve brought these to school parties, neighborhood gatherings, and work potlucks. They disappear faster than anything else on the table. Kids love the ghost shape, adults love the rich flavor.
- Surprisingly Easy: The frosting technique looks fancy, but it’s just a simple swirl with a couple of chocolate chip eyes. If you can pipe a basic dollop, you can make these ghosts.
What makes these different from every other Halloween cupcake recipe out there? It’s the texture. Black cocoa can sometimes make baked goods dry, but this recipe uses buttermilk and a touch of oil to keep things incredibly moist. The cream cheese frosting is tangy and light, balancing the deep cocoa flavor perfectly. It’s not just a pretty face—it’s genuinely one of the best chocolate cupcakes I’ve ever made, black or otherwise.
This is the recipe that made me stop being a control freak in the kitchen. It taught me that sometimes the best ideas come from the people who haven’t learned yet what “shouldn’t” work. And honestly? That’s a pretty good lesson to carry into any holiday baking session.
What Ingredients You Will Need
This recipe uses simple, wholesome ingredients to create that signature black velvet texture and flavor. Most of these are pantry staples, though you might need to hunt down black cocoa powder—trust me, it’s worth the search.
For the Cupcakes
- 1 ½ cups all-purpose flour (spooned and leveled—don’t scoop straight from the bag)
- ½ cup black cocoa powder (I recommend King Arthur or Rodelle for the deepest color)
- 1 teaspoon baking soda
- ½ teaspoon salt
- 1 cup granulated sugar
- ½ cup vegetable oil (or any neutral oil like canola or avocado)
- 2 large eggs, room temperature
- 1 teaspoon vanilla extract
- 1 cup buttermilk, room temperature (adds tenderness and helps activate the baking soda)
- 1 teaspoon white vinegar (trust me on this—it helps the color stay deep and dark)
For the Cream Cheese Frosting
- 8 ounces cream cheese, softened (full-fat works best for stability)
- ½ cup unsalted butter, softened
- 3 ½ cups powdered sugar, sifted (sifting prevents lumps—I learned this the hard way)
- 1 teaspoon vanilla extract
- Pinch of salt
For the Ghost Faces
- Mini chocolate chips (for the eyes—about 24 per dozen cupcakes)
- Black decorating gel (optional, for tiny mouths, but I find the chips alone are cuter)
Ingredient Tips & Substitutions: If you can’t find black cocoa powder, you can use Dutch-process cocoa instead, but the color will be more of a dark brown than true black. For a dairy-free version, use vegan butter and a plant-based buttermilk (just add 1 tablespoon of vinegar to 1 cup of oat milk and let it sit for 5 minutes). I’ve tried this with gluten-free 1:1 flour blends, and it works—just add an extra tablespoon of flour to compensate for the lack of gluten structure.
Equipment Needed
You don’t need a professional bakery setup for these ghosts, but a few key tools make everything smoother:
- 12-cup muffin tin (standard size—mini muffins won’t give you enough surface for the ghost swirl)
- Paper liners (black or white both look great; I prefer black for the full spooky effect)
- Mixing bowls (one large, one medium)
- Whisk and spatula
- Electric hand mixer or stand mixer (you can do the frosting by hand, but your arm will hate you)
- Piping bag with a large round tip (I use a Wilton 1A tip, but you can also use a zip-top bag with the corner snipped off)
- Cooling rack
- Small offset spatula (optional but helpful for smoothing frosting)
Budget-Friendly Alternatives: No piping bag? No problem. A sturdy zip-top bag works perfectly—just fill it, seal it, and snip about ½ inch off the corner. No electric mixer? You can whisk the cupcake batter by hand (it’s actually better not to overmix), and for the frosting, a good old-fashioned wooden spoon and some elbow grease will get the job done. I’ve made these in a friend’s cabin with exactly zero fancy tools, and they turned out beautifully.
Preparation Method
Let’s make some ghosts! This recipe comes together in about 35 minutes of active time, plus cooling. I like to set everything out before I start—it makes the whole process feel more like a fun project and less like a frantic scramble.
- Preheat and prep. Preheat your oven to 350°F (175°C). Line your muffin tin with 12 paper liners. If you’re feeling extra spooky, use black liners—they make the ghosts pop even more.
- Mix the dry ingredients. In a medium bowl, whisk together the flour, black cocoa powder, baking soda, and salt. Make sure there are no lumps—black cocoa can be clumpy, so really get in there with your whisk. Set this aside.
- Combine the wet ingredients. In a large bowl, whisk together the sugar and oil until well combined. Add the eggs one at a time, whisking after each addition until smooth. Stir in the vanilla extract. The mixture should look glossy and smell amazing already.
- Alternate wet and dry. Add about one-third of the dry ingredients to the wet mixture and stir gently. Pour in half the buttermilk and stir again. Repeat with another third of dry, the remaining buttermilk, and finally the last of the dry ingredients. Stir until just combined—a few streaks of flour are okay. Overmixing will make the cupcakes tough, so be gentle here.
- Add the vinegar. Stir in the white vinegar. You’ll see the batter lighten slightly and get a little bubbly. That’s the baking soda reacting, and it helps keep the color deep and the texture tender. Don’t skip this step—I once did, and the cupcakes came out a sad, muddy gray.
- Fill the liners. Divide the batter evenly among the 12 liners, filling each about two-thirds full. An ice cream scoop works great for this. The batter will be thin—that’s normal for velvet-style cakes.
- Bake. Bake for 18-22 minutes, or until a toothpick inserted in the center comes out with just a few moist crumbs. The tops should spring back when lightly touched. Let them cool in the pan for 5 minutes, then transfer to a wire rack to cool completely. Do not frost warm cupcakes—your ghosts will melt into sad puddles.
- Make the frosting. While the cupcakes cool, beat the softened cream cheese and butter together in a large bowl until smooth and creamy (about 2 minutes). Add the vanilla and salt, then gradually beat in the powdered sugar, one cup at a time, until the frosting is light and fluffy. If it seems too soft to pipe, pop it in the fridge for 15 minutes to firm up.
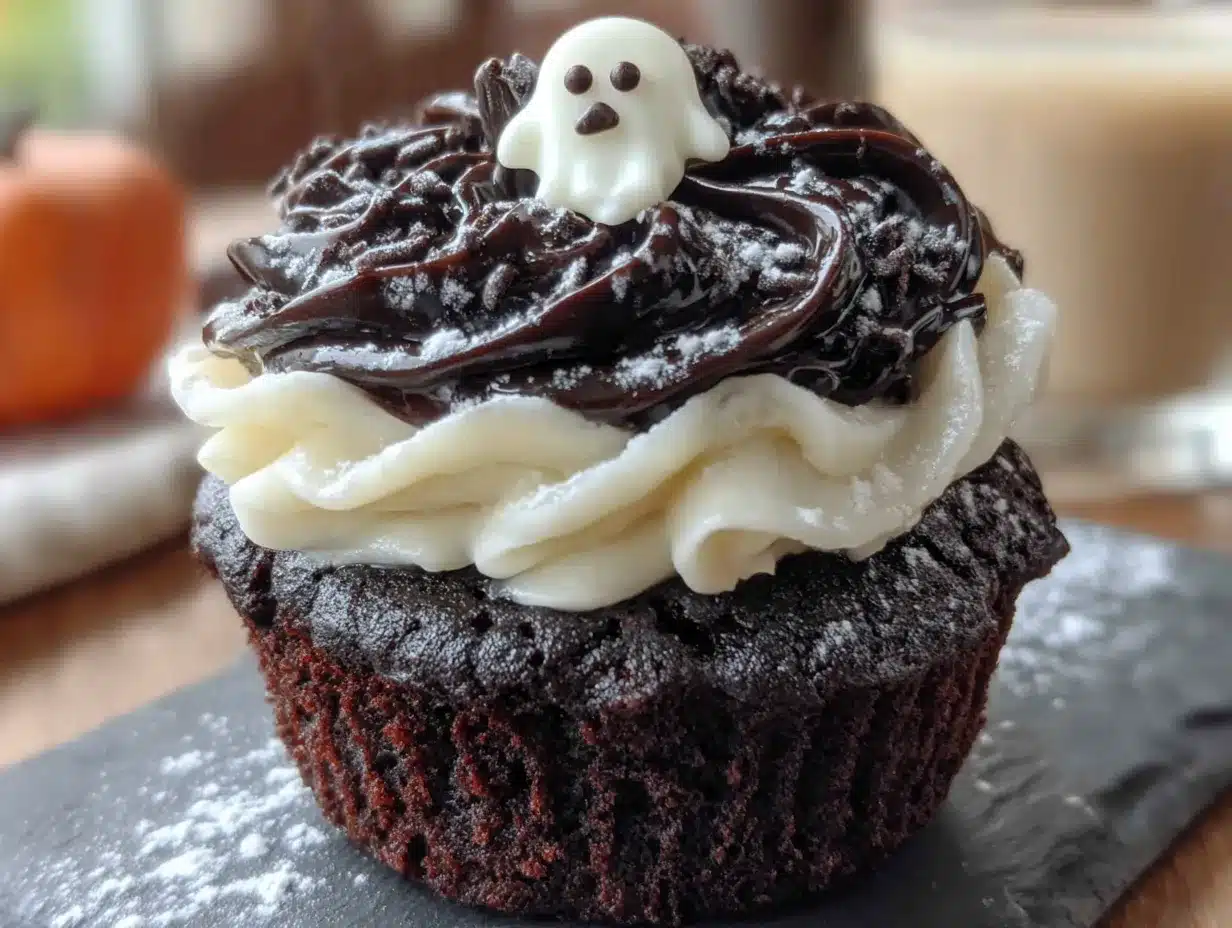
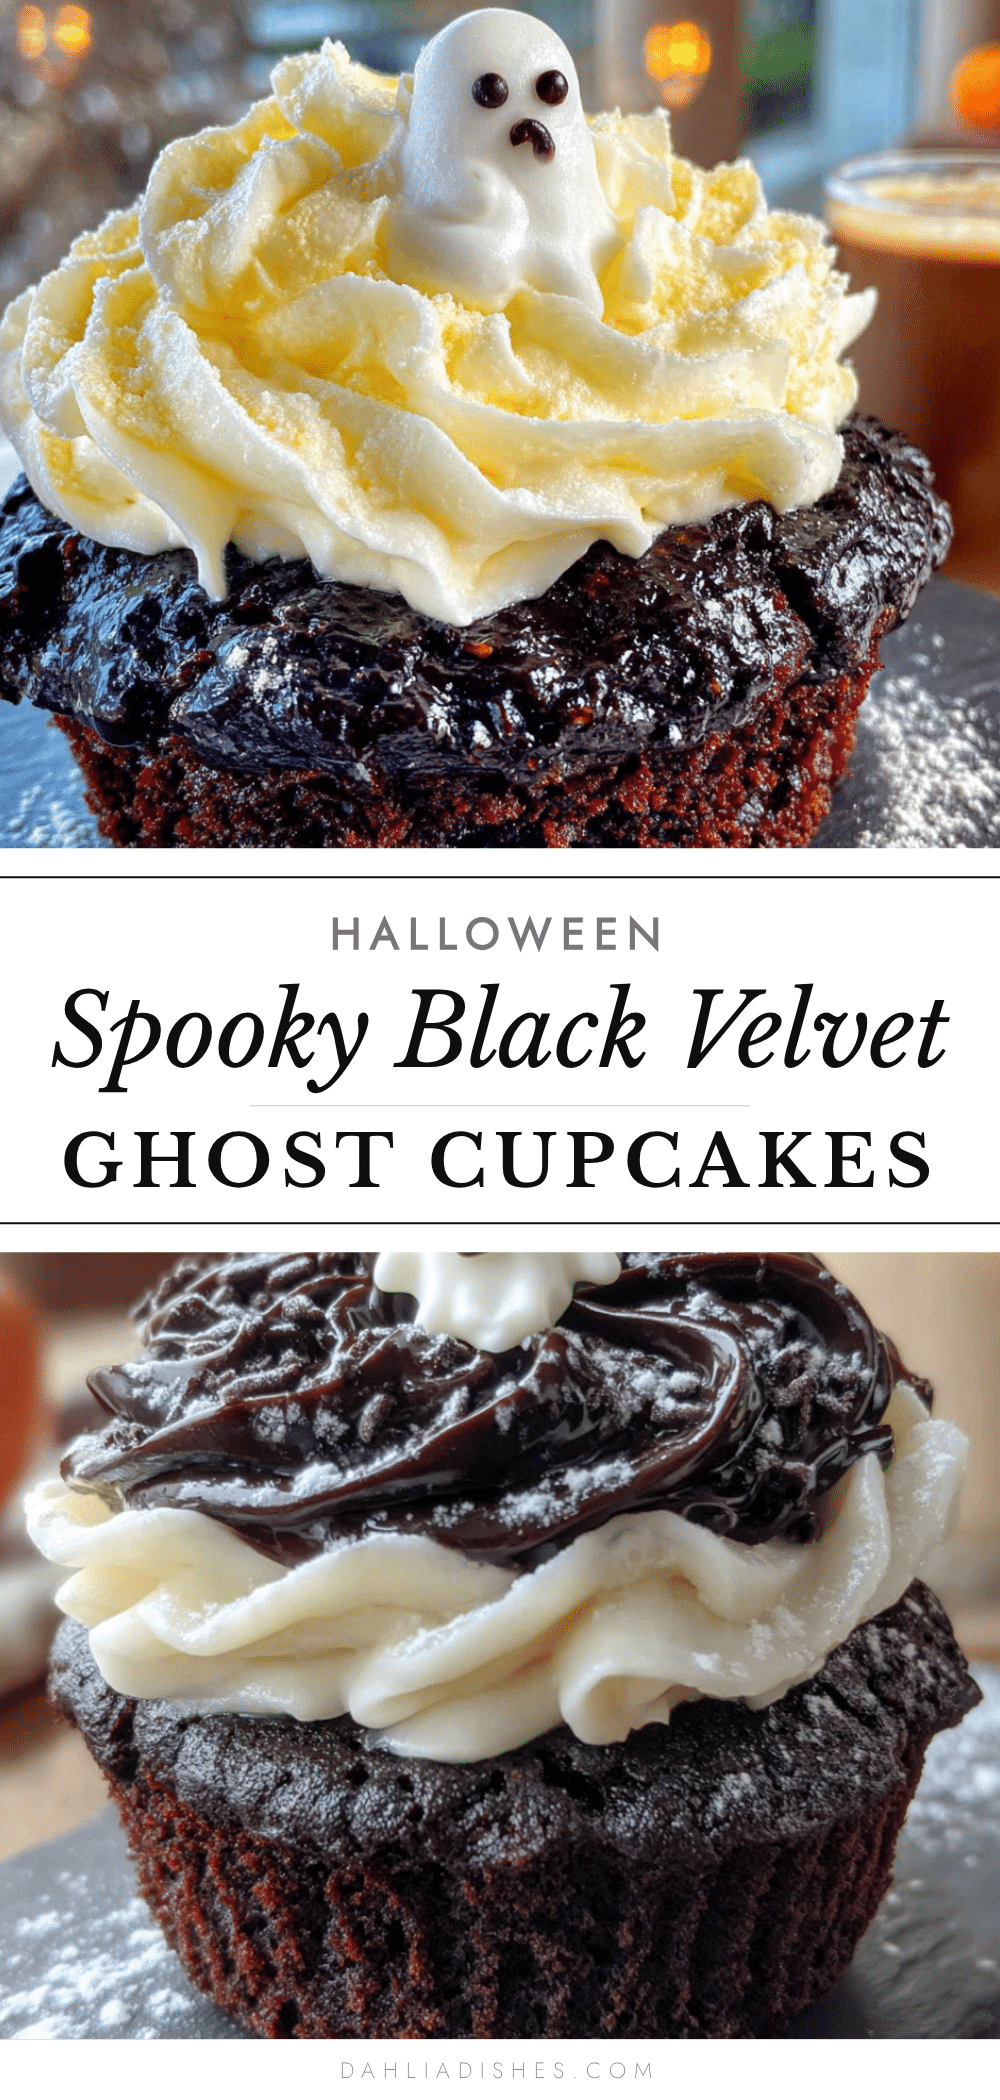
- Pipe the ghosts. Transfer the frosting to your piping bag fitted with a large round tip. Starting at the outer edge of each cupcake, pipe a spiral of frosting, working your way inward and slightly upward to create a dome. For the ghost’s head, finish with a small peak at the top—give it a little flick of the wrist to create a cute pointy head.
- Add the faces. Gently press two mini chocolate chips into the frosting for eyes, angled slightly downward for maximum ghostly expression. If you want to add tiny mouths, use black decorating gel, but honestly, the chip eyes alone are so charming that I rarely bother.
Sensory Cues: The batter should be smooth and slightly thin, like a thick milkshake. When you pull the cupcakes from the oven, the kitchen will smell like a cross between brownies and a cozy fall evening. The frosting should be soft enough to pipe easily but firm enough to hold its shape—think the texture of a well-chilled buttercream.
Cooking Tips & Techniques
I’ve made these Spooky Black Velvet Ghost Cupcakes at least a dozen times now, and I’ve collected a few hard-won lessons along the way. Here’s what I wish someone had told me the first time:
Room temperature ingredients matter. I know, I know—every recipe says this, and it feels like a suggestion you can ignore. But cold eggs and cold buttermilk will make your batter seize up, and the cupcakes won’t rise as nicely. Take them out of the fridge 30 minutes before you start. Your future self will thank you.
Don’t overmix the batter. This is the number one mistake I made early on. Black cocoa is already more delicate than regular cocoa, and overmixing develops gluten that makes cupcakes tough. Mix until the flour just disappears, then stop. A few lumps are fine—they’ll bake out.
The vinegar trick works. I was skeptical when Leo suggested it, but the acid in the vinegar reacts with the baking soda to create a lighter crumb and helps maintain that deep black color. Without it, the cocoa can turn slightly reddish-brown during baking. If you don’t have white vinegar, apple cider vinegar works too.
Frosting consistency is everything. If your cream cheese frosting is too soft, the ghosts will slump. If it’s too stiff, they’ll look lumpy and weird. The sweet spot is when the frosting holds a peak but still feels soft and spreadable. If you overbeat it and it gets runny, add a tablespoon of powdered sugar and chill it for 10 minutes.
Pipe with confidence. Your first ghost might look a little derpy. That’s okay—it’s part of the charm. I still have a batch where one ghost looks like it’s winking and another looks mildly concerned. My nephew calls them “character ghosts,” and honestly, they’re the ones everyone remembers.
Variations & Adaptations
Once you’ve mastered the basic ghost, the possibilities are endless. Here are a few ways I’ve played with this recipe over the years:
Gluten-Free Version: Substitute the all-purpose flour with a 1:1 gluten-free baking blend that contains xanthan gum. I’ve had good luck with Bob’s Red Mill. Add an extra tablespoon of flour to the recipe to help with structure, and don’t overmix—gluten-free batters are more delicate.
Dairy-Free Version: Use vegan cream cheese and butter for the frosting (I like Miyoko’s or Violife). For the cupcakes, replace buttermilk with 1 cup of oat milk mixed with 1 tablespoon of vinegar. The texture will be slightly less tender, but the flavor is still fantastic.
Pumpkin Spice Ghosts: Swap ¼ cup of the flour for pumpkin puree and add 1 teaspoon of pumpkin pie spice to the dry ingredients. The cupcakes will be a little denser, but the fall flavor is incredible. These are my go-to for Thanksgiving weekend baking.
Mini Ghosts: Use a mini muffin tin and bake for 10-12 minutes. You’ll get about 24 mini ghosts, which are perfect for classroom parties or snack-sized treats. Just reduce the frosting amount slightly so the ghosts don’t overwhelm the tiny cakes.
Chocolate Ganache Drip: For an extra-decadent version, drizzle a little dark chocolate ganache over the ghosts before adding the faces. It gives them a “drippy” Halloween vibe that’s super dramatic and surprisingly easy.
Serving & Storage Suggestions
These ghosts are best served at room temperature, which lets the cream cheese frosting soften to that perfect creamy texture. I like to arrange them on a black cake stand or a wooden board with some fake spiderwebs and plastic spiders scattered around—it makes for a killer Halloween centerpiece.
Storage: Store any leftover cupcakes in an airtight container in the refrigerator for up to 4 days. The cream cheese frosting needs to stay chilled, but let the cupcakes sit at room temperature for about 20 minutes before serving to take the chill off. The flavor actually improves after a day in the fridge—the black cocoa deepens and the frosting sets beautifully.
Freezing: You can freeze the unfrosted cupcakes for up to 3 months. Wrap them individually in plastic wrap, then pop them in a freezer bag. When you’re ready to serve, thaw them at room temperature, make a fresh batch of frosting, and pipe the ghosts. I’ve done this for Halloween parties when I wanted to prep ahead, and no one ever knew the cupcakes weren’t baked that morning.
Reheating: If you’re serving these with a warm drink, a quick 10-second zap in the microwave takes the edge off without melting the frosting. Just don’t overdo it—nobody wants a puddle of cream cheese.
Nutritional Information & Benefits
Let’s be real—these are a treat, not a health food. But here’s the approximate breakdown per cupcake (frosting included):
- Calories: 380
- Fat: 22g
- Carbohydrates: 45g
- Protein: 5g
- Sugar: 32g
Health Highlights: Black cocoa powder is actually rich in antioxidants—more so than regular cocoa, since it’s less processed. It also contains iron, magnesium, and a little bit of fiber. The cream cheese adds a small amount of calcium and protein. Is that enough to make these a health food? Absolutely not. But it’s nice to know there’s a tiny bit of goodness hiding behind all that spooky deliciousness.
Dietary Considerations: This recipe contains gluten, dairy, and eggs. For gluten-free and dairy-free options, see the variations section above. These are not low-sugar or low-carb, but they are nut-free if you skip any nut-based substitutions.
Conclusion
These Spooky Black Velvet Ghost Cupcakes have become more than just a Halloween recipe in my house. They’re a reminder that sometimes the best ideas come from the most unexpected places—like a ten-year-old who doesn’t know he’s not supposed to question the way things have always been done. Every time I make them, I think about that moment in my kitchen, standing there with black cocoa powder dusted across the counter, realizing I’d been doing it wrong for years.
I hope you give these ghosts a try. Don’t stress about making them perfect—the slightly lopsided ones, the ones with uneven eyes, the ones that look like they’re having a bad day—those are the ones with the most personality. And honestly? That’s what Halloween is all about. Embrace the imperfections, have fun with the piping, and don’t forget to save one for yourself before the kids descend.
If you make these, I’d love to hear about it. Drop a comment below and tell me about your ghost creations—especially if someone in your kitchen taught you something new along the way. Happy Halloween, and happy baking!
Frequently Asked Questions
Can I make these cupcakes ahead of time?
Absolutely. You can bake the cupcakes up to 2 days in advance and store them in an airtight container at room temperature. Make the frosting and pipe the ghosts the day you plan to serve them for the best presentation.
Why did my cupcakes turn out gray instead of black?
This usually happens if you skip the vinegar or use regular cocoa powder instead of black cocoa. The vinegar helps activate the baking soda, which keeps the color deep. Also, make sure your black cocoa is fresh—old cocoa loses its intensity.
Can I use a different frosting?
Sure! A classic buttercream or even a stabilized whipped cream would work. But the tangy cream cheese frosting really complements the rich black cocoa flavor, so I’d recommend sticking with it for the full ghost experience.
How do I get the ghost shape right?
Practice makes perfect, but the key is starting from the outside and spiraling inward, then finishing with a little upward flick of the wrist. If your first ghost looks more like a blob, just call it a “friendly ghost” and move on. They all taste the same!
Can I double this recipe?
Yes! This recipe doubles beautifully. Just use two muffin tins and bake them on separate racks, rotating halfway through. You might need to add a minute or two to the baking time, so keep an eye on them.
Pin This Recipe!
Spooky Black Velvet Ghost Cupcakes
These Spooky Black Velvet Ghost Cupcakes are a fun and easy Halloween treat featuring naturally dark black cocoa cupcakes topped with a tangy cream cheese frosting piped into adorable ghost shapes. Perfect for parties and guaranteed to impress both kids and adults.
- Prep Time: 35 minutes
- Cook Time: 20 minutes
- Total Time: 55 minutes
- Yield: 12 cupcakes 1x
- Category: Dessert
- Cuisine: American
Ingredients
- 1 ½ cups all-purpose flour (spooned and leveled)
- ½ cup black cocoa powder
- 1 teaspoon baking soda
- ½ teaspoon salt
- 1 cup granulated sugar
- ½ cup vegetable oil (or canola/avocado oil)
- 2 large eggs, room temperature
- 1 teaspoon vanilla extract
- 1 cup buttermilk, room temperature
- 1 teaspoon white vinegar
- 8 ounces cream cheese, softened
- ½ cup unsalted butter, softened
- 3 ½ cups powdered sugar, sifted
- 1 teaspoon vanilla extract
- Pinch of salt
- Mini chocolate chips (for eyes)
- Black decorating gel (optional, for mouths)
Instructions
- Preheat oven to 350°F (175°C). Line a 12-cup muffin tin with paper liners.
- In a medium bowl, whisk together flour, black cocoa powder, baking soda, and salt until no lumps remain.
- In a large bowl, whisk together sugar and oil until well combined. Add eggs one at a time, whisking after each addition. Stir in vanilla extract.
- Add about one-third of the dry ingredients to the wet mixture and stir gently. Pour in half the buttermilk and stir. Repeat with another third of dry ingredients, remaining buttermilk, and final third of dry ingredients. Stir until just combined (a few streaks of flour are okay).
- Stir in white vinegar. The batter will lighten slightly and become bubbly.
- Divide batter evenly among the 12 liners, filling each about two-thirds full.
- Bake for 18-22 minutes, or until a toothpick inserted in the center comes out with a few moist crumbs. Cool in pan for 5 minutes, then transfer to a wire rack to cool completely.
- While cupcakes cool, beat softened cream cheese and butter together until smooth and creamy (about 2 minutes). Add vanilla and salt, then gradually beat in powdered sugar, one cup at a time, until light and fluffy. If too soft, refrigerate for 15 minutes.
- Transfer frosting to a piping bag fitted with a large round tip. Starting at the outer edge of each cupcake, pipe a spiral of frosting working inward and slightly upward to create a dome. Finish with a small peak at the top.
- Gently press two mini chocolate chips into the frosting for eyes. Optionally add tiny mouths with black decorating gel.
Notes
Room temperature ingredients are crucial for best results. Don’t overmix the batter to avoid tough cupcakes. The vinegar helps maintain the deep black color. If frosting is too soft, chill for 15 minutes before piping. First ghost may look imperfect—that’s part of the charm. Store in refrigerator for up to 4 days; let sit at room temperature 20 minutes before serving. Unfrosted cupcakes can be frozen for up to 3 months.
Nutrition
- Serving Size: 1 cupcake
- Calories: 380
- Sugar: 32
- Sodium: 280
- Fat: 22
- Saturated Fat: 10
- Carbohydrates: 45
- Fiber: 2
- Protein: 5
Keywords: Halloween cupcakes, black velvet cupcakes, ghost cupcakes, cream cheese frosting, Halloween dessert, spooky treats, black cocoa cupcakes


