Love this? Save it for later!
Share the inspiration with your friends
It was 11:47 PM on a random Tuesday, and I had a desperate craving for something warm and chocolatey. But here’s the thing—I didn’t have a single packet of hot cocoa mix in the house, and the idea of putting on real pants to go to the store? Not happening. What I did have was a half-full bag of cocoa powder, some sugar that was getting clumpy, and a bag of mini marshmallows that had been sitting in the pantry since last summer’s camping trip. And then the idea hit me, probably because it was late and my brain was making weird connections: why not make my own mix? Better yet, why not make it in a jar with marshmallow dust mixed right in?
Honestly, it started as a “let me just see if this works” experiment. I dumped cocoa powder and sugar into a bowl, crushed some marshmallows into fine powder with my hands (which got sticky, let me tell you), and stirred it all together. The first cup I made tasted like a happy accident—creamy, not too sweet, with little marshmallow bits floating on top. I mean, I was standing in my kitchen at midnight in fuzzy socks, drinking something I’d just invented, and it felt like I’d discovered a secret. By the third test cup, I knew this wasn’t just a late-night whim. It was something worth sharing.
That’s how these Quick DIY Hot Cocoa Mix Jars with Marshmallow Dust were born. They’re perfect for busy people who want something homemade without the fuss, and they make amazing gifts for friends who deserve a little warmth. Maybe you’ve been there—staring into your pantry, wishing for hot chocolate but finding nothing ready-made. This recipe solves that problem forever. You mix it once, store it in a jar, and you’re always ten minutes away from the coziest cup of cocoa you’ve ever had. No judgment if you make your first batch at midnight, by the way. That’s how all the best recipes start.
Why You’ll Love This Recipe
Let me tell you why this homemade hot cocoa mix is about to become your new best friend. I’ve tested this recipe about a dozen times, adjusting the ratios and trying different methods, and I can say with confidence—this is the one. Here’s what makes it special:
- Quick & Easy: This comes together in under 10 minutes. Seriously, you’ll spend more time finding a pretty jar than you will actually making the mix. Perfect for those nights when you need cocoa right now.
- Simple Ingredients: You probably have everything in your kitchen already. Cocoa powder, sugar, salt, and marshmallows. That’s it. No fancy grocery store trips required.
- Perfect for Gifting: These jars make the most thoughtful homemade gifts for holidays, teacher appreciation, or just because. Tie a ribbon around the jar and you’ve got a present that shows real effort.
- Crowd-Pleaser: Kids absolutely love the marshmallow dust, and adults appreciate that it’s not overly sweet. Everyone wins.
- Unbelievably Delicious: The marshmallow dust melts into the cocoa, creating this silky texture that regular mixes just can’t match. It’s next-level comfort in a mug.
What makes this recipe different from the store-bought packets? It’s the marshmallow dust, honestly. Most homemade mixes skip this step, but blending crushed marshmallows into the dry ingredients creates a creamier, richer hot chocolate that feels like a hug in a cup. Plus, you control the sweetness and quality of the ingredients. No weird preservatives or artificial flavors here.
This recipe isn’t just good—it’s the kind that makes you close your eyes after the first sip. It’s comfort food at its finest, made faster and easier than you’d think possible. Perfect for impressing guests without stress, or turning a regular Tuesday night into something memorable.
What Ingredients You Will Need
This recipe uses simple, everyday ingredients to deliver bold chocolate flavor and satisfying creaminess. Most of these are pantry staples, so you can whip up a batch anytime the craving hits.
- Unsweetened cocoa powder (1 cup / 120g) — I prefer Ghirardelli or Hershey’s Special Dark for a richer chocolate flavor. Dutch-process cocoa works beautifully here too, giving a smoother, less acidic taste.
- Granulated sugar (1 ½ cups / 300g) — Regular white sugar works perfectly. You can reduce it to 1 cup if you prefer a less sweet cocoa, but this ratio hits that classic hot chocolate sweetness.
- Powdered milk (1 cup / 120g) — This is the secret to creamy cocoa without needing fresh milk. If you’re dairy-free, use powdered coconut milk or powdered oat milk instead.
- Mini marshmallows (2 cups / about 100g) — You’ll crush these into a fine dust. Jet-Puffed works great, but any brand of mini marshmallows will do. Don’t use jumbo marshmallows—they’re harder to crush evenly.
- Salt (½ teaspoon) — Just a pinch enhances the chocolate flavor and balances the sweetness. Don’t skip it!
- Optional: Vanilla powder (1 teaspoon) — If you have it, this adds a lovely warmth. You can also add a drop of vanilla extract when you prepare each cup.
- Optional: Cinnamon or chili powder (½ teaspoon) — For a spicy twist, add a pinch of cinnamon or a tiny bit of chili powder to the mix.
Ingredient Selection Tips: Look for cocoa powder that smells rich and chocolatey—that’s a sign of freshness. For the marshmallows, the fresher they are, the easier they’ll crush. Stale marshmallows get tough and won’t break down as nicely. If you’re using powdered milk, check the expiration date; old powdered milk can taste flat.
Substitution Guidance: Need a vegan version? Use dairy-free powdered milk and vegan marshmallows (Dandies brand works great). Want a lower-sugar option? Swap half the sugar with monk fruit sweetener or coconut sugar. The texture will change slightly, but the flavor will still be delicious. For a gluten-free option, this recipe is naturally gluten-free as long as your marshmallows are certified gluten-free.
Equipment Needed
You don’t need fancy equipment for this recipe, which is honestly my favorite part. Here’s what you’ll need:
- Mason jars or airtight containers (quart-sized, about 32 oz) — I love using wide-mouth pint jars for gifting. They’re the perfect size for one batch of mix. You can also use any clean glass jar with a tight-fitting lid.
- Mixing bowl — A medium-sized bowl works fine. Nothing fancy needed.
- Whisk — For combining the dry ingredients evenly. A fork works in a pinch, but a whisk does a better job.
- Blender or food processor — This is for crushing the marshmallows into dust. A high-speed blender works best, but a food processor will do the job too. If you don’t have either, you can crush them by hand in a zip-top bag using a rolling pin—it just takes a little more elbow grease.
- Measuring cups and spoons — Standard set for accurate measurements.
- Funnel (optional but helpful) — Makes pouring the mix into jars much less messy. I learned this the hard way after cleaning cocoa powder off my counter three times.
- Ribbon or twine (for gifting) — Totally optional, but it makes the jars look adorable.
Budget-Friendly Tip: You don’t need to buy new jars. Save pasta sauce jars or pickle jars, wash them thoroughly, and remove the labels. They work just as well and add a rustic, homemade look.
Preparation Method
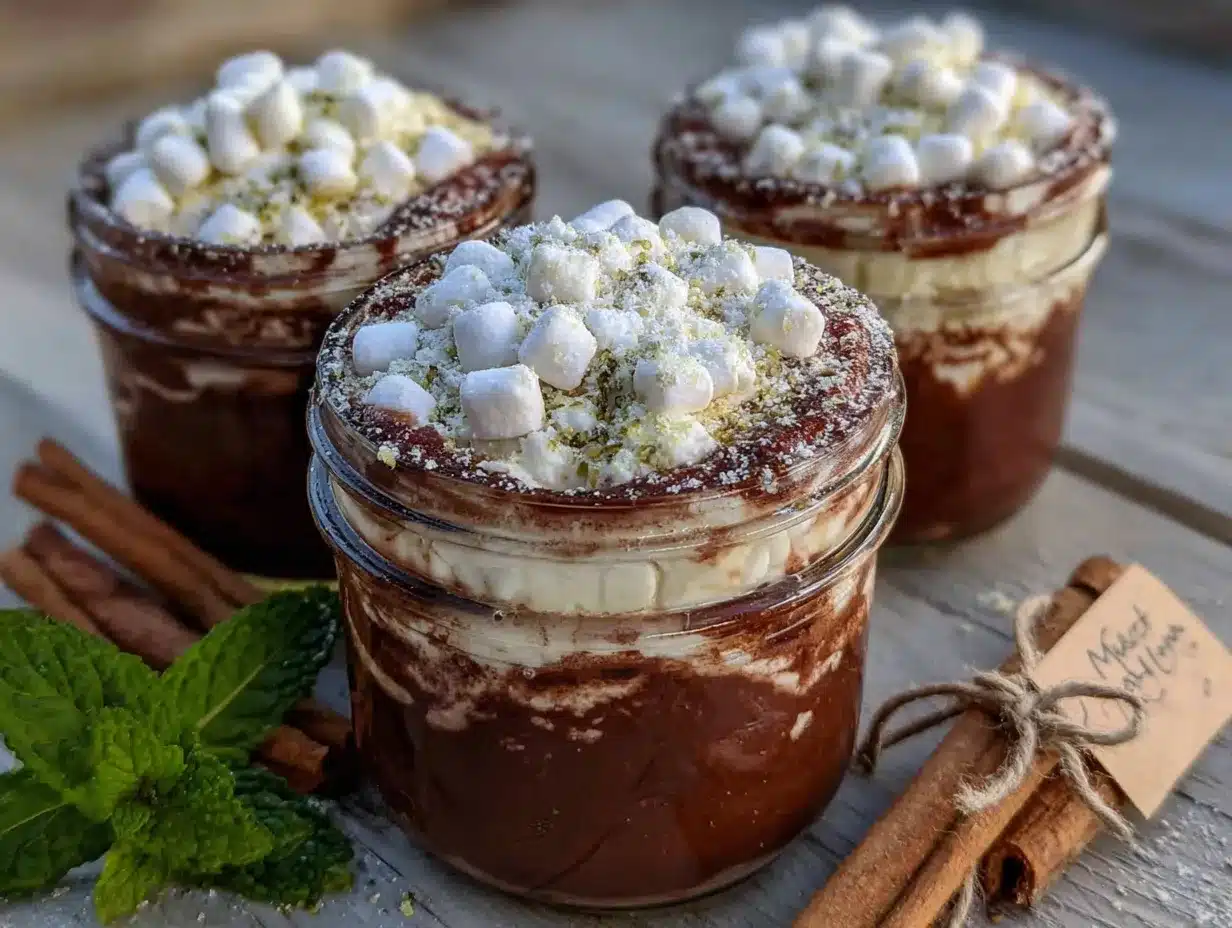
Okay, let’s make this happen. Follow these steps, and you’ll have your hot cocoa mix ready in about 10 minutes flat.
- Crush the marshmallows into dust. Add 2 cups of mini marshmallows to your blender or food processor. Pulse for about 30 seconds, until the marshmallows turn into a fine powder. You might see some small bits remaining—that’s totally fine. In fact, those little pieces will melt into cute marshmallow islands on top of your cocoa. If you’re crushing by hand, put the marshmallows in a zip-top bag, squeeze out the air, and roll over them with a rolling pin until they’re crushed. Set the marshmallow dust aside.
- Combine the dry ingredients. In your mixing bowl, add 1 cup of unsweetened cocoa powder, 1 ½ cups of granulated sugar, 1 cup of powdered milk, and ½ teaspoon of salt. Whisk everything together until it’s evenly combined. Take your time here—you want the cocoa powder to be fully distributed so every cup tastes consistent. I usually whisk for about a minute, scraping the bottom of the bowl to make sure nothing’s hiding down there.
- Add the marshmallow dust. Pour the crushed marshmallows into the bowl with the cocoa mixture. Whisk again until the marshmallow dust is evenly incorporated. The mixture will look a little fluffy and smell amazing—like chocolate and sugar and childhood all at once.
- Transfer to jars. Use your funnel (or a steady hand) to pour the mix into your clean jars. Leave about an inch of space at the top so you can shake the jar before using it. If you’re making multiple jars, divide the mix evenly. This recipe fills about two pint-sized jars or one quart-sized jar.
- Seal and label. Screw the lids on tightly. If you’re gifting these, attach a tag with instructions: “Add 3 tablespoons of mix to 8 oz of hot milk or water. Stir well and enjoy!” You can also add a note about the marshmallow dust settling—just give the jar a good shake before scooping.
- Prepare a test cup (optional but highly recommended). Heat 8 oz of milk (or water) until steaming—don’t let it boil. Add 3 tablespoons of your mix and stir until fully dissolved. Taste it and adjust if needed. Want it sweeter? Add more sugar next time. Prefer a stronger chocolate flavor? Increase the cocoa powder. This is your mix, after all.
Sensory Cue: When you first add hot milk to the mix, you’ll see the marshmallow dust bloom and dissolve into tiny white specks that float to the surface. The smell is pure comfort—warm chocolate with a hint of vanilla sweetness. The finished cocoa should be smooth and creamy, not grainy. If it feels gritty, your marshmallows weren’t crushed finely enough, but don’t worry—it’ll still taste amazing.
Troubleshooting Tip: If your cocoa mix clumps together in the jar, it’s probably because the marshmallows are absorbing moisture. Store the jars in a cool, dry place, and always use a dry spoon when scooping. If it does clump, just break it up with a fork before using.
Cooking Tips & Techniques
After making this recipe more times than I care to count, I’ve learned a few things that make a real difference. Here are my best tips:
Crush marshmallows in batches. If you’re making a big batch, work in smaller amounts. Overcrowding the blender means uneven crushing, and nobody wants big chunks of marshmallow in their cocoa powder. I do about 1 cup at a time in my blender, and it works perfectly.
Don’t skip the salt. I know it sounds weird to add salt to something sweet, but trust me on this. Salt enhances the chocolate flavor and keeps the sweetness from being overwhelming. Without it, the cocoa tastes flat. It’s a tiny ingredient with a big job.
Use hot milk, not water. Water works in a pinch, but hot milk makes the cocoa infinitely creamier and richer. Whole milk gives the best texture, but oat milk or almond milk work well too. Just avoid skim milk—it can make the cocoa taste thin.
Shake before each use. The marshmallow dust tends to settle at the bottom of the jar, especially after a few days. Give the jar a good shake before you scoop out your mix. This ensures every cup has the perfect ratio of cocoa to marshmallow.
My biggest failure: The first time I made this, I didn’t crush the marshmallows finely enough. I just threw them in the blender for a few seconds and called it done. When I added the mix to hot milk, I ended up with floating marshmallow blobs instead of smooth, creamy cocoa. It was still tasty, but not what I was going for. Now I pulse the marshmallows for a full 30 seconds, and the texture is perfect every time.
Timing strategy: Make this mix when you have 10 minutes of downtime—while waiting for water to boil, during a commercial break, or as a quick weekend project. It’s fast enough that you can do it on a whim, but intentional enough to feel like a small accomplishment.
Variations & Adaptations
One of the best things about this recipe is how easy it is to customize. Here are some variations I’ve tried and loved:
Spicy Mexican Hot Cocoa: Add 1 teaspoon of cinnamon and a pinch of cayenne pepper to the dry mix. The warmth of the spices pairs beautifully with the rich chocolate. I made this for a winter gathering, and it was the first thing to disappear from the table.
Peppermint Cocoa: Crush a few peppermint candies along with the marshmallows, or add ½ teaspoon of peppermint extract to the mix. This version is perfect for the holidays and makes a great gift jar with a candy cane tied to the side.
Vegan Version: Use dairy-free powdered milk and vegan marshmallows. I’ve tested this with coconut milk powder, and it’s surprisingly creamy. The coconut flavor is subtle and actually complements the chocolate nicely.
Dark Chocolate Lovers: Swap half the regular cocoa powder for Dutch-process cocoa. The result is a deeper, more intense chocolate flavor that’s less sweet and more sophisticated. This is my personal favorite for late-night sipping.
White Hot Cocoa: Replace the cocoa powder with an equal amount of white chocolate powder or finely chopped white chocolate. Skip the marshmallow dust (or keep it for texture) and add a splash of vanilla. It’s a completely different drink, but just as comforting.
Low-Sugar Option: Replace the granulated sugar with a monk fruit sweetener or allulose. The sweetness level will be slightly different, but the cocoa will still be delicious. I’ve made this for friends watching their sugar intake, and they didn’t miss a thing.
Serving & Storage Suggestions
Serving: For the best experience, serve your hot cocoa steaming hot in a cozy mug. Top with extra mini marshmallows, a drizzle of chocolate syrup, or a dollop of whipped cream. A cinnamon stick makes a lovely stirrer and adds a hint of spice. This cocoa is perfect for sipping by the fireplace, wrapping up after a cold walk, or sharing with friends during a movie night.
Temperature: Heat your milk or water until it’s steaming but not boiling—around 160°F to 170°F. Boiling milk can scorch it and ruin the flavor. If you’re using a microwave, heat in 30-second intervals and stir between each one.
Complementary Pairings: Serve with buttery shortbread cookies, a slice of banana bread, or a warm chocolate chip cookie. For a grown-up twist, add a shot of peppermint schnapps or bourbon to your cocoa. It’s also wonderful alongside a bowl of popcorn for a sweet-and-salty combo.
Storage: Store your hot cocoa mix in an airtight container at room temperature for up to 3 months. Keep it in a cool, dark place like a pantry or cupboard. Avoid storing it near the stove or in direct sunlight, as heat and moisture can cause clumping. If you notice the mix starting to clump, just break it up with a fork—it’s still perfectly fine to use.
Freezer: You can actually freeze the mix! Place it in a freezer-safe jar or bag, and it will keep for up to 6 months. Thaw at room temperature for about an hour before using, and give it a good shake to redistribute the ingredients.
Flavor Development: The flavors actually meld together over time. After about a week, the cocoa tastes even richer as the marshmallow dust fully integrates with the other ingredients. So if you can wait a few days before opening your jar, you’ll be rewarded with an even better cup of cocoa.
Nutritional Information & Benefits
Here’s the estimated nutritional breakdown for one serving (3 tablespoons of mix prepared with 8 oz of whole milk):
| Nutrient | Amount |
|---|---|
| Calories | 220 |
| Total Fat | 6g |
| Saturated Fat | 3.5g |
| Cholesterol | 15mg |
| Sodium | 180mg |
| Total Carbohydrates | 38g |
| Dietary Fiber | 2g |
| Sugars | 32g |
| Protein | 6g |
| Calcium | 150mg |
| Iron | 1mg |
Health Benefits: Cocoa powder is rich in antioxidants called flavonoids, which can help reduce inflammation and support heart health. The powdered milk adds calcium and vitamin D, making this a bone-friendly treat. And let’s be honest—sometimes the mental health benefits of a warm, comforting drink are just as important as the physical ones.
Dietary Considerations: This recipe is vegetarian and can be made vegan with simple substitutions. It contains dairy and may contain traces of gluten depending on your marshmallow brand. For a lower-calorie option, prepare with water or unsweetened almond milk and reduce the sugar to 1 cup.
Personal Note: I don’t believe in demonizing treats. Life is short, and a cup of hot cocoa made with love is good for the soul. Enjoy it mindfully, savor every sip, and don’t stress about the numbers.
Conclusion
These Quick DIY Hot Cocoa Mix Jars with Marshmallow Dust are proof that the best things don’t have to be complicated. With just a few pantry staples and ten minutes of your time, you can create something that brings warmth and joy to your kitchen—and to anyone lucky enough to receive a jar as a gift.
I love this recipe because it’s forgiving, customizable, and endlessly satisfying. Whether you’re making it for yourself on a quiet night or gifting it to friends during the holidays, it never fails to deliver that cozy, chocolatey comfort we all crave. And honestly, knowing exactly what’s in your mix? That’s a win in my book.
So go ahead—raid your pantry, crush some marshmallows, and fill a jar with this magic. And when you take that first sip, I’d love to hear about it. Share your creations in the comments below, tag me in your photos, or tell me about your favorite variation. Did you add cinnamon? Peppermint? A secret ingredient I haven’t thought of? Let’s keep this conversation going, because good cocoa is meant to be shared.
Now go make some cocoa. You deserve it.
Frequently Asked Questions
Can I use hot water instead of milk?
Absolutely! Hot water works perfectly fine, especially if you’re watching calories or don’t have milk on hand. The cocoa will be slightly less creamy, but still delicious. For a richer taste with water, add a pat of butter or a splash of cream to your cup.
How long does the mix stay fresh?
Stored in an airtight container in a cool, dry place, the mix stays fresh for up to 3 months. If you freeze it, it can last up to 6 months. Just make sure to give it a good shake before each use, as the ingredients can settle over time.
Can I make this without a blender?
Yes! If you don’t have a blender or food processor, place the marshmallows in a zip-top bag and crush them with a rolling pin or the bottom of a heavy pan. It takes a little more effort, but it works. You can also skip the marshmallow dust entirely and just add whole mini marshmallows to your cocoa when you serve it.
Why did my cocoa mix clump together?
Clumping usually happens when moisture gets into the jar. Always use a dry spoon when scooping, and make sure your jars are completely dry before filling them. If your mix does clump, just break it up with a fork or whisk—it’s still perfectly safe to use.
Can I double this recipe?
Definitely! This recipe scales beautifully. Just double or triple all the ingredients and mix in a larger bowl. It’s perfect for making big batches for holiday gifts, party favors, or stocking up your own pantry. Just make sure you have enough jars to store it all.
Pin This Recipe!
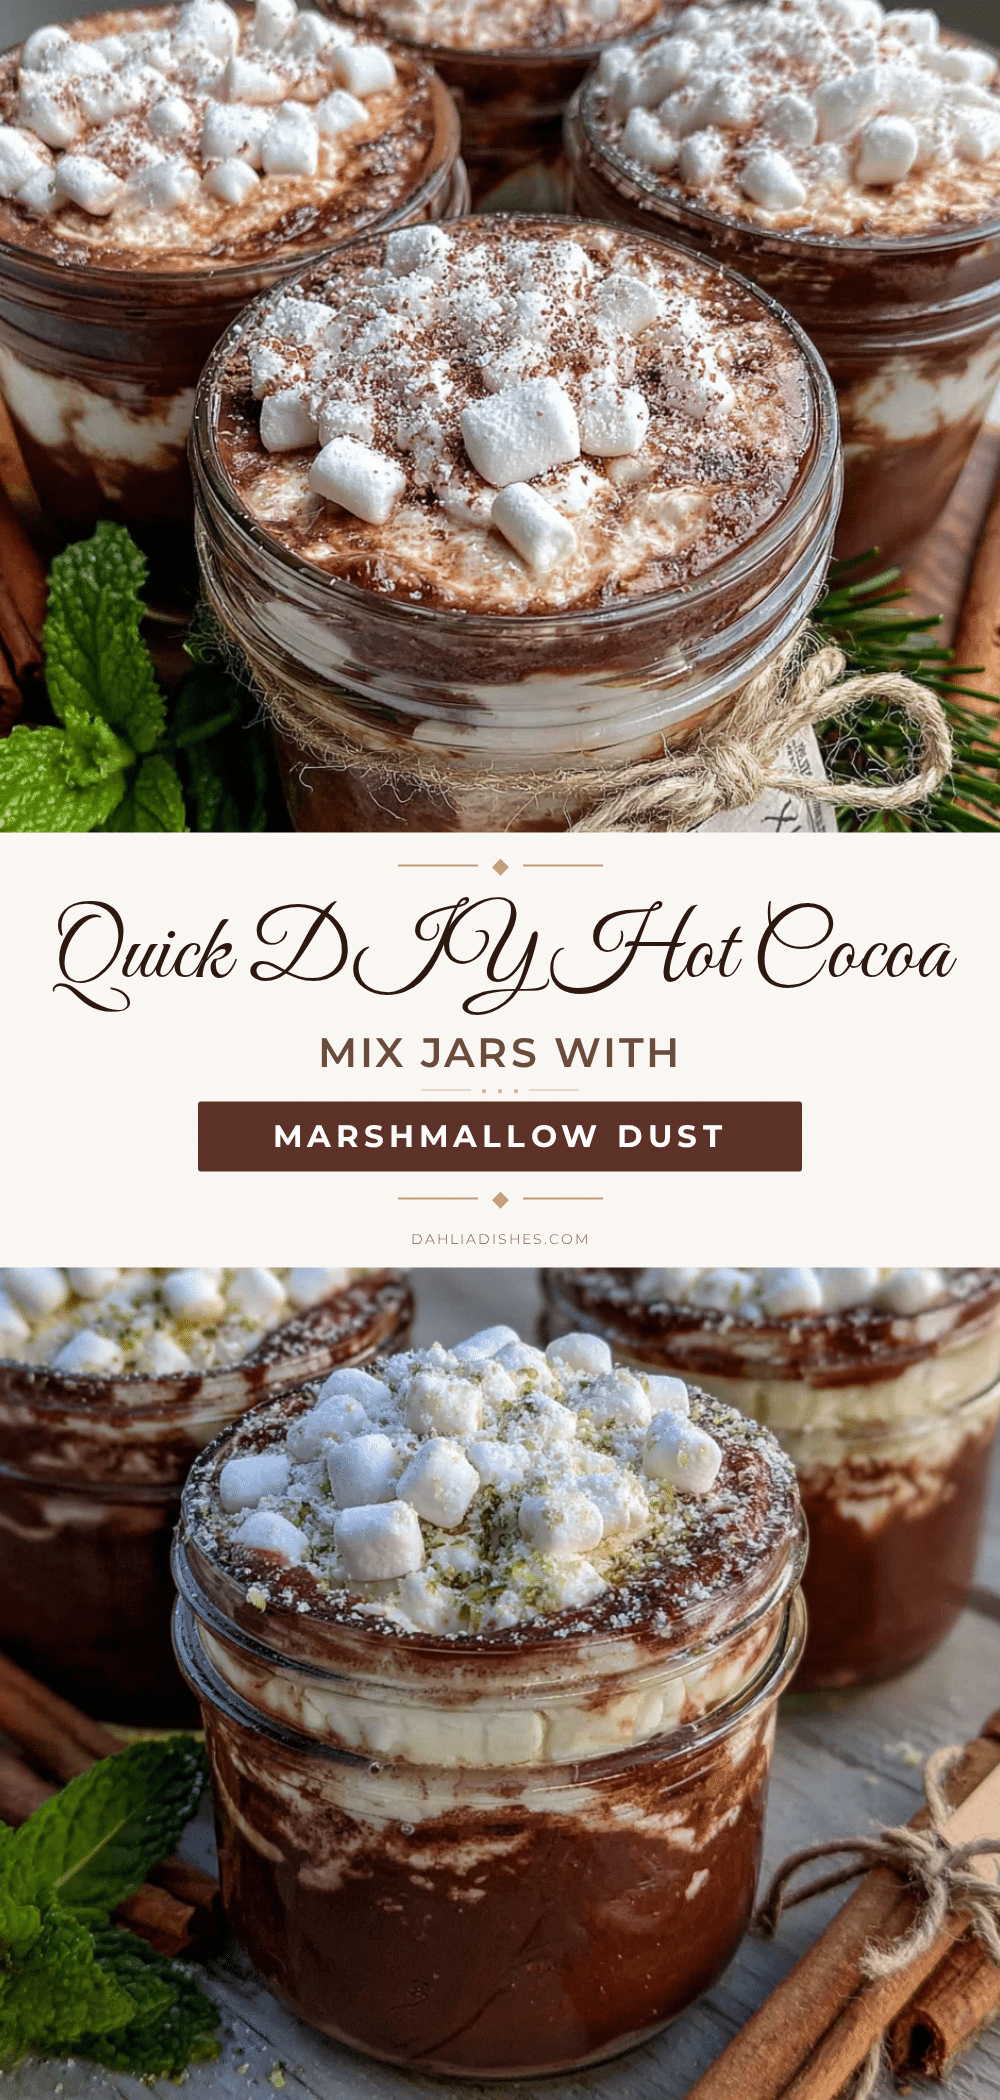
Quick DIY Hot Cocoa Mix Jars with Marshmallow Dust
Make your own hot cocoa mix in under 10 minutes with simple pantry ingredients. This recipe features crushed marshmallows blended into the dry mix for a creamy, rich hot chocolate that’s perfect for cozy nights or homemade gifts.
- Prep Time: 10 minutes
- Cook Time: 0 minutes
- Total Time: 10 minutes
- Yield: 2 pint jars (about 16 servings) 1x
- Category: Beverage
- Cuisine: American
Ingredients
- 1 cup (120g) unsweetened cocoa powder
- 1 ½ cups (300g) granulated sugar
- 1 cup (120g) powdered milk
- 2 cups (about 100g) mini marshmallows
- ½ teaspoon salt
- 1 teaspoon vanilla powder (optional)
- ½ teaspoon cinnamon or chili powder (optional)
Instructions
- Crush the marshmallows into dust: Add 2 cups of mini marshmallows to a blender or food processor. Pulse for about 30 seconds until they turn into a fine powder. Set aside.
- Combine the dry ingredients: In a mixing bowl, add 1 cup unsweetened cocoa powder, 1 ½ cups granulated sugar, 1 cup powdered milk, and ½ teaspoon salt. Whisk until evenly combined.
- Add the marshmallow dust: Pour the crushed marshmallows into the bowl with the cocoa mixture. Whisk again until the marshmallow dust is evenly incorporated.
- Transfer to jars: Use a funnel to pour the mix into clean jars, leaving about an inch of space at the top. This recipe fills about two pint-sized jars or one quart-sized jar.
- Seal and label: Screw the lids on tightly. If gifting, attach a tag with instructions: ‘Add 3 tablespoons of mix to 8 oz of hot milk or water. Stir well and enjoy!’
- Prepare a test cup (optional): Heat 8 oz of milk (or water) until steaming. Add 3 tablespoons of mix and stir until fully dissolved. Adjust sweetness or cocoa strength to taste.
Notes
Store in an airtight container at room temperature for up to 3 months. Shake jar before each use as marshmallow dust settles. For a vegan version, use dairy-free powdered milk and vegan marshmallows. For a lower-sugar option, replace half the sugar with monk fruit sweetener or coconut sugar.
Nutrition
- Serving Size: 3 tablespoons of mix
- Calories: 220
- Sugar: 32
- Sodium: 180
- Fat: 6
- Saturated Fat: 3.5
- Carbohydrates: 38
- Fiber: 2
- Protein: 6
Keywords: hot cocoa mix, DIY hot chocolate, marshmallow dust, homemade gift, easy hot cocoa, quick recipe, pantry staple


