Love this? Save it for later!
Share the inspiration with your friends
My neighbor, Mrs. Kowalski, watched me fumble with a piping bag one rainy October afternoon. I was trying to make elegant ghost cookies for a party, and honestly, I was failing miserably. She didn’t say anything at first, just peered over the fence that separates our backyards with a knowing smile. Then, she disappeared into her house and came back holding a worn, flour-dusted index card. “Forget the fancy ghosts,” she said, handing it over. “Make these. They’re more fun.” The card simply read “Witch Fingers” in her spidery handwriting. I laughed out loud. It was the most perfectly named recipe I’d ever seen. That was three years ago, and I haven’t made a single Halloween treat without a batch of these spooky witch finger cookies since. They are the star of every party, the thing people talk about, and the one cookie that makes even adults giggle nervously before taking a bite. I mean, who can resist a cookie that looks like it just crawled out of a graveyard? Maybe you’ve been there, scrolling for that one show-stopping Halloween recipe that isn’t just another pumpkin spice thing. Let me tell you, these are it. They are the reason I look forward to fall baking every single year.
Why You’ll Love This Recipe
Let’s be real for a second. Halloween baking can be a lot of pressure. You want something that looks incredible, tastes amazing, and doesn’t require a culinary degree. These witch finger cookies deliver on all fronts. I have tested this recipe more times than I care to admit, tweaking the butter ratio and the chilling time until it was absolutely perfect. The result is a cookie that is both a visual masterpiece and a buttery, melt-in-your-mouth delight.
- Unbelievably Realistic: The almond nail and knuckle wrinkles make these look genuinely spooky. People will do a double-take, I promise.
- Simple Ingredients: You probably have most of these in your pantry right now. No exotic extracts or hard-to-find flours here.
- Perfect for Halloween Parties: These are the undisputed champions of the dessert table. They start conversations and get everyone in the spooky spirit.
- Kid-Friendly Fun: This is a fantastic recipe to make with kids. They love shaping the fingers and pressing in the almond “nails.”
- Surprisingly Delicious: Beyond the looks, these are classic shortbread cookies. They are buttery, slightly sweet, and have the perfect crumbly texture.
What makes this recipe different from the rest is the chilling technique. I learned the hard way that rushing this step leads to flat, sad fingers. Taking the time to properly chill the dough ensures your cookies hold their shape and keep those creepy knuckle wrinkles. It’s the little detail that makes all the difference. This isn’t just another Halloween cookie; it’s the one that makes you close your eyes after the first bite, surprised by how something so spooky can taste so comforting. It’s the perfect blend of theatrical fun and genuine baking satisfaction.
What Ingredients You Will Need
This recipe uses simple, pantry-friendly ingredients to create a cookie that is both visually striking and delicious. The magic is in the technique, not a long list of exotic items. Here is everything you will need to bring these spooky fingers to life.
- For the Cookie Dough:
- 1 cup (2 sticks) unsalted butter, softened: This is the backbone of our shortbread. Make sure it is truly at room temperature so it creams properly with the sugar. I prefer using a good quality butter like Kerrygold for a richer flavor.
- 1 cup powdered sugar: Powdered sugar gives the cookies a tender, melt-in-your-mouth texture that granulated sugar just can’t achieve.
- 1 large egg: This helps bind the dough together. Make sure it is also at room temperature for the best emulsion.
- 1 teaspoon pure vanilla extract: Adds a warm, sweet flavor that balances the buttery richness.
- 1/2 teaspoon almond extract: This is the secret weapon. It gives the cookies a subtle, nutty flavor that perfectly complements the almond “nails.” Don’t skip it!
- 2 3/4 cups all-purpose flour: Spoon and level your flour for the most accurate measurement. Scooping directly from the bag can pack in too much flour, making the cookies dry.
- 1 teaspoon baking powder: This gives the cookies just a tiny bit of lift, preventing them from being too dense.
- 1/2 teaspoon salt: Don’t forget the salt! It enhances all the other flavors and prevents the cookies from tasting flat.
- For the “Nails” and Decorating:
- 1/2 cup whole almonds (blanched or skin-on): Whole almonds are the perfect shape for witch fingernails. I sometimes use slivered almonds in a pinch, but whole almonds look much more realistic and dramatic.
- Red food coloring (gel or liquid): A small amount goes a long way. You only need a drop or two to create a bloody effect at the “cuticle” base of the almond.
- Optional for extra spookiness: A little bit of green food coloring to tint the dough a pale, sickly green. This is totally optional, but it adds to the “witchy” vibe!
Equipment Needed
You don’t need any fancy gadgets for these cookies, which is part of their charm. Here is the basic equipment you will want to have on hand.
- Electric Mixer (Stand or Handheld): Creaming the butter and sugar is much easier with a mixer. You can do it by hand with a wooden spoon, but your arm will get a serious workout.
- Mixing Bowls: You will need a large bowl for the dough and a small bowl for the red food coloring wash.
- Baking Sheets: Line them with parchment paper or a silicone baking mat for easy cleanup. I prefer parchment paper as it helps the cookies brown evenly on the bottom.
- Sharp Knife or Bench Scraper: You will use this to score the knuckle lines into the dough. A dull knife will just drag the dough, so make sure it’s sharp.
- Small Pastry Brush: This is for brushing the red food coloring onto the almond “nails.” A clean, small paintbrush from a craft store works perfectly too!
- Cooling Rack: Essential for letting the cookies cool completely so the texture sets properly.
A good quality baking sheet is a worthwhile investment. I use a light-colored, heavy-gauge sheet that prevents the bottoms of the cookies from burning before the rest is baked through. Dark sheets can cause the cookies to brown too quickly.
Preparation Method
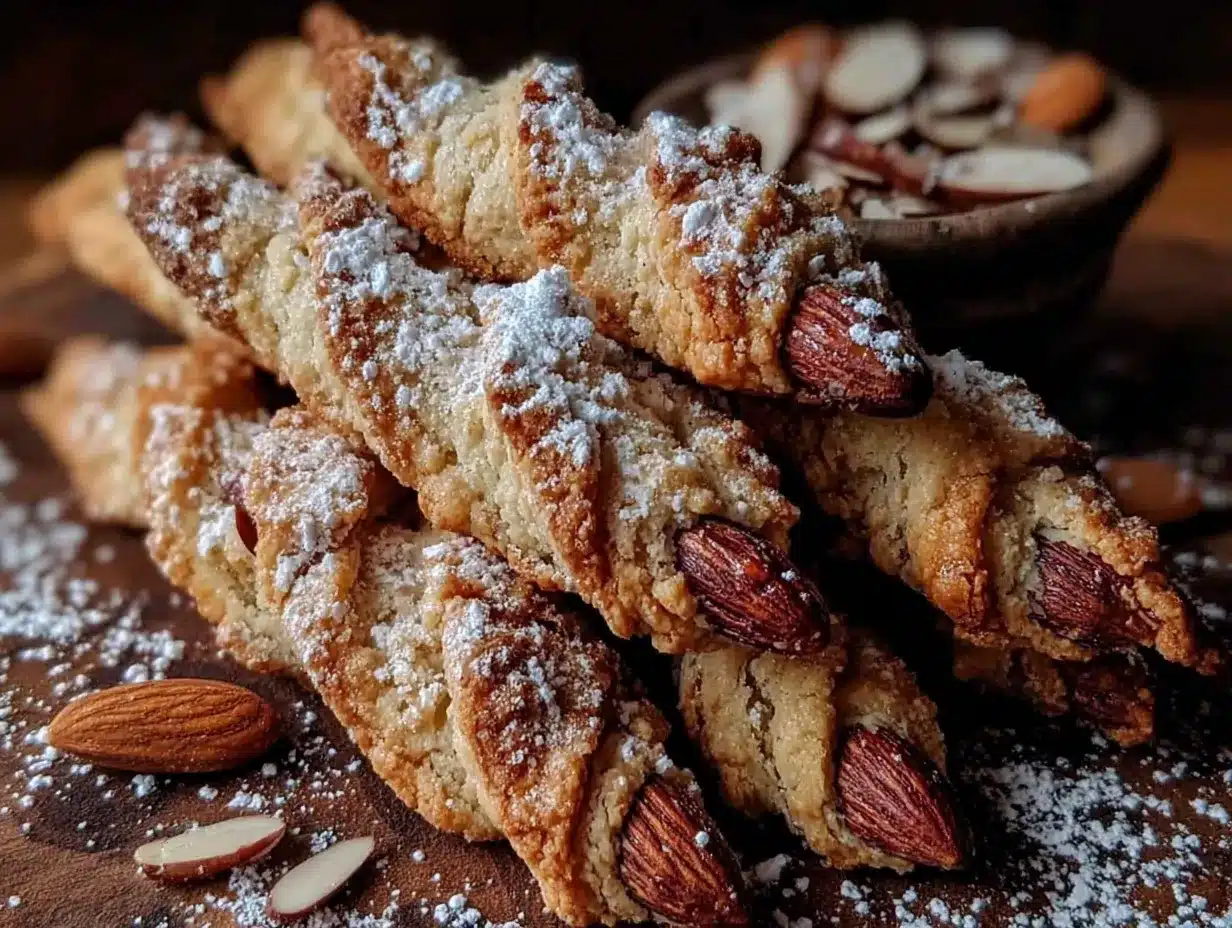
Follow these steps carefully, and you will have a batch of the most delightfully disturbing cookies on the block. Patience with the chilling steps is the key to success here.
- Cream the Butter and Sugar: In a large mixing bowl, beat the softened butter and powdered sugar together on medium speed until light, fluffy, and pale in color. This should take about 3-4 minutes. Scrape down the sides of the bowl as needed. The mixture should look almost like a thick frosting.
- Add the Wet Ingredients: Beat in the egg, vanilla extract, and almond extract until everything is fully combined and smooth. The mixture might look slightly broken at this point, but don’t worry, the flour will bring it all together.
- Combine the Dry Ingredients: In a separate bowl, whisk together the all-purpose flour, baking powder, and salt. This ensures the baking powder and salt are evenly distributed throughout the flour.
- Form the Dough: Gradually add the dry ingredients to the wet mixture, mixing on low speed. Mix until just combined and a soft dough forms. Do not overmix! Overworking the gluten will make the cookies tough. If you want a spooky green tint, add a few drops of green food coloring at this stage and mix until the color is even.
- Chill the Dough (Crucial Step!): Divide the dough in half, flatten each half into a disc, wrap tightly in plastic wrap, and refrigerate for at least 2 hours, or up to overnight. Chilling the dough is non-negotiable. It solidifies the butter, which prevents the cookies from spreading too much in the oven and losing their finger shape.
- Preheat and Prep: When you are ready to bake, preheat your oven to 325°F (165°C). Line your baking sheets with parchment paper. Remove one disc of dough from the fridge at a time, keeping the other cold.
- Shape the Fingers: Take a small piece of dough, about the size of a walnut, and roll it into a cylinder shape on a lightly floured surface. Then, gently taper one end to make it narrower, like a fingertip. The other end should be slightly thicker, like the base of a finger. Place it on the prepared baking sheet.
- Add the Knuckle Wrinkles: Using the back of a sharp knife or a bench scraper, gently press 2-3 lines across the middle of the “finger” to create knuckle wrinkles. Don’t press all the way through the dough; just create a deep indentation.
- Attach the Almond Nail: Take a whole almond and press it firmly into the tapered end of the finger. Make sure it is well-embedded so it doesn’t fall off during baking. Gently press the dough around the base of the almond to secure it.
- Bake the Cookies: Bake for 12-15 minutes, or until the cookies are set and the bottoms are just barely golden. The tops should not be brown. They will look pale, which is exactly what you want for a creepy, undead look.
- Create the “Bloody” Cuticle: While the cookies are still warm from the oven, mix a drop or two of red food coloring with a teaspoon of water. Using your small pastry brush, carefully paint a tiny bit of this red wash right at the base of the almond, where it meets the “finger.” This creates a gruesome, bloody cuticle effect that takes the realism over the top.
- Cool Completely: Let the cookies cool on the baking sheet for 5 minutes before transferring them to a wire rack to cool completely. The cookies will be very fragile when warm, so handle them gently.
Cooking Tips & Techniques
I have made a lot of mistakes with these cookies over the years so you don’t have to. Here are the most important lessons I have learned.
The Dough Must Be Cold. This is the number one rule. If your dough feels soft or sticky at any point during the shaping process, pop it back in the fridge for 15 minutes. Warm dough will spread into flat, blob-like shapes instead of creepy fingers. I once tried to rush this step and ended up with cookies that looked like sad, mutated potatoes. Not the vibe.
Don’t Skip the Almond Extract. It might seem like a small detail, but that hint of almond flavor is what ties the whole cookie together. It makes the “nail” feel like a natural part of the cookie, not just a decoration. It also gives the cookies a wonderfully complex flavor profile that goes beyond a simple shortbread.
Vary the Finger Shapes. For the most realistic (and disturbing) effect, don’t make all your fingers identical. Make some longer and thinner, some shorter and stubbier. Bend a few slightly at the knuckle to look broken or twisted. This variety is what makes them look like a real collection of witch fingers, not just mass-produced cookies.
Work in Batches. Keep the dough you are not actively working with in the refrigerator. Only take out one disc at a time. This prevents the dough from warming up and becoming unmanageable. It makes the whole process much less stressful.
Variations & Adaptations
One of the best things about this base shortbread recipe is how easily it adapts to different spooky themes and dietary needs.
- Gluten-Free Witch Fingers: Substitute the all-purpose flour with a good quality 1-to-1 gluten-free baking flour blend. I have had excellent results with the Cup4Cup brand. Add an extra tablespoon of cold water if the dough feels too dry and crumbly. The chilling time is even more important with gluten-free dough.
- Chocolate-Dipped Fingers: For an extra decadent treat, dip the cooled cookies halfway in melted dark or white chocolate. You can even add a sprinkle of crushed graham crackers or orange sprinkles to the chocolate for a “dirt” or “pumpkin” effect. This turns them from a simple cookie into a truly indulgent dessert.
- Zombie Fingers: Skip the almond nails entirely and press a small piece of dried cranberry or a red M&M into the tip for a bloody, torn-off look. You can also tint the dough a grayish-green color using food coloring for a more undead, zombie-like appearance.
- Spiced Pumpkin Fingers: Add 1/2 cup of pumpkin puree and 1 teaspoon of pumpkin pie spice to the wet ingredients. You will likely need to add an extra 1/4 cup of flour to compensate for the moisture from the pumpkin. These have a softer, cakier texture but a delicious autumnal flavor.
Serving & Storage Suggestions
These cookies are best served at room temperature, which is when their buttery, crumbly texture really shines. For the ultimate Halloween effect, arrange them on a black or dark purple platter, perhaps scattered with a few plastic spiders or fake cobwebs. The contrast of the pale “fingers” against a dark background is visually stunning.
They pair wonderfully with a glass of cold milk, a hot apple cider, or even a spooky cocktail like a Vampire’s Kiss or a Blackberry Bourbon Smash. The simple sweetness of the shortbread is a perfect counterpoint to tart or boozy drinks.
Storage: Store the cooled cookies in an airtight container at room temperature for up to 5 days. Layer them between sheets of parchment paper to prevent them from breaking. Do not refrigerate them, as this can make them dry out faster.
Freezing: You can freeze the unbaked, shaped cookies on a baking sheet until solid, then transfer them to a freezer-safe bag. Bake them directly from frozen, adding 2-3 minutes to the baking time. You can also freeze the baked, cooled cookies for up to 3 months. Thaw them at room temperature before serving.
The flavor of these cookies actually improves slightly after a day or two. The almond and vanilla flavors meld together beautifully, making them even more delicious on day two or three.
Nutritional Information & Benefits
While these are a treat, not a health food, it is helpful to know what is in them. This recipe makes approximately 24-30 cookies, depending on the size of your “fingers.”
Estimated per cookie (based on 24 cookies):
- Calories: 150-180
- Fat: 10g
- Carbohydrates: 16g
- Protein: 2g
- Sugar: 7g
Dietary Considerations: This recipe contains gluten, dairy, eggs, and tree nuts (almonds). For a nut-free version, you can use a cashew or a small piece of dried apricot for the nail, though the look will be different. For a vegan version, you can substitute the butter with a high-quality vegan butter stick, use a flax egg (1 tablespoon flaxseed meal + 3 tablespoons water), and a plant-based milk wash instead of an egg wash.
The almonds themselves are a great source of healthy fats, vitamin E, and magnesium. So while the cookies are a sugary indulgence, at least the “nails” offer a tiny nutritional silver lining.
Conclusion
These spooky witch finger cookies are more than just a Halloween recipe; they are an experience. They are the kind of treat that brings joy, laughter, and a little bit of delightful horror to any gathering. They are proof that baking can be both delicious and incredibly fun. I love making them because they always steal the show, and they remind me of that rainy afternoon with Mrs. Kowalski and her simple, perfect recipe card.
I encourage you to make these your own. Play with the colors, experiment with different “nails,” and don’t be afraid to make them as gruesome or as cute as you like. The most important ingredient is having fun with it. So go ahead, preheat your oven and get ready to create something truly memorable.
I would love to see your creations! Share your photos and tag me, or leave a comment below telling me how your witch fingers turned out. Happy Halloween baking!
Frequently Asked Questions
Can I make the dough ahead of time?
Absolutely! The dough can be made up to 3 days in advance and kept tightly wrapped in the refrigerator. You can also freeze the dough discs for up to 3 months. Just thaw them overnight in the fridge before shaping and baking.
Why did my cookies spread out and lose their shape?
This is almost always because the dough was not chilled enough. Make sure your dough is thoroughly chilled for at least 2 hours. If your kitchen is warm, pop the shaped cookies back in the fridge for 10-15 minutes before they go into the oven.
Can I use a different nut for the nails?
Yes! Slivered almonds are a great option for shorter, more delicate nails. You can also use whole cashews for a wider, more gnarled nail, or even a small pumpkin seed for a more subtle effect. Just make sure whatever you use is pressed firmly into the dough.
How do I get the red coloring to look like blood?
The key is to use a very small amount of a concentrated gel food coloring. Liquid coloring is too watery and will just soak into the cookie. Mix a tiny drop of red gel with a drop of water and paint it on with a fine brush right at the base of the almond while the cookie is still warm.
Can I make these cookies without an electric mixer?
Yes, you can! You will need a good amount of elbow grease. Use a wooden spoon to vigorously cream the softened butter and sugar together until light and fluffy. Then, stir in the remaining wet ingredients before folding in the dry ingredients. It will take a bit longer, but it is totally doable.
Pin This Recipe!
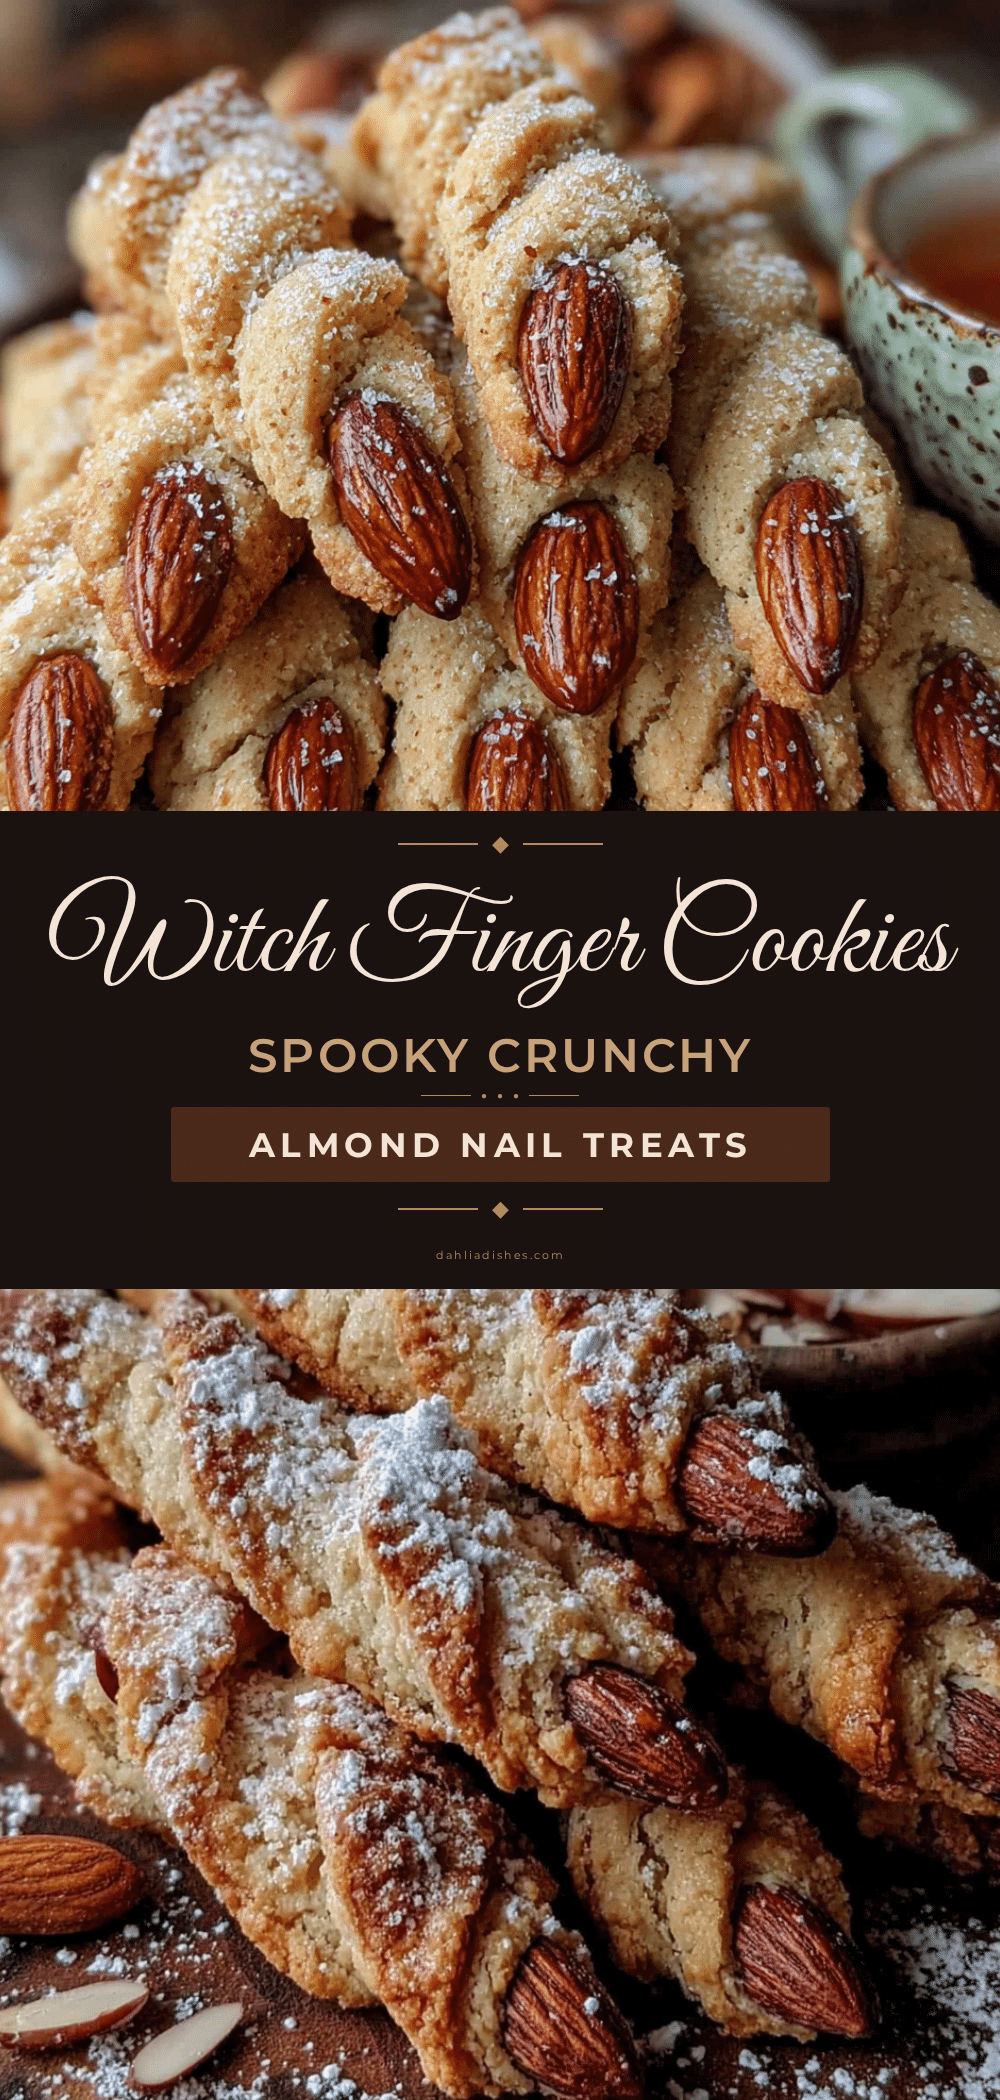
Perfect Spooky Witch Finger Cookies Easy Recipe
These spooky witch finger cookies are a Halloween showstopper. Made with a buttery shortbread dough and almond ‘nails,’ they are deliciously creepy and surprisingly easy to make.
- Prep Time: 30 minutes
- Cook Time: 15 minutes
- Total Time: 2 hours 45 minutes (includes 2 hours chilling)
- Yield: 24-30 cookies 1x
- Category: Dessert
- Cuisine: American
Ingredients
- 1 cup (2 sticks) unsalted butter, softened
- 1 cup powdered sugar
- 1 large egg
- 1 teaspoon pure vanilla extract
- 1/2 teaspoon almond extract
- 2 3/4 cups all-purpose flour
- 1 teaspoon baking powder
- 1/2 teaspoon salt
- 1/2 cup whole almonds (blanched or skin-on)
- Red food coloring (gel or liquid)
- Optional: green food coloring for dough
Instructions
- Cream the butter and powdered sugar together on medium speed until light, fluffy, and pale in color, about 3-4 minutes.
- Beat in the egg, vanilla extract, and almond extract until fully combined and smooth.
- In a separate bowl, whisk together the flour, baking powder, and salt.
- Gradually add the dry ingredients to the wet mixture, mixing on low speed until just combined. Do not overmix. Add green food coloring if desired.
- Divide the dough in half, flatten into discs, wrap in plastic wrap, and refrigerate for at least 2 hours or overnight.
- Preheat oven to 325°F (165°C). Line baking sheets with parchment paper.
- Take a small piece of dough (walnut-sized) and roll into a cylinder. Taper one end to form a fingertip. Place on baking sheet.
- Use the back of a sharp knife to press 2-3 knuckle wrinkles into the middle of each finger.
- Press a whole almond firmly into the tapered end to create the nail.
- Bake for 12-15 minutes until set and bottoms are just barely golden.
- While warm, mix a drop of red food coloring with a teaspoon of water and paint a small amount at the base of the almond to create a ‘bloody’ cuticle.
- Cool on baking sheet for 5 minutes, then transfer to a wire rack to cool completely.
Notes
Chilling the dough is crucial to prevent spreading. Keep dough cold while shaping. Vary finger shapes for a more realistic look. Cookies can be stored in an airtight container at room temperature for up to 5 days. Unbaked shaped cookies can be frozen for up to 3 months.
Nutrition
- Serving Size: 1 cookie
- Calories: 165
- Sugar: 7
- Sodium: 85
- Fat: 10
- Saturated Fat: 5
- Carbohydrates: 16
- Fiber: 1
- Protein: 2
Keywords: Halloween cookies, witch finger cookies, spooky cookies, shortbread cookies, easy Halloween recipe


