Love this? Save it for later!
Share the inspiration with your friends
My neighbor, a woman named Carol who had been baking for fifty years, swore she hated cream cheese frosting. “Too rich,” she’d say, waving a hand dismissively whenever I mentioned it. “Ruins a perfectly good cake.” I believed her, honestly. She made a mean pound cake, the kind with a crackled top that tasted of butter and vanilla and patience. So when I decided to bake a pumpkin bread with a cream cheese swirl last October, I kept it to myself. I wasn’t trying to prove a point. I just had a half-eaten block of cream cheese in the fridge and a can of pumpkin puree that was staring at me every time I opened the door.
The power went out halfway through mixing the batter. Not a dramatic storm or anything—just a transformer blowing a few streets over. I stood there in the sudden silence, the hand mixer still in my hand, the kitchen lit only by the gray afternoon light filtering through the window. I finished mixing by hand, which, let me tell you, is a workout for your wrist. I poured the batter into the loaf pan, dolloped the cream cheese mixture on top, and swirled it with a butter knife like I was painting a small, edible masterpiece.
An hour later, the power came back on, and the smell that hit me when I opened the oven door was something else. It was warm and spicy, with that tangy, almost sour note from the cream cheese cutting through the sweetness. I let it cool on the counter, wrapped it in foil, and forgot about it until the next morning. I cut myself a thick slice for breakfast, and that first bite had this unexpected thing happen—the cream cheese had baked into these little pockets of tangy, almost cheesecake-like richness, perfectly balanced against the moist, spiced pumpkin bread. It wasn’t too rich. It wasn’t ruining anything. It was exactly right.
Later that week, I brought a loaf over to Carol’s house. I didn’t say a word about the cream cheese. I just handed it to her with a smile. She called me two days later, her voice a little sheepish. “I need that recipe,” she said. “And I need to apologize to you.” I just laughed. Maybe you’ve been there—stubborn about a certain ingredient, convinced you know what you don’t like, only to be proven gloriously wrong by a single, perfect bite. This is that recipe. It’s the one that changed Carol’s mind, and honestly, it’s the one I keep coming back to year after year. It’s just that good.
Why You’ll Love This Recipe
This isn’t just another pumpkin bread recipe. It’s the one that has a happy little surprise baked right in the middle. Here’s why it’s become my go-to for fall baking, and why I think you’ll feel the same way.
- Quick & Easy : From start to finish, this comes together in about an hour and fifteen minutes. Most of that is hands-off baking time. It’s perfect for a Sunday afternoon when you want the house to smell amazing without spending all day in the kitchen.
- Simple Ingredients : You probably already have most of this in your pantry. Canned pumpkin, flour, sugar, eggs, butter, and a block of cream cheese. No fancy grocery trips or hard-to-find spices required. I mean it—I’ve made this with the basic pumpkin pie spice blend from the back of the cabinet and it turned out beautifully.
- Perfect for Fall Gatherings : This bread is a crowd-pleaser at Thanksgiving, Friendsgiving, or just a cozy weekend brunch. It travels well, slices neatly, and looks impressive with that beautiful cream cheese swirl on top.
- Crowd-Pleaser : I’ve served this to kids, adults, and even my picky uncle who “doesn’t do pumpkin.” The cream cheese swirl is the secret weapon. It adds a creamy, tangy richness that even non-pumpkin fans find irresistible.
- Unbelievably Delicious : The texture is what gets me every time. It’s incredibly moist without being dense or gummy. The pumpkin keeps it tender, and the cream cheese swirl adds these little pockets of almost-cheesecake goodness. It’s comfort food reimagined—familiar enough to feel nostalgic, but with a twist that makes it feel special.
What makes this recipe different from the rest is the technique. Instead of just swirling the cream cheese on top, I fold a portion of it into the batter itself. This creates a marbled effect throughout the loaf, so every single slice has that tangy cream cheese flavor, not just the top. It’s a small tweak, but it makes a huge difference. Honestly, it’s the kind of bread that makes you close your eyes after the first bite. It’s perfect for impressing guests without any stress, or turning a simple coffee break into something memorable.
What Ingredients You Will Need
This recipe uses simple, wholesome ingredients to deliver that perfect balance of spiced pumpkin and tangy cream cheese. Most of these are pantry staples, which makes this an easy last-minute bake.
For the Pumpkin Bread
- All-purpose flour – 1 ¾ cups (220g). The structure of the bread. I recommend Gold Medal or King Arthur for consistent results.
- Baking soda – 1 teaspoon. Helps the bread rise and gives it a tender crumb.
- Baking powder – ½ teaspoon. Adds a little extra lift.
- Salt – ½ teaspoon. Balances the sweetness and enhances the spices.
- Ground cinnamon – 2 teaspoons. The main spice. I prefer Simply Organic for its warm, bold flavor.
- Ground nutmeg – ½ teaspoon. Adds a subtle, nutty warmth.
- Ground ginger – ¼ teaspoon. A tiny kick of heat that complements the pumpkin.
- Ground cloves – ⅛ teaspoon. A little goes a long way. Adds depth.
- Granulated sugar – 1 cup (200g). For sweetness and moisture.
- Brown sugar, packed – ½ cup (100g). Adds moisture and a hint of molasses flavor. Light or dark works fine, but dark gives a deeper flavor.
- Vegetable oil – ½ cup (120ml). Keeps the bread incredibly moist. Canola or avocado oil work well too.
- Large eggs – 2, at room temperature. They bind everything together and add richness.
- Pumpkin puree – 1 cup (245g). Make sure it’s 100% pumpkin, not pumpkin pie filling. Libby’s is my go-to brand for consistent texture and flavor.
- Vanilla extract – 1 teaspoon. Enhances the overall flavor profile.
For the Cream Cheese Swirl
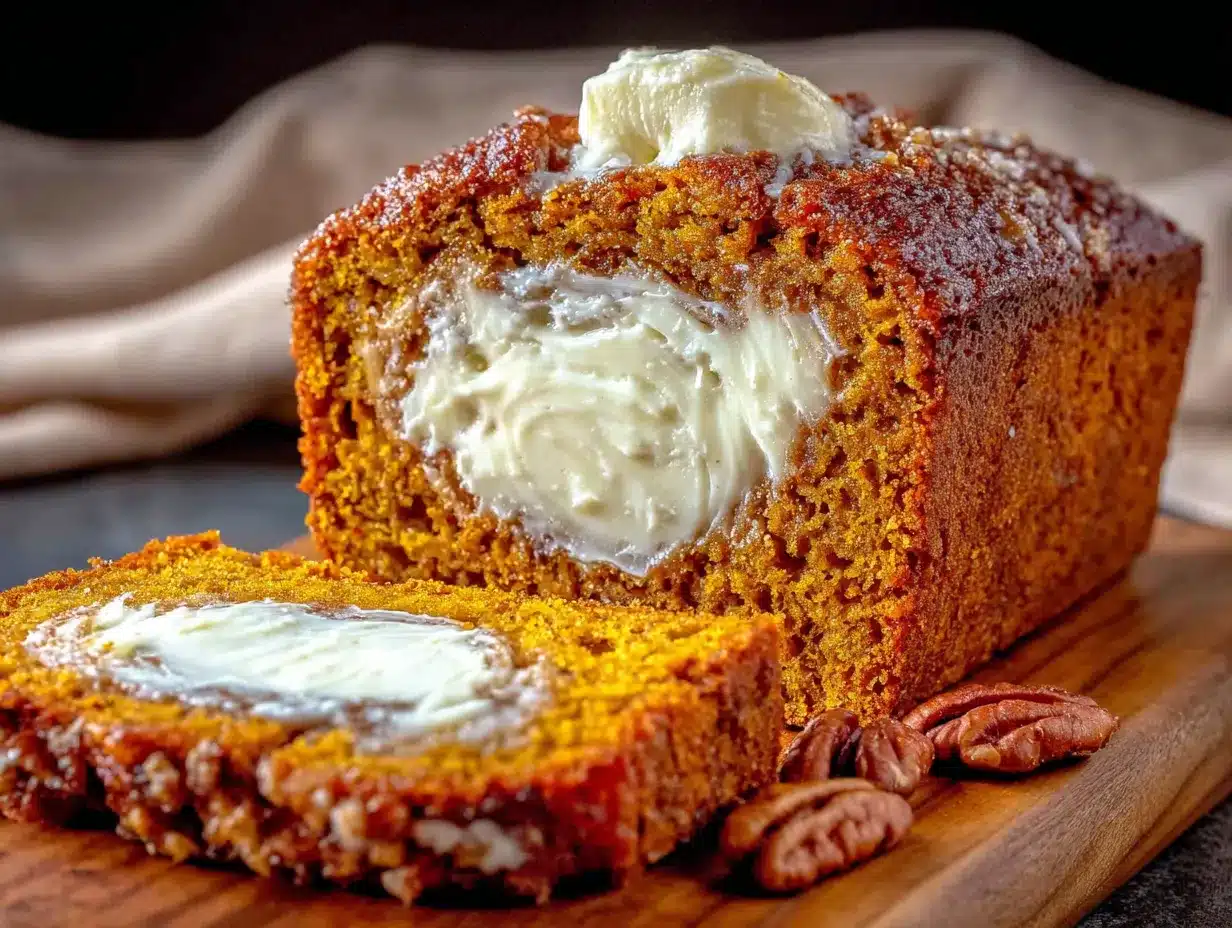
- Cream cheese – 8 ounces (226g), softened to room temperature. Use full-fat block cream cheese, not the spreadable kind in a tub. Philadelphia is my standard.
- Granulated sugar – ¼ cup (50g). Just enough to sweeten the swirl without making it cloying.
- Large egg yolk – 1. Adds richness and helps the swirl set properly.
- Vanilla extract – ½ teaspoon. A little extra flavor.
Substitution Guidance : If you need a gluten-free option, you can substitute the all-purpose flour with a 1:1 gluten-free baking blend, like Bob’s Red Mill. For a dairy-free cream cheese swirl, use a block-style dairy-free cream cheese, but note that the texture might be slightly softer. I’ve tried Kite Hill brand with good results. You can also swap the vegetable oil for melted coconut oil, but use a refined one to avoid a coconut flavor.
Equipment Needed
You don’t need a fancy kitchen to make this bread. Here’s what you’ll need:
- 9×5-inch loaf pan – The standard size for this recipe. If you only have an 8×4-inch pan, the baking time will be longer, and the bread might dome more. I love my USA Pan loaf pan for even baking and easy release.
- Mixing bowls – One large bowl for the dry ingredients, one medium for the wet, and one small for the cream cheese swirl.
- Whisk – For combining the dry ingredients.
- Hand mixer or stand mixer – Makes creaming the cream cheese swirl a breeze. You can do it by hand with a wooden spoon, but it takes some elbow grease.
- Rubber spatula – For folding the batter and scraping every last bit of the cream cheese mixture.
- Parchment paper – Lining the pan makes for easy removal and clean-up. I always leave a little overhang on the sides to use as handles.
- Butter knife or skewer – For swirling the cream cheese into the batter. A butter knife creates wider, more distinct swirls, while a skewer makes thinner, more delicate ones.
- Cooling rack – Essential for letting the bread cool evenly so the bottom doesn’t get soggy.
Budget-friendly options : If you don’t have a hand mixer, a sturdy whisk and some patience will work for the cream cheese swirl. Just make sure the cream cheese is very soft. You can also skip the parchment paper and just grease the pan well with butter or non-stick spray.
Preparation Method
Let’s get baking. This method is broken down into clear steps, so you can follow along easily.
- Preheat and Prep: Preheat your oven to 350°F (175°C). Line your 9×5-inch loaf pan with parchment paper, leaving an overhang on the two long sides. This will act as handles to lift the bread out later. Lightly grease the parchment and any exposed sides of the pan.
- Mix the Dry Ingredients: In a large bowl, whisk together the 1 ¾ cups (220g) all-purpose flour, 1 teaspoon baking soda, ½ teaspoon baking powder, ½ teaspoon salt, 2 teaspoons cinnamon, ½ teaspoon nutmeg, ¼ teaspoon ginger, and ⅛ teaspoon cloves. Whisk until everything is well combined. This ensures the spices are evenly distributed throughout the bread.
- Mix the Wet Ingredients: In a separate medium bowl, combine 1 cup (200g) granulated sugar and ½ cup (100g) packed brown sugar. Add the ½ cup (120ml) vegetable oil and whisk until smooth. Then add the 2 large eggs, one at a time, whisking well after each addition. Finally, whisk in the 1 cup (245g) pumpkin puree and 1 teaspoon vanilla extract. The mixture will be smooth and a beautiful deep orange color.
- Combine Wet and Dry: Pour the wet ingredients into the bowl with the dry ingredients. Use a rubber spatula to fold everything together gently. Stir just until you no longer see streaks of flour. A few small lumps are fine—overmixing will make the bread tough. The batter will be thick and slightly glossy.
- Make the Cream Cheese Swirl: In a small bowl, beat the 8 ounces (226g) of softened cream cheese with a hand mixer until it’s smooth and creamy. Add the ¼ cup (50g) granulated sugar, 1 egg yolk, and ½ teaspoon vanilla extract. Beat again until the mixture is completely smooth and free of any lumps. Set it aside.
- Assemble the Loaf: Pour about half of the pumpkin batter into the prepared loaf pan and spread it into an even layer. Spoon the cream cheese mixture on top of the batter in generous dollops. Don’t spread it. Then, pour the remaining pumpkin batter over the cream cheese dollops and gently spread it to cover them.
- The Swirl: Take a butter knife or a skewer and insert it deep into the batter. Drag it through the batter in a figure-eight pattern or a series of S-curves. Do this about 5-6 times, making sure to reach the bottom of the pan. Don’t over-swirl, or you’ll lose the definition of the cream cheese. You want distinct ribbons, not a uniform tan color.
- Bake: Place the pan in the preheated oven and bake for 55-65 minutes. The bread is done when a toothpick inserted into the center comes out clean or with just a few moist crumbs attached. If the top is browning too quickly after 40 minutes, tent it loosely with aluminum foil. The smell in your kitchen right now is pure fall magic.
- Cool: Let the bread cool in the pan on a wire rack for 15 minutes. Then, using the parchment paper overhang, lift the bread out of the pan and transfer it directly to the wire rack to cool completely. This is a crucial step—if you slice it while it’s still warm, the cream cheese swirl will be too soft and will squish out. Patience, my friend.
Cooking Tips & Techniques
Over the years, I’ve made this bread more times than I can count, and I’ve learned a few things the hard way. Here are my best tips for getting it perfect every single time.
Room temperature ingredients are non-negotiable. I know, it’s tempting to use cold eggs or cream cheese straight from the fridge. But cold ingredients don’t emulsify properly, which can lead to a lumpy batter or a dense bread. Take the cream cheese and eggs out of the fridge about 30 minutes before you start. If you forgot, you can place the eggs in a bowl of warm water for 5 minutes, and cut the cream cheese into small cubes to help it soften faster.
Don’t overmix the batter. This is the number one mistake I see. Once you add the flour, gluten starts to develop. Overmixing creates too much gluten, which results in a tough, rubbery bread. Mix just until the flour disappears. A few streaks are perfectly fine. I learned this after making a loaf that was so dense it could have been used as a doorstop.
The swirl technique matters. I used to just dollop the cream cheese on top and call it a day. But the best swirls come from a gentle hand. Insert your knife or skewer all the way to the bottom of the pan and drag it in smooth, continuous motions. If you swirl too aggressively, you’ll just mix the cream cheese into the batter, and you’ll lose that beautiful marbled effect. Think of it as painting, not stirring.
Check for doneness with a toothpick. Ovens can be finicky. Start checking your bread at the 55-minute mark. Insert a toothpick into the center of the loaf. If it comes out clean or with just a few moist crumbs, it’s done. If it comes out with wet batter, give it another 5 minutes and check again. The cream cheese swirl can sometimes make the toothpick test tricky—it might come out with a little bit of the cream cheese mixture on it, which is fine. You’re looking for raw batter.
Cool completely before slicing. I know it’s hard to wait. The smell is intoxicating, and you just want a warm slice with a pat of butter. But if you cut into it too soon, the cream cheese swirl will be soft and will smoosh out, leaving you with a messy, uneven slice. Let it cool completely on the wire rack. It takes about 2 hours, but it’s worth it. Trust me.
Variations & Adaptations
One of the best things about this recipe is how easy it is to tweak. Here are a few variations I’ve tried and loved.
Chocolate Chip Pumpkin Bread: This is my husband’s favorite. After you mix the batter, gently fold in ½ cup (85g) of semi-sweet or dark chocolate chips. The chocolate adds a lovely richness that pairs beautifully with the pumpkin and the tangy cream cheese. I like to use mini chocolate chips so they distribute more evenly.
Gluten-Free Version: I’ve made this with a 1:1 gluten-free baking blend (like Bob’s Red Mill) several times, and it works wonderfully. The texture is slightly more tender, but it’s still incredibly moist and delicious. Just make sure your blend contains xanthan gum for structure. I also add an extra tablespoon of milk to the batter to compensate for the dryness of the gluten-free flour.
Vegan Adaptation: For a vegan version, you can substitute the eggs with flax eggs (1 tablespoon ground flaxseed mixed with 3 tablespoons water per egg). Use a dairy-free cream cheese for the swirl, and replace the butter with coconut oil or a vegan butter stick. The texture will be a bit denser, but the flavor is still spot-on. I’ve made this for a vegan friend’s brunch, and it disappeared in minutes.
Spice It Up: If you like a bolder spice profile, add a pinch of cardamom or allspice to the flour mixture. I sometimes add ¼ teaspoon of cardamom for a slightly floral, citrusy note that’s really lovely. You can also use a pumpkin pie spice blend instead of the individual spices—just use 2 ½ teaspoons of the blend.
Nutty Crunch: For added texture, fold in ½ cup (60g) of toasted pecans or walnuts into the batter. I recommend toasting them first in a dry skillet over medium heat for 3-4 minutes until fragrant. It brings out their nutty flavor and keeps them crunchy in the bread.
Serving & Storage Suggestions
This bread is incredibly versatile. Here’s how to serve it and keep it fresh.
Serving: This bread is delicious at room temperature, but I also love it slightly warm. If you’ve stored it in the fridge, pop a slice in the microwave for 10-15 seconds, or toast it lightly in a toaster oven. For an extra indulgent treat, spread a little salted butter or a drizzle of honey on top. It’s also wonderful with a dollop of whipped cream or a scoop of vanilla ice cream for dessert. I’ve even served it as part of a Thanksgiving brunch spread, alongside a frittata and a fruit salad.
Storage: Once the bread is completely cool, wrap it tightly in plastic wrap or aluminum foil. Store it at room temperature for up to 3 days. If you live in a humid climate, you might want to store it in the refrigerator to prevent mold. The cream cheese swirl means this bread should be refrigerated if you’re keeping it for more than 2 days. I find the flavors actually deepen and meld together even more on the second day.
Freezing: This bread freezes beautifully. I often make two loaves at once—one to eat now, and one to freeze for later. To freeze, wrap the completely cooled loaf tightly in a layer of plastic wrap, then a layer of aluminum foil. You can also slice it first and wrap individual slices in plastic wrap and place them in a freezer bag. This way, you can pull out a single slice whenever you want. It will keep in the freezer for up to 3 months. To thaw, let it sit at room temperature for a few hours, or pop a frozen slice in the microwave for 30 seconds.
Nutritional Information & Benefits
Here’s a rough estimate of the nutritional information for one slice (assuming 10 slices per loaf).
| Nutrient | Amount per Slice |
|---|---|
| Calories | 320 |
| Total Fat | 16g |
| Saturated Fat | 6g |
| Cholesterol | 65mg |
| Sodium | 260mg |
| Total Carbohydrates | 41g |
| Dietary Fiber | 2g |
| Sugars | 26g |
| Protein | 5g |
While this is definitely a treat, it does have some redeeming qualities. Pumpkin is packed with vitamin A (in the form of beta-carotene), which is great for your eyes and immune system. It’s also a good source of fiber. The cream cheese adds a bit of calcium and protein. I like to think of this as a “better-for-you” indulgence. It’s a way to enjoy a classic fall flavor without resorting to a boxed mix loaded with preservatives. Plus, when you bake it yourself, you control the quality of the ingredients. That’s a win in my book.
Dietary Considerations: This recipe contains gluten, dairy, and eggs. For gluten-free and vegan adaptations, see the Variations section above.
Conclusion
This Perfect Pumpkin Bread with Cream Cheese Swirl is more than just a recipe—it’s a little piece of fall that you can hold in your hands. It’s the kind of bread that fills your home with the scent of cinnamon and nutmeg, and makes everything feel a little bit cozier. It’s the recipe that changed my neighbor Carol’s mind about cream cheese, and it’s the one I turn to every single autumn without fail.
I hope you give it a try, and I hope it becomes a tradition in your home, too. Don’t be afraid to play around with the variations—add some chocolate chips, swap in a different spice blend, or make it your own in whatever way feels right. That’s the beauty of baking. It’s a science, sure, but it’s also an art.
When you make this bread, I’d love to hear about it. Leave a comment below and tell me how it turned out, or share a photo on Pinterest and tag me. Did you add a twist? Did you serve it for a special occasion? Let me know! Your feedback and creativity are what make this community so special. Now go on, preheat that oven, and get ready to bake something truly wonderful.
Frequently Asked Questions
Can I use fresh pumpkin instead of canned?
Yes, you can! Just make sure to roast or steam the pumpkin until tender, then puree it in a food processor until smooth. You’ll want to drain any excess liquid by pressing the puree through a fine-mesh sieve or letting it sit in a cheesecloth for about 30 minutes. Fresh pumpkin has more water content than canned, which can make the bread soggy. I’ve done it, and it works, but canned is more consistent and convenient.
Why did my cream cheese swirl sink to the bottom?
This usually happens if the cream cheese mixture is too heavy or the pumpkin batter is too thin. Make sure your cream cheese is fully softened and beaten until smooth. Also, don’t overmix the pumpkin batter—overmixing can make it too thin. Another trick is to reserve a few tablespoons of the pumpkin batter and spread it on the bottom of the pan first, then add the cream cheese, then the rest of the batter. This creates a barrier that helps the swirl stay in the middle.
Can I make this into muffins instead of a loaf?
Absolutely! This batter works great for muffins. Line a 12-cup muffin tin with paper liners and fill each cup about ⅔ full. Drop a small dollop of the cream cheese mixture on top of each muffin and swirl gently with a toothpick. Bake at 350°F (175°C) for 18-22 minutes, or until a toothpick inserted into the center comes out clean. You’ll get about 12-14 muffins.
How do I know when the bread is done if the cream cheese swirl makes the toothpick test tricky?
This is a common question! If the toothpick comes out with a little bit of the cream cheese mixture on it, that’s okay—you’re looking for raw pumpkin batter. If it comes out with wet, goopy batter, it needs more time. You can also check by gently pressing on the top of the loaf. If it springs back, it’s likely done. The internal temperature should be around 200°F (93°C) when measured with an instant-read thermometer.
Can I double this recipe?
Yes, you can easily double this recipe to make two loaves. Just make sure you have two 9×5-inch loaf pans. You can bake them at the same time on the same oven rack, but you might need to add 5-10 minutes to the baking time. Rotate the pans halfway through baking for even results. I often do this to freeze one loaf for later.
Pin This Recipe!
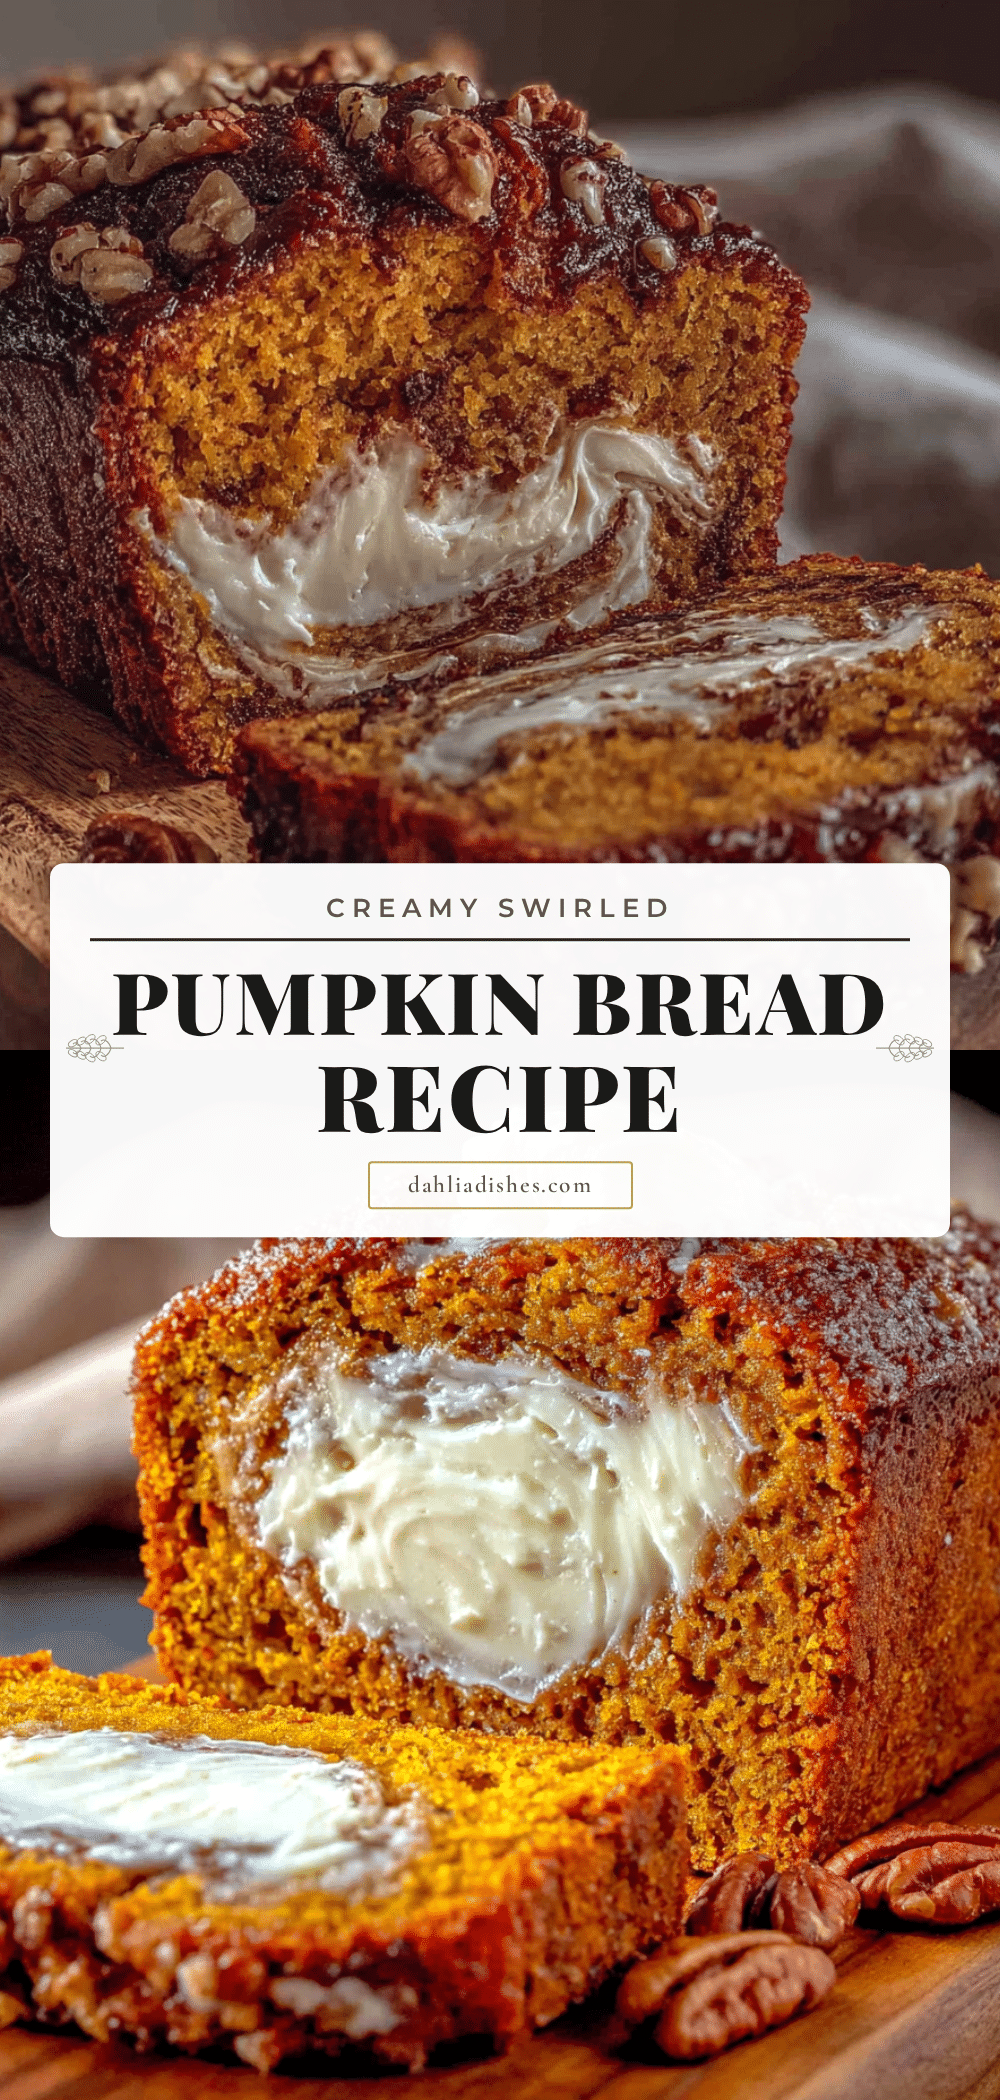
Perfect Pumpkin Bread with Cream Cheese Swirl
This incredibly moist pumpkin bread features a tangy cream cheese swirl baked right in. It’s the perfect fall treat that’s quick to make and always a crowd-pleaser.
- Prep Time: 15 minutes
- Cook Time: 55-65 minutes
- Total Time: 1 hour 15 minutes
- Yield: 10 servings 1x
- Category: Dessert
- Cuisine: American
Ingredients
- 1 ¾ cups (220g) all-purpose flour
- 1 teaspoon baking soda
- ½ teaspoon baking powder
- ½ teaspoon salt
- 2 teaspoons ground cinnamon
- ½ teaspoon ground nutmeg
- ¼ teaspoon ground ginger
- ⅛ teaspoon ground cloves
- 1 cup (200g) granulated sugar
- ½ cup (100g) packed brown sugar
- ½ cup (120ml) vegetable oil
- 2 large eggs, at room temperature
- 1 cup (245g) pumpkin puree
- 1 teaspoon vanilla extract
- 8 ounces (226g) cream cheese, softened
- ¼ cup (50g) granulated sugar (for swirl)
- 1 large egg yolk
- ½ teaspoon vanilla extract (for swirl)
Instructions
- Preheat oven to 350°F (175°C). Line a 9×5-inch loaf pan with parchment paper, leaving overhang on the long sides. Lightly grease the parchment and exposed pan sides.
- In a large bowl, whisk together flour, baking soda, baking powder, salt, cinnamon, nutmeg, ginger, and cloves.
- In a separate medium bowl, whisk together granulated sugar, brown sugar, and vegetable oil until smooth. Add eggs one at a time, whisking well after each. Whisk in pumpkin puree and vanilla extract.
- Pour wet ingredients into dry ingredients. Fold with a rubber spatula until just combined. Do not overmix; a few lumps are fine.
- In a small bowl, beat softened cream cheese with a hand mixer until smooth. Add ¼ cup sugar, egg yolk, and ½ teaspoon vanilla. Beat until completely smooth.
- Pour half of the pumpkin batter into the prepared loaf pan and spread evenly. Dollop the cream cheese mixture on top. Pour remaining pumpkin batter over the cream cheese and gently spread to cover.
- Insert a butter knife or skewer deep into the batter and swirl in a figure-eight or S-curve pattern about 5-6 times. Do not over-swirl.
- Bake for 55-65 minutes, until a toothpick inserted in the center comes out clean or with a few moist crumbs. If browning too quickly after 40 minutes, tent with foil.
- Cool in the pan on a wire rack for 15 minutes. Use parchment overhang to lift bread out and transfer to wire rack to cool completely before slicing.
Notes
Room temperature ingredients are crucial for best results. Do not overmix the batter. Cool completely before slicing to prevent the cream cheese swirl from squishing out. For a gluten-free version, use a 1:1 gluten-free baking blend. For a vegan version, use flax eggs and dairy-free cream cheese.
Nutrition
- Serving Size: 1 slice
- Calories: 320
- Sugar: 26
- Sodium: 260
- Fat: 16
- Saturated Fat: 6
- Carbohydrates: 41
- Fiber: 2
- Protein: 5
Keywords: pumpkin bread, cream cheese swirl, fall baking, pumpkin recipe, easy pumpkin bread


