Love this? Save it for later!
Share the inspiration with your friends
The neighborhood Halloween block party was in four hours and I’d completely forgotten. Everyone else would be bringing elaborate things—a friend had spent three days on a graveyard cake with handmade marzipan tombstones, and another neighbor was famous for her pumpkin-shaped sugar cookies with royal icing. I had a box of black cocoa powder I’d bought on a whim last spring, a half-used block of cream cheese, and the sinking feeling that I was about to show up empty-handed to the one event all year where my kids actually wanted me to show off.
I mean, let me tell you—I was scrambling. I’d found the recipe for black velvet cupcakes somewhere online ages ago, but I’d never actually tested it. The batter looked almost wrong when I mixed it, this eerie, dark gray sludge that didn’t resemble anything I’d ever baked before. I nearly threw it out twice. But the oven did its magic, and when I pulled those cupcakes out, they were this gorgeous, deep black color—like midnight in cake form. I slapped together a quick cream cheese frosting, piped it on in a panic, and ran out the door with the cupcakes still slightly warm.
You know that feeling when you bring something to a gathering and you’re already making excuses before anyone’s even tasted it? That was me. I kept saying, “They’re just simple cupcakes, I ran out of time.” And then people started eating them. My neighbor actually stopped mid-conversation and asked me for the recipe. The graveyard cake sat half-eaten. The sugar cookies got ignored. These black velvet cupcakes—the ones I’d thrown together in a frenzy—were gone in twenty minutes. Maybe you’ve been there, showing up with something simple while everyone else brought masterpieces, only to have the simple thing win. That’s this recipe. It’s the underdog that steals the show, and honestly, I’ve been making it every Halloween since.
Why You’ll Love This Recipe
These aren’t your average chocolate cupcakes dyed with food coloring. Black velvet gets its dramatic color from black cocoa powder, which gives the cake a rich, almost Oreo-like flavor that’s deeper and more complex than regular chocolate. The cream cheese frosting is tangy and smooth, cutting through the intensity of the cocoa perfectly. Here’s why this recipe stands out:
- No Artificial Dyes: The color comes entirely from black cocoa powder, not food coloring. No stained fingers, no neon-green tongues, no worrying about what you’re feeding your family.
- Simple Ingredients: You probably already have most of these in your pantry. Black cocoa powder is the only specialty item, and it’s easy to find online or at well-stocked grocery stores.
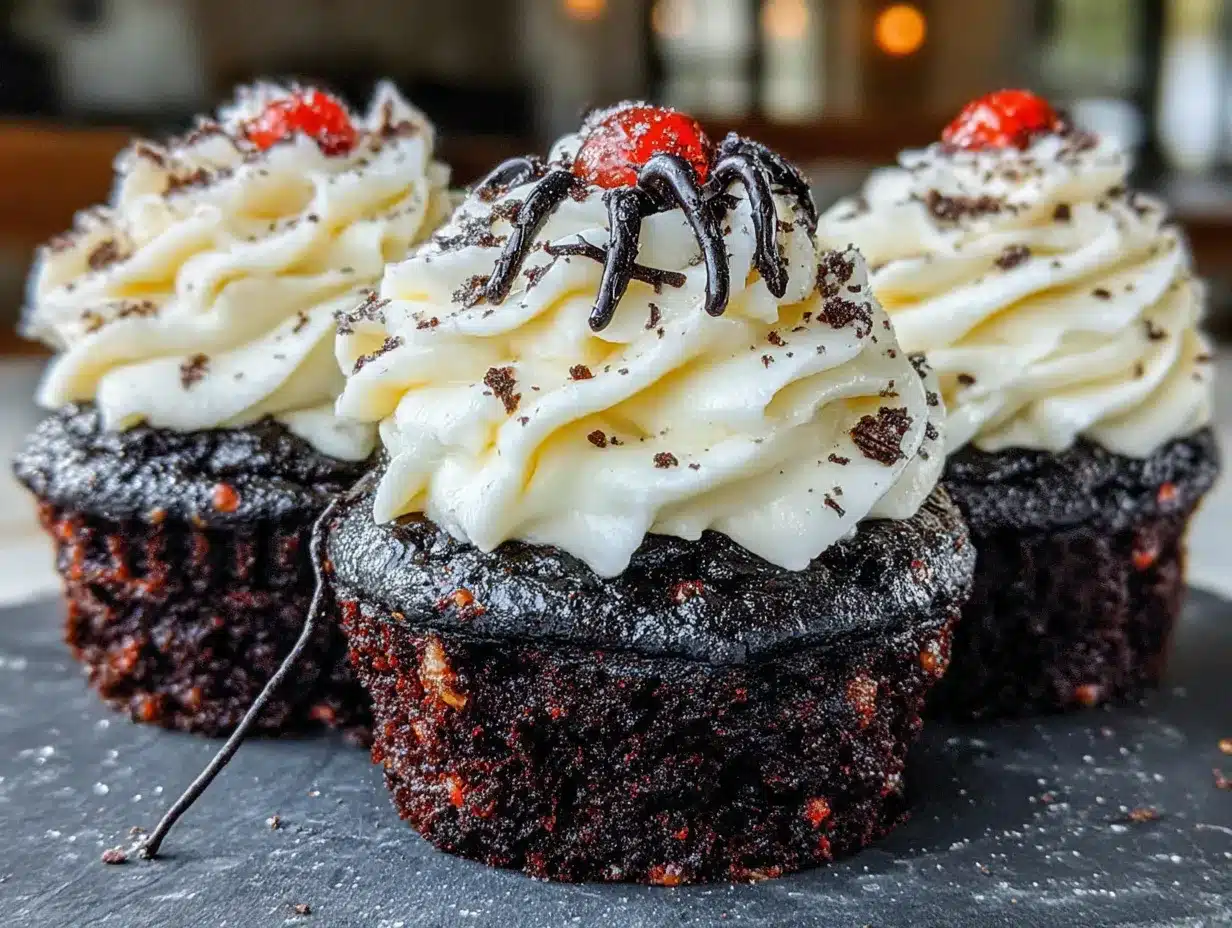
- Perfect for Halloween: These cupcakes look dramatic and spooky without requiring any fancy decorating skills. A swirl of white cream cheese frosting against the black cake is visually stunning all on its own.
- Crowd-Pleaser: Kids love the color, adults love the flavor. I’ve brought these to Halloween parties, school events, and even a “spooky” book club meeting, and they always disappear first.
- Unbelievably Moist: The combination of buttermilk and oil keeps these cupcakes tender for days. They don’t dry out like some chocolate cakes tend to do.
What makes this recipe different from the rest is the balance. I’ve tested versions with too much black cocoa (bitter and dry) and versions with too little (just looked like regular chocolate cake). This version hits the sweet spot—intense color, deep flavor, and a texture that’s soft and velvety, just like the name promises. It’s comfort food with a dark twist, perfect for impressing guests without the stress.
What Ingredients You Will Need
This recipe uses simple, wholesome ingredients to deliver bold flavor and satisfying texture without the fuss. Most items are pantry staples, with black cocoa powder being the star of the show.
For the Cupcakes
- 1 ½ cups all-purpose flour (spooned and leveled, not scooped)
- ¾ cup black cocoa powder (I recommend King Arthur Flour Black Cocoa for the deepest color)
- 1 teaspoon baking soda
- ½ teaspoon salt
- 1 cup granulated sugar
- ⅓ cup vegetable oil (or any neutral oil like canola or avocado)
- 1 large egg, room temperature
- 1 teaspoon vanilla extract
- 1 cup buttermilk, room temperature (adds tenderness and acidity to activate the baking soda)
- ½ cup hot coffee (or hot water—coffee enhances the chocolate flavor without making it taste like coffee)
For the Cream Cheese Frosting
- 8 ounces cream cheese, softened (full-fat works best for stability)
- ½ cup unsalted butter, softened
- 3 cups powdered sugar, sifted (prevents lumps)
- 1 teaspoon vanilla extract
- Pinch of salt
Ingredient Tips: Black cocoa powder is different from regular Dutch-process cocoa. It’s more alkalized, which gives it that dark color and milder flavor. If you can’t find it, you can substitute with regular Dutch-process cocoa, but the color will be dark brown, not black. For a dairy-free option, use plant-based buttermilk (add 1 tablespoon vinegar to 1 cup oat or almond milk) and vegan cream cheese. I’ve tested this with Kite Hill cream cheese style spread and it worked beautifully.
Equipment Needed
- 12-cup muffin tin (standard size)
- Paper liners (I prefer black or white ones for Halloween, but any color works)
- Two mixing bowls (one medium, one large)
- Whisk (for dry ingredients)
- Electric hand mixer or stand mixer (for the frosting—you can do it by hand, but your arm will thank you for the mixer)
- Rubber spatula
- Cooling rack
- Piping bag with a large star tip (or a zip-top bag with the corner snipped off)
- Measuring cups and spoons
If you don’t have a piping bag, don’t worry—I’ve used a zip-top bag in a pinch and it works just fine. Just fill the bag, snip off a corner, and squeeze. The swirls won’t be as defined, but the taste is identical. For the muffin tin, a nonstick one works best, but if yours tends to stick, use paper liners anyway—they make cleanup a breeze.
Preparation Method
- Preheat and Prep: Preheat your oven to 350°F (175°C). Line your muffin tin with 12 paper liners. This recipe makes exactly 12 standard cupcakes, so no need to adjust.
- Mix Dry Ingredients: In a medium bowl, whisk together the flour, black cocoa powder, baking soda, and salt. Sifting the cocoa powder is a good idea if it’s clumpy—black cocoa tends to clump more than regular cocoa. I learned this the hard way when my first batch had little dark cocoa lumps in the batter.
- Combine Wet Ingredients: In a large bowl, whisk together the sugar and oil until well combined. Add the egg and vanilla, whisking until smooth. The mixture will look slightly grainy from the sugar, and that’s fine.
- Add Buttermilk: Pour in the buttermilk and whisk until the batter is smooth and uniform. It should look like a thin, dark gray liquid at this point. Don’t panic—it’s supposed to look almost unappetizingly dark. That’s the black cocoa doing its job.
- Incorporate Dry Ingredients: Add the dry ingredients to the wet mixture in two additions, folding gently with a rubber spatula after each addition. Mix just until no streaks of flour remain. Overmixing will make the cupcakes tough. The batter will be thick and dark, like wet concrete.
- Add Hot Coffee: Pour in the hot coffee (or hot water) and stir until the batter is smooth and thin. This step might feel wrong—adding liquid to an already wet batter—but the hot liquid helps bloom the cocoa and creates a tender crumb. The batter will be very runny, almost like a thin milkshake. That’s exactly what you want.
- Fill the Liners: Divide the batter evenly among the 12 liners, filling each about ⅔ full. I use a ¼-cup measuring cup for this—it’s the perfect amount per cupcake. The batter is thin, so it will spread easily. Don’t overfill, or your cupcakes will mushroom over the edges.
- Bake: Bake for 18-22 minutes, or until a toothpick inserted into the center comes out clean or with a few moist crumbs. The tops should spring back when lightly touched. My oven runs hot, so I check at 18 minutes. Rotate the pan halfway through if your oven has hot spots.
- Cool Completely: Let the cupcakes cool in the pan for 5 minutes, then transfer them to a wire rack to cool completely. This is crucial—if you frost them while they’re warm, the cream cheese frosting will melt into a sad, soupy mess. I’ve done it. It’s not pretty.
- Make the Frosting: While the cupcakes cool, make the frosting. In a large bowl with an electric mixer, beat the cream cheese and butter together until smooth and creamy, about 2 minutes. Scrape down the sides of the bowl. Add the powdered sugar, vanilla, and salt, and beat on low speed until combined, then increase to medium-high and beat for 2-3 minutes until light and fluffy. The frosting should be thick enough to hold a peak but soft enough to pipe easily.
- Frost the Cupcakes: Once the cupcakes are completely cool, fill a piping bag fitted with a large star tip with the cream cheese frosting. Pipe a swirl onto each cupcake, starting from the outside and working inward. If you don’t have a piping bag, simply spread the frosting with a knife—it’ll look rustic and charming.
- Decorate (Optional): Add Halloween sprinkles, a drizzle of black sanding sugar, or a small candy spider on top for extra spooky flair. I sometimes press a few black sesame seeds into the frosting for a subtle crunch and visual texture.
Cooking Tips & Techniques
Here’s where I share the hard-earned lessons from my many batches of black velvet cupcakes. First, don’t skip the hot coffee. I know it sounds weird, but the heat helps dissolve the black cocoa powder completely, which prevents that slightly gritty texture you sometimes get with dark cocoa cakes. If you’re serving these to kids and worry about caffeine, use hot water instead—it still works, just with slightly less depth of flavor.
Second, measure your black cocoa powder carefully. I once got lazy and just scooped it straight from the bag, and my cupcakes turned out dry and bitter. Spoon the cocoa into your measuring cup and level it off with a knife. That extra attention makes a difference. Also, black cocoa is more absorbent than regular cocoa, so don’t be tempted to add more flour if the batter looks thin—it’s supposed to be thin.
Third, room temperature ingredients matter. Cold buttermilk and cold eggs will seize the butter (or oil) and create a lumpy batter. I set my buttermilk and egg on the counter about 30 minutes before I start baking. If I forget, I microwave the buttermilk for 15 seconds and place the egg in a bowl of warm water for 5 minutes. It’s not perfect, but it works in a pinch.
One mistake I made early on was overmixing the frosting. Cream cheese frosting can become thin and runny if you beat it too long, especially if the cream cheese is too soft. Beat it just until it’s smooth and fluffy, then stop. If your frosting seems too soft, pop it in the fridge for 15 minutes before piping.
Finally, for consistent cupcakes, use a cookie scoop or measuring cup to portion the batter. I use a ¼-cup scoop, and every cupcake comes out the same size and bakes evenly. No more tiny cupcakes next to giant ones.
Variations & Adaptations
Gluten-Free Version: Substitute the all-purpose flour with a 1:1 gluten-free baking flour blend. I’ve used Bob’s Red Mill 1:1 Baking Flour with great results. The texture is slightly denser but still delicious. Add ¼ teaspoon xanthan gum if your blend doesn’t already include it.
Vegan Version: Replace the egg with a flax egg (1 tablespoon ground flaxseed mixed with 3 tablespoons water, let sit for 5 minutes). Use plant-based buttermilk and vegan cream cheese. The cupcakes will be a bit more delicate, so handle them gently when transferring to the cooling rack.
Spooky Flavor Twist: Add 1 teaspoon of peppermint extract to the batter for a “minty midnight” flavor. The peppermint pairs beautifully with the dark cocoa, and it gives the cupcakes a refreshing finish that’s unexpected for Halloween. I tried this last year and it was a hit with the adults.
Cupcake to Cake Conversion: Pour the batter into two 8-inch round cake pans lined with parchment paper. Bake at 350°F for 25-30 minutes. Double the frosting recipe for a layered cake. The black cake layers with white frosting in between is stunning for a Halloween birthday party.
Mini Cupcakes: Use a mini muffin tin and bake for 10-12 minutes. This makes about 36 mini cupcakes, perfect for school parties or trick-or-treat gatherings. Reduce the frosting slightly—you won’t need the full batch for minis.
Serving & Storage Suggestions
These cupcakes are best served at room temperature, which allows the cream cheese frosting to soften slightly and the cake to be tender. If you’ve refrigerated them, let them sit out for 15-20 minutes before serving. For Halloween parties, arrange them on a black cake stand or a tray lined with orange and purple napkins. The contrast between the dark cupcakes and the white frosting is visually striking.
Storage: Store unfrosted cupcakes in an airtight container at room temperature for up to 3 days. Frosted cupcakes should be refrigerated in a covered container for up to 5 days. The cream cheese frosting needs to stay chilled, but the cake will still be moist thanks to the oil and buttermilk. If you’re making them ahead, I recommend baking the cupcakes a day in advance, storing them unfrosted, and frosting them the morning of your event. The frosting pipes best when fresh.
Freezing: Unfrosted cupcakes freeze beautifully for up to 3 months. Wrap each cupcake individually in plastic wrap, then place them in a freezer bag. Thaw at room temperature for about an hour before frosting. I’ve also frozen the frosting in a piping bag—just thaw it in the fridge overnight and give it a quick stir before using. The texture stays surprisingly good.
Reheating: If you want that just-baked warmth, pop an unfrosted cupcake in the microwave for 10 seconds. Don’t microwave frosted cupcakes—the frosting will melt. Instead, let them sit at room temperature for 20 minutes.
Nutritional Information & Benefits
Per cupcake (with frosting): approximately 380 calories, 18g fat, 52g carbohydrates, 4g protein, 2g fiber, 35g sugar. These numbers are estimates and will vary based on specific ingredients and portion sizes.
While these are definitely a treat, black cocoa powder contains antioxidants called flavonoids, which are also found in dark chocolate. It has less sugar than regular cocoa powder and a more intense flavor, meaning you can use less sugar overall in the recipe. The cream cheese frosting provides a small amount of protein and calcium, though let’s be honest—we’re eating these for the joy, not the health benefits.
For those watching their sugar intake, you can reduce the sugar in the frosting to 2 cups instead of 3. The frosting will be less stiff but still delicious. I’ve also used a sugar substitute like Swerve in the cupcakes with good results—just note that the texture will be slightly less tender. This recipe is vegetarian and can be made dairy-free and gluten-free with the substitutions mentioned above. It contains wheat, dairy, and eggs in its standard form.
FAQs
Can I use regular cocoa powder instead of black cocoa?
Yes, but the color will be dark brown, not black. The flavor will also be more intense and slightly more bitter. If you use regular Dutch-process cocoa, reduce the amount to ½ cup and add ¼ cup all-purpose flour to maintain the structure. The cupcakes will still taste great, but they won’t have that dramatic black velvet look.
Why did my cupcakes turn out dry?
Dry cupcakes usually mean overbaking or overmixing. Check your oven temperature with an oven thermometer—many ovens run hot. Also, make sure you measured your flour correctly by spooning it into the measuring cup and leveling it off. Scooping directly from the bag packs in too much flour. Finally, don’t skip the buttermilk—it adds moisture and tenderness.
Can I make these cupcakes without coffee?
Absolutely. Substitute the hot coffee with an equal amount of hot water. The coffee doesn’t add a coffee flavor—it just enhances the chocolate notes of the cocoa. Hot water works perfectly fine and won’t affect the color or texture. I’ve made them both ways and honestly can’t tell the difference in the final taste.
How do I get my cream cheese frosting to be stiff enough for piping?
Start with cold cream cheese and room temperature butter. Beat them together until smooth, then gradually add sifted powdered sugar. If the frosting is still too soft, refrigerate it for 15-20 minutes before piping. Also, make sure you’re using full-fat cream cheese—low-fat versions have more water content and will make the frosting runny. If you’re in a humid environment, add an extra ¼ cup of powdered sugar to stabilize it.
Can I use a different frosting?
Yes, but I really recommend the cream cheese frosting—it’s the perfect tangy counterpoint to the rich, dark cake. That said, a simple vanilla buttercream or even a chocolate ganache would work. For a dairy-free option, use a coconut cream frosting (chilled coconut cream whipped with powdered sugar). The black velvet cake is versatile enough to pair with almost any frosting.
Conclusion
These black velvet Halloween cupcakes have become my go-to recipe for every spooky occasion, and I honestly think they’ll become yours too. They’re dramatic without being difficult, delicious without being complicated, and they always, always impress. The deep black color from the cocoa powder is naturally stunning, and the tangy cream cheese frosting is the perfect finishing touch. Whether you’re bringing them to a Halloween party, a school event, or just making them for a cozy night in with a scary movie, these cupcakes deliver.
I love this recipe because it proves that you don’t need fancy decorating skills or expensive ingredients to create something memorable. It’s simple, honest baking that happens to look like it came from a bakery. So go ahead—make a mess in your kitchen, lick the frosting off the spatula, and watch these cupcakes disappear. And if you try them, I’d love to hear how they turned out. Drop a comment below, tag me in your photos, or share your own twist on the recipe. Happy Halloween, and happy baking!
Pin This Recipe!
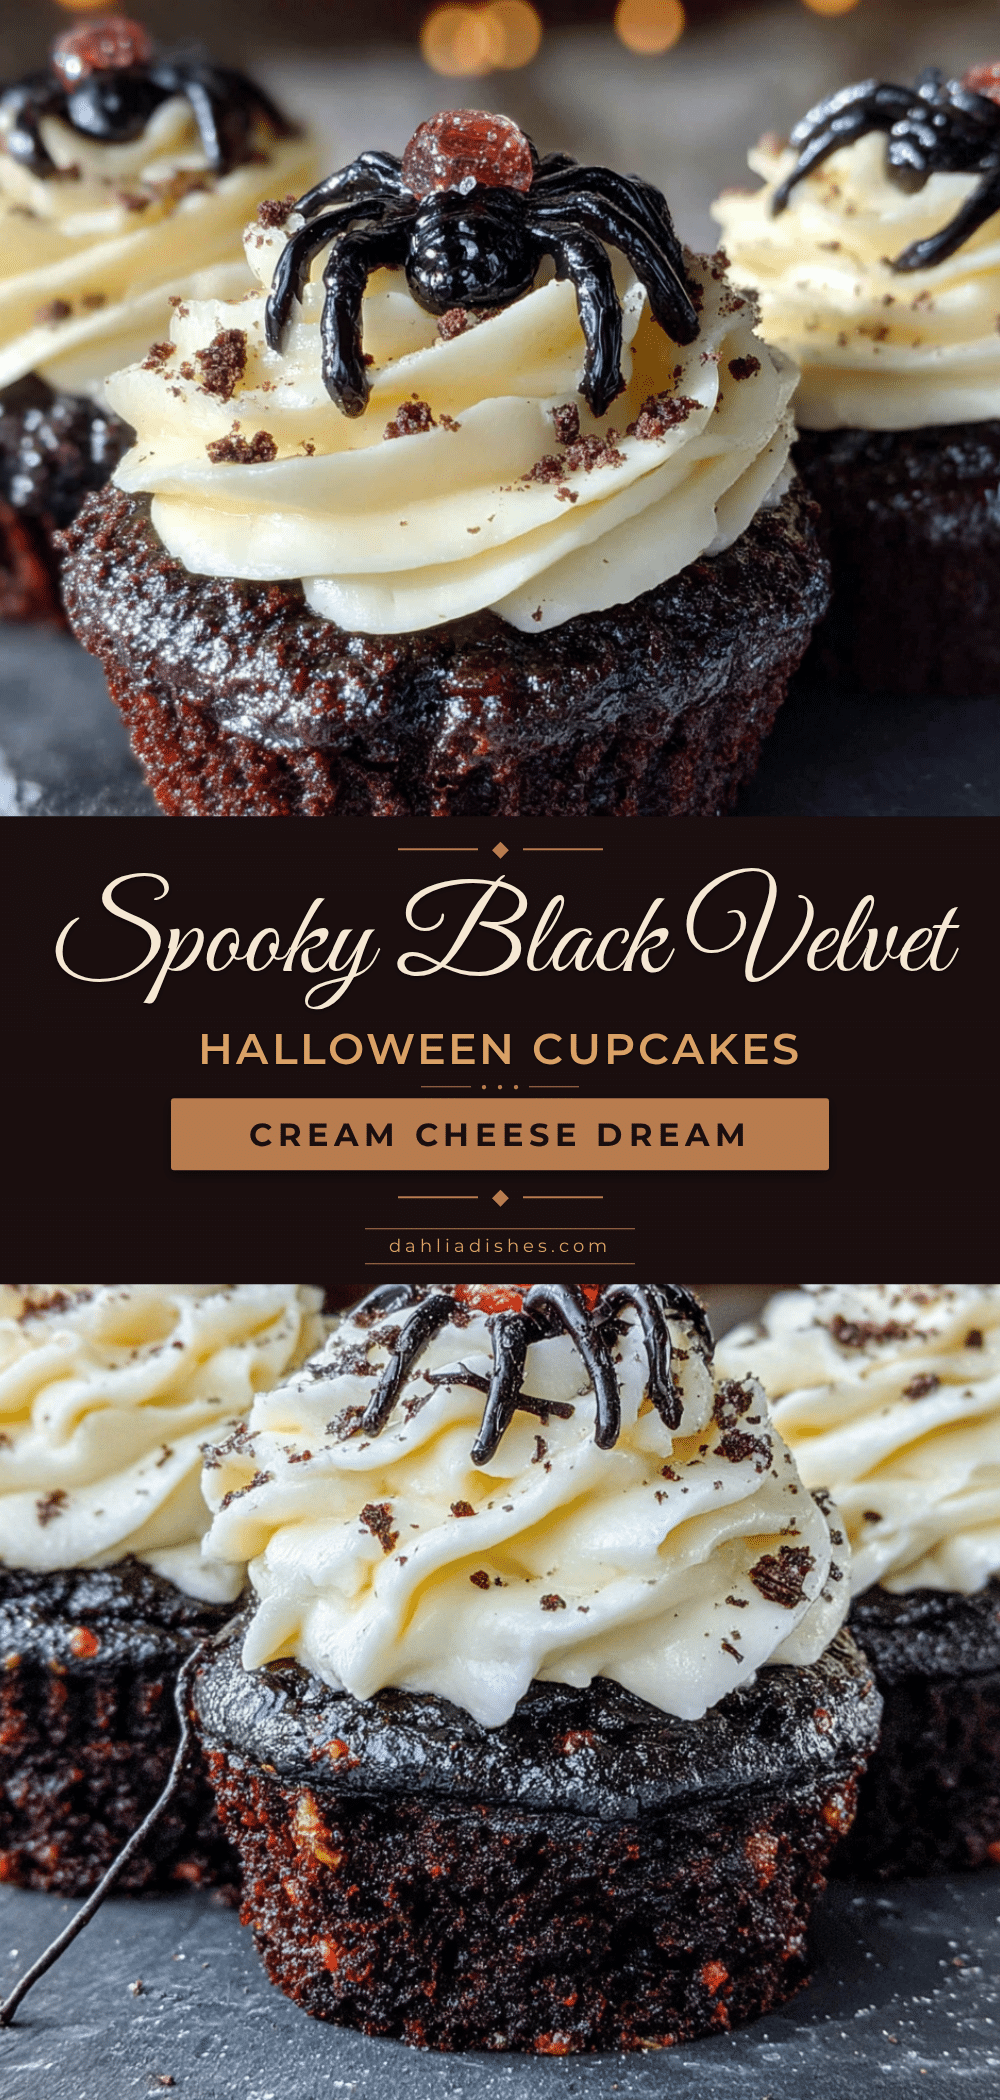
Perfect Black Velvet Halloween Cupcakes: Easy Cream Cheese Frosting
These black velvet Halloween cupcakes get their dramatic color from black cocoa powder, giving them a rich, Oreo-like flavor. Topped with tangy cream cheese frosting, they’re a crowd-pleasing treat that requires no artificial dyes and looks stunning with minimal effort.
- Prep Time: 20 minutes
- Cook Time: 20 minutes
- Total Time: 40 minutes
- Yield: 12 cupcakes 1x
- Category: Dessert
- Cuisine: American
Ingredients
- 1 ½ cups all-purpose flour (spooned and leveled)
- ¾ cup black cocoa powder
- 1 teaspoon baking soda
- ½ teaspoon salt
- 1 cup granulated sugar
- ⅓ cup vegetable oil (or canola/avocado oil)
- 1 large egg, room temperature
- 1 teaspoon vanilla extract
- 1 cup buttermilk, room temperature
- ½ cup hot coffee (or hot water)
- 8 ounces cream cheese, softened (full-fat)
- ½ cup unsalted butter, softened
- 3 cups powdered sugar, sifted
- 1 teaspoon vanilla extract
- Pinch of salt
Instructions
- Preheat oven to 350°F (175°C). Line a 12-cup muffin tin with paper liners.
- In a medium bowl, whisk together flour, black cocoa powder, baking soda, and salt. Sift cocoa if clumpy.
- In a large bowl, whisk together sugar and oil until combined. Add egg and vanilla, whisk until smooth.
- Pour in buttermilk and whisk until batter is smooth and uniform (thin, dark gray liquid).
- Add dry ingredients to wet mixture in two additions, folding gently with a rubber spatula until no streaks remain. Do not overmix.
- Pour in hot coffee (or hot water) and stir until batter is smooth and thin (like a thin milkshake).
- Divide batter evenly among 12 liners, filling each about ⅔ full (use a ¼-cup measuring cup).
- Bake for 18-22 minutes, until a toothpick inserted in center comes out clean or with a few moist crumbs. Rotate pan halfway if needed.
- Let cupcakes cool in pan for 5 minutes, then transfer to a wire rack to cool completely.
- For frosting: In a large bowl with an electric mixer, beat cream cheese and butter until smooth and creamy (about 2 minutes). Scrape down sides.
- Add powdered sugar, vanilla, and salt. Beat on low until combined, then increase to medium-high and beat 2-3 minutes until light and fluffy.
- Once cupcakes are completely cool, fill a piping bag fitted with a large star tip with frosting. Pipe a swirl onto each cupcake, starting from outside and working inward.
- Optional: Decorate with Halloween sprinkles, black sanding sugar, or candy spiders.
Notes
Don’t skip the hot coffee—it helps dissolve black cocoa and creates a tender crumb. Use hot water if avoiding caffeine. Measure black cocoa carefully (spoon and level) to avoid bitterness. Room temperature ingredients are crucial for smooth batter. For gluten-free, use 1:1 gluten-free flour blend with ¼ tsp xanthan gum. For vegan, use flax egg, plant-based buttermilk, and vegan cream cheese. Frosted cupcakes keep refrigerated up to 5 days; unfrosted freeze up to 3 months.
Nutrition
- Serving Size: 1 cupcake
- Calories: 380
- Sugar: 35
- Sodium: 280
- Fat: 18
- Saturated Fat: 8
- Carbohydrates: 52
- Fiber: 2
- Protein: 4
Keywords: black velvet cupcakes, Halloween cupcakes, cream cheese frosting, black cocoa, spooky desserts, no artificial dye, easy Halloween recipe


