Love this? Save it for later!
Share the inspiration with your friends
It was 10:47 PM on a random Wednesday in late October, and I had a very specific, almost embarrassing craving. I wanted mac and cheese—the kind from the blue box, honestly, the kind that’s more nostalgia than food. But here’s the thing: I didn’t have a box of that stuff anywhere in the pantry. I had a butternut squash that was starting to look a little lonely on the counter, a block of sharp cheddar, and this wild idea that maybe, just maybe, I could trick myself into something that felt just as comforting but was, you know, a vegetable. I was tired. It had been a long day of school pickups and work deadlines, and the last thing I wanted was a complicated recipe. So I just started chopping the squash, not even measuring, just hoping for the best.
The kitchen was quiet except for the hum of the microwave softening the squash—my little shortcut. I roasted it anyway because roasting makes everything better, but I was impatient. I remember thinking, “This is either going to be a disaster or a new obsession.” Honestly, there was a moment when I added the cheddar and the pureed squash together, and it looked like a weird, orange-ish mess. I almost gave up and ordered pizza. But I stirred it into the pasta, took one bite, and just stood there in the dark kitchen, fork in hand, feeling like I’d stumbled onto something magical. It was creamy, a little sweet from the squash, but still undeniably cheesy and satisfying.
That late-night experiment became the dish I now make for every family gathering, especially Thanksgiving. It’s the one that makes the kids ask for seconds and the adults pretend they’re being healthy. You know that feeling when you find a recipe that solves a problem you didn’t even know you had? This is that recipe. It’s the bridge between what the kids love and what the grown-ups want to serve. And it all started with a craving, a lonely squash, and a little bit of late-night kitchen courage. This is the story of how that weird Wednesday night became our favorite Thanksgiving side dish.
Why You’ll Love This Recipe
Let’s be real—Thanksgiving dinner can be a battlefield. You’ve got the turkey, the stuffing, the pies, and then there’s the one kid who only wants to eat the plain rolls. This butternut squash mac and cheese is my secret weapon. It’s the dish that brings everyone to the table, no arguments required.
- Kid-Approved and Parent-Pleasing: The squash blends in so smoothly that even the pickiest eaters won’t notice. It adds a natural sweetness and a gorgeous golden color that makes it feel extra special for the holiday.
- Budget-Friendly Ingredients: No need for fancy truffle oil or imported cheeses. This recipe uses simple, affordable staples like butternut squash, sharp cheddar, and elbow macaroni. You can feed a crowd without breaking the bank.
- Make-Ahead Magic: You can assemble this dish a day or two before Thanksgiving, then just pop it in the oven while the turkey rests. It’s a lifesaver for a busy cook’s timeline.
- Perfect for Leftovers: This mac and cheese reheats beautifully. The flavors actually get better after a day in the fridge, so don’t be shy about making extra.
- A Healthier Twist on a Classic: You get a full serving of vegetables hidden in every creamy, cheesy bite. It’s comfort food that makes you feel good about what you’re feeding your family.
What makes this recipe different from the dozens of other mac and cheese recipes out there? It’s the method. Instead of a complicated béchamel sauce, we use the roasted squash itself to create a naturally creamy, velvety base. This isn’t just another version of mac and cheese—it’s the one that will have your mother-in-law asking for the recipe and your kids licking their plates clean. It’s comfort food reimagined for the real world: faster, healthier, and with the same soul-soothing satisfaction that makes Thanksgiving feel like home.
What Ingredients You Will Need
This recipe relies on simple, wholesome ingredients to deliver that big, comforting flavor. Most of these are probably already in your kitchen or easy to find at any grocery store. Here’s what you’ll need and why each one matters.
For the Butternut Squash Puree
- 1 medium butternut squash (about 2-3 pounds) – Look for one that feels heavy for its size with a firm, unblemished skin. This is the star of the show, adding sweetness and creaminess.
- 2 tablespoons olive oil – Helps the squash roast evenly and adds a little richness. (I use a good quality extra-virgin for better flavor.)
- 1/2 teaspoon salt – Enhances the natural sweetness of the squash.
- 1/4 teaspoon black pepper – A little warmth to balance the sweetness.
For the Pasta and Cheese Sauce
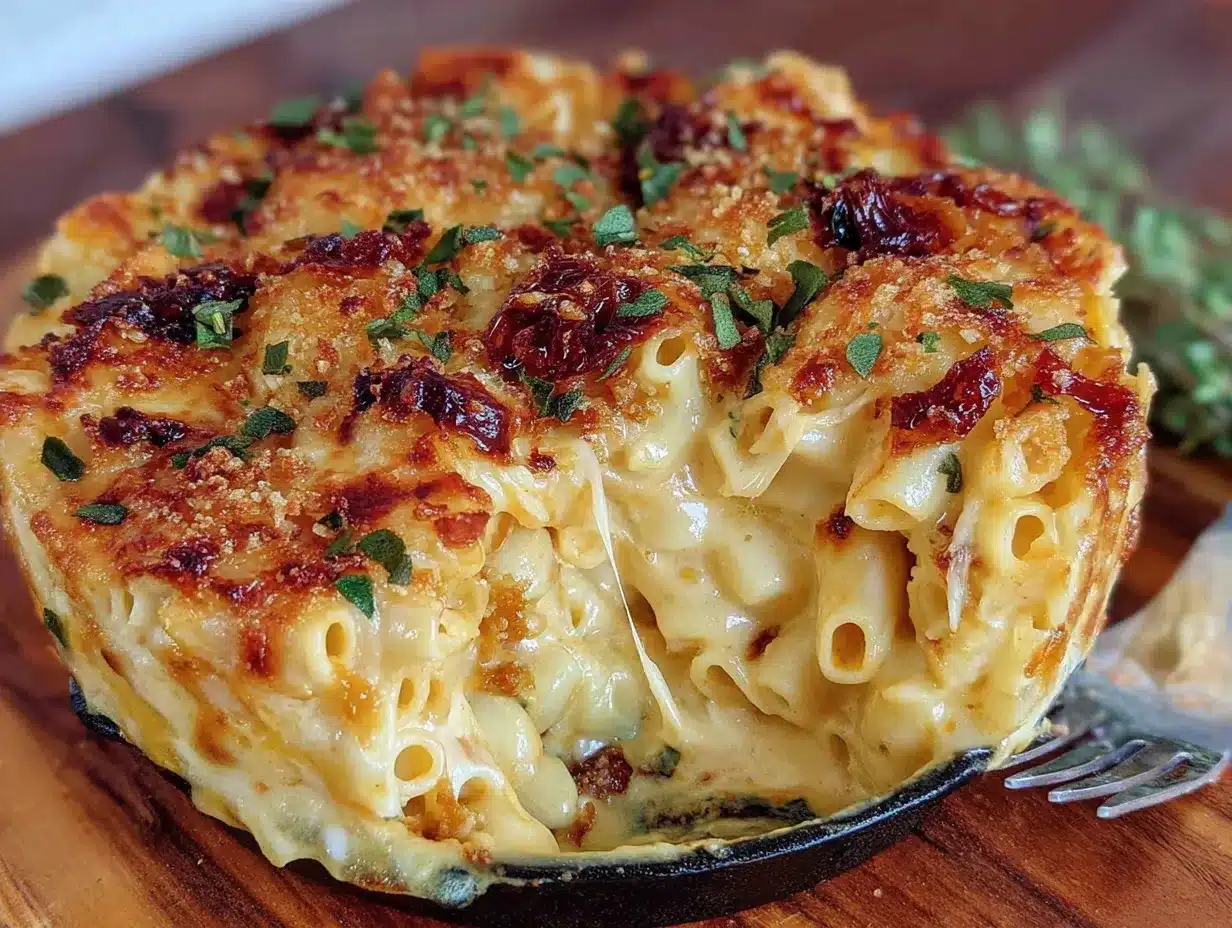
- 1 pound elbow macaroni (or any short pasta like shells or cavatappi) – Elbows are classic and hold the sauce perfectly. (You can use whole wheat or gluten-free pasta if needed.)
- 4 tablespoons unsalted butter – Adds richness and helps create a smooth sauce. (I recommend using a good quality butter like Kerrygold for the best flavor.)
- 1/4 cup all-purpose flour – Thickens the sauce without making it gluey. (For a gluten-free version, use a 1:1 gluten-free flour blend.)
- 2 cups whole milk – Creates a creamy base. (You can use 2% or a dairy-free milk like oat milk, but the sauce will be slightly less rich.)
- 1 cup heavy cream – This is the secret to that ultra-luxurious texture. (For a lighter version, use all milk and add an extra tablespoon of butter.)
- 3 cups sharp cheddar cheese, shredded – Use a good sharp cheddar for the most flavor. Pre-shredded cheese has anti-caking agents that can make the sauce grainy, so shred it yourself. (I love Tillamook or Cabot for this.)
- 1 cup Gruyère or Fontina cheese, shredded (optional but recommended) – Adds a nutty, melty quality that takes this over the top. (If you’re on a budget, just use all cheddar.)
- 1/2 teaspoon garlic powder – A subtle savory note that kids won’t even notice.
- 1/4 teaspoon nutmeg (freshly grated is best) – This is the secret ingredient that makes the squash and cheese sing together.
- Salt and pepper to taste – Always adjust at the end.
For the Topping (Optional but Highly Recommended)
- 1/2 cup panko breadcrumbs – Adds a lovely crunch. (Use gluten-free panko if needed.)
- 2 tablespoons melted butter – Helps the breadcrumbs get golden and crispy.
- 1/4 cup grated Parmesan cheese – Adds a salty, savory kick to the topping.
Ingredient Tip: If you’re short on time, you can use 2 cups of pre-cut butternut squash cubes from the grocery store. Just roast them the same way. For the cheese, I always recommend buying blocks and shredding them yourself. It makes a huge difference in how smoothly the sauce comes together.
Equipment Needed
You don’t need a fancy kitchen to pull this off. Here’s what you’ll need:
- Large baking sheet – For roasting the squash. A rimmed sheet works best to catch any juices.
- Large pot – For boiling the pasta. I use a 6-quart pot.
- Medium saucepan – For making the cheese sauce.
- Wooden spoon or silicone spatula – For stirring the sauce without scratching your pot.
- Whisk – Helps prevent lumps in the sauce.
- Food processor or blender – To puree the roasted squash until smooth. (I’ve used my trusty old immersion blender in a pinch, and it works fine.)
- 9×13-inch baking dish – For assembling and baking the mac and cheese.
- Box grater – For shredding your own cheese. (A food processor with a grating disc makes this even faster.)
Budget-Friendly Tip: If you don’t have a food processor, you can mash the roasted squash very well with a potato masher. It won’t be quite as smooth, but it will still work. I’ve done it that way when I was camping, and honestly, it was still delicious.
Preparation Method
Let’s get cooking! This recipe has a few steps, but I promise they’re all straightforward. Take your time, and remember that a little mess in the kitchen is a sign of a good meal in the making.
- Roast the Butternut Squash (Total Time: 40 minutes): Preheat your oven to 400°F (200°C). Cut the butternut squash in half lengthwise and scoop out the seeds. (You can save those seeds to roast later—they make a great snack!) Place the squash halves cut-side up on a baking sheet. Drizzle with the olive oil and sprinkle with salt and pepper. Roast for 35-40 minutes, until the flesh is very tender when pierced with a fork. Let it cool for a few minutes, then scoop the flesh into a food processor or blender. Puree until completely smooth. You should have about 2 cups of puree. Set aside.
- Cook the Pasta (Total Time: 10 minutes): While the squash roasts, bring a large pot of salted water to a boil. Add the elbow macaroni and cook according to package directions until al dente. (I usually cook it for 1 minute less than the package says, since it will bake later.) Drain the pasta and return it to the pot. Drizzle with a tiny bit of olive oil to prevent sticking.
- Make the Cheese Sauce (Total Time: 10 minutes): In a medium saucepan, melt the butter over medium heat. Once it’s bubbly, whisk in the flour and cook for 1 minute, stirring constantly. This is called a roux, and it’s the foundation of a smooth sauce. Slowly pour in the milk and heavy cream while whisking continuously to prevent lumps. Cook for 3-4 minutes, stirring often, until the sauce thickens enough to coat the back of a spoon.
- Add the Squash and Cheese (Total Time: 5 minutes): Reduce the heat to low. Stir in the butternut squash puree until it’s fully incorporated. The sauce will turn a beautiful golden-orange color. Now, add the shredded cheddar and Gruyère (if using) in handfuls, stirring until each addition is melted before adding the next. Stir in the garlic powder, nutmeg, and a pinch of salt and pepper. Taste it—this is the moment of truth. Adjust the seasoning if needed. The sauce should be creamy, cheesy, and just a little bit sweet from the squash.
- Combine and Assemble (Total Time: 5 minutes): Pour the cheese sauce over the cooked pasta and stir gently until every piece of macaroni is coated. Transfer the mixture to a greased 9×13-inch baking dish and spread it into an even layer.
- Add the Topping and Bake (Total Time: 25 minutes): In a small bowl, mix the panko breadcrumbs, melted butter, and Parmesan cheese. Sprinkle this evenly over the mac and cheese. Bake at 375°F (190°C) for 20-25 minutes, until the top is golden brown and the edges are bubbly. Let it rest for 5 minutes before serving—this helps it set so it doesn’t turn into a soupy mess on the plate.
Personal Tip: The first time I made this, I forgot to add the nutmeg. I tasted the sauce and wondered why it felt like something was missing. A pinch of nutmeg later, and it was like magic. Don’t skip it!
Cooking Tips & Techniques
I’ve made this recipe more times than I can count, and I’ve learned a few things along the way. Here are my best tips to make sure yours turns out perfect every time.
- Don’t Overcook the Pasta: Al dente is your friend. The pasta will continue to cook in the oven, so if you cook it fully on the stove, you’ll end up with mushy mac and cheese. Trust me, I learned this the hard way when I was rushing one Thanksgiving morning.
- Shred Your Own Cheese: I know it’s tempting to buy the pre-shredded bags, but they contain starches and anti-caking agents that prevent the cheese from melting smoothly. Your sauce will be much creamier if you shred it yourself. It takes an extra 5 minutes, and it’s worth it.
- Low and Slow for the Sauce: When you add the cheese, keep the heat on low. High heat can cause the cheese to seize up and become grainy. Patience is key here.
- Taste as You Go: The amount of salt you need will depend on the cheese you use. Some cheddars are saltier than others. Always taste the sauce before you pour it over the pasta and adjust accordingly.
- Make It Ahead: You can assemble the entire dish (without the topping) up to 2 days in advance. Cover it tightly with foil and refrigerate. When you’re ready to bake, add the topping and bake for 30-35 minutes, until heated through and bubbly. This is a game-changer for Thanksgiving day.
- The Leftover Secret: This mac and cheese is even better the next day. The flavors meld together overnight. If you have leftovers, reheat them in a skillet with a splash of milk to bring back the creaminess.
Variations & Adaptations
One of the best things about this recipe is how flexible it is. Here are some ways to make it your own.
- Make It Gluten-Free: Use a gluten-free pasta blend (I like the one from Barilla) and swap the all-purpose flour for a 1:1 gluten-free flour blend. Use gluten-free panko for the topping. The texture will be slightly different, but it’s still delicious.
- Add Some Protein: Stir in 2 cups of shredded rotisserie chicken or cooked, crumbled bacon before baking. This turns it into a complete meal that’s perfect for a post-Thanksgiving dinner.
- Veggie Boost: Sauté 1 cup of finely chopped broccoli or spinach and stir it into the mac and cheese along with the sauce. The kids will never know there are even more vegetables in there.
- Spice It Up: For the adults, add 1/4 teaspoon of cayenne pepper or a pinch of smoked paprika to the cheese sauce. It adds a warm, smoky depth that’s lovely against the sweet squash.
- Dairy-Free Version: Use a good quality dairy-free butter (like Miyoko’s), unsweetened oat milk, and a dairy-free cheddar shred (like Violife). The sauce won’t be quite as creamy, but it’s still a solid option for those with allergies.
- My Personal Variation: Last year, I added a handful of fresh sage leaves that I fried in butter until crispy. I crumbled them over the top before serving. That little touch made it feel like a restaurant-quality dish, and it’s become my new favorite way to make it.
Serving & Storage Suggestions
This mac and cheese is a star on any Thanksgiving table, but it’s also perfect for casual weeknight dinners. Here’s how to serve and store it.
Serving: Serve it hot, straight from the oven, with the crispy topping still crunchy. It pairs beautifully with roasted turkey, honey-glazed ham, or even a simple green salad. For a full Thanksgiving plate, I love it next to some green bean casserole from scratch and fluffy dinner rolls. The kids will go for the mac and cheese first, and that’s perfectly okay.
Storage: Leftovers can be stored in an airtight container in the refrigerator for up to 5 days. The texture will firm up as it cools, but it will reheat beautifully. For longer storage, you can freeze the baked mac and cheese for up to 3 months. Wrap the dish tightly in plastic wrap and then foil before freezing. Thaw it in the refrigerator overnight before reheating.
Reheating: The best way to reheat this is in the oven at 350°F (175°C) for 15-20 minutes, covered with foil. If you’re in a hurry, you can microwave individual portions for 1-2 minutes, but the topping will lose its crunch. For a quick stovetop reheat, place a portion in a skillet with a splash of milk and warm it over medium-low heat, stirring occasionally.
Flavor Development: Honestly, this mac and cheese tastes even better the next day. The squash and cheese flavors have time to meld together, and the texture becomes even creamier. I often make a double batch just so I can have leftovers for lunch.
Nutritional Information & Benefits
This recipe is comfort food at its finest, but it also has some surprising nutritional perks. Here’s a rough breakdown per serving (based on 8 servings):
- Calories: Approximately 480-520
- Protein: 18-20g
- Fat: 28-32g
- Carbohydrates: 42-46g
- Fiber: 4-5g
- Vitamin A: Over 200% of the daily value (thanks to the butternut squash!)
Health Benefits: Butternut squash is packed with vitamin A, which is great for eye health and immune function. It’s also a good source of fiber, which helps keep everyone feeling full and satisfied. By swapping out some of the heavy cream for squash puree, you’re adding a vegetable to a classic dish without sacrificing any of the creamy, cheesy goodness. This is a win for parents trying to sneak in extra nutrients and for kids who just want a delicious meal.
Dietary Considerations: This recipe can easily be adapted for gluten-free or dairy-free diets (see variations above). It’s not suitable for a low-carb or keto diet due to the pasta and squash. As always, check your cheese labels if you’re concerned about rennet or other additives.
Conclusion
This kid-approved butternut squash mac and cheese has become a non-negotiable part of our Thanksgiving tradition. It’s the dish that proves you can have your comfort food and eat your vegetables too. Whether you’re feeding a crowd of picky eaters or just looking for a new side dish that will impress everyone at the table, this recipe delivers.
I love this recipe because it’s forgiving. You can tweak it, adapt it, and make it your own. Maybe you’ll add bacon, or maybe you’ll go heavy on the nutmeg. That’s the beauty of cooking—you get to make it yours. So go ahead, give it a try. I promise you’ll be scraping the baking dish clean.
I’d love to hear how it turns out for you! Drop a comment below and let me know if your kids gave it the thumbs up. Did you try any fun variations? Share your photos and tag me on social media. Happy cooking, and happy Thanksgiving!
Frequently Asked Questions
Can I use frozen butternut squash instead of fresh?
Yes, absolutely! Frozen butternut squash cubes work great. Just thaw them, pat them dry, and roast them at 400°F for about 20-25 minutes until tender. You can also microwave them to save time, but roasting gives better flavor.
How do I make this recipe ahead of time for Thanksgiving?
Assemble the mac and cheese completely (without the topping) up to 2 days in advance. Cover and refrigerate. On Thanksgiving day, add the panko topping and bake at 375°F for 30-35 minutes, until hot and bubbly. This makes your holiday cooking so much easier.
Can I use a different type of pasta?
Absolutely! While elbow macaroni is classic, any short pasta shape works well. I love using cavatappi, shells, or even rotini. The key is to choose a shape that has nooks and crannies to hold onto that creamy sauce.
My cheese sauce turned out grainy. What went wrong?
This usually happens when the heat is too high when you add the cheese. Always melt cheese over low heat, and add it gradually while stirring constantly. Also, using pre-shredded cheese can cause graininess due to the anti-caking agents. Shredding your own cheese from a block is the best way to avoid this.
Can I freeze this mac and cheese?
Yes, this freezes beautifully! Assemble and bake the mac and cheese, then let it cool completely. Wrap the dish tightly in plastic wrap and then foil. Freeze for up to 3 months. To reheat, thaw overnight in the fridge and bake at 350°F for 20-25 minutes, covered with foil.
Pin This Recipe!
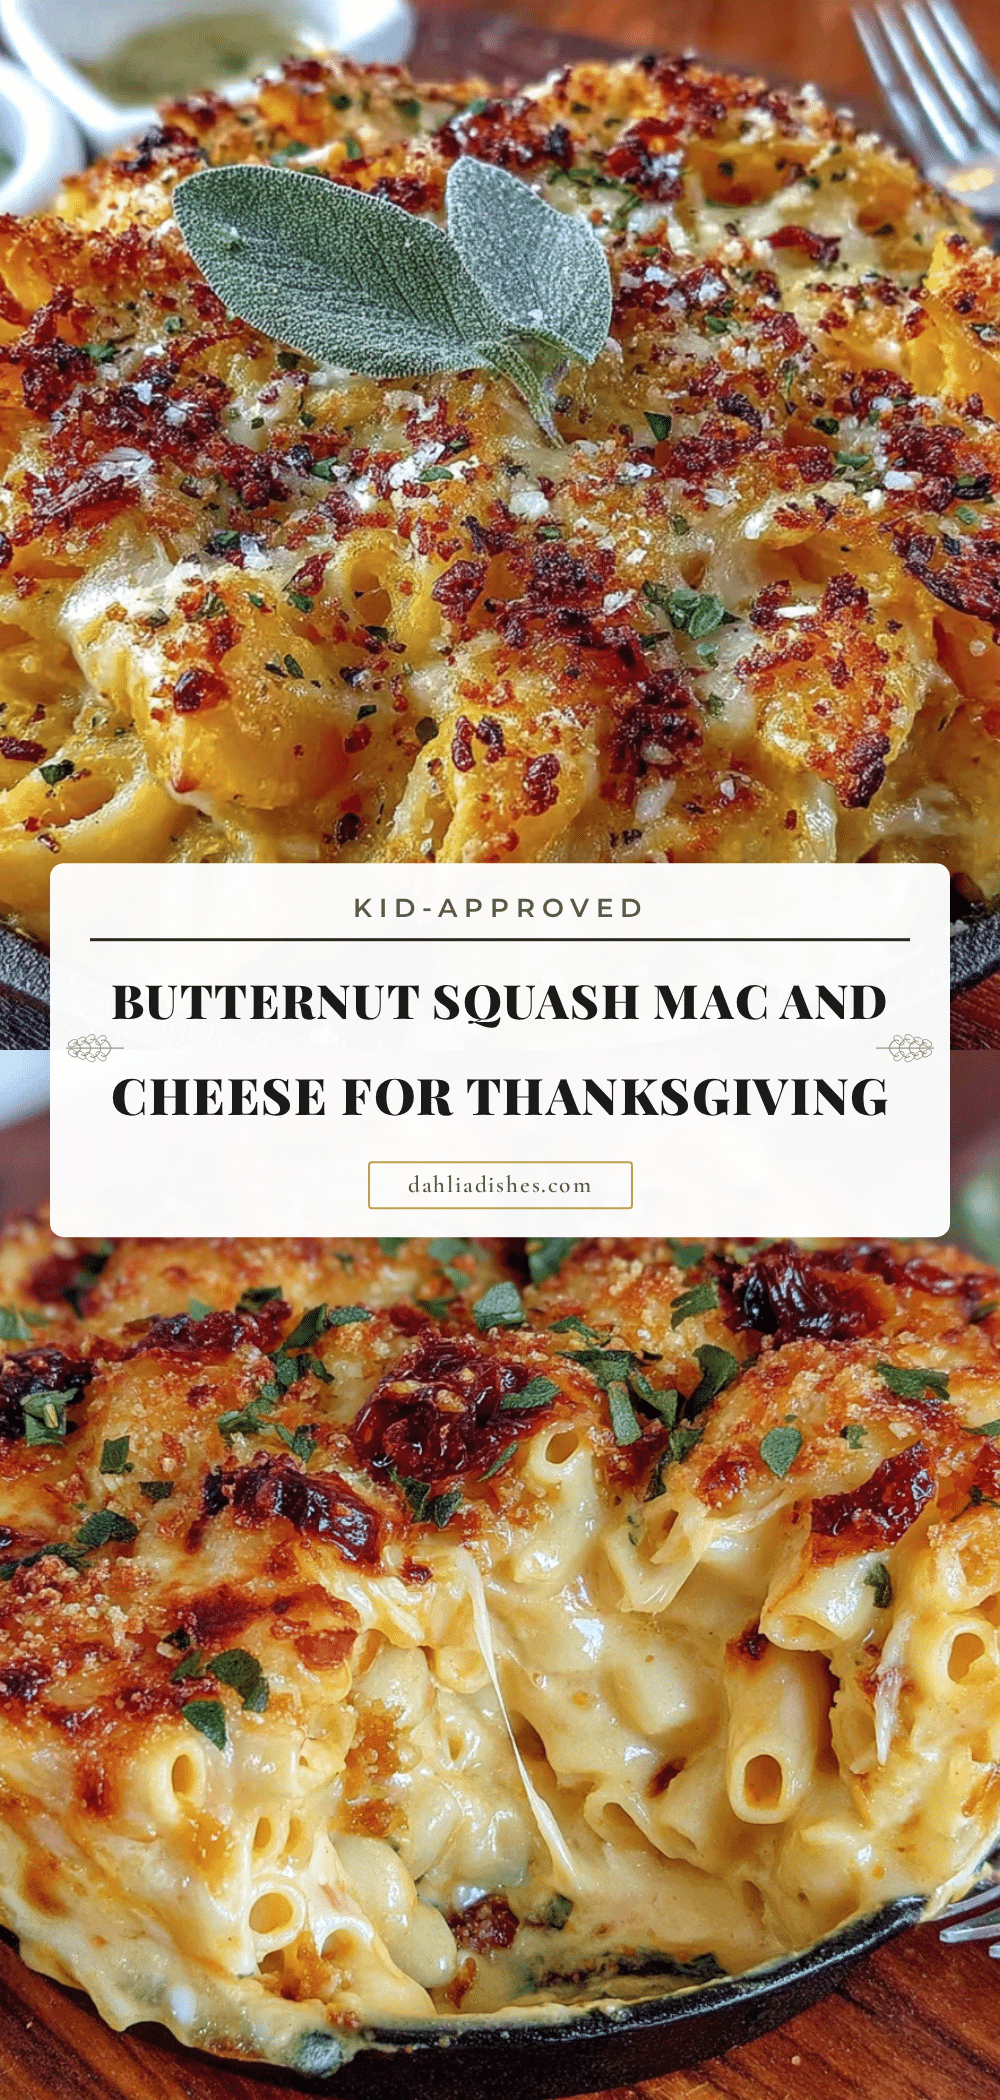
Kid-Approved Butternut Squash Mac and Cheese: Best Thanksgiving Side

This creamy, cheesy mac and cheese is made with a hidden butternut squash puree that adds natural sweetness and a gorgeous golden color. It’s a kid-approved, parent-pleasing side dish that’s perfect for Thanksgiving or any family gathering.
- Prep Time: 15 minutes
- Cook Time: 40 minutes
- Total Time: 55 minutes
- Yield: 8 servings 1x
- Category: Side Dish
- Cuisine: American
Ingredients
- 1 medium butternut squash (about 2–3 pounds)
- 2 tablespoons olive oil
- 1/2 teaspoon salt
- 1/4 teaspoon black pepper
- 1 pound elbow macaroni (or any short pasta like shells or cavatappi)
- 4 tablespoons unsalted butter
- 1/4 cup all-purpose flour
- 2 cups whole milk
- 1 cup heavy cream
- 3 cups sharp cheddar cheese, shredded
- 1 cup Gruyère or Fontina cheese, shredded (optional but recommended)
- 1/2 teaspoon garlic powder
- 1/4 teaspoon nutmeg (freshly grated is best)
- Salt and pepper to taste
- 1/2 cup panko breadcrumbs
- 2 tablespoons melted butter
- 1/4 cup grated Parmesan cheese
Instructions
- Preheat oven to 400°F (200°C). Cut butternut squash in half lengthwise, scoop out seeds. Place cut-side up on a baking sheet, drizzle with olive oil, and sprinkle with salt and pepper. Roast for 35-40 minutes until tender. Let cool, then scoop flesh into a food processor or blender and puree until smooth. Set aside.
- Bring a large pot of salted water to a boil. Cook elbow macaroni according to package directions until al dente (cook 1 minute less than package suggests). Drain and return to pot. Drizzle with a little olive oil to prevent sticking.
- In a medium saucepan, melt butter over medium heat. Whisk in flour and cook for 1 minute, stirring constantly. Slowly pour in milk and heavy cream while whisking continuously. Cook for 3-4 minutes until sauce thickens enough to coat the back of a spoon.
- Reduce heat to low. Stir in butternut squash puree until fully incorporated. Add shredded cheddar and Gruyère (if using) in handfuls, stirring until melted. Stir in garlic powder, nutmeg, and salt and pepper to taste.
- Pour cheese sauce over cooked pasta and stir gently until coated. Transfer to a greased 9×13-inch baking dish and spread evenly.
- In a small bowl, mix panko breadcrumbs, melted butter, and Parmesan cheese. Sprinkle over mac and cheese. Bake at 375°F (190°C) for 20-25 minutes until golden brown and bubbly. Let rest 5 minutes before serving.
Notes
Don’t skip the nutmeg—it’s the secret ingredient that makes the squash and cheese sing together. For a make-ahead option, assemble the dish (without topping) up to 2 days in advance, refrigerate, then add topping and bake for 30-35 minutes at 375°F. Leftovers reheat beautifully; add a splash of milk when reheating to restore creaminess.
Nutrition
- Serving Size: 1 serving (about 1 c
- Calories: 500
- Sugar: 6
- Sodium: 600
- Fat: 30
- Saturated Fat: 18
- Carbohydrates: 44
- Fiber: 4
- Protein: 19
Keywords: butternut squash mac and cheese, Thanksgiving side dish, kid-friendly mac and cheese, healthy mac and cheese, creamy mac and cheese


