Love this? Save it for later!
Share the inspiration with your friends
I was standing in line at the hardware store—of all places—holding a lightbulb and feeling sorry for myself about the long wait, when the woman ahead of me turned around and started talking about Christmas gifts. She was maybe seventy, wearing a puffy vest with paint stains on it, and she had exactly three items in her basket: a putty knife, a roll of duct tape, and a bag of marshmallows. I remember thinking, okay, this is going to be interesting. She told me she was making her famous hot cocoa mix for everyone on her list again this year, and that she had learned the recipe from her mother-in-law back in 1972. I wasn’t expecting gift-giving advice from a woman buying duct tape, but there I was, listening to her describe exactly how to layer the cocoa powder and sugar just so, and how the trick was always the tiny pinch of salt.
Honestly, I almost forgot to buy my lightbulb. She drew me a little diagram on the back of her receipt, and I still have it tucked into my favorite cookbook. That chance conversation changed how I thought about homemade gifts forever. I mean, who knew a simple jar of cocoa mix could carry so much meaning? Maybe you’ve been there—staring at gift lists and wondering what to give that won’t break the bank or feel impersonal. This homemade hot cocoa mix in a jar is the answer. It’s thoughtful, it’s beautiful, and it tastes like a warm hug on a cold day.
The best part? It comes together in minutes, uses ingredients you probably already have, and the jar itself becomes part of the gift. I’ve made dozens of these over the years, and every single time I layer those ingredients, I think about that woman in the hardware store. This recipe stayed with me because it’s not just about the cocoa—it’s about taking a moment to make something by hand for someone you care about. Let me show you how simple it is.
Why You’ll Love This Recipe
This homemade hot cocoa mix in a jar is the kind of recipe that makes you look like a kitchen wizard, but it’s almost laughably easy to put together. I’ve tested this mix more times than I can count, tweaking the ratios until the balance of chocolate, creaminess, and sweetness was absolutely perfect. It’s been approved by my picky neighbor, my nutritionist friend, and a whole troop of sugar-crazed kids at a holiday party. Trust me when I say this mix delivers every single time.
- Quick & Easy: You can assemble a dozen jars in under thirty minutes. Seriously. It’s perfect for last-minute gift giving or holiday prep.
- Simple Ingredients: No weird additives or hard-to-find items. Everything is a pantry staple or easily found at any grocery store.
- Perfect for Gifting: This is the ultimate DIY present for teachers, neighbors, coworkers, or anyone on your list. It’s personal without being complicated.
- Crowd-Pleaser: Kids and adults both go crazy for it. The rich, creamy texture beats any store-bought packet by a mile.
- Unbelievably Delicious: The combination of high-quality cocoa, powdered milk, and a secret splash of vanilla powder creates a depth of flavor that’s next-level comfort.
What makes this recipe different from the rest? It’s the tiny pinch of salt and the optional addition of vanilla powder that balances everything out. Most mixes are just sweet—this one has soul. It’s the kind of hot cocoa that makes you close your eyes after the first sip. It’s comfort in a mug, made with your own two hands, and that makes it taste even better.
What Ingredients You Will Need
This recipe uses simple, wholesome ingredients to deliver a rich and creamy hot cocoa experience. Most of these are probably already in your pantry, which makes this mix incredibly convenient to whip up on a whim.
- Granulated Sugar (1 ½ cups / 300g): This provides the necessary sweetness. I prefer standard white sugar, but you can use a fine-cane sugar if you like. It dissolves easily and gives the mix a nice texture.
- Unsweetened Cocoa Powder (1 cup / 100g): This is the star of the show. I strongly recommend using a Dutch-processed cocoa powder like Droste or Valrhona for a smoother, richer chocolate flavor. It’s less acidic and blends more easily than natural cocoa.
- Powdered Milk (1 cup / 120g): This is what makes the cocoa creamy and luxurious. It adds body and a velvety texture that water alone can’t achieve. You can find it in the baking aisle or near the powdered coffee creamer.
- Powdered Coffee Creamer (½ cup / 60g): This is my little secret. A plain or vanilla-flavored non-dairy creamer adds an extra layer of richness and helps the mix dissolve perfectly. If you want to skip it, just add an extra ½ cup of powdered milk.
- Confectioners’ Sugar (½ cup / 60g): Also known as powdered sugar, this helps the mix dissolve instantly and adds a touch of extra sweetness and smoothness. Don’t skip it—it makes a real difference in texture.
- Salt (¼ teaspoon / 1.5g): A tiny pinch of salt is essential. It doesn’t make the cocoa salty—it enhances the chocolate flavor and balances the sweetness. Trust me on this one.
- Vanilla Powder (1 teaspoon, optional / 4g): This is optional but highly recommended. It infuses the mix with a warm, aromatic vanilla flavor. If you don’t have vanilla powder, you can add a drop of vanilla extract to each individual mug when serving.
- Mini Marshmallows or Chocolate Chips (for layering): These are for the visual appeal of the jar. They create those beautiful layers that make the gift so photogenic. Use mini marshmallows, dark chocolate chips, or white chocolate chips.
Ingredient Note: For the best results, always sift your cocoa powder and confectioners’ sugar together before mixing. Cocoa powder can be clumpy, and sifting ensures a smooth, lump-free mix. I learned this the hard way after my first batch had stubborn little cocoa lumps that refused to dissolve.
Equipment Needed
You don’t need fancy equipment for this recipe, which is part of its charm. Here’s what you’ll need to get started:
- Quart-Size Mason Jars (24 oz / 700ml): These are perfect for gifting. They hold enough mix for about 8-10 servings. I love using wide-mouth jars because they’re easier to layer and fill.
- Funnel: A small funnel is a lifesaver for getting the dry ingredients into the jar without making a mess. It’s worth the small investment.
- Mixing Bowl: A large bowl for combining the dry ingredients before layering. This ensures the salt and vanilla powder are evenly distributed.
- Whisk: For mixing the ingredients together thoroughly. A simple wire whisk works perfectly.
- Measuring Cups and Spoons: Accurate measurements are key to getting the ratios right. Use dry measuring cups for the powders.
- Ribbon, Twine, or Gift Tags: For decorating the jars. This is where you can get creative and make each gift unique.
If you don’t have a funnel, you can roll a piece of parchment paper into a cone shape and use that instead—it’s a little messy but it works in a pinch. I’ve done it more times than I’d like to admit!
Preparation Method
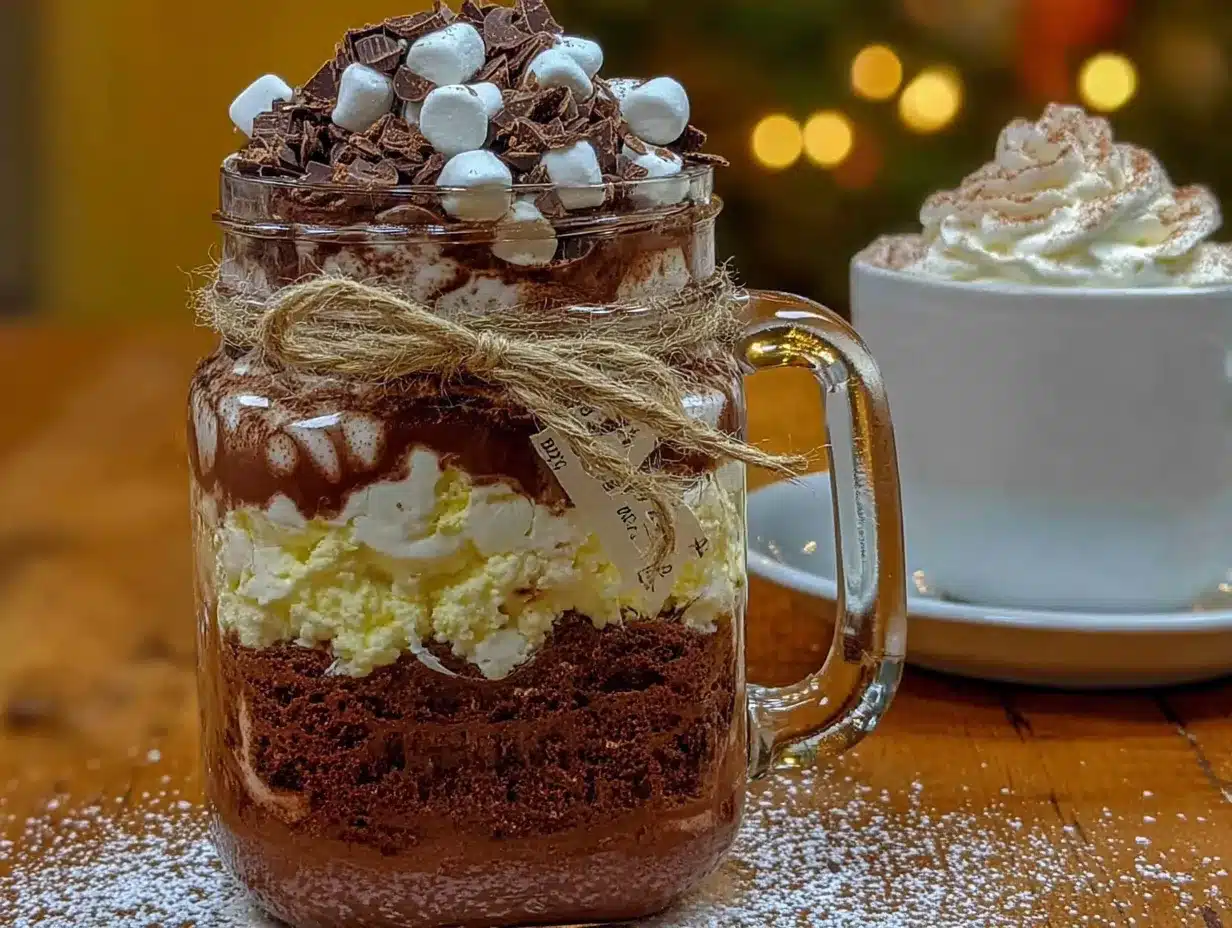
Making this homemade hot cocoa mix in a jar is incredibly straightforward. Follow these steps, and you’ll have beautiful, gift-ready jars in no time.
- Prepare Your Workspace (5 minutes): Clear your counter and gather all your ingredients and equipment. Make sure your mason jars are clean and completely dry. Any moisture can cause the powders to clump, so take your time with this step.
- Mix the Dry Ingredients (5 minutes): In a large mixing bowl, combine the granulated sugar, sifted cocoa powder, powdered milk, powdered coffee creamer, confectioners’ sugar, salt, and vanilla powder (if using). Whisk everything together until it’s uniformly combined. The color should be an even, rich chocolate brown. This step ensures that every scoop of mix has the perfect balance of flavors.
- Layer the Jar (10 minutes): This is the fun part. Using your funnel, carefully pour the mix into the jar. You want to create distinct, even layers for that gorgeous visual effect. Start with a layer of the cocoa mix, then tap the jar gently on the counter to settle it. Repeat until the jar is about three-quarters full. The layers should be neat and level.
- Add the Topping Layer (5 minutes): On top of the cocoa mix, add a layer of mini marshmallows, followed by a layer of chocolate chips or white chocolate chips. This creates a beautiful contrast at the top of the jar. Gently press them down so they’re snug against the mix.
- Seal and Decorate (10 minutes): Place the lid on the jar and screw it on tightly. Now comes the personal touch. Cut a square of festive fabric or a piece of parchment paper and place it over the lid before screwing on the band. Tie it with ribbon or twine. Attach a gift tag with the serving instructions.
Serving Instructions for the Gift Tag: “To make a cup of hot cocoa, add 3 heaping tablespoons of this mix to a mug. Pour in 8 ounces of hot milk (dairy or non-dairy) and stir until fully dissolved. Top with extra marshmallows or whipped cream if desired. Enjoy!”
Pro Tip: When layering, use the back of a spoon to gently level each layer before adding the next. This creates those crisp, Instagram-worthy lines that make the jar look so professional. I always tap the jar on the counter a few times between layers to help everything settle.
Cooking Tips & Techniques
Over the years, I’ve made a few mistakes with this mix so you don’t have to. Here are my best tips for getting it right every single time.
- Sift Your Cocoa: This is non-negotiable. Cocoa powder loves to clump, and those clumps will not dissolve in hot milk. Sifting it with the confectioners’ sugar ensures a silky smooth mix. I learned this after my first batch had gritty bits—not a good look for a gift.
- Don’t Overfill the Jar: Leave about an inch of space at the top of the jar. This allows room for the marshmallows and chocolate chips without the mix spilling out when you put the lid on. A full jar is a messy jar.
- Use Fresh Ingredients: Powdered milk and cocoa powder can go stale. Check the expiration dates before you start. Fresh ingredients make a noticeable difference in the final flavor. Trust me, stale cocoa is not something you want to gift.
- Tap, Tap, Tap: After each layer, tap the jar gently on the counter. This settles the powder and prevents air pockets. It also helps create those beautiful, defined layers that make the jar look so professional.
- Make a Test Batch: Before you make a dozen jars for gifts, make one jar and test it yourself. This lets you adjust the sweetness or chocolate level to your taste. I once made a batch that was too sweet, and I was so glad I caught it before gifting them.
One of my biggest failures? I once tried to use natural cocoa powder without adjusting the recipe. The mix was bitter and had a weird aftertaste. Stick with Dutch-processed cocoa for the best results. It’s smoother, richer, and more forgiving.
Variations & Adaptations
This recipe is incredibly versatile. Here are some of my favorite variations to keep things interesting.
- Spicy Mexican Hot Cocoa: Add ½ teaspoon of ground cinnamon, ¼ teaspoon of chili powder, and a pinch of cayenne pepper to the dry mix. It’s warm, spicy, and absolutely divine. I love gifting this one to adventurous foodie friends.
- Peppermint Hot Cocoa: Crush a few peppermint candies or add ½ teaspoon of peppermint extract powder (if you can find it) to the mix. Layer the jar with crushed candy canes instead of chocolate chips for a festive holiday look.
- Vegan & Dairy-Free Version: Substitute the powdered milk with a powdered coconut milk or oat milk creamer. Use dairy-free chocolate chips for the topping. The flavor is still rich and creamy, and it’s perfect for friends with dietary restrictions.
- Dark Chocolate Lover’s Mix: Use dark cocoa powder (like black cocoa) and swap the granulated sugar for a slightly smaller amount. Add dark chocolate shavings to the top layer. It’s intensely chocolatey and not too sweet.
- White Hot Cocoa: Omit the cocoa powder entirely. Use 2 cups of powdered milk, 1 cup of powdered white chocolate (or more confectioners’ sugar), and the rest of the ingredients as listed. It’s a creamy, dreamy alternative for those who prefer vanilla over chocolate.
I personally love the Spicy Mexican version. I made it for a winter gathering once, and it was the first thing to disappear. People kept asking for the recipe, and I felt like a culinary genius!
Serving & Storage Suggestions
This mix is designed to be gifted, but it’s also perfect for keeping in your own pantry for those cozy nights in.
Serving: For the best results, use hot milk (dairy or non-dairy) instead of water. The milk creates a creamier, richer cocoa. Heat the milk on the stovetop or in the microwave until it’s steaming but not boiling. Add 3 heaping tablespoons of the mix to a mug, pour in 8 ounces of hot milk, and stir vigorously until everything is dissolved. Top with whipped cream, extra marshmallows, or a sprinkle of cinnamon.
Storage: Store the sealed jars in a cool, dry place away from direct sunlight. The mix will stay fresh for up to 6 months. I don’t recommend refrigerating it, as the moisture can cause clumping. If you’re gifting it, let the recipient know to store it in their pantry.
Reheating: If your cocoa gets cold, simply reheat it in the microwave for 30 seconds or on the stovetop over low heat. Stir well before drinking.
Flavor Development: The flavors actually meld together and deepen after a week or two. So if you’re making these for holiday gifts, prepare them a few weeks in advance for the best flavor. The vanilla and cocoa have time to get to know each other!
Nutritional Information & Benefits
While this is definitely a treat, there are some nutritional highlights worth noting.
Estimated values per serving (3 tablespoons of mix prepared with 8 oz of whole milk): Calories: 280, Fat: 8g, Carbohydrates: 45g, Protein: 8g, Sugar: 38g. These values will vary based on the type of milk you use and any additional toppings.
Health Benefits: Cocoa powder is rich in antioxidants called flavonoids, which can help reduce inflammation and improve heart health. Using milk adds calcium and vitamin D. If you use a dairy-free milk, you can still get a good dose of vitamins depending on the fortification.
Dietary Considerations: This recipe can easily be made gluten-free (all ingredients are naturally gluten-free, but check labels). It can be made vegan by using powdered coconut milk and dairy-free chocolate. It is not low-carb or keto-friendly due to the sugar content, but you could experiment with a sugar substitute like monk fruit or allulose.
Potential Allergens: This recipe contains dairy (milk powder, creamer). It may contain traces of soy or nuts depending on the brands you use. Always check labels if you’re gifting to someone with allergies.
I love that this recipe feels indulgent but uses real, recognizable ingredients. It’s a treat you can feel good about giving—and drinking.
Conclusion
This homemade hot cocoa mix in a jar is more than just a recipe—it’s a little piece of warmth you can share with the people you care about. It’s quick, it’s beautiful, and it tastes like a genuine hug in a mug. Whether you’re making it for holiday gifts, teacher appreciation, or just because, it’s a project that brings joy from the very first layer.
I encourage you to make this recipe your own. Swap in different chips, add your favorite spices, or tie it with a ribbon that matches the season. The possibilities are endless, and that’s the beauty of a handmade gift. It’s personal, it’s thoughtful, and it’s made with love.
I’d love to hear how your jars turn out! Drop a comment below and let me know what variations you tried, or tag me in your photos on social media. There’s nothing better than seeing these little jars of joy out in the world. Happy gifting, and happy sipping!
Frequently Asked Questions
Can I use hot water instead of milk to make the cocoa?
You can, but the result will be much thinner and less creamy. The powdered milk in the mix helps, but using hot milk (dairy or non-dairy) gives you that rich, velvety texture that makes this cocoa so special. I always recommend milk for the best experience.
How long does the homemade hot cocoa mix last in the jar?
Stored in a cool, dry place away from sunlight, the mix will stay fresh for up to 6 months. The shelf life is excellent because all the ingredients are dry. Just make sure the jar is sealed tightly and no moisture gets in.
Can I reduce the sugar in this recipe?
Absolutely. You can cut the granulated sugar down to 1 cup or even ¾ cup if you prefer a less sweet cocoa. The confectioners’ sugar helps with texture, so I’d keep that in, but feel free to adjust the main sugar to your taste. The mix will still work perfectly.
What if I don’t have powdered milk or coffee creamer?
No problem! You can substitute the powdered milk with an equal amount of additional powdered coffee creamer, or vice versa. If you don’t have either, you can use a combination of more confectioners’ sugar and a bit of cornstarch (about 2 tablespoons) to help with texture, but the creaminess will be slightly reduced.
Can I make this mix in bulk and store it in a large container?
Yes! This recipe scales beautifully. Just multiply the ingredients by the number of jars you want to make, mix everything in a large bowl, and store it in an airtight container. When you’re ready to gift, just scoop it into jars and add the toppings. It’s a great time-saver for the holiday season.
Pin This Recipe!
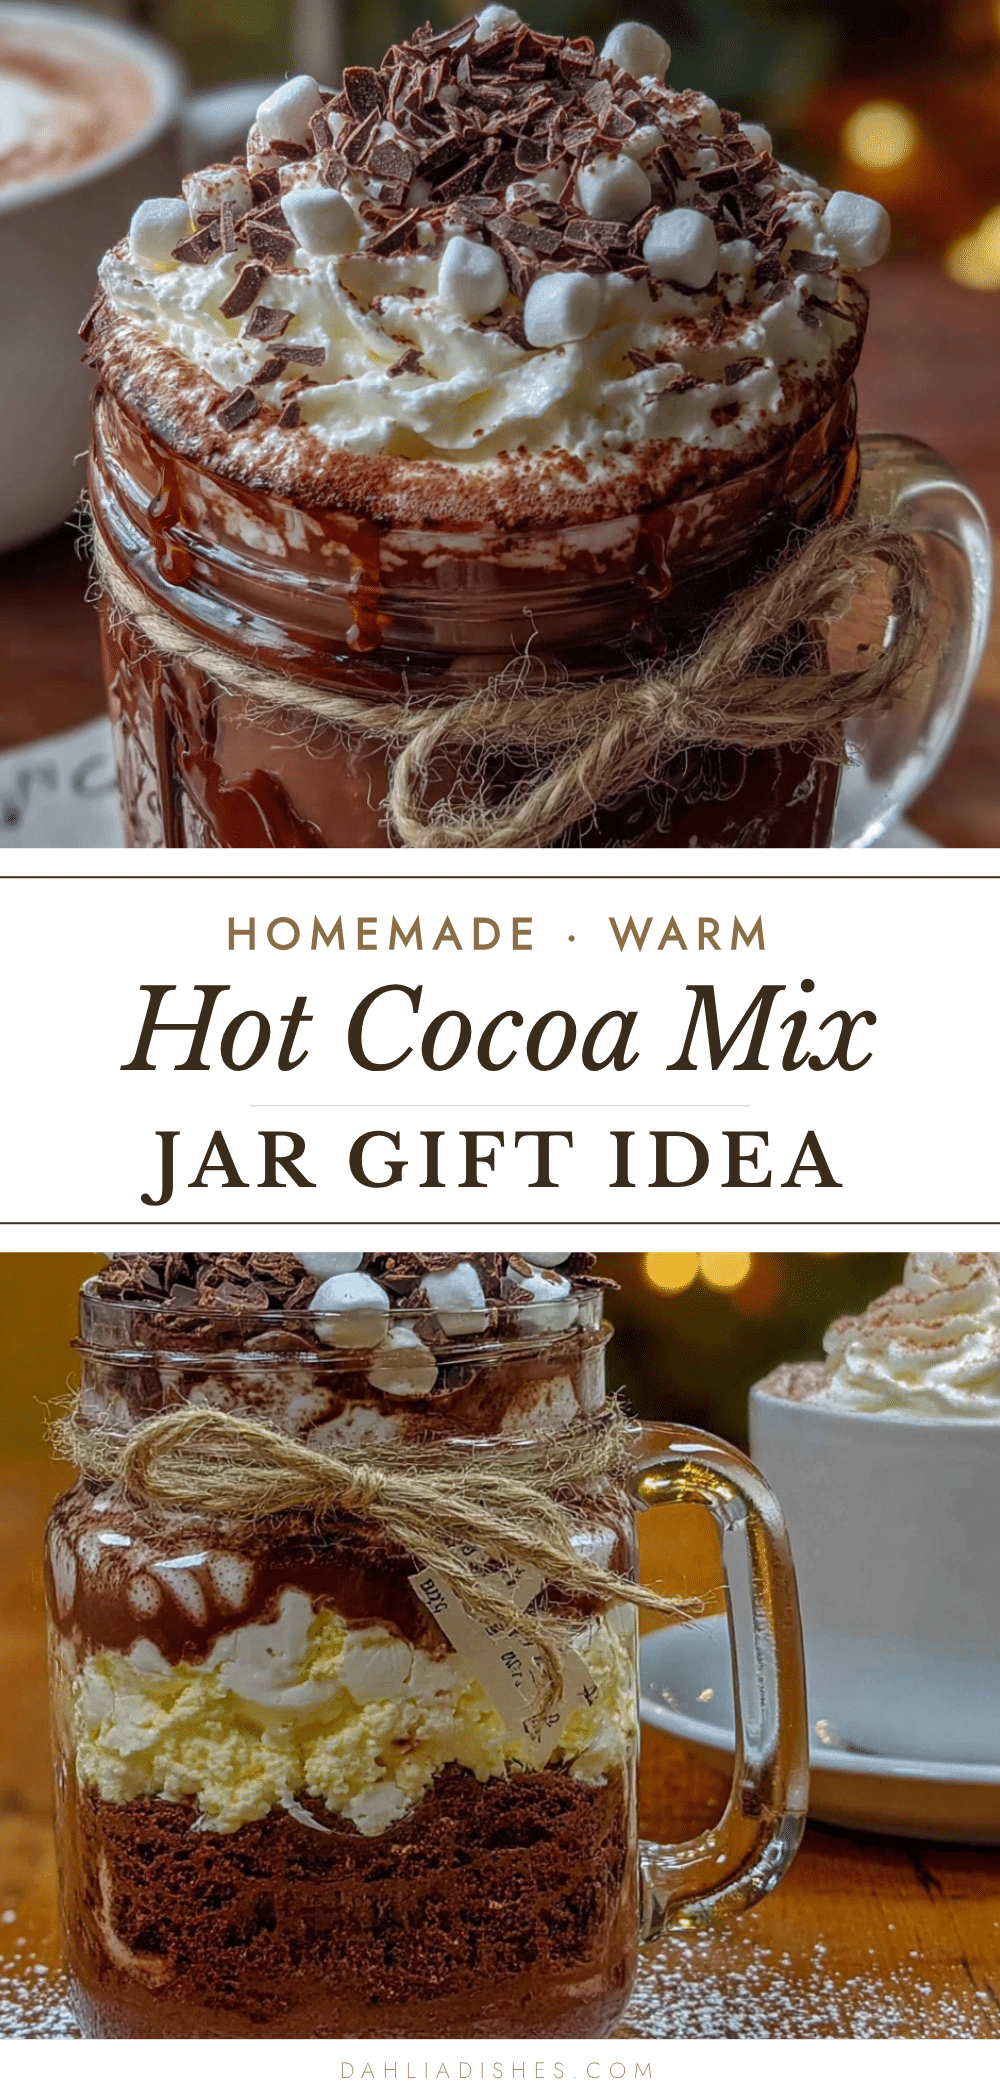
Homemade Hot Cocoa Mix in a Jar: Easy Gift Idea

This homemade hot cocoa mix in a jar is the perfect DIY gift—quick to assemble, made with simple pantry ingredients, and tastes like a warm hug on a cold day. Layer it beautifully in a mason jar for a thoughtful, personal present.
- Prep Time: 15 minutes
- Cook Time: 0 minutes
- Total Time: 15 minutes
- Yield: 8-10 servings per jar 1x
- Category: Beverage
- Cuisine: American
Ingredients
- 1 ½ cups (300g) granulated sugar
- 1 cup (100g) unsweetened Dutch-processed cocoa powder, sifted
- 1 cup (120g) powdered milk
- ½ cup (60g) powdered coffee creamer (plain or vanilla)
- ½ cup (60g) confectioners’ sugar, sifted
- ¼ teaspoon (1.5g) salt
- 1 teaspoon (4g) vanilla powder (optional)
- Mini marshmallows (for layering)
- Chocolate chips or white chocolate chips (for layering)
Instructions
- Prepare your workspace: Clear your counter and gather all ingredients and equipment. Ensure mason jars are clean and completely dry.
- Mix the dry ingredients: In a large mixing bowl, combine granulated sugar, sifted cocoa powder, powdered milk, powdered coffee creamer, confectioners’ sugar, salt, and vanilla powder (if using). Whisk until uniformly combined and an even, rich chocolate brown color.
- Layer the jar: Using a funnel, carefully pour the mix into a quart-size mason jar. Create distinct, even layers by adding a layer of mix, then tapping the jar gently on the counter to settle it. Repeat until the jar is about three-quarters full.
- Add the topping layer: On top of the cocoa mix, add a layer of mini marshmallows, followed by a layer of chocolate chips or white chocolate chips. Gently press them down so they are snug against the mix.
- Seal and decorate: Place the lid on the jar and screw it on tightly. Cut a square of festive fabric or parchment paper and place it over the lid before screwing on the band. Tie with ribbon or twine. Attach a gift tag with serving instructions.
Notes
Sift cocoa powder and confectioners’ sugar together to avoid lumps. For best results, use Dutch-processed cocoa powder. The mix stays fresh for up to 6 months in a cool, dry place. For serving, add 3 heaping tablespoons of mix to a mug with 8 oz of hot milk and stir until dissolved.
Nutrition
- Serving Size: 3 tablespoons of mix
- Calories: 280
- Sugar: 38
- Sodium: 150
- Fat: 8
- Saturated Fat: 5
- Carbohydrates: 45
- Fiber: 2
- Protein: 8
Keywords: hot cocoa mix, homemade gift, DIY gift, mason jar gift, hot chocolate mix, Christmas gift, easy gift idea


