Love this? Save it for later!
Share the inspiration with your friends
My sister-in-law’s annual fall brunch was in twelve hours and I had completely forgotten. I mean, I’d RSVP’d “yes” weeks ago, promising to bring a dish. But there I was, the night before, staring into my pantry like it held the answers to the universe. Everyone else would be showing up with those elaborate, multi-day preparations—you know the type. Flaky, laminated pastries that take three days to proof. A quiche with a homemade crust that’s been chilling since Tuesday. And me? I had a can of pumpkin, a bag of oats, and about forty-five minutes before I needed to get some sleep if I wanted to function the next day.
Honestly, I almost just grabbed a store-bought coffee cake and called it a day. But then I spotted a container of Greek yogurt in the fridge and something clicked. I’d been messing around with baked oatmeal for a while, but never with pumpkin. I figured, what’s the worst that could happen? If it flopped, I’d blame it on a “new recipe I was testing.” That’s the beauty of being the “foodie” of the family—you get a free pass for experimental disasters.
I threw everything into a bowl, mixed it with a bit more desperation than precision, and slid it into the oven. The whole thing took maybe fifteen minutes of actual work. The next morning, I walked into her house feeling sheepish, holding this humble-looking baking dish. And let me tell you, by the time the brunch was over, three people had asked for the recipe. The elaborate quiche? Barely touched. The fancy pastries? Half-eaten. My little pumpkin oat bake? Completely gone. I stood there, slightly stunned, holding an empty dish and a new favorite recipe. That’s how this Healthy Pumpkin Oat Breakfast Bake became my go-to for every single gathering since. It’s the accidental overachiever of my kitchen, and I think you’re going to love it too.
Why You’ll Love This Recipe
Let’s be honest—finding a breakfast dish that’s both healthy enough to feel good about and impressive enough to serve to guests is like finding a unicorn. Most “healthy” breakfast bakes taste like cardboard and sadness. Not this one. This Healthy Pumpkin Oat Breakfast Bake is the real deal, and here’s why it’s become my secret weapon for hosting.
- Make-Ahead Magic: This is the ultimate host-friendly recipe. You can assemble the entire thing the night before your brunch, pop it in the fridge, and just bake it off in the morning. No early morning scrambling, no stressed-out host vibes. You get to actually enjoy your coffee and talk to your guests instead of sweating over a hot stove.
- Simple, Whole-Food Ingredients: No weird powders or hard-to-find specialty items. You probably have most of these ingredients in your pantry right now. Oats, pumpkin puree, eggs, maple syrup, and some warm spices. That’s it. It’s the kind of recipe that makes you feel like a culinary genius without any actual effort.
- Perfect for a Crowd: This bake serves 8-10 people easily. It’s the perfect centerpiece for a fall brunch, a Thanksgiving morning breakfast, or a cozy gathering with friends. You can even double it for a larger party. It scales beautifully, which is a lifesaver when you’re hosting.
- Naturally Sweet & Satisfying: The pumpkin and maple syrup provide just the right amount of sweetness without being cloying. Each bite is packed with cozy fall flavor, and the texture is this perfect cross between a soft baked oatmeal and a comforting bread pudding. It’s filling without being heavy, so your guests will have room for mimosas.
- Always Gets Rave Reviews: I’ve brought this to potlucks, family gatherings, and friend brunches. It never fails. People are always surprised that something so delicious is actually good for them. It’s the kind of dish that makes you look like you spent hours in the kitchen when you really didn’t.
What makes this recipe different from every other pumpkin baked oatmeal out there? It’s the texture. I’ve tested this thing probably a dozen times to get it just right. Most baked oatmeals turn out either too dry and crumbly or too mushy and soggy. This one hits that sweet spot—creamy and tender on the inside, with a slightly crisp, golden top. The secret is the ratio of liquid to oats and the addition of Greek yogurt, which adds protein and an incredible tenderness. It’s not just another version; it’s my best version, perfected through trial and error so you don’t have to do the work.
What Ingredients You Will Need
This recipe uses simple, wholesome ingredients that work together to create something truly special. The beauty is in how these everyday staples transform into a dish that feels both indulgent and nourishing. Here’s everything you’ll need and a few notes on why each one matters.
- Rolled Oats (3 cups / 270g): Please use old-fashioned rolled oats, not the quick-cooking or steel-cut varieties. Rolled oats hold their shape during baking and give the dish that perfect chewy-soft texture. Quick oats will turn into mush, and steel-cut oats won’t soften enough. I prefer Bob’s Red Mill or Quaker Old-Fashioned for consistent results. If you need this to be gluten-free, make sure your oats are certified gluten-free.
- Canned Pumpkin Puree (1 can, 15 oz / 425g): Make sure you’re getting 100% pure pumpkin puree, not pumpkin pie filling. The pie filling has added sugar and spices that will throw off the balance. I always stock up on Libby’s when it goes on sale in the fall. You can also use homemade pumpkin puree, just make sure it’s well-drained so the bake isn’t watery.
- Large Eggs (3): Eggs are the binder here, giving the bake structure and helping it set properly. They also add a nice richness. For best results, use room temperature eggs—they incorporate more easily into the batter. If you’re in a rush, just place the eggs in a bowl of warm water for 5 minutes.
- Greek Yogurt (1 cup / 240g): This is my secret ingredient. The yogurt adds a ton of protein, makes the bake incredibly moist and tender, and gives it a slight tang that balances the sweetness of the pumpkin and maple syrup. I use plain full-fat Greek yogurt for the best texture, but 2% works too. Avoid nonfat, as it can make the bake a bit dry.
- Milk (1 cup / 240ml): Any milk works here. I typically use whole milk or unsweetened almond milk. The milk provides the necessary liquid to soften the oats and create that creamy texture. If you’re using a thicker milk like oat milk, you might need to add an extra tablespoon or two.
- Maple Syrup (1/2 cup / 120ml): Pure maple syrup, not pancake syrup. It adds a deep, complex sweetness that pairs beautifully with the pumpkin and spices. You can substitute honey or agave if that’s what you have, but the flavor will be slightly different. For a less sweet version, reduce to 1/3 cup.
- Coconut Oil or Butter (1/4 cup / 56g), melted: This adds richness and helps create that golden, slightly crispy top. I love the subtle flavor coconut oil gives, but melted butter works wonderfully too. If using coconut oil, make sure it’s melted and slightly cooled before adding.
- Vanilla Extract (1 teaspoon): A must for rounding out the flavors. Use real vanilla extract, not imitation, for the best taste.
- Pumpkin Pie Spice (2 teaspoons): You can use store-bought or make your own blend. My homemade mix is 1 teaspoon cinnamon, 1/2 teaspoon ginger, 1/4 teaspoon nutmeg, 1/4 teaspoon allspice, and a pinch of cloves. It’s cheaper and you can adjust it to your taste.
- Cinnamon (1 teaspoon): Because you can never have too much cinnamon in a pumpkin dish. It adds warmth and that unmistakable fall aroma.
- Salt (1/2 teaspoon): Don’t skip this! Salt enhances all the other flavors and prevents the bake from tasting flat. I use fine sea salt.
- Optional Toppings: Chopped pecans or walnuts, pepitas (pumpkin seeds), dried cranberries, or a sprinkle of brown sugar on top before baking. These add texture and make the dish look even more impressive for guests.
Equipment Needed
You don’t need a fancy kitchen to pull this off. Here’s what you’ll need, along with a few tips from my own experience.
- 9×13-inch Baking Dish: This is the ideal size for a single batch. A 9×9-inch dish works too, but the bake will be much thicker and may need an extra 5-10 minutes in the oven. For a double batch, use a 9×13-inch dish or a large cast-iron skillet for a rustic look.
- Large Mixing Bowl: Any large bowl will do. I prefer a glass or stainless steel bowl because they don’t retain odors.
- Whisk: For combining the wet ingredients smoothly. A fork works in a pinch, but a whisk is faster and gets the eggs fully incorporated.
- Rubber Spatula: Essential for scraping every last bit of batter into the dish. It’s also great for folding in any add-ins like nuts or dried fruit.
- Measuring Cups and Spoons: For accuracy. I cannot stress this enough—baking is a science, and eyeballing measurements can lead to disaster. Use dry measuring cups for the oats and wet measuring cups for the milk and maple syrup.
- Parchment Paper (optional but recommended): Lining your baking dish with parchment paper makes cleanup a breeze and allows you to lift the entire bake out for easy slicing. Just leave a little overhang on the sides.
Preparation Method
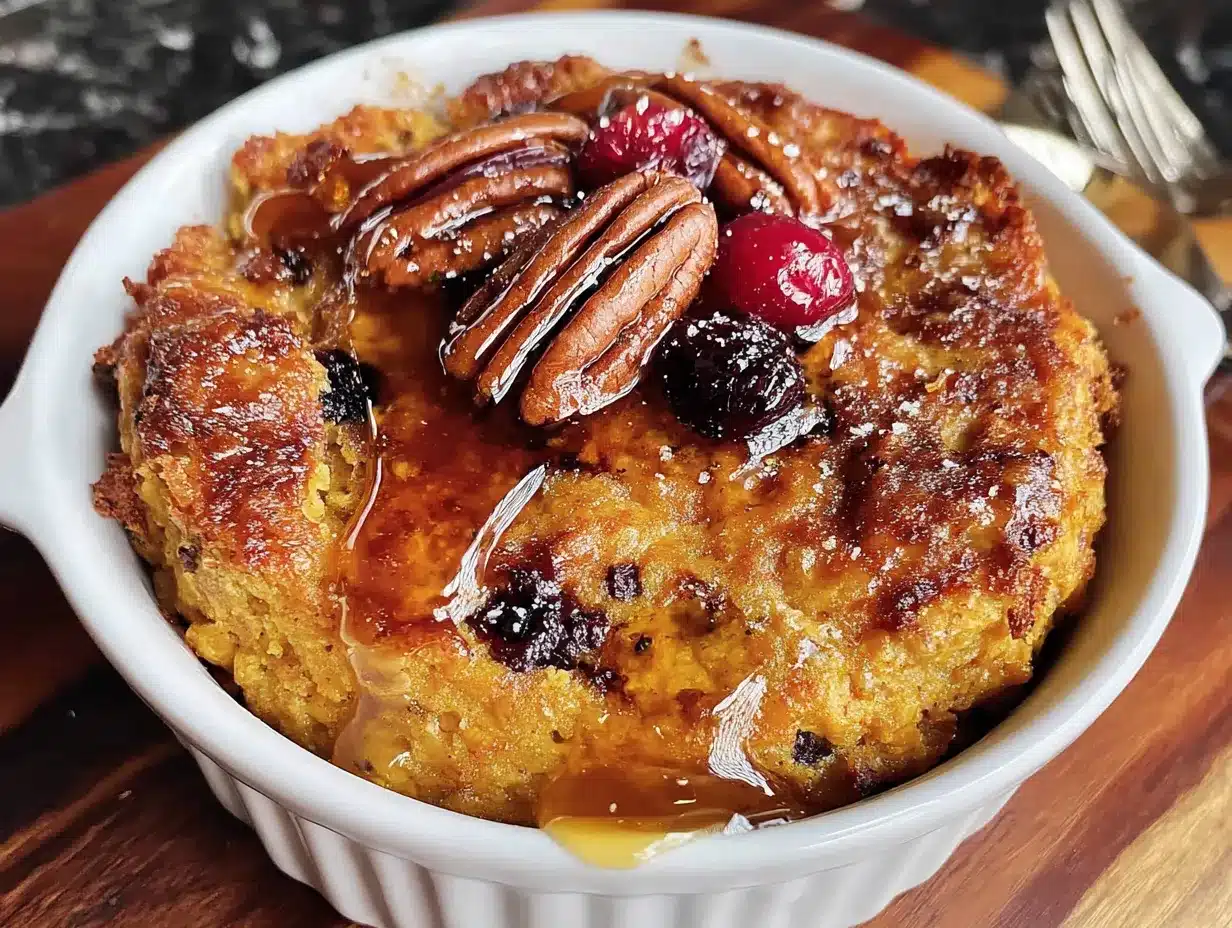
Alright, let’s get cooking. This is the easy part. I’ve broken it down into clear steps with all the little details I’ve learned from making this dish more times than I can count.
- Preheat and Prep (5 minutes): Preheat your oven to 375°F (190°C). While it’s heating up, grease your 9×13-inch baking dish with a little butter or coconut oil. If you’re using parchment paper, line the dish now, leaving some overhang on the long sides. This step takes two minutes and saves you from scrubbing later.
- Mix the Dry Ingredients (3 minutes): In your large mixing bowl, combine the 3 cups of rolled oats, 2 teaspoons of pumpkin pie spice, 1 teaspoon of cinnamon, and 1/2 teaspoon of salt. Give it a good stir with your whisk or a fork to distribute the spices evenly. This ensures every bite is perfectly seasoned. If you’re adding any nuts or dried fruit, stir them in now. I usually add a handful of chopped pecans for crunch.
- Combine the Wet Ingredients (5 minutes): In a separate medium bowl (or just a large liquid measuring cup), whisk together the 3 eggs, 1 cup of Greek yogurt, 1 cup of milk, 1/2 cup of maple syrup, 1/4 cup of melted coconut oil (or butter), and 1 teaspoon of vanilla extract. Whisk until the mixture is smooth and the eggs are fully incorporated. You don’t want any streaks of egg white floating around. The mixture should look creamy and uniform.
- Add the Pumpkin (2 minutes): Open your can of pumpkin puree and give it a stir in the can first—sometimes it separates. Then add the entire 15-ounce can to the wet ingredient mixture. Whisk until the pumpkin is completely incorporated. The mixture will turn a beautiful, vibrant orange. It’s one of my favorite moments in this whole process.
- Combine Wet and Dry (3 minutes): Pour the wet pumpkin mixture into the bowl with the dry oats. Use your rubber spatula to fold everything together until just combined. Be careful not to overmix—you want to stir until you don’t see any dry oats, but a few lumps are totally fine. Overmixing can make the bake a bit dense. The batter will look quite liquidy at this point, but don’t worry. The oats will absorb the liquid as they bake.
- Transfer to Baking Dish (2 minutes): Pour the batter into your prepared baking dish. Use your spatula to spread it into an even layer. If you want a little extra crunch on top, sprinkle a tablespoon of brown sugar and a handful of pepitas or chopped pecans over the surface. This is optional, but it makes for a gorgeous presentation.
- Bake (35-40 minutes): Place the dish in the preheated oven and bake for 35 to 40 minutes. The bake is done when the edges are golden brown and the center is set—it should jiggle just slightly when you gently shake the dish, like a cheesecake. A toothpick inserted into the center should come out mostly clean, with a few moist crumbs attached. If it’s still wet and goopy, give it another 5 minutes. Every oven is different, so start checking at the 30-minute mark.
- Cool and Serve (10 minutes): Once baked, remove the dish from the oven and place it on a wire rack to cool for at least 10 minutes. This resting time is crucial—it allows the bake to finish setting up and makes it easier to slice. If you dig in too soon, it will be a bit loose. After 10 minutes, slice into squares and serve warm. You can drizzle a little extra maple syrup on top or add a dollop of yogurt for extra creaminess.
Cooking Tips & Techniques
I’ve made this Healthy Pumpkin Oat Breakfast Bake at least twenty times, and I’ve learned a few things the hard way. Here are my best tips to ensure yours turns out perfect every single time.
Don’t Skip the Resting Time: I know it’s tempting to dive right in, but letting the bake cool for 10 minutes is non-negotiable. The first time I made this, I was impatient and served it immediately. It was a soupy mess. The oats need that time to absorb the remaining liquid and set up properly. Trust me on this one.
Watch Your Oven: Oven temperatures vary wildly. My old oven ran hot and would brown the top way too fast while the center was still raw. If you notice the top getting too dark before the center is set, loosely tent the dish with aluminum foil for the last 10 minutes of baking. This will prevent burning while allowing the inside to finish cooking.
Make It Ahead Like a Pro: This is a game-changer for hosting. You can assemble the entire bake the night before, cover it with plastic wrap, and store it in the fridge. In the morning, let it sit on the counter for 15 minutes while the oven preheats, then bake as directed. You may need to add 5-10 minutes to the baking time since it’s starting from cold. This method is my secret for stress-free hosting.
Texture Troubleshooting: If your bake turns out too dry, you probably used too many oats or overbaked it. If it’s too wet, you might have used quick oats or didn’t bake it long enough. I once used steel-cut oats by accident (grabbed the wrong container in a hurry), and it was a disaster—hard, crunchy oats in a sea of liquid. Stick with rolled oats and you’ll be fine.
Scaling for a Crowd: Doubling this recipe is simple. Just use a larger baking dish (like a 10×15-inch or two 9x13s) and increase the baking time by about 10-15 minutes. Check for doneness with the toothpick test. I’ve done this for Thanksgiving morning brunch and it fed 16 people with leftovers.
Variations & Adaptations
One of the best things about this recipe is how flexible it is. Here are some of my favorite ways to switch it up, depending on the season, your dietary needs, or just your mood.
- Vegan Version: This is surprisingly easy to adapt. Replace the eggs with 3 flax eggs (3 tablespoons ground flaxseed mixed with 9 tablespoons water, let sit for 5 minutes). Use a plant-based Greek yogurt (I like Kite Hill or Siggi’s plant-based) and your favorite non-dairy milk. The texture will be slightly less firm, but still delicious. I tested this for a vegan friend’s brunch and it was a hit.
- Gluten-Free Option: Simply use certified gluten-free rolled oats. That’s it. The rest of the ingredients are naturally gluten-free. Just double-check your pumpkin pie spice blend, as some brands use anti-caking agents that may contain gluten.
- Nut-Free & Seed-Based Crunch: If you’re serving guests with nut allergies, skip the pecans and walnuts. Instead, top the bake with pepitas (pumpkin seeds) or sunflower seeds. They add the same satisfying crunch without the allergen risk. I do this for my nephew’s birthday brunch every year.
- Apple Pumpkin Twist: In the fall, I love adding one finely diced apple (like Honeycrisp or Granny Smith) to the batter. It adds little pockets of tender, sweet fruit that complement the pumpkin beautifully. Just fold it in with the oats. No need to peel the apple, but I do recommend it for a smoother texture.
- Chocolate Chip Indulgence: For a more dessert-like version (perfect for a holiday brunch), stir in 1/2 cup of dark chocolate chips. The combination of pumpkin, warm spices, and chocolate is unexpectedly amazing. My husband requests this version every single time.
- Lower Sugar Option: You can reduce the maple syrup to 1/3 cup without sacrificing too much sweetness, especially if you’re using a sweetened yogurt. Add an extra teaspoon of vanilla to enhance the perceived sweetness. I’ve done this for friends who are watching their sugar intake, and no one noticed.
Serving & Storage Suggestions
This Healthy Pumpkin Oat Breakfast Bake is incredibly versatile when it comes to serving. Here’s how I like to present it and keep it fresh.
Serving Temperature: This bake is best served warm, straight from the oven. The aroma alone will have your guests hovering in the kitchen. For a brunch gathering, I like to set it out on a trivet with a serving spatula and let people help themselves. It looks beautiful on a buffet table alongside a fruit salad and some mimosas.
Presentation Tips for Hosting: To make it look extra special, I dust the top with a little powdered sugar and a sprinkle of cinnamon just before serving. A drizzle of maple syrup or a dollop of vanilla Greek yogurt on each serving adds a touch of elegance. If you’re feeling fancy, serve it in individual ramekins for a personal touch. Just reduce the baking time to about 20-25 minutes.
What to Serve Alongside: This bake pairs beautifully with a simple side of fresh fruit—think sliced apples, pears, or a citrus salad. For protein, I often serve it with scrambled eggs or turkey sausage. And of course, a hot cup of coffee or a pumpkin spice latte is the perfect beverage pairing. It’s also a great side dish for a larger brunch spread that includes quiche or a breakfast casserole.
Storage Instructions: Leftovers (if you have any!) keep beautifully. Store them in an airtight container in the refrigerator for up to 5 days. I actually think the flavors meld and deepen overnight, making it even better the next day. You can also freeze individual portions for up to 3 months—just wrap them tightly in plastic wrap and then foil.
Reheating Tips: The best way to reheat is in the oven at 350°F (175°C) for about 10 minutes, which restores that slightly crispy top. In a pinch, the microwave works too—just heat individual portions for 30-45 seconds. If reheating from frozen, let it thaw in the fridge overnight first. I sometimes eat it cold straight from the fridge as a quick breakfast, and honestly, it’s still delicious.
Nutritional Information & Benefits
Let’s talk about why this dish is as good for you as it is delicious. While I’m not a nutritionist, I’ve done my research and I feel great about serving this to my family and friends.
Estimated Nutritional Values (per serving, based on 8 servings):
Calories: 285 | Fat: 10g | Carbohydrates: 40g | Fiber: 6g | Sugar: 16g | Protein: 10g
Health Benefits of Key Ingredients:
– Pumpkin: Packed with vitamin A (over 200% of your daily needs per serving), fiber, and antioxidants. It’s great for eye health and immune function.
– Oats: A fantastic source of soluble fiber, which helps lower cholesterol and keeps you feeling full and satisfied. They also provide steady energy without the blood sugar spike.
– Greek Yogurt: Adds protein and probiotics for gut health. It also contributes calcium for strong bones.
– Eggs: High-quality protein and essential nutrients like choline, which supports brain health.
Dietary Considerations: This recipe is naturally vegetarian and can easily be made vegan, gluten-free, and nut-free with the substitutions I mentioned. It’s a great option for those looking for a higher-protein breakfast or a lower-sugar alternative to traditional baked goods. The fiber and protein content make it a balanced meal that will keep your guests energized throughout the morning.
Personal Perspective: I love that I can serve this to a crowd without worrying about anyone’s dietary restrictions. It feels indulgent, but it’s actually nourishing. For me, that’s the sweet spot of hosting—food that makes people feel good, inside and out.
Conclusion
So there you have it—my accidental masterpiece turned go-to hosting hero. This Healthy Pumpkin Oat Breakfast Bake is proof that you don’t need hours in the kitchen or a list of fancy ingredients to create something truly memorable. It’s simple, forgiving, and absolutely packed with the flavors of fall. Whether you’re hosting a big holiday brunch, bringing a dish to a potluck, or just want a cozy breakfast that feels like a warm hug, this recipe has your back.
I’d love to hear how it turns out for you. Did you add any fun mix-ins? Serve it with something special? Leave a comment below and tell me all about it—I read every single one and I genuinely love hearing your stories. And if you snap a photo, tag me on Pinterest or Instagram. There’s nothing that makes my day like seeing my recipes in your kitchens.
Go ahead, give yourself the gift of a stress-free, delicious breakfast that will have everyone asking for the recipe. You’ve got this, and honestly? Your guests are in for a treat.
Frequently Asked Questions
Can I use quick oats instead of rolled oats?
I don’t recommend it. Quick oats are more processed and will absorb liquid too quickly, resulting in a mushy, porridge-like texture. Rolled oats give the bake structure and that perfect chewy-soft bite. Stick with old-fashioned rolled oats for the best results.
Can I make this without eggs?
Absolutely! Use 3 flax eggs (3 tablespoons ground flaxseed mixed with 9 tablespoons water, let sit for 5 minutes) as a replacement. The texture will be slightly softer and less firm, but it will still be delicious. I’ve tested this version and it works great for vegan guests.
How do I know when the bake is fully cooked?
The edges should be golden brown and pulling away from the sides of the dish. The center should be set—it will jiggle slightly when you shake the dish, like a cheesecake, but it shouldn’t be liquidy. A toothpick inserted into the center should come out with a few moist crumbs, not wet batter.
Can I freeze this breakfast bake?
Yes, it freezes beautifully! Let the bake cool completely, then cut it into individual portions. Wrap each portion tightly in plastic wrap and then aluminum foil, or place them in a freezer-safe container. They’ll keep for up to 3 months. To reheat, thaw in the fridge overnight and warm in the oven or microwave.
What can I use instead of Greek yogurt?
You can substitute an equal amount of sour cream, cottage cheese (blended until smooth), or a dairy-free yogurt alternative. The Greek yogurt adds protein and moisture, so any substitute should have a similar thick, creamy consistency. I’ve used full-fat coconut yogurt for a dairy-free version and it worked wonderfully.
Pin This Recipe!
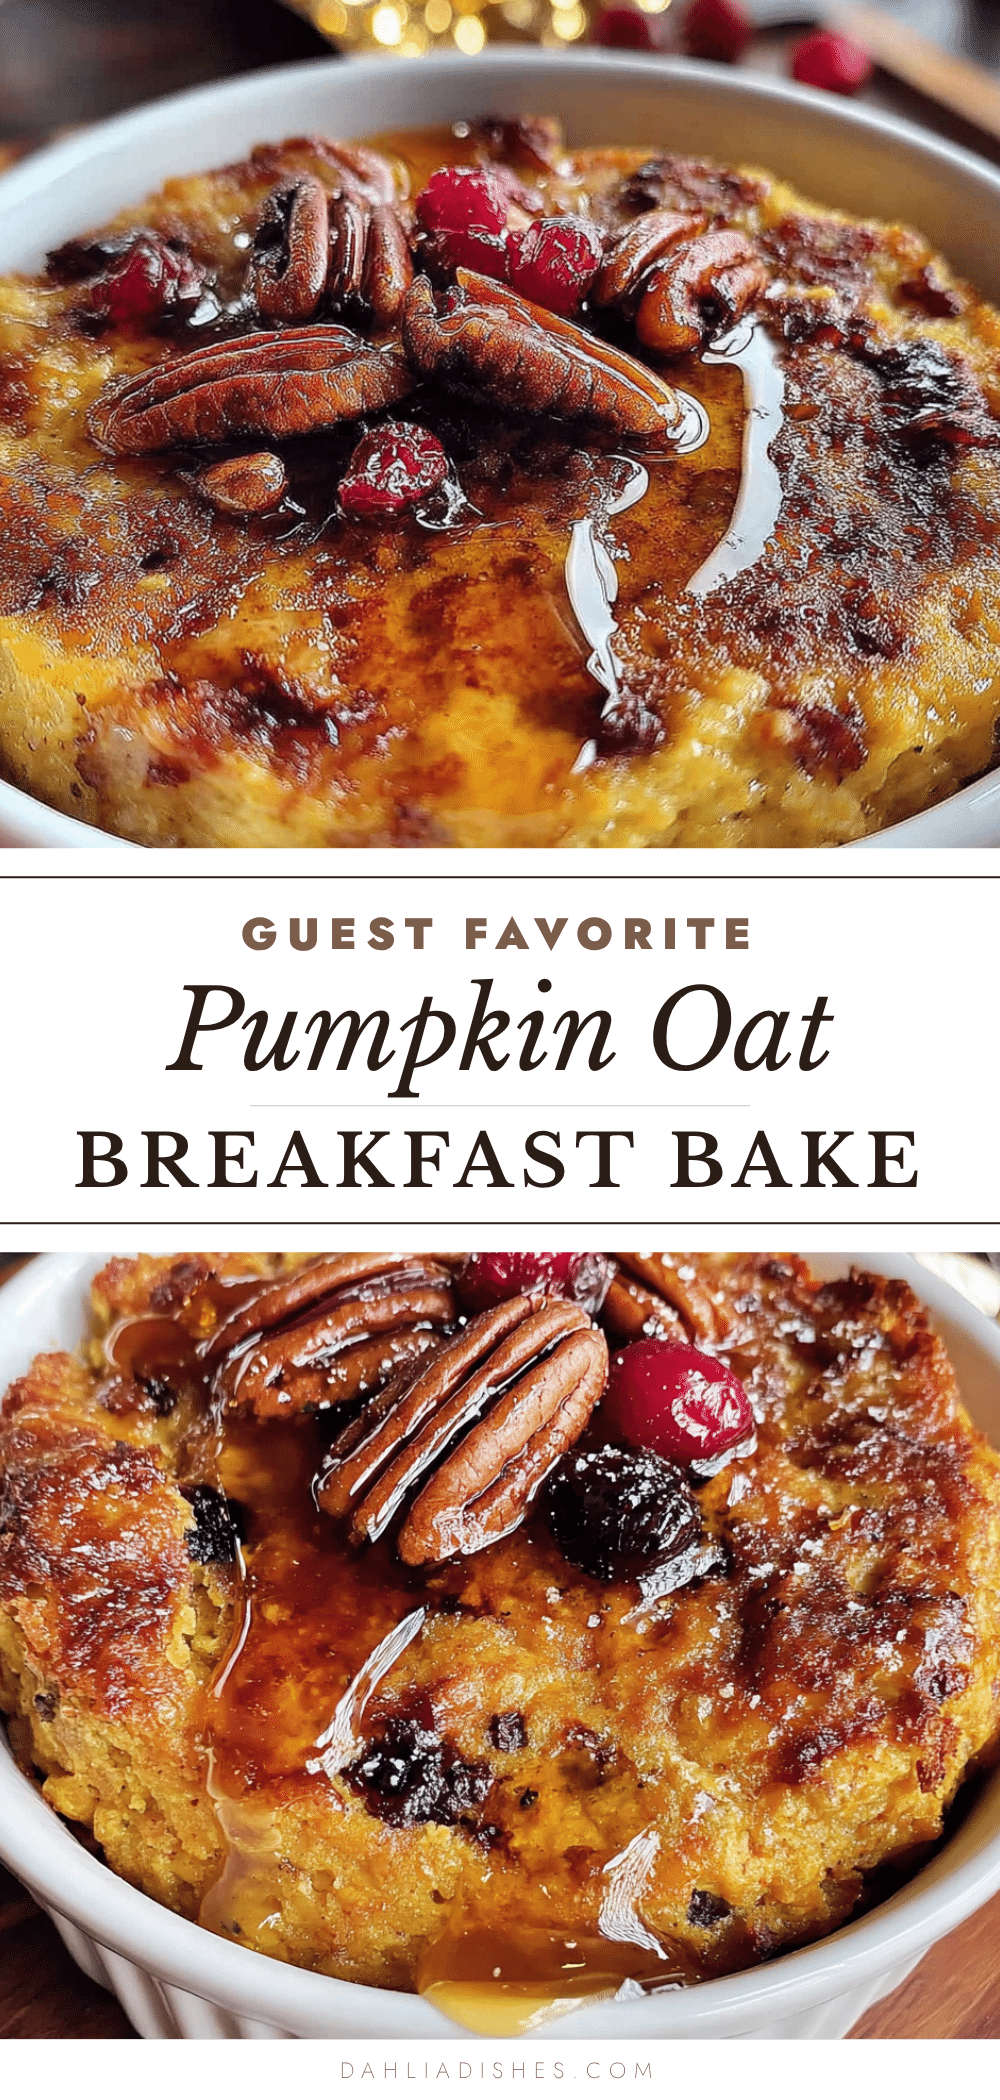
Healthy Pumpkin Oat Breakfast Bake: Easy Make-Ahead Recipe

This Healthy Pumpkin Oat Breakfast Bake is the ultimate make-ahead breakfast for fall gatherings. It’s packed with warm spices, creamy pumpkin, and hearty oats, and it’s surprisingly healthy and easy to prepare.
- Prep Time: 15 minutes
- Cook Time: 35-40 minutes
- Total Time: 50-55 minutes
- Yield: 8-10 servings 1x
- Category: Breakfast / Brunch
- Cuisine: American
Ingredients
- 3 cups (270g) rolled oats (old-fashioned)
- 1 can (15 oz / 425g) 100% pure pumpkin puree
- 3 large eggs, room temperature
- 1 cup (240g) plain Greek yogurt (full-fat or 2%)
- 1 cup (240ml) milk (whole or unsweetened almond milk)
- 1/2 cup (120ml) pure maple syrup
- 1/4 cup (56g) coconut oil or butter, melted
- 1 teaspoon vanilla extract
- 2 teaspoons pumpkin pie spice
- 1 teaspoon cinnamon
- 1/2 teaspoon fine sea salt
- Optional toppings: chopped pecans or walnuts, pepitas, dried cranberries, brown sugar
Instructions
- Preheat oven to 375°F (190°C). Grease a 9×13-inch baking dish with butter or coconut oil. Optionally, line with parchment paper for easy removal.
- In a large mixing bowl, combine rolled oats, pumpkin pie spice, cinnamon, and salt. Stir to distribute spices evenly. If adding nuts or dried fruit, stir them in now.
- In a separate medium bowl or large liquid measuring cup, whisk together eggs, Greek yogurt, milk, maple syrup, melted coconut oil (or butter), and vanilla extract until smooth and fully incorporated.
- Stir the canned pumpkin puree in the can, then add it to the wet ingredient mixture. Whisk until completely combined and the mixture is a vibrant orange.
- Pour the wet pumpkin mixture into the bowl with the dry oats. Fold together with a rubber spatula until just combined. Do not overmix; a few lumps are fine.
- Pour the batter into the prepared baking dish and spread into an even layer. If desired, sprinkle brown sugar and pepitas or chopped pecans on top.
- Bake for 35-40 minutes, until the edges are golden brown and the center is set (it should jiggle slightly like a cheesecake). A toothpick inserted into the center should come out mostly clean with a few moist crumbs.
- Remove from oven and cool on a wire rack for at least 10 minutes before slicing and serving. Serve warm, optionally with extra maple syrup or a dollop of yogurt.
Notes
For make-ahead: Assemble the night before, cover, and refrigerate. Let sit at room temperature for 15 minutes while oven preheats, then bake as directed, adding 5-10 minutes if needed. For vegan version: Use 3 flax eggs (3 tbsp ground flaxseed + 9 tbsp water), plant-based yogurt, and non-dairy milk. For gluten-free: Use certified gluten-free rolled oats. For lower sugar: Reduce maple syrup to 1/3 cup and add extra vanilla.
Nutrition
- Serving Size: 1 square (based on 8
- Calories: 285
- Sugar: 16
- Sodium: 250
- Fat: 10
- Saturated Fat: 5
- Carbohydrates: 40
- Fiber: 6
- Protein: 10
Keywords: pumpkin oat bake, healthy breakfast bake, make-ahead breakfast, fall brunch, baked oatmeal, pumpkin breakfast