Love this? Save it for later!
Share the inspiration with your friends
My friend Jenna asked why I couldn’t just press the crust into the pan with my fingers instead of using the bottom of a glass. I started to explain why that wouldn’t work—something about even thickness and proper compaction—then stopped. Honestly, I was tired. It was a Tuesday night, and I’d already washed the glass twice. So I shrugged and said, “You know what? Try it.” She did. And it was fine. Better than fine, actually. The crust came out perfectly even, with those nice little textured edges that catch the filling just right. I stood there with my mouth half open, holding a clean glass I didn’t need anymore.
That moment taught me something about these gingerbread cheesecake bars. Sometimes the best version of a recipe comes from letting go of the rules a little bit. I’d been making these bars for years, always following the same careful method my grandmother used. But that night, with Jenna’s sticky fingers pressing gingersnap crumbs into a pan, I realized the recipe was sturdy enough to handle a little improvisation. The cheesecake layer still set up silky smooth. The gingerbread still filled the kitchen with that warm, spicy smell that makes everyone wander in asking what’s baking. And the cream cheese frosting? It still disappeared before I could even get it to the table.
These bars have become my go-to for pretty much any gathering where I need to impress people without spending all day in the kitchen. Dinner parties, holiday potlucks, Sunday brunch with neighbors—they always work. The first time I brought them to a friend’s Christmas party, three different people asked for the recipe before I’d even put my coat back on. Maybe you’ve been there, where a dessert just lands right and suddenly you’re the person known for that one thing. That’s these bars for me. And I keep making them because they remind me that sometimes the best cooking advice comes from someone who doesn’t know any better.
Why You’ll Love This Recipe
Let me tell you why these gingerbread cheesecake bars have earned a permanent spot in my holiday rotation and why they’ll become your secret weapon for hosting too.
- Simple Ingredients : You probably already have most of what you need in your pantry. Gingersnap cookies, cream cheese, butter, sugar, eggs, and a few spices. No hunting down specialty stores or expensive imports.
- Make-Ahead Friendly : These bars actually taste better after a day in the fridge. You can make them two days before your party and cross one thing off your to-do list.
- Perfect for Crowds : One pan serves 16 people easily. Cut them smaller for a cookie tray or bigger for a proper dessert plate. They work either way.
- No Water Bath Needed : Traditional cheesecake requires a fussy water bath that stresses everyone out. These bars bake up perfectly without one. I mean it.
- Unbelievably Delicious : The combination of spicy gingerbread and creamy cheesecake topped with tangy cream cheese frosting is the kind of thing that makes people close their eyes after the first bite.
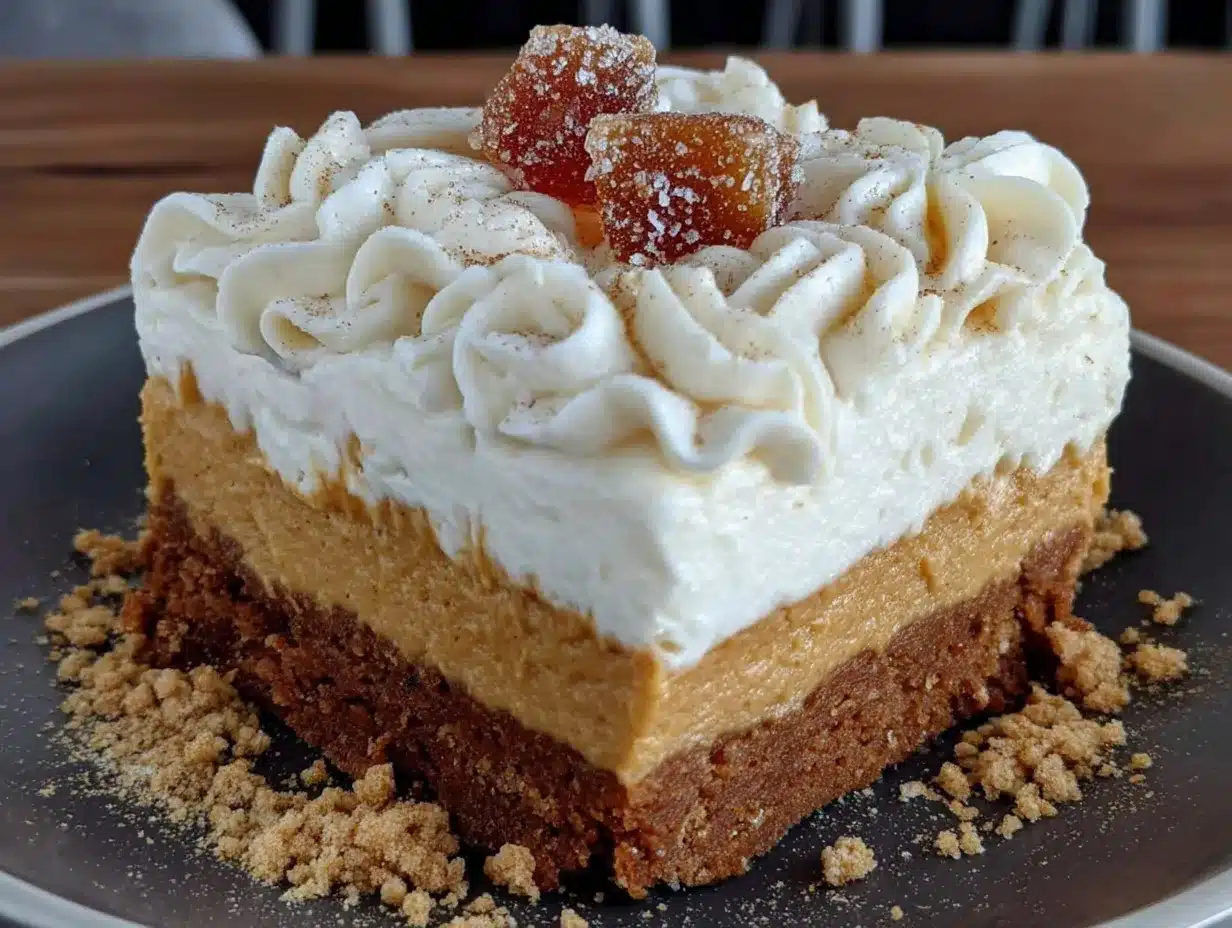
What makes these different from other cheesecake bars is the texture. The crust stays crunchy even after a couple days in the fridge—a trick I learned after testing about seven different ratios of butter to crumbs. The cheesecake layer is dense but silky, not too sweet, so it balances the bold gingerbread flavor. And the frosting? It’s thick enough to pipe if you’re feeling fancy but simple enough to spread with a spatula when you’re not.
These bars are comfort food reimagined for hosting. They look impressive on a platter, they travel well if you’re bringing them somewhere, and they make your whole kitchen smell like Christmas. Plus, they’re the kind of dessert that gets better as the party goes on. People come back for seconds. They ask for the recipe. And you get to look like a hero without breaking a sweat.
What Ingredients You Will Need
This recipe uses straightforward ingredients that come together to create something truly special. Here’s what you’ll need and why each one matters.
For the Gingersnap Crust
- 2 cups (240g) gingersnap cookie crumbs — I prefer Nabisco brand for consistent texture, but any brand works. You can crush them in a food processor or put them in a ziplock bag and go at them with a rolling pin. About 30 cookies makes 2 cups of crumbs.
- 5 tablespoons (70g) unsalted butter, melted — Use real butter here, not margarine. It gives the crust that rich flavor and helps it hold together when you cut the bars.
- 2 tablespoons (25g) granulated sugar — Just a little extra sweetness to balance the spicy cookies. You could skip this if your gingersnaps are on the sweeter side.
- Pinch of salt — A tiny pinch brings out all the other flavors. Don’t skip it.
For the Gingerbread Cheesecake Filling
- 24 ounces (680g) cream cheese, softened — Full-fat cream cheese is non-negotiable here. The low-fat versions have too much water and your filling won’t set properly. Let it sit on the counter for at least an hour before you start.
- 1 cup (200g) granulated sugar — Regular white sugar keeps the filling clean and lets the spices shine.
- 3 large eggs, room temperature — Cold eggs will make your filling lumpy. Set them out with the cream cheese or float them in warm water for five minutes.
- 1/3 cup (80ml) molasses — Use unsulphured molasses, not blackstrap. Blackstrap is too bitter and will overpower everything. Grandma’s brand or Brer Rabbit both work beautifully.
- 1 teaspoon vanilla extract — Pure vanilla extract makes a difference here. The artificial stuff has a chemical note that doesn’t play well with the warm spices.
- 2 teaspoons ground ginger — This is where the gingerbread flavor comes from. Make sure your ginger is fresh—if it’s been sitting in your cabinet for two years, replace it.
- 1 teaspoon ground cinnamon — Cinnamon and ginger are best friends in this recipe. They need each other.
- 1/2 teaspoon ground cloves — Cloves are strong, so don’t go overboard. A half teaspoon is just right.
- 1/4 teaspoon nutmeg — Freshly grated if you have it, but pre-ground works fine too.
- 2 tablespoons all-purpose flour — This helps stabilize the cheesecake and prevents cracking. It’s a little trick I learned from a pastry chef friend.
For the Cream Cheese Frosting
- 4 ounces (113g) cream cheese, softened — Same deal as above. Full fat, room temperature.
- 4 tablespoons (56g) unsalted butter, softened — Let it sit out with the cream cheese so they blend smoothly.
- 2 cups (240g) powdered sugar — Sift it if it’s lumpy. Nobody wants lumpy frosting.
- 1 teaspoon vanilla extract — Vanilla rounds out the tanginess of the cream cheese.
- 1-2 tablespoons heavy cream — Add slowly until you reach your desired consistency. Milk works in a pinch but heavy cream makes it richer.
Optional Garnishes
- Candied ginger, finely chopped — Adds a nice chewy texture and extra ginger kick.
- Fresh rosemary sprigs — Makes the platter look fancy for photos.
- Ground cinnamon for dusting — A light sprinkle right before serving looks pretty.
Equipment Needed
You don’t need a professional bakery setup for these bars, but having the right tools makes everything easier.
- 9×13 inch baking pan — Glass or metal both work. I prefer metal because it heats up faster and gives a nicer edge on the crust. If you use glass, expect the bars to take a few extra minutes in the oven.
- Parchment paper — Line your pan with a sling of parchment paper that hangs over the long sides. This lets you lift the whole block of bars out cleanly for cutting.
- Electric mixer — A stand mixer is ideal, but a hand mixer works perfectly. You need to beat the cream cheese until it’s completely smooth, and doing that by hand will wear out your arm.
- Food processor or ziplock bag — For crushing the gingersnaps. The food processor is faster and gives more even crumbs, but the bag method works if you don’t mind a little arm work.
- Mixing bowls — You’ll need at least three: one for the crust, one for the cheesecake filling, and one for the frosting.
- Spatula — A rubber spatula for scraping down the bowl and a small offset spatula for spreading the frosting evenly.
- Sharp knife — For clean cuts. A chef’s knife works better than a butter knife. Wipe it clean between each cut for those perfect Instagram-worthy slices.
If you don’t have a food processor, don’t worry. I’ve made these bars in a friend’s vacation rental kitchen with nothing but a ziplock bag and a wine bottle. The crumbs weren’t perfectly even, but the bars still disappeared.
Preparation Method
Let’s get into the actual making of these bars. Take your time with each step and you’ll end up with something that looks like it came from a fancy bakery.
Step 1: Prep Your Pan and Preheat
Preheat your oven to 325°F (163°C). Line your 9×13 pan with parchment paper, leaving about 2 inches hanging over the long sides. This sling is how you’ll lift the bars out later. Lightly spray the parchment with nonstick cooking spray so nothing sticks.
Step 2: Make the Crust
Put your gingersnap cookies in a food processor and pulse until you have fine crumbs. You need 2 cups total. Pour the crumbs into a medium bowl, add the melted butter, sugar, and salt. Stir with a fork until all the crumbs are moistened and the mixture looks like wet sand. Press this mixture firmly into the bottom of your prepared pan. Use the bottom of a measuring cup or your fingers—Jenna’s method works fine, I promise. Bake the crust for 10 minutes, then set it aside to cool slightly while you make the filling.
Step 3: Make the Cheesecake Filling
In a large bowl, beat the softened cream cheese with an electric mixer on medium speed until it’s completely smooth, about 2 minutes. Scrape down the sides and bottom of the bowl with your spatula. Add the sugar and beat for another 2 minutes until light and fluffy. Add the eggs one at a time, beating on low speed after each addition just until combined. Overbeating at this stage adds too much air and can cause cracks later.
Add the molasses, vanilla, ginger, cinnamon, cloves, nutmeg, and flour. Mix on low speed until everything is combined and smooth. Scrape the bowl again and give it one final stir by hand to make sure nothing is hiding at the bottom. The batter should be thick, pale brown, and smell incredible.
Step 4: Assemble and Bake
Pour the cheesecake filling over the warm crust. Spread it evenly with your spatula. Give the pan a gentle tap on the counter to release any air bubbles. Bake at 325°F (163°C) for 35-40 minutes. The edges should look set and slightly puffed, but the center should still jiggle a little when you shake the pan. That jiggle is what gives you that silky texture. If the center is completely firm, you’ve overbaked it.
Let the bars cool on a wire rack for 1 hour at room temperature. Then transfer the pan to the refrigerator and chill for at least 4 hours, preferably overnight. This is the hardest part of the recipe, I know. But trust me, cold bars cut much cleaner and the flavors meld together beautifully overnight.
Step 5: Make the Frosting
When the bars are fully chilled and you’re ready to serve, make the frosting. Beat the softened cream cheese and butter together until smooth and fluffy, about 3 minutes. Add the powdered sugar and vanilla, then beat on low speed until combined. Add heavy cream one tablespoon at a time until you reach a spreadable consistency. You want it thick enough to hold its shape but soft enough to spread smoothly.
Step 6: Frost and Cut
Lift the bars out of the pan using the parchment sling. Place them on a cutting board. Spread the frosting evenly over the top. If you’re feeling fancy, you can pipe the frosting instead of spreading it. I usually spread it because it’s faster and I’m lazy. Sprinkle with chopped candied ginger if you’re using it. Cut into 16 squares, wiping your knife clean between each cut. Serve cold or let them sit at room temperature for 15 minutes if you prefer a softer texture.
Cooking Tips & Techniques
After making these bars about twenty times, I’ve learned a few things the hard way. Let me save you some trouble.
Room temperature ingredients matter more than you think. I learned this lesson when I was rushing to make these bars for a dinner party and used cold cream cheese straight from the fridge. The filling was lumpy no matter how long I beat it. It still tasted fine, but the texture wasn’t as smooth as it should have been. Set your cream cheese, eggs, and butter out at least an hour before you start. If you forget, you can soften cream cheese in the microwave at 50% power for 15-second intervals, but it’s not quite the same.
Don’t overmix the filling after adding the eggs. This was a hard lesson for me because I’m an aggressive mixer by nature. Too much air in the batter creates steam pockets during baking, which leads to cracks and a spongy texture instead of that dense, silky cheesecake texture. Mix just until each egg is incorporated, then stop.
The jiggle test is your friend. When you shake the pan at the end of baking, the center should wobble like Jell-O, not slosh like liquid. If it sloshes, give it another 5 minutes. If it’s completely firm, you’ve gone too far. The residual heat will finish cooking the center as it cools.
Patience with chilling is non-negotiable. I once tried to cut these bars after only 2 hours in the fridge because guests were arriving early. It was a mess. The knife dragged through the filling, the crust crumbled, and I ended up serving what looked like cheesecake rubble. It still tasted good, but presentation was a disaster. Give them the full 4 hours minimum.
Wipe your knife between cuts. This is the difference between clean, professional-looking bars and smeared, messy ones. Run your knife under hot water, dry it, make one cut, wipe it clean, repeat. It takes an extra minute and makes everything look better.
Variations & Adaptations
One of the best things about this recipe is how flexible it is. Here are some ways to make it your own.
Gluten-Free Version: Use gluten-free gingersnap cookies for the crust. Most brands are naturally gluten-free, but check the label. Replace the 2 tablespoons of flour in the filling with a gluten-free all-purpose blend or cornstarch. I’ve tested this with Bob’s Red Mill 1-to-1 flour and it works perfectly.
Pumpkin Spice Twist: Replace the molasses with pumpkin puree and add an extra teaspoon of pumpkin pie spice. The texture comes out a little lighter and the flavor is more fall-forward. This version is always a hit at Thanksgiving potlucks.
Chocolate Gingerbread Version: Add 1/4 cup of cocoa powder to the cheesecake filling and use chocolate wafer cookies for half of the crust. The chocolate and ginger combination is unexpected and absolutely delicious. My neighbor Sarah tried this variation and now makes it every year for her holiday cookie exchange.
Dairy-Free Adaptation: Use dairy-free cream cheese and butter alternatives. I’ve had good results with Kite Hill brand cream cheese and Miyoko’s butter. The texture is slightly softer, so chill the bars for the full overnight period before cutting. The flavor is still fantastic.
Mini Bar Version: Press the crust into a lined muffin tin instead of a 9×13 pan. Fill each cup about 3/4 full and bake for 18-22 minutes. These mini bars are perfect for cookie trays or parties where people want to grab and go. Just reduce the chilling time to 2 hours since they’re smaller.
Serving & Storage Suggestions
These bars are versatile enough for all kinds of serving situations. Here’s how to make them shine.
Serving Temperature: I prefer these bars cold, straight from the fridge. The cheesecake is firm and the crust stays crunchy. If you like a softer texture, let them sit at room temperature for 15-20 minutes before serving. For holiday parties, I arrange them on a platter with fresh rosemary sprigs and a light dusting of cinnamon. It looks festive and takes about 30 seconds.
What to Serve Alongside: These bars pair beautifully with a cup of hot coffee or spiced chai. For a dessert spread, serve them alongside a batch of classic sugar cookies and a bowl of fresh berries. If you’re hosting a brunch, they’re wonderful with a side of cinnamon-spiced applesauce for a cozy fall combination.
Storage Instructions: Store the bars in an airtight container in the refrigerator for up to 5 days. Place a layer of parchment paper between stacked bars so the frosting doesn’t stick. I’ve never had these last more than 3 days in my house, but they’ll hold up fine for the full 5.
Freezer Instructions: These bars freeze beautifully. Freeze them unfrosted for the best results. Wrap the entire block tightly in plastic wrap, then aluminum foil, and freeze for up to 3 months. When you’re ready to serve, thaw overnight in the refrigerator, then make the frosting fresh. You can freeze frosted bars too, but the frosting texture changes slightly after thawing.
Reheating Tips: Don’t reheat these bars. They’re meant to be served cold or at room temperature. If you want a warm dessert, make a quick gingerbread cake instead. These bars lose their structure when heated.
Nutritional Information & Benefits
Let’s be real—these are a treat, not a health food. But knowing what’s in them helps you plan your indulgence.
Per bar (based on 16 servings): Approximately 380 calories, 24g fat, 38g carbohydrates, 6g protein, and 28g sugar. These numbers will vary based on your specific ingredients and how you cut the bars.
The ginger in this recipe offers some anti-inflammatory properties, and molasses contains iron and calcium. The cream cheese provides a decent amount of protein and calcium too. But honestly, the main benefit here is the joy of sharing something delicious with people you care about. That counts for something.
If you’re watching your sugar intake, you can reduce the sugar in the filling to 3/4 cup without affecting the texture too much. The frosting needs the full amount of powdered sugar for structure, so I wouldn’t reduce that.
For those with dietary restrictions: This recipe contains dairy, gluten, and eggs. See the variations section for gluten-free and dairy-free adaptations. There’s no good egg substitute for this particular recipe—I’ve tried flax eggs and they made the filling gummy.
Conclusion
These gingerbread cheesecake bars have become my signature dessert for good reason. They look impressive, they taste incredible, and they’re actually pretty forgiving for a recipe that sounds fancy. The crust doesn’t crumble, the filling stays creamy, and that cream cheese frosting on top ties everything together in the best way.
I love that I can make these two days before a party and not worry about a thing. I love that people always ask for the recipe. And I love that they remind me of that Tuesday night when Jenna showed me that I don’t know everything about cooking. Sometimes the best lessons come from letting someone else take the lead.
Give these bars a try for your next gathering. Customize them however you want—add more ginger if you like it spicy, pipe the frosting if you’re feeling fancy, or skip the candied ginger garnish if you’re keeping it simple. They’ll work either way.
I’d love to hear how they turn out for you. Drop a comment below and let me know if you tried any variations or if these bars stole the show at your dinner party. And if you have a friend like Jenna who always has a better idea, maybe listen to them once in a while. You never know what you might learn.
Frequently Asked Questions
Can I use store-bought gingersnap crumbs instead of crushing my own cookies?
Yes, you can use pre-crushed gingersnap crumbs if you find them. Just measure out 2 cups and proceed with the recipe. The texture might be slightly finer than homemade crumbs, but the bars will turn out fine.
Why did my cheesecake filling crack on top?
Cracks usually happen from overbaking or overmixing the batter. Make sure you pull the bars out when the center still jiggles slightly. Also, avoid beating the filling too vigorously after adding the eggs. The frosting covers minor cracks anyway, so don’t stress about it.
Can I use blackstrap molasses instead of regular molasses?
I wouldn’t recommend it. Blackstrap molasses has a very strong, bitter flavor that can overwhelm the other ingredients. Stick with unsulphured molasses for the right balance of sweetness and depth.
How far in advance can I make these bars for a party?
You can make the bars up to 2 days ahead of time. Store them unfrosted in the refrigerator, then make the frosting and decorate them the day of your event. This keeps the frosting looking fresh and pretty.
Can I double this recipe for a larger crowd?
Absolutely. Double all the ingredients and bake in a half-sheet pan (about 13×18 inches). You’ll need to increase the baking time by about 10-15 minutes. Keep an eye on the center jiggle test to know when it’s done.
Pin This Recipe!
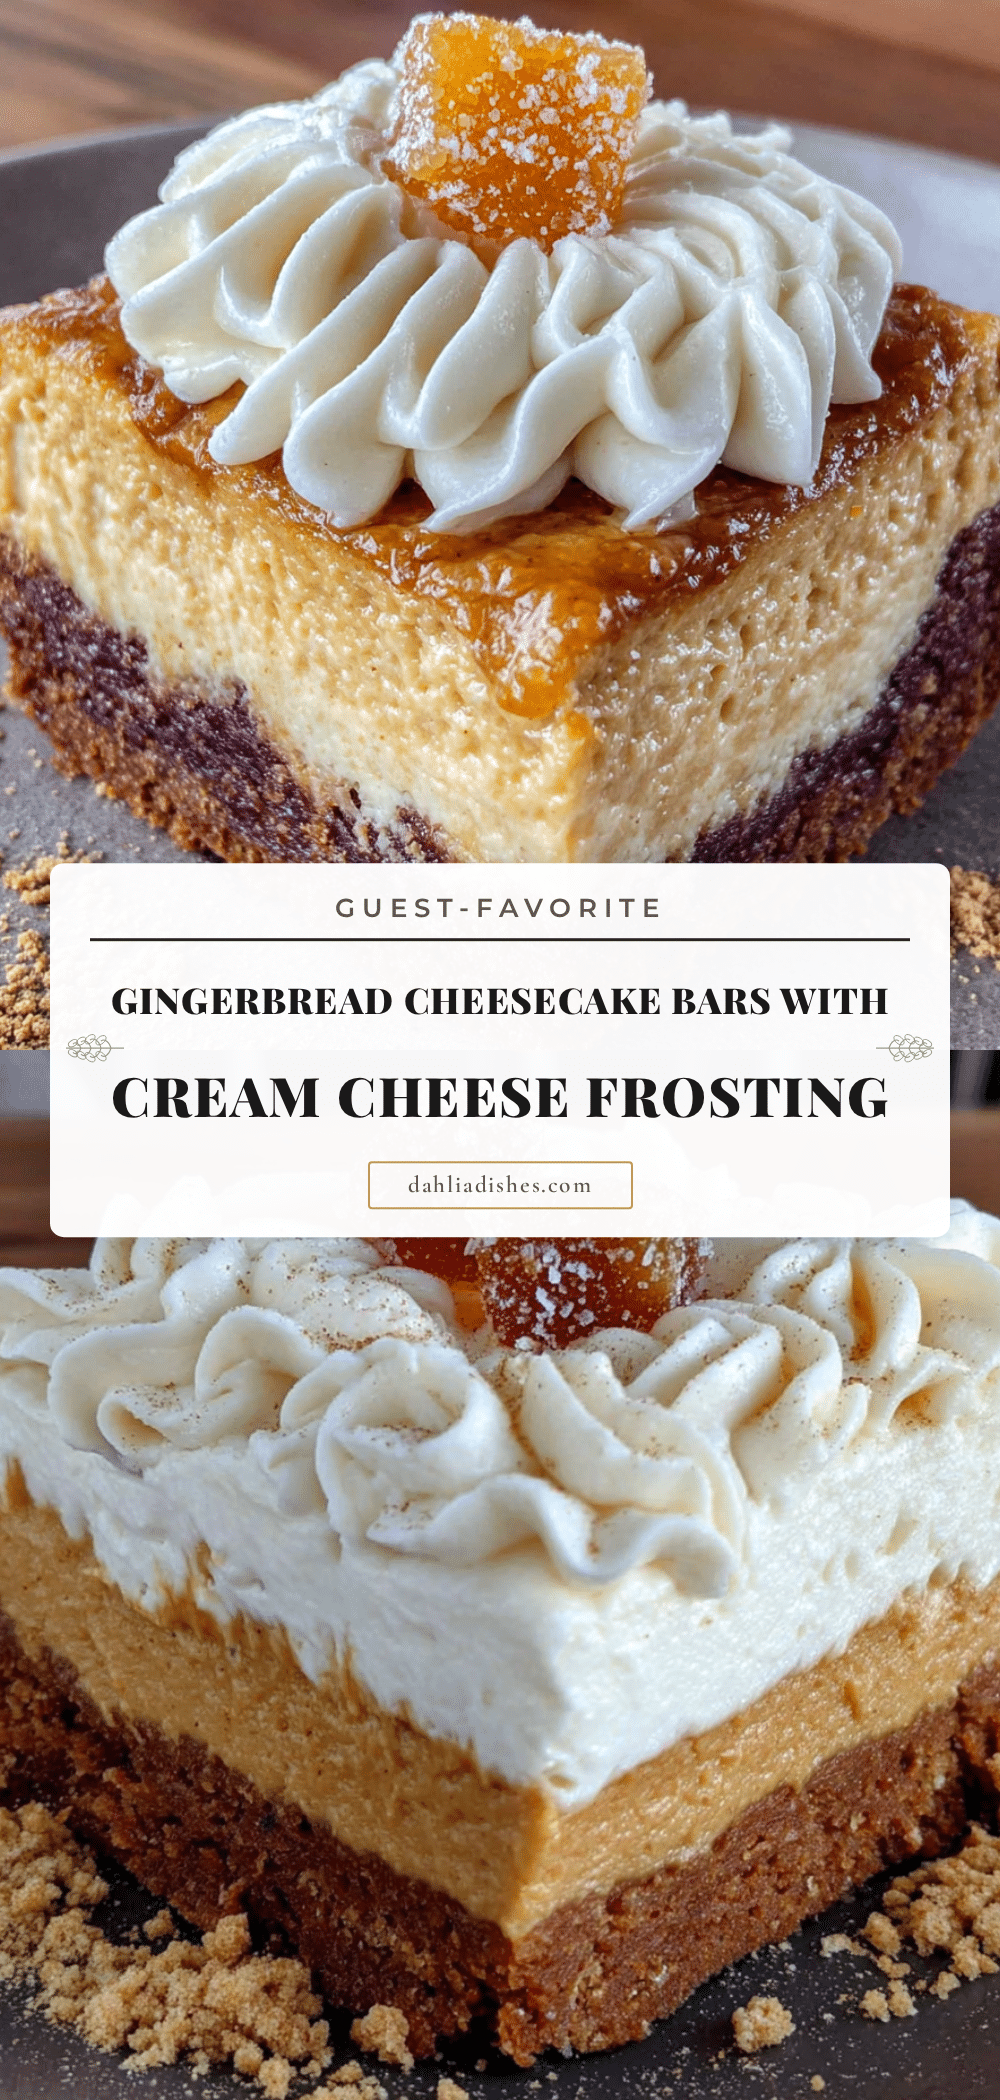
Guest-Favorite Gingerbread Cheesecake Bars with Frosting
These gingerbread cheesecake bars feature a crunchy gingersnap crust, a silky gingerbread cheesecake filling, and a tangy cream cheese frosting. They’re make-ahead friendly, perfect for crowds, and require no water bath.
- Prep Time: 30 minutes
- Cook Time: 40 minutes
- Total Time: 5 hours 10 minutes (includes chilling)
- Yield: 16 servings 1x
- Category: Dessert
- Cuisine: American
Ingredients
- 2 cups (240g) gingersnap cookie crumbs
- 5 tablespoons (70g) unsalted butter, melted
- 2 tablespoons (25g) granulated sugar
- Pinch of salt
- 24 ounces (680g) cream cheese, softened
- 1 cup (200g) granulated sugar
- 3 large eggs, room temperature
- 1/3 cup (80ml) molasses
- 1 teaspoon vanilla extract
- 2 teaspoons ground ginger
- 1 teaspoon ground cinnamon
- 1/2 teaspoon ground cloves
- 1/4 teaspoon nutmeg
- 2 tablespoons all-purpose flour
- 4 ounces (113g) cream cheese, softened (for frosting)
- 4 tablespoons (56g) unsalted butter, softened (for frosting)
- 2 cups (240g) powdered sugar
- 1 teaspoon vanilla extract (for frosting)
- 1–2 tablespoons heavy cream
- Candied ginger, finely chopped (optional garnish)
- Fresh rosemary sprigs (optional garnish)
- Ground cinnamon for dusting (optional garnish)
Instructions
- Preheat oven to 325°F (163°C). Line a 9×13 inch baking pan with parchment paper, leaving overhang on long sides. Lightly spray with nonstick cooking spray.
- Make the crust: Pulse gingersnap cookies in a food processor until fine crumbs. Combine 2 cups crumbs with melted butter, sugar, and salt. Press firmly into prepared pan. Bake for 10 minutes. Set aside to cool slightly.
- Make the cheesecake filling: Beat softened cream cheese with an electric mixer on medium speed until smooth, about 2 minutes. Add sugar and beat for 2 minutes until light and fluffy. Add eggs one at a time, beating on low after each addition. Add molasses, vanilla, ginger, cinnamon, cloves, nutmeg, and flour. Mix on low until combined. Scrape bowl and stir by hand.
- Pour filling over warm crust. Spread evenly. Tap pan gently on counter to release air bubbles. Bake at 325°F (163°C) for 35-40 minutes until edges are set but center jiggles slightly. Cool on wire rack for 1 hour, then refrigerate for at least 4 hours or overnight.
- Make the frosting: Beat softened cream cheese and butter until smooth and fluffy, about 3 minutes. Add powdered sugar and vanilla, beat on low until combined. Add heavy cream one tablespoon at a time until spreadable consistency.
- Lift bars out of pan using parchment sling. Spread frosting evenly over top. Sprinkle with candied ginger if desired. Cut into 16 squares, wiping knife clean between cuts. Serve cold or at room temperature.
Notes
Room temperature ingredients are crucial for smooth texture. Don’t overmix after adding eggs to avoid cracks. The jiggle test is key for doneness. Chill at least 4 hours before cutting. Wipe knife between cuts for clean slices. Bars can be made up to 2 days ahead and stored unfrosted in the refrigerator. Freeze unfrosted for up to 3 months.
Nutrition
- Serving Size: 1 bar
- Calories: 380
- Sugar: 28
- Sodium: 280
- Fat: 24
- Saturated Fat: 14
- Carbohydrates: 38
- Fiber: 1
- Protein: 6
Keywords: gingerbread cheesecake bars, holiday dessert, cream cheese frosting, gingersnap crust, make-ahead dessert


