Love this? Save it for later!
Share the inspiration with your friends
This was supposed to be a cheese board. A simple, predictable, rectangular cheese board for a holiday party I was already running late for. I had the meats, the cheeses, the crackers—everything laid out like I was a contestant on a cooking show I was definitely losing. But then I opened the fridge and realized I had grabbed a block of cheddar instead of the brie I’d planned for, and the salami was already sliced into these awkward, stubby little rounds that looked more like a mistake than a charcuterie component. I was annoyed. Honestly, I was about five seconds away from just dumping everything on a platter and calling it a day.
But then I looked at the green grapes I’d washed, and for some reason—maybe the holiday lights were hitting them just right—they looked like little ornaments. And the rosemary sprigs sitting on the counter smelled like a Christmas tree. And I thought, “What if I just… stacked it all into a triangle?” I mean, it was a desperate move. I grabbed a cutting board, started arranging the salami in rows, and just went with it. No plan. No Pinterest board. Just me, some cheese, and a very grumpy attitude that slowly turned into disbelief as it actually started to look good.
What came out was nothing like the plan—and better. It was a Christmas tree. A full-on, festive, edible Christmas tree made of pepperoni, prosciutto, and cubes of cheese. My guests walked in and literally gasped. One friend said it was the best thing I’d ever made, which was a little insulting to my lasagna, but I took the win. And now? I can’t imagine a holiday gathering without it. It’s the recipe that saved my party and made me look like I had my life together—when really, I just made a happy mistake. Maybe you’ve been there, too? That moment when the kitchen chaos turns into something kind of magical?
Why You’ll Love This Recipe
Let’s be real—holiday hosting is stressful. You want something that looks like you spent hours on it, but you also need to actually enjoy your own party. This Christmas tree charcuterie board is the answer to that very specific problem. It’s the kind of thing that makes people take photos before they even grab a napkin, and you barely broke a sweat putting it together.
- Quick & Easy: This board comes together in about 20 minutes. Seriously. Once you have your ingredients prepped, it’s just a matter of layering and stacking. Perfect for last-minute holiday cravings or when your guests show up early (we all have that one friend).
- Simple Ingredients: No fancy grocery trips needed. You likely already have most of this in your fridge—cheese, deli meats, grapes, crackers. It’s the kind of recipe that works with what you’ve got.
- Perfect for Holiday Parties: Whether it’s Christmas Eve, a cookie exchange, or a cozy dinner with friends, this board fits right in. It’s a conversation starter and a snack all in one.
- Crowd-Pleaser: I’ve made this for adults and kids, and everyone digs in. There’s something for everyone—savory, salty, sweet, crunchy. It’s the ultimate grazing board.
- Unbelievably Delicious: The texture combo is next-level. You get the creamy cheese, the salty prosciutto, the crisp crackers, and the pop of sweetness from the grapes. It’s comfort food reimagined—healthier, faster, but with the same soul-soothing satisfaction.
What makes this different from every other charcuterie board out there? It’s the shape. The tree form is so visually striking that it does the heavy lifting for you. You don’t need to be a food stylist or have a fancy platter. Just a cutting board and a little bit of patience. It’s perfect for impressing guests without stress, or turning a simple snack into something memorable. And honestly? It’s the kind of board that makes you close your eyes after the first bite.
What Ingredients You Will Need
This recipe uses simple, wholesome ingredients to deliver bold flavor and satisfying texture without the fuss. Most of these are pantry staples or easy to find at any grocery store. Here’s what you’ll need to build your tree:
- For the Base (Meats):
- 8-10 slices of salami or pepperoni (I prefer Applegate for a cleaner ingredient list)
- 4-6 slices of prosciutto (look for thinly sliced, it layers better)
- 4-6 slices of capicola or soppressata (adds a nice spicy kick)
- For the Cheeses:
- 8 oz block of cheddar, cut into small cubes (about ½-inch pieces)
- 4 oz of mozzarella pearls or small fresh mozzarella balls (drained well)
- 4 oz of gouda or havarti, sliced into thin triangles (use a sharp knife for clean cuts)
- For the Tree Decorations:
- 1 cup of green grapes (washed and dried; they look like ornaments)
- ½ cup of cherry tomatoes (red ones pop against the green)
- ¼ cup of black olives or kalamata olives (pitted, for the “trunk” area)
- Fresh rosemary sprigs (for the tree “branches” and aroma)
- Fresh thyme or parsley (optional, for garnish)
- For the Crunch:
- 1 cup of crackers or crostini (I like Milton’s for a sturdy, gluten-free option)
- ½ cup of pretzel sticks or breadsticks (for the tree trunk)
- For the Star Topper (Optional but Fun):
- 1 star-shaped cookie or a slice of yellow bell pepper (cut into a star shape)
- Or a small star-shaped cheese slice (like a cheddar star)
Ingredient Selection Tips: For the best texture, use a mix of hard and soft cheeses. The cheddar holds its shape well for cubes, while the gouda adds a creamy contrast. If you’re dairy-free, swap the cheese with your favorite plant-based alternatives—just make sure they’re firm enough to cube. For the meats, I recommend getting them pre-sliced from the deli counter; it saves time and gives you uniform pieces. If you’re feeling adventurous, add some pickled vegetables like cornichons or pepperoncini for a tangy pop.
Substitution Guidance: Use turkey or chicken slices for a leaner option. For a vegetarian version, load up on cheese and veggies—skip the meat entirely. You can also use bell pepper strips or cucumber slices to add more color and crunch. In summer, swap in fresh berries instead of grapes for a lighter twist.
Equipment Needed
You don’t need a lot of fancy gear for this recipe, which is part of the beauty. Here’s what I used and what you can substitute if needed:
- Large Cutting Board or Wooden Board: This is your canvas. I used a 12×18 inch bamboo board, but any flat surface works—a baking sheet or even a large platter will do. Just make sure it’s clean and dry.
- Sharp Knife: For cutting cheese and slicing grapes. A chef’s knife is ideal, but a paring knife works in a pinch. I once used a butter knife and it was a disaster—don’t do that.
- Small Bowls: For holding olives, grapes, or any loose items. I like using ramekins or small ceramic bowls to keep things tidy.
- Toothpicks or Small Skewers: Optional, but helpful for securing the star topper or for guests to grab cheese cubes without touching everything.
- Parchment Paper (Optional): If you’re worried about the board getting greasy, line it with parchment paper first. It makes cleanup a breeze.
Budget-Friendly Options: Don’t have a wooden board? A large dinner plate or a clean pizza pan works perfectly. For the star topper, use a cookie cutter to shape a slice of cheese or a piece of bell pepper. No need to buy anything special.
Maintenance Tip: If you use a wooden board, wipe it down with a damp cloth after serving—don’t soak it. Oil it occasionally with food-grade mineral oil to keep it looking nice.
Preparation Method
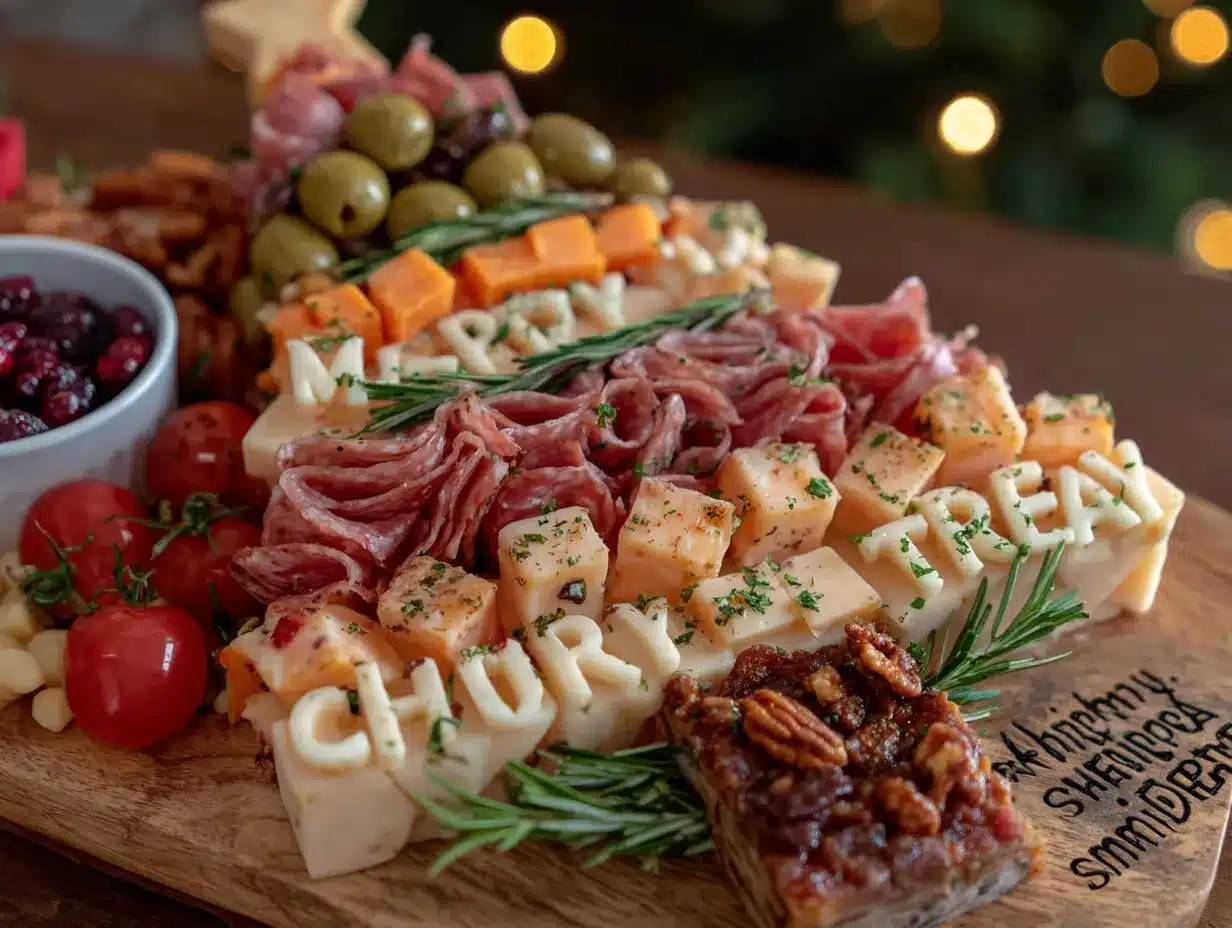
Alright, let’s build this tree. Take your time—it’s more about placement than speed. Here’s exactly how I do it:
- Prep Your Ingredients (5 minutes): Wash and dry the grapes and cherry tomatoes. Cut the cheddar into ½-inch cubes. Slice the gouda into thin triangles. Lay out your prosciutto and salami slices so they’re easy to grab. Pat the mozzarella pearls dry with a paper towel—wet cheese will make the board soggy.
- Create the Tree Shape (2 minutes): On your cutting board, visualize a triangle. I start by placing the pretzel sticks or breadsticks at the bottom center to form the trunk. Lay them vertically, about 4-5 sticks wide. This gives the tree a base.
- Layer the Meats (5 minutes): Starting from the bottom of the triangle (just above the trunk), arrange the salami slices in a row. Overlap them slightly so they look like tree branches. I do about 3-4 slices per row. Then, add a row of prosciutto above that, folding each slice into a little ribbon. Continue layering the meats, alternating types, and moving upward. Each row should be slightly shorter than the one below it. Don’t worry if it looks messy—the cheese and decorations will cover it up.
- Add the Cheeses (5 minutes): Scatter the cheddar cubes over the meat layers, pressing them in gently so they stay put. Tuck the gouda triangles in between the meats. Place the mozzarella pearls in little clusters—they look like snowballs or ornaments. Make sure you leave some space for the grapes and tomatoes.
- Decorate the Tree (5 minutes): Now for the fun part. Place the green grapes in small groups around the tree—they mimic ornaments. Dot the cherry tomatoes here and there for a pop of red. Tuck the black olives near the trunk area or along the edges. Insert small sprigs of rosemary between the layers to look like pine needles. The rosemary also adds a lovely holiday scent.
- Add the Star Topper (1 minute): At the very top of the tree, place your star-shaped cookie, cheese slice, or bell pepper. If it won’t stay put, use a toothpick to secure it. I’ve used a star-shaped pretzel before, and it worked great.
- Fill in the Gaps (2 minutes): Look over the board. Any empty spots? Tuck in some crackers or extra grapes. Sprinkle fresh thyme or parsley over the whole thing for a finishing touch. Step back and admire your work—you just made a Christmas tree out of snacks.
Sensory Cues: The meats should be overlapping but not piled too high—you want to see the layers. The cheese cubes should feel firm to the touch. The rosemary should smell piney and fresh. When you’re done, the board should look like a lush, edible forest.
Troubleshooting Tip: If the board feels unstable, use a few toothpicks to anchor the meats to the cheese. If the grapes are rolling off, place them in small clusters where they’re cradled by the cheese cubes.
Cooking Tips & Techniques
I’ve made this board about a dozen times now, and I’ve learned a few things the hard way. Here’s what I wish someone had told me:
- Don’t Overcrowd the Board: It’s tempting to pile everything on, but leave a little breathing room. Guests need to be able to grab things without knocking over the whole tree. I once made a board so dense that the first person to reach for a cracker sent a cascade of cheese cubes onto the floor. Learn from my mistake.
- Use Room-Temperature Cheese: Cold cheese is harder to cube and less flavorful. Let your cheese sit out for 15-20 minutes before you start. It’ll taste creamier and slice more easily.
- Layer Strategically: The meats at the bottom provide a sturdy base. Think of them as the foundation. The cheese and decorations go on top. If you put soft cheese like brie at the bottom, it’ll get squished.
- Prep Everything First: This is a big one. Have all your ingredients washed, sliced, and ready to go before you start arranging. Once you start layering, you don’t want to stop to wash grapes. It breaks the flow.
- Keep It Fresh: If you’re making this ahead of time (up to 2 hours), cover it loosely with plastic wrap and refrigerate. But add the crackers and fresh herbs just before serving, or they’ll get soggy. The rosemary can go on early—it holds up fine.
- Multitasking Strategy: While your cheese is coming to room temperature, wash and dry the grapes and tomatoes. Slice the cheese while the meats are being laid out. It’s all about doing the passive prep first.
Common Mistake: Using wet grapes. I did this once, and the moisture made the crackers beneath them go limp. Always pat your grapes dry with a paper towel. It makes a huge difference.
Variations & Adaptations
This board is endlessly customizable. Here are some ways I’ve tweaked it over the years:
- Vegetarian Version: Skip the meats entirely and double up on cheese and veggies. Add roasted red pepper strips, artichoke hearts, and marinated mushrooms. Use hummus or a cheese spread as the “glue” for the base layer.
- Gluten-Free Option: Use gluten-free crackers or veggie sticks (like carrot or cucumber slices) instead of pretzels. Most cheeses and meats are naturally gluten-free, but check the labels on processed meats.
- Dairy-Free Adaptation: Swap all cheeses with plant-based alternatives. I like Miyoko’s for a creamy option and Violife for cheddar-style cubes. Add extra nuts and seeds for texture.
- Spicy Twist: Use spicy salami, add jalapeño slices, and include a small bowl of sriracha or hot honey for dipping. This is my go-to for parties where I know the crowd likes heat.
- Sweet & Savory Combo: Add dried apricots, figs, or dark chocolate squares to the board. The sweetness balances the salty meats and cheese beautifully. I tried this last Christmas, and it was a hit.
- Mini Tree Boards: For individual servings, make mini trees on small plates or wooden boards. Perfect for a party where everyone gets their own snack. Just scale down the ingredients.
Personal Variation: I once made this with a “snow” effect by adding a light dusting of grated parmesan over the top. It looked like the tree had been dusted with snow. It was extra, but people loved it.
Serving & Storage Suggestions
This board is best served at room temperature, so take it out of the fridge about 20 minutes before your guests arrive. The flavors really open up when the cheese isn’t ice-cold. Place it in the center of your table or on a coffee table for grazing.
What to Serve With It: This board pairs beautifully with a crisp white wine like Sauvignon Blanc or a light red like Pinot Noir. For a non-alcoholic option, sparkling water with a splash of cranberry juice feels festive. You can also add a small bowl of honey or fig jam on the side for drizzling over the cheese.
Storage Instructions: If you have leftovers (unlikely, but possible), remove any fresh herbs and grapes first—they get mushy. Store the meats and cheeses in separate airtight containers in the fridge. They’ll keep for 2-3 days. The crackers should be stored separately in a ziplock bag to stay crisp.
Reheating Tips: You don’t really reheat a charcuterie board, but if you want to revive the cheese, let it sit at room temperature for 15 minutes before serving again. The meats are fine cold or at room temp.
How Flavors Develop: Honestly, this board is best the day it’s made. The fresh ingredients like grapes and herbs lose their snap after a day. But the cheese and meats actually taste better after a day in the fridge—the flavors meld together nicely.
Nutritional Information & Benefits
This board is more of a snack than a meal, but it does pack some nutritional perks. Here’s a rough estimate per serving (about ¼ of the board):
- Calories: Approximately 350-400
- Protein: 18-22g (from meats and cheese)
- Fat: 25-30g (mostly from cheese and meats, with some healthy fats from olives)
- Carbohydrates: 15-20g (from crackers, grapes, and tomatoes)
- Fiber: 2-3g (from grapes and herbs)
Health Benefits: The cheeses provide calcium and protein, while the grapes and tomatoes offer antioxidants like vitamin C and lycopene. The rosemary has anti-inflammatory properties, and the olives contribute healthy monounsaturated fats. It’s not a health food, but it’s a balanced snack that won’t leave you feeling heavy.
Dietary Considerations: This recipe is naturally low-carb if you skip the crackers. It’s also high in sodium, so be mindful if you’re watching your salt intake. For a lighter option, use low-fat cheese and lean turkey slices.
Personal Wellness Perspective: I love that this board lets people graze at their own pace. It encourages mindful eating—you can pick and choose what you want, and you’re less likely to overeat than with a heavy meal. Plus, the festive presentation makes it feel like a treat, even when you’re using simple ingredients.
Conclusion
This Christmas tree charcuterie board is more than just a snack—it’s a centerpiece, a conversation starter, and a little piece of holiday magic that you can make in under 30 minutes. It started as a mistake in my kitchen, but now it’s a tradition I look forward to every year. The best part? It’s completely forgiving. You can swap ingredients, change the shape, or add your own decorations, and it’ll still look amazing.
I love this recipe because it reminds me that hosting doesn’t have to be perfect. You don’t need a fancy platter or a culinary degree. You just need some good food, a little creativity, and the willingness to laugh when things go wrong. Because sometimes, the happy accidents are the best part.
I’d love to hear how yours turns out! Did you add a star topper? Did you use a different meat? Drop a comment below and share your version. And if you make this for your holiday party, tag me—I want to see your edible trees. Happy snacking, and happy holidays!
Frequently Asked Questions
Can I make this charcuterie board ahead of time?
Yes, you can assemble the board up to 2 hours in advance. Just cover it loosely with plastic wrap and refrigerate. Add the crackers and fresh herbs right before serving to keep them crisp.
What if I don’t have a star-shaped topper?
No problem! You can use a small cookie cutter to shape a slice of cheese or bell pepper. Or just skip it—the tree looks great without it. I’ve used a star-shaped pretzel before, and it worked perfectly.
Can I use different meats or cheeses?
Absolutely. This recipe is super flexible. Swap in your favorites—turkey, roast beef, brie, or even smoked gouda. Just make sure the cheeses are firm enough to cube or slice.
How do I keep the board from getting messy?
Pat all wet ingredients (grapes, tomatoes, mozzarella) dry before adding them. Use toothpicks to secure loose items. And don’t overcrowd—leave a little space between elements so guests can grab things easily.
Is this recipe suitable for a gluten-free diet?
Yes, with a few swaps. Use gluten-free crackers or veggie sticks instead of pretzels. Most cheeses and meats are naturally gluten-free, but always check the labels on processed meats to be safe.
Pin This Recipe!
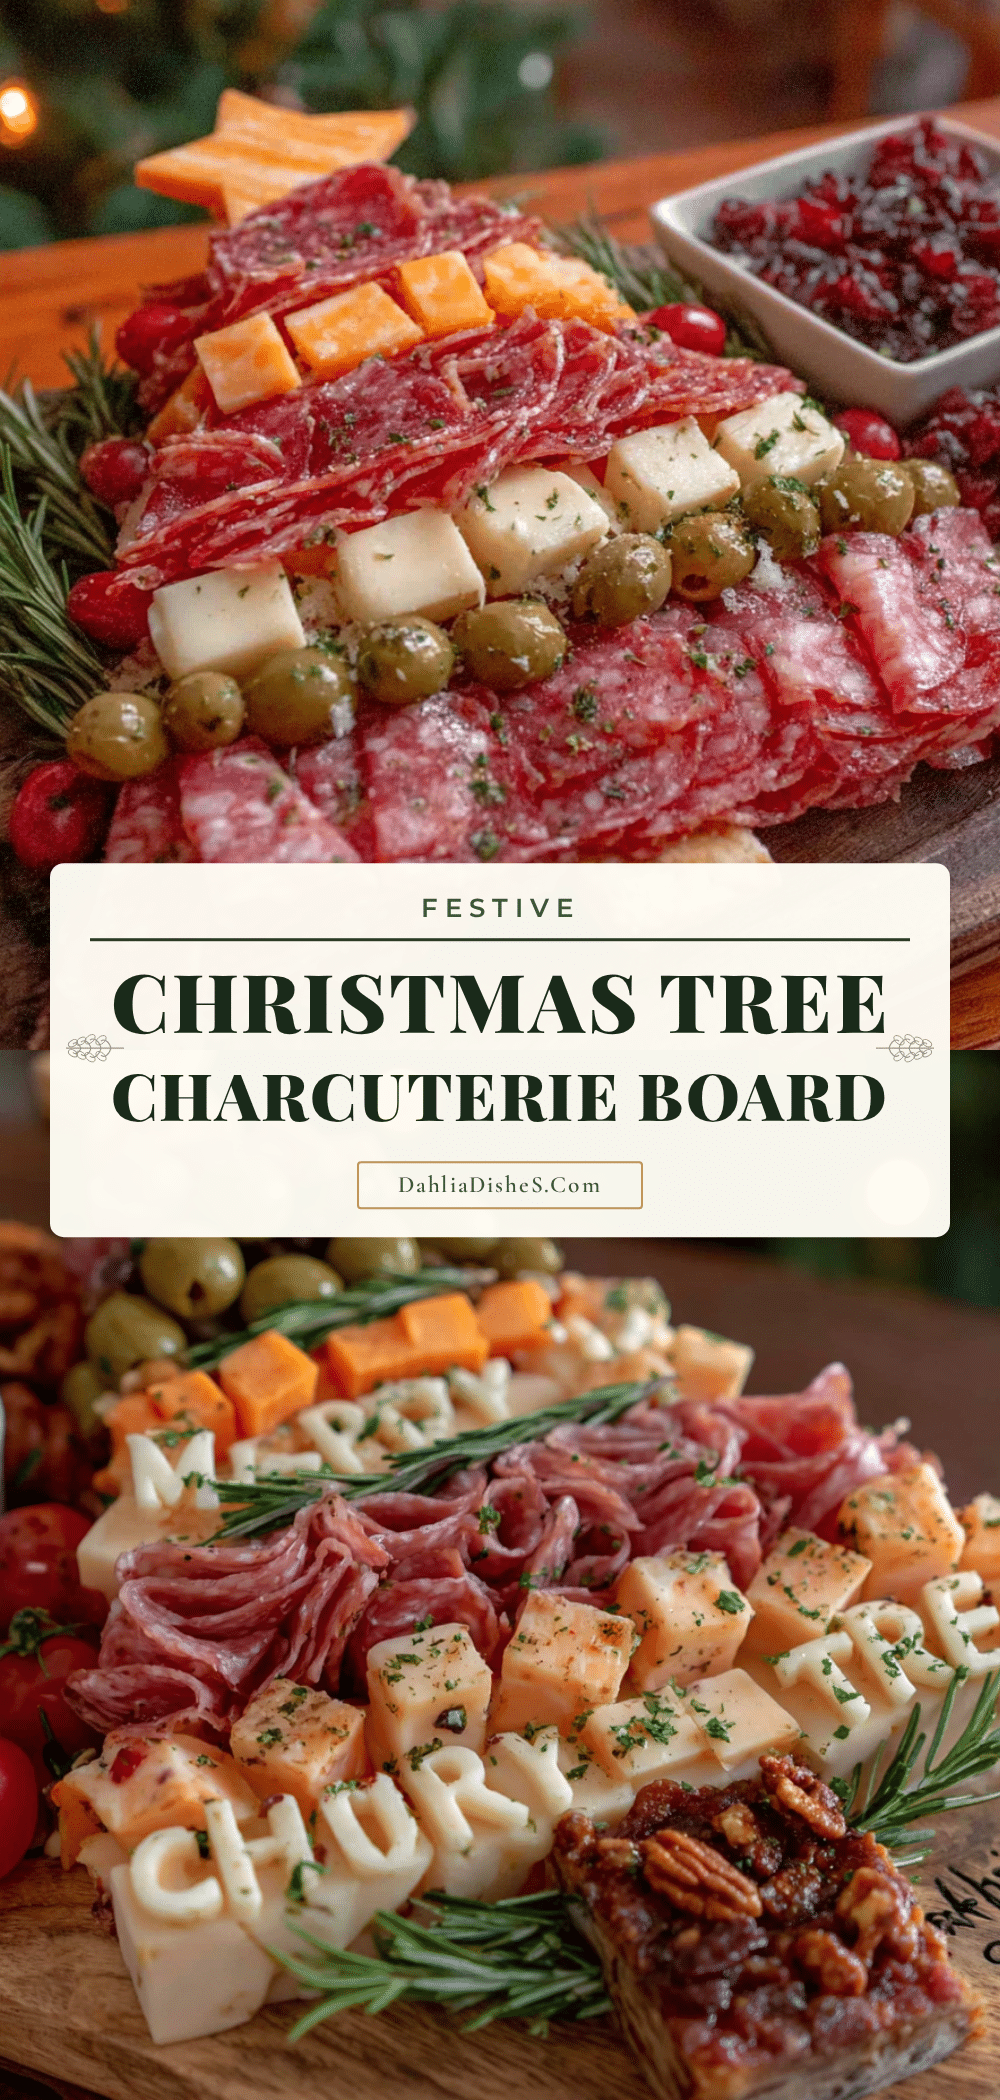
Festive Christmas Tree Charcuterie Board: Easy & Impressive Party Idea
A stunning Christmas tree-shaped charcuterie board made with meats, cheeses, grapes, and rosemary. This easy, no-cook appetizer comes together in 20 minutes and is perfect for holiday parties.
- Prep Time: 20 minutes
- Cook Time: 0 minutes
- Total Time: 20 minutes
- Yield: 8 servings 1x
- Category: Appetizer
- Cuisine: American
Ingredients
- 8–10 slices salami or pepperoni
- 4–6 slices prosciutto
- 4–6 slices capicola or soppressata
- 8 oz block cheddar cheese, cut into ½-inch cubes
- 4 oz mozzarella pearls or small fresh mozzarella balls, drained
- 4 oz gouda or havarti cheese, sliced into thin triangles
- 1 cup green grapes, washed and dried
- ½ cup cherry tomatoes
- ¼ cup black olives or kalamata olives, pitted
- Fresh rosemary sprigs
- Fresh thyme or parsley (optional, for garnish)
- 1 cup crackers or crostini
- ½ cup pretzel sticks or breadsticks
- 1 star-shaped cookie, slice of yellow bell pepper, or star-shaped cheese slice (optional, for topper)
Instructions
- Prep your ingredients: Wash and dry the grapes and cherry tomatoes. Cut the cheddar into ½-inch cubes. Slice the gouda into thin triangles. Lay out prosciutto and salami slices. Pat mozzarella pearls dry with a paper towel.
- Create the tree shape: On a large cutting board, visualize a triangle. Place pretzel sticks or breadsticks vertically at the bottom center to form the trunk (about 4-5 sticks wide).
- Layer the meats: Starting from the bottom of the triangle (just above the trunk), arrange salami slices in a row, overlapping slightly. Add a row of prosciutto above, folding each slice into a ribbon. Continue layering meats, alternating types, moving upward with each row slightly shorter than the one below.
- Add the cheeses: Scatter cheddar cubes over the meat layers, pressing gently. Tuck gouda triangles between meats. Place mozzarella pearls in small clusters.
- Decorate the tree: Place green grapes in small groups around the tree. Dot cherry tomatoes here and there. Tuck black olives near the trunk or edges. Insert small rosemary sprigs between layers to look like pine needles.
- Add the star topper: Place the star-shaped topper at the very top of the tree. Use a toothpick to secure if needed.
- Fill in the gaps: Tuck in crackers or extra grapes in any empty spots. Sprinkle fresh thyme or parsley over the whole thing for a finishing touch.
Notes
Pat all wet ingredients (grapes, tomatoes, mozzarella) dry before adding to prevent sogginess. Let cheese sit at room temperature for 15-20 minutes before assembling for better flavor and easier slicing. If making ahead, assemble up to 2 hours in advance, cover loosely with plastic wrap, and refrigerate. Add crackers and fresh herbs just before serving. For a vegetarian version, skip the meats and double up on cheese and veggies.
Nutrition
- Serving Size: ¼ of the board
- Calories: 375
- Sugar: 8
- Sodium: 850
- Fat: 28
- Saturated Fat: 12
- Carbohydrates: 18
- Fiber: 2
- Protein: 20
Keywords: Christmas tree charcuterie board, holiday appetizer, easy charcuterie board, festive snack, no-cook appetizer, party food