Love this? Save it for later!
Share the inspiration with your friends
I’m not supposed to play favorites with recipes, but honestly? These witch finger pretzel snacks have me completely hooked. My neighbor, an older woman named Gladys who has lived three houses down for as long as I can remember, watched me struggling to untangle a string of Christmas lights last November and didn’t say anything at first. Then she just shook her head, disappeared inside her house, and came back holding a plastic container with these creepy, beautiful pretzel fingers staring up at me. She handed them over without a word, and I knew—this was her way of saying I needed a break.
The power almost went out trying to get those lights fixed, but those snacks? Let me tell you, they saved the whole evening. Gladys never formally taught me the recipe. She just mentioned it casually over the fence a few weeks later, like it was nothing. “Oh, you just dip pretzel rods in green candy melts and stick an almond on the end,” she said, waving her hand like it was the most ordinary thing in the world. But I knew better. That first bite had this unexpected crunch—salty pretzel meeting sweet candy coating, with that almond nail adding the perfect finishing touch.
Maybe you’ve been there, scrambling for a Halloween treat that doesn’t look like everything else on the table. These witch finger pretzels are it. They’re creepy enough to impress the kids, but simple enough that you won’t pull your hair out making them. I’ve tweaked Gladys’s original version just a little—added a dab of red gel for that bloody cuticle look—and honestly, they’ve become my signature Halloween contribution every single year. The recipe arrived through a relationship, not through a transaction, and that’s probably why I keep coming back to it.
Why You’ll Love This Recipe
These easy witch finger pretzel Halloween snacks are the kind of recipe that makes you look like a kitchen wizard without actually having to be one. I’ve tested this method at least a dozen times, tweaking the candy melt consistency, experimenting with different almond sizes, and figuring out the exact chilling time so everything holds together perfectly. Here is why this recipe has earned a permanent spot in my Halloween rotation:
- Quick & Easy : Comes together in under 20 minutes of active time. The hardest part is waiting for the candy melts to set in the fridge. Perfect for busy weeknights or last-minute Halloween party prep.
- Simple Ingredients : No fancy grocery trips needed. You likely already have pretzel rods in your pantry, and the rest is just candy melts, almonds, and a little food coloring. No obscure baking supplies required.
- Perfect for Halloween Parties : These are great for classroom treats, office potlucks, spooky movie nights, or trick-or-treaters who deserve something a little different than another candy bar.
- Crowd-Pleaser : Always gets rave reviews from kids and adults alike. There’s something about the salty-sweet combo that makes everyone reach for seconds. I’ve seen grown adults giggle when they bite into the almond “nail.”
- Unbelievably Delicious : The texture and flavor combo is next-level comfort food. That salty pretzel rod wrapped in sweet, creamy candy coating with a crunchy almond tip—it just works.
What makes this recipe different from the rest? It’s the little details I’ve figured out through trial and error. Like using a piping bag to drizzle the red gel for the “blood” effect instead of just dotting it randomly. Or letting the candy melts cool for exactly two minutes before dipping so the coating isn’t too thin or too thick. This isn’t just another version of witch finger pretzels—it’s the best version. The kind that makes you close your eyes after the first bite, even if you’re pretending to be scared.
This recipe is comfort food reimagined for the spooky season—simple, fast, but with the same soul-soothing satisfaction of a homemade treat. Perfect for impressing guests without stress, or turning a simple snack into something memorable.
What Ingredients You Will Need
This recipe uses simple, wholesome ingredients to deliver bold flavor and satisfying crunch without the fuss. Most of these are pantry staples or easy to find at your local grocery store during the Halloween season.
- Pretzel rods (1 package, about 30-40 rods) – Look for thick, sturdy pretzel rods that won’t break easily when dipped. I prefer Snyder’s of Hanover brand for their consistent shape and crunch. Avoid thin pretzel sticks—they’ll snap under the weight of the candy coating.
- Green candy melts (12 ounces) – These give the witch fingers their signature creepy color. I recommend Wilton brand green candy melts for smooth melting and vibrant color. You can also use white candy melts with green food coloring, but the pre-colored ones give a more consistent result.
- Whole almonds (30-40 pieces) – These become the witch fingernails. Look for almonds that are relatively uniform in size and shape. Sliced almonds won’t work here—you need the whole almond with its pointed tip intact. Roasted or raw both work fine.
- Red gel food coloring (1 small tube) – This creates the “bloody” cuticle effect at the base of the almond nail. I use Wilton red gel, but any brand of gel food coloring works. Liquid food coloring is too runny and will bleed everywhere.
- Coconut oil or shortening (1 teaspoon, optional) – Adding a tiny bit of coconut oil to your candy melts helps thin them out for smoother dipping. If your candy melts are already melting nicely, you can skip this.
- Edible googly eyes (optional, for decoration) – Sometimes I add these for extra personality. They’re totally optional but make the fingers look even more cartoonishly creepy.
Ingredient Selection Tips: For the best texture, choose pretzel rods that are fresh and crunchy—stale pretzels will taste soft and disappointing. If you’re making these ahead of time, fresh pretzels hold up better in the fridge. For the almonds, look for the “whole natural” variety rather than blanched, as the brown skin adds a more realistic nail appearance.
Substitution Guidance: If you can’t find green candy melts, use white candy melts and add green gel food coloring until you reach your desired shade. For a nut-free version, skip the almonds entirely and use a small green candy melt dabbed at the tip to form a nail shape—it won’t look as realistic, but it will still be delicious. Use dairy-free candy melts and vegan pretzels for a vegan-friendly option.
Equipment Needed
You don’t need a professional bakery setup for these witch finger pretzels. Most of this equipment is probably already hiding in your kitchen drawers.
- Microwave-safe bowl – For melting the candy melts. Glass or ceramic works best. Avoid plastic bowls, as they can hold onto grease and affect the melting process.
- Parchment paper or silicone baking mat – For setting the dipped pretzels. Parchment paper is cheap and disposable; silicone mats are reusable and eco-friendly. Both work beautifully.
- Baking sheet – To hold the parchment paper and give the pretzels a flat surface to set on. Any standard half-sheet pan works.
- Small piping bag or zip-top bag – For drizzling the red gel. If you don’t have piping bags, a small zip-top bag with the corner snipped off works perfectly.
- Toothpicks – Handy for touching up any bare spots on the candy coating or for helping position the almonds.
- Tweezers – Okay, this sounds fancy, but trust me—tweezers make placing those tiny almonds so much easier. Your fingers will thank you when they aren’t covered in sticky green candy.
Budget-Friendly Alternatives: No piping bag? Use a spoon to drizzle the red gel. No baking sheet? A flat cutting board covered in parchment works fine. I’ve made these in a tiny apartment kitchen with zero fancy equipment, and they turned out just as creepy.
Preparation Method
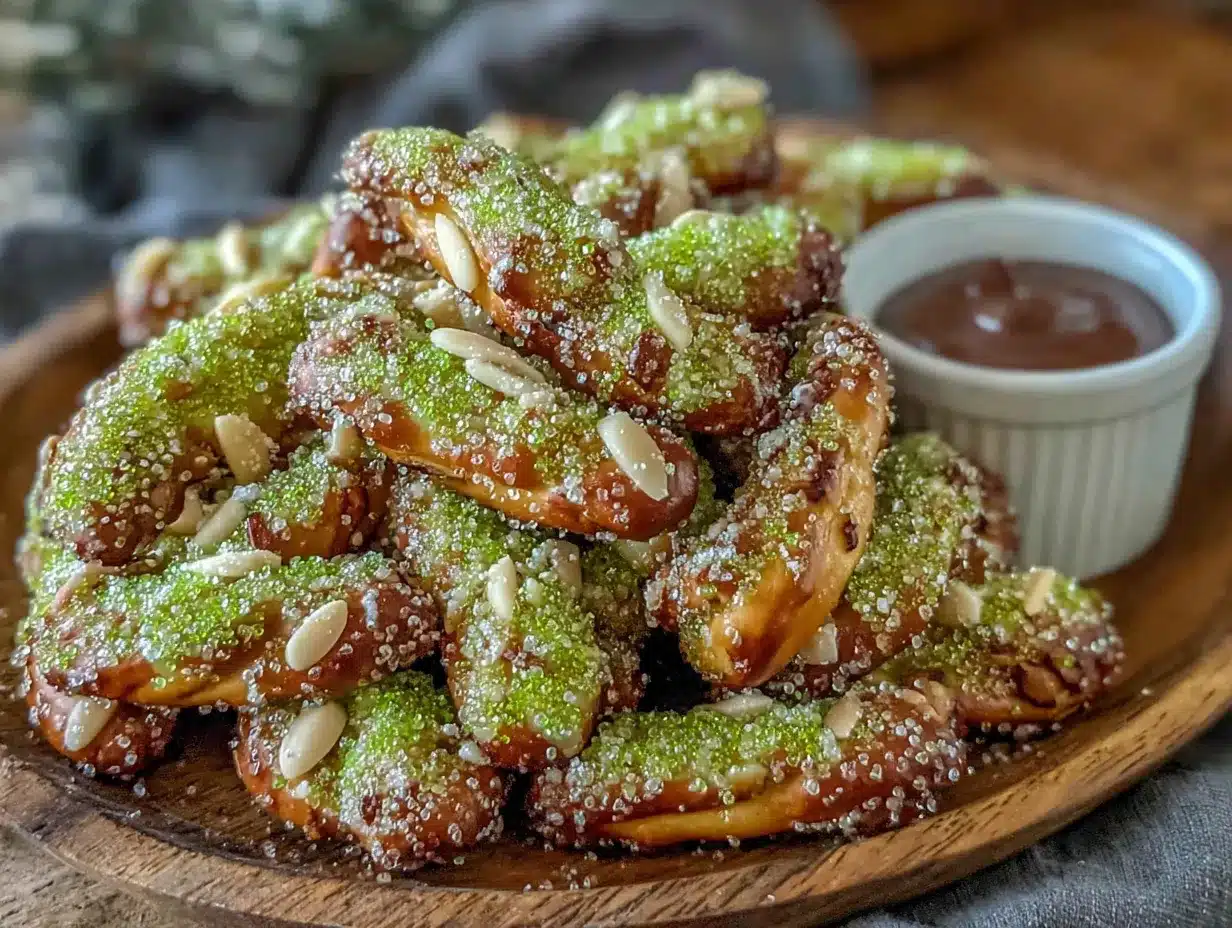
Making these witch finger pretzel snacks is surprisingly straightforward. The process takes about 20 minutes of active work, plus 15 minutes of chilling time. Here is exactly how I do it:
- Prep your workspace. Line a baking sheet with parchment paper or a silicone baking mat. Make sure it fits flat in your refrigerator. Arrange your pretzel rods nearby so they’re ready to grab. Count out your almonds so you have one for each pretzel rod.
- Melt the green candy melts. Place the candy melts in a microwave-safe bowl. Microwave in 30-second intervals at 50% power, stirring well between each interval. This prevents the candy from burning—trust me, I’ve ruined a batch by getting impatient and cranking the power up. It takes about 2-3 intervals total. The candy should be smooth and fully melted with no lumps. If it seems too thick, stir in 1 teaspoon of coconut oil to thin it out.
- Let the candy cool slightly. This step is crucial. Let the melted candy sit for 2-3 minutes before dipping. If the candy is too hot, it will slide right off the pretzel rods and pool at the bottom. You want it warm enough to coat smoothly but cool enough to cling to the pretzel. I usually test with one pretzel first—if the coating is too thin, I let it cool another minute.
- Dip the pretzel rods. Hold a pretzel rod by one end and dip it into the melted green candy, leaving about 1 inch undipped at the top (this becomes the “wrist” area where the witch’s hand would connect). Gently twist the pretzel as you pull it out to help excess candy drip off. You want a nice, even coating—not too thick, not too thin.
- Tap off excess. Gently tap the dipped pretzel against the side of the bowl to remove any excess candy. If you skip this step, you’ll get a big blob at the bottom that looks messy instead of creepy. Hold it over the bowl for a few seconds to let the extra drip down.
- Place on parchment. Lay the dipped pretzel on the prepared baking sheet. Repeat with the remaining pretzel rods, spacing them about 1 inch apart so they don’t touch each other. Work quickly—the candy starts to set as it cools.
- Attach the almond “fingernails.” While the candy coating is still wet, press one whole almond onto the tip of each pretzel rod. The pointed end of the almond should face outward, away from the pretzel, like a fingernail extending past the finger. Press gently so the almond sticks but doesn’t flatten the candy coating. If the candy has started to set, you can dip the almond in the melted candy first to help it adhere.
- Create the “cuticle” effect. Using your piping bag or a toothpick, dab a small amount of red gel food coloring at the base of each almond, where it meets the green candy. This creates the illusion of a bloody cuticle. Don’t go overboard—a tiny dab is all you need. Too much red gel looks more like a crime scene than a Halloween treat.
- Add wrinkles (optional but fun). While the candy is still soft, use a toothpick to gently drag a few lines along the length of the green coating to create “wrinkles” on the witch fingers. This adds texture and makes them look more like actual fingers. I usually do 2-3 subtle lines per pretzel.
- Chill to set. Place the baking sheet in the refrigerator for 10-15 minutes, or until the candy coating is completely firm. Don’t skip this step—the candy needs to harden fully so the pretzels don’t stick together when you store them.
- Serve or store. Once set, carefully remove the witch finger pretzels from the parchment paper. Arrange them on a platter with the almond “nails” facing outward for maximum creepiness. They’re ready to serve immediately.
Sensory Cues: The candy melts should look glossy and smooth when properly melted. When you tap the dipped pretzel, you should hear a light thud—not a slosh. The green coating should be opaque, not translucent. When you press the almond in, you should feel a slight resistance as it settles into the candy. The finished pretzels should feel firm to the touch, with no sticky spots.
Cooking Tips & Techniques
After making these witch finger pretzels about a hundred times (okay, maybe fifty), I’ve learned a few tricks that make the process smoother and the results more impressive.
Temperature is everything. Candy melts are finicky little things. If they’re too hot, they’ll slide off the pretzel and pool on your parchment. If they’re too cool, they’ll clump up and give you a lumpy coating. The sweet spot is when the melted candy feels warm but not hot to the touch—like a comfortable bath temperature. I learned this the hard way when my first batch looked like green blobs instead of witch fingers.
Work in small batches. Don’t try to dip all 40 pretzels at once. Melt your candy in batches if needed, or work quickly once the candy is melted. The candy starts to set within a few minutes, especially if your kitchen is cool. I usually dip about 10 pretzels at a time, then reheat the candy for 10 seconds if it starts getting too thick.
Keep your almonds organized. Before you start dipping, sort through your almonds and pick out the ones that look most like fingernails—pointed, slightly curved, and roughly the same size. Having them lined up and ready to go saves precious seconds when you’re working with fast-setting candy.
Don’t skip the chilling step. I once got impatient and tried to serve these without refrigerating them first. The candy was still soft, and the almonds slid right off when people picked them up. A solid 15 minutes in the fridge makes everything set properly and keeps the pretzels looking perfect.
Common mistake to avoid: Using liquid food coloring instead of gel. Liquid food coloring will seize your candy melts and turn them into a grainy, unusable mess. Always use gel or powder food coloring when working with candy melts. I learned this the hard way and ended up tossing an entire batch.
Variations & Adaptations
These witch finger pretzels are surprisingly versatile. Here are some variations I’ve tried and loved:
Spooky Color Variations: Swap the green candy melts for purple, orange, or black for different Halloween vibes. Purple fingers look extra witchy, while orange gives them a more pumpkin-spice feel. I made a batch of black witch fingers last year for a Halloween party, and they were a huge hit—they looked like charred, creepy claws.
Nut-Free Version: If you’re serving kids with nut allergies, skip the almonds entirely. Instead, use a small candy melt (like a green M&M or a yogurt-covered raisin) pressed into the tip of the pretzel to create a nail shape. It won’t look as realistic, but it will still be delicious and safe for everyone to enjoy.
Gluten-Free Adaptation: Use gluten-free pretzel rods instead of regular ones. Most major brands now offer gluten-free options that taste just as good. The rest of the ingredients are naturally gluten-free, so this is an easy swap.
Extra Creepy Details: Add edible googly eyes to the “knuckles” of the fingers for a cartoonishly creepy look. Or use black gel food coloring to draw tiny hairs on the fingers. I tried this once and it was both hilarious and disgusting—perfect for Halloween.
Dairy-Free Version: Use dairy-free candy melts (many brands offer vegan options) and skip the coconut oil if you’re avoiding all oils. The recipe works exactly the same way with dairy-free alternatives.
Serving & Storage Suggestions
These witch finger pretzels are best served at room temperature, which makes them perfect for Halloween parties where food sits out for a while. Arrange them on a platter with the almond “nails” pointing outward, like a disembodied hand reaching up from the plate. For extra drama, place them in a small vase or jar so they look like a bouquet of creepy fingers.
Complementary Dishes: These pair beautifully with other Halloween treats like pumpkin dip, caramel apples, or a bowl of candy corn. For a savory balance, serve them alongside a cheese platter or spicy popcorn. The salty pretzel and sweet candy combination goes surprisingly well with a warm cup of apple cider or hot chocolate.
Storage Instructions: Store the witch finger pretzels in an airtight container at room temperature for up to 5 days. If your kitchen is warm or humid, store them in the refrigerator to prevent the candy coating from getting sticky. Layer them between sheets of parchment paper to prevent them from sticking together.
Freezer Instructions: These freeze beautifully! Place the pretzels in a single layer on a baking sheet and freeze until solid (about 1 hour). Then transfer them to a freezer-safe container or zip-top bag, separating layers with parchment paper. They’ll keep for up to 3 months. Thaw at room temperature for about 15 minutes before serving.
Flavor Development: Interestingly, these pretzels actually taste better after a day or two. The candy coating softens slightly and melds with the pretzel, creating a more cohesive texture. The almond flavor also seems to intensify as it sits. So don’t worry if you make them a day ahead—they’ll be even more delicious.
Nutritional Information & Benefits
While these witch finger pretzels are definitely a treat, they do offer a few nutritional perks worth mentioning. Each pretzel (using standard ingredients) contains approximately 80-100 calories, 4g of fat, 12g of carbohydrates, and 1g of protein. The almonds provide healthy monounsaturated fats, vitamin E, and magnesium, which support heart health and brain function.
The pretzel rods offer a quick source of carbohydrates for energy, and the candy coating, while indulgent, is portion-controlled by the size of the pretzel. These are naturally nut-based (if using almonds) and can be adapted for gluten-free or dairy-free diets as mentioned above.
Dietary Considerations: These treats contain gluten (from the pretzels), dairy (from the candy melts, unless using dairy-free), and tree nuts (from the almonds). They are egg-free and can be made vegan with simple substitutions. Always check labels on candy melts and pretzels for specific allergen information.
Personal Wellness Perspective: I believe in balance—these witch finger pretzels are a fun, occasional treat that brings joy to Halloween celebrations. They’re not health food, and that’s okay. Enjoy them mindfully, share them with friends, and don’t stress about the sugar content. Life is about moments like these.
Conclusion
These easy witch finger pretzel Halloween snacks have become more than just a recipe in my kitchen—they’re a tradition now. Every October, I pull out the green candy melts and the parchment paper, and I think about Gladys handing me that container over the fence. There’s something special about a recipe that comes with a story attached, don’t you think?
I encourage you to make these your own. Add extra googly eyes if you’re feeling silly. Use purple candy melts instead of green. Skip the almonds if you’re feeding a nut-free crowd. The beauty of this recipe is how forgiving it is—you can customize it however you like, and it will still turn out deliciously creepy.
I’d love to hear how your witch finger pretzels turn out! Drop a comment below and let me know what variations you tried, or share a photo of your spooky creations. And if you’re looking for more Halloween inspiration, don’t forget to check out my spider web dip recipe or these mummy pizza bites for a full spooky spread. Happy haunting, and happy snacking!
Frequently Asked Questions
Can I make these witch finger pretzels ahead of time?
Absolutely! These are perfect for making 1-2 days ahead of your Halloween party. Store them in an airtight container at room temperature or in the refrigerator, and they’ll stay fresh and crunchy. Just make sure the candy coating is fully set before stacking them.
Why did my candy melts get lumpy?
This usually happens when moisture gets into the candy melts. Make sure your bowl is completely dry before melting, and avoid using a plastic bowl that might have residual grease. If your candy does seize up, try adding a teaspoon of coconut oil and stirring vigorously—sometimes that can save the batch.
Can I use white chocolate instead of candy melts?
You can, but white chocolate behaves differently than candy melts. It needs to be tempered properly to set firmly, and it’s more sensitive to heat. If you want to use white chocolate, add green gel food coloring and a bit of coconut oil to help it melt smoothly. Just know that it may not set as hard as candy melts.
How do I keep the almonds from falling off?
The key is pressing the almond into the candy coating while it’s still wet and slightly warm. If the candy has started to set, dip the flat end of the almond into the melted candy first, then press it onto the pretzel. Chilling the pretzels immediately after also helps the almond adhere firmly.
Can I use pretzel sticks instead of rods?
I don’t recommend it. Pretzel sticks are much thinner and more fragile—they’ll likely snap under the weight of the candy coating and the almond. Stick with thick pretzel rods for the best results. If you only have sticks, consider making witch finger pretzel bites by cutting the sticks in half and using smaller almond pieces.
Pin This Recipe!

Easy Witch Finger Pretzel Halloween Snacks

These creepy yet delicious witch finger pretzels are made by dipping pretzel rods in green candy melts and topping them with an almond fingernail. Perfect for Halloween parties, they come together in under 20 minutes of active time and are always a crowd-pleaser.
- Prep Time: 20 minutes
- Cook Time: 0 minutes
- Total Time: 35 minutes
- Yield: 30-40 servings 1x
- Category: Snack
- Cuisine: American
Ingredients
- 1 package pretzel rods (about 30–40 rods)
- 12 ounces green candy melts
- 30–40 whole almonds
- 1 small tube red gel food coloring
- 1 teaspoon coconut oil or shortening (optional)
- Edible googly eyes (optional, for decoration)
Instructions
- Line a baking sheet with parchment paper or a silicone baking mat. Arrange pretzel rods nearby and count out almonds.
- Place green candy melts in a microwave-safe bowl. Microwave in 30-second intervals at 50% power, stirring well between each interval, until smooth and fully melted (about 2-3 intervals). If too thick, stir in 1 teaspoon coconut oil.
- Let the melted candy cool for 2-3 minutes until warm but not hot to the touch.
- Hold a pretzel rod by one end and dip it into the melted green candy, leaving about 1 inch undipped at the top. Gently twist as you pull it out to remove excess.
- Gently tap the dipped pretzel against the side of the bowl to remove excess candy.
- Lay the dipped pretzel on the prepared baking sheet. Repeat with remaining pretzel rods, spacing them about 1 inch apart.
- While the candy coating is still wet, press one whole almond onto the tip of each pretzel rod with the pointed end facing outward. Press gently to adhere.
- Using a piping bag or toothpick, dab a small amount of red gel food coloring at the base of each almond to create a ‘bloody cuticle’ effect.
- Optionally, use a toothpick to gently drag a few lines along the green coating to create ‘wrinkles’ on the witch fingers.
- Place the baking sheet in the refrigerator for 10-15 minutes, or until the candy coating is completely firm.
- Once set, carefully remove the pretzels from the parchment paper. Serve immediately or store.
Notes
For best results, use thick pretzel rods (not sticks) to prevent breaking. Let candy melts cool slightly before dipping to ensure even coating. If almonds fall off, dip the flat end in melted candy first. Store in an airtight container at room temperature for up to 5 days or freeze for up to 3 months.
Nutrition
- Serving Size: 1 pretzel
- Calories: 90
- Sugar: 8
- Sodium: 150
- Fat: 4
- Saturated Fat: 2
- Carbohydrates: 12
- Fiber: 1
- Protein: 1
Keywords: witch finger pretzels, Halloween snacks, easy Halloween treats, pretzel rods, candy melts, spooky snacks


