Love this? Save it for later!
Share the inspiration with your friends
The woman at the farmer’s market stand watched me eyeing her pumpkins for a solid minute before she finally spoke. “You’re not gonna bake those, are you?” she asked, half-smiling. I admitted I was planning to, and she just shook her head. “Come back next week. I’ll show you something better.” Honestly, I thought she was just being nice, but a week later, there she was with a cooler and a knowing look. She handed me a cup full of something creamy and spiced, topped with what looked like crushed graham crackers. “Pumpkin pie,” she said, “but no oven required.”
That first bite stopped me mid-conversation. It had all the deep, warm flavors of a classic pumpkin pie—the cinnamon, the ginger, that velvety texture—but it felt lighter, fresher somehow. And the best part? She was right. No oven, no rolling out dough, no stress. I scribbled her instructions on a napkin right there, and I’ve been making these Easy No-Bake Pumpkin Pie Icebox Cups ever since. They’re the kind of dessert that makes you feel like you pulled off something impressive, when really, you just let the fridge do all the work.
Maybe you’ve been there—wanting that cozy fall dessert but dreading the whole pie-making ordeal. I mean, I love a good homemade crust as much as anyone, but sometimes you just need the flavor without the flour all over your counter. These little cups solve that problem beautifully. They’re my go-to for weeknight cravings, unexpected guests, or those days when you want autumn on a spoon without turning on the oven. Let me show you how simple this really is.
Why You’ll Love This Recipe
These Easy No-Bake Pumpkin Pie Icebox Cups have become my most-requested fall dessert, and for good reason. They deliver everything you love about pumpkin pie without any of the fuss. Here is why they keep showing up at my table—and yours:
- No Oven Required: This is a true no-bake dessert. On those warm fall days or when your oven is already full, these cups come together in minutes. The fridge does all the heavy lifting.
- Simple Ingredients: You probably have most of these in your pantry right now. No specialty items, no last-minute grocery runs for obscure spices. Just real, straightforward ingredients.
- Perfect for Fall Gatherings: Whether it is a Thanksgiving potluck, a cozy dinner party, or just a Tuesday night craving, these individual servings feel special without being fussy. They travel well, too.
- Crowd-Pleaser: I have served these to kids, grandparents, and everyone in between. The creamy texture and warm spices appeal to all ages. People always ask for the recipe.
- Incredibly Delicious: The combination of silky pumpkin filling, crunchy graham cracker crust, and fluffy whipped topping is pure comfort. It is the kind of dessert that makes you close your eyes after the first bite.
What makes this recipe different from other no-bake pumpkin desserts is the texture. I use a simple technique—blending the filling until it is impossibly smooth—that gives these cups a mousse-like quality. It is not too dense, not too light, but just right. And honestly? It is comfort food reimagined: quicker, easier, but with the same soul-soothing satisfaction as a slice of homemade pie.
What Ingredients You Will Need
This recipe uses simple, wholesome ingredients to deliver that classic pumpkin pie flavor without the hassle. Most of these are pantry staples, especially during fall baking season.
For the Crust Layer:
- Graham cracker crumbs, 1 cup (about 8 full sheets) — You can crush them yourself in a bag or use pre-made crumbs. I prefer the texture of freshly crushed ones.
- Unsalted butter, 3 tablespoons, melted — This binds the crumbs together. Salted butter works too, just skip the pinch of salt.
- Brown sugar, 1 tablespoon, packed — Adds a subtle molasses flavor that pairs beautifully with pumpkin.
- Pinch of salt — Balances the sweetness.
For the Pumpkin Filling:
- Pumpkin puree, 1 cup (not pumpkin pie filling) — I recommend Libby’s for consistent texture. Make sure it is 100% pure pumpkin.
- Cream cheese, 4 ounces, softened — Full-fat works best for that rich, creamy texture. Let it sit out for 30 minutes before starting.
- Powdered sugar, 1/2 cup — Dissolves easily into the filling without grittiness.
- Heavy whipping cream, 1/2 cup — Whipped to soft peaks for lightness. You can use Cool Whip in a pinch, but fresh whipped cream is worth it.
- Pumpkin pie spice, 1 teaspoon — Store-bought is fine, or make your own with cinnamon, nutmeg, ginger, and cloves.
- Vanilla extract, 1/2 teaspoon — Enhances all the warm flavors.
For the Topping:
- Whipped cream, for serving — Homemade or store-bought, your choice.
- Ground cinnamon or nutmeg, for garnish — A light dusting makes them look bakery-worthy.
- Optional: crushed pecans or caramel drizzle — Adds crunch and extra flavor if you are feeling fancy.
Substitution Guidance: For a gluten-free version, use gluten-free graham crackers or crushed shortbread cookies. To make it dairy-free, substitute the cream cheese with a vegan version and use coconut cream instead of heavy cream. The texture will be slightly different but still delicious.
Equipment Needed
You do not need much for these Easy No-Bake Pumpkin Pie Icebox Cups, which is part of their charm. Here is what you will need:
- Mixing bowls (2 medium-sized) — One for the crust, one for the filling.
- Electric hand mixer or stand mixer — Whipping cream by hand is possible but tiring. A mixer makes it effortless.
- Small skillet or saucepan — Only if you want to toast the graham cracker crumbs for extra flavor (optional but recommended).
- 4 to 6 small serving cups or ramekins — Mason jars, small glasses, or any 4-ounce containers work beautifully.
- Rubber spatula — For scraping every bit of filling into the cups.
- Measuring cups and spoons — Precision matters for the spice blend.
- Ziploc bag or food processor — For crushing graham crackers if you are not using pre-made crumbs.
I have made these with just a whisk and a fork when my mixer was packed away after a move. It took a little more elbow grease, but the result was just as good. Do not let missing equipment stop you.
Preparation Method
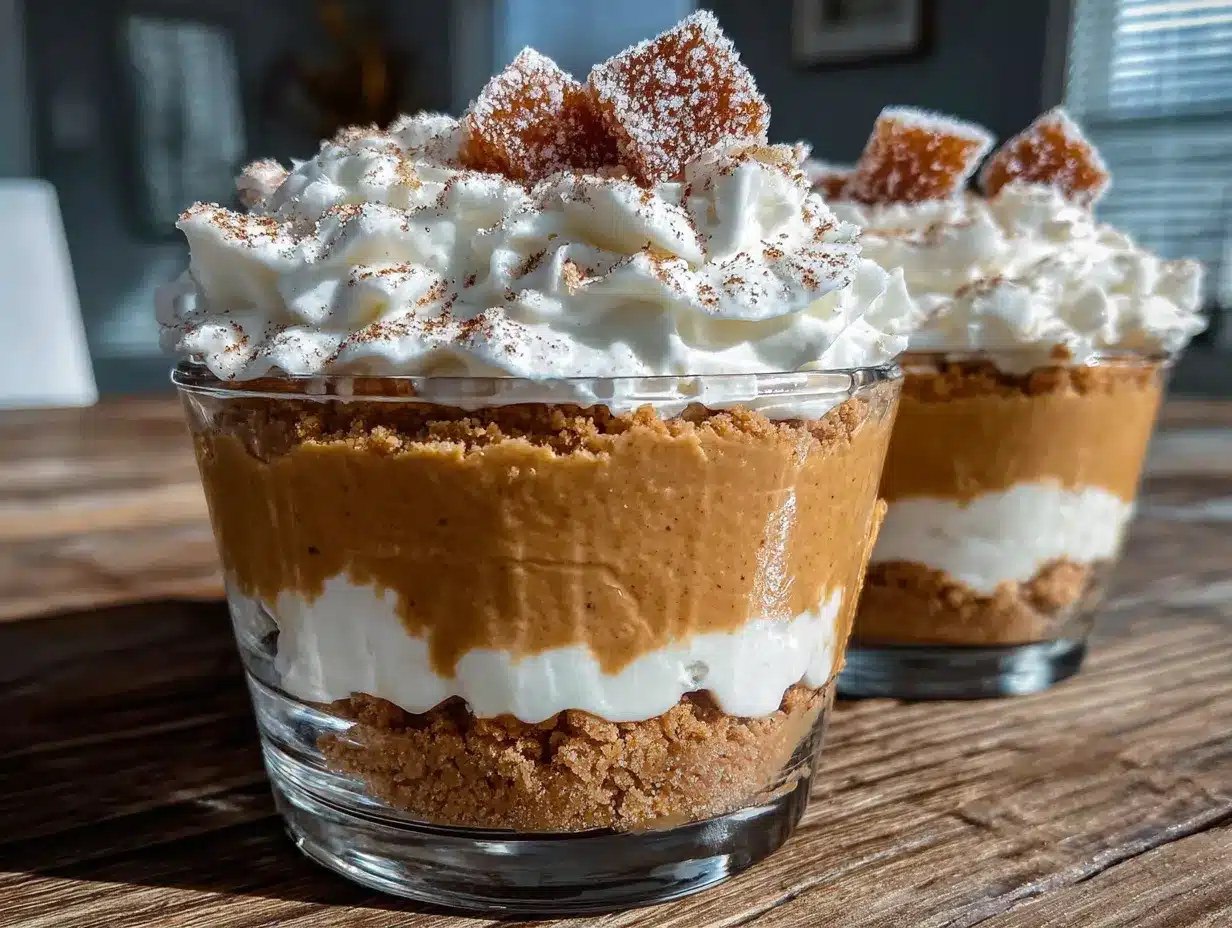
These Easy No-Bake Pumpkin Pie Icebox Cups come together in about 20 minutes of active time. The hardest part is waiting for them to chill!
- Prepare the crust. In a medium bowl, combine 1 cup graham cracker crumbs, 1 tablespoon packed brown sugar, and a pinch of salt. Pour in 3 tablespoons melted unsalted butter and stir with a fork until the mixture looks like wet sand. It should clump together when pressed. Divide the mixture evenly among your serving cups—about 2 to 3 tablespoons per cup depending on size. Press it down firmly with the back of a spoon or the bottom of a small glass. Pop these in the refrigerator while you make the filling.
- Whip the cream. In a clean mixing bowl, pour 1/2 cup cold heavy whipping cream. Using an electric mixer on medium-high speed, whip until soft peaks form—this takes about 2 to 3 minutes. You are looking for peaks that flop over slightly when you lift the beaters. Do not over-whip or you will end up with butter. Set this aside in the refrigerator for now.
- Make the pumpkin filling. In another bowl, beat 4 ounces softened cream cheese with the electric mixer until smooth and fluffy, about 1 minute. Add 1/2 cup powdered sugar and beat until combined, scraping down the sides as needed. Then add 1 cup pumpkin puree, 1 teaspoon pumpkin pie spice, and 1/2 teaspoon vanilla extract. Mix on medium speed until everything is smooth and well incorporated. The mixture should be thick and creamy.
- Fold in the whipped cream. Take the whipped cream out of the fridge. Add about one-third of it to the pumpkin mixture and stir gently with a rubber spatula to lighten the batter. Then add the remaining whipped cream and fold it in using a gentle, sweeping motion. Fold until no white streaks remain, but be careful not to deflate the mixture. You want it airy and mousse-like.
- Assemble the cups. Spoon or pipe the pumpkin filling over the crust layer in each cup. Fill them almost to the top, leaving a little room for the whipped cream topping. Smooth the tops with the back of a spoon. Tap the cups gently on the counter to settle the filling.
- Chill. Cover each cup with plastic wrap or a lid and refrigerate for at least 4 hours, but overnight is best. This allows the flavors to meld and the texture to set properly. I know the waiting is hard, but trust me on this.
- Serve. When ready to serve, top each cup with a generous dollop of whipped cream. Dust with a pinch of cinnamon or nutmeg. If you are using pecans or caramel drizzle, add them now. Serve cold directly from the fridge.
Sensory Cue: The filling should be thick enough to hold its shape when spooned, but light enough to melt on your tongue. If it looks too soft after mixing, it needs more chill time.
Cooking Tips & Techniques
After making these Easy No-Bake Pumpkin Pie Icebox Cups more times than I can count, I have learned a few tricks that make a real difference.
Softening cream cheese properly. I used to microwave cream cheese to soften it, but it often ended up too warm or uneven. Now I just leave it on the counter for 30 minutes before starting. If you forget, cut it into small cubes and let it sit for 10 minutes. Room temperature cream cheese blends smoothly without lumps.
Don’t skip the chill time. I learned this the hard way. The first time I made these, I was impatient and served them after only an hour in the fridge. The filling was runny and the crust was soggy. Four hours is the minimum, but overnight really transforms the texture. The flavors deepen and the whole thing sets into a sliceable consistency.
Crush your own graham crackers. Pre-crushed crumbs are convenient, but they are often too fine and can make the crust dense. I put whole graham crackers in a ziploc bag and crush them with a rolling pin until I have a mix of fine crumbs and tiny pieces. This gives the crust better texture.
Toast the crumbs for extra flavor. This is optional but amazing. Before mixing with butter, toast the graham cracker crumbs in a dry skillet over medium heat for 3 to 4 minutes, stirring constantly. They will smell nutty and toasty. Let them cool completely before adding butter. It adds a whole new dimension to the dessert.
Pipe the filling for clean layers. If you want those beautiful distinct layers, transfer the pumpkin filling to a piping bag or a ziploc bag with the corner snipped off. This lets you control the flow and keeps the crust layer undisturbed.
Variations & Adaptations
One of the best things about these Easy No-Bake Pumpkin Pie Icebox Cups is how adaptable they are. Here are some variations I have tried and loved:
Vegan Version: Use vegan cream cheese and coconut cream in place of heavy cream. For the crust, use vegan butter or coconut oil. The filling will be slightly less firm but still delicious. I made this for a friend with dairy allergies and she said it was better than the original.
Ginger Snap Crust: Swap the graham crackers for crushed ginger snaps. The spicy snap of the cookies pairs beautifully with the creamy pumpkin filling. This has become my personal favorite variation. Use about 1 cup of crushed ginger snaps and reduce the brown sugar to 1 teaspoon since the cookies are already sweet.
Pumpkin Cheesecake Style: Add an extra 2 ounces of cream cheese and reduce the powdered sugar to 1/4 cup. The filling becomes denser and more cheesecake-like. Top with a dollop of sour cream mixed with a little sugar for that authentic cheesecake tang.
Chocolate Pumpkin Cups: Add a layer of melted dark chocolate between the crust and the pumpkin filling. Let the chocolate set in the fridge for 10 minutes before adding the filling. The combination of chocolate and pumpkin is surprisingly wonderful.
Spice It Up: If you like things warm, add 1/4 teaspoon of cayenne pepper or a pinch of black pepper to the pumpkin filling. It does not make it spicy, just adds a subtle warmth that enhances the other spices.
Serving & Storage Suggestions
These Easy No-Bake Pumpkin Pie Icebox Cups are best served cold, straight from the refrigerator. The contrast between the cool, creamy filling and the crunchy crust is part of what makes them so satisfying.
Presentation Ideas: Serve them in clear glass cups or mason jars so the layers are visible. A final dusting of cinnamon or nutmeg makes them look professional. For a holiday table, add a small cinnamon stick or a star anise as a garnish.
What to Serve With: These cups are rich enough to stand alone, but they pair beautifully with a cup of hot coffee or spiced chai tea. For a dessert spread, serve them alongside a plate of crisp cookies or a slice of apple cake.
Storage: Cover each cup tightly with plastic wrap or a lid and store in the refrigerator for up to 4 days. The flavor actually improves after the first day as the spices meld. Do not add the whipped cream topping until just before serving, or it will deflate and become watery.
Freezing Instructions: These cups freeze surprisingly well. Prepare them without the whipped cream topping, cover tightly, and freeze for up to 1 month. Thaw in the refrigerator overnight before serving. The texture remains creamy, though the crust might soften slightly.
Reheating: There is no need to reheat these. They are meant to be enjoyed cold. If you prefer a softer texture, let them sit at room temperature for 10 to 15 minutes before serving.
Nutritional Information & Benefits
Here is an approximate nutritional breakdown per serving (based on 6 servings, without optional toppings):
- Calories: 285
- Fat: 18g
- Carbohydrates: 28g
- Protein: 4g
- Fiber: 2g
- Sugar: 18g
These Easy No-Bake Pumpkin Pie Icebox Cups offer some surprising nutritional benefits. Pumpkin is packed with vitamin A, which supports eye health and immune function. It is also rich in fiber and antioxidants. The cream cheese and heavy cream provide calcium and protein, though this is definitely a treat, not a health food.
Dietary Considerations: This recipe is vegetarian. For gluten-free, dairy-free, or vegan options, see the variations section above. The recipe contains dairy and gluten in its standard form.
I personally love that these cups satisfy my pumpkin pie craving without the heavy feeling that sometimes comes with traditional pie. They feel indulgent but not overwhelming.
Conclusion
These Easy No-Bake Pumpkin Pie Icebox Cups are proof that you do not need an oven, a pie plate, or hours of time to enjoy the flavors of fall. They are creamy, spiced, and utterly satisfying—everything you want from a pumpkin dessert, without the stress.
I still think about that woman at the farmer’s market whenever I make these. She taught me that sometimes the best recipes come from unexpected places, and that good food does not have to be complicated. These cups are my little tribute to that lesson.
Now I want to hear from you. Have you tried making these? Did you add your own twist? Drop a comment below and let me know how they turned out. And if you loved them, share this recipe with a friend who needs a little fall comfort in their life. Happy no-baking!
Frequently Asked Questions
Can I use canned pumpkin pie filling instead of pure pumpkin puree?
No, I do not recommend it. Pumpkin pie filling is already sweetened and spiced, which will throw off the flavor balance of this recipe. Stick with 100% pure pumpkin puree for the best results.
How far in advance can I make these cups?
You can make them up to 4 days ahead of time. Store them covered in the refrigerator and add the whipped cream topping just before serving. They actually taste better after a day or two as the flavors meld together.
Can I make these without a mixer?
Absolutely. You can whip the cream by hand using a whisk and some elbow grease. It will take about 5 to 7 minutes of vigorous whisking. For the cream cheese, just beat it with a wooden spoon until smooth. It takes a little more effort, but the result is the same.
My filling came out runny. What went wrong?
This usually happens for one of two reasons: either the cream cheese was not softened enough and left lumps, or the cups did not chill long enough. Make sure your cream cheese is at room temperature, and give the cups at least 4 hours in the fridge. Overnight is even better.
Can I double this recipe for a crowd?
Yes, this recipe doubles beautifully. Just make sure you have enough serving cups and refrigerator space. The chilling time remains the same regardless of batch size.
Pin This Recipe!
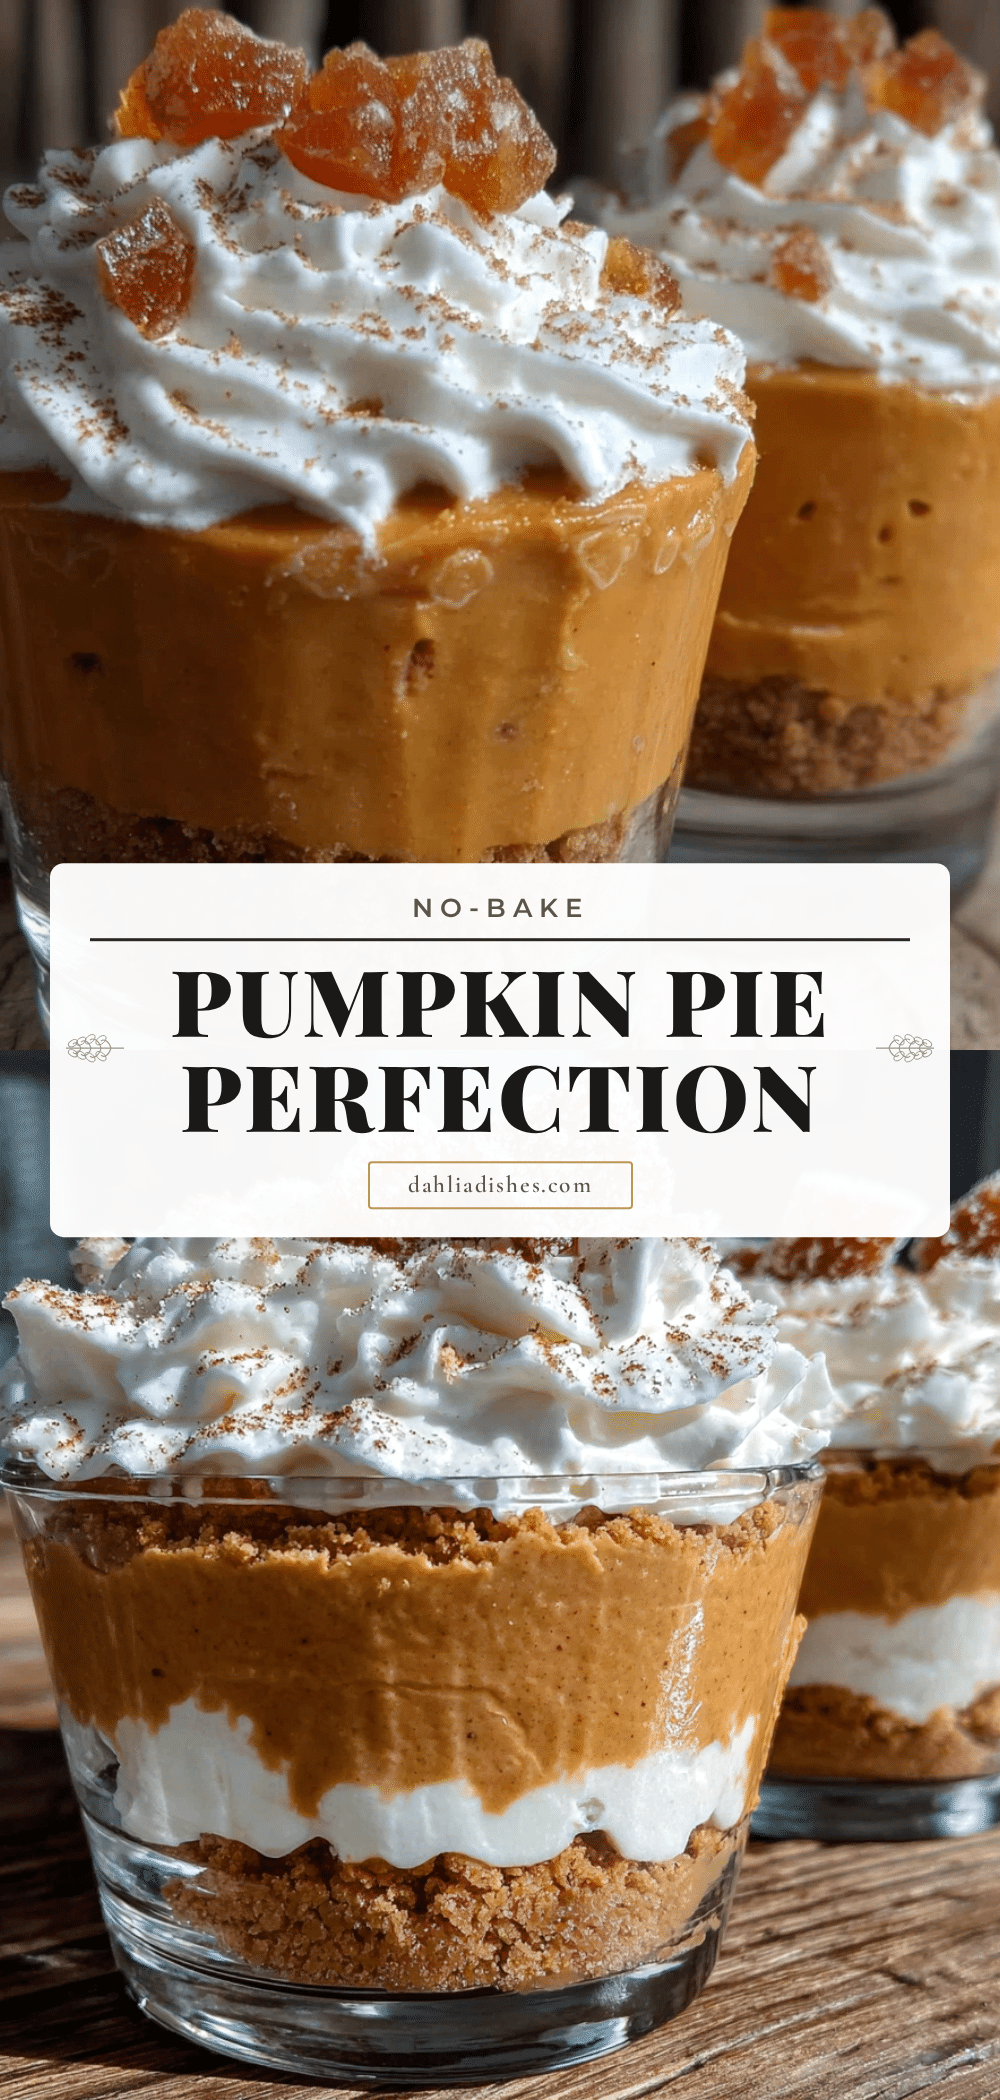
Easy No-Bake Pumpkin Pie Icebox Cups: Best Fall Dessert
These creamy, spiced pumpkin pie icebox cups deliver all the warm flavors of classic pumpkin pie without turning on the oven. A simple no-bake dessert that’s perfect for fall gatherings and weeknight cravings.
- Prep Time: 20 minutes
- Cook Time: 0 minutes
- Total Time: 4 hours 20 minutes (includes chilling)
- Yield: 6 servings 1x
- Category: Dessert
- Cuisine: American
Ingredients
- 1 cup graham cracker crumbs (about 8 full sheets)
- 3 tablespoons unsalted butter, melted
- 1 tablespoon brown sugar, packed
- Pinch of salt
- 1 cup pumpkin puree (not pumpkin pie filling)
- 4 ounces cream cheese, softened
- 1/2 cup powdered sugar
- 1/2 cup heavy whipping cream
- 1 teaspoon pumpkin pie spice
- 1/2 teaspoon vanilla extract
- Whipped cream, for serving
- Ground cinnamon or nutmeg, for garnish
- Optional: crushed pecans or caramel drizzle
Instructions
- Prepare the crust: In a medium bowl, combine graham cracker crumbs, brown sugar, and salt. Pour in melted butter and stir until mixture looks like wet sand. Divide evenly among serving cups (about 2-3 tablespoons per cup) and press down firmly. Refrigerate while making filling.
- Whip the cream: In a clean mixing bowl, whip cold heavy cream with an electric mixer on medium-high speed until soft peaks form, about 2-3 minutes. Refrigerate.
- Make the pumpkin filling: In another bowl, beat softened cream cheese until smooth and fluffy, about 1 minute. Add powdered sugar and beat until combined. Add pumpkin puree, pumpkin pie spice, and vanilla extract; mix until smooth and creamy.
- Fold in the whipped cream: Add one-third of the whipped cream to the pumpkin mixture and stir gently to lighten. Fold in remaining whipped cream with a rubber spatula until no white streaks remain, being careful not to deflate.
- Assemble the cups: Spoon or pipe the pumpkin filling over the crust layer in each cup, filling almost to the top. Smooth tops and tap cups gently to settle.
- Chill: Cover cups with plastic wrap or lids and refrigerate for at least 4 hours, preferably overnight.
- Serve: Top each cup with whipped cream, dust with cinnamon or nutmeg, and add optional pecans or caramel drizzle. Serve cold.
Notes
For best results, chill overnight to allow flavors to meld and texture to set. Do not add whipped cream topping until just before serving. For gluten-free, use gluten-free graham crackers. For dairy-free, use vegan cream cheese and coconut cream.
Nutrition
- Serving Size: 1 cup
- Calories: 285
- Sugar: 18
- Sodium: 180
- Fat: 18
- Saturated Fat: 10
- Carbohydrates: 28
- Fiber: 2
- Protein: 4
Keywords: no-bake pumpkin pie, pumpkin icebox cups, easy fall dessert, pumpkin dessert, no-bake dessert, pumpkin pie cups


