Love this? Save it for later!
Share the inspiration with your friends
I used to be that person who rolled their eyes at Halloween desserts. You know the type—the one who thinks pumpkin belongs in a pie pan, not shaped like a ghost or dipped in chocolate. The summer I turned thirty, my best friend’s daughter asked me to help with her Halloween class party, and I found myself standing in the baking aisle, genuinely annoyed. “Why does everything have to be so fussy?” I grumbled to myself, grabbing a can of pumpkin puree more out of obligation than inspiration.
Then it hit me—what if I skipped the oven entirely? What if I made something that looked ridiculous and fun but tasted genuinely good? Not one of those Pinterest-fails that looks cute but tastes like cardboard, but an actual dessert you’d want to eat even if it wasn’t shaped like a mummy. I grabbed some cream cheese, a package of gluten-free cookies (because one kid had allergies), and decided to wing it. Honestly, I was half-expecting a disaster.
But here’s the thing about happy accidents in the kitchen—they happen when you stop overthinking. The first batch came together in about twenty minutes flat, and I nearly dropped the plate when the kids devoured them before I could even arrange them on the serving tray. My friend’s daughter looked at me with those big eyes and said, “These are better than candy.” I mean, that’s basically a Michelin star review from a seven-year-old, right?
These easy no-bake mummy pumpkin pie bites have become my secret weapon for every Halloween gathering since. They’re the recipe that converted me from Halloween dessert skeptic to full-on enthusiast. Maybe you’ve been there too—wanting something festive but not wanting to spend hours in the kitchen or turn on the oven. Trust me, I get it. These little guys are proof that you can have your pumpkin pie and eat it too, without any of the stress.
Why You’ll Love This Recipe
Let me share why these little mummies have earned a permanent spot in my Halloween rotation. After testing this recipe at least a dozen times (for various class parties, office potlucks, and one very memorable Halloween movie marathon), I can confidently say these are foolproof.
- Quick & Easy: Comes together in under 20 minutes, perfect for last-minute Halloween cravings or when the kids announce they need treats for school tomorrow. No oven required, which means no hovering and no burnt edges.
- Simple Ingredients: You likely have most of these in your kitchen right now. No fancy grocery store trips for obscure ingredients that you’ll never use again. I’m looking at you, that bottle of pomegranate molasses from 2019.
- Perfect for Halloween Parties: These are great for class parties, trunk-or-treat events, or just a fun weekend activity with the kids. They travel well and don’t need refrigeration for several hours.
- Crowd-Pleaser: Every time I bring these to a gathering, they disappear within minutes. Kids love the mummy look, adults love the pumpkin pie flavor—it’s a win-win.
- Unbelievably Delicious: The texture is this perfect combination of creamy, crunchy, and smooth. The filling tastes like a lighter, fresher version of pumpkin pie filling, and the white chocolate “bandages” add just the right amount of sweetness.
What makes this recipe different from the dozens of other no-bake pumpkin treats out there? It’s the texture. Instead of using graham crackers or vanilla wafers that get soggy, I use a specific type of cookie that stays crisp even after a day in the fridge. Plus, the cream cheese to pumpkin ratio is spot-on—enough pumpkin flavor to taste like the real deal, but enough cream cheese to keep it from being too dense or heavy.
This recipe isn’t just good—it’s the kind that makes you close your eyes after the first bite. It’s comfort food reimagined for the Halloween season: festive, fun, and genuinely satisfying. Perfect for impressing guests without any stress, or turning a simple Tuesday into a mini celebration.
What Ingredients You Will Need
This recipe uses simple, wholesome ingredients to deliver that classic pumpkin pie flavor with a fun Halloween twist. Most of these are pantry staples or easy to find at any grocery store.
For the Pumpkin Pie Filling
- 1 cup pumpkin puree (not pumpkin pie filling—make sure you grab the plain stuff. I prefer Libby’s for consistent texture)
- 8 oz cream cheese, softened to room temperature (full-fat works best for that creamy texture, but Neufchâtel is fine too)
- 1/4 cup powdered sugar (adds sweetness without grittiness)
- 1 teaspoon pumpkin pie spice (or 1/2 teaspoon cinnamon + 1/4 teaspoon each nutmeg, ginger, and cloves)
- 1 teaspoon vanilla extract (pure vanilla extract makes a difference here)
- Pinch of salt (balances the sweetness and brings out the pumpkin flavor)
For the Base & Assembly
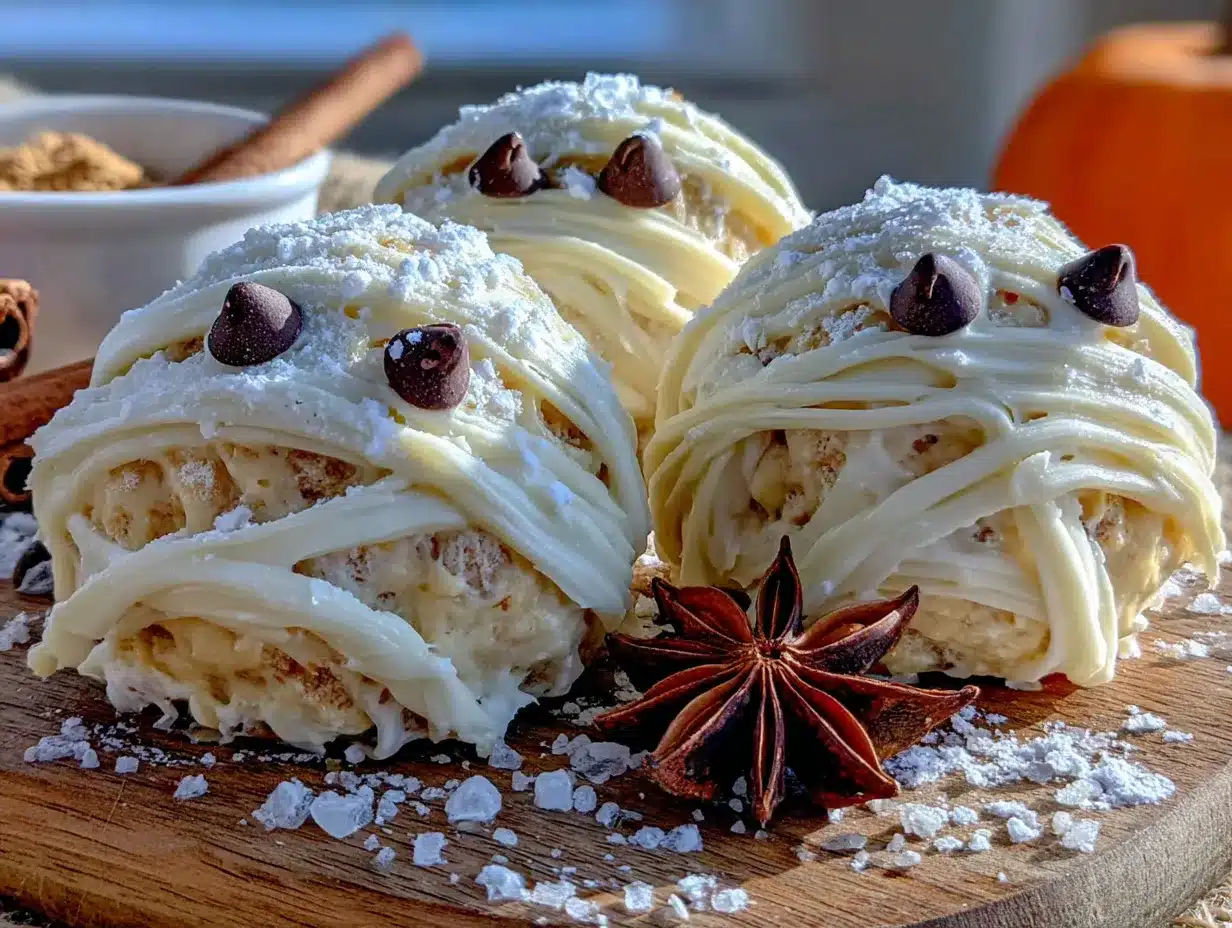
- 24-30 round buttery cookies (I use Lotus Biscoff cookies or shortbread cookies—they stay crunchy. Regular vanilla wafers work too, but they soften faster)
- 1 cup white chocolate melting wafers (or white chocolate chips with 1 teaspoon coconut oil for thinning)
- Candy eyes (the little black and white ones—you can find them at craft stores or online)
Ingredient Selection Tips: For the pumpkin puree, look for cans that are BPA-free if you’re concerned about that sort of thing. I’ve tested this with both canned and fresh pumpkin puree, and honestly, canned works better because the moisture content is more consistent. Fresh pumpkin can be too watery and make the filling runny.
Substitution Guidance: Need this to be gluten-free? Use gluten-free shortbread cookies or gluten-free graham crackers. Want a dairy-free version? Use dairy-free cream cheese and coconut cream instead of cream cheese (though the texture will be slightly softer). For a lower-sugar option, use monk fruit powdered sweetener instead of powdered sugar—just note that it might be slightly less sweet.
Brand Recommendation: For the white chocolate, I really like Ghirardelli melting wafers. They melt smoothly without seizing, and the flavor is creamy without being waxy. If you’re using regular white chocolate chips, add a teaspoon of coconut oil or shortening to help them melt smoothly.
Equipment Needed
- Mixing bowls (one medium, one small microwave-safe bowl)
- Hand mixer or stand mixer (a whisk works too, but you’ll need some arm strength)
- Spatula (for scraping down the sides)
- Baking sheet or large plate (to hold the assembled bites)
- Parchment paper or wax paper (so the bites don’t stick)
- Small piping bag or zip-top bag (for the white chocolate bandages)
- Microwave or double boiler (for melting the white chocolate)
- Toothpick (for placing the candy eyes)
Budget-Friendly Alternatives: Don’t have a piping bag? No problem. Just use a zip-top bag with a tiny corner snipped off. It works exactly the same way. No hand mixer? A whisk and some elbow grease will do the job—just make sure your cream cheese is really soft first.
I learned the hard way that parchment paper is non-negotiable here. The first time I made these, I put them directly on a plate, and the white chocolate stuck to everything. It was a sticky, frustrating mess. Trust me on this one.
Preparation Method
- Make the pumpkin pie filling: In a medium mixing bowl, combine the softened cream cheese and powdered sugar. Beat with a hand mixer on medium speed until smooth and creamy, about 2 minutes. Scrape down the sides with a spatula. Add the pumpkin puree, pumpkin pie spice, vanilla extract, and salt. Mix on low speed until everything is combined, then increase to medium and beat for another minute until the mixture is light and fluffy. It should look like a thick, creamy mousse. (Pro tip: If your cream cheese isn’t fully softened, you’ll get lumps. Leave it out on the counter for at least 30 minutes before starting.)
- Chill the filling: Cover the bowl with plastic wrap and pop it in the fridge for about 15-20 minutes. This step is important—the filling needs to be firm enough to hold its shape when you pipe it onto the cookies. While it’s chilling, you can set up your assembly station.
- Prepare your assembly station: Line a baking sheet or large plate with parchment paper. Arrange the cookies in a single layer on the parchment, leaving about an inch of space between each one. You should get about 24-30 cookies depending on the size.
- Pipe the filling onto the cookies: Transfer the chilled pumpkin filling to a piping bag fitted with a large round tip (or a zip-top bag with the corner snipped off). Pipe a generous dollop of filling onto each cookie, about the size of a walnut. Don’t worry about making them perfect—you’re going to cover them with white chocolate anyway. If you don’t have a piping bag, you can use a small cookie scoop or even two spoons to place the filling.
- Add the candy eyes: Gently press two candy eyes into the filling on each cookie, positioning them near the top to create the “face” of the mummy. Press them in just enough so they stay put—not so deep that they disappear into the filling. Use a toothpick to adjust them if needed. (This is my favorite part—the kids always argue over who gets to place the eyes.)
- Melt the white chocolate: Place the white chocolate melting wafers in a microwave-safe bowl. Microwave in 30-second intervals, stirring well after each interval, until completely smooth and melted. This usually takes about 1-2 minutes total. Be careful not to overheat—white chocolate burns easily and becomes grainy. If you’re using a double boiler, keep the water at a gentle simmer, not a rolling boil.
- Create the mummy bandages: Transfer the melted white chocolate to a small piping bag or zip-top bag with a tiny corner snipped off. Starting at one side of each pumpkin bite, drizzle the white chocolate back and forth across the filling to create the “bandage” effect. Leave the eyes exposed—that’s the whole charm of the mummy look. Don’t worry about being precise; the messy, uneven drizzles actually look more authentic. (My first batch looked too perfect, and my niece said they looked like “fancy ghosts.” Lesson learned.)
- Set the chocolate: Place the baking sheet in the refrigerator for at least 15-20 minutes, or until the white chocolate is completely set. The bites should feel firm when you gently touch the chocolate. If you’re in a hurry, you can pop them in the freezer for 5-7 minutes, but keep an eye on them—you don’t want the filling to freeze.
- Serve and enjoy: Once set, transfer the mummy pumpkin pie bites to a serving platter. They’re best served cold, straight from the fridge. The contrast between the crisp cookie, creamy filling, and snappy white chocolate is absolutely perfect.
Cooking Tips & Techniques
After making these more times than I care to admit, I’ve picked up a few tricks that make the process smoother and the results better. Let me share what I’ve learned the hard way so you don’t have to.
Temperature matters more than you think. The cream cheese needs to be at room temperature—not cold, not warm, just soft enough that you can easily press a finger into it. Cold cream cheese will give you lumpy filling no matter how long you beat it. I’ve made that mistake exactly once, and I spent ten minutes trying to strain out the lumps. Not fun.
Don’t overmix the filling. Once you add the pumpkin puree, mix just until combined. Overmixing can make the filling too thin and runny. You want it to be thick enough to hold its shape on the cookie. If your filling seems too soft after mixing, pop it in the fridge for an extra 10 minutes before piping.
The white chocolate drizzle is the hardest part. I’m not going to lie—my first few batches looked terrible. The chocolate was too thick, so it came out in blobs instead of thin strips. The fix? Add a teaspoon of coconut oil to the white chocolate before melting. It thins it out just enough to drizzle smoothly without being runny. Also, let the chocolate cool for about 30 seconds after melting before you start drizzling. Too hot, and it will melt the filling and slide right off.
Timing is everything. Here’s my strategy: make the filling first and let it chill while you set up everything else. Then assemble the bites, melt the chocolate last, and drizzle immediately. The chocolate sets best when the filling is still cold. If you let the bites sit out too long before drizzling, the filling warms up and the chocolate won’t set as quickly.
Consistency tip: If you’re making these for a party, assemble them the day before and keep them refrigerated. The flavors actually meld together overnight, and the texture stays perfect. Just don’t add the white chocolate drizzle until the morning of—it stays prettier that way.
Variations & Adaptations
One of the best things about this recipe is how flexible it is. Here are some variations I’ve tried and loved.
Chocolate Mummy Bites: Swap the white chocolate for dark or milk chocolate. The rich chocolate flavor pairs beautifully with the pumpkin filling, and the dark chocolate version looks especially striking against the orange filling. Use a 70% dark chocolate for a more sophisticated adult version.
Vegan Pumpkin Bites: Use vegan cream cheese (I like Kite Hill or Tofutti), vegan butter cookies, and vegan white chocolate. The texture will be slightly softer, but the flavor is still fantastic. Just make sure to chill them well before serving.
Pumpkin Cheesecake Bites: Add 1/4 cup of sour cream or Greek yogurt to the filling for a tangier, more cheesecake-like flavor. This is my personal favorite variation—it cuts the sweetness and makes the pumpkin flavor pop even more.
Gluten-Free Option: Use gluten-free shortbread cookies or gluten-free vanilla wafers. I’ve tested this with several brands, and Schär’s gluten-free shortbread cookies work beautifully. They stay crisp even after refrigeration.
Spiced Pumpkin Bites: Add an extra 1/2 teaspoon of pumpkin pie spice and a pinch of cayenne pepper for a warm, spicy kick. The heat is subtle but adds a lovely depth that complements the sweet white chocolate.
No-Bake Mummy Pumpkin Pie Bites with Graham Cracker Base: If you don’t have round cookies, use graham crackers broken into squares. The texture is slightly different—more crumbly—but it works in a pinch. Just be gentle when drizzling the chocolate so the crackers don’t break.
Serving & Storage Suggestions
Serving Temperature: These bites are best served cold, straight from the refrigerator. The filling is firm and creamy, the cookie is crisp, and the white chocolate has that satisfying snap. If you leave them out at room temperature for more than 30 minutes, the filling will start to soften and the chocolate may become sticky.
Presentation Tips: Arrange the bites on a dark-colored platter or a black serving board to make the white mummy bandages pop. You can also sprinkle a little crushed graham cracker or orange sanding sugar around the plate for a “dirt” or “pumpkin patch” effect. For a spooky touch, add a few plastic spiders or fake cobwebs to the serving platter.
Complementary Dishes and Beverages: These pair beautifully with hot apple cider, pumpkin spice lattes, or even a warm mug of chai tea. For a Halloween party spread, serve them alongside caramel apples, popcorn balls, or a bowl of warm spiced nuts. They also make a great addition to a Halloween charcuterie board.
Storage Instructions: Store the bites in an airtight container in the refrigerator for up to 5 days. Place them in a single layer with parchment paper between layers to prevent the white chocolate from sticking. Do not freeze them—the texture of the cream cheese filling changes when frozen and thawed, becoming grainy and watery.
Flavor Development: Here’s a secret—these actually taste better the next day. The flavors meld together overnight, and the pumpkin spice becomes more pronounced. The cookie stays crisp because the cream cheese filling acts as a barrier. So don’t hesitate to make them a day ahead.
Reheating: These are meant to be served cold, so no reheating is needed. If you’ve stored them in the fridge, just take them out about 5 minutes before serving to take the chill off slightly. This makes the filling a little creamier and more luxurious.
Nutritional Information & Benefits
While these are definitely a treat (it is Halloween, after all!), they do have some redeeming qualities. Here’s the approximate nutritional breakdown per bite (based on 24 servings):
- Calories: 120-140 per bite
- Fat: 7-9g
- Carbohydrates: 14-16g
- Protein: 2-3g
- Sugar: 10-12g
Health Benefits: Pumpkin is packed with vitamin A (great for eye health and immune function) and fiber. The cream cheese provides calcium and protein, while the white chocolate… well, it’s white chocolate. But in moderation, it’s fine. The portion size is small enough that you can enjoy one or two without derailing your healthy eating goals.
Dietary Considerations: This recipe can be made gluten-free (use gluten-free cookies), vegetarian-friendly (it already is), and with some modifications, vegan and dairy-free as noted above. It contains dairy (cream cheese, white chocolate) and gluten (cookies) in its standard form, so keep that in mind for allergies.
Personal Wellness Perspective: I’m a firm believer in the 80/20 rule—eat well 80% of the time, and enjoy treats 20% of the time. These bites fall firmly in the “treat” category, and that’s okay. Food is about joy and connection, especially during holidays. One or two of these with a cup of tea is a perfectly balanced way to celebrate Halloween without going overboard.
Conclusion
These easy no-bake mummy pumpkin pie bites are everything I want in a Halloween dessert: fun to make, delicious to eat, and stress-free to prepare. They’ve converted me from a Halloween dessert skeptic to someone who actually looks forward to making them every October. I mean, any recipe that can win over a room full of seven-year-olds AND adults is worth keeping in your back pocket.
I encourage you to make these your own. Maybe you’ll add extra spice, use dark chocolate instead of white, or go wild with different candy eye colors. That’s the beauty of a simple recipe—it leaves room for your personality to shine through. Don’t be afraid to experiment and find your perfect version.
For me, these bites have become a tradition. Every Halloween, I make a batch with my niece, and we argue about whether the eyes should be close together or far apart. (She likes them wide and goofy; I prefer them tiny and mischievous.) That messy, flour-dusted, chocolate-smudged hour in the kitchen is my favorite part of the holiday.
If you make these, I’d love to hear about it. Drop a comment below and tell me how they turned out, what variations you tried, or if your kids gave them the coveted “better than candy” stamp of approval. Happy Halloween, and happy snacking!
Frequently Asked Questions
Can I make these no-bake mummy pumpkin pie bites ahead of time?
Absolutely! You can assemble them up to 24 hours in advance. Just keep them refrigerated in an airtight container. For best results, add the white chocolate drizzle the morning of your event so it stays nice and shiny.
Can I use pumpkin pie filling instead of pumpkin puree?
I wouldn’t recommend it. Pumpkin pie filling is already sweetened and spiced, so it would throw off the balance of the recipe. Stick with plain pumpkin puree and add your own spices—you’ll have much better control over the flavor.
My white chocolate seized up and became grainy. What went wrong?
White chocolate is finicky—it burns easily. You likely overheated it. Always melt it in short 30-second bursts, stirring well between each one. If it does seize, you can try adding a teaspoon of coconut oil or vegetable shortening and stirring vigorously. Sometimes that saves it.
Can I freeze these for later?
I don’t recommend freezing them. The cream cheese filling becomes grainy and watery after thawing, and the texture of the cookie can become soggy. These are best made fresh and stored in the refrigerator for up to 5 days.
My filling is too runny. How can I fix it?
If your filling seems too soft, it might be because the cream cheese wasn’t cold enough or you overmixed it. Pop the bowl in the fridge for 20-30 minutes to firm it up before piping. If it’s still too runny after that, you can try adding a tablespoon of powdered sugar to help thicken it.
Pin This Recipe!
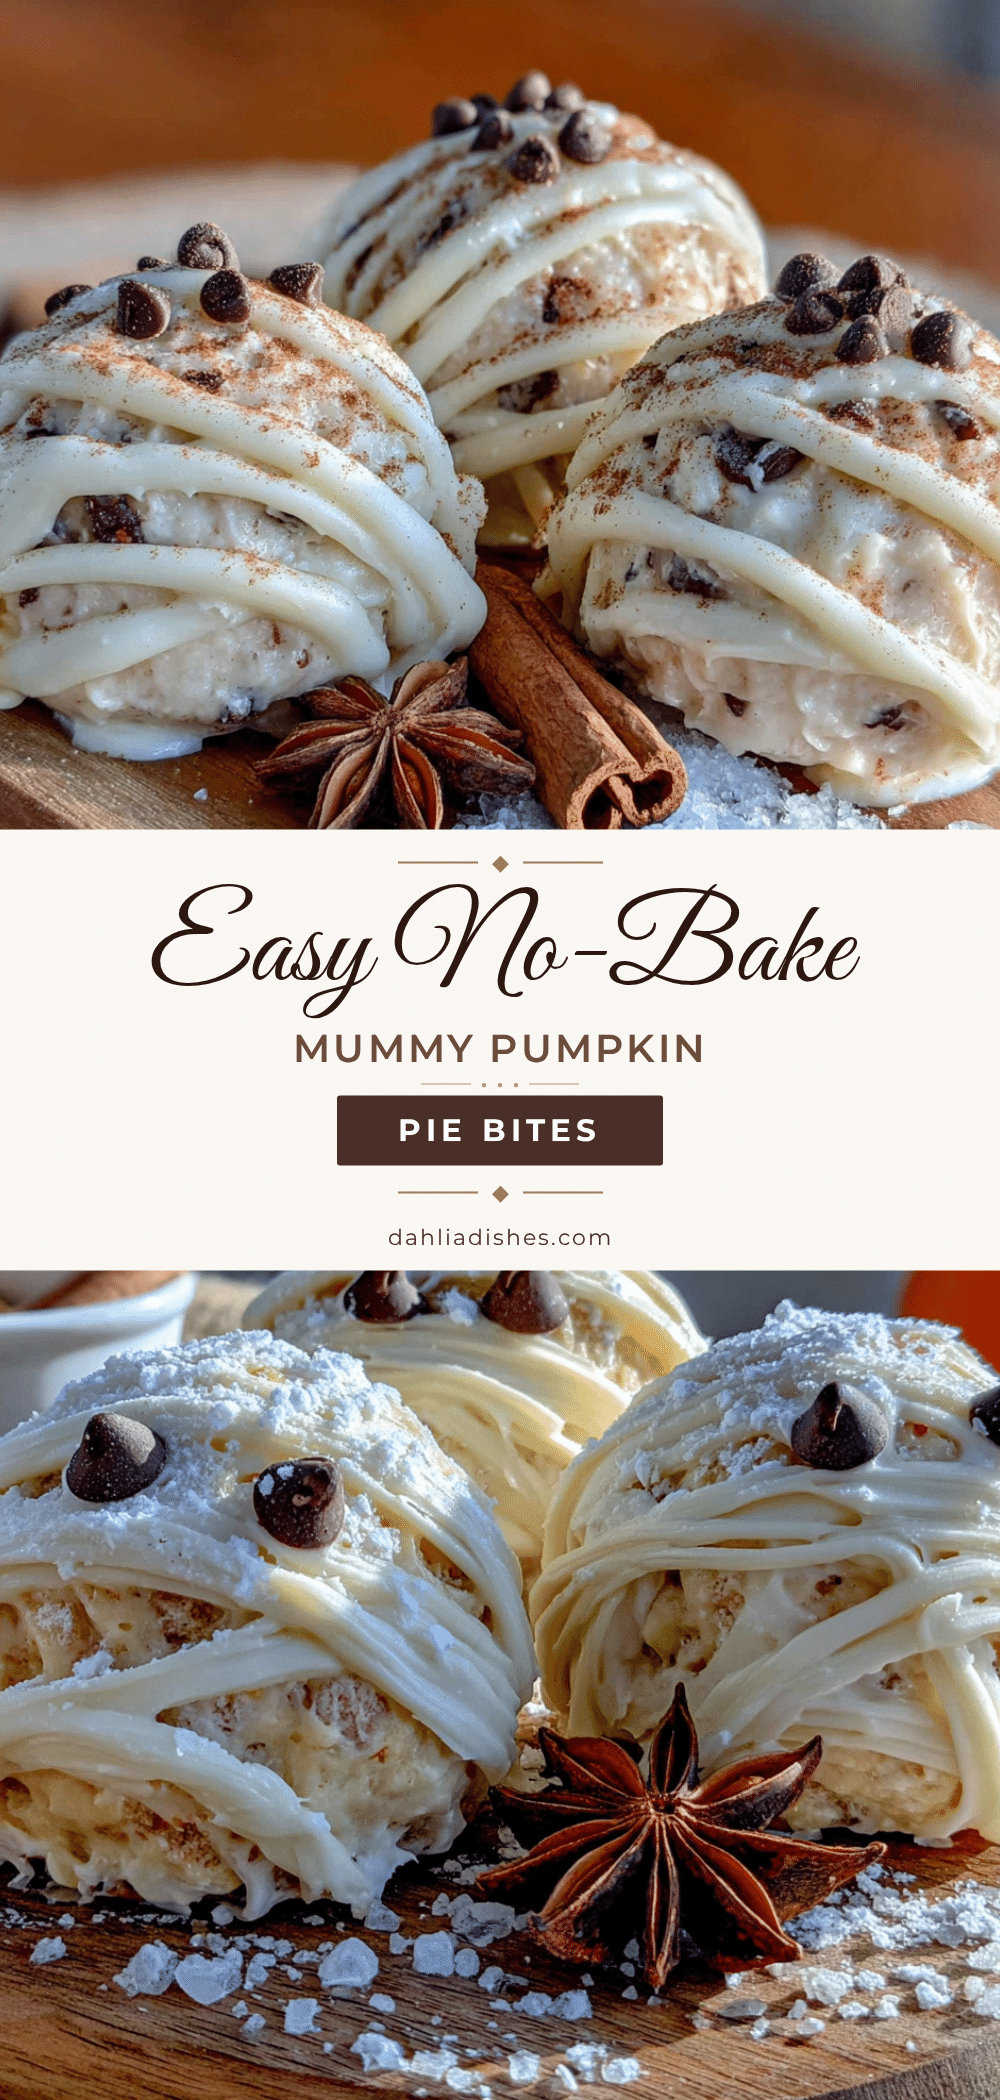
Easy No-Bake Mummy Pumpkin Pie Bites: Perfect Halloween Treat
These easy no-bake mummy pumpkin pie bites are a fun and delicious Halloween treat that comes together in under 20 minutes. With a creamy pumpkin pie filling on a crisp cookie base, topped with white chocolate bandages and candy eyes, they’re a crowd-pleaser for kids and adults alike.
- Prep Time: 20 minutes
- Cook Time: 0 minutes
- Total Time: 40 minutes (including chilling time)
- Yield: 24-30 servings 1x
- Category: Dessert
- Cuisine: American
Ingredients
- 1 cup pumpkin puree (not pumpkin pie filling)
- 8 oz cream cheese, softened to room temperature
- 1/4 cup powdered sugar
- 1 teaspoon pumpkin pie spice (or 1/2 teaspoon cinnamon + 1/4 teaspoon each nutmeg, ginger, and cloves)
- 1 teaspoon vanilla extract
- Pinch of salt
- 24–30 round buttery cookies (such as Lotus Biscoff or shortbread cookies)
- 1 cup white chocolate melting wafers (or white chocolate chips with 1 teaspoon coconut oil)
- Candy eyes (small black and white)
Instructions
- Make the pumpkin pie filling: In a medium mixing bowl, combine the softened cream cheese and powdered sugar. Beat with a hand mixer on medium speed until smooth and creamy, about 2 minutes. Scrape down the sides with a spatula. Add the pumpkin puree, pumpkin pie spice, vanilla extract, and salt. Mix on low speed until everything is combined, then increase to medium and beat for another minute until the mixture is light and fluffy.
- Chill the filling: Cover the bowl with plastic wrap and refrigerate for about 15-20 minutes until firm enough to hold its shape.
- Prepare your assembly station: Line a baking sheet or large plate with parchment paper. Arrange the cookies in a single layer on the parchment, leaving about an inch of space between each one.
- Pipe the filling onto the cookies: Transfer the chilled pumpkin filling to a piping bag fitted with a large round tip (or a zip-top bag with the corner snipped off). Pipe a generous dollop of filling onto each cookie, about the size of a walnut.
- Add the candy eyes: Gently press two candy eyes into the filling on each cookie, positioning them near the top to create the face of the mummy. Use a toothpick to adjust them if needed.
- Melt the white chocolate: Place the white chocolate melting wafers in a microwave-safe bowl. Microwave in 30-second intervals, stirring well after each interval, until completely smooth and melted, about 1-2 minutes total.
- Create the mummy bandages: Transfer the melted white chocolate to a small piping bag or zip-top bag with a tiny corner snipped off. Starting at one side of each pumpkin bite, drizzle the white chocolate back and forth across the filling to create the bandage effect, leaving the eyes exposed.
- Set the chocolate: Place the baking sheet in the refrigerator for at least 15-20 minutes, or until the white chocolate is completely set.
- Serve and enjoy: Once set, transfer the mummy pumpkin pie bites to a serving platter. Serve cold, straight from the fridge.
Notes
Cream cheese must be at room temperature to avoid lumps. Do not overmix the filling once pumpkin is added. For smoother white chocolate drizzle, add 1 teaspoon of coconut oil. Assemble bites up to 24 hours in advance but add white chocolate drizzle the morning of serving for best appearance. Store in an airtight container in the refrigerator for up to 5 days. Do not freeze.
Nutrition
- Serving Size: 1 bite
- Calories: 130
- Sugar: 11
- Sodium: 95
- Fat: 8
- Saturated Fat: 4
- Carbohydrates: 15
- Fiber: 1
- Protein: 2.5
Keywords: no-bake, pumpkin pie bites, mummy, Halloween, easy dessert, no oven, kid-friendly, fall treat


