Love this? Save it for later!
Share the inspiration with your friends
Introduction
I’m not supposed to play favorites with recipes, but here we are. My neighbor Karen, who has a standing rule against anything that requires more than four ingredients, had been eyeing my kitchen counter for weeks. She’d watch me haul out the stand mixer, the food processor, the double boiler—all for recipes that honestly, sometimes didn’t even turn out that great. “Too much work,” she’d mutter, shaking her head as she walked her golden retriever past my window. I mean, fair point. She wasn’t wrong.
Then came the week before Halloween last year. I was knee-deep in pumpkin carving, my kitchen looked like a disaster zone, and I had completely forgotten I promised to bring treats to my niece’s classroom party. The clock was ticking—I had maybe forty minutes before I needed to leave. That’s when I grabbed a pack of Oreos from the pantry, a block of cream cheese from the fridge, and started crumbling things together like a woman possessed.
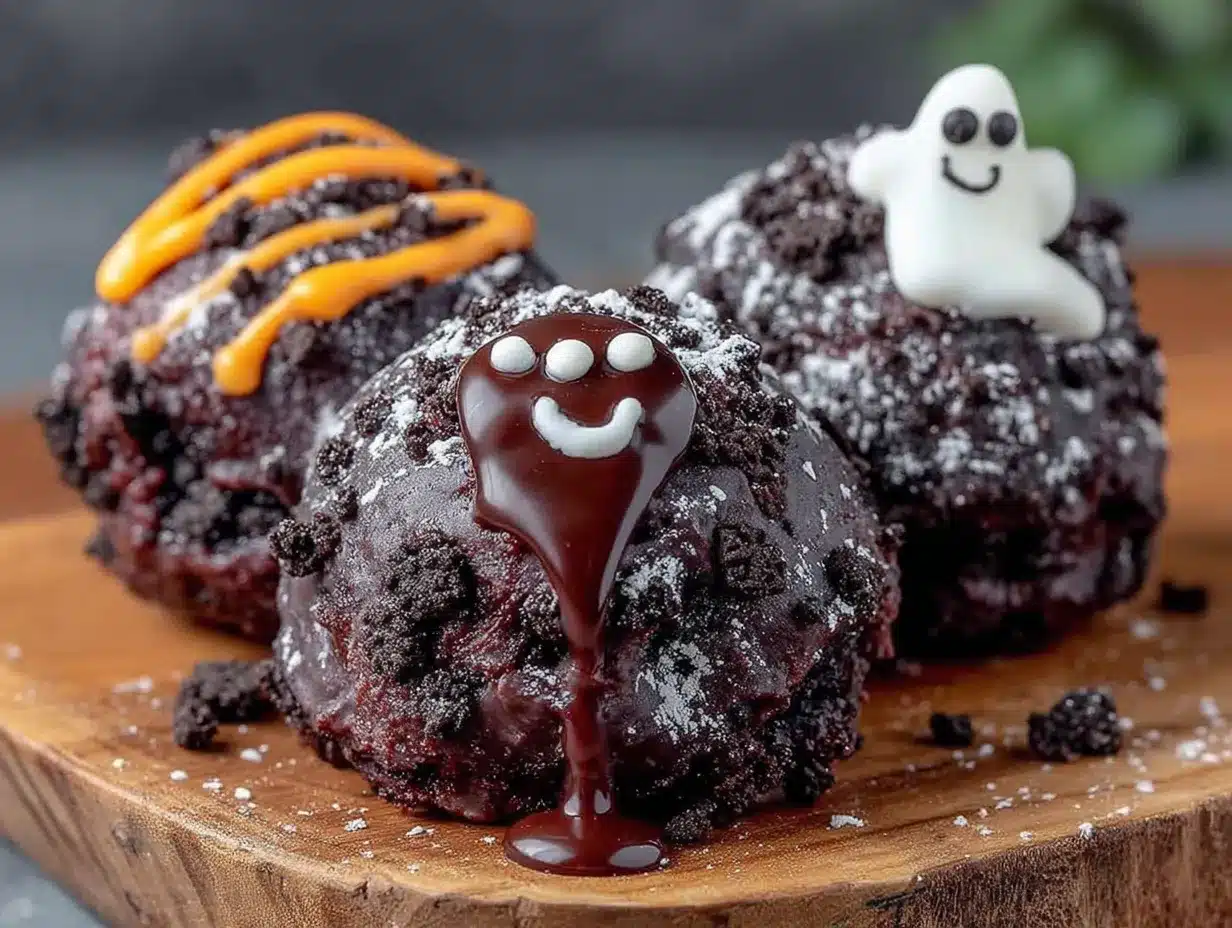
The truffles came together in what felt like seconds. I rolled them, dipped them in orange candy melts, and threw some sprinkles on top. When Karen stopped by later that evening to borrow a flashlight (the power had flickered during a storm), I handed her one. She took a bite, and her eyes went wide. “You made these?” she asked, looking at the clock like I’d somehow cheated time itself. Let me tell you, watching someone who claims to hate shortcuts eat three truffles in under a minute is a special kind of satisfaction. Maybe you’ve been there—that moment when a recipe proves itself without you having to say a word.
The best part? These Easy No-Bake Halloween Oreo Truffles have become my secret weapon for every fall gathering since. They’re the kind of treat that makes people think you spent hours in the kitchen when really, you just let three ingredients do all the work. And honestly, that’s my favorite kind of recipe.
Why You’ll Love This Recipe
Let me tell you why these truffles have earned a permanent spot in my Halloween rotation. I’ve tested this recipe at least a dozen times—with different cookie brands, different cream cheese temperatures, different coating methods—and every single time, they disappear within minutes. That’s the kind of reliability you can trust.
- Quick & Easy: Comes together in under 30 minutes, with zero oven time. Perfect for last-minute Halloween parties or when you need a treat that doesn’t demand your whole afternoon.
- Simple Ingredients: No fancy grocery trips needed. Oreos, cream cheese, and candy melts are probably already in your kitchen or just a quick store run away.
- Perfect for Halloween: Great for classroom parties, Halloween gatherings, or just a fun afternoon project with kids. The decorating possibilities are endless.
- Crowd-Pleaser: Every time I bring these to a party, someone asks for the recipe. Kids love them, adults sneak extras—they’re truly universal.
- Unbelievably Delicious: The combination of crushed Oreos and creamy cheesecake filling creates a texture that’s pure magic. One bite and you’ll understand why these are so addictive.
What makes these truffles different from other no-bake recipes? It’s the ratio. I spent three batches getting the Oreo-to-cream-cheese balance just right—too much cream cheese and they’re too soft to roll, too little and they’re dry. This version hits that sweet spot where the truffles are rich, fudgy, and hold their shape perfectly for dipping.
This recipe isn’t just good—it’s the kind that makes you close your eyes after the first bite. It’s comfort food reimagined for the spooky season, with all the nostalgia of Halloween treats but none of the stress. Perfect for impressing guests without breaking a sweat.
What Ingredients You Will Need
This recipe uses simple, everyday ingredients to deliver bold flavor and that irresistible truffle texture. The beauty is in the simplicity—no weird specialty items, no complicated shopping lists.
- 1 package (14.3 oz) regular Oreo cookies (not Double Stuf—the regular ones have the perfect cookie-to-creme ratio for truffles)
- 8 oz brick-style cream cheese, softened to room temperature (I recommend Philadelphia brand for the creamiest texture; the block style works better than the spreadable tub version)
- 12 oz orange and/or black candy melts (I use Wilton brand; you can also use white chocolate chips with orange food coloring if that’s what you have)
For decorating (optional but highly recommended):
- Halloween sprinkles (eyeballs, bats, pumpkins—whatever looks fun)
- 1 tablespoon coconut oil or shortening (added to candy melts for smoother dipping consistency)
- Black or orange sanding sugar (for extra sparkle)
- Mini pretzel sticks (to make “witch broom” handles if you’re feeling creative)
Ingredient Selection Tips: For the best texture, make sure your cream cheese is truly at room temperature—cold cream cheese won’t blend smoothly into the Oreo crumbs and will leave lumps. I usually take mine out of the fridge about 30 minutes before I start. If you’re in a rush, you can microwave it for 10-15 seconds, but watch it carefully so it doesn’t get too soft.
Substitution Guidance: If you need a gluten-free option, use gluten-free chocolate sandwich cookies—they work exactly the same way. For a dairy-free version, use dairy-free cream cheese (Tofutti or Kite Hill work well) and dairy-free chocolate chips for coating. Just note that dairy-free cream cheese can be a bit softer, so you may need to chill the truffle mixture an extra 15 minutes before rolling.
Seasonal Variations: In the fall, I love using pumpkin spice Oreos instead of regular ones for a seasonal twist. The pumpkin spice flavor pairs beautifully with the cream cheese and orange candy melts. Just keep in mind the filling in flavored Oreos is slightly different, so the texture might be just a touch softer.
Equipment Needed
You don’t need a fancy kitchen to make these truffles, which is honestly one of my favorite things about this recipe. Here’s what you’ll need:
- Food processor or blender (for crushing Oreos into fine crumbs; a zip-top bag and rolling pin work in a pinch, but the food processor gives you that perfect sandy texture)
- Large mixing bowl (for combining Oreo crumbs and cream cheese)
- Hand mixer or sturdy spatula (the hand mixer makes blending easier, but a good spatula and some elbow grease work fine)
- Small cookie scoop or tablespoon (for portioning uniform truffles—I use a 1-tablespoon scoop for consistent sizes)
- Baking sheet lined with parchment paper (for chilling the truffles before dipping)
- Microwave-safe bowl or double boiler (for melting candy melts)
- Fork or dipping tool (for coating truffles in melted candy; I use a cheap dipping fork from the cake supply store)
Budget-Friendly Alternatives: If you don’t have a food processor, place Oreos in a large zip-top bag and crush them with a rolling pin or even a heavy skillet. It takes a few extra minutes but works just as well. For the dipping tool, a regular fork works fine—just tap off the excess chocolate gently.
Personal Experience: I’ve tried making these with both a food processor and the bag method, and honestly, the food processor gives you a much finer crumb that blends more evenly with the cream cheese. But when I’m making these with my niece, we use the bag method because it’s more fun for her. Both work—just know the texture will be slightly different.
Preparation Method
Let me walk you through this step by step. I’ve made these truffles more times than I can count, so I’ve learned exactly what to look for at each stage.
- Crush the Oreos: Place the entire package of Oreos (filling included) in your food processor. Pulse until you get fine, sand-like crumbs. You should have about 2 ½ to 3 cups of crumbs. Pro tip: Don’t over-process or you’ll end up with Oreo butter—stop when the crumbs look like dark sand with no visible chunks.
- Soften the cream cheese: Make sure your cream cheese is at room temperature. If it’s still cold, let it sit for another 10 minutes or microwave for 10 seconds. You want it soft enough that you can easily press your finger into it.
- Combine the base: Transfer the Oreo crumbs to a large mixing bowl. Add the softened cream cheese. Using a hand mixer on low speed (or a spatula if you’re going old school), mix until everything is fully combined. The mixture should look like a thick, dark brown dough that holds together when pressed. Sensory cue: It should feel like slightly sticky cookie dough—not wet, not dry, but just right.
- Chill the mixture: Cover the bowl with plastic wrap and refrigerate for 15-20 minutes. This step is crucial—chilling makes the mixture easier to roll and helps the truffles hold their shape during dipping. Don’t skip this, even if you’re in a hurry. I learned that the hard way when my first batch turned into flat puddles on the baking sheet.
- Roll into balls: Using a small cookie scoop or tablespoon, portion out the mixture and roll between your palms into smooth, 1-inch balls. Place them on the parchment-lined baking sheet. You should get about 24-28 truffles depending on size. Troubleshooting tip: If the mixture is too sticky to roll, refrigerate for another 10 minutes. If it’s too crumbly, you may need to add a tiny bit more cream cheese—start with 1 tablespoon.
- Freeze the truffles: Place the baking sheet with the rolled truffles in the freezer for 15-20 minutes. This firms them up so they don’t fall apart when you dip them in the warm candy melts. Warning: Don’t leave them in longer than 30 minutes or they may crack when dipped.
- Melt the candy melts: Place the orange and/or black candy melts in a microwave-safe bowl. Heat in 30-second intervals, stirring between each, until fully melted and smooth. Add 1 tablespoon of coconut oil or shortening if the mixture seems too thick—this gives you that perfect, thin coating consistency.
- Dip the truffles: Remove the truffles from the freezer. Working with one truffle at a time, drop it into the melted candy. Use a fork or dipping tool to gently turn it until fully coated. Lift it out, letting the excess drip off, and place it back on the parchment-lined sheet. Quick tip: Tap the fork gently on the edge of the bowl to remove excess coating—this prevents “feet” (those puddles of chocolate at the bottom of your truffles).
- Add decorations: While the coating is still wet, sprinkle on your Halloween decorations. Work quickly—the candy sets fast, especially if your truffles are still cold from the freezer. I like to do a mix of orange and black sprinkles, with a few candy eyeballs thrown in for fun.
- Set and serve: Let the truffles sit at room temperature until the coating is fully set, about 10-15 minutes. If you’re in a hurry, pop them in the refrigerator for 5 minutes. Then they’re ready to serve!
Cooking Tips & Techniques
After making these truffles more times than I care to count, I’ve picked up a few tricks that make the process smoother and the results more consistent. Let me share what I’ve learned the hard way.
Common Mistake #1: Over-melting the candy melts. I once got distracted by a phone call and microwaved my candy melts for a full minute without stirring. Burnt chocolate is not a good look. Always use 30-second intervals and stir thoroughly between each. The residual heat will continue melting the candy, so stop when there are still a few small lumps—stirring will smooth them out.
Common Mistake #2: Dipping warm truffles. I know I said to chill them, but I’ve also tried rushing the process. Warm truffles fall apart in the melted candy, leaving you with a chocolatey mess and no truffles. Trust the process—those 15 minutes in the freezer are non-negotiable.
Timing Strategy: I like to make the truffle mixture the night before and keep it in the fridge. The next day, I roll and dip them when I have a free half-hour. This makes Halloween prep so much less stressful. The mixture keeps well for up to 3 days in the refrigerator.
Consistency Tip: If your truffle mixture feels too dry and crumbly, don’t panic. Add cream cheese one tablespoon at a time until it holds together. If it’s too wet and sticky, add more crushed Oreos (or even graham cracker crumbs) until it firms up. The perfect texture should feel like Play-Doh—moldable but not greasy.
Multitasking Hack: While the truffle mixture chills in the fridge, set up your dipping station. Lay out parchment paper, arrange your sprinkles in small bowls, and have your fork ready. This way, when the truffles come out of the freezer, you can work through them quickly without scrambling for supplies.
Variations & Adaptations
One of the best things about this recipe is how easy it is to customize. Here are some variations I’ve tried and loved.
Dietary Variations:
- Gluten-Free: Use gluten-free chocolate sandwich cookies (like Glutino or Kinnikinnick brands). The texture is slightly different—a bit more crumbly—but they taste just as good.
- Dairy-Free: Substitute dairy-free cream cheese and dairy-free chocolate chips. I’ve had great results with Tofutti cream cheese and Enjoy Life dark chocolate chips.
- Vegan: Follow the dairy-free version and use vegan sandwich cookies. Most standard Oreos are actually vegan-friendly (check the label), so you may not need to change a thing!
Flavor Twists:
- Peppermint Halloween: Add ½ teaspoon peppermint extract to the truffle mixture and use white candy melts with red sprinkles for a candy-cane-meets-Halloween vibe.
- Peanut Butter Monster: Swap 2 tablespoons of cream cheese for creamy peanut butter. The peanut butter adds a savory note that balances the sweetness beautifully.
- Cookies and Cream Deluxe: Reserve ¼ cup of crushed Oreos and fold them into the mixture after combining with cream cheese. This gives you those lovely white creme chunks throughout.
Seasonal Adaptations: These truffles aren’t just for Halloween! For Christmas, use red and green candy melts with holiday sprinkles. For Valentine’s Day, try pink and red coatings with heart sprinkles. For Easter, pastel colors work perfectly. The base recipe stays the same—just change the decorations.
Personal Variation: My favorite version uses pumpkin spice Oreos with orange candy melts and a pinch of cinnamon in the coating. I add a tiny candy corn on top of each truffle before the coating sets. It sounds weird, but the combination of pumpkin, chocolate, and candy corn is surprisingly addictive. My niece calls them “pumpkin monsters” and requests them every year.
Serving & Storage Suggestions
These truffles are best served slightly chilled—the texture is firmer and the coating stays perfectly snappy. I like to arrange them on a Halloween-themed platter or in mini cupcake liners for individual servings.
Presentation Ideas:
- Place truffles in a glass jar tied with orange ribbon for a cute gift idea
- Arrange on a white platter with fake spiderwebs and plastic spiders for a spooky centerpiece
- Stack in a small pumpkin-shaped bowl for a seasonal touch
- Serve alongside warm apple cider or hot chocolate for the ultimate fall treat
Storage Instructions:
- Refrigerator: Store in an airtight container for up to 1 week. Layer truffles between sheets of parchment paper to prevent sticking.
- Freezer: These truffles freeze beautifully! Place them in a single layer on a baking sheet and freeze until solid, then transfer to a freezer-safe container. They’ll keep for up to 3 months.
- Room Temperature: If you’re serving them within a few hours, they’re fine at room temperature. But for longer storage, keep them chilled—the cream cheese filling needs refrigeration.
Reheating Tips: These are served cold or at room temperature, so no reheating needed. If you’re pulling them from the freezer, let them sit at room temperature for 5-10 minutes before serving. The coating will warm up slightly while the filling stays cool and creamy.
Flavor Development: Honestly, these truffles taste even better the next day. The flavors meld together overnight, and the texture becomes even more fudgy and indulgent. I often make them a day ahead of Halloween parties for this exact reason.
Nutritional Information & Benefits
While these are definitely a treat (not a health food), here’s what you can expect nutritionally per truffle (based on 24 truffles):
- Calories: Approximately 140-160 per truffle
- Fat: 8-9g
- Carbohydrates: 16-18g
- Sugar: 12-14g
- Protein: 2-3g
- Calcium: 2% DV (from cream cheese)
Health Benefits of Key Ingredients: Believe it or not, there are a few redeeming qualities here. The cream cheese provides a small amount of calcium and protein. And dark chocolate (if you use it instead of candy melts) contains antioxidants. But let’s be real—these are a Halloween treat, and they’re meant to be enjoyed in moderation.
Dietary Considerations: These truffles are naturally vegetarian. For gluten-free, dairy-free, or vegan versions, see the variations section above. They are not suitable for nut-free diets unless you verify your specific brands are nut-free (some chocolate products may be processed in facilities that handle nuts).
Allergen Warning: Contains wheat (from Oreos), dairy (from cream cheese and candy melts), and may contain soy. Always check labels if you’re serving someone with allergies.
Conclusion
These Easy No-Bake Halloween Oreo Truffles have become my go-to for every fall gathering, and I think they’ll become yours too. They’re proof that you don’t need a dozen ingredients or hours in the kitchen to create something truly special. Three ingredients, thirty minutes, and you’ve got a treat that looks like you spent all day on it.
What I love most about this recipe is how forgiving it is. Whether you’re making them with kids, rushing before a party, or just craving something sweet without turning on the oven, these truffles deliver every single time. And honestly, watching someone take that first bite and realize how good they are never gets old.
I’d love to hear how yours turn out! Try them with different Oreo flavors, experiment with the decorations, or add your own twist. Drop a comment below and let me know what variations you come up with—I’m always looking for new ideas. And if you share them on social media, tag me so I can see your spooky creations. Happy Halloween, and happy truffle-making!
Frequently Asked Questions
Can I use Double Stuf Oreos instead of regular ones?
You can, but the texture will be slightly different. Double Stuf Oreos have more creme filling, which means the cookie-to-creme ratio is off. Your truffle mixture may be a bit softer and harder to roll. If you use Double Stuf, reduce the cream cheese by about 1 tablespoon to compensate. I’ve tested this and it works, but regular Oreos give you the best, most consistent results.
How do I prevent the truffles from cracking when I dip them?
Cracking usually happens when the truffles are too cold and the coating is too hot. Make sure your truffles are only frozen for 15-20 minutes (not hours), and let your melted candy cools slightly before dipping—it should be warm, not hot. If you’re still having trouble, try dipping the truffles in two thin coats instead of one thick coat.
Can I make these truffles ahead of time?
Absolutely! In fact, they taste even better the next day. You can make the truffle mixture up to 3 days ahead and keep it in the fridge. Or you can fully assemble the truffles (including dipping and decorating) and store them in an airtight container in the refrigerator for up to a week. They also freeze beautifully for up to 3 months.
My truffle mixture is too sticky. What did I do wrong?
This usually happens if the cream cheese is too soft or if you used a different type of Oreo (like Double Stuf or a flavored variety). Don’t worry—it’s fixable! Simply add more crushed Oreos, one tablespoon at a time, until the mixture reaches a Play-Doh-like consistency. You can also chill the mixture for an extra 15 minutes before rolling to make it easier to handle.
Can I use white chocolate chips instead of candy melts?
Yes, but white chocolate chips can be finicky. They tend to seize (become grainy) if they get too hot or if any water gets into the bowl. If using white chocolate chips, add 1 tablespoon of coconut oil or shortening to help them melt smoothly. You’ll also need to add orange food coloring—gel food coloring works better than liquid, which can cause the chocolate to seize. Candy melts are easier and give you that perfect coating, but white chocolate chips work in a pinch.
Pin This Recipe!

Easy No-Bake Halloween Oreo Truffles – Best 3-Ingredient Treat

These Easy No-Bake Halloween Oreo Truffles are a quick, 3-ingredient treat that comes together in under 30 minutes. Perfect for Halloween parties, they’re rich, fudgy, and endlessly customizable with festive decorations.
- Prep Time: 15 minutes
- Cook Time: 0 minutes
- Total Time: 30 minutes
- Yield: 24-28 truffles 1x
- Category: Dessert
- Cuisine: American
Ingredients
- 1 package (14.3 oz) regular Oreo cookies (not Double Stuf)
- 8 oz brick-style cream cheese, softened to room temperature
- 12 oz orange and/or black candy melts
- Halloween sprinkles (optional, for decorating)
- 1 tablespoon coconut oil or shortening (optional, for smoother dipping)
- Black or orange sanding sugar (optional, for decorating)
- Mini pretzel sticks (optional, for witch broom handles)
Instructions
- Crush the Oreos: Place the entire package of Oreos (filling included) in a food processor. Pulse until you get fine, sand-like crumbs (about 2 ½ to 3 cups). Do not over-process.
- Soften the cream cheese: Ensure cream cheese is at room temperature. If cold, let sit for 10 minutes or microwave for 10 seconds.
- Combine the base: Transfer Oreo crumbs to a large mixing bowl. Add softened cream cheese. Mix with a hand mixer on low speed or a spatula until fully combined. Mixture should look like thick, dark brown dough that holds together when pressed.
- Chill the mixture: Cover bowl with plastic wrap and refrigerate for 15-20 minutes.
- Roll into balls: Using a small cookie scoop or tablespoon, portion out the mixture and roll between palms into smooth, 1-inch balls. Place on a parchment-lined baking sheet. You should get about 24-28 truffles.
- Freeze the truffles: Place baking sheet in the freezer for 15-20 minutes to firm up.
- Melt the candy melts: Place candy melts in a microwave-safe bowl. Heat in 30-second intervals, stirring between each, until fully melted and smooth. Add 1 tablespoon coconut oil or shortening if too thick.
- Dip the truffles: Remove truffles from freezer. Working one at a time, drop into melted candy. Use a fork to turn until fully coated. Lift out, let excess drip off, and place back on parchment.
- Add decorations: While coating is still wet, sprinkle on Halloween decorations. Work quickly as candy sets fast.
- Set and serve: Let truffles sit at room temperature until coating is set, about 10-15 minutes. Refrigerate for 5 minutes if in a hurry.
Notes
For best results, use regular Oreos (not Double Stuf). Ensure cream cheese is at room temperature for smooth blending. Chill mixture before rolling to prevent stickiness. Freeze truffles before dipping to prevent cracking. Truffles taste even better the next day. Store in refrigerator for up to 1 week or freeze for up to 3 months.
Nutrition
- Serving Size: 1 truffle
- Calories: 150
- Sugar: 13
- Sodium: 95
- Fat: 8.5
- Saturated Fat: 4
- Carbohydrates: 17
- Fiber: 0.5
- Protein: 2.5
Keywords: Halloween truffles, no-bake Oreo truffles, 3-ingredient dessert, easy Halloween treat, Oreo cream cheese truffles


