Love this? Save it for later!
Share the inspiration with your friends
The Super Bowl party was in four hours and I’d completely forgotten I was supposed to bring the main dish. Everyone else would be showing up with elaborate dips, slow-cooker pulled pork, and those fancy charcuterie boards that look like works of art. I had a pound of ground beef thawing in the sink, a block of questionable cheddar, and a bag of tortilla chips that was starting to look a little sad. Honestly, I almost just grabbed takeout on the way. But then I remembered the nacho bar my cousin had set up at her birthday party last summer—the one where people just went crazy piling stuff on their plates. I figured, why not try a scaled-down version? I threw together a quick ground beef mixture, melted whatever cheese I had into something resembling queso, and dumped everything into separate bowls. I walked in feeling like a fraud, carrying my mismatched containers. And you know what happened? The nacho bar was the first thing to run out. People kept coming back for seconds and thirds, building these towering plates of chips, beef, and that goopy, glorious queso. I stood there, holding my sad little empty bowl, feeling sheepish and honestly a little smug. That’s the thing about a loaded nacho bar—it doesn’t need to be fancy to be unforgettable. It just needs to be good. And this one? It’s the one that made me stop apologizing for last-minute cooking.
Why You’ll Love This Recipe
Let me tell you why this loaded nacho bar has become my go-to for everything from game days to lazy Tuesdays. It’s not just another recipe—it’s the one that makes you the hero of the party without breaking a sweat.
- Quick & Easy: You can have this entire spread ready in under 30 minutes. Seriously, the ground beef cooks in about 10 minutes, and the queso comes together in another 10. It’s faster than ordering pizza.
- Simple Ingredients: No weird specialty items here. Ground beef, cheese, chips, and a few pantry staples. You probably have most of this stuff already, which is exactly what I need on a busy day.
- Perfect for Any Occasion: Super Bowl parties, movie nights, birthday gatherings, or even a fun weeknight dinner where everyone builds their own plate. It’s interactive and always a hit.
- Crowd-Pleaser: I’ve served this to picky kids, vegan friends (just set aside the beef), and my dad who claims he “doesn’t like nachos.” They all came back for more. It’s magic, I swear.
- Unbelievably Delicious: The secret is in the queso. Instead of using processed cheese, I blend in a little evaporated milk and a pinch of cumin. It gives this creamy, slightly smoky flavor that makes people close their eyes when they take a bite. Trust me.
What makes this different from every other nacho recipe out there? It’s the balance. The beef is seasoned just right—not too spicy, not too bland. The queso is silky and smooth, not clumpy or greasy. And the toppings? You get to choose your own adventure. It’s comfort food that feels special, even when you threw it together in a panic. This is the kind of meal that makes you look like you planned it all along.
What Ingredients You Will Need
This recipe uses simple, everyday ingredients to build layers of flavor without any fuss. Most of these are pantry staples, but I’ll note a few tips to help you pick the best ones.
For the Seasoned Ground Beef
- 1 pound ground beef (80/20 is best for flavor; drain excess fat if needed)
- 1 tablespoon olive oil (for browning)
- 1 small yellow onion, finely diced
- 3 cloves garlic, minced
- 1 tablespoon chili powder (I prefer McCormick for consistent heat)
- 1 teaspoon ground cumin
- 1/2 teaspoon smoked paprika (adds that subtle smoky depth)
- 1/2 teaspoon salt
- 1/4 teaspoon black pepper
- 1/2 cup beef broth (or water, if that’s all you have)
- 1 tablespoon tomato paste (optional, but adds richness)
For the Queso
- 2 tablespoons unsalted butter
- 2 tablespoons all-purpose flour
- 1 cup whole milk (or 2% works fine)
- 1/2 cup evaporated milk (this is the secret to smooth, non-grainy queso)
- 8 ounces sharp cheddar cheese, freshly shredded (please don’t use pre-shredded—it has anti-caking agents that ruin the texture)
- 4 ounces Monterey Jack cheese, freshly shredded
- 1/4 teaspoon cumin
- 1/4 teaspoon cayenne pepper (optional, for a little kick)
- Salt to taste
For the Nacho Bar Toppings
- 1 large bag tortilla chips (I like Tostitos scoop-style for sturdiness)
- 1 cup pico de gallo (store-bought is fine, or make your own)
- 1/2 cup sour cream
- 1 avocado, diced (or guacamole)
- 1/2 cup canned black beans, rinsed and drained
- 1/4 cup pickled jalapeños (drain them well)
- 1/4 cup chopped fresh cilantro
- 1 lime, cut into wedges
Substitution note: For a leaner option, use ground turkey or chicken instead of beef. Add a little extra oil to keep it moist. For a vegetarian version, swap the beef with a can of black beans and a cup of corn. The queso can be made with plant-based milk and vegan cheese, though the texture will be slightly different.
Equipment Needed
You don’t need a fancy kitchen to pull this off. Here’s what you’ll need, along with a few tips from my own trials.
- Large skillet or frying pan (12-inch is ideal for browning the beef without overcrowding)
- Medium saucepan (for the queso)
- Wooden spoon or spatula (for stirring the beef)
- Whisk (essential for smooth queso—a fork will leave lumps)
- Cutting board and sharp knife
- Measuring cups and spoons
- Small bowls or ramekins (for serving toppings)
- Large platter or sheet pan (for building the nacho bar)
If you don’t have a whisk, use a fork and stir vigorously. I’ve done it in a pinch, and it works—just takes a little more elbow grease. For the sheet pan, a rimmed baking sheet is perfect because it catches any stray cheese or beef. If you’re serving a crowd, use two smaller platters so people can build from both sides.
Preparation Method
Let’s get cooking. This whole thing comes together in about 25 minutes, so read through the steps first. I’ll tell you exactly what to look for at each stage.
- Cook the ground beef. Heat the olive oil in your large skillet over medium-high heat. Add the diced onion and cook for 2-3 minutes until it’s soft and translucent. Add the ground beef, breaking it apart with your spoon. Cook for 5-6 minutes, stirring occasionally, until the beef is browned and no longer pink. Don’t drain all the fat—leave about a tablespoon for flavor. If there’s a lot, spoon off the excess.
- Season the beef. Reduce heat to medium. Add the minced garlic, chili powder, cumin, smoked paprika, salt, and pepper. Stir for 30 seconds until it smells amazing. Add the tomato paste and stir for another minute—this caramelizes it a bit and deepens the flavor. Pour in the beef broth and let it simmer for 2-3 minutes, scraping up any browned bits from the pan. The liquid should reduce slightly, coating the meat. Remove from heat and set aside.
- Start the queso. While the beef is simmering, melt the butter in your medium saucepan over medium heat. Add the flour and whisk constantly for 1 minute—you’re making a roux. It should look like a pale paste. Slowly pour in the milk while whisking, followed by the evaporated milk. Keep whisking until the mixture thickens, about 3-4 minutes. It should coat the back of a spoon.
- Melt the cheese. Reduce heat to low. Add the shredded cheddar and Monterey Jack cheese one handful at a time, whisking until each batch is fully melted before adding more. This prevents clumps. Once all the cheese is in, add the cumin and cayenne (if using). Taste and add salt if needed—cheese is already salty, so go easy. Keep the queso warm on the lowest heat, stirring occasionally. If it gets too thick, add a splash of milk.
- Prepare the toppings. While the queso is melting, chop the avocado, rinse the black beans, and set out the pico de gallo, sour cream, jalapeños, and cilantro. Put each in a small bowl. Cut the lime into wedges.
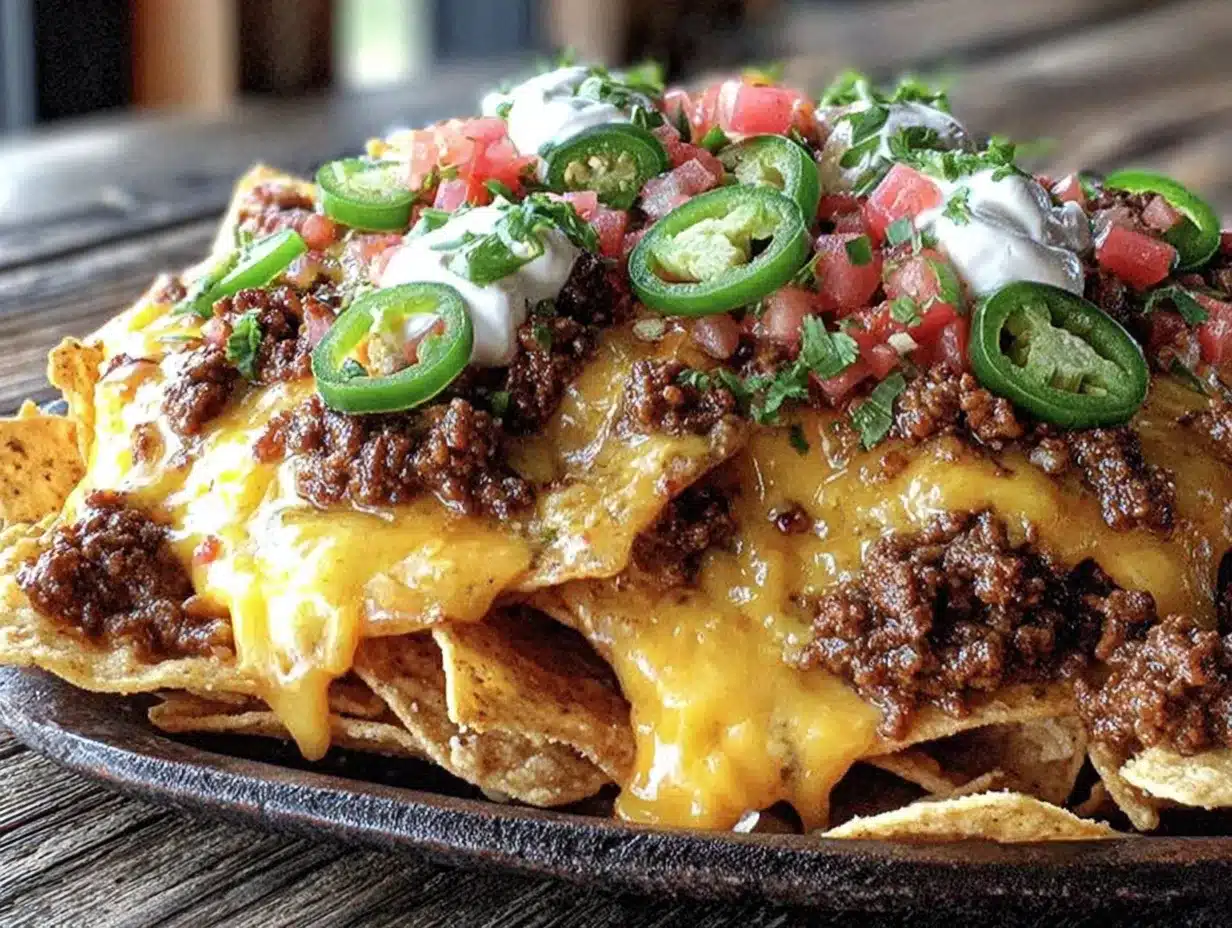
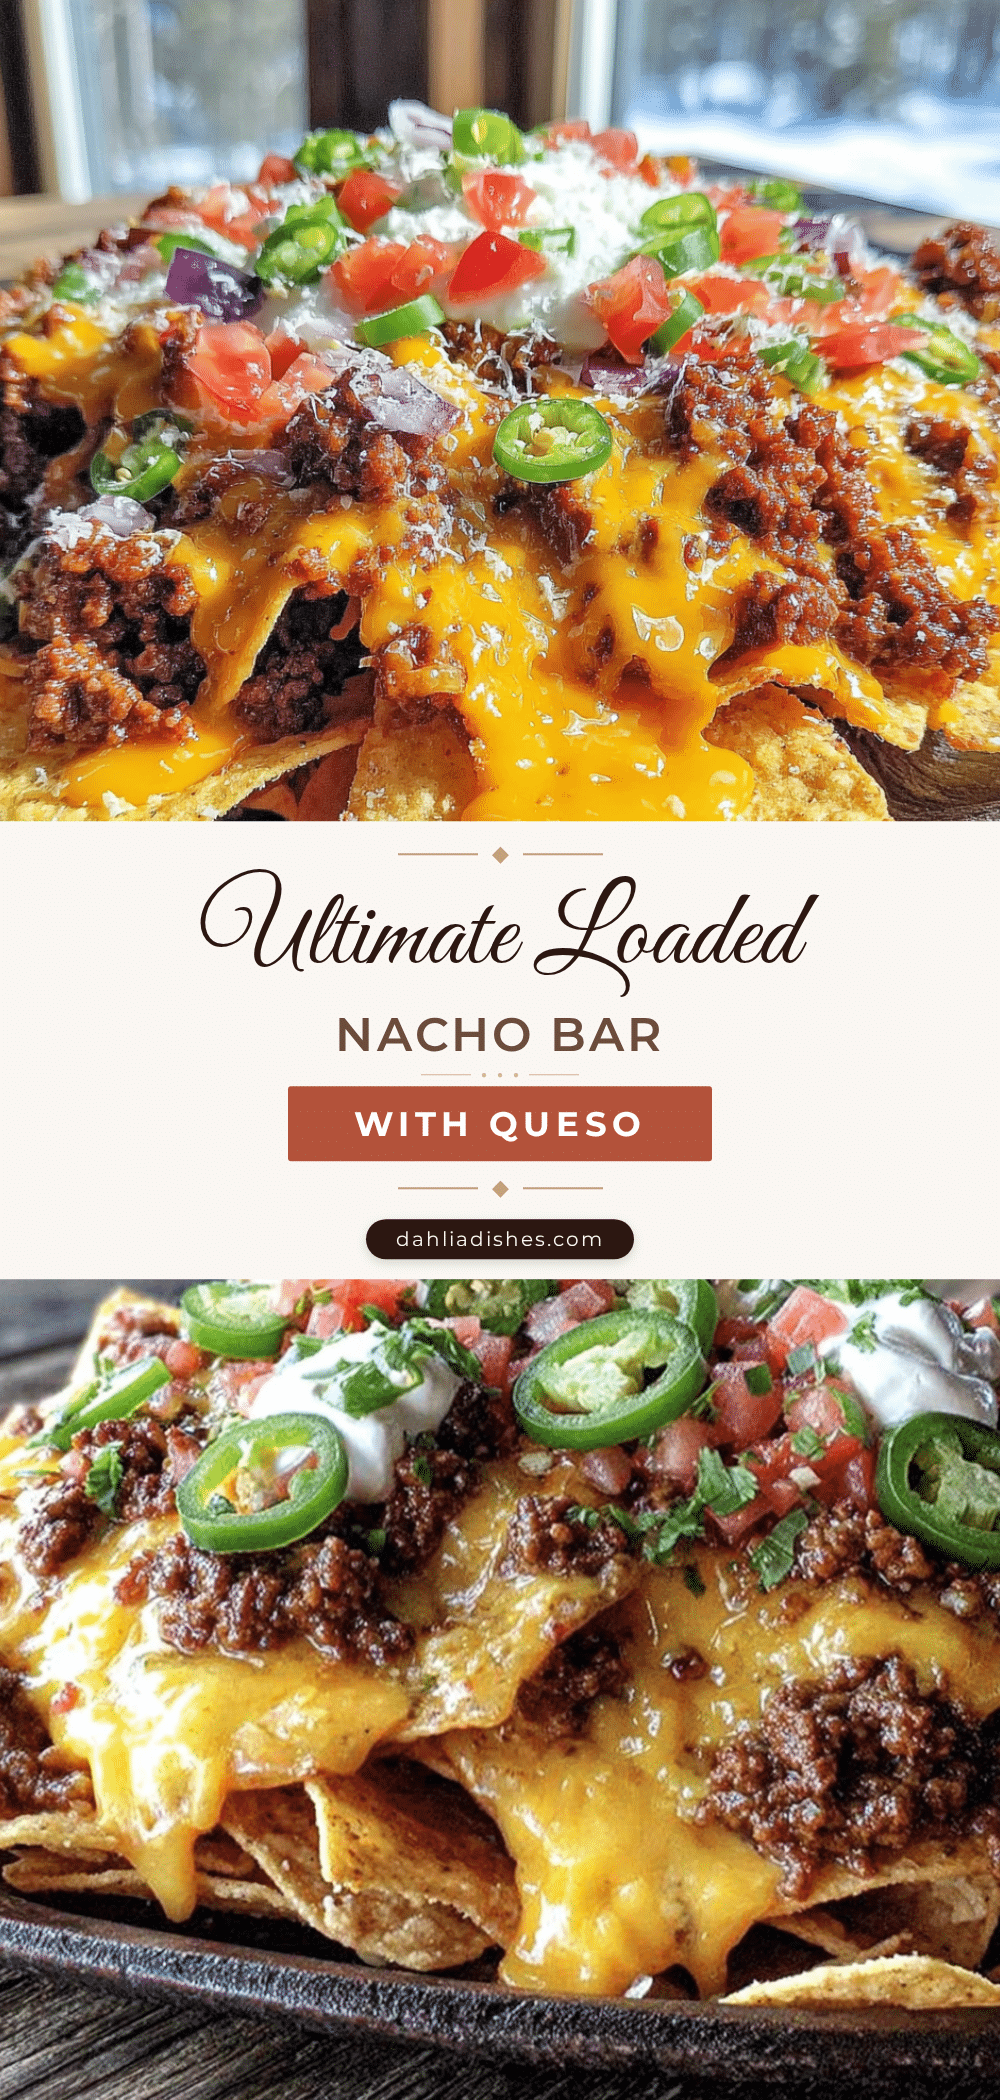
- Assemble the nacho bar. Spread a layer of tortilla chips on your large platter or sheet pan. Spoon the seasoned ground beef over the chips. Drizzle the warm queso generously over everything. Let people add their own toppings from the bowls—this is the fun part. Serve immediately while the queso is still warm and the chips are crunchy.
Pro tip: If you’re serving a big crowd, set up the nacho bar buffet-style. Put the chips in a big bowl, the beef in a slow cooker on warm, and the queso in a small slow cooker or a heatproof bowl over a candle warmer. Let everyone build their own plate. It’s less messy and keeps everything hot.
Cooking Tips & Techniques
I’ve made this nacho bar more times than I can count, and I’ve learned a few things the hard way. Here’s what I wish someone had told me.
- Don’t overwork the beef. When browning, let it sit for a minute before breaking it up. You want nice, caramelized bits, not tiny, dry crumbles. Let the pan do the work.
- Freshly shredded cheese is non-negotiable. I know it’s tempting to buy the bag, but pre-shredded cheese has cellulose and starch that prevent it from melting smoothly. Your queso will be gritty. Take the extra 3 minutes to shred a block—it’s worth it.
- Keep the queso warm, not hot. If you overheat it, the cheese can separate and turn oily. Use low heat and stir often. If you’re making it ahead, reheat gently with a splash of milk.
- Layer strategically. Don’t just dump everything on top. Put the beef on first so it gets a little crispy on the edges from the heat of the chips. Then drizzle the queso so it seeps into all the nooks and crannies. Toppings go on last so they stay fresh.
- Timing is everything. Cook the beef first, then start the queso while the beef rests. That way, everything is hot at the same time. I once made the queso first and it got cold while I waited for the beef—lesson learned.
One time, I forgot to add the cumin to the queso and it tasted flat. I tried to fix it by stirring it in at the end, but it wasn’t the same. So don’t skip it—that little pinch makes all the difference.
Variations & Adaptations
This recipe is a canvas, and you can paint it however you like. Here are a few ways I’ve adapted it over the years.
- Spicy Chorizo Version: Swap the ground beef for Mexican chorizo (remove the casing). Brown it the same way, but skip the extra spices—chorizo is already heavily seasoned. The grease from the chorizo adds incredible flavor to the queso if you drizzle a little in.
- Vegetarian Black Bean & Corn: Replace the beef with one can of black beans (rinsed) and one cup of frozen corn (thawed). Sauté them with the onion and garlic, then add the same spices. It’s hearty and filling, and no one misses the meat.
- Sheet Pan Nachos for a Crowd: Instead of a bar, layer everything on a rimmed baking sheet. Start with chips, then beef, then cheese (shredded, not queso). Bake at 400°F for 10 minutes until the cheese melts. Top with pico, sour cream, and avocado. It’s less interactive but faster for a party.
- Dairy-Free Queso: Use a good vegan cheddar shred (I like Violife) and replace the milk with unsweetened oat milk. The texture won’t be as stretchy, but it’s still creamy and delicious. Add a tablespoon of nutritional yeast for a cheesy flavor.
My personal favorite variation? I add a layer of refried beans under the beef. It makes the whole thing extra creamy and filling. Just spread a thin layer on the chips before adding the meat. Trust me on this one.
Serving & Storage Suggestions
This nacho bar is best served immediately, while the chips are still crunchy and the queso is warm and flowing. But I’ve got tips for leftovers and make-ahead prep.
- Serving temperature: Serve the beef and queso hot, but let the toppings (pico, avocado, sour cream) stay cool. The contrast in temperatures is part of the magic.
- Presentation: Use a large wooden board or a white platter for contrast. Put the chips in a big bowl and arrange the toppings in small bowls around it. It looks intentional and inviting.
- Storage: Store leftover beef and queso separately in airtight containers in the fridge for up to 3 days. The chips will get soggy if stored with anything wet, so keep them in their bag.
- Reheating: Reheat the beef in a skillet over medium heat with a splash of water. Reheat the queso in a saucepan over low heat, stirring constantly. Add a splash of milk if it’s too thick. Do not microwave the queso—it will separate.
- Flavor development: The beef actually tastes better the next day, as the spices meld together. The queso is best fresh, but it’s still good reheated. Just don’t expect it to be as silky.
If you’re planning a party, cook the beef and make the queso up to a day ahead. Store them separately and reheat just before serving. It saves you from last-minute stress.
Nutritional Information & Benefits
Let’s be real—this is indulgent food. But it’s made with real ingredients, and there are a few bright spots worth mentioning.
- Estimated per serving (based on 6 servings): 520 calories, 28g protein, 35g fat, 30g carbohydrates, 3g fiber, 5g sugar. These are rough numbers—your mileage will vary depending on toppings.
- Protein punch: The ground beef provides a solid dose of protein and iron. It’s satisfying and keeps you full longer than a plain chip dip.
- Calcium from cheese: The queso is a good source of calcium, which is great for bone health. Just don’t go overboard—it’s still rich.
- Customizable for diets: This recipe can be made gluten-free (use corn chips and skip the flour in the queso, or use a cornstarch slurry instead). It’s also easy to make low-carb by serving with pork rinds instead of chips.
- Potential allergens: Contains dairy and gluten (from the flour in the queso). The beef is a common allergen for some. Use the substitutions above to adapt.
I’m not a nutritionist, but I believe in balance. This nacho bar is a treat, not an everyday meal. Pair it with a big salad or some veggie sticks to round things out. Your body will thank you.
Conclusion
This loaded nacho bar with ground beef and queso is more than just a recipe—it’s a solution for those moments when you need to feed a crowd and look like you planned it all along. It’s quick, it’s forgiving, and it’s absolutely delicious. I love how it brings people together, standing around the table, piling on their favorite toppings, and laughing over who made the tallest stack of chips.
Don’t be afraid to make it your own. Swap the beef for chicken, add extra jalapeños if you like heat, or throw on some pickled onions for tang. The beauty of a nacho bar is that everyone gets what they want. I’d love to hear how yours turns out—what toppings did you add? Did anyone ask for the recipe? Drop a comment below and let me know. And if you’re looking for another crowd-pleaser, you might enjoy this crispy chicken tacos recipe I made last month. Happy cooking, and remember—sometimes the best meals come from a little bit of panic and a whole lot of heart.
Frequently Asked Questions
Can I make the queso without evaporated milk?
Yes, you can use regular milk instead, but the queso won’t be as creamy. Evaporated milk has a higher concentration of milk solids, which helps the cheese melt smoothly. If you skip it, add an extra tablespoon of butter to compensate.
How do I prevent the chips from getting soggy?
Serve the chips separately and let everyone build their own plate. If you’re making sheet pan nachos, don’t overload them with wet toppings. Add the pico and sour cream right before serving, not before baking.
Can I use pre-shredded cheese for the queso?
I really don’t recommend it. Pre-shredded cheese is coated with anti-caking agents that prevent it from melting smoothly. Your queso will be gritty and clumpy. Take the extra few minutes to shred a block—it makes a huge difference.
How do I reheat leftover queso without it breaking?
Reheat it slowly on the stovetop over low heat, stirring constantly. Add a splash of milk or cream to help restore the texture. Do not microwave it, as the rapid heating can cause the cheese to separate.
Can I make this recipe in a slow cooker?
Absolutely. Brown the beef on the stovetop first, then transfer it to a slow cooker on warm. For the queso, melt it on the stovetop and then pour it into a small slow cooker or a heatproof bowl set over a candle warmer. This is perfect for parties where you want everything to stay hot for hours.
Pin This Recipe!
Easy Loaded Nacho Bar with Ground Beef & Queso
A quick and easy loaded nacho bar with seasoned ground beef, creamy homemade queso, and all your favorite toppings. Perfect for game days, parties, or a fun weeknight dinner that everyone can customize.
- Prep Time: 10 minutes
- Cook Time: 15 minutes
- Total Time: 25 minutes
- Yield: 6 servings 1x
- Category: Main Course
- Cuisine: Mexican-American
Ingredients
- 1 pound ground beef (80/20 is best)
- 1 tablespoon olive oil
- 1 small yellow onion, finely diced
- 3 cloves garlic, minced
- 1 tablespoon chili powder
- 1 teaspoon ground cumin
- 1/2 teaspoon smoked paprika
- 1/2 teaspoon salt
- 1/4 teaspoon black pepper
- 1/2 cup beef broth
- 1 tablespoon tomato paste (optional)
- 2 tablespoons unsalted butter
- 2 tablespoons all-purpose flour
- 1 cup whole milk
- 1/2 cup evaporated milk
- 8 ounces sharp cheddar cheese, freshly shredded
- 4 ounces Monterey Jack cheese, freshly shredded
- 1/4 teaspoon cumin
- 1/4 teaspoon cayenne pepper (optional)
- Salt to taste
- 1 large bag tortilla chips (scoop-style recommended)
- 1 cup pico de gallo
- 1/2 cup sour cream
- 1 avocado, diced
- 1/2 cup canned black beans, rinsed and drained
- 1/4 cup pickled jalapeños, drained
- 1/4 cup chopped fresh cilantro
- 1 lime, cut into wedges
Instructions
- Cook the ground beef: Heat olive oil in a large skillet over medium-high heat. Add diced onion and cook for 2-3 minutes until soft. Add ground beef, breaking it apart, and cook for 5-6 minutes until browned. Leave about 1 tablespoon of fat in the pan.
- Season the beef: Reduce heat to medium. Add minced garlic, chili powder, cumin, smoked paprika, salt, and pepper. Stir for 30 seconds. Add tomato paste and stir for 1 minute. Pour in beef broth and simmer for 2-3 minutes, scraping up browned bits. Remove from heat.
- Start the queso: In a medium saucepan, melt butter over medium heat. Add flour and whisk constantly for 1 minute to make a roux. Slowly pour in milk and evaporated milk while whisking. Continue whisking until thickened, about 3-4 minutes.
- Melt the cheese: Reduce heat to low. Add shredded cheddar and Monterey Jack cheese one handful at a time, whisking until fully melted before adding more. Stir in cumin and cayenne (if using). Add salt to taste. Keep warm on low heat, stirring occasionally.
- Prepare the toppings: While queso is melting, chop avocado, rinse black beans, and set out pico de gallo, sour cream, jalapeños, and cilantro in small bowls. Cut lime into wedges.
- Assemble the nacho bar: Spread tortilla chips on a large platter or sheet pan. Spoon seasoned ground beef over chips. Drizzle warm queso generously over everything. Serve immediately with toppings on the side for everyone to add their own.
Notes
For best results, use freshly shredded cheese for the queso—pre-shredded cheese contains anti-caking agents that can make the queso gritty. Keep the queso warm on low heat to prevent separation. For a vegetarian version, replace the beef with black beans and corn. The beef can be made a day ahead and reheated.
Nutrition
- Serving Size: 1 serving (about 1/6
- Calories: 520
- Sugar: 5
- Sodium: 800
- Fat: 35
- Saturated Fat: 15
- Carbohydrates: 30
- Fiber: 3
- Protein: 28
Keywords: nacho bar, loaded nachos, ground beef nachos, queso, game day food, party appetizer, easy dinner, crowd-pleaser


