Love this? Save it for later!
Share the inspiration with your friends
I was supposed to be making a fancy layered trifle for a Halloween potluck. You know the kind—angel food cake, layers of colored pudding, the whole Pinterest-worthy production. But somewhere between the third trip to the grocery store and realizing I’d forgotten to pick up the expensive berries, I grabbed a pack of Oreos and a bag of gummy worms instead. The power went out for about twenty minutes that afternoon—just long enough for me to stand in my dark kitchen and think, “What am I even doing?” The trifle was stressing me out, honestly. I had a toddler who kept trying to eat the decorations, a dog who’d already stolen one of the chocolate spiders, and absolutely no patience left for a complicated dessert.
So I threw together this ridiculous, no-bake thing with crushed cookies, instant pudding, and those creepy little worms. I mean, I literally just dumped everything into clear plastic cups and hoped nobody would notice I’d given up. The potluck was at my neighbor Carla’s house, and I walked in feeling like I’d brought a kids’ snack to an adult party. But let me tell you, those dirt cups disappeared faster than anything else on the table. People kept coming back for seconds, asking for the recipe, and my daughter’s friends were absolutely obsessed. The fancy trifle I’d planned? Nobody even asked about it. Sometimes the best recipes come from the moments when you just surrender to the chaos.
Maybe you’ve been there—standing in your kitchen, surrounded by half-unpacked groceries, wondering why you ever thought you could pull off something elaborate. That’s exactly where this recipe was born. And honestly, it’s the one I keep coming back to year after year because it’s fun, it’s forgiving, and it makes everyone smile. Even the grown-ups can’t resist digging into a cup of “dirt” with a gummy worm peeking out.
Why You’ll Love This Recipe
This isn’t just another Halloween dessert. It’s the one that saves your sanity and makes you look like a hero at the same time.
- No baking required : Comes together in about 20 minutes flat. No oven, no stove, no complicated techniques. Perfect for busy parents, last-minute party prep, or those days when you just can’t.
- Simple ingredients you already have : Chocolate pudding, Oreos, cool whip, and gummy worms. That’s it. No fancy grocery store trips or obscure specialty items. You probably have most of this in your pantry right now.
- Perfect for Halloween parties : Whether it’s a classroom celebration, a neighborhood potluck, or just a fun family movie night, these dirt cups fit right in. They’re portable, individual-sized, and everyone loves them.
- Crowd-pleaser for all ages : I’ve seen toddlers and grandparents go back for thirds. There’s something about the combination of creamy pudding, crunchy cookie “dirt,” and chewy gummy worms that appeals to literally everyone.
- Unbelievably easy to customize : You can make them dairy-free, gluten-free, or switch up the flavors without changing the basic method. This recipe is more of a template than a strict set of rules.
What makes these dirt cups different from the hundred other versions you’ll find online? It’s the texture. I spent a good month testing different ratios of cookie crumbs to pudding, different ways of layering, and even different types of pudding. The secret is using crushed Oreos that still have some texture—not too fine, not too chunky—and letting the pudding set just enough so it holds its shape but stays creamy. It’s a small thing, but it makes a big difference when you take that first bite.
This is the kind of dessert that makes you close your eyes after the first spoonful. Not because it’s fancy, but because it’s exactly what you wanted. It’s comfort food with a spooky twist, and it brings back that childhood feeling of eating something just for the joy of it.
What Ingredients You Will Need
This recipe uses simple, everyday ingredients to create something that feels special. Most of these are pantry staples, which is exactly what you want when you’re putting together a last-minute Halloween treat.
- For the pudding layer:
- 2 (3.9-ounce) boxes instant chocolate pudding mix (I prefer Jell-O brand for consistent results)
- 3 cups cold whole milk (2% works too, but whole milk gives a creamier texture)
- 1 cup cold heavy cream (optional, but makes the pudding extra rich)
- For the “dirt” layer:
- 1 (14.3-ounce) package Oreo cookies (about 36 cookies, regular not double-stuffed)
- 2 tablespoons unsalted butter, melted (helps the crumbs stick together slightly)
- For the topping and decorations:
- 1 (8-ounce) container Cool Whip, thawed (or homemade whipped cream)
- 1 cup gummy worms (the sour kind add a nice tangy contrast)
- Optional: candy eyeballs, gummy spiders, or crushed graham crackers for extra texture
Now let me talk about a few of these ingredients in more detail because the choices you make here actually matter.
Chocolate pudding : Instant pudding is non-negotiable here. Cook-and-serve pudding takes too long to set and doesn’t have the same creamy texture. I’ve tested this with store-brand pudding mixes, and honestly, Jell-O brand gives the best consistency. The pudding needs to be thick enough to hold its shape when you scoop it, but still smooth and luscious. If you want a richer flavor, use chocolate fudge pudding instead of regular chocolate.
Oreo cookies : Regular Oreos work best. Double-stuffed ones have too much cream filling, which makes the “dirt” clump together instead of staying crumbly. You want the cookies to crush into a texture that resembles actual soil—some fine crumbs, some small chunks. I’ve also tried this with generic chocolate sandwich cookies, and they work fine, but Oreos have that distinctive dark color that looks more like real dirt.
Gummy worms : This is where you can have fun. Sour gummy worms add a nice tangy contrast to the sweet pudding, but regular ones work too. I like to use a mix of colors and sizes for visual interest. Pro tip: cut some of the worms in half so they look like they’re crawling out of the dirt at different angles. My kids think this is hilarious.
Cool Whip vs. homemade whipped cream : I usually use Cool Whip because it holds its shape longer and doesn’t deflate as quickly. But if you prefer homemade, just whip 1 cup of heavy cream with 2 tablespoons of powdered sugar and a splash of vanilla until stiff peaks form. It’s a little more work, but the flavor is undeniably better.
Substitution guidance : For a dairy-free version, use almond milk or oat milk in the pudding (it will be slightly thinner, so add an extra tablespoon of cornstarch), and use a dairy-free whipped topping like CocoWhip. For gluten-free, use gluten-free chocolate sandwich cookies (like Glutino brand) and check that your pudding mix is certified gluten-free. You can also swap the gummy worms for any other Halloween-themed candy—gummy spiders, candy corn, or even plastic rings for a treasure hunt vibe.
Equipment Needed
You don’t need anything fancy for this recipe, which is part of why I love it. Here’s what you’ll need:
- 1 large mixing bowl (for the pudding)
- 1 medium mixing bowl (for crushing cookies)
- Whisk or hand mixer (hand mixer makes the pudding come together faster)
- Rolling pin or food processor (for crushing Oreos)
- 6 to 8 clear plastic cups (8-ounce size works perfectly)
- Measuring cups and spoons
- Spatula for scraping bowls
- Small spoon for layering
If you don’t have a food processor, don’t worry. I’ve crushed Oreos with a rolling pin while they’re still in the bag, and it works just fine. You can also put them in a zip-top bag and pound them with a heavy pan—honestly, it’s kind of therapeutic after a long day. Just make sure you don’t crush them too fine. You want some texture, not dust.
Clear plastic cups are ideal because everyone can see the layers, which is half the fun. But you can use small mason jars, glass tumblers, or even paper cups if that’s what you have. Just make sure they’re transparent enough to show off those gummy worms peeking through the dirt.
Preparation Method
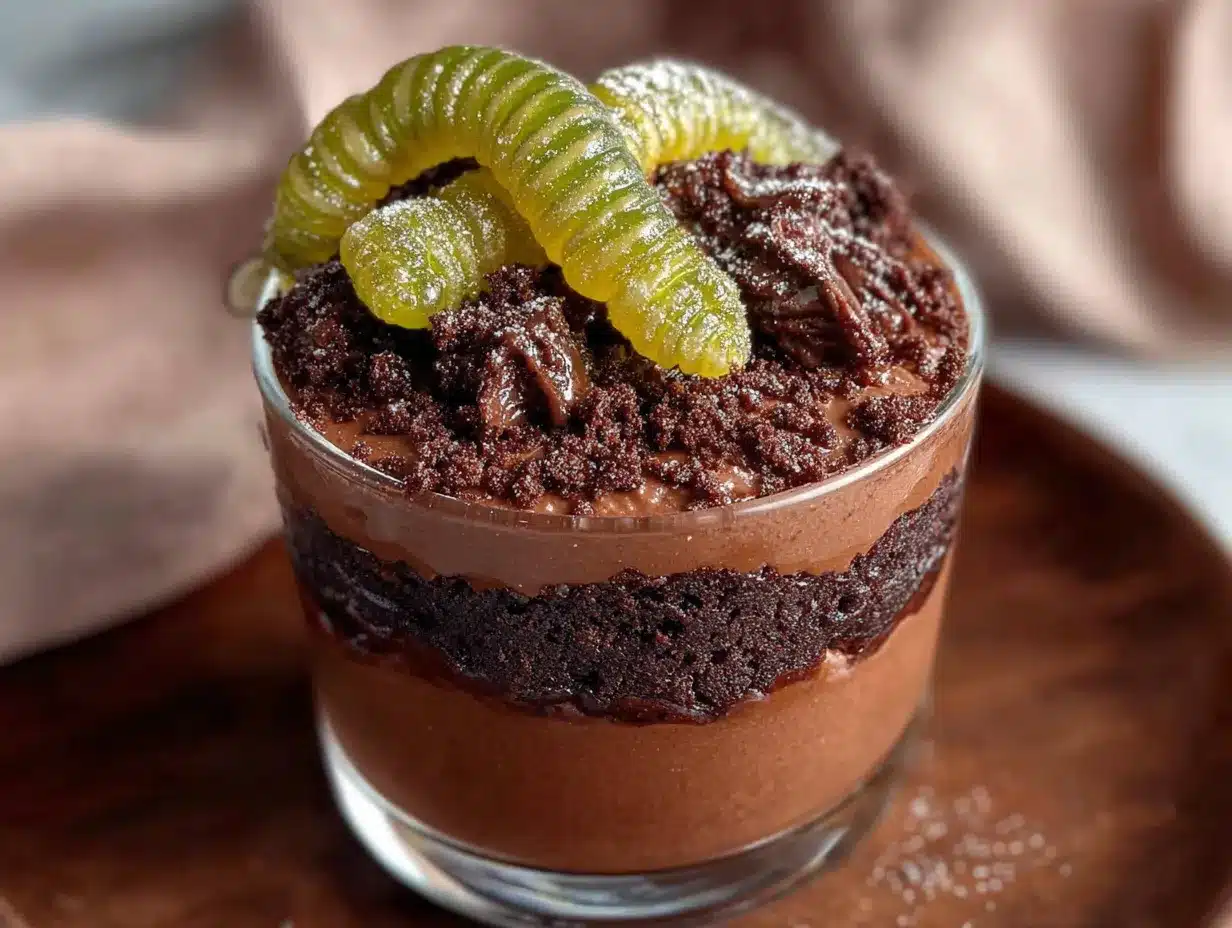
This recipe comes together in about 20 minutes, plus at least 2 hours of chill time. The active work is minimal, which leaves you plenty of time to focus on other party prep—or just sit down and enjoy a cup of coffee while the pudding sets.
- Make the pudding : In a large mixing bowl, combine the instant chocolate pudding mix with 3 cups of cold milk. Whisk vigorously for about 2 minutes until the pudding starts to thicken. If you’re using the heavy cream, replace 1 cup of the milk with the cream. The mixture will be thick but still pourable. Let it sit for 5 minutes to set slightly while you prepare the other components.
- Crush the Oreos : Place the entire package of Oreos (cream filling included) into a food processor. Pulse about 10-12 times until the cookies are broken into small crumbs with some slightly larger pieces. If you’re using a rolling pin, put the cookies in a zip-top bag and crush them until you have a mix of fine crumbs and small chunks. Transfer the crumbs to a medium bowl and stir in the melted butter with a fork until evenly distributed. This helps the “dirt” hold together slightly without becoming clumpy.
- Prepare the cups : Arrange your clear cups on a baking sheet or tray for easy transport. This is important—trust me, trying to move filled cups one by one is a disaster waiting to happen. I learned this the hard way when I knocked over three cups in a row and ended up with pudding on my counter, my shirt, and somehow my ceiling.
- Layer the dirt : Spoon about 2 tablespoons of the Oreo crumbs into the bottom of each cup. Press down gently with the back of a spoon to create an even base layer. This bottom layer of “dirt” gives the illusion that the worms have burrowed up from below.
- Add the pudding : Spoon or pour the pudding mixture over the Oreo layer, filling each cup about halfway. Use a spatula to scrape the sides of the bowl and get every last bit. Tap the cups gently on the counter to settle the pudding and remove any air bubbles.
- Insert the worms : Take 3-4 gummy worms and push them into the pudding layer so they’re partially submerged. Let a few ends poke out of the pudding so it looks like the worms are crawling through the dirt. Angle them in different directions for a more natural look. I like to save one worm per cup to place on top later.
- Top with more dirt : Add another 2-3 tablespoons of Oreo crumbs on top of the pudding layer, covering the worms completely. You want a thick enough layer that the “dirt” looks realistic. Reserve about 1/4 cup of crumbs for the final garnish.
- Chill : Place the cups in the refrigerator for at least 2 hours, or up to overnight. This allows the pudding to set completely and the flavors to meld together. The longer they sit, the better they taste—the cookie crumbs soften slightly and absorb some of the pudding’s moisture, creating a texture that’s surprisingly close to actual dirt (in the best possible way).
- Finish with toppings : Just before serving, add a dollop of Cool Whip to each cup if desired. Sprinkle the reserved Oreo crumbs on top, then add the final gummy worms, candy eyeballs, or any other decorations. This is where you can go wild with creativity. I’ve made little gravestones out of chocolate wafers, added candy pumpkins for a harvest feel, and even stuck plastic spiders into the dirt for maximum creep factor.
A few sensory cues to watch for: The pudding should be thick enough that it doesn’t run when you tilt the cup. The Oreo crumbs should look like dark, rich soil—not too dry, not too wet. When you push a gummy worm in, it should stay in place without sliding back out. And when you take that first bite, the contrast between the creamy pudding, the crunchy dirt, and the chewy worm is absolutely perfect.
Cooking Tips & Techniques
I’ve made these dirt cups at least two dozen times over the past few years, and I’ve learned a few things the hard way. Let me save you some trouble.
Don’t overmix the pudding : Instant pudding sets up quickly, and if you whisk it too vigorously or for too long, it can become thin and watery. Mix just until it starts to thicken, then stop. A few small lumps are fine—they’ll smooth out as the pudding sets in the fridge.
Temperature matters : Make sure your milk is cold straight from the refrigerator. Warm milk won’t allow the pudding to set properly, and you’ll end up with a soupy mess. I once made the mistake of using milk that had been sitting on the counter for an hour, and the pudding never thickened. It was a sad, chocolatey puddle.
Crush the Oreos strategically : The texture of your “dirt” is crucial. If you crush the cookies too fine, they’ll turn into a paste when mixed with the melted butter. If you leave them too chunky, they won’t look like dirt. Aim for a mix of fine crumbs and small pea-sized pieces. The butter should just barely coat the crumbs—you’re not making a crust, just helping the dirt hold together slightly.
Layer with intention : The key to a visually impressive dirt cup is distinct layers. Don’t press the Oreo crumbs too hard into the pudding, or they’ll get soggy and blend together. Keep them separate for that beautiful striped effect when you look at the cup from the side.
Make ahead strategy : These are perfect for making a day ahead. In fact, they’re better after sitting overnight because the flavors meld together. Just wait to add the final toppings and gummy worms until right before serving, otherwise the worms will get too soft and lose their chewy texture.
Common mistake to avoid : Don’t use too many gummy worms. I know it’s tempting, but if you overload the cups, the worms will push the pudding out of place and the layers will collapse. Three to four worms per cup is plenty. You want them to look like they’re crawling through the dirt, not staging a full-scale invasion.
Variations & Adaptations
One of the best things about this recipe is how easy it is to adapt. Here are a few variations I’ve tried and loved:
Peanut butter cup version : Swap the chocolate pudding for chocolate peanut butter pudding (just add 1/3 cup of peanut butter to the milk before mixing). Layer in some chopped peanut butter cups along with the Oreo crumbs. This is my husband’s favorite version, and honestly, it’s hard to go back to the original after trying it.
Cookies and cream twist : Use white chocolate pudding instead of chocolate, and mix some crushed Oreos directly into the pudding before layering. The contrast between the white pudding and dark cookie crumbs is really striking, and it tastes like a cookies and cream milkshake in cup form.
Vegan friendly : Use dairy-free chocolate pudding mix (check the label, many are accidentally vegan), oat milk or almond milk, and vegan chocolate sandwich cookies. For the whipped topping, CocoWhip works perfectly. I’ve served this at a potluck with vegan friends, and nobody could tell the difference.
Spooky graveyard scene : Instead of gummy worms, use gummy skeletons or make little gravestones out of chocolate wafers. Write “RIP” on them with white icing using a toothpick. Add some candy pumpkins around the base for a harvest graveyard feel. This is great for older kids who might find worms a little too gross.
Individual dessert cups for parties : Use small 4-ounce shot glasses or mini cups for a party appetizer version. They’re perfect for Halloween parties where people want to sample multiple desserts. Just reduce the layering amounts accordingly—about 1 tablespoon of crumbs, 2 tablespoons of pudding, and one gummy worm per mini cup.
Pumpkin patch version : For a fall twist that works from September through November, use vanilla or butterscotch pudding instead of chocolate, and top with crushed graham crackers instead of Oreos. Add a small candy pumpkin on top of each cup. The orange and brown color scheme is perfect for autumn.
Serving & Storage Suggestions
These dirt cups are best served cold, straight from the refrigerator. The contrast between the chilled pudding and the crunchy Oreo crumbs is what makes them so satisfying. I like to take them out about 10 minutes before serving so they’re not ice-cold, but still nicely chilled.
Presentation ideas : For Halloween parties, arrange the cups on a platter lined with black or orange napkins. You can scatter extra gummy worms around the base of the cups for a creepy crawly effect. If you’re feeling extra creative, use a Sharpie to draw spiderwebs on the outside of the cups before filling them.
What to serve with them : These are rich enough to stand alone, but they pair beautifully with something light and fruity. A platter of apple slices with caramel dip balances the chocolate perfectly. For a full Halloween spread, serve them alongside mummy hot dogs, pumpkin-shaped cheese balls, and witch’s brew punch.
Storage instructions : Store any leftover dirt cups in the refrigerator, covered with plastic wrap or a lid. They’ll keep for up to 3 days, but the Oreo crumbs will soften over time. If you’re making them ahead, I recommend storing the components separately and assembling just before serving. The pudding can be made up to 3 days in advance, and the Oreo crumbs can be stored in an airtight container at room temperature for up to a week.
Reheating : These are meant to be served cold, so no reheating needed. If the pudding seems too thick after refrigeration, let the cups sit at room temperature for 15-20 minutes before serving.
Freezer option : You can freeze these for up to 1 month, but the texture will change slightly. The pudding becomes more like ice cream, which is actually pretty delicious. Just thaw in the refrigerator overnight before serving. The gummy worms will become harder in the freezer, so I recommend adding them fresh after thawing.
How flavors develop : The best thing about making these a day ahead is that the Oreo crumbs absorb some of the pudding’s moisture, creating a texture that’s remarkably similar to actual dirt. It sounds weird, but it’s incredibly satisfying. The chocolate flavor also deepens and becomes more complex after sitting overnight.
Nutritional Information & Benefits
Let’s be real—these are a treat, not a health food. But here’s the nutritional breakdown for one serving (based on 8 cups made with whole milk and Cool Whip):
- Calories: 385
- Total Fat: 18g
- Saturated Fat: 9g
- Cholesterol: 25mg
- Sodium: 480mg
- Total Carbohydrates: 52g
- Dietary Fiber: 2g
- Sugars: 38g
- Protein: 6g
Health benefits of key ingredients : Believe it or not, there are a few redeeming qualities here. The milk provides calcium and vitamin D for bone health. Cocoa powder (in the pudding and Oreos) contains antioxidants called flavonoids that support heart health. And gummy worms? Well, they’re made from gelatin, which is a source of protein. I’m reaching here, I know.
Dietary considerations : This recipe contains dairy, gluten, and soy (from the Oreos). For a gluten-free version, use gluten-free chocolate sandwich cookies. For a dairy-free version, use plant-based milk and dairy-free whipped topping. The recipe is naturally nut-free if you use standard ingredients, but always check labels for cross-contamination warnings.
My personal perspective : Look, I’m not going to pretend these are healthy. But I genuinely believe that desserts like this have a place in a balanced life. They’re about fun, connection, and creating memories with the people you love. One of these dirt cups won’t derail your health goals, but it might make your kid’s Halloween party a little more magical. And that’s worth something.
Conclusion
These Easy Halloween Dirt Cups with Gummy Worms are proof that the best recipes don’t have to be complicated. They started as a happy accident in my dark kitchen on a stressful afternoon, and now they’re the dessert I’m known for. Every Halloween, someone asks me to bring them, and every time, I watch people’s faces light up when they see those gummy worms peeking out of the chocolate dirt.
What I love most about this recipe is that it’s completely forgiving. You can’t really mess it up. The layers don’t have to be perfect, the worms don’t have to be arranged just so, and nobody cares if your “dirt” is a little lumpy. It’s the kind of dessert that invites creativity and doesn’t take itself too seriously.
So go ahead and make these for your next Halloween party, classroom celebration, or just a fun Friday night with the kids. Customize them however you want—add different candies, change up the pudding flavors, or go wild with the decorations. And when someone asks for the recipe (they will), tell them it came from a moment of kitchen chaos that turned into something unexpectedly wonderful. That’s the story behind every great recipe, isn’t it?
I’d love to hear how yours turn out! Drop a comment below and let me know what variations you tried, or tag me in your photos if you share them on social media. Happy Halloween, and happy eating!
Frequently Asked Questions
Can I make these dirt cups ahead of time?
Absolutely! You can assemble them up to 24 hours in advance. Just wait to add the final gummy worms and any decorative toppings until right before serving. The worms will get soft if they sit in the pudding too long, and you want them to have that nice chewy texture.
Can I use homemade pudding instead of instant?
You can, but it changes the texture significantly. Homemade pudding is thinner and won’t set as firmly as instant pudding. If you want to go that route, add an extra tablespoon of cornstarch to your homemade recipe and cook it until it’s very thick. Let it cool completely before layering.
How many cups does this recipe make?
This recipe makes 6 to 8 cups, depending on the size of your cups. I use 8-ounce clear plastic cups and get exactly 8 servings. If you’re using smaller cups for a party, you can stretch it to 12 mini servings.
Can I use a different type of cookie for the dirt?
Definitely! Chocolate wafer cookies, chocolate graham crackers, or even crushed chocolate chip cookies work well. Just avoid cookies with too much cream filling or frosting, as they’ll make the “dirt” clumpy instead of crumbly.
How do I keep the gummy worms from sinking to the bottom?
Let the pudding set for about 5 minutes before adding the worms. The pudding should be thick enough that the worms stay suspended. If you add them while the pudding is still very liquid, they’ll sink straight to the bottom. Also, don’t push them in too deep—just enough to anchor them in the pudding.
Pin This Recipe!
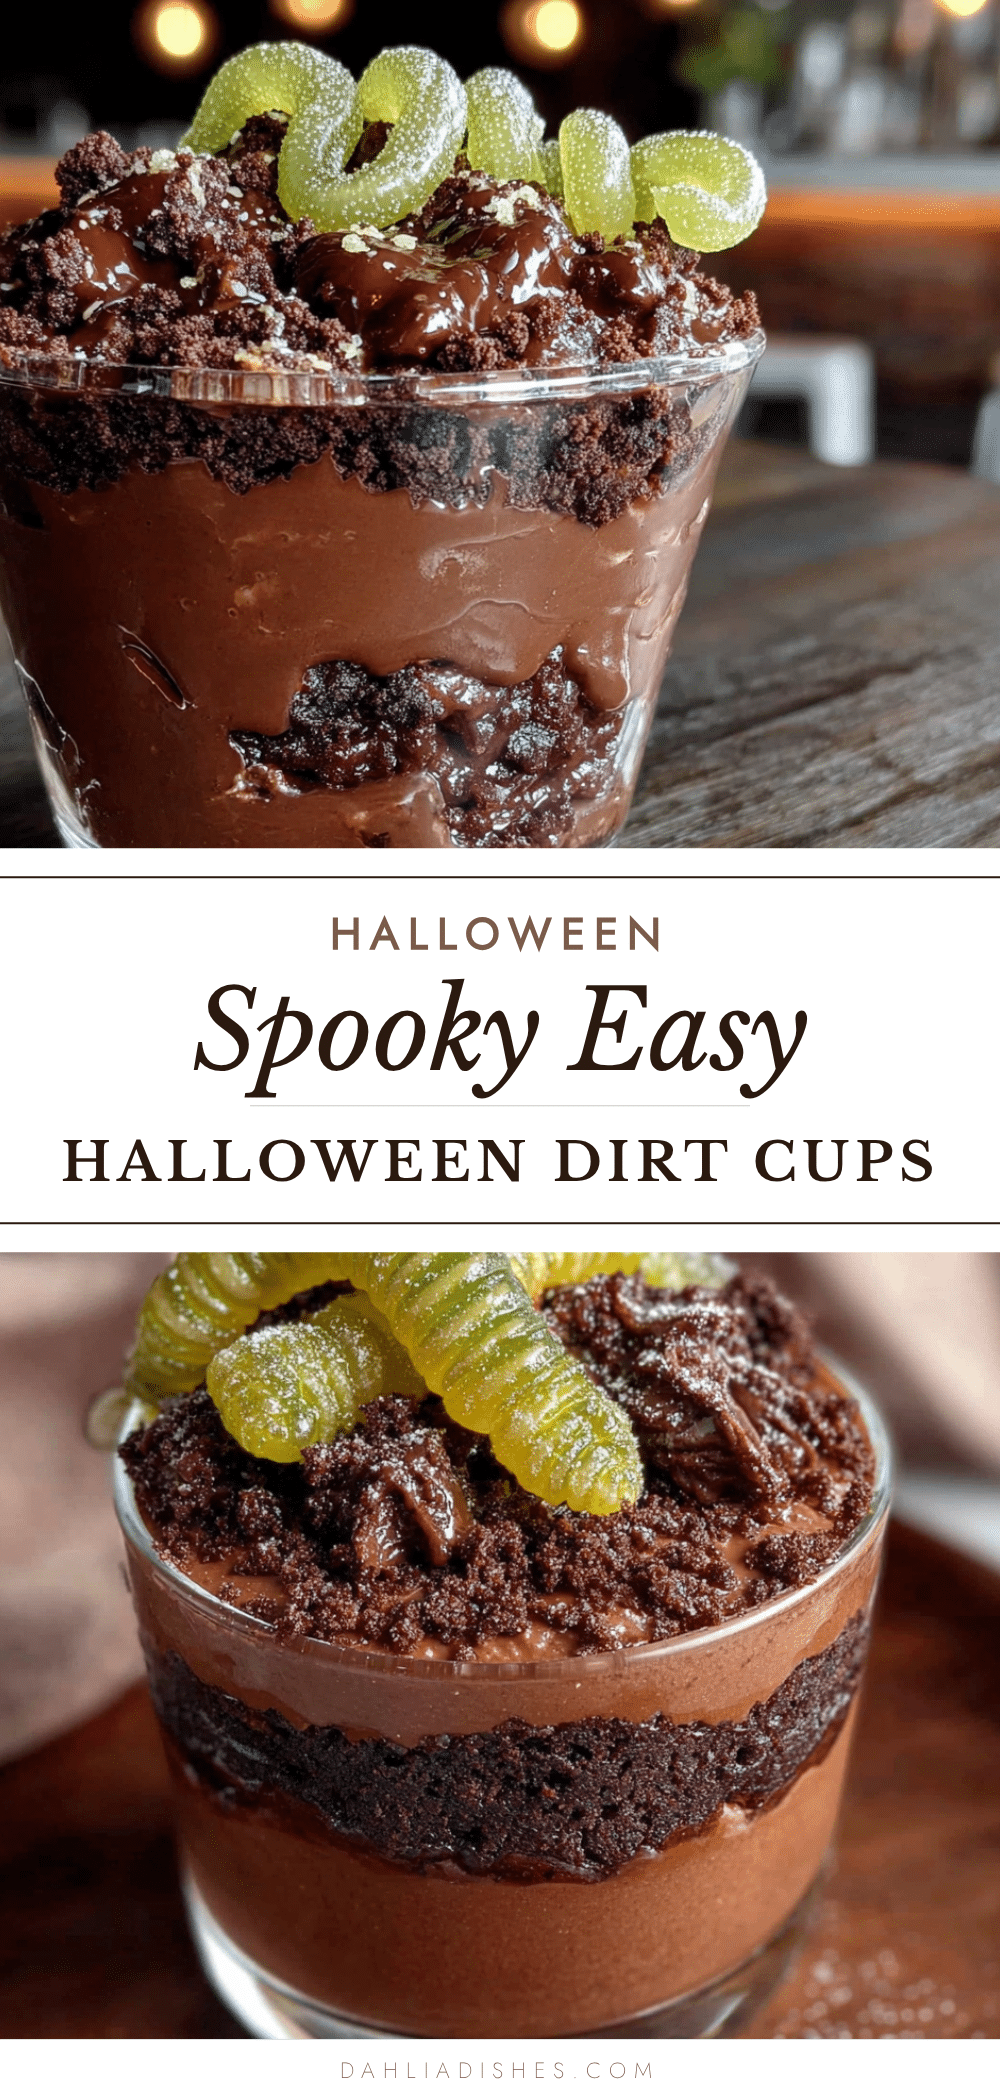
Easy Halloween Dirt Cups with Gummy Worms Recipe
No-bake Halloween dirt cups with creamy chocolate pudding, crushed Oreo ‘dirt,’ and gummy worms. A fun, forgiving dessert that saves your sanity and makes everyone smile.
- Prep Time: 20 minutes
- Cook Time: 0 minutes
- Total Time: 2 hours 20 minutes (includes chilling)
- Yield: 8 servings 1x
- Category: Dessert
- Cuisine: American
Ingredients
- 2 (3.9-ounce) boxes instant chocolate pudding mix
- 3 cups cold whole milk
- 1 cup cold heavy cream (optional)
- 1 (14.3-ounce) package Oreo cookies (about 36 cookies, regular not double-stuffed)
- 2 tablespoons unsalted butter, melted
- 1 (8-ounce) container Cool Whip, thawed
- 1 cup gummy worms
- Optional: candy eyeballs, gummy spiders, or crushed graham crackers for extra texture
Instructions
- Make the pudding: In a large mixing bowl, combine the instant chocolate pudding mix with 3 cups of cold milk. Whisk vigorously for about 2 minutes until the pudding starts to thicken. If using heavy cream, replace 1 cup of the milk with the cream. Let it sit for 5 minutes to set slightly.
- Crush the Oreos: Place the entire package of Oreos (cream filling included) into a food processor. Pulse about 10-12 times until the cookies are broken into small crumbs with some slightly larger pieces. Alternatively, put the cookies in a zip-top bag and crush with a rolling pin. Transfer to a medium bowl and stir in the melted butter with a fork until evenly distributed.
- Prepare the cups: Arrange 6 to 8 clear plastic cups (8-ounce size) on a baking sheet or tray.
- Layer the dirt: Spoon about 2 tablespoons of the Oreo crumbs into the bottom of each cup. Press down gently with the back of a spoon to create an even base layer.
- Add the pudding: Spoon or pour the pudding mixture over the Oreo layer, filling each cup about halfway. Tap the cups gently on the counter to settle the pudding and remove any air bubbles.
- Insert the worms: Take 3-4 gummy worms and push them into the pudding layer so they’re partially submerged. Let a few ends poke out. Angle them in different directions. Save one worm per cup for the top.
- Top with more dirt: Add another 2-3 tablespoons of Oreo crumbs on top of the pudding layer, covering the worms completely. Reserve about 1/4 cup of crumbs for the final garnish.
- Chill: Place the cups in the refrigerator for at least 2 hours, or up to overnight.
- Finish with toppings: Just before serving, add a dollop of Cool Whip to each cup if desired. Sprinkle the reserved Oreo crumbs on top, then add the final gummy worms, candy eyeballs, or any other decorations.
Notes
For best results, use cold milk straight from the refrigerator. Don’t overmix the pudding. Crush Oreos to a mix of fine crumbs and small pea-sized pieces. Let pudding set for 5 minutes before adding worms to prevent sinking. Make ahead up to 24 hours, but add final toppings just before serving. For dairy-free: use almond milk and dairy-free whipped topping. For gluten-free: use gluten-free chocolate sandwich cookies.
Nutrition
- Serving Size: 1 cup (8 oz)
- Calories: 385
- Sugar: 38
- Sodium: 480
- Fat: 18
- Saturated Fat: 9
- Carbohydrates: 52
- Fiber: 2
- Protein: 6
Keywords: Halloween dessert, dirt cups, gummy worms, no-bake, chocolate pudding, Oreo, kids dessert, party dessert, easy Halloween recipe


