Love this? Save it for later!
Share the inspiration with your friends
I was standing in the Halloween aisle at the grocery store last October—you know the one, crammed between the giant bags of candy corn and those plastic cauldrons that never quite hold enough punch—when the smell of chili powder hit me. Not from the store, but from my memory. And suddenly I was seven years old, sitting cross-legged on my Aunt Rita’s linoleum kitchen floor, watching her pull a bubbling casserole dish out of the oven. She always made something warm and cheesy for the grown-ups to pick at while us kids sorted our candy haul on the living room rug. I can still see her crooked oven mitt—the one with the burn hole on the thumb—and hear her say, “Don’t burn your tongue, kiddo.” She passed a few years back, and I never did get her exact recipe. But I’ve been chasing that feeling ever since. That warm, gooey, slightly ridiculous joy of a Halloween snack that feels like a hug.
So when I started hosting my own Halloween parties, I knew I needed something that captured that same spirit. Something fun, a little bit spooky, but mostly just delicious. That’s how this Best Black Bean Mummy Taco Dip was born. It’s got the familiar taco dip flavors everyone loves—beefy, cheesy, a little bit spicy—but it’s dressed up like a mummy. And honestly? It’s become the star of every Halloween spread I’ve ever put together. Maybe you’ve been there, staring at a table full of store-bought cookies and wondering where the real food is. This dip solves that problem.
Let me tell you, the first time I made this, I forgot to drain the black beans. The dip turned into a soupy mess, and the mummy face slid right off the top. My friends still ate it with chips and laughed at me, but I learned my lesson. Now I always drain and rinse those beans like my life depends on it. This recipe is the result of trial, error, and a whole lot of cheesy goodness. It’s the one I keep making because it brings people together, makes everyone smile, and honestly, it tastes incredible. Let’s get into it.
Why You’ll Love This Recipe
This isn’t just another taco dip. It’s a conversation starter, a crowd-pleaser, and a total lifesaver for any Halloween host. Here’s why you’re going to love it:
- Quick & Easy: Comes together in under 30 minutes. Seriously, you can prep this while the kids are still arguing over costumes.
- Simple Ingredients: You probably have most of these in your pantry right now. No fancy trips to specialty stores required.
- Perfect for Halloween Parties: It’s spooky, fun, and totally themed without being complicated. Your guests will be snapping photos before they dig in.
- Crowd-Pleaser: Kids love the mummy face, adults love the flavor. It disappears faster than candy corn on November 1st.
- Unbelievably Delicious: The combination of seasoned beef, creamy black beans, and melted cheese is pure comfort food magic. You’ll be sneaking bites all night.
What makes this recipe different from the rest? It’s the perfect balance of showmanship and substance. I’ve tested it with different cheeses, spice levels, and even a vegetarian version. This is the one that always gets the “Oh, wow!” reaction. It’s not just a gimmick—it’s genuinely the best taco dip you’ll ever serve, wrapped in a cute, spooky package. Perfect for impressing guests without stress, or turning a simple gathering into something memorable.
What Ingredients You Will Need
This recipe uses simple, wholesome ingredients to deliver bold flavor and satisfying texture without the fuss. Most of these are pantry staples, which is exactly what you want when you’re scrambling to get ready for a party.
For the Dip Base
- 1 lb ground beef (80/20 works great for flavor; drain excess fat)
- 1 can (15 oz) black beans, drained and rinsed (I swear by Bush’s for consistent texture)
- 1 packet taco seasoning (or 3 tbsp homemade blend: chili powder, cumin, paprika, garlic powder, onion powder, oregano)
- 1/2 cup water
- 1 cup salsa (use your favorite—I like a medium heat for balance)
- 8 oz cream cheese, softened (full-fat gives the creamiest result)
- 2 cups shredded Mexican blend cheese, divided (reserve 1/2 cup for the top)
For the Mummy Face
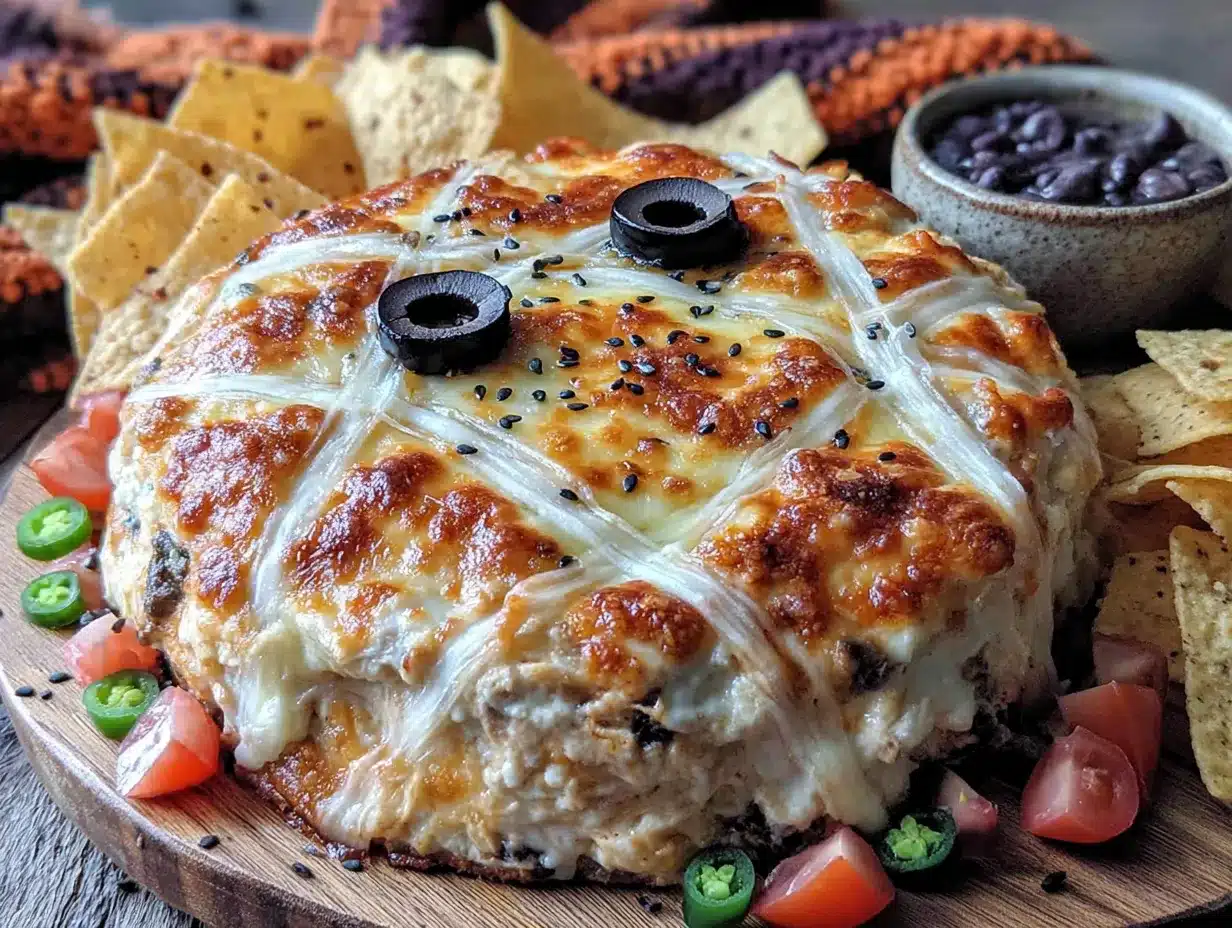
- 1 can (8 oz) refrigerated crescent roll dough (Pillsbury is my go-to)
- 2 slices black olives, for eyes (or use black bean slices if you’re olive-averse)
- 1 small piece red bell pepper, for the tongue (a little scary, a lot cute)
For Serving
- Tortilla chips (the sturdy scoop kind are best—you’ll need them to hold all that dip)
- Optional toppings: sliced jalapeños, fresh cilantro, diced avocado, sour cream
Ingredient Selection Tips: Look for black beans that are firm, not mushy. I’ve found that canned beans from organic brands tend to hold their shape better. For the cheese, shred it yourself if you have time—pre-shredded cheese has anti-caking agents that can affect melting. But honestly, on a busy party day, the bagged stuff works just fine. I’ve used both.
Substitution Guidance: Use ground turkey or chicken for a lighter option. For a vegetarian version, replace the beef with an extra can of black beans or a plant-based ground meat. Need it gluten-free? Check your taco seasoning packet (some contain wheat flour) and use a certified gluten-free crescent dough or skip the mummy face altogether and just top with extra cheese.
Equipment Needed
You don’t need a fancy kitchen to pull this off. Here’s what you’ll need:
- 9×13-inch baking dish (or any oven-safe dish roughly that size)
- Large skillet for browning the beef
- Mixing bowl for combining the dip base
- Spatula or wooden spoon
- Knife and cutting board for prep
- Measuring cups and spoons
- Oven preheated to 375°F (190°C)
Alternative Equipment: If you don’t have a 9×13 dish, a cast-iron skillet works beautifully—just make sure it’s oven-safe. You can also use individual ramekins for single-serving mummy dips, which is adorable for a party. I’ve done that before, and everyone fights over who gets the one with the most cheese.
Budget-Friendly Tip: Don’t own a 9×13 dish? Thrift stores always have them for a few bucks. That’s where I got my favorite one—it’s got a little chip on the corner, but it bakes perfectly every time.
Preparation Method
Let’s make this spooky masterpiece. Follow these steps, and you’ll have a dip that’s both terrifyingly cute and delicious.
- Preheat your oven to 375°F (190°C). While it’s heating, grab a large skillet and place it over medium-high heat.
- Cook the ground beef. Add the beef to the hot skillet and break it apart with a spatula. Cook for 6-8 minutes, until browned and no longer pink. Drain any excess fat (I usually tilt the skillet and spoon it out).
- Season the beef. Sprinkle the taco seasoning over the cooked beef, then add 1/2 cup of water. Stir everything together and let it simmer for 2-3 minutes, until the liquid thickens slightly. The kitchen will smell amazing right about now.
- Combine the dip base. In a large mixing bowl, add the seasoned beef, drained and rinsed black beans, salsa, softened cream cheese, and 1 1/2 cups of the shredded Mexican blend cheese. Stir until everything is well combined. The cream cheese should be fully incorporated—no white streaks left.
- Transfer to baking dish. Spread the mixture evenly into your greased 9×13-inch baking dish. Use a spatula to smooth the top. It should be pretty even, but don’t stress about perfection.
- Top with remaining cheese. Sprinkle the remaining 1/2 cup of shredded cheese over the dip. This will create that golden, bubbly crust.
- Create the mummy face. Open the can of crescent roll dough. Unroll it and separate the triangles. Cut each triangle lengthwise into thin strips—about 1/2 inch wide. Lay the strips across the dip in a crisscross pattern, leaving a small gap for the eyes. You want it to look like bandages wrapped around a mummy. Don’t worry if some strips overlap; it adds to the messy, mummy vibe.
- Add the eyes. Place two black olive slices in the gap you left for the eyes. Add a small sliver of red bell pepper just below them for a tongue. This is where the mummy comes to life!
- Bake. Place the dish in the preheated oven and bake for 18-22 minutes, until the dip is bubbly and the crescent dough is golden brown. The cheese around the edges should be melted and slightly crispy.
- Rest and serve. Let the dip cool for 5 minutes before serving. This is important—it’ll be molten hot straight out of the oven. Serve with sturdy tortilla chips and watch it disappear.
Sensory Cues: When the dip is ready, you’ll see the edges bubbling gently, and the crescent strips will be a beautiful golden brown. The smell is intoxicating—warm beef, melty cheese, and a hint of chili. Your guests will start gathering in the kitchen before you even call them.
Personal Tip: I like to prep the dip base the night before and just assemble the mummy face right before baking. It saves so much time on party day. Just keep the cream cheese mixture covered in the fridge, and let it sit at room temperature for 15 minutes before spreading it in the dish.
Cooking Tips & Techniques
I’ve made this dip more times than I can count, and I’ve learned a few things along the way. Here are my best tips for mummy dip success:
- Don’t skip draining the black beans. I learned this the hard way. Extra liquid makes the dip soupy, and the mummy face will slide right off. Rinse them in a colander and shake off as much water as you can.
- Soften the cream cheese properly. Leave it on the counter for 30 minutes before you start. If you’re in a rush, microwave it in 10-second bursts until it’s soft but not melted. Cold cream cheese won’t mix evenly.
- Cut the crescent strips thin enough. If they’re too thick, they won’t cook through in the baking time. Aim for about 1/2 inch wide. A pizza cutter works great for this.
- Watch the oven. Crescent dough can go from golden to burnt in a minute flat. Check it at the 18-minute mark. If the dough is browning too fast but the dip isn’t bubbly, tent it loosely with foil.
- Let it rest. I know it’s tempting to dig in right away, but that 5-minute rest is crucial. The dip sets up slightly, and you won’t burn your mouth on molten cheese. Trust me on this one.
Common Mistake to Avoid: Overcrowding the mummy strips. You want gaps of dip visible between the dough so people can actually scoop it up with chips. If you cover the whole surface, you’ll end up with a bread bowl situation, which is not what we’re going for.
Timing Strategy: If you’re hosting a party, get the dip in the oven about 20 minutes before guests arrive. That way, it comes out hot and bubbly right as people are settling in. The smell alone will draw them to the kitchen.
Variations & Adaptations
This recipe is super flexible. Here are some ways to make it your own:
- Vegetarian Mummy Dip: Swap the ground beef for an extra can of black beans or a plant-based crumble. I’ve used Beyond Meat before, and it works beautifully. Just cook it the same way you would the beef.
- Spicy Mummy Dip: Add a diced jalapeño to the beef while it cooks, or use a hot salsa. For extra heat, mix in 1/2 teaspoon of cayenne pepper with the taco seasoning. My husband loves this version—I call it the “Frankenstein” dip because it’s a little scary.
- White Chicken Mummy Dip: Use shredded rotisserie chicken instead of beef, and swap the black beans for white beans. Use a white queso or Monterey Jack cheese. It’s a totally different flavor profile but still fits the mummy theme perfectly.
- Dairy-Free Option: Use dairy-free cream cheese and shredded vegan cheese. I’ve tried this with Kite Hill cream cheese and Follow Your Heart shreds, and it works surprisingly well. The texture is slightly less creamy, but the flavor is still there.
- Slow Cooker Version: Brown the beef and mix everything together, then transfer to a slow cooker. Cook on low for 2-3 hours. Add the mummy face in the last 20 minutes? Not really—the crescent dough needs the dry heat of an oven to crisp up. So if you go this route, just skip the mummy face and serve it as a regular taco dip. Still delicious, just not as spooky.
Personal Variation: I once made this with chorizo instead of ground beef, and it was incredible. The smoky, spicy flavor paired perfectly with the black beans. Just be sure to drain the fat well—chorizo is greasy. It’s not for everyone, but if you’re feeling adventurous, give it a try.
Serving & Storage Suggestions
This dip is best served warm, right out of the oven. Here’s how to make it shine:
- Serving Temperature: Serve hot, with the cheese still bubbly and the crescent strips golden. Let it rest for 5 minutes so it’s not lava-hot, but don’t let it cool completely—the cheese will start to set.
- Presentation Ideas: Place the baking dish on a wooden board or a festive Halloween platter. Surround it with tortilla chips, and maybe add a few fake spiderwebs or plastic spiders for extra spooky vibes. Your guests will love the photo op.
- Complementary Dishes: This dip pairs perfectly with a simple side salad or a bowl of Mexican street corn salad for a full meal. For drinks, a cold margarita or a pumpkin beer is a natural fit. For the kids, serve it with apple cider.
- Storage Instructions: Leftovers (if you have any!) can be stored in an airtight container in the refrigerator for up to 3 days. The crescent dough will soften, but the flavor is still great.
- Reheating Methods: Reheat in the oven at 350°F (175°C) for 10-15 minutes, until bubbly. The microwave works in a pinch, but the cheese won’t be as gooey. I don’t recommend freezing this dip—the texture of the cream cheese and crescent dough changes too much.
Flavor Development: Honestly, this dip tastes even better the next day. The flavors meld together overnight, and the black beans soak up all that seasoned beef goodness. If you’re making it ahead, assemble the dip base (without the mummy face) and refrigerate. Add the crescent strips and bake just before serving.
Nutritional Information & Benefits
Let’s be real—this is party food, not health food. But it does have some redeeming qualities. Here’s a rough estimate per serving (based on 8 servings):
- Calories: ~380 per serving
- Protein: 22g (thanks to the beef, black beans, and cheese)
- Fiber: 6g (the black beans are doing the heavy lifting here)
- Fat: 24g (mostly from cheese and beef—it’s worth it)
- Carbohydrates: 22g
Health Benefits: Black beans are packed with fiber and plant-based protein, which helps keep you full and supports digestive health. They’re also rich in antioxidants and iron. The beef provides B vitamins and zinc, which are important for energy and immune function. And hey, the tomatoes in the salsa are a good source of vitamin C. So while this isn’t a salad, it’s not total junk food either.
Dietary Considerations: This recipe contains dairy and gluten (from the crescent dough). For a gluten-free version, use certified gluten-free crescent dough or skip the mummy face. For dairy-free, use vegan cheese and cream cheese alternatives. It’s also easy to make nut-free—just check your salsa and taco seasoning for any nut-based additives.
Personal Wellness Perspective: I believe in balance. This dip is for celebrations and special occasions. It’s not an everyday meal, and that’s okay. Enjoy it with friends, savor every bite, and don’t stress about the numbers. Food is about joy, connection, and creating memories. This dip delivers all three.
Conclusion
This Best Black Bean Mummy Taco Dip is more than just a Halloween appetizer—it’s a little piece of nostalgia, a conversation starter, and a genuinely delicious dish that will have everyone coming back for more. Whether you’re hosting a spooky party, a casual get-together, or just want to make a Tuesday night feel special, this dip delivers.
I’ve made this recipe for Halloween parties, football games, and even a “spooky movie night” in July. It never fails to make people smile. And honestly, that’s what cooking is all about—sharing something you love with the people you care about. Don’t be afraid to customize it. Add more spice, swap the protein, or get creative with the mummy face. Make it your own. That’s the beauty of a recipe like this—it’s a starting point, not a rulebook.
I’d love to hear how yours turns out! Drop a comment below and let me know if your mummy face stayed intact, or if you ended up with a “zombie” dip like I did that first time. Share your photos, tag me on social media, and most importantly, enjoy every cheesy, spooky bite. Happy Halloween, friends!
Frequently Asked Questions
Can I make this dip ahead of time?
Absolutely! Assemble the dip base (without the crescent dough mummy face) up to 24 hours in advance. Keep it covered in the fridge. When you’re ready to bake, add the crescent strips and bake as directed. You may need to add 5 extra minutes to the baking time if the dip is cold from the fridge.
Can I use a different type of meat?
Yes! Ground turkey, chicken, or chorizo all work great. If you use chorizo, be sure to drain the excess fat well. For a vegetarian option, use a plant-based ground meat or an extra can of black beans.
Why did my crescent dough not cook through?
This usually happens if the strips are cut too thick. Aim for 1/2-inch-wide strips. Also, make sure your oven is fully preheated to 375°F (190°C). If the dough is still doughy after the recommended baking time, tent the dish with foil and bake for another 5 minutes.
Can I freeze this dip?
I don’t recommend freezing it. The cream cheese and crescent dough don’t thaw well, and the texture becomes grainy and soggy. It’s best enjoyed fresh or within 3 days of refrigeration.
How do I make the mummy face look better?
Practice makes perfect! For a cleaner look, cut the crescent strips with a sharp knife or pizza cutter. Leave a clear gap for the eyes, and don’t overlap the strips too much. You can also use sliced black olives for the eyes and a thin strip of red bell pepper for the tongue. If the dough shifts during baking, gently nudge it back into place with a spatula while it’s still warm.
Pin This Recipe!
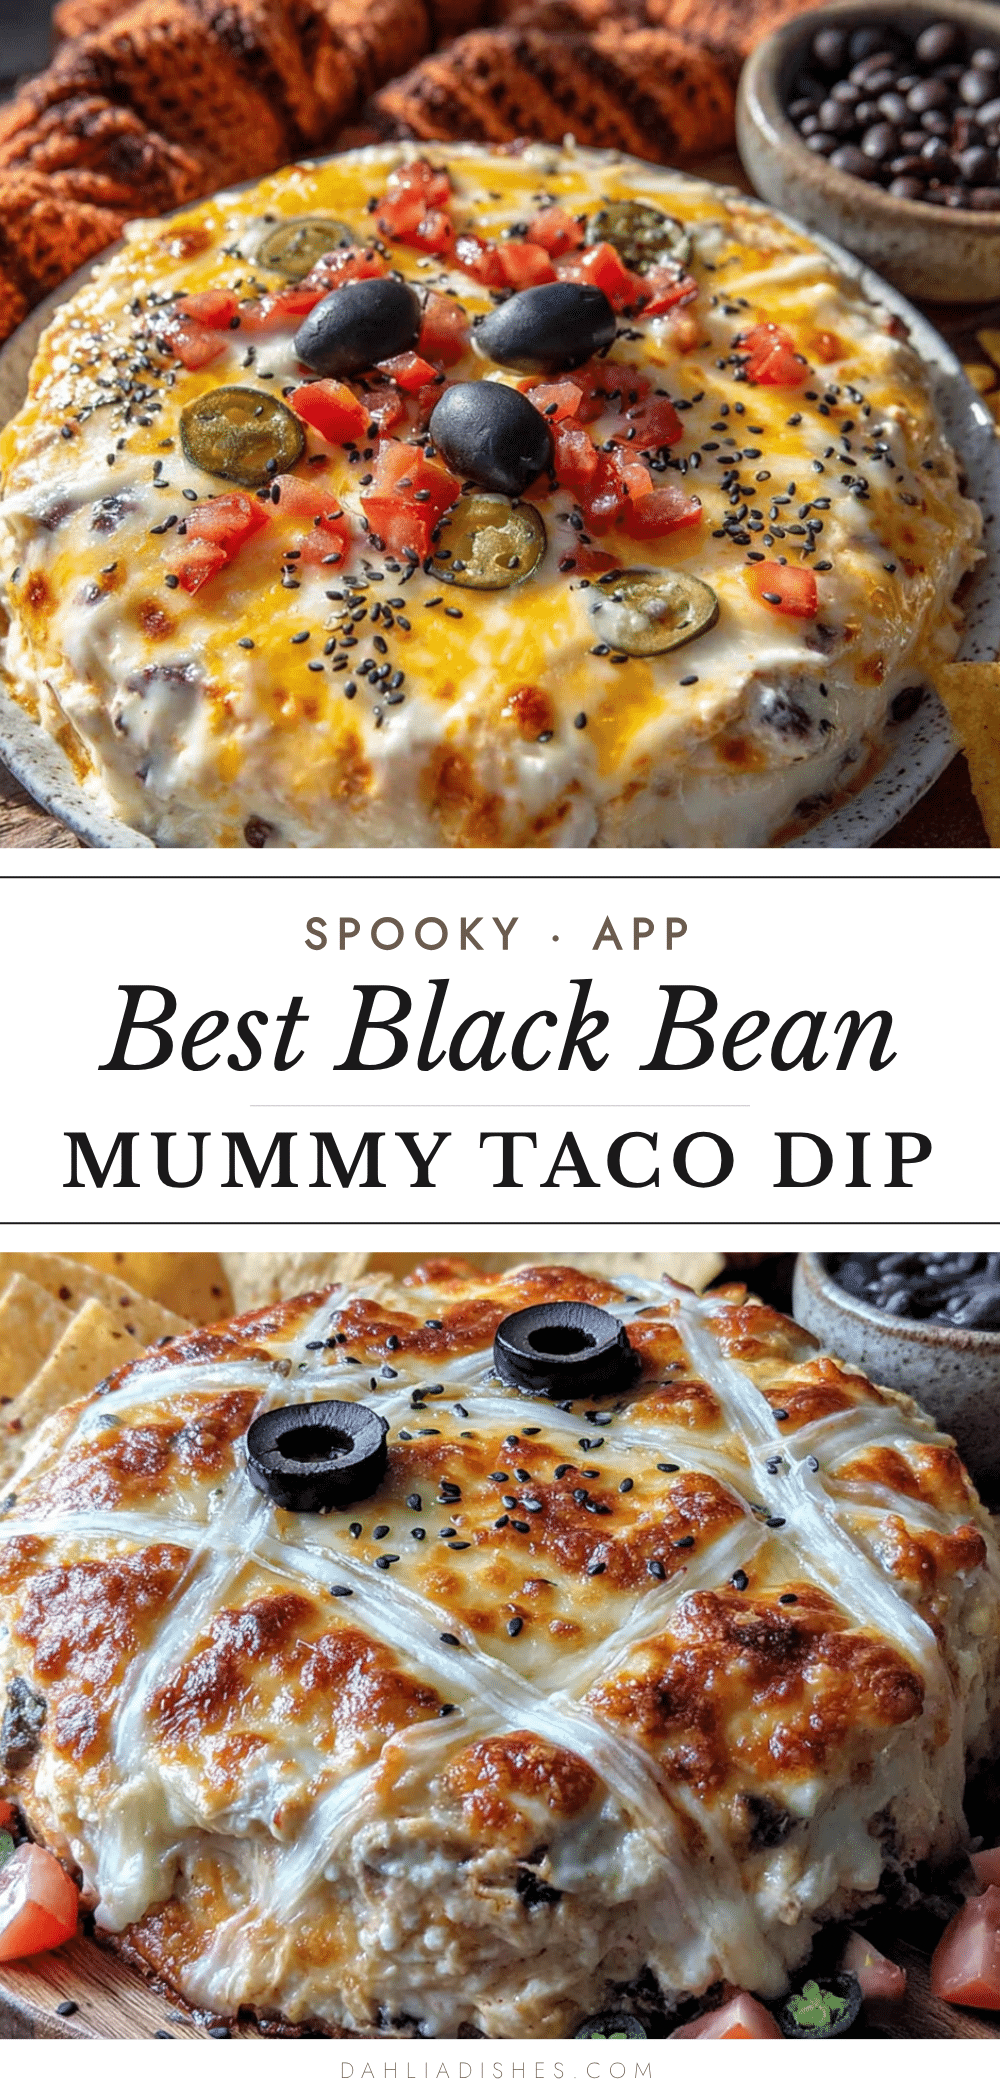
Easy Black Bean Mummy Taco Dip: Perfect Spooky Appetizer

A fun, spooky, and delicious taco dip dressed up like a mummy, perfect for Halloween parties. It features seasoned beef, creamy black beans, and melted cheese, all topped with a crescent dough mummy face.
- Prep Time: 15 minutes
- Cook Time: 22 minutes
- Total Time: 37 minutes
- Yield: 8 servings 1x
- Category: Appetizer
- Cuisine: Mexican-American
Ingredients
- 1 lb ground beef (80/20 works great for flavor; drain excess fat)
- 1 can (15 oz) black beans, drained and rinsed
- 1 packet taco seasoning (or 3 tbsp homemade blend: chili powder, cumin, paprika, garlic powder, onion powder, oregano)
- 1/2 cup water
- 1 cup salsa (medium heat recommended)
- 8 oz cream cheese, softened (full-fat recommended)
- 2 cups shredded Mexican blend cheese, divided (reserve 1/2 cup for the top)
- 1 can (8 oz) refrigerated crescent roll dough (e.g., Pillsbury)
- 2 slices black olives (for eyes; or use black bean slices)
- 1 small piece red bell pepper (for the tongue)
- Tortilla chips (sturdy scoop kind recommended)
- Optional toppings: sliced jalapeños, fresh cilantro, diced avocado, sour cream
Instructions
- Preheat your oven to 375°F (190°C).
- Cook the ground beef in a large skillet over medium-high heat for 6-8 minutes, until browned and no longer pink. Drain any excess fat.
- Sprinkle the taco seasoning over the cooked beef, then add 1/2 cup of water. Stir and let it simmer for 2-3 minutes until the liquid thickens slightly.
- In a large mixing bowl, combine the seasoned beef, drained and rinsed black beans, salsa, softened cream cheese, and 1 1/2 cups of the shredded Mexican blend cheese. Stir until well combined and no white streaks remain.
- Spread the mixture evenly into a greased 9×13-inch baking dish. Smooth the top with a spatula.
- Sprinkle the remaining 1/2 cup of shredded cheese over the dip.
- Open the can of crescent roll dough. Unroll it and separate the triangles. Cut each triangle lengthwise into thin strips, about 1/2 inch wide.
- Lay the strips across the dip in a crisscross pattern, leaving a small gap for the eyes. Overlap is fine for a mummy look.
- Place two black olive slices in the gap for the eyes. Add a small sliver of red bell pepper just below them for a tongue.
- Bake for 18-22 minutes, until the dip is bubbly and the crescent dough is golden brown.
- Let the dip cool for 5 minutes before serving. Serve with sturdy tortilla chips.
Notes
Don’t skip draining the black beans to avoid a soupy dip. Soften cream cheese properly for even mixing. Cut crescent strips thin (about 1/2 inch) to ensure they cook through. Watch the oven as crescent dough can burn quickly. Let the dip rest for 5 minutes before serving to set slightly and prevent burns. For a vegetarian version, replace beef with an extra can of black beans or plant-based ground meat. For a gluten-free version, use certified gluten-free crescent dough or skip the mummy face.
Nutrition
- Serving Size: 1 serving (based on
- Calories: 380
- Sugar: 4
- Sodium: 850
- Fat: 24
- Saturated Fat: 12
- Carbohydrates: 22
- Fiber: 6
- Protein: 22
Keywords: Halloween, mummy dip, taco dip, black bean, spooky appetizer, party food, easy appetizer


