Love this? Save it for later!
Share the inspiration with your friends
There used to be a tiny wine bar tucked behind a bookstore in downtown Portland called The Cork & Vine that made these incredible bacon-wrapped cheese balls. When they closed their doors back in 2019 — just up and vanished one day — I honestly felt a little lost. I mean, where else was I supposed to get that perfect combo of creamy, tangy cheese wrapped in salty, crispy bacon with those little bursts of sweet cranberry?
After twelve tries — and let me tell you, some of those early attempts were straight-up disasters — I finally cracked the code. The first batch that actually worked came out of my oven on a random Tuesday night, and I may have eaten three of them standing over the counter before my husband even got home from work. That’s the kind of moment this recipe creates.
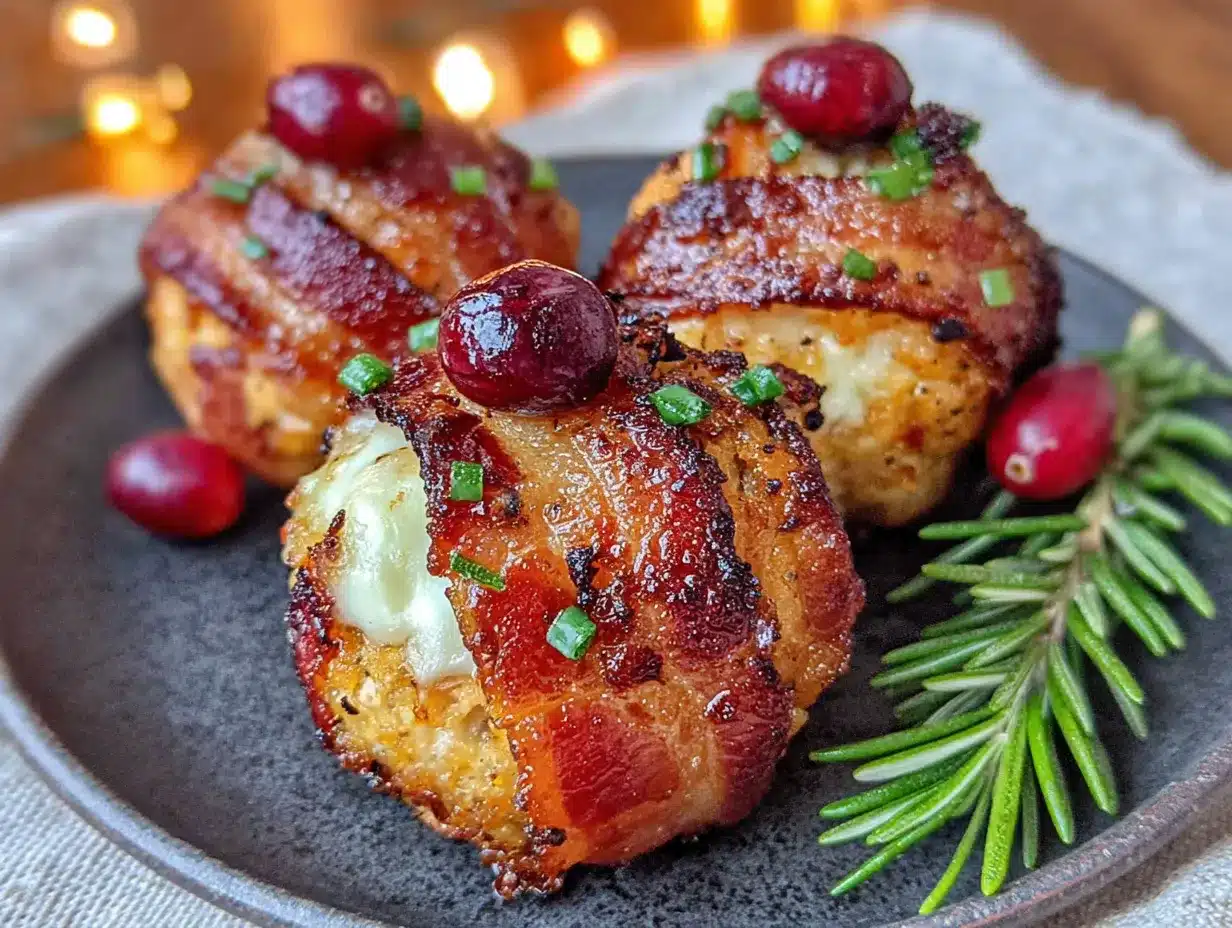
These Easy Bacon Wrapped Cranberry Cheese Balls are everything you want in a holiday appetizer: they look fancy (nobody needs to know how simple they are), they come together in under 30 minutes, and they disappear faster than anything else on the table. Whether you’re hosting a Christmas party, bringing something to a potluck, or just want a snack that feels special, these little guys deliver every single time. Maybe you’ve been there — scrolling through Pinterest looking for something that actually works, not just something that looks pretty in photos. This one works.
Why You’ll Love This Recipe
Let me be straight with you — I’ve tested this recipe more times than I’d like to admit. Some batches were too greasy, others fell apart, and a few just didn’t have that pop of flavor I was chasing. But this version? This is the one I’d serve to anyone, including my pickiest food critic friends.
- Quick & Easy: From start to table in about 25 minutes. That’s faster than ordering takeout, and way more impressive.
- Simple Ingredients: You probably have most of these in your fridge right now. No trips to specialty stores required.
- Perfect for Holidays: Christmas, New Year’s Eve, Super Bowl parties — these fit every occasion that calls for finger food.
- Crowd-Pleaser: I’ve watched people who “don’t like cheese balls” go back for thirds. True story.
- Unbelievably Delicious: The contrast between the warm, melty inside and the crispy bacon outside is honestly next-level comfort food.
What makes this recipe different from all the other cheese ball recipes out there? It’s the technique. Most recipes have you roll everything into balls and wrap them in bacon, but they fall apart in the oven. I figured out that a quick freeze before wrapping keeps everything intact. Plus, using cream cheese that’s been at room temperature for exactly 30 minutes — not 20, not 45 — gives you that perfectly smooth texture without being too soft to handle.
This is the kind of appetizer that makes you close your eyes after the first bite. It’s comfort food reimagined for busy people who still want something special. Perfect for impressing guests without stressing yourself out.
What Ingredients You Will Need
This recipe uses simple, everyday ingredients to deliver that big, bold flavor without any fuss. Most of these are pantry and fridge staples you likely already have on hand.
For the Cheese Balls
- 8 oz cream cheese, softened to room temperature (I prefer Philadelphia for the creamiest texture)
- 1 cup sharp cheddar cheese, shredded (freshly shredded melts better than pre-shredded, trust me on this)
- 1/3 cup dried cranberries, finely chopped (Craisins work perfectly here)
- 2 green onions, thinly sliced (just the green and light green parts)
- 1/4 teaspoon garlic powder
- 1/4 teaspoon onion powder
- 1/8 teaspoon black pepper
- Pinch of salt (go easy — the bacon and cheese add plenty)
For the Bacon Wrap
- 12 slices thin-cut bacon (thick-cut takes too long to crisp up)
- 2 tablespoons brown sugar (optional, but it adds an amazing caramelized finish)
- 1/2 teaspoon smoked paprika (optional, for extra depth)
Ingredient Tips from My Kitchen: I’ve tried this with reduced-fat cream cheese, and honestly, it doesn’t hold up as well. Go for the full-fat version for the best texture. For the cheddar, I love using a sharp white cheddar from Tillamook — it gives a more pronounced cheese flavor that stands up to the bacon. If you’re in a pinch, any good-quality sharp cheddar works.
For the cranberries, don’t skip chopping them. Whole cranberries create lumpy cheese balls that don’t roll smoothly. A quick 30-second chop on the cutting board makes a huge difference. And if you’re not a fan of cranberries, dried cherries or even finely chopped apricots make excellent substitutes.
One more thing — the brown sugar and smoked paprika are totally optional, but they create this incredible sweet-and-smoky crust on the bacon that takes these from good to unforgettable. I never skip them anymore.
Equipment Needed
You don’t need a professional kitchen to pull these off. Here’s what you’ll actually use:
- Mixing bowl (medium size is perfect)
- Rubber spatula or wooden spoon for mixing
- Cutting board and sharp knife
- Baking sheet with a wire rack (the rack keeps the bacon crispy on all sides)
- Parchment paper (for easy cleanup)
- Small cookie scoop or tablespoon for portioning (a regular spoon works too)
- Toothpicks (to secure the bacon if needed)
Budget-Friendly Tip: If you don’t have a wire rack, just line your baking sheet with parchment paper and flip the cheese balls halfway through cooking. They won’t be quite as crispy on the bottom, but they’ll still be delicious. I’ve done it this way plenty of times when my rack was in the dishwasher.
I use my favorite Nordic Ware baking sheet for these — it distributes heat evenly and never warps. But honestly, any rimmed baking sheet works fine. Just don’t use a cookie sheet without edges, or the bacon grease will drip into your oven and cause smoke.
Preparation Method
Alright, let’s get cooking. I’ve broken this down into simple steps so you don’t miss anything.
-
Preheat your oven to 400°F (200°C). Line a baking sheet with parchment paper and place a wire rack on top if you have one. This gets the oven nice and hot while you prep.
-
Soften the cream cheese. Take your cream cheese out of the fridge about 30 minutes before starting. It should be soft enough that you can easily press your finger into it, but not mushy. If you forgot to take it out, microwave it for 10-15 seconds — but watch it carefully. Nobody wants melted cream cheese.
-
Mix the cheese ball base. In your medium mixing bowl, combine the softened cream cheese, shredded cheddar, chopped cranberries, sliced green onions, garlic powder, onion powder, pepper, and salt. Use your rubber spatula to mix everything together until it’s fully combined. You want the cranberries and onions evenly distributed throughout — no big clumps of anything.
-
Form the balls. Using a small cookie scoop or a tablespoon, portion out the cheese mixture. Roll each portion between your palms to form smooth, round balls. You should get about 12 balls, each roughly 1 to 1.5 inches in diameter. Here’s the trick: Place them on a parchment-lined plate and pop them in the freezer for 10 minutes. This firms them up so they don’t fall apart when you wrap them in bacon.
-
Prep the bacon. While the cheese balls are chilling, cut your bacon slices in half crosswise. You’ll need two half-slices per cheese ball. If you’re using the brown sugar and smoked paprika, mix them together in a small bowl.
-
Wrap the cheese balls. Take the chilled cheese balls out of the freezer. Wrap each one with two half-slices of bacon, crossing them over the top like a little package. The bacon should cover most of the cheese ball — don’t worry if there are small gaps. If the bacon doesn’t stay put, use a toothpick to secure it. Pro tip: If you’re using the brown sugar mix, roll each wrapped ball in the mixture now, pressing gently so it sticks.
-
Arrange on the baking sheet. Place the wrapped cheese balls on your prepared wire rack or directly on the parchment-lined sheet. Leave a little space between each one so the bacon crisps up evenly. You should see the brown sugar mixture starting to melt slightly — that’s a good sign.
-
Bake for 15-18 minutes. Pop them in the preheated oven and bake until the bacon is crispy and golden brown. At the 12-minute mark, check on them. If the bacon isn’t browning evenly, rotate the pan. The cheese should be bubbly and starting to ooze slightly through the bacon cracks — that’s exactly what you want.
-
Let them rest. Remove from the oven and let them cool on the baking sheet for 5 minutes. This is important — they’re molten hot straight out of the oven, and resting lets them set up so they don’t fall apart when you pick them up. The bacon will also continue crisping as they cool.
-
Serve warm. Transfer to a serving platter and watch them disappear. If you used toothpicks, remove them before serving.
Sensory Cue: When they’re done, your kitchen should smell like a combination of smoky bacon, sweet brown sugar, and warm cheese. The bacon should look dark golden and crispy, and you might see little bubbles of melted cheese peeking through. The cranberries will have softened slightly and turned a deeper red.
Cooking Tips & Techniques
After making these more times than I can count, I’ve learned a few things the hard way. Let me save you some trouble.
The Freezer Step Is Non-Negotiable. I learned this after my first batch turned into a cheesy bacon mess on the baking sheet. The cheese mixture needs to be firm enough to hold its shape when you wrap it. Ten minutes in the freezer is all it takes, and it makes the whole process so much easier. Don’t skip it.
Thin-Cut Bacon Is Your Friend. I made the mistake of using thick-cut bacon once, thinking it would be “better.” It took forever to cook through, and by the time the bacon was crispy, the cheese inside had turned into lava and leaked everywhere. Thin-cut bacon crisps up in the same time it takes the cheese to get warm and melty. Perfect timing.
Watch Your Oven Like a Hawk. Every oven runs a little differently. My old oven would burn these at 400°F, so I had to drop it to 375°F and add a few minutes. Start checking at the 12-minute mark and go from there. You’re looking for that deep golden-brown color on the bacon — not burnt, but definitely not pale and floppy.
Multitasking Strategy: While the cheese balls are in their 10-minute freezer nap, prep your baking sheet and mix your brown sugar coating. That way, everything is ready to go when they come out. You can also chop the cranberries and slice the green onions while the cream cheese is softening. A little planning saves a lot of stress.
Don’t Overmix. When you’re combining the ingredients, mix just until everything comes together. Overmixing can make the cheese mixture dense and tough instead of light and creamy. You want to see little specks of cranberry and green onion throughout, not a uniform pink blob.
Variations & Adaptations
One of the best things about this recipe is how easy it is to switch things up. Here are some of my favorite variations:
Spicy Southwest Version: Swap the dried cranberries for finely chopped pickled jalapeños, add 1/4 cup of chopped cilantro, and use pepper jack cheese instead of cheddar. The bacon stays the same, but you get this amazing spicy-creamy-salty combo that’s perfect for game day. I made these for a Super Bowl party and they were gone in ten minutes flat.
Herb & Garlic Version: Skip the cranberries entirely and add 2 tablespoons of fresh chopped parsley, 1 tablespoon of fresh chopped chives, and an extra 1/4 teaspoon of garlic powder. This version is more savory and pairs beautifully with a glass of white wine. It’s my go-to for bridal showers and ladies’ nights.
Blue Cheese & Fig Version: Replace half the cream cheese with crumbled blue cheese, swap the cranberries for finely chopped dried figs, and add a tablespoon of honey to the cheese mixture. This one feels fancy without any extra work. The blue cheese gets all warm and melty inside the bacon — it’s ridiculous.
Make It Dairy-Free: Use a high-quality dairy-free cream cheese (I like Kite Hill) and a dairy-free shredded cheddar. The texture will be slightly different, but the flavor is still fantastic. Just make sure to chill the balls a little longer before wrapping since dairy-free cheese tends to be softer.
Air Fryer Method: If you have an air fryer, these cook beautifully at 375°F for about 10-12 minutes. No need to flip them — the circulating air crisps the bacon evenly. Just don’t overcrowd the basket; work in batches if needed.
Serving & Storage Suggestions
These are best served warm, straight from the oven, when the cheese is melty and the bacon is at its crispiest. I like to arrange them on a wooden board or a white platter with a small bowl of honey mustard or ranch dressing for dipping. The cool, creamy dip contrasts beautifully with the warm, salty cheese balls.
What to Serve With Them: These pair wonderfully with a crisp green salad if you’re serving them as a starter. For a full appetizer spread, add some fresh veggies, crackers, and maybe a fruit platter. A glass of dry sparkling wine or a crisp lager beer cuts through the richness perfectly.
Storage: If you somehow have leftovers (unlikely, but possible), let them cool completely, then store them in an airtight container in the refrigerator for up to 3 days. The bacon will lose its crispness, but the flavor will still be amazing.
Reheating: To bring back that crispy bacon texture, reheat them in a 375°F oven for 5-7 minutes. Don’t use the microwave — it’ll make the bacon soggy and the cheese rubbery. If you’re in a hurry, an air fryer at 350°F for 3-4 minutes works like a charm.
Make-Ahead Tip: You can assemble the cheese balls (without the bacon) up to 24 hours in advance. Keep them covered in the refrigerator, then wrap and bake them right before serving. The flavors actually meld together even more overnight. I do this all the time for holiday parties — it makes the day-of so much less stressful.
Freezer Instructions: These freeze beautifully. Assemble the wrapped, unbaked cheese balls on a baking sheet and freeze until solid. Transfer to a freezer bag and store for up to 2 months. Bake straight from frozen, adding 3-5 minutes to the cooking time. This is my secret weapon for unexpected guests.
Nutritional Information & Benefits
Let’s be real — these are an indulgence, and that’s okay. Here’s the approximate nutritional breakdown per cheese ball (based on 12 servings):
- Calories: 185
- Protein: 8g
- Fat: 15g
- Carbohydrates: 5g
- Fiber: 0.5g
- Sugar: 3g
- Sodium: 310mg
What’s Actually Good About Them: The cream cheese provides a decent amount of calcium and vitamin A, while the cheddar adds protein and more calcium. The cranberries offer a small dose of antioxidants and fiber. And hey, bacon has protein too — I’m just saying.
Dietary Considerations: This recipe is naturally low-carb and keto-friendly if you skip the brown sugar coating. It’s also gluten-free, which makes it a safe option for guests with celiac disease or gluten sensitivities. The main allergens here are dairy and (obviously) pork.
My personal take? These are a treat, not an everyday snack. But having one or two at a holiday party isn’t going to derail anyone’s healthy eating goals. Balance is everything, and these are worth every single bite.
Conclusion
Look, I know there are a million appetizer recipes out there. But these Easy Bacon Wrapped Cranberry Cheese Balls are different. They’re the recipe that people ask for by name after they’ve tried them. They’re the appetizer that disappears before the main course even hits the table. And they’re the dish that makes you look like you spent hours in the kitchen when really, you had them done in under 30 minutes.
I love this recipe because it reminds me of that little wine bar and the joy of finally recreating something I thought I’d lost. Every time I make them, I smile. And honestly? That’s the best thing a recipe can do.
Customize these however you like — swap the cranberries for something else, play with the cheese, make them your own. That’s the beauty of cooking. When you make these, I’d love to hear about it. Drop a comment below and tell me how they turned out, or share your own twist on them. And if you loved them, share this post with a friend who needs a showstopper appetizer in their life.
Now go preheat that oven — your taste buds are waiting.
Frequently Asked Questions
Can I make these ahead of time for a party?
Absolutely! You can assemble the cheese balls (without the bacon) up to 24 hours ahead and keep them covered in the fridge. Wrap and bake them right before serving for the best texture. Or freeze the fully assembled, unbaked cheese balls for up to 2 months and bake straight from frozen.
Why did my cheese balls fall apart in the oven?
This usually happens when the cheese mixture isn’t chilled enough before wrapping. Make sure to freeze the formed cheese balls for a full 10 minutes before wrapping them in bacon. Also, avoid overmixing the cheese mixture — it should be cohesive but not overworked.
Can I use turkey bacon instead of regular bacon?
Yes, but turkey bacon is leaner and won’t get as crispy. It also cooks faster, so check them at the 10-minute mark. The flavor will be different, but it’s a good option if you’re watching your fat intake or don’t eat pork.
How do I keep the bacon from unrolling during baking?
Use a toothpick to secure the bacon if it’s being stubborn. Just remember to remove the toothpicks before serving. Another trick is to make sure the bacon overlaps slightly when wrapping — the fat acts like glue as it renders.
Can I make these in a mini version for parties?
Definitely! Use a teaspoon instead of a tablespoon to form smaller cheese balls, and cut the bacon slices into thirds instead of halves. Reduce the baking time to 10-12 minutes. Mini versions are perfect for cocktail parties and holiday buffets.
Pin This Recipe!

Easy Bacon Wrapped Cranberry Cheese Balls: Best Holiday Appetizer

These Easy Bacon Wrapped Cranberry Cheese Balls are the perfect holiday appetizer: creamy, tangy cheese wrapped in salty, crispy bacon with bursts of sweet cranberry. Ready in under 30 minutes, they look fancy but are simple to make and disappear fast at any party.
- Prep Time: 15 minutes
- Cook Time: 15-18 minutes
- Total Time: 30 minutes
- Yield: 12 servings 1x
- Category: Appetizer
- Cuisine: American
Ingredients
- 8 oz cream cheese, softened to room temperature
- 1 cup sharp cheddar cheese, shredded
- 1/3 cup dried cranberries, finely chopped
- 2 green onions, thinly sliced (green and light green parts only)
- 1/4 teaspoon garlic powder
- 1/4 teaspoon onion powder
- 1/8 teaspoon black pepper
- Pinch of salt
- 12 slices thin-cut bacon
- 2 tablespoons brown sugar (optional)
- 1/2 teaspoon smoked paprika (optional)
Instructions
- Preheat your oven to 400°F (200°C). Line a baking sheet with parchment paper and place a wire rack on top if you have one.
- Soften the cream cheese by letting it sit at room temperature for about 30 minutes, or microwave for 10-15 seconds.
- In a medium mixing bowl, combine the softened cream cheese, shredded cheddar, chopped cranberries, sliced green onions, garlic powder, onion powder, pepper, and salt. Mix until fully combined.
- Using a small cookie scoop or tablespoon, portion out the cheese mixture and roll into smooth, round balls (about 12 balls, 1 to 1.5 inches in diameter). Place on a parchment-lined plate and freeze for 10 minutes.
- While the cheese balls are chilling, cut the bacon slices in half crosswise. If using, mix the brown sugar and smoked paprika in a small bowl.
- Remove the cheese balls from the freezer. Wrap each one with two half-slices of bacon, crossing them over the top. If needed, secure with a toothpick. If using the brown sugar mix, roll each wrapped ball in the mixture.
- Arrange the wrapped cheese balls on the prepared wire rack or parchment-lined baking sheet, leaving space between each.
- Bake for 15-18 minutes, until the bacon is crispy and golden brown. Check at 12 minutes and rotate the pan if needed.
- Remove from the oven and let cool on the baking sheet for 5 minutes.
- Serve warm. Remove any toothpicks before serving.
Notes
The freezer step is crucial to prevent the cheese balls from falling apart. Use thin-cut bacon for best results. If you don’t have a wire rack, flip the cheese balls halfway through cooking. For make-ahead, assemble cheese balls (without bacon) up to 24 hours in advance, or freeze fully assembled unbaked cheese balls for up to 2 months.
Nutrition
- Serving Size: 1 cheese ball
- Calories: 185
- Sugar: 3
- Sodium: 310
- Fat: 15
- Carbohydrates: 5
- Fiber: 0.5
- Protein: 8
Keywords: bacon wrapped cheese balls, cranberry cheese balls, holiday appetizer, easy appetizer, party food, bacon wrapped appetizer


