Love this? Save it for later!
Share the inspiration with your friends
It was 11:47 PM on a random Thursday, and I had a bag of tortilla chips staring at me from the pantry. The craving hit hard — that kind of craving where only something cold, creamy, and slightly spicy will do. I didn’t have any ground beef thawed, and honestly, I wasn’t about to cook anything at that hour. But I had a block of cream cheese, a jar of salsa, and a can of black beans that had been sitting there for months. So I just started layering things in a glass dish, not really thinking it through. I figured it would be fine — just a weird late-night snack for one.
Well, the next day, my roommate came home, saw the leftovers in the fridge, and ate half of it with a spoon. That’s when I knew I was onto something. I mean, maybe you’ve been there — you throw something together when you’re half-tired and not trying to impress anyone, and it turns out to be the best thing you’ve made all week. I’ve tweaked it since then, added a few layers, made it prettier for parties, but the soul of it is still that 11 PM experiment. This easy 7-layer taco dip for a crowd is the result of that night, and honestly, it’s the only party appetizer I trust now.
This isn’t one of those fussy recipes that takes an hour of chopping and a dozen dirty bowls. It’s the kind of dip that shows up, does its job, and makes everyone happy. And let me tell you — once you bring this to a game day gathering or a potluck, people will ask you for the recipe every single time. I keep making it because it’s the one thing that disappears before anything else on the table. That first bite — cold, crunchy, creamy, and a little bit tangy — never gets old.
Why You’ll Love This Recipe
Let’s be real for a second. There are a million taco dip recipes out there, and I’ve tried most of them. Some are too watery, some use weird processed cheese goo, and some just don’t have enough layers to keep things interesting. This one is different because I actually tested it on real crowds — like, Super Bowl parties and family reunions where people are brutally honest about food. Here’s why this one wins:
- Quick & Easy: You can throw this together in about 15 minutes flat. No cooking required, just layering. Perfect for when guests show up early and you panic.
- Simple Ingredients: Everything comes from a regular grocery store. No specialty aisles, no weird international ingredients you’ll never use again.
- Perfect for Parties: This dip feeds a crowd easily — think 12 to 16 people with chips and happy faces. Great for game day, potlucks, birthday parties, or just a Tuesday.
- Crowd-Pleaser: I’ve watched picky kids and grown adults fight over the last scoop. It’s universally loved, and I’m not exaggerating.
- Unbelievably Delicious: The combination of creamy, crunchy, spicy, and fresh is just unbeatable. It hits every single texture and flavor note you want.
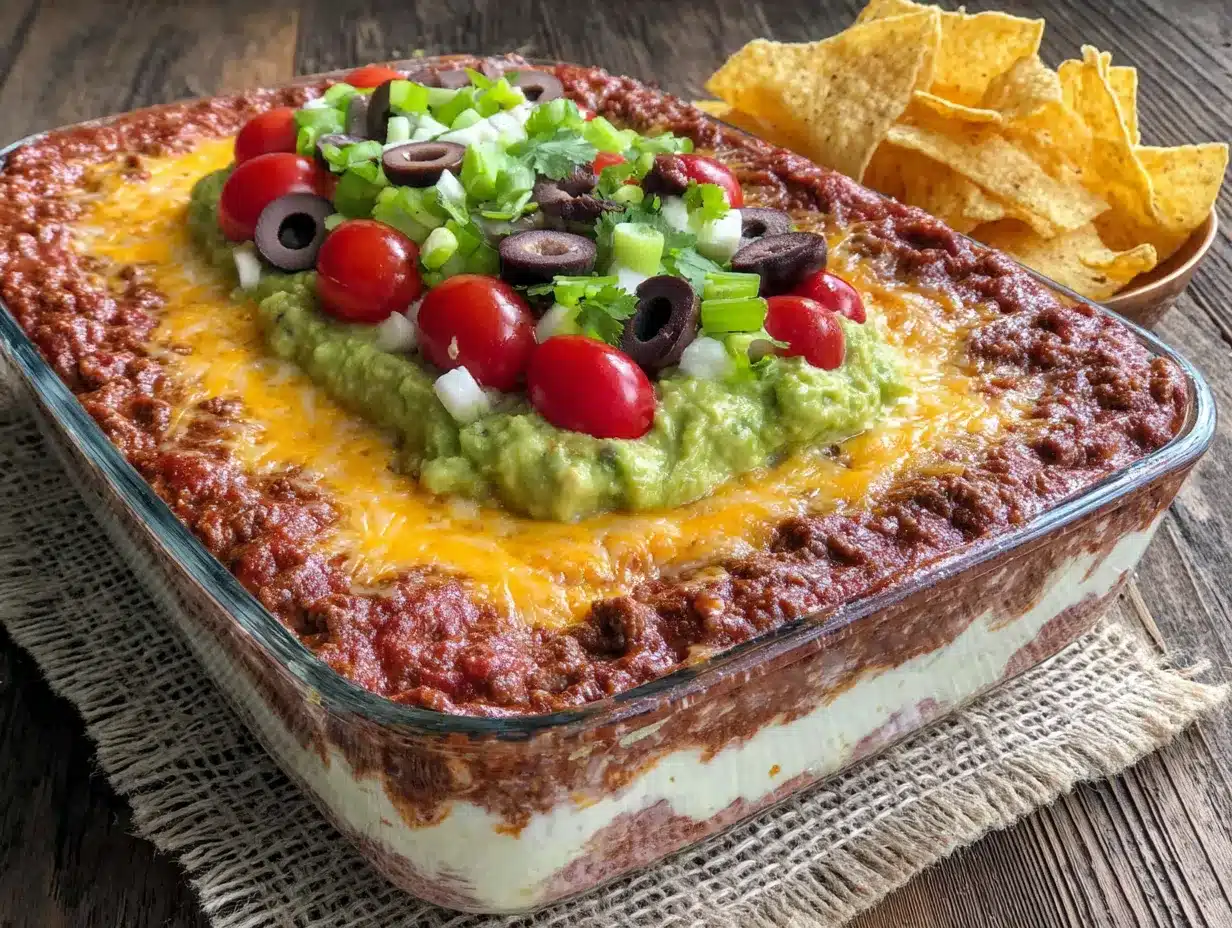
What makes this recipe stand out from the rest is the order of the layers and the little tricks I’ve learned. For example, I spread the refried beans as the base on top of the cream cheese — that way, the chips don’t slide around. And I add a thin layer of sour cream mixed with taco seasoning, which gives it way more flavor than plain sour cream. It’s not just another version — it’s the version I’ve perfected after years of making it for literally every gathering I’ve ever hosted.
This dip is the kind that makes people close their eyes after the first bite. It’s comfort food at its finest — no stress, no complicated techniques, just pure satisfaction. Whether you’re trying to impress your in-laws or just feed your hungry friends before the big game, this dip has your back.
What Ingredients You Will Need
This recipe uses simple, everyday ingredients to deliver bold flavor and satisfying texture without any fuss. I’ve kept it straightforward because nobody wants to hunt down obscure items when they’re already stressed about hosting. Here’s what you need:
For the Base Layers
- 16 oz cream cheese, softened to room temperature (I use Philadelphia — it blends the smoothest)
- 16 oz sour cream (full-fat works best, but light is okay)
- 1 packet taco seasoning (I prefer Old El Paso or Ortega — they have the right balance of spices)
- 16 oz refried beans (canned is fine — look for vegetarian ones if you want to skip the lard)
For the Toppings
- 1 ½ cups salsa (mild, medium, or hot — your call. I use a chunky one for texture)
- 2 cups shredded lettuce (iceberg or romaine, finely chopped)
- 2 cups shredded Mexican blend cheese (or cheddar, if that’s what you have)
- 1 cup diced tomatoes (seeded and drained to avoid soggy dip)
- 1 cup sliced black olives (drained well — nobody likes olive juice in their dip)
- ½ cup sliced green onions (both white and green parts for color and bite)
- Optional: 1 cup diced avocado or guacamole (adds a fresh, creamy layer on top)
For Serving
- Tortilla chips (I recommend restaurant-style or scoop-shaped chips — they hold up better)
A few notes from experience: Make sure your cream cheese is truly softened. If it’s cold, you’ll end up with lumps no matter how hard you mix. I leave mine on the counter for about an hour before I start. For the refried beans, I’ve tried both traditional and black bean versions — both work great, but traditional has a smoother texture. And here’s a sneaky tip: if you want extra flavor, add a tablespoon of lime juice to the sour cream mixture. It brightens everything up without being obvious.
For substitutions, you can use dairy-free cream cheese and sour cream if needed — just make sure they’re softened the same way. If you’re gluten-free, double-check your taco seasoning packet (most are fine, but some contain wheat starch). And if you hate olives, just leave them out or swap with pickled jalapeños for a kick.
Equipment Needed
You don’t need fancy equipment for this dip, which is part of the beauty. Here’s what I use:
- 9×13 inch glass baking dish or a large serving platter with raised edges (I’ve used both — glass lets you see the layers, which is fun)
- Electric hand mixer or stand mixer for blending the cream cheese mixture (a sturdy whisk works too, but your arm will get tired)
- Rubber spatula for spreading layers evenly (the flexible kind is a lifesaver)
- Cutting board and sharp knife for chopping veggies
- Small mixing bowl for the sour cream and taco seasoning
- Can opener — obvious but easy to forget
- Measuring cups and spoons
If you don’t have a 9×13 dish, you can use a large pie plate, a round cake pan, or even a rimmed baking sheet. Just adjust the layering to fit. I’ve made this in a deep square dish before, and it worked fine — just ended up with thicker layers. For budget-friendly options, dollar store glass dishes work perfectly. And if you’re using a hand mixer, just be careful not to overmix the cream cheese — you want it smooth, not whipped into a frenzy.
Preparation Method
Alright, let’s get to the good part. This is where the magic happens, and I promise it’s easier than you think. Here’s how to build the perfect easy 7-layer taco dip for a crowd:
- Soften the cream cheese. Take your cream cheese out of the fridge at least 30-45 minutes before you start. If you’re in a rush, you can microwave it in 10-second bursts — just be careful not to melt it. You want it soft but still cool.
- Mix the cream cheese base. In a medium bowl, beat the softened cream cheese with ½ cup of the sour cream until smooth and fluffy. This takes about 2 minutes with a hand mixer on medium speed. Scrape down the sides with a spatula halfway through. The mixture should be light and spreadable — if it’s too thick, add a tablespoon more sour cream.
- Spread the first layer. Using your rubber spatula, spread the cream cheese mixture evenly across the bottom of your 9×13 dish. Don’t worry about perfection — just get it smooth and even. This layer is the foundation, so make sure it goes all the way to the edges.
- Add the refried beans. Spoon the refried beans over the cream cheese layer. Gently spread them with the back of a spoon or spatula. Here’s a tip: if the beans are too thick to spread, stir in a tablespoon of water or salsa to loosen them up. Go slow so you don’t mix the beans into the cream cheese.
- Make the seasoned sour cream. In a small bowl, combine the remaining 1 ½ cups of sour cream with the entire packet of taco seasoning. Stir until fully combined and the color is even. This takes about 30 seconds. Taste it — it should be tangy, salty, and a little spicy.
- Spread the seasoned sour cream. Dollop the seasoned sour cream over the bean layer, then spread it gently. Try not to disturb the beans underneath. If you’re having trouble, drop small spoonfuls first, then spread from the center outward.
- Add the salsa. Spoon the salsa evenly over the sour cream layer. If your salsa is very watery, drain off some of the liquid first — nobody wants a soggy dip. Spread it gently with the back of a spoon, but don’t press down.
- Sprinkle the cheese. Evenly sprinkle the shredded Mexican blend cheese over the salsa. Don’t dump it all in one spot — distribute it across the whole dish. This layer acts as a barrier between the wet salsa and the fresh toppings.
- Add the lettuce. Sprinkle the shredded lettuce over the cheese. Keep it light and airy — don’t pack it down. The lettuce adds crunch and freshness, so you want it to stay fluffy.
- Top with tomatoes and olives. Scatter the diced tomatoes and sliced black olives over the lettuce. Make sure the tomatoes are well-drained, or they’ll make the lettuce soggy within an hour.
- Finish with green onions. Sprinkle the sliced green onions over everything for a pop of color and mild onion flavor. If you’re using avocado or guacamole, add it now in small dollops or a thin layer.
- Chill before serving. Cover the dish with plastic wrap and refrigerate for at least 1 hour before serving. This lets the flavors meld together and makes the dip easier to scoop. If you’re in a hurry, 30 minutes works, but 2 hours is ideal.
A few sensory cues to watch for: when you spread the cream cheese, it should feel smooth and silky, not lumpy. The seasoned sour cream should look uniform in color — no white streaks. And when you’re done, the dip should look like a beautiful striped rainbow. If you see any gaps or bare spots, just fill them in with extra toppings. Nobody’s judging.
Cooking Tips & Techniques
After making this dip more times than I can count, I’ve collected a few hard-won tips that will save you from common disasters. Trust me, I’ve made every mistake so you don’t have to.
Don’t skip softening the cream cheese. I know it’s tempting to just throw cold cream cheese in the mixer, but you’ll end up with lumpy dip that looks unappetizing. If you forgot to take it out, cut it into cubes and microwave for 15 seconds. It’s not ideal, but it works in a pinch.
Layer in the right order. The order matters more than you think. Cream cheese first, then beans, then seasoned sour cream — this creates a stable base. If you put salsa directly on the cream cheese, it gets watery and slides around. The beans act as a barrier, and the seasoned sour cream adds flavor without making things runny.
Drain your wet ingredients. This is the number one mistake I see people make. Watery salsa, undrained tomatoes, and wet olives will turn your beautiful dip into a sad, soupy mess. Take the extra 30 seconds to drain everything. Your future self will thank you.
Let it rest. I know you want to serve it immediately, but the dip really benefits from at least an hour in the fridge. The flavors marry together, the layers set up, and it’s much easier to scoop. Plus, cold dip tastes better — it’s a fact.
Use scoop-shaped chips. Flat chips break too easily when you’re trying to get through all seven layers. The scoop-shaped ones are sturdier and hold more dip per bite. It’s a game changer.
Make it ahead. This dip actually gets better after a few hours in the fridge. You can make it up to 24 hours in advance — just wait to add the lettuce, tomatoes, and green onions until right before serving. That way the toppings stay fresh and crunchy.
Variations & Adaptations
One of the best things about this easy 7-layer taco dip for a crowd is how customizable it is. I’ve tried dozens of variations over the years, and here are my favorites:
Spicy Southwestern Version
Add a layer of canned diced green chiles between the salsa and cheese. Use pepper jack cheese instead of Mexican blend, and top with pickled jalapeños. This version has a nice kick without being overwhelming — perfect for spice lovers.
Healthy-ish Twist
Use reduced-fat cream cheese, light sour cream, and low-fat refried beans. Swap the shredded cheese for a smaller amount of sharp cheddar (you get more flavor with less cheese). Load up on extra lettuce, tomatoes, and even some diced bell peppers for crunch. It still tastes indulgent, but you won’t feel guilty after the third scoop.
Guacamole Layer Version
Add a layer of homemade guacamole between the salsa and cheese. Just mash 2 ripe avocados with lime juice, salt, and a little garlic powder. Spread it gently over the salsa, then add the cheese on top. This makes the dip extra creamy and adds healthy fats.
Meat Lover’s Version
Brown 1 pound of ground beef or ground turkey with taco seasoning, let it cool, and sprinkle it over the cheese layer before adding the lettuce. It turns the dip into a more substantial meal. I’ve done this for Super Bowl parties, and it disappears in minutes.
Vegan Version
Use dairy-free cream cheese and sour cream (I like Kite Hill or Tofutti). Replace the shredded cheese with a vegan Mexican blend, or just skip it and double the guacamole. Use vegetarian refried beans to keep it plant-based. It’s surprisingly good — my vegan friends always request this version.
Serving & Storage Suggestions
This dip is best served cold, right out of the fridge. The contrast between the cool, creamy layers and the crunchy chips is what makes it so addictive. I like to set it out about 10 minutes before guests arrive so it’s not ice-cold, but still refreshing.
For presentation, I sometimes sprinkle a little extra cheese and green onions on top right before serving to make it look fresh. If I’m feeling fancy, I’ll add a few whole black olives in the center and arrange the chips around the dish like a sunburst. It takes 30 seconds but looks like you tried really hard.
This dip pairs beautifully with margaritas, cold beer, or even a simple lime soda. If you’re serving a full spread, it goes great alongside easy guacamole, homemade salsa, and slow cooker chicken tacos. For a lighter option, serve it with cucumber slices or bell pepper strips instead of chips.
Storage: Leftover dip will keep in the fridge for 2-3 days, but the lettuce will get a little sad. If you know you’ll have leftovers, I recommend storing the dip without the lettuce and adding it fresh each time. Cover tightly with plastic wrap or transfer to an airtight container.
Reheating: Honestly, I don’t recommend reheating this dip. It’s meant to be served cold. If you absolutely must warm it up, scoop out a portion and microwave it for 20-30 seconds — but know that the texture will change. The cream cheese gets runny, and the lettuce wilts. Cold is the way to go.
One thing I’ve noticed: the dip actually tastes better on day two. The flavors meld together, and the layers become more cohesive. Just add fresh toppings before serving, and it’s even better than when you first made it.
Nutritional Information & Benefits
Let’s be honest — this is not health food. But it’s a party appetizer, so we’re not pretending otherwise. That said, here’s a rough estimate per serving (based on 16 servings):
| Nutrient | Per Serving |
|---|---|
| Calories | 280-320 |
| Protein | 8-10g |
| Carbohydrates | 12-15g |
| Fat | 22-26g |
| Fiber | 3-4g |
| Sodium | 550-650mg |
There are some redeeming qualities here. The black beans in the refried beans add fiber and plant-based protein. The tomatoes and lettuce provide vitamins A and C. And if you use avocado, you’re getting healthy monounsaturated fats. But let’s be real — the main benefit is happiness, and this dip delivers that in spades.
For dietary considerations: this recipe contains dairy (cream cheese, sour cream, cheese). It’s naturally gluten-free if you use a gluten-free taco seasoning. For a lower-sodium version, use low-sodium refried beans and watch your chip selection. And if you’re watching your fat intake, the light versions work fine — just don’t expect the same creamy texture.
Frequently Asked Questions
Can I make this 7-layer taco dip the night before?
Yes, absolutely! You can assemble the dip up to 24 hours in advance. Just wait to add the lettuce, tomatoes, and green onions until right before serving. This keeps the toppings fresh and crunchy. Cover the dish tightly with plastic wrap and refrigerate.
How do I keep the dip from getting watery?
The secret is draining your wet ingredients. Drain the salsa, pat the tomatoes dry with paper towels, and make sure your olives are well-drained. Also, don’t skip the layer of cheese between the salsa and the lettuce — it acts as a barrier that prevents moisture from seeping up.
Can I use homemade refried beans instead of canned?
Definitely! Homemade refried beans work great and can add even more flavor. Just make sure they’re thick enough to spread — if they’re too thin, they’ll mix with the cream cheese layer. Let them cool completely before spreading, and add a little extra salt if needed.
What’s the best way to serve this dip for a large crowd?
I recommend using a large, clear glass dish so people can see the beautiful layers. Set it out with a basket of scoop-shaped tortilla chips and a small spoon for serving. If you’re worried about running out, double the recipe and make two dishes. Trust me, it will go fast.
Can I freeze leftover 7-layer taco dip?
I don’t recommend freezing this dip. The dairy-based layers (cream cheese, sour cream, cheese) will separate and become grainy when thawed. The lettuce and tomatoes will turn into a watery mess. Your best bet is to refrigerate leftovers and eat them within 2-3 days.
Final Thoughts
This easy 7-layer taco dip for a crowd has saved me more times than I can count. It’s the recipe I turn to when I need something impressive without the stress, when I want to feed a crowd without spending hours in the kitchen, and when I just need a guaranteed win. There’s something about those colorful layers that makes people smile before they even take a bite.
I love how forgiving this recipe is — you can swap ingredients, adjust the spice level, or add your own twists, and it always turns out great. It’s become my signature party dish, and I hope it becomes yours too. The best part? Watching someone take that first scoop and seeing their eyes light up when they hit all seven layers in one bite.
So go ahead — make this for your next gathering. Customize it, make it your own, and don’t forget to set some aside for yourself before the crowd descends. And when someone asks for the recipe (they will), send them my way. I’d love to hear how it turned out for you. Drop a comment below, share a photo, or tell me about your favorite variation. Happy dipping!
Pin This Recipe!
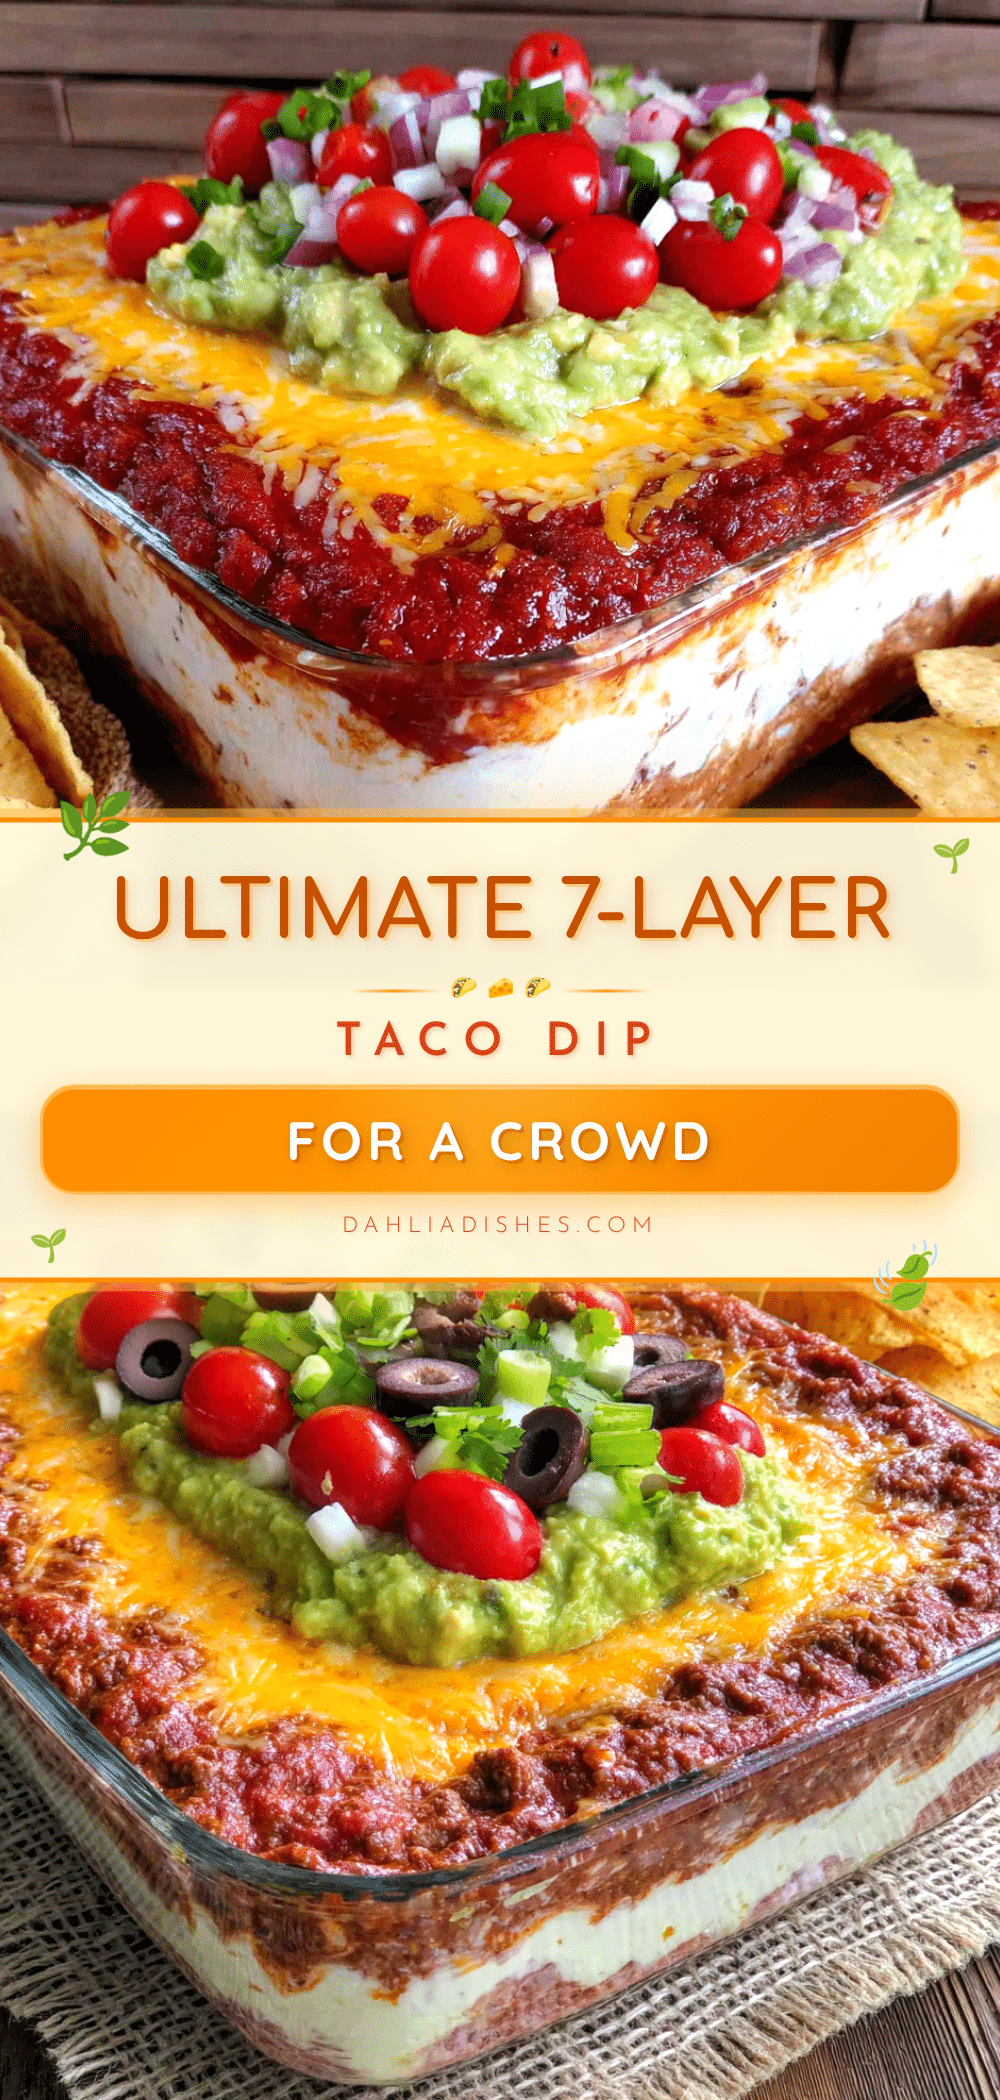
Easy 7-Layer Taco Dip for a Crowd: The Best Party Appetizer
This easy 7-layer taco dip is the ultimate party appetizer—creamy, crunchy, and slightly spicy, made with simple ingredients and no cooking required. Perfect for game day, potlucks, or any gathering, it’s a crowd-pleaser that disappears fast.
- Prep Time: 15 minutes
- Cook Time: 0 minutes
- Total Time: 1 hour 15 minutes (including chilling)
- Yield: 16 servings 1x
- Category: Appetizer
- Cuisine: Mexican-American
Ingredients
- 16 oz cream cheese, softened
- 16 oz sour cream
- 1 packet taco seasoning
- 16 oz refried beans
- 1 ½ cups salsa
- 2 cups shredded lettuce
- 2 cups shredded Mexican blend cheese
- 1 cup diced tomatoes, seeded and drained
- 1 cup sliced black olives, drained
- ½ cup sliced green onions
- Optional: 1 cup diced avocado or guacamole
- Tortilla chips for serving
Instructions
- Soften the cream cheese by leaving it at room temperature for 30-45 minutes, or microwave in 10-second bursts until soft but not melted.
- In a medium bowl, beat the softened cream cheese with ½ cup of the sour cream until smooth and fluffy (about 2 minutes with a hand mixer).
- Spread the cream cheese mixture evenly across the bottom of a 9×13 inch glass baking dish.
- Spoon the refried beans over the cream cheese layer and gently spread with a spatula. If too thick, stir in a tablespoon of water or salsa.
- In a small bowl, combine the remaining 1 ½ cups sour cream with the taco seasoning packet until fully mixed.
- Dollop the seasoned sour cream over the bean layer and spread gently without disturbing the beans.
- Spoon the salsa evenly over the sour cream layer. Drain excess liquid if watery.
- Sprinkle the shredded Mexican blend cheese evenly over the salsa.
- Add the shredded lettuce in a light, airy layer over the cheese.
- Scatter the diced tomatoes and sliced black olives over the lettuce.
- Sprinkle sliced green onions on top. Add avocado or guacamole if using.
- Cover with plastic wrap and refrigerate for at least 1 hour before serving (2 hours is ideal). Serve cold with tortilla chips.
Notes
For best results, drain all wet ingredients (salsa, tomatoes, olives) to prevent a watery dip. The dip can be made up to 24 hours in advance—add lettuce, tomatoes, and green onions just before serving. Use scoop-shaped tortilla chips for sturdier dipping. Leftovers keep in the fridge for 2-3 days but lettuce may wilt.
Nutrition
- Serving Size: 1 serving (about 1/1
- Calories: 300
- Sugar: 4
- Sodium: 600
- Fat: 24
- Saturated Fat: 12
- Carbohydrates: 14
- Fiber: 3
- Protein: 9
Keywords: 7-layer taco dip, easy taco dip, party appetizer, game day dip, cold dip, no-cook appetizer, crowd-pleaser


