Love this? Save it for later!
Share the inspiration with your friends
There used to be a tiny health food store tucked between a dry cleaner and a nail salon on the corner of 7th and Main that made these incredible protein bites. When they closed—just vanished one day with a handwritten sign taped to the door saying “Thanks for 15 years”—I honestly felt a little lost. Those little bites got me through some long afternoons, and I’d grab two or three whenever I was in the neighborhood. After twelve tries—some crumbly disasters, one that tasted like sawdust, and a batch my dog wouldn’t even touch—I finally got it.
And here’s the funny part. The original recipe probably wasn’t even that complicated. I mean, we’re talking about five ingredients here, nothing fancy or hard to find. But sometimes the simplest things hit different, you know? There was just something about the texture—firm enough to hold together, soft enough to melt slightly in your palm—and the way the sweetness felt natural, not cloying. I spent months trying to match that exact balance.
The week I finally nailed it, I made three batches in one afternoon. My kitchen looked like a flour bomb went off, and I had oat dust in my hair for two days. But that first bite? Pure relief. It was the same feeling I used to get walking out of that little store with a paper bag in hand. Maybe you’ve been there—obsessing over a food memory that seems too simple to be this hard to recreate. These protein bites are that memory, finally captured in my own kitchen, and I keep making them because they remind me that good things don’t need to be complicated.
Why You’ll Love This Recipe
Let me tell you why these Easy 5-Ingredient No-Bake Protein Bites have become my go-to snack for pretty much everything. I’ve tested this recipe more times than I care to admit, and it’s finally at the point where I can make it blindfolded—not that I recommend that, but you get the idea.
- Quick & Easy: These come together in under 15 minutes from start to finish. No oven, no stove, no waiting around. Perfect for those afternoons when hunger hits and you need something now.
- Simple Ingredients: You probably have most of these in your pantry already. No weird superfood powders or expensive specialty items. Just real food that works.
- Perfect for Meal Prep: Make a batch on Sunday and you’ve got snacks for the whole week. They’re great for lunchboxes, post-workout refueling, or that 3 PM slump we all know too well.
- Crowd-Pleaser: I’ve brought these to potlucks, office parties, and family gatherings. They disappear fast, and people always ask for the recipe.
- Unbelievably Delicious: The texture is this perfect middle ground—chewy but not sticky, firm but not hard. And the flavor? Just the right amount of sweet with that satisfying peanut butter richness.
What makes these different from every other protein bite recipe out there is the ratio. I spent weeks tweaking the proportions until the texture was just right—not too dry, not too wet, holding together without being a sticky mess. Plus, I figured out a little trick with how you combine the ingredients that makes all the difference in the final texture. Trust me, it’s the little things.
This is the kind of snack that makes you feel good about eating it. It’s honest food—no weird additives, no processed junk, just five real ingredients doing their thing together. And when you take that first bite and realize you made something this good in under fifteen minutes with basically no cleanup? That feeling never gets old.
What Ingredients You Will Need
This recipe uses five simple, wholesome ingredients that work together to create something surprisingly satisfying. Nothing fancy here—just pantry staples that you can find at any grocery store. Here’s what you’ll need and why each one matters.
- Rolled Oats (1 cup / 90g): Not instant oats, not steel-cut—rolled oats are the sweet spot here. They give the protein bites their structure and that satisfying chewy texture. I recommend Quaker Old-Fashioned Oats or Bob’s Red Mill, both work great. If you need these to be gluten-free, make sure you grab certified gluten-free oats. Quick oats will work in a pinch, but the texture will be a bit softer and less defined.
- Creamy Peanut Butter (½ cup / 130g): This is your binder and your flavor powerhouse. Use natural peanut butter with just peanuts and salt in the ingredients—no added sugar or hydrogenated oils. The natural oils help everything come together properly. I’ve had good luck with Smucker’s Natural and Trader Joe’s creamy peanut butter. If you’re allergic to peanuts, almond butter or sunflower seed butter work beautifully here, though sunflower butter will turn the bites a greenish color (don’t worry, it’s natural and safe).
- Honey (⅓ cup / 110g): This adds sweetness and helps bind everything together. Pure honey works best—the flavor is cleaner and it blends more smoothly than flavored honey. Maple syrup is a great substitute if you want a vegan option, though the mixture will be slightly stickier. Agave nectar works too, but the bites will be a bit softer.
- Dark Chocolate Chips (½ cup / 90g): Those little bursts of chocolate make every bite exciting. I use semi-sweet or dark chocolate chips—around 60% cocoa content is my sweet spot. Ghirardelli 60% Cacao Bittersweet Chips are my personal favorite because they hold their shape well and melt beautifully on your tongue. If you’re dairy-free, look for Enjoy Life brand or any vegan chocolate chips. Mini chocolate chips work great too and distribute more evenly throughout the mixture.
- Ground Flaxseed (2 tablespoons / 14g): This is the secret ingredient that holds everything together and adds a nutritional boost. It absorbs moisture and helps the bites maintain their shape without being too sticky. I use Bob’s Red Mill Golden Flaxseed Meal. You can substitute chia seeds if you prefer, though the texture will be slightly different with more visible seeds throughout. Just remember—flaxseed goes rancid quickly, so keep it in the fridge or freezer between uses.
That’s it. Five ingredients, no surprises, no hunting down specialty items. The beauty of this recipe is that every single ingredient pulls its weight—nothing is there just for show. Each one has a job to do, and together they create something that’s way more than the sum of its parts.
Equipment Needed
You don’t need a fancy kitchen to make these protein bites. In fact, you probably already own everything required. Here’s what you’ll need:
- Large Mixing Bowl: Any medium-to-large bowl will work. I use a glass mixing bowl because it doesn’t hold onto smells, but ceramic or stainless steel are fine too.
- Measuring Cups and Spoons: For accurate measurements. I cannot stress this enough—eyeballing ingredients with protein bites leads to sad, crumbly results. Use proper measuring cups for dry ingredients and liquid measuring cups for the honey and peanut butter.
- Rubber Spatula or Wooden Spoon: Something sturdy enough to mix thick, sticky dough. A rubber spatula is my go-to because it scrapes the sides clean and doesn’t leave anything behind.
- Baking Sheet or Large Plate: To hold the bites while they chill. Line it with parchment paper or wax paper for easy cleanup.
- Parchment Paper: Not strictly necessary, but it makes cleanup so much easier. Plus, the bites don’t stick to the paper while they’re setting up in the fridge.
- Cookie Scoop (optional but helpful): A 1-tablespoon cookie scoop gives you perfectly uniform bites every time. If you don’t have one, just use your hands—they work just as well.
- Air-Tight Container: For storing the finished bites. A glass container with a tight-fitting lid works perfectly. Mason jars are great too if you’re giving some away.
If you don’t have a cookie scoop, no worries. I actually prefer using my hands because I can feel the texture and adjust if the mixture seems too dry or too wet. Just make sure your hands are slightly damp so the dough doesn’t stick to your palms.
Preparation Method
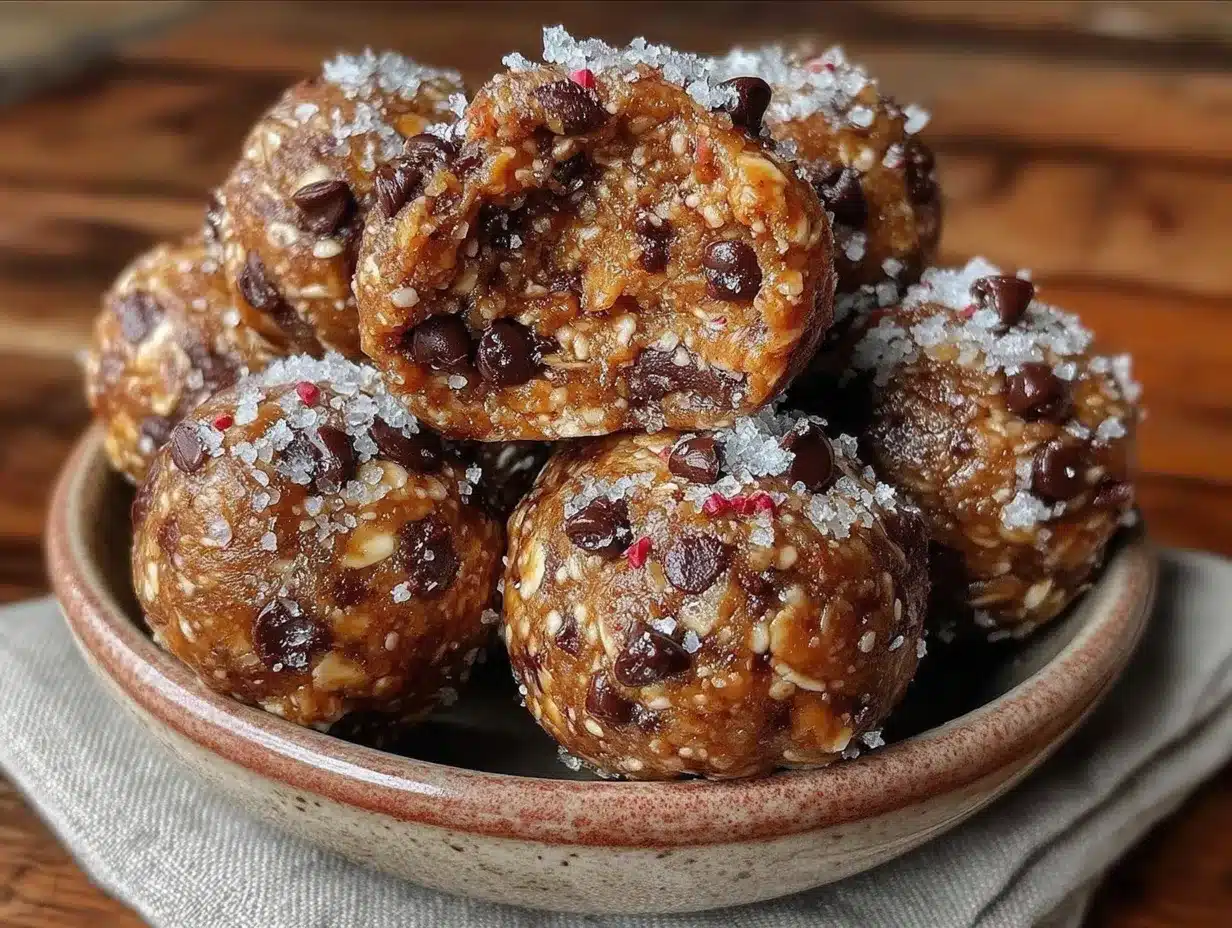
Alright, let’s get to the good part. Follow these steps carefully, and you’ll have perfect protein bites every single time. I’ve included all the little details that make the difference between good and great.
- Prep your workspace (2 minutes): Line a baking sheet or large plate with parchment paper. Clear your counter and make sure your hands are clean. This is one of those recipes where being organized upfront makes everything smoother.
- Combine the dry ingredients (1 minute): In your large mixing bowl, add 1 cup (90g) of rolled oats and 2 tablespoons (14g) of ground flaxseed. Give them a quick stir with your spatula to distribute the flaxseed evenly. You don’t want clumps of flax hiding in there—trust me, I learned that the hard way.
- Add the wet ingredients (2 minutes): Spoon ½ cup (130g) of creamy peanut butter into the bowl. Drizzle ⅓ cup (110g) of honey over the peanut butter. Don’t worry if it looks messy—that’s exactly how it should look. The honey will feel thick and stubborn, but that’s normal.
- Mix everything together (3-4 minutes): Start stirring with your rubber spatula, pressing the peanut butter and honey into the oats and flax. This will feel stiff and a little awkward at first. That’s okay. Keep mixing, scraping the bottom and sides of the bowl, until all the oats are coated and you can’t see any dry patches. The mixture should look uniform and hold together when you squeeze a bit in your hand. If it seems too dry, add a teaspoon more honey. Too wet? Add a tablespoon more oats.
- Fold in the chocolate chips (1 minute): Add ½ cup (90g) of dark chocolate chips to the bowl. Fold them in gently until they’re evenly distributed throughout the dough. Don’t overmix here—you want the chocolate chips to stay whole and create those little pockets of melty goodness.
- Chill the mixture (10 minutes): Pop the bowl in the fridge for about 10 minutes. This step is optional but highly recommended. Chilling makes the dough firmer and easier to roll without getting sticky hands. If you’re in a hurry, you can skip this step, but your hands will get messier.
- Roll into bites (5-7 minutes): Scoop out about 1 tablespoon of dough and roll it between your palms to form a ball. Place each ball on your parchment-lined baking sheet. If the dough starts sticking to your hands, dampen your palms slightly with water. You should get about 16 to 18 bites from this recipe, depending on how generous you are with your scooping.
- Final chill (20-30 minutes): Place the baking sheet with your rolled bites in the fridge for at least 20 minutes. This allows them to set up properly so they hold their shape. If you can wait 30 minutes, even better. The bites will be firmer and less likely to fall apart when you grab one.
And that’s it. Eight steps, maybe 45 minutes total including chilling time, and you’ve got a week’s worth of healthy snacks ready to go. The kitchen will look like a small disaster zone, but the payoff is so worth it.
Cooking Tips & Techniques
After making these protein bites more times than I can count, I’ve picked up a few tricks that make the process smoother and the results more consistent. Here’s what I wish someone had told me when I first started.
Get your measurements right. This is the number one mistake people make with no-bake recipes. Too many oats and your bites will be dry and crumbly. Too much peanut butter and they’ll be greasy and fall apart. Use proper measuring cups and level them off with a knife. Don’t pack the oats down—just scoop and level.
Use room temperature ingredients. Cold peanut butter is a nightmare to mix. It doesn’t blend well and leaves stubborn streaks throughout the dough. Let your peanut butter sit out for 15-20 minutes before you start. Same goes for honey, though it’s less critical. Room temperature ingredients combine more smoothly and give you a more uniform texture.
Don’t overmix the chocolate chips. I know it’s tempting to keep stirring until everything looks perfect, but overmixing can break the chocolate chips into smaller pieces or even melt them slightly from the heat of your hands. Fold them in gently, just until they’re distributed. You want whole chips in every bite, not chocolate dust.
Test the texture before rolling. Take a small pinch of the mixture and squeeze it in your fist. If it holds together without crumbling, you’re good to go. If it falls apart, add a little more honey or peanut butter. If it’s too sticky, add more oats. This simple test has saved me from many batches of disappointing protein bites.
Keep your hands cool and slightly damp. Warm hands make the dough sticky and hard to work with. Run your hands under cold water before rolling, and shake off the excess. The thin layer of moisture prevents the dough from sticking to your palms without making the bites wet. I learned this trick from a pastry chef friend, and it’s a game changer.
Chill between batches if needed. If you’re making a double batch, the dough will warm up as you work with it. Pop it back in the fridge for 5-10 minutes if it starts feeling too soft. Cold dough is cooperative dough.
Variations & Adaptations
One of the best things about this recipe is how easy it is to customize. Here are some of my favorite variations, along with adaptations for different dietary needs.
Vegan Version: Swap the honey for maple syrup or agave nectar. Both work beautifully, though maple syrup gives a slightly thinner consistency. You might need to add an extra tablespoon of oats to compensate. Use vegan chocolate chips (Enjoy Life brand is my go-to) and you’re all set. The texture will be a tiny bit softer, but still delicious.
Nut-Free Option: Replace the peanut butter with sunflower seed butter or tahini. Sunflower seed butter is my favorite substitute because it has a similar texture and richness. Just be aware that sunflower seeds react with baking soda (if you ever bake with them) and can turn green—but since these are no-bake, you’re fine. The flavor will be different but equally good.
Protein Boost: Add 2 tablespoons of your favorite protein powder. Reduce the oats by the same amount to keep the texture balanced. Vanilla or chocolate protein powder works best. I’ve used Orgain Simple Vanilla Protein Powder with great results. Just note that protein powder can make the mixture drier, so you might need to add an extra teaspoon of honey or peanut butter.
Flavor Twists: Try these fun variations:
- Chocolate Coconut: Add ¼ cup shredded coconut and use chocolate protein powder instead of chocolate chips.
- Peanut Butter & Jelly: Swap half the chocolate chips for dried cranberries or chopped dried strawberries.
- Mint Chocolate: Add ¼ teaspoon peppermint extract to the wet ingredients before mixing.
- Spiced Apple: Replace chocolate chips with dried apple pieces and add ½ teaspoon cinnamon.
Texture Preferences: If you like crunchier bites, use crunchy peanut butter instead of creamy. For softer bites, add an extra tablespoon of honey. For firmer bites, increase the oats by 2 tablespoons and add a tablespoon of water to compensate for the dryness.
Serving & Storage Suggestions
These protein bites are incredibly versatile when it comes to serving and storing. Here’s everything you need to know to keep them at their best.
Serving Temperature: I prefer these straight from the fridge—they’re firmer and more satisfying that way. But at room temperature, they soften slightly and the chocolate chips become a little melty. Both are delicious, just different experiences. If you’re packing them for a lunchbox, they’ll be at room temperature by lunchtime and still taste amazing.
Presentation Ideas: For a snack board, arrange them on a wooden platter with fresh fruit, cheese cubes, and nuts. They look beautiful alongside apple slices and almond butter. For gifting, layer them in a mason jar with a pretty ribbon tied around the lid. I’ve given these as teacher gifts, hostess gifts, and holiday treats—they’re always appreciated.
Complementary Pairings: These bites go beautifully with a cold glass of milk (dairy or plant-based), a hot cup of coffee, or a tall glass of iced tea. For a post-workout snack, pair them with a banana for extra carbohydrates and potassium. For a dessert, serve them with a scoop of vanilla ice cream—trust me on this one.
Refrigerator Storage: Store your protein bites in an airtight container in the refrigerator for up to 2 weeks. Layer them with parchment paper between layers if you’re stacking them, so they don’t stick together. I use a glass container with a tight-fitting lid, and they stay fresh for the full two weeks.
Freezer Storage: These freeze beautifully for up to 3 months. Place the bites in a single layer on a baking sheet and freeze until solid (about 1 hour). Then transfer them to a freezer-safe bag or container. To thaw, just move them to the fridge overnight, or let them sit at room temperature for 15-20 minutes. I always keep a stash in my freezer for busy weeks when I don’t have time to make a fresh batch.
Flavor Development: Here’s something interesting—these bites actually taste better after a day or two in the fridge. The flavors meld together, the oats soften slightly, and everything becomes more cohesive. So don’t be disappointed if they taste a little different on day one. Give them time to come together.
Nutritional Information & Benefits
Let’s talk about what makes these protein bites a genuinely healthy snack option. I’m not a nutritionist, but I’ve done my research and I track what goes into my body.
Per Serving (1 bite, based on 16 bites per batch):
- Calories: 145
- Protein: 5g
- Carbohydrates: 18g
- Fiber: 3g
- Sugar: 9g (naturally occurring from honey and minimal added)
- Fat: 7g (mostly healthy unsaturated fats from peanut butter)
- Sodium: 50mg
Key Health Benefits:
- Oats provide complex carbohydrates for sustained energy and beta-glucan for heart health. They’re also rich in fiber, which keeps you feeling full longer.
- Peanut butter delivers plant-based protein and healthy monounsaturated fats. It’s also a good source of vitamin E, magnesium, and potassium.
- Flaxseed is packed with omega-3 fatty acids, lignans (which have antioxidant properties), and additional fiber. It’s a tiny seed with big nutritional impact.
- Dark chocolate contains flavonoids that support heart health and mood. Plus, it makes healthy eating feel like a treat.
- Honey provides natural sweetness with trace amounts of vitamins and minerals, plus antimicrobial properties.
Dietary Considerations: These bites are naturally dairy-free (if you use dairy-free chocolate chips), vegetarian, and can easily be made vegan and gluten-free. They contain peanuts (unless substituted) and are not suitable for those with peanut allergies without modification.
I personally love that these bites give me steady energy without the crash you get from processed snacks. They’re my go-to for long workdays, hiking trips, and after intense workouts. They satisfy my sweet tooth while actually nourishing my body, and that’s a win in my book.
Conclusion
These Easy 5-Ingredient No-Bake Protein Bites have become such a staple in my kitchen that I honestly can’t imagine my life without them. They’re the snack I reach for when I need something quick, the treat I pack for road trips, and the recipe I share with anyone who asks how I stay fueled through busy days.
What I love most about this recipe is how forgiving it is. You can tweak it, adapt it, and make it your own without worrying about ruining it. Add more chocolate chips. Swap the peanut butter for almond butter. Throw in some dried fruit or coconut. The base is so solid that it welcomes experimentation. So don’t be afraid to make this recipe your own—that’s what cooking is all about.
I’d love to hear how these turn out for you. Did you try any fun variations? Did your kids love them? Did you bring them to a party and watch them disappear? Drop a comment below and let me know. And if you’re feeling generous, share this recipe with a friend who needs a healthy snack in their life. We could all use a little more goodness in our day, and these bites deliver it in the most delicious way possible.
Happy snacking, friends. You’ve got this.
Frequently Asked Questions
Can I use quick oats instead of rolled oats?
Yes, you can use quick oats, but the texture will be different. Rolled oats give the bites a more substantial, chewy texture, while quick oats create a softer, more uniform bite. Both work, but I prefer rolled oats for better structure.
How long do these protein bites last at room temperature?
They’re best kept in the fridge, but they can sit at room temperature for up to 4-6 hours without issue. If you’re packing them for lunch, they’ll be perfectly fine until lunchtime. Just don’t leave them out overnight.
Can I make these without chocolate chips?
Absolutely. The chocolate chips are optional, though they do add a nice burst of flavor. You can replace them with dried fruit like raisins, cranberries, or chopped dates. Or simply leave them out and add an extra tablespoon of oats to maintain the texture.
My mixture is too dry and crumbly. What went wrong?
This usually happens when the oats are packed too tightly in the measuring cup or the peanut butter is too thick. Add a teaspoon of honey or a splash of warm water and mix again. If that doesn’t help, add a little more peanut butter until the mixture holds together when squeezed.
Can I double this recipe?
Yes, this recipe doubles beautifully. Just use a larger bowl and make sure everything is thoroughly combined. The chilling time remains the same. I often make double batches on weekends so I have snacks for the whole week and some to freeze for later.
Pin This Recipe!
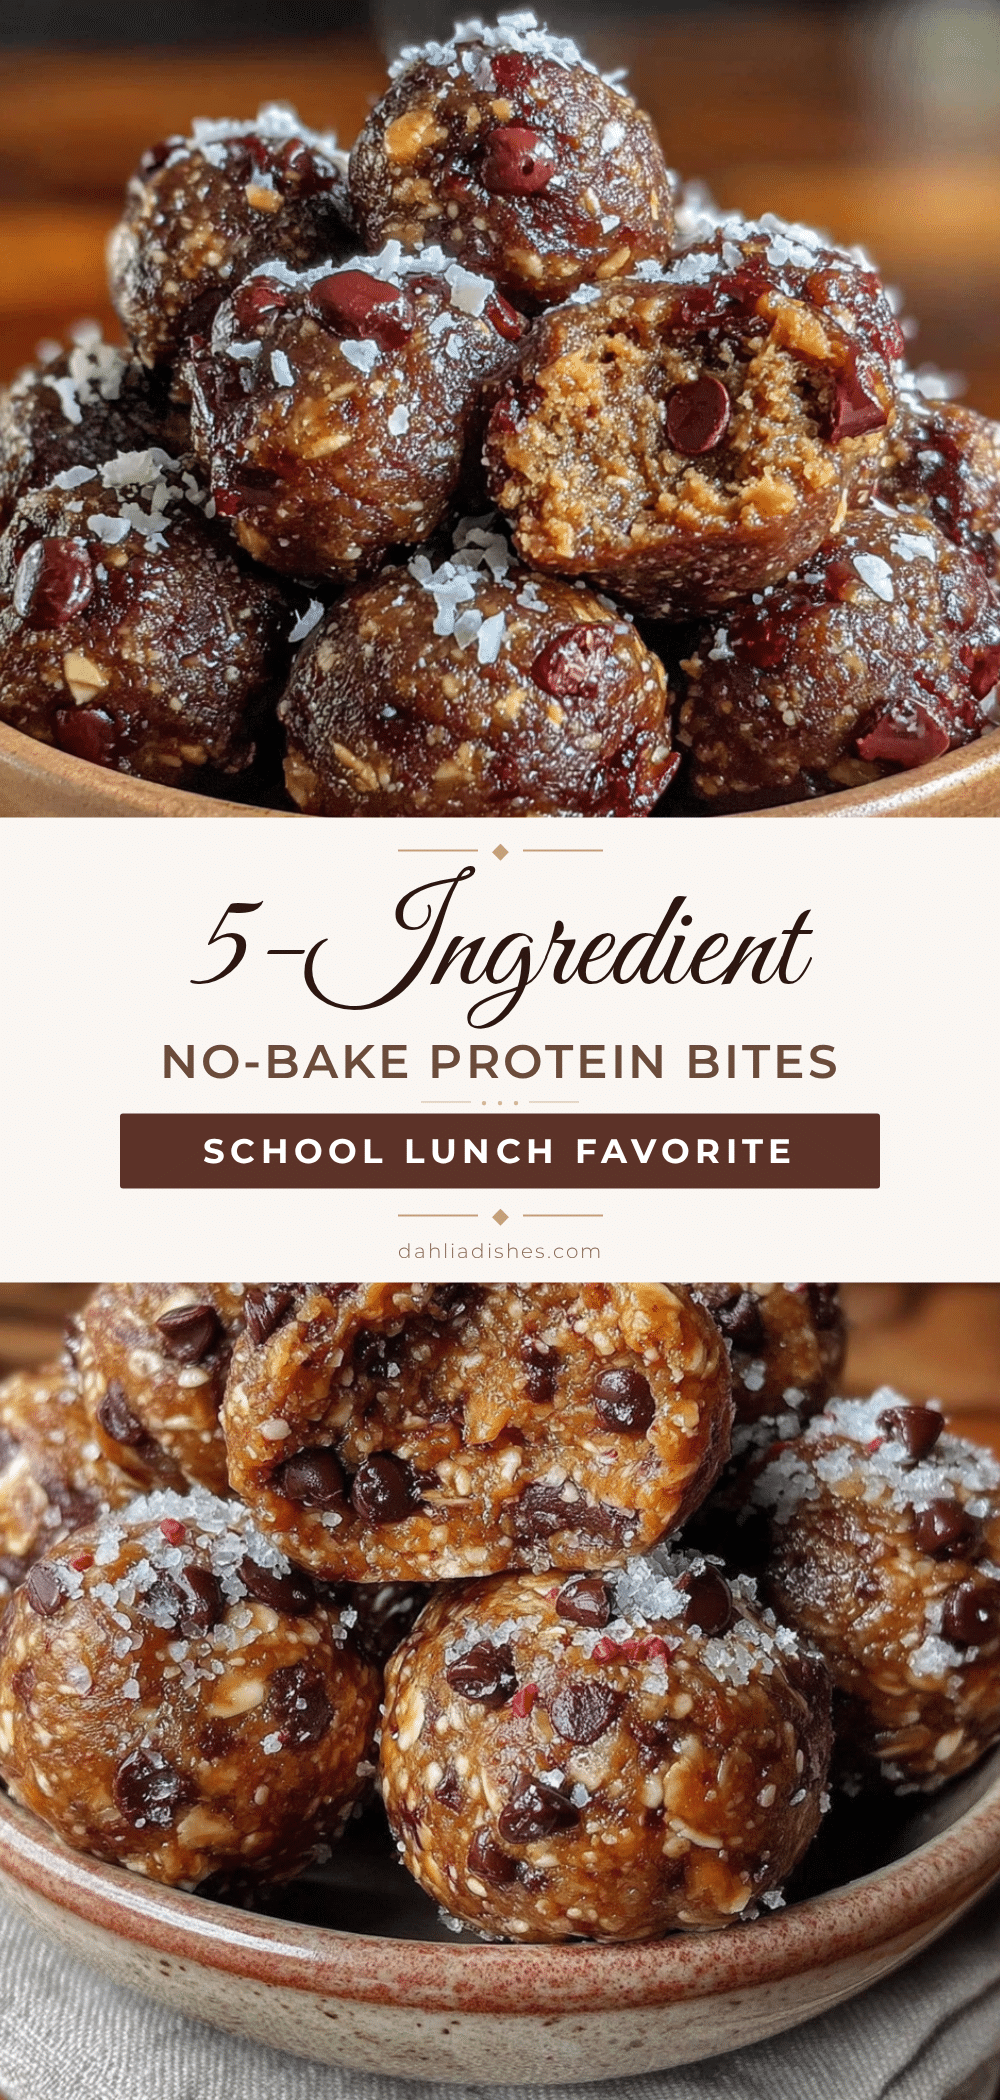
Easy 5-Ingredient No-Bake Protein Bites: The Best Healthy Snack

These no-bake protein bites are made with just five simple ingredients and come together in under 15 minutes. They’re the perfect healthy snack for meal prep, post-workout refueling, or that 3 PM slump.
- Prep Time: 15 minutes
- Cook Time: 0 minutes
- Total Time: 45 minutes
- Yield: 16-18 bites 1x
- Category: Snack
- Cuisine: American
Ingredients
- 1 cup (90g) rolled oats
- ½ cup (130g) creamy peanut butter
- ⅓ cup (110g) honey
- ½ cup (90g) dark chocolate chips
- 2 tablespoons (14g) ground flaxseed
Instructions
- Prep your workspace: Line a baking sheet or large plate with parchment paper.
- Combine the dry ingredients: In a large mixing bowl, add rolled oats and ground flaxseed. Stir to distribute evenly.
- Add the wet ingredients: Spoon peanut butter into the bowl and drizzle honey over it.
- Mix everything together: Stir with a rubber spatula until all oats are coated and mixture holds together when squeezed.
- Fold in the chocolate chips: Add chocolate chips and fold gently until evenly distributed.
- Chill the mixture: Refrigerate for 10 minutes to make rolling easier.
- Roll into bites: Scoop 1 tablespoon of dough and roll into balls. Place on prepared baking sheet. You should get 16-18 bites.
- Final chill: Refrigerate for 20-30 minutes to set.
Notes
For best texture, use rolled oats (not instant or steel-cut). Natural peanut butter with just peanuts and salt works best. If mixture is too dry, add a teaspoon more honey; if too wet, add a tablespoon more oats. Keep hands slightly damp when rolling to prevent sticking. These bites taste even better after a day in the fridge as flavors meld.
Nutrition
- Serving Size: 1 bite
- Calories: 145
- Sugar: 9
- Sodium: 50
- Fat: 7
- Saturated Fat: 2
- Carbohydrates: 18
- Fiber: 3
- Protein: 5
Keywords: protein bites, no-bake, healthy snack, 5-ingredient, peanut butter, oats, gluten-free option, vegan option


