Love this? Save it for later!
Share the inspiration with your friends
I was standing in line at the hardware store, of all places, holding a bag of new drawer pulls, when the woman behind me—probably in her seventies, with the kind of no-nonsense haircut that says she doesn’t waste time—looked at my cart and said, “You know, the secret to getting anything crispy isn’t the oven.” I blinked, confused. I wasn’t buying food. But she just smiled and started telling me about her air fryer and the chicken tenders she makes for her grandkids every Tuesday. I wasn’t expecting cooking advice from a stranger at the checkout counter, but there I was, listening to her describe exactly how to make the crispiest chicken tenders I’d ever tasted.
Honestly, I almost forgot to pay. I scribbled her tips on the back of my receipt while she talked about panko breadcrumbs and Parmesan cheese, and how most people ruin it by overcrowding the basket. She said it like it was obvious, like she was letting me in on a secret the rest of the world hadn’t figured out yet. I went home, dug out my air fryer from the back of the cabinet—you know, the one you bought on a whim and then barely used—and gave her method a shot. Let me tell you, the first batch came out so good I texted my sister immediately. She thought I was exaggerating. I wasn’t.
These crispy air fryer Parmesan chicken tenders have become my weeknight hero. They’re crunchy, cheesy, and ready in about 20 minutes flat. Maybe you’ve been there—standing in front of your fridge at 6 p.m. with no plan and a bag of chicken breasts staring back at you. This is the recipe that saves those nights. It’s the one that makes you wonder why you ever bothered with the oven. And it all started with a conversation at the hardware store. I mean, who knew?
Why You’ll Love This Recipe
I’ve tested this recipe more times than I care to admit. I’ve tried different breadcrumb ratios, different temperatures, different coatings. I’ve burned a batch, undercooked a batch, and once forgot the Parmesan entirely (don’t ask—it was a long day). Through all those trials, I landed on a method that works every single time. Here’s why this version stands out:
- Quick & Easy: From start to finish, these tenders take about 20 minutes. No marinating overnight, no complicated steps. Just mix, coat, and air fry.
- Simple Ingredients: You probably have most of these in your kitchen right now. Panko, Parmesan, eggs, chicken, and a few spices. That’s it.
- Perfect for Busy Weeknights: When you need dinner on the table fast and everyone’s hungry, these tenders deliver. They’re also great for meal prep—just reheat in the air fryer.
- Crowd-Pleaser: Kids love them. Adults love them. I’ve served them at parties and watched people go back for thirds. They disappear fast.
- Unbelievably Crispy: The combination of panko and Parmesan creates a crust that’s golden, crunchy, and stays crispy even after sitting for a few minutes. No soggy chicken here.
What makes these different from other recipes? It’s the technique. Most recipes tell you to spray the breaded chicken with oil, but I’ve found that mixing a little oil into the breadcrumb mixture itself gives you a more even, golden crust. It’s a small tweak, but it makes a big difference. Plus, the Parmesan isn’t just for flavor—it helps create that craggy, crunchy texture that clings to the chicken. I’ve tested it with different cheeses, and nothing works quite like freshly grated Parmesan.
This recipe isn’t just good—it’s the kind that makes you close your eyes after the first bite. It’s comfort food made faster, healthier, and honestly, better than the deep-fried version. Perfect for impressing guests without stress, or turning a simple Tuesday dinner into something you actually look forward to.
What Ingredients You Will Need
This recipe uses simple, everyday ingredients that come together to create something genuinely special. No fancy grocery trips required. Here’s what you’ll need:
For the Chicken Tenders
- 1 pound chicken breast tenders (or boneless, skinless chicken breasts cut into strips—about 4-5 strips per breast)
- 1 cup panko breadcrumbs (I prefer the Japanese-style panko for extra crunch; they’re lighter and flakier than regular breadcrumbs)
- 1/2 cup freshly grated Parmesan cheese (please skip the pre-shredded stuff—it doesn’t melt the same way and won’t stick as well)
- 2 large eggs (room temperature works best, but cold is fine in a pinch)
- 1 tablespoon olive oil (or avocado oil—this gets mixed into the breadcrumbs for even browning)
- 1 teaspoon garlic powder
- 1 teaspoon onion powder
- 1/2 teaspoon paprika (smoked paprika adds a lovely depth, but regular works too)
- 1/2 teaspoon salt (I use kosher salt)
- 1/4 teaspoon black pepper
- Optional: 1/4 teaspoon cayenne pepper (if you like a little heat)
For Serving (Optional)
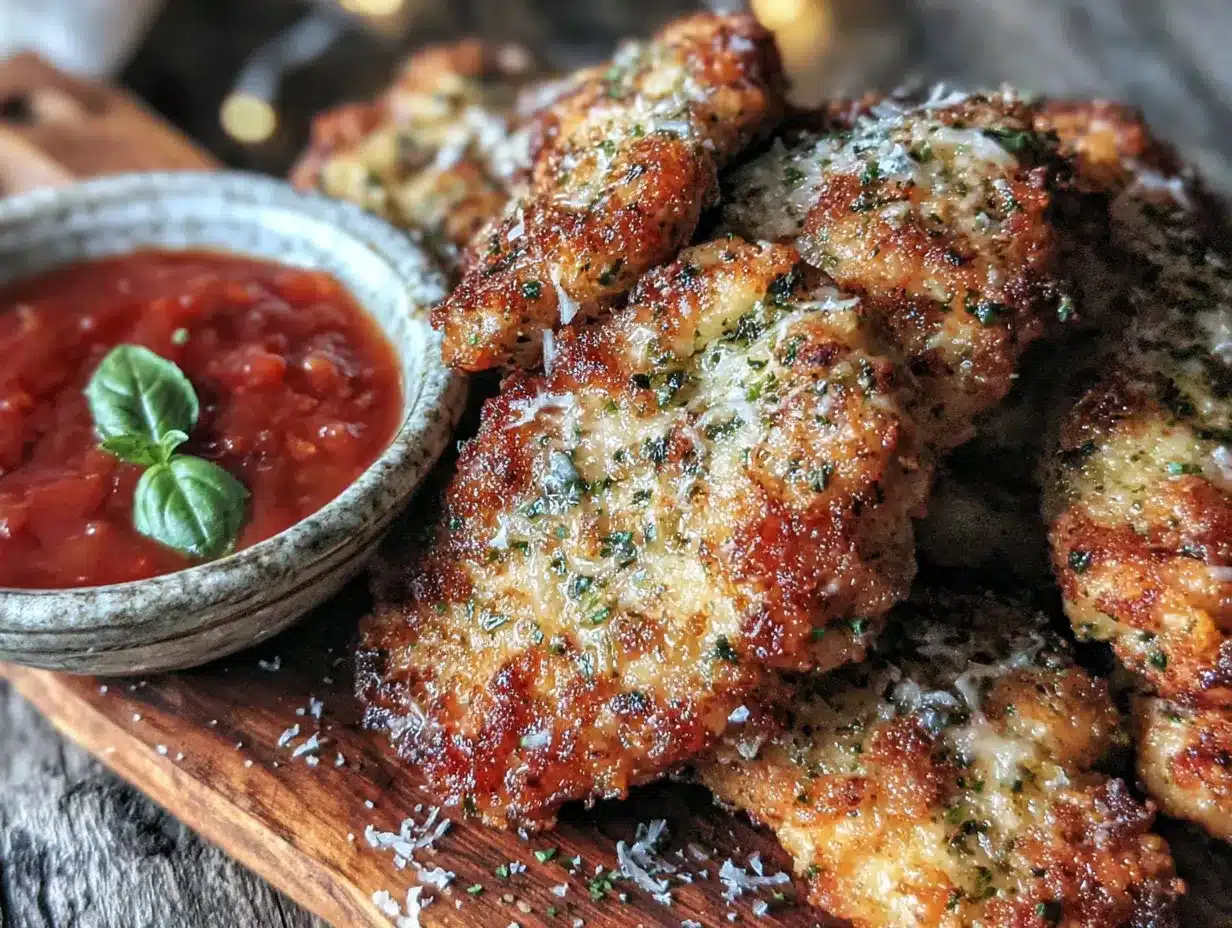
- Marinara sauce (for dipping—classic and always good)
- Ranch dressing (my personal favorite)
- Honey mustard (the sweet and savory combo is amazing here)
- Lemon wedges (a squeeze of fresh lemon brightens everything up)
A few notes on ingredient selection: I’ve tried this with both regular breadcrumbs and panko, and panko wins every time. They create a lighter, crunchier crust that doesn’t get dense or heavy. As for the Parmesan, I really recommend grating it yourself from a block. The pre-grated stuff has anti-caking agents that prevent it from melting properly, and you’ll end up with a less cohesive coating. If you’re dairy-free, you can substitute the Parmesan with nutritional yeast—it won’t be exactly the same, but it adds a nice cheesy flavor and still crisps up well.
For the chicken, I prefer buying whole chicken breasts and cutting them into strips myself. Pre-cut tenders can be uneven in size, which means they cook at different rates. Cutting your own ensures everything cooks evenly. If you’re feeding a crowd, feel free to double the recipe—just work in batches to avoid overcrowding the air fryer basket.
Equipment Needed
You don’t need much for this recipe, which is part of the appeal. Here’s what you’ll need:
- Air fryer (any size works, but a 5-6 quart basket-style is ideal for cooking a full batch without overcrowding)
- Two shallow bowls (for the egg wash and breadcrumb mixture—I use pie plates, but any wide, shallow dish works)
- Tongs (for transferring the chicken without making a mess)
- Cutting board and knife (if you’re cutting whole chicken breasts into strips)
- Measuring spoons
- Optional: wire rack (I like to place the breaded tenders on a wire rack while I finish coating the rest—it prevents the bottom from getting soggy)
If you don’t have an air fryer, you can make these in the oven. Place the breaded tenders on a wire rack set over a baking sheet and bake at 425°F for 12-15 minutes, flipping halfway through. They won’t be quite as crispy as the air fryer version, but they’re still delicious. I’ve also tested them in a convection oven with good results—just reduce the temperature by 25°F.
One tip: if you’re using a smaller air fryer, don’t try to cram all the tenders in at once. They need space for the hot air to circulate, or they’ll steam instead of crisp. I learned this the hard way after a particularly sad batch of soggy chicken. Trust me on this one.
Preparation Method
Ready to make the best chicken tenders of your life? Let’s go. This whole process takes about 20 minutes from start to finish, and most of that is hands-off cooking time.
- Preheat your air fryer to 400°F (200°C). Most air fryers need about 3-5 minutes to preheat. While it’s heating, you can prep everything else. If your air fryer doesn’t have a preheat function, just run it empty for 3 minutes at 400°F.
- Set up your breading station. In one shallow bowl, whisk the eggs until they’re smooth and slightly frothy—this helps the breadcrumbs stick better. In a second shallow bowl, combine the panko breadcrumbs, grated Parmesan, garlic powder, onion powder, paprika, salt, pepper, and cayenne if using. Drizzle the olive oil over the breadcrumb mixture and use your fingers to rub it in until the breadcrumbs are evenly coated. This step is key—the oil helps the breadcrumbs brown evenly in the air fryer.
- Pat the chicken dry. Use paper towels to remove any excess moisture from the chicken tenders. Wet chicken won’t hold the breading as well, and it can make the coating slide off during cooking. I learned this after a particularly frustrating batch where all the breading ended up at the bottom of the air fryer basket.
- Bread the chicken. Working one piece at a time, dip each chicken tender into the egg wash, letting any excess drip off. Then transfer it to the breadcrumb mixture and press gently to coat all sides. Don’t be shy—really press the breadcrumbs into the chicken so they stick. Place the breaded tender on a wire rack or plate while you finish the rest.
- Arrange in the air fryer basket. Place the breaded tenders in a single layer in the air fryer basket, leaving a little space between each piece. You want the hot air to be able to circulate around each tender. Depending on the size of your air fryer, you may need to work in batches. Don’t overcrowd—I can fit about 4-5 tenders in my 5.8-quart basket.
- Cook for 8-10 minutes. Air fry at 400°F for 8 minutes, then flip each tender with tongs and cook for another 2-3 minutes, until the coating is deep golden brown and the chicken is cooked through. The internal temperature should reach 165°F (74°C) when checked with an instant-read thermometer. If your tenders are on the thicker side, add another minute or two.
- Let them rest. Remove the tenders from the air fryer and let them rest on a wire rack for 2-3 minutes. This helps the coating set and stay crispy. If you pile them on a plate right away, the steam can make the bottom soggy.
- Serve immediately. Arrange the tenders on a platter with your dipping sauces of choice. Sprinkle with a little extra Parmesan and fresh parsley if you’re feeling fancy.
A few things to watch for: If your breadcrumbs look pale after 8 minutes, give them another minute or two. Every air fryer runs a little differently, so keep an eye on them the first time you make these. Also, if you’re cooking in batches, keep the finished tenders warm in a 200°F oven while you cook the rest. Place them on a wire rack set over a baking sheet so they stay crispy.
Cooking Tips & Techniques
Over the course of testing this recipe, I’ve made just about every mistake you can imagine. Here’s what I’ve learned so you don’t have to repeat my errors:
Don’t skip the oil in the breadcrumbs. This is the single most important tip I can give you. Most recipes tell you to spray the breaded chicken with oil after coating, but I’ve found that mixing the oil into the breadcrumbs themselves gives you a much more even, golden crust. The oil distributes through the coating and helps every bit of panko brown beautifully. Plus, it saves you the step of spraying each tender individually.
Pat the chicken dry. I know it seems like a small step, but it makes a huge difference. Wet chicken creates steam as it cooks, which can loosen the breading and make it slide right off. Take an extra 30 seconds to blot the chicken with paper towels before you start breading.
Use freshly grated Parmesan. I mentioned this earlier, but it bears repeating. Pre-shredded Parmesan has anti-caking agents that prevent it from melting and sticking properly. A block of Parmesan grated on the fine side of a box grater will give you a much better coating. It’s worth the extra minute of effort.
Don’t overcrowd the basket. This is probably the most common mistake people make with air fryers. If you pack the basket too full, the hot air can’t circulate, and your food will steam instead of crisp. Leave at least half an inch of space between each tender. If you’re making a large batch, cook in multiple batches. It takes a little longer, but the results are worth it.
Flip halfway through. Even in an air fryer, the bottom of the tenders can stay paler than the top if you don’t flip them. Set a timer for 8 minutes, flip, and cook for another 2-3 minutes. You’ll get an even, golden crust all around.
Let them rest on a wire rack. This is a game-changer. If you put the hot tenders directly on a plate, the steam trapped underneath will soften the coating. A wire rack allows air to circulate around the entire tender, keeping it crispy. I use a cooling rack set over a baking sheet, and it works perfectly.
Variations & Adaptations
One of the best things about this recipe is how adaptable it is. Here are a few variations I’ve tried and loved:
Spicy Buffalo Version: Add 1 tablespoon of buffalo sauce to the egg wash and increase the cayenne to 1/2 teaspoon. Serve with blue cheese or ranch dressing for dipping. The heat level is adjustable—start with less if you’re sensitive to spice.
Gluten-Free Option: Swap the panko breadcrumbs for gluten-free panko (I like the brand Ian’s) or crushed pork rinds for a low-carb version. The cooking time stays the same. I’ve tested this with both, and the pork rind version is surprisingly good—extra crispy and very keto-friendly.
Herb and Garlic Version: Add 1 tablespoon of dried Italian seasoning or a mix of dried basil, oregano, and thyme to the breadcrumb mixture. You can also add a teaspoon of garlic powder and a teaspoon of onion powder for extra savory flavor. This version is especially good with marinara sauce for dipping.
Lemon Pepper Version: Omit the paprika and cayenne, and add 1 tablespoon of lemon pepper seasoning to the breadcrumb mixture. Serve with lemon wedges and a side of roasted vegetables. The bright, citrusy flavor is perfect for spring and summer.
Parmesan-Crusted Fish: Use the same breading method on white fish fillets like cod or tilapia. Reduce the cooking time to 6-8 minutes at 400°F, depending on the thickness of the fish. It’s a great way to switch things up if you’re tired of chicken.
I’ve also tried this with chicken thighs cut into strips, and they work well too—just add a minute or two to the cooking time since thighs are a little thicker. If you’re feeding picky eaters, you can reduce the Parmesan slightly (to about 1/3 cup) for a milder flavor.
Serving & Storage Suggestions
These tenders are best served fresh and hot, right out of the air fryer. But they’re also surprisingly good at room temperature, which makes them perfect for parties or lunchboxes. Here’s how I like to serve and store them:
Serving Temperature: Serve immediately after cooking for maximum crispiness. If you’re making a large batch, keep the finished tenders warm in a 200°F oven on a wire rack set over a baking sheet. This keeps them crispy without drying them out.
Dipping Sauces: I’m a big fan of variety. Set out a few different sauces so everyone can choose their favorite. Marinara, ranch, honey mustard, buffalo sauce, and even a simple squeeze of lemon all work beautifully. For a quick homemade ranch, mix 1/2 cup Greek yogurt with 1 teaspoon dried dill, 1/2 teaspoon garlic powder, and a pinch of salt.
Side Dishes: These tenders pair well with just about anything. Serve them with a simple green salad, roasted vegetables, sweet potato fries, or a side of mac and cheese. For a lighter meal, I like them with a big Greek salad and some tzatziki for dipping.
Storage: Store leftover tenders in an airtight container in the refrigerator for up to 3 days. The coating will soften slightly, but they’ll still be tasty. To reheat, place them back in the air fryer at 375°F for 3-4 minutes, until heated through and crispy again. The microwave will make them soggy, so I don’t recommend it.
Freezing: You can freeze these tenders either before or after cooking. To freeze uncooked, bread the tenders and place them on a baking sheet lined with parchment paper. Freeze for 2 hours, then transfer to a freezer bag. Cook from frozen at 400°F for 12-14 minutes, flipping halfway through. To freeze cooked tenders, let them cool completely, then freeze in a single layer on a baking sheet before transferring to a freezer bag. Reheat from frozen in the air fryer at 375°F for 5-6 minutes.
One thing I love about this recipe is that the flavors actually get better after a day in the fridge. The Parmesan and spices meld together, and the chicken stays moist. I often make a double batch on Sunday and eat the leftovers for lunch throughout the week.
Nutritional Information & Benefits
While I’m not a nutritionist, I can share some general information about what makes these tenders a healthier choice compared to traditional deep-fried versions. Here’s an approximate nutritional breakdown per serving (about 4-5 tenders, depending on size):
| Nutrient | Amount per Serving |
|---|---|
| Calories | 320-380 |
| Protein | 35-40g |
| Fat | 12-15g |
| Carbohydrates | 18-22g |
| Fiber | 1-2g |
| Sugar | 1-2g |
| Sodium | 600-700mg |
Compared to deep-fried chicken tenders, these air fryer versions use significantly less oil—about 1 tablespoon total for the entire batch versus several cups for deep frying. That translates to fewer calories and less fat without sacrificing the crispy texture you crave.
Chicken breast is an excellent source of lean protein, which helps keep you full and supports muscle health. Parmesan cheese adds calcium and a good amount of flavor for relatively few calories. And since you’re controlling the ingredients, you can easily adjust the sodium or spice levels to suit your dietary needs.
If you’re watching your carb intake, you can substitute the panko with almond flour or crushed pork rinds for a keto-friendly version. The pork rind version is especially good—it’s crispy, flavorful, and has almost zero carbs. I’ve made it for friends who follow a low-carb diet, and they couldn’t tell the difference.
One note on allergens: This recipe contains dairy (Parmesan) and eggs. For a dairy-free version, substitute the Parmesan with nutritional yeast, which adds a cheesy flavor without the dairy. For an egg-free version, you can use buttermilk or a mixture of milk and cornstarch as the binder, though the coating won’t be quite as crispy.
Frequently Asked Questions
Can I use chicken breasts instead of tenders?
Absolutely. If you’re using whole chicken breasts, just cut them into strips about 1-inch thick. You can also leave them whole and adjust the cooking time—thicker pieces will need about 12-14 minutes total. Just make sure the internal temperature reaches 165°F before serving.
Why did my breading fall off?
This usually happens for one of three reasons: the chicken wasn’t patted dry before breading, the egg wash was too thin, or the air fryer basket was overcrowded. Make sure to blot the chicken with paper towels, whisk the eggs until they’re frothy, and leave space between each tender in the basket.
Can I make these ahead of time?
Yes! You can bread the chicken up to 24 hours in advance and store it in the refrigerator on a wire rack. Cook them just before serving for the best texture. You can also freeze the breaded, uncooked tenders for up to 3 months and cook them straight from frozen—just add a few minutes to the cooking time.
How do I reheat leftovers without losing crispiness?
The air fryer is your best friend here. Reheat leftover tenders at 375°F for 3-4 minutes, until they’re hot and crispy again. The oven works too—place them on a wire rack over a baking sheet at 400°F for 5-7 minutes. Avoid the microwave, which will make the coating soggy.
Can I use a different cheese?
You can, but the results will be different. Parmesan works best because it’s dry and salty, which helps create a crispy coating. Pecorino Romano is a good substitute—it’s similar in texture but a little saltier. Softer cheeses like mozzarella or cheddar won’t crisp up the same way and may make the coating greasy.
Conclusion
I’ve made these crispy air fryer Parmesan chicken tenders more times than I can count, and they never get old. They’re the kind of recipe that feels like a secret weapon—quick enough for a busy weeknight, impressive enough for company, and so delicious that everyone asks for the recipe. The fact that they came from a random conversation at the hardware store just makes them feel even more special.
What I love most about this recipe is how forgiving it is. You can adjust the spices, swap the cheese, or change up the dipping sauces, and it still works. It’s a foundation you can build on, which is exactly what a good recipe should be. Whether you’re a seasoned cook or someone who’s never used an air fryer before, these tenders are practically foolproof.
So go ahead—give them a try. Play with the seasonings, experiment with different dips, and make them your own. And if you discover a variation you love, I’d love to hear about it. Drop a comment below or tag me in your photos. Nothing makes my day like seeing someone else fall in love with a recipe that started with a stranger at the checkout counter. Happy cooking!
Pin This Recipe!
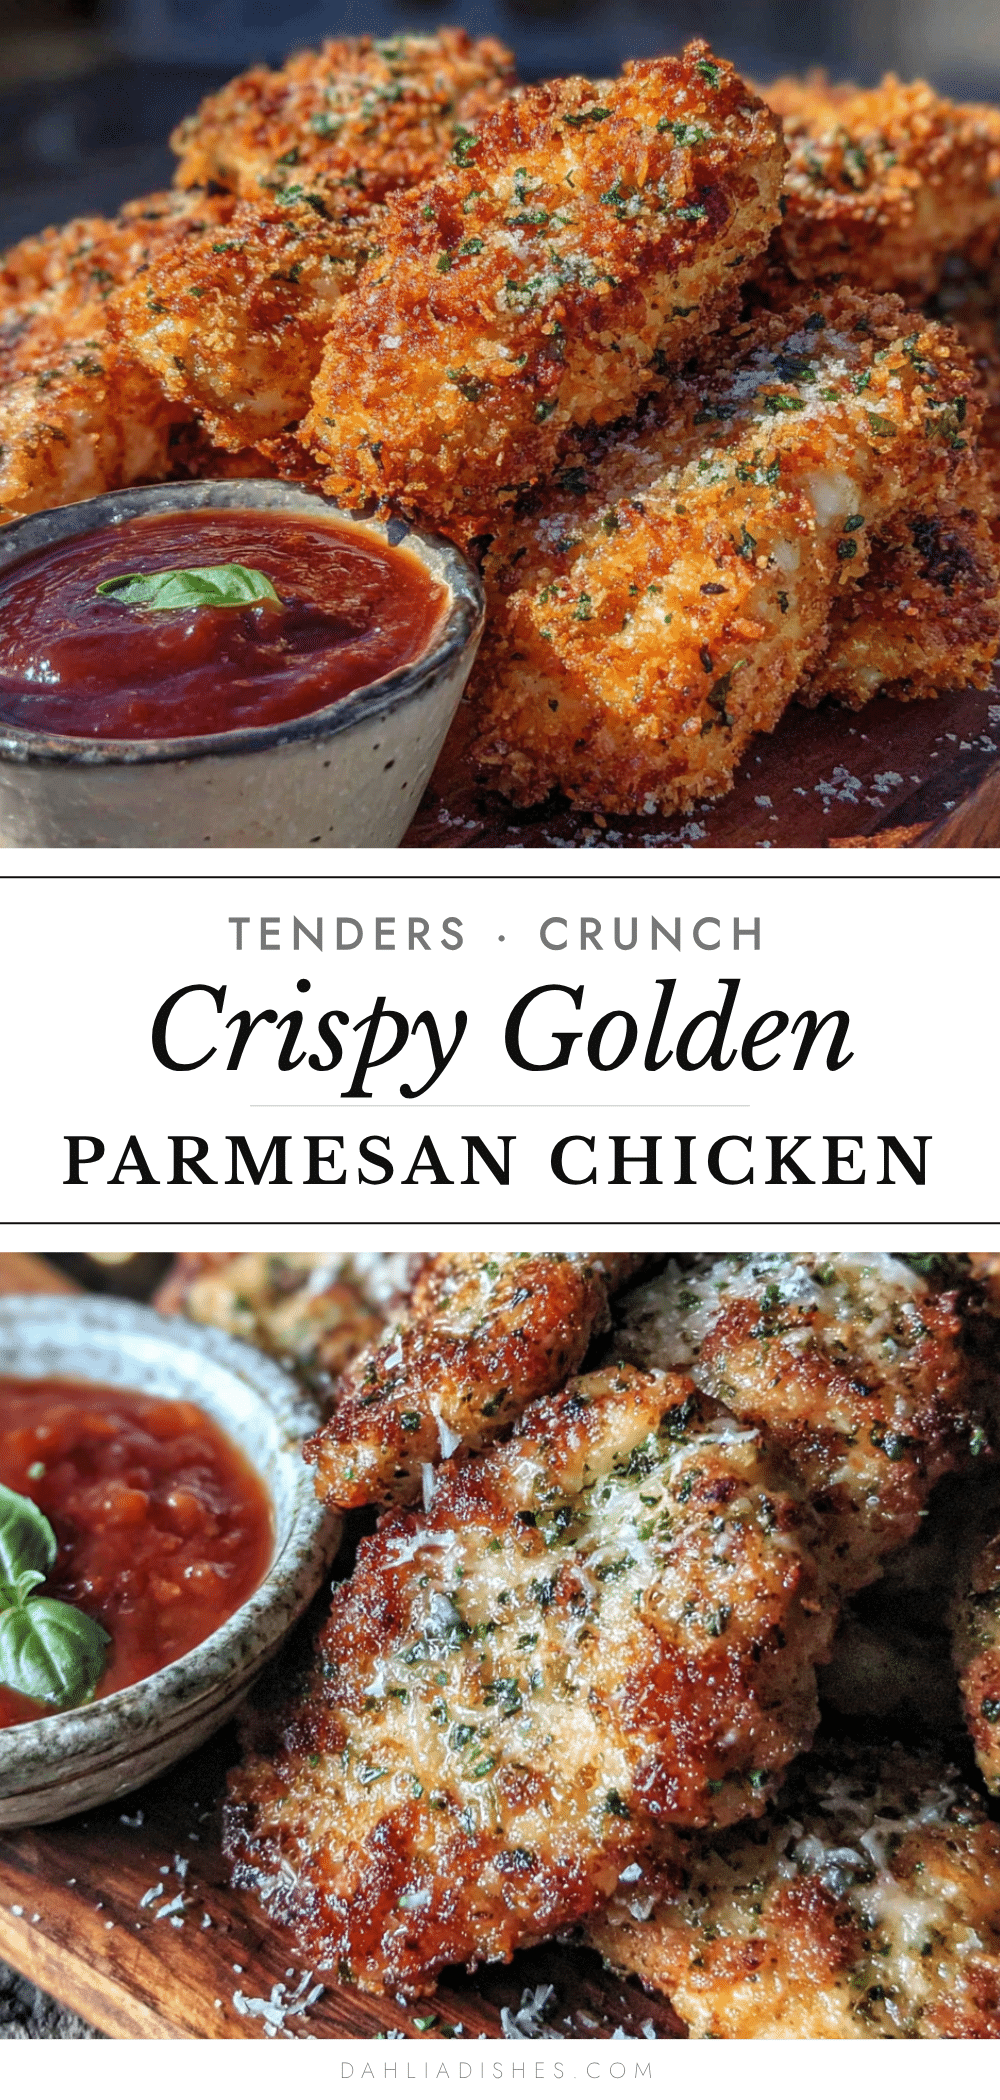
Crispy Air Fryer Parmesan Chicken Tenders: Easy 20-Min Recipe

These crispy air fryer Parmesan chicken tenders are crunchy, cheesy, and ready in about 20 minutes. Perfect for busy weeknights, they use simple ingredients and deliver an unbelievably crispy crust without deep frying.
- Prep Time: 10 minutes
- Cook Time: 10 minutes
- Total Time: 20 minutes
- Yield: 4 servings 1x
- Category: Main Course
- Cuisine: American
Ingredients
- 1 pound chicken breast tenders (or boneless, skinless chicken breasts cut into strips)
- 1 cup panko breadcrumbs
- 1/2 cup freshly grated Parmesan cheese
- 2 large eggs
- 1 tablespoon olive oil (or avocado oil)
- 1 teaspoon garlic powder
- 1 teaspoon onion powder
- 1/2 teaspoon paprika (smoked paprika preferred)
- 1/2 teaspoon salt (kosher salt preferred)
- 1/4 teaspoon black pepper
- Optional: 1/4 teaspoon cayenne pepper
- For serving: marinara sauce, ranch dressing, honey mustard, lemon wedges
Instructions
- Preheat your air fryer to 400°F (200°C). If your air fryer doesn’t have a preheat function, run it empty for 3 minutes at 400°F.
- Set up your breading station. In one shallow bowl, whisk the eggs until smooth and slightly frothy. In a second shallow bowl, combine panko breadcrumbs, grated Parmesan, garlic powder, onion powder, paprika, salt, pepper, and cayenne if using. Drizzle olive oil over the breadcrumb mixture and use your fingers to rub it in until evenly coated.
- Pat the chicken dry with paper towels to remove excess moisture.
- Bread the chicken: Working one piece at a time, dip each chicken tender into the egg wash, letting excess drip off. Transfer to the breadcrumb mixture and press gently to coat all sides. Place on a wire rack or plate while finishing the rest.
- Arrange breaded tenders in a single layer in the air fryer basket, leaving space between each piece. Work in batches if needed to avoid overcrowding.
- Cook at 400°F for 8 minutes, then flip each tender with tongs and cook for another 2-3 minutes, until coating is deep golden brown and internal temperature reaches 165°F (74°C).
- Remove tenders from air fryer and let rest on a wire rack for 2-3 minutes to keep the coating crispy.
- Serve immediately with dipping sauces of choice. Sprinkle with extra Parmesan and fresh parsley if desired.
Notes
Mix oil into breadcrumbs for even browning. Pat chicken dry to help breading stick. Don’t overcrowd the air fryer basket. Let tenders rest on a wire rack after cooking to maintain crispiness. For oven method: bake at 425°F for 12-15 minutes on a wire rack over a baking sheet, flipping halfway.
Nutrition
- Serving Size: 4-5 tenders
- Calories: 320380
- Sugar: 12
- Sodium: 600700
- Fat: 1215
- Saturated Fat: 34
- Carbohydrates: 1822
- Fiber: 12
- Protein: 3540
Keywords: air fryer chicken tenders, crispy chicken tenders, Parmesan chicken, easy chicken recipe, weeknight dinner, air fryer recipe


