Love this? Save it for later!
Share the inspiration with your friends
It was 10:47 PM on a random Wednesday in late August, and I was standing in my kitchen staring at a bag of roasted Hatch green chiles I’d impulse-bought at the farmer’s market three days earlier. The craving hit me out of nowhere—not for something complicated, but for that specific, soul-warming comfort you only get from a pan of bubbling enchiladas. I didn’t have the red sauce my abuela always used, but I had those smoky chiles, a tub of sour cream, and this wild idea that maybe, just maybe, a creamy white sauce would be even better. I grabbed a pen, scribbled some measurements on a napkin, and started pulling ingredients from the fridge. Honestly? I was half-convinced I was about to ruin dinner. But something about the late hour made me braver—less worried about rules, more willing to just taste and adjust. The first bite, fresh out of the oven at nearly midnight, made me actually laugh out loud. It was that good. I’ve made these Creamy Hatch Green Chili Enchiladas at least a dozen times since that night, tweaking the sauce, testing different cheeses, and perfecting the method. And now? They’re the cozy dinner I turn to whenever I need a warm hug on a plate. Maybe you’ve been there—standing in your own kitchen, craving something familiar but wanting to try something new. This recipe is for exactly that moment.
Why You Will Love This Recipe
Let me tell you why these enchiladas have earned a permanent spot in my weekly dinner rotation. I’ve tested this recipe more times than I can count, tweaking the sauce-to-filling ratio and the baking time until everything was just right. The result is a dish that delivers on every level without demanding hours in the kitchen.
- Quick & Easy: From start to finish, these come together in about 45 minutes. Perfect for a busy Tuesday when you still want something that feels special.
- Simple Ingredients: No hunting down obscure items. You likely have the pantry staples already—the star of the show is those beautiful Hatch chiles.
- Perfect for Cozy Nights: Great for fall gatherings, weeknight dinners, or when you just need a meal that feels like a hug.
- Crowd-Pleaser: I’ve served these to everyone from my spice-wary sister to my chile-obsessed neighbor, and they disappear every single time.
- Unbelievably Delicious: The creamy sauce, the smoky heat from the chiles, the melty cheese—it’s next-level comfort food that makes you close your eyes after the first bite.
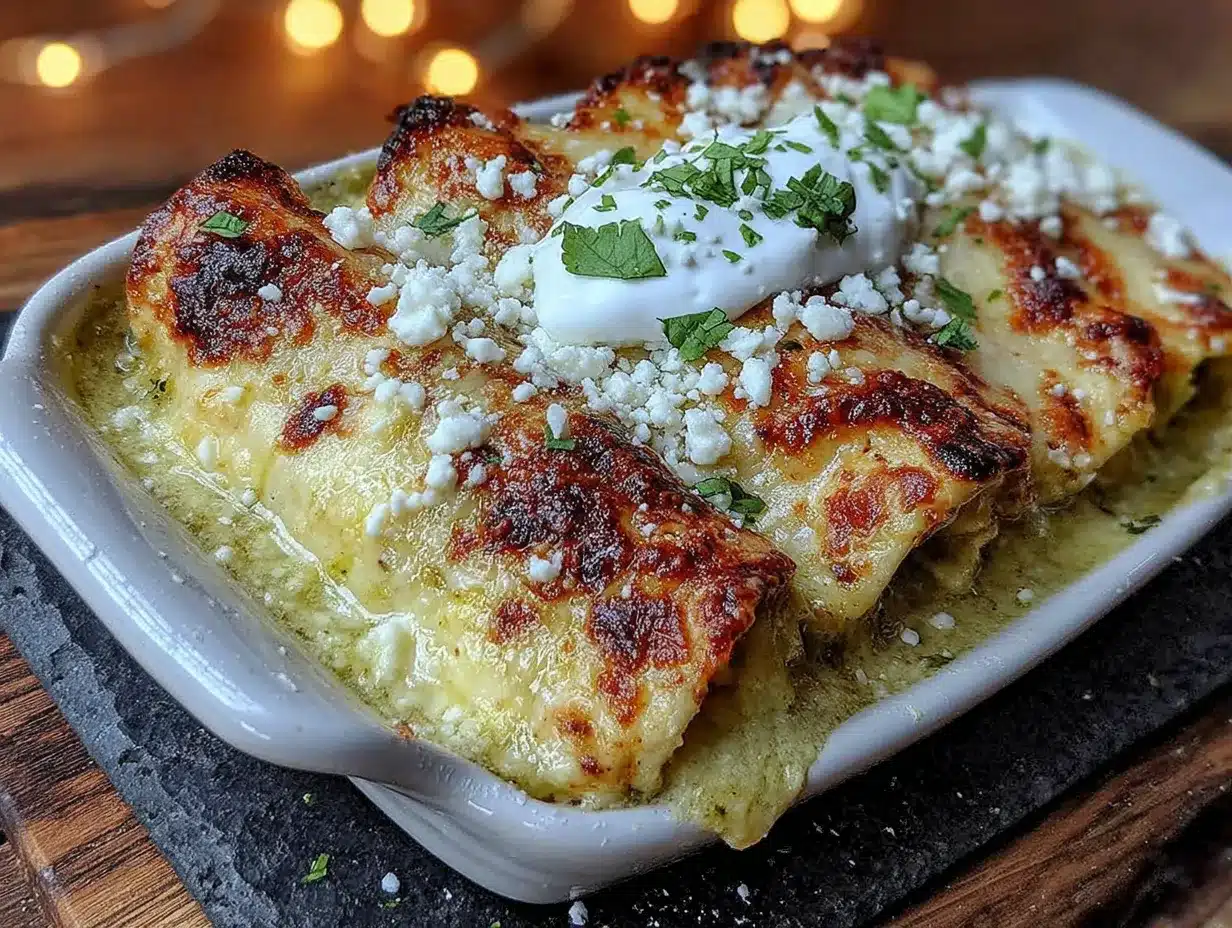
What makes this different from other enchilada recipes? It’s the sauce. Instead of a canned red sauce or a complicated mole, we’re making a silky, tangy cream sauce infused with roasted Hatch chiles. It’s rich without being heavy, and the flavor is so much deeper than you’d expect from such a straightforward method. This isn’t just another enchilada recipe—it’s the one you will remember.
What Ingredients You Will Need
This recipe uses simple, wholesome ingredients to deliver bold flavor and satisfying texture without the fuss. Most of these are pantry staples, especially if you stock up on Hatch chiles during their short season.
For the Filling
- 2 cups cooked, shredded chicken (rotisserie chicken works great here)
- 1 cup roasted Hatch green chiles, chopped (mild or hot, your choice)
- 8 oz cream cheese, softened
- 1/2 cup shredded Monterey Jack cheese
- 1/4 cup chopped cilantro
- 1/2 teaspoon cumin
- 1/2 teaspoon garlic powder
- Salt and pepper to taste
For the Creamy Sauce
- 2 tablespoons unsalted butter
- 2 tablespoons all-purpose flour
- 1 cup chicken broth
- 1 cup sour cream (full-fat works best)
- 1/2 cup roasted Hatch green chiles, finely chopped
- 1/4 teaspoon salt
- 1/4 teaspoon white pepper (or black pepper if that’s what you have)
For Assembly
- 8-10 flour or corn tortillas (I prefer flour for softness, but corn works beautifully too)
- 1 1/2 cups shredded Mexican blend cheese (or a mix of Monterey Jack and cheddar)
- Fresh cilantro and sliced green onions for garnish
When it comes to the Hatch chiles, I recommend buying them roasted and frozen during the late summer season—they’re available at many grocery stores or online. Brands like 505 Southwestern or Bueno are reliable options. If you can’t find Hatch chiles, you can substitute with Anaheim chiles or even canned green chiles in a pinch, though the flavor won’t be quite as smoky and complex.
Equipment Needed
You don’t need a fancy kitchen to make these enchiladas, which is part of their charm. Here’s what you will need:
- A 9×13-inch baking dish (glass or ceramic works best for even heating)
- A medium saucepan for the sauce
- A mixing bowl for the filling
- A whisk (a fork works in a pinch, but a whisk makes the sauce smoother)
- A spatula for spreading
- Measuring cups and spoons
- A sharp knife and cutting board
If you don’t have a 9×13 dish, you can use two smaller dishes or even a cast-iron skillet—just adjust the baking time slightly. I’ve used my trusty Pyrex dish for years, and it’s never let me down. A good whisk is worth the investment; I learned that lesson the hard way after a lumpy sauce incident that I’d rather forget.
Preparation Method
Let’s walk through this step by step. I promise it’s easier than it sounds, and the smell alone is worth the effort.
- Preheat your oven to 375°F (190°C). While it’s heating, lightly grease your 9×13 baking dish with butter or non-stick spray.
- Make the filling: In a medium bowl, combine the shredded chicken, 1 cup chopped Hatch chiles, softened cream cheese, 1/2 cup Monterey Jack cheese, cilantro, cumin, garlic powder, and a pinch of salt and pepper. Mix until everything is well combined. The cream cheese should be soft enough to blend easily—if it’s still cold, pop it in the microwave for 10-15 seconds. Taste the filling and adjust seasoning if needed. It should be creamy, slightly tangy, and have a gentle warmth from the chiles.
- Prepare the sauce: In a medium saucepan over medium heat, melt the butter. Once it’s bubbling, whisk in the flour and cook for 1-2 minutes, stirring constantly. This gets rid of the raw flour taste. Slowly pour in the chicken broth while whisking continuously to prevent lumps. Bring the mixture to a gentle simmer—it will thicken slightly. Reduce the heat to low and stir in the sour cream and the remaining 1/2 cup of finely chopped Hatch chiles. Add the salt and white pepper. Whisk until the sauce is smooth and creamy. Don’t let it boil after adding the sour cream, or it might curdle. Set the sauce aside.
- Assemble the enchiladas: Take a tortilla and spoon about 2-3 tablespoons of the filling down the center. Roll it up tightly and place it seam-side down in the prepared baking dish. Repeat with the remaining tortillas and filling. You should fit 8-10 enchiladas snugly in the dish—don’t worry if they’re touching; that’s what you want.
- Pour the sauce: Pour the creamy Hatch chile sauce evenly over the rolled enchiladas, making sure to cover the ends so they don’t dry out. Use a spatula to spread it gently if needed.
- Add the cheese: Sprinkle the shredded Mexican blend cheese generously over the top. Don’t be shy here—the cheese creates that golden, bubbly crust that makes enchiladas irresistible.
- Bake: Place the dish in the preheated oven and bake for 20-25 minutes, until the sauce is bubbling and the cheese is melted and lightly golden. If you want a browner top, switch the oven to broil for the last 1-2 minutes—but watch it closely so it doesn’t burn.
- Rest and garnish: Let the enchiladas rest for 5 minutes after taking them out of the oven. This helps the sauce set so it doesn’t run everywhere when you serve. Sprinkle with fresh cilantro and sliced green onions before serving.
One thing I learned from my first attempt: don’t overfill the tortillas. It’s tempting to stuff them, but they’ll burst open during baking and make a mess. A modest 2-3 tablespoons per tortilla is the sweet spot. Also, if your tortillas are cracking when you roll them, warm them briefly in the microwave (about 20 seconds wrapped in a damp paper towel) to make them pliable.
Cooking Tips & Techniques
After making these enchiladas more times than I can count, I’ve picked up a few tricks that make a real difference. Here are my best tips for success:
- Toast your tortillas first: If you’re using corn tortillas, lightly fry them in a skillet with a little oil for about 30 seconds per side. This prevents them from getting soggy and adds a subtle flavor. For flour tortillas, a quick warm-up in the microwave is enough.
- Don’t skip the cream cheese: It might seem like an extra step, but the cream cheese is what makes the filling so luscious. Make sure it’s fully softened so it blends evenly—cold cream cheese will leave lumps.
- Season as you go: Taste the filling before you roll. Taste the sauce before you pour. Adjusting salt and heat levels at each stage is the secret to a perfectly balanced dish.
- Let it rest: I know it’s hard to wait when the kitchen smells this good, but letting the enchiladas rest for 5 minutes after baking is crucial. The sauce thickens slightly, and the layers settle, making for cleaner slices and better presentation.
I once forgot to add the salt to the sauce—don’t ask me how—and the whole dish fell flat. Salt is a flavor enhancer, and in a creamy sauce, it’s essential for bringing out the chiles and cheese. Learn from my mistake and don’t skip the tasting step!
Variations & Adaptations
One of the best things about this recipe is how flexible it is. Here are some ways to make it your own:
- Vegetarian Version: Swap the chicken for black beans, pinto beans, or roasted sweet potatoes. The creamy sauce pairs beautifully with earthy beans or caramelized vegetables.
- Spice Level: Use mild Hatch chiles for a gentle warmth, or go for hot ones if you like a kick. You can also add a diced jalapeño to the filling or a pinch of cayenne to the sauce.
- Cheese Swap: Try using pepper jack for extra heat, or go with all Monterey Jack for a milder, creamier melt. A sprinkle of cotija on top before serving adds a salty, crumbly finish.
- Gluten-Free Option: Use corn tortillas and a gluten-free flour blend in the sauce. The sauce might be slightly thinner, but it still tastes amazing.
- Make It a Casserole: Instead of rolling individual enchiladas, layer the tortillas, filling, and sauce like a lasagna. It’s faster and just as delicious—perfect for a lazy Sunday.
I once made a version with leftover Thanksgiving turkey and a handful of spinach I needed to use up. It was a happy accident that turned into a new favorite. Don’t be afraid to experiment with whatever you have on hand.
Serving & Storage Suggestions
These enchiladas are best served warm, straight from the oven, with the cheese still stretchy and the sauce bubbling. I love to serve them with a simple side salad dressed with lime juice and a dollop of extra sour cream on the side. A scoop of Mexican cilantro lime rice or a bowl of black bean soup rounds out the meal beautifully. For drinks, a cold Mexican lager or a tart limeade is perfect.
If you have leftovers (which is rare in my house), store them in an airtight container in the refrigerator for up to 4 days. The flavors actually deepen overnight, making next-day leftovers even better. To reheat, pop individual portions in the microwave for 1-2 minutes, or reheat the whole dish in a 350°F oven for 15 minutes, covered with foil. The sauce might thicken a bit after refrigeration, so add a splash of chicken broth or milk when reheating if needed.
These enchiladas also freeze beautifully. Assemble the dish completely but don’t bake it. Cover tightly with foil and freeze for up to 3 months. When you’re ready to eat, bake from frozen at 375°F for about 45 minutes, removing the foil for the last 10 minutes. It’s like having a cozy dinner waiting for you on a busy night.
Nutritional Information & Benefits
Here’s an approximate nutritional breakdown per serving (based on 8 servings):
- Calories: 420
- Protein: 28g
- Fat: 24g
- Carbohydrates: 28g
- Fiber: 3g
- Sugar: 4g
These enchiladas are a good source of protein from the chicken and cheese, and the Hatch chiles provide a healthy dose of vitamin C and capsaicin, which has anti-inflammatory properties. The sour cream and cream cheese add calcium, while the cilantro offers a small amount of antioxidants. If you’re watching your sodium, use low-sodium chicken broth and go easy on the added salt. For a lighter version, you can use Greek yogurt in place of sour cream and reduced-fat cheese—though the texture will be slightly different. This dish is naturally gluten-free if you use corn tortillas and a gluten-free flour blend.
Conclusion
These Creamy Hatch Green Chili Enchiladas have become my go-to for those nights when I need something deeply satisfying without spending hours in the kitchen. They’re the kind of meal that makes you slow down, take a deep breath, and really enjoy every bite. Whether you’re cooking for your family, a group of friends, or just yourself on a quiet evening, this recipe delivers warmth and flavor in every single serving. I love how adaptable it is—you can make it your own with whatever ingredients you have, and it always turns out delicious. So go ahead, grab those Hatch chiles if you can find them, and give this recipe a try. When you do, I’d love to hear how it turned out—drop a comment below and tell me about your own enchilada adventure. Happy cooking, friends!
Frequently Asked Questions
Can I use canned green chiles instead of Hatch chiles?
Yes, absolutely. While roasted Hatch chiles have a distinct smoky flavor, canned green chiles work perfectly in a pinch. Use about 1 1/2 cups of canned chiles, drained, and you’ll still get a delicious result.
How do I make the sauce less tangy?
If you prefer a milder tang, use half sour cream and half heavy cream in the sauce. You can also add a pinch of sugar to balance the acidity. Taste as you go and adjust to your liking.
Can I prepare these enchiladas ahead of time?
Definitely. Assemble the enchiladas up to 24 hours in advance, cover tightly, and refrigerate. When you’re ready to bake, add about 10 minutes to the baking time since the dish will be cold. You can also freeze them unbaked for up to 3 months.
What’s the best way to shred chicken for this recipe?
I use a stand mixer with the paddle attachment on low speed—it shreds a whole chicken breast in seconds without any mess. If you don’t have a mixer, two forks work great, or you can use your hands once the chicken is cool enough to handle. A rotisserie chicken from the store is my favorite shortcut.
Why did my sauce curdle?
Sauce curdling usually happens when the heat is too high after adding the sour cream. Always add sour cream off the heat or over very low heat, and whisk continuously. If it does curdle, you can sometimes save it by whisking in a tablespoon of cold milk or cream.
Pin This Recipe!
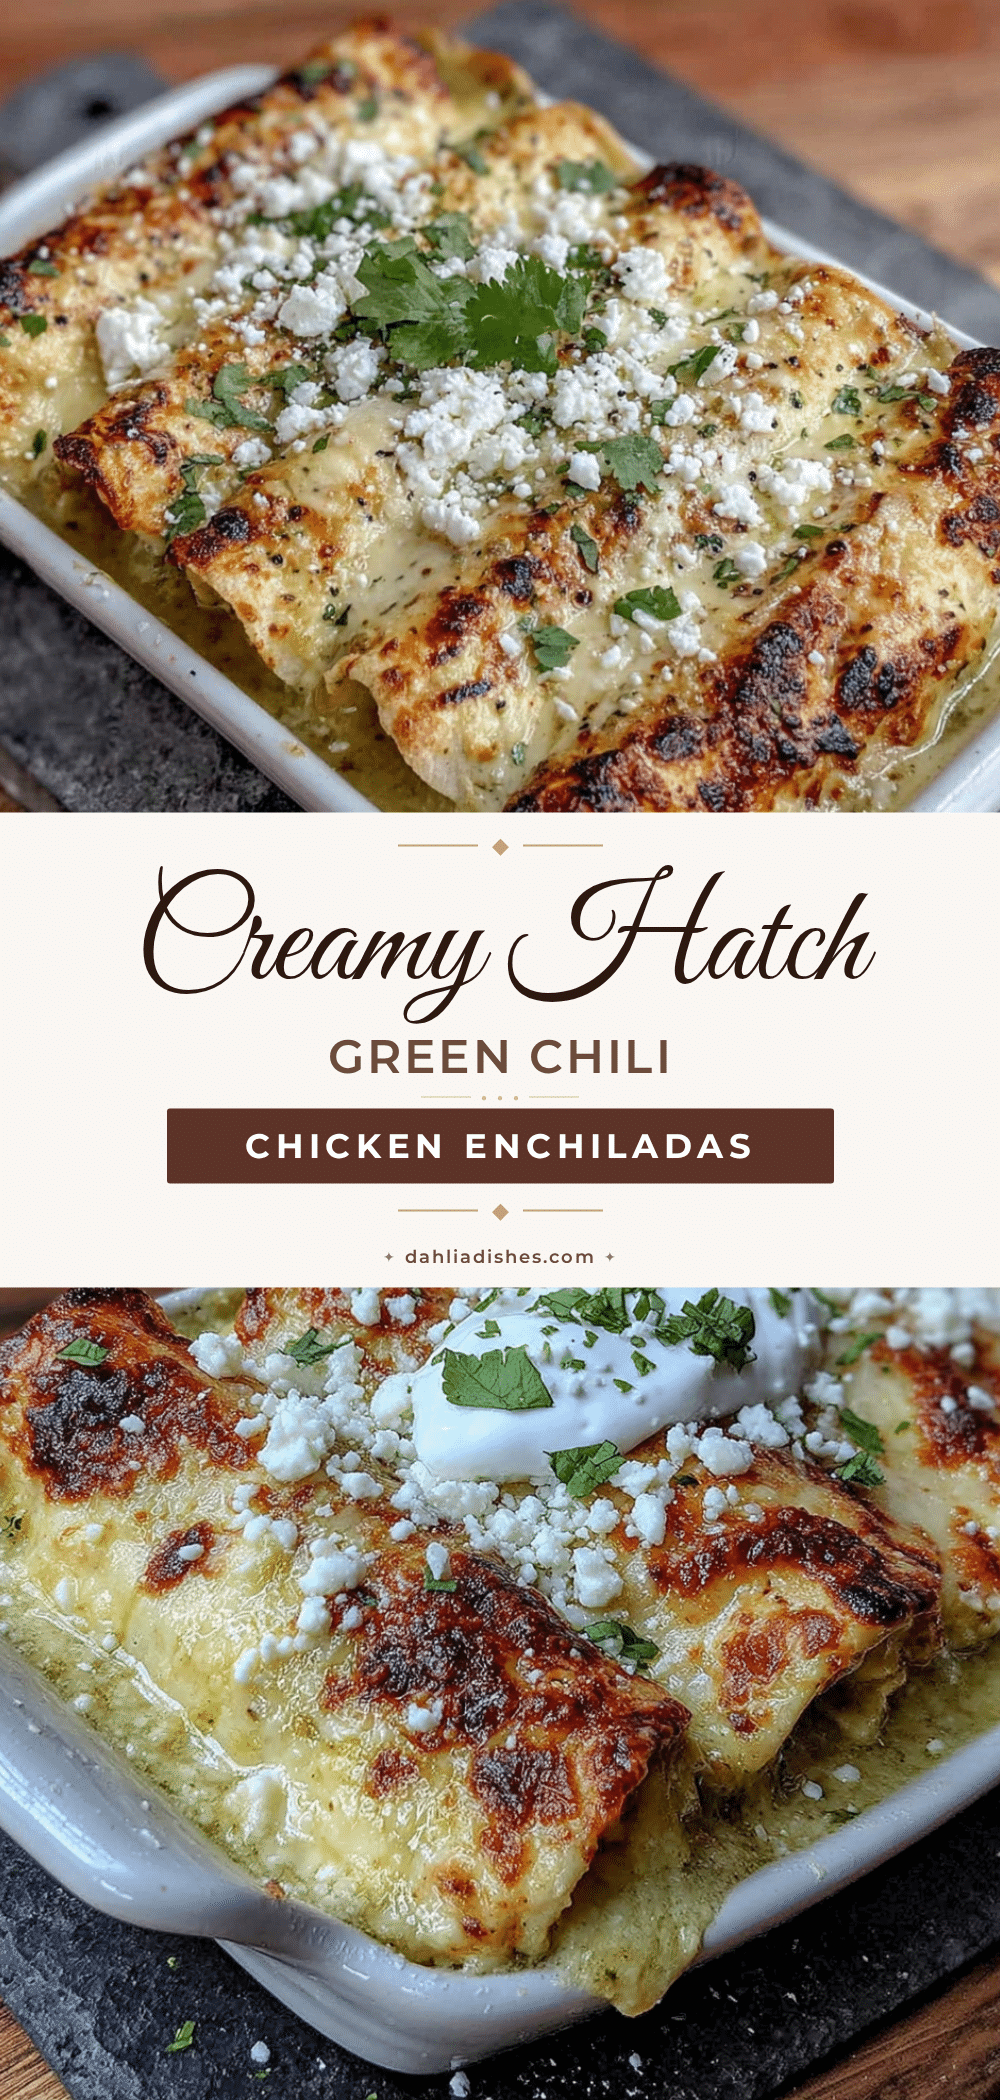
Creamy Hatch Green Chili Enchiladas: Best Easy Dinner
These Creamy Hatch Green Chili Enchiladas are a soul-warming comfort dish featuring a silky, tangy cream sauce infused with roasted Hatch chiles, tender shredded chicken, and melty cheese. Ready in about 45 minutes, they’re perfect for cozy weeknight dinners.
- Prep Time: 20 minutes
- Cook Time: 25 minutes
- Total Time: 45 minutes
- Yield: 8 servings 1x
- Category: Main Course
- Cuisine: Mexican
Ingredients
- 2 cups cooked, shredded chicken (rotisserie chicken works great)
- 1 cup roasted Hatch green chiles, chopped (mild or hot)
- 8 oz cream cheese, softened
- 1/2 cup shredded Monterey Jack cheese
- 1/4 cup chopped cilantro
- 1/2 teaspoon cumin
- 1/2 teaspoon garlic powder
- Salt and pepper to taste
- 2 tablespoons unsalted butter
- 2 tablespoons all-purpose flour
- 1 cup chicken broth
- 1 cup sour cream (full-fat works best)
- 1/2 cup roasted Hatch green chiles, finely chopped
- 1/4 teaspoon salt
- 1/4 teaspoon white pepper (or black pepper)
- 8–10 flour or corn tortillas
- 1 1/2 cups shredded Mexican blend cheese (or mix of Monterey Jack and cheddar)
- Fresh cilantro and sliced green onions for garnish
Instructions
- Preheat your oven to 375°F (190°C). Lightly grease a 9×13-inch baking dish with butter or non-stick spray.
- Make the filling: In a medium bowl, combine shredded chicken, 1 cup chopped Hatch chiles, softened cream cheese, 1/2 cup Monterey Jack cheese, cilantro, cumin, garlic powder, and a pinch of salt and pepper. Mix until well combined. Taste and adjust seasoning if needed.
- Prepare the sauce: In a medium saucepan over medium heat, melt the butter. Whisk in the flour and cook for 1-2 minutes, stirring constantly. Slowly pour in the chicken broth while whisking continuously to prevent lumps. Bring to a gentle simmer until thickened slightly. Reduce heat to low and stir in the sour cream and remaining 1/2 cup finely chopped Hatch chiles. Add salt and white pepper. Whisk until smooth and creamy. Do not let it boil after adding sour cream.
- Assemble the enchiladas: Spoon about 2-3 tablespoons of filling down the center of each tortilla. Roll tightly and place seam-side down in the prepared baking dish. Repeat with remaining tortillas and filling.
- Pour the sauce evenly over the rolled enchiladas, covering the ends. Use a spatula to spread gently if needed.
- Sprinkle shredded Mexican blend cheese generously over the top.
- Bake for 20-25 minutes, until sauce is bubbling and cheese is melted and lightly golden. For a browner top, broil for the last 1-2 minutes, watching closely.
- Let enchiladas rest for 5 minutes. Garnish with fresh cilantro and sliced green onions before serving.
Notes
Don’t overfill tortillas; 2-3 tablespoons per tortilla is ideal. If tortillas crack, warm them in the microwave for 20 seconds wrapped in a damp paper towel. Let enchiladas rest for 5 minutes after baking to set the sauce. For a vegetarian version, swap chicken for black beans or roasted sweet potatoes. To freeze, assemble unbaked, cover tightly, and freeze for up to 3 months; bake from frozen at 375°F for about 45 minutes.
Nutrition
- Serving Size: 1 enchilada
- Calories: 420
- Sugar: 4
- Sodium: 650
- Fat: 24
- Saturated Fat: 12
- Carbohydrates: 28
- Fiber: 3
- Protein: 28
Keywords: Hatch green chili enchiladas, creamy enchiladas, chicken enchiladas, easy dinner, comfort food, Mexican recipe


