Love this? Save it for later!
Share the inspiration with your friends
My daughter’s third-grade holiday party was in six hours and I’d completely forgotten. The sign-up sheet had been taped to the fridge for two weeks, and somehow my eyes just glided right over it every single morning. At 9 AM, the class mom texted: “Just a reminder—treats are due at 2:30!” I stared at my phone like it had personally betrayed me.
Everyone else would be bringing Pinterest-perfect cookies with royal icing, homemade gingerbread houses, or those fancy cake pops that take actual talent. I had a block of white chocolate melting in a bowl, a bag of mini marshmallows that were slightly stale, and about twenty minutes before I needed to pick up my toddler from preschool. Honestly, I almost just bought a box of store-bought cookies and called it a day.
But then I spotted the snowman sprinkles hiding in the back of my baking cabinet—leftover from a project last year that never happened. And that’s when this little disaster of a recipe was born. I melted the chocolate, tossed in the marshmallows, dumped in the sprinkles, and spread it all out on a sheet pan. It looked ridiculous. Like, truly silly. I wrapped it in some holiday cellophane and walked into that classroom feeling like I’d brought a half-finished art project to a gallery opening.
You know what happened next. The kids lost their minds. Parents were asking for the recipe. One dad actually asked if I could make him a batch for his office party. I stood there, slightly stunned, explaining that it was basically “melt chocolate, add stuff, chill.” It was the underdog story of the year, honestly. And now this cozy white chocolate snowman poop bark with marshmallows has become my go-to holiday treat. It’s the recipe that taught me that sometimes the most stressful moments produce the best kitchen accidents.
Why You’ll Love This Recipe
Let me tell you why this cozy white chocolate snowman poop bark with marshmallows has earned a permanent spot in my holiday rotation. I’ve tested this recipe about seven times now (purely for quality control, you understand), and it delivers every single time without fail.
- Ridiculously Quick : From start to finish, you’re looking at about 15 minutes of active work. The rest is just chilling time in the fridge. Perfect for those moments when you realize the school party is in a few hours.
- Minimal Ingredients : White chocolate, marshmallows, sprinkles, and maybe a little coconut oil. That’s it. You probably have most of this in your pantry right now.
- Perfect for Holiday Chaos : Whether it’s a classroom party, a cookie swap, or just a cozy night in with hot cocoa, this bark fits the occasion. It’s the kind of treat that feels festive without requiring a PhD in pastry.
- Crowd-Pleaser for All Ages : I’ve watched toddlers and grandparents alike reach for seconds. There’s something about the combination of creamy white chocolate and soft marshmallows that hits a universal comfort-food button.
- Unbelievably Satisfying : The texture is what gets me—the snap of the white chocolate gives way to these pillowy pockets of marshmallow. It’s like a snow day in dessert form.
What makes this recipe different from every other holiday bark out there? It’s the marshmallows. Most bark recipes use crunchy toppings like pretzels or nuts. But the marshmallows stay soft and chewy, creating this incredible contrast with the firm white chocolate base. It’s not just another bark—it’s the one that makes people say “wait, what’s in this?” after their first bite. And honestly, that moment never gets old.
This cozy white chocolate snowman poop bark with marshmallows is comfort food at its most accessible. It’s the recipe you make when you need something that feels special but doesn’t require a trip to three different specialty stores. It’s for the nights when you’re wrapped in a blanket, watching a holiday movie, and you just want something sweet without all the fuss.
What Ingredients You Will Need
This recipe uses simple, straightforward ingredients to deliver maximum holiday cheer with minimal effort. Most of these are pantry staples during the winter months, which is exactly what makes this cozy white chocolate snowman poop bark with marshmallows so reliable when you’re in a pinch.
- White chocolate melting wafers or white chocolate chips (16 ounces) – I prefer Ghirardelli white chocolate melting wafers for the smoothest melt and creamiest texture. White chocolate chips work fine, but they sometimes contain stabilizers that make melting trickier. If using chips, add a teaspoon of coconut oil to help them melt smoothly.
- Coconut oil (1 teaspoon) – This is optional but highly recommended. It thins the white chocolate slightly, making it easier to spread and giving the finished bark a nicer snap. Refined coconut oil has no coconut flavor, so it won’t affect the taste.
- Mini marshmallows (1 ½ cups) – The regular white ones work best. Don’t use the colored fruit-flavored marshmallows unless you want a very different flavor profile. I’ve tried both, and the plain white marshmallows let the white chocolate shine. For best results, use fresh marshmallows—stale ones get a weird texture when mixed with warm chocolate.
- Snowman-themed sprinkles (¼ cup) – This is where the fun happens. Look for sprinkle mixes that include little snowman shapes, white snowflake sprinkles, and silver or blue jimmies. I found a great mix at Michael’s craft store in the holiday baking section. Wilton also makes a good snowman sprinkle mix.
- White sanding sugar or edible glitter (1 tablespoon, optional) – For that extra sparkle that makes the bark look like fresh snow. This is purely cosmetic but honestly, it makes a difference in the visual appeal.
- Pinch of salt – Just a tiny one. Salt enhances the sweetness of white chocolate and keeps it from tasting flat. Flaky sea salt is nice here if you have it.
For the white chocolate, I recommend staying away from white chocolate bars meant for eating—they don’t melt as evenly as melting wafers or chips. I learned this the hard way when I tried using a fancy Belgian white chocolate bar and ended up with a grainy, seized mess. Save the good eating chocolate for snacking and use melting wafers for this recipe.
If you’re looking for a dairy-free option, there are some decent white chocolate alternatives made with cocoa butter alternatives. I’ve had good luck with the Enjoy Life brand white chips, though they do have a slightly different texture. Add an extra teaspoon of coconut oil to help them melt properly.
The marshmallows are non-negotiable in terms of the texture they provide. However, if you’re avoiding gelatin, there are vegan marshmallow brands like Dandies that work well. They’re a bit denser than regular marshmallows, so they won’t soften as much in the warm chocolate, but the overall effect is still delicious.
Equipment Needed
You don’t need much for this cozy white chocolate snowman poop bark with marshmallows, which is honestly one of the best things about it. Here’s what you’ll want to have on hand:
- Baking sheet (half-sheet size, 13×18 inches) – A rimmed baking sheet works best to keep everything contained. If you only have a smaller sheet, that’s fine—your bark will just be thicker.
- Parchment paper or silicone baking mat – Absolutely essential. Without it, your bark will stick to the pan and you’ll be chiseling white chocolate shards off the metal. I prefer parchment because it’s easy to lift the whole slab off the pan.
- Microwave-safe bowl (medium size) – Glass or ceramic works best. Avoid plastic bowls for melting chocolate—they can retain odors and the chocolate doesn’t heat evenly.
- Rubber spatula – For stirring and spreading. A silicone spatula is ideal because it won’t scratch your bowls and it scrapes every last bit of chocolate out.
- Offset spatula or butter knife – For spreading the melted chocolate into an even layer. An offset spatula gives you more control, but a regular butter knife works in a pinch.
- Measuring cups and spoons – Standard set for measuring marshmallows and sprinkles.
- Refrigerator space – You’ll need a flat spot in your fridge where the baking sheet can sit undisturbed for about 30 minutes.
If you don’t have a microwave, you can melt the white chocolate using a double boiler. Just put a heatproof bowl over a pot of simmering water (make sure the bowl doesn’t touch the water) and stir until melted. It takes a few minutes longer but works just as well. I’ve also successfully melted white chocolate in a slow cooker on low heat, though that’s a bit unconventional.
For storage, an airtight container is nice but not strictly necessary. I’ve kept this bark in a ziplock bag on the counter for several days with no issues. Just make sure whatever you use is clean and dry—moisture is the enemy of white chocolate.
Preparation Method
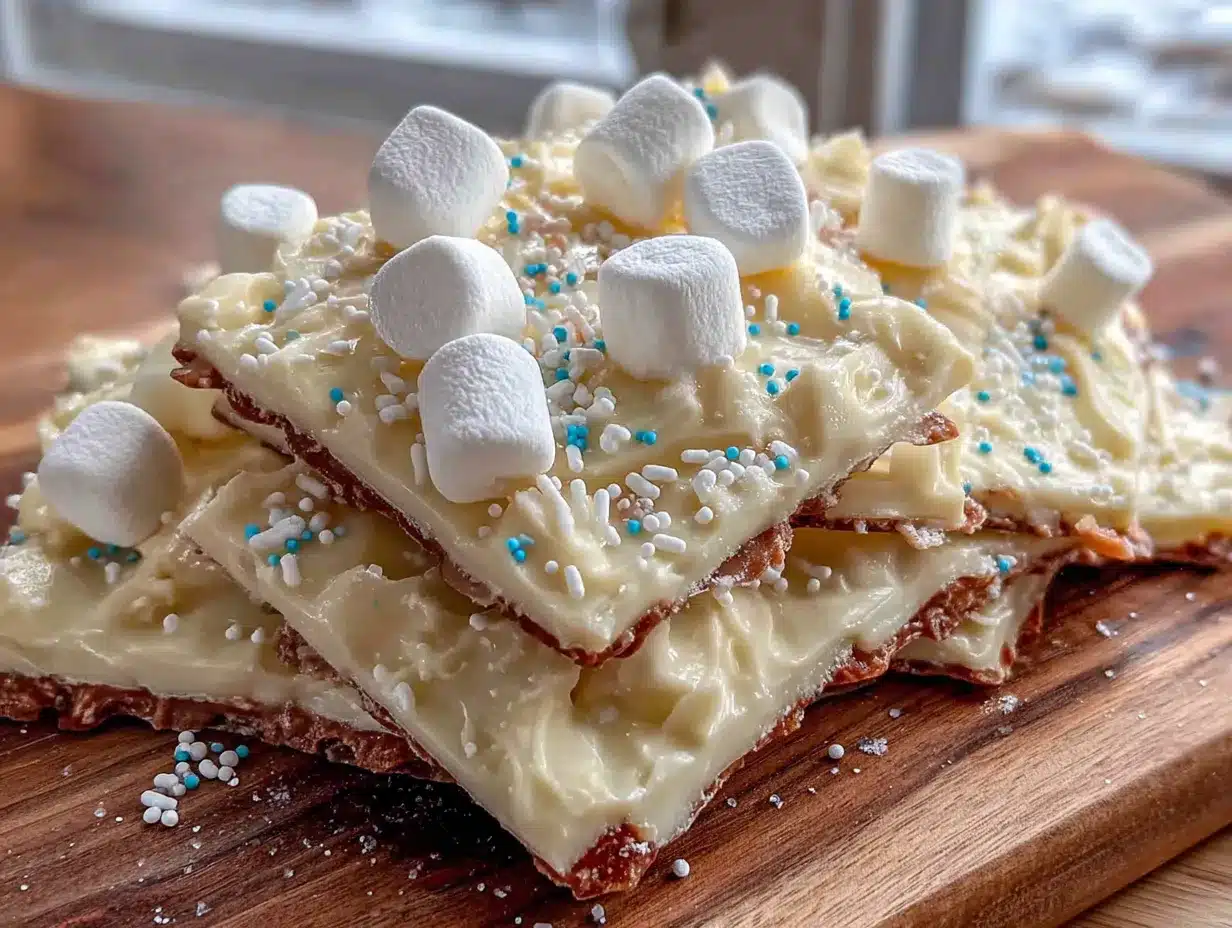
Making this cozy white chocolate snowman poop bark with marshmallows is almost embarrassingly simple. But let me walk you through it step by step, including all the little details I’ve picked up from making this about a dozen times now.
- Prep your pan – Line your baking sheet with parchment paper, making sure it extends up the sides a bit. This gives you handles to lift the bark out later. If you’re using a silicone mat, place it flat on the sheet. Set this aside while you work on the chocolate.
- Melt the white chocolate – Put your white chocolate melting wafers or chips in a microwave-safe bowl. Add the teaspoon of coconut oil if you’re using it. Microwave in 30-second intervals at 50% power, stirring thoroughly between each interval. White chocolate burns easily, so don’t rush this. After about 2-3 intervals, most of the chocolate should be melted. Stir until the residual heat melts the remaining lumps. The chocolate should be smooth and glossy, not thick or clumpy.
- Add the salt – Stir in that tiny pinch of salt. You won’t taste it directly, but it rounds out the sweetness. I forgot this step once and the bark tasted flat and one-dimensional. Trust me, that pinch makes a difference.
- Fold in the marshmallows – Pour in about 1 cup of the mini marshmallows (reserve the remaining half cup for the top). Gently fold them into the melted white chocolate with your rubber spatula. Don’t overmix—you want some marshmallows to stay mostly intact. The warm chocolate will soften them slightly, which is exactly what you want. Work quickly here because the chocolate starts setting as it cools.
- Spread the mixture – Pour the marshmallow-chocolate mixture onto your prepared baking sheet. Use your offset spatula or the back of a spoon to spread it into an even layer. Aim for about ¼ to ½ inch thickness. Don’t worry if it’s not perfectly uniform—rustic looks better here anyway. The bark should be roughly rectangular, but edges can be irregular.
- Top with remaining marshmallows and sprinkles – While the chocolate is still wet and warm, sprinkle the remaining half cup of marshmallows over the top. Then scatter the snowman sprinkles and sanding sugar evenly across the surface. Press them in gently with your fingers or the back of a spoon so they stick. This is the fun part—go ahead and make it look festive.
- Chill until set – Carefully transfer the baking sheet to the refrigerator. Let it chill for at least 30 minutes, or until the white chocolate is completely firm and no longer sticky to the touch. If you’re in a hurry, you can pop it in the freezer for 15 minutes, but watch it carefully—white chocolate can get too hard and develop condensation if frozen too long.
- Break into pieces – Once the bark is fully set, lift it out of the pan using the parchment paper edges. Place it on a cutting board. Use your hands to break it into irregular pieces, or use a sharp knife to cut cleaner shapes. I prefer breaking it by hand for that rustic, homemade look. Aim for pieces that are about 2-3 inches across.
- Serve or store – Arrange the pieces on a serving platter or pack them into gift bags. If you’re not serving immediately, store in an airtight container at room temperature for up to a week. Don’t refrigerate after breaking—the condensation can make the marshmallows soggy.
A few things I’ve learned the hard way: If your white chocolate seizes up (turns thick and grainy), you probably got a drop of water in it. Unfortunately, there’s no saving seized white chocolate—you have to start over. Also, if you’re making this in a humid environment, the white chocolate might not set as firmly. A little extra coconut oil helps with this.
Cooking Tips & Techniques
After making this cozy white chocolate snowman poop bark with marshmallows more times than I care to admit, I’ve collected a few tricks that make the process smoother and the results better.
Temperature matters more than you think. White chocolate is finicky about heat. If you melt it too fast or too hot, it can seize or become grainy. I ruined my first batch by microwaving on full power—the chocolate looked fine on the outside but was scorched in the center. Low and slow is the way to go. If your kitchen is warm (above 75°F), consider working in a cooler room or even running the air conditioning briefly. The chocolate needs to set properly, and a warm kitchen works against you.
Don’t overmix the marshmallows. I made this mistake twice before I learned. When you fold the marshmallows into the warm chocolate, they start to melt and soften. If you stir too aggressively, they’ll disintegrate completely, and you’ll lose that lovely texture contrast. Gentle folds, just until everything is combined. Some marshmallows will melt partially—that’s fine. The ones that stay intact are what make this bark special.
Use the right marshmallows. I mentioned this in the ingredients section, but it bears repeating: fresh mini marshmallows work best. Stale marshmallows get hard and chewy, which isn’t pleasant when mixed with the chocolate. If your marshmallows are a bit old, you can revive them by placing them in a sealed bag with a slice of bread overnight. The bread absorbs the staleness and the marshmallows soften up.
Timing your sprinkle application. If you add the sprinkles too early, they might sink into the chocolate and disappear. Too late, and the chocolate has set enough that they won’t stick. The sweet spot is about 30-60 seconds after you’ve spread the chocolate. The surface should still look wet and glossy. I usually sprinkle half, wait a minute, then sprinkle the rest to make sure everything adheres.
Multitasking strategy : While the bark is chilling in the fridge, use that time to clean up your workspace. The white chocolate residue on your spatula and bowl will harden quickly, making cleanup harder later. Hot soapy water right after you finish spreading makes cleanup a breeze. I usually wash my tools while the bark sets, then come back to a clean kitchen and ready-to-break bark.
Variations & Adaptations
One of the best things about this cozy white chocolate snowman poop bark with marshmallows is how easily it adapts to different tastes and occasions. Here are some variations I’ve tried and loved.
Peppermint Bark Version – Add ½ teaspoon of peppermint extract to the melted white chocolate before adding the marshmallows. Replace the snowman sprinkles with crushed candy canes or peppermint candies. The combination of cool peppermint and sweet white chocolate is classic for a reason. This version disappears fastest at holiday parties, in my experience.
Dark Chocolate Twist – Swap half the white chocolate for dark chocolate chips. Melt them together and proceed as directed. The contrast between dark and white chocolate with the marshmallows is gorgeous, both visually and in flavor. Use dark chocolate that’s around 60% cacao for the best balance—too bitter and it overpowers the marshmallows.
Vegan-Friendly Adaptation – Use dairy-free white chocolate chips (Enjoy Life makes a good one) and vegan marshmallows (Dandies are my go-to). Add an extra teaspoon of coconut oil to help the dairy-free chocolate melt smoothly. The texture is slightly different—a bit softer—but the flavor is still fantastic. I’ve served this to vegan and non-vegan friends alike and nobody complained.
Add Some Crunch – If you want a textural contrast beyond the marshmallows, try adding ½ cup of crushed pretzels or toasted coconut flakes. Fold them in with the marshmallows. The salt from the pretzels plays beautifully against the sweet white chocolate. I made a batch with crushed salted pretzels for a Super Bowl party and it was gone in minutes.
Seasonal Sprinkle Swaps – This bark isn’t just for winter. Swap the snowman sprinkles for pastel Easter sprinkles in spring, red-white-and-blue for the Fourth of July, or orange and black for Halloween. The base recipe stays the same year-round. I’ve made this for every major holiday and it always fits right in.
Cookie Butter Version – This one’s a little indulgent, but hear me out. Swirl 2-3 tablespoons of cookie butter (like Biscoff spread) into the melted white chocolate before adding the marshmallows. Use a knife to create swirl patterns. The cookie butter adds a spiced, caramelized flavor that’s incredible with the marshmallows. I made this for a cookie exchange and people literally asked for the recipe before they finished their first piece.
Serving & Storage Suggestions
Serving this cozy white chocolate snowman poop bark with marshmallows is where the fun really begins. Here’s how to make it look as good as it tastes.
Serving Temperature – This bark is best served at room temperature or slightly chilled. If it’s too cold, the white chocolate can be hard and the marshmallows might feel chewy. Let it sit out for about 10 minutes after coming out of the fridge before serving. On a serving platter, it stays perfect for about an hour at room temperature.
Presentation Ideas – Arrange the broken pieces on a white platter or cake stand for that snowy winter aesthetic. You can stack them in a pyramid or scatter them casually. For gift-giving, place pieces in clear cellophane bags tied with festive ribbon. I’ve also used small mason jars filled with bark pieces as party favors—they look adorable and people actually use them.
Complementary Dishes – This bark pairs beautifully with hot chocolate, coffee, or a warm cup of tea. The sweetness of the white chocolate balances the bitterness of coffee perfectly. If you’re serving it as part of a dessert table, it goes well with sugar cookies, gingerbread, or peppermint brownies. For a cheese board twist (and yes, I’ve done this), serve small pieces alongside aged cheddar or creamy brie—the sweet-salty contrast is surprisingly good.
Storage Instructions – Store your bark in an airtight container at room temperature for up to a week. If your kitchen is warm (above 70°F), you can store it in the refrigerator, but let it come to room temperature before serving to avoid condensation. I don’t recommend freezing this bark—the marshmallows get tough and the white chocolate can develop a weird texture after thawing.
Flavor Development – Interestingly, this bark actually tastes better the day after it’s made. The marshmallows have time to soften slightly and meld with the white chocolate, creating a more cohesive texture. If you’re making this for an event, making it a day ahead is actually ideal. Just keep it in an airtight container and it’ll be perfect.
Transport Tips – If you’re bringing this bark to a party, transport it in a single layer in a container with a tight lid. Stacking pieces can cause them to break further (though honestly, broken pieces still taste the same). I usually pack the pieces in a shallow baking dish covered with foil, then transfer them to a serving platter at the destination.
Nutritional Information & Benefits
Let’s be real—this cozy white chocolate snowman poop bark with marshmallows is a treat, not a health food. But here’s the nutritional breakdown so you know what you’re working with.
Estimated Nutritional Values (per 1-ounce serving, about 2 pieces) :
- Calories: 150-170
- Total Fat: 9-10g
- Saturated Fat: 5-6g
- Carbohydrates: 18-20g
- Sugar: 15-17g
- Protein: 1-2g
- Sodium: 20-30mg
Health Considerations : White chocolate is made from cocoa butter, sugar, and milk solids. It contains some calcium from the milk content, along with small amounts of iron and potassium. The marshmallows are primarily sugar and gelatin, so they don’t add much nutritional value beyond the joy they bring.
Dietary Notes : This recipe contains dairy and may contain soy (check your white chocolate ingredients). It’s not gluten-free unless you verify your white chocolate and marshmallows are certified gluten-free—some brands use wheat-based additives. For a lower-sugar version, you can try using sugar-free white chocolate, though the texture will be different and it may not melt as smoothly.
My Personal Take : Look, I’m not going to pretend this is a health food. But I do believe that treats made with intention and shared with people you love have their own kind of nutritional value. A piece or two of this bark after a long day? That’s comfort, pure and simple. And sometimes comfort is exactly what we need.
Allergen Warning : White chocolate contains milk and may contain traces of nuts, soy, and wheat depending on the brand. Marshmallows contain gelatin (animal-derived). Always check labels if serving to someone with allergies.
Conclusion
This cozy white chocolate snowman poop bark with marshmallows has become my secret weapon for holiday stress, last-minute party emergencies, and those evenings when I just need something sweet without a complicated production. It’s the recipe that proved to me that you don’t need fancy techniques or rare ingredients to make something people genuinely love.
What I love most about this recipe is how forgiving it is. You can use whatever white chocolate you have, whatever sprinkles are in your pantry, and it still turns out delicious. It’s the kind of recipe that builds confidence in the kitchen—if you can melt chocolate and sprinkle things on top, you can make this. And honestly, that’s a beautiful thing.
I hope you give this recipe a try, whether it’s for a classroom party, a holiday gathering, or just a quiet night at home. Feel free to make it your own—swap the sprinkles, add some peppermint, throw in some pretzels. The base recipe is just a starting point. I’d love to hear how yours turns out. Drop a comment below and tell me about your version. Did you add something unexpected? Did your kids help with the sprinkles? Did it save you from a last-minute panic like it saved me?
Until next time, happy baking—and remember, sometimes the best recipes come from the biggest disasters.
Frequently Asked Questions
Can I use almond bark or candy melts instead of white chocolate?
Yes, absolutely. Almond bark and candy melts are designed for melting and coating, so they work perfectly for this recipe. They’re actually more forgiving than real white chocolate because they don’t seize as easily. The flavor is slightly different—less creamy and more sweet—but the texture will be excellent. If you use candy melts, you might not need the coconut oil since they already contain oils for smooth melting.
Why did my white chocolate seize up and turn grainy?
White chocolate seizes when it comes into contact with even a tiny amount of water. This can happen if your bowl wasn’t completely dry, if steam from the microwave got into the chocolate, or if you used a wet spatula. Unfortunately, seized white chocolate can’t be saved—you have to start over. To prevent this, make sure all your equipment is bone-dry, and never cover the bowl while microwaving (condensation can drip down). Adding a teaspoon of coconut oil before melting also helps stabilize the chocolate.
How far in advance can I make this bark?
You can make this bark up to a week in advance if stored properly. Keep it in an airtight container at room temperature away from direct sunlight. I actually find the bark tastes better on day two because the marshmallows have softened slightly and melded with the chocolate. Just don’t refrigerate it after breaking it into pieces—the condensation can make the marshmallows soggy and the white chocolate develop a white bloom on the surface.
Can I double this recipe for a larger batch?
Yes, but I recommend making it in two separate batches rather than trying to melt all the chocolate at once. White chocolate is tricky to melt in large quantities because it heats unevenly and can burn. Split the ingredients in half, make one batch, then make the second batch. If you try to spread double the mixture on one baking sheet, the bark will be too thick and won’t set properly. Use two baking sheets instead.
My bark turned out too soft and won’t break cleanly. What went wrong?
This usually happens for one of two reasons. First, you might have used too much coconut oil or added it after the chocolate was already melted (which can thin it too much). Stick to 1 teaspoon maximum. Second, your kitchen might be too warm for the chocolate to set properly. If it’s above 75°F, the chocolate may not firm up completely. Try chilling it in the refrigerator for a full hour, or even 15 minutes in the freezer. If it’s still soft after that, you might need to remelt it and add a bit more white chocolate to balance the fat content.
Pin This Recipe!
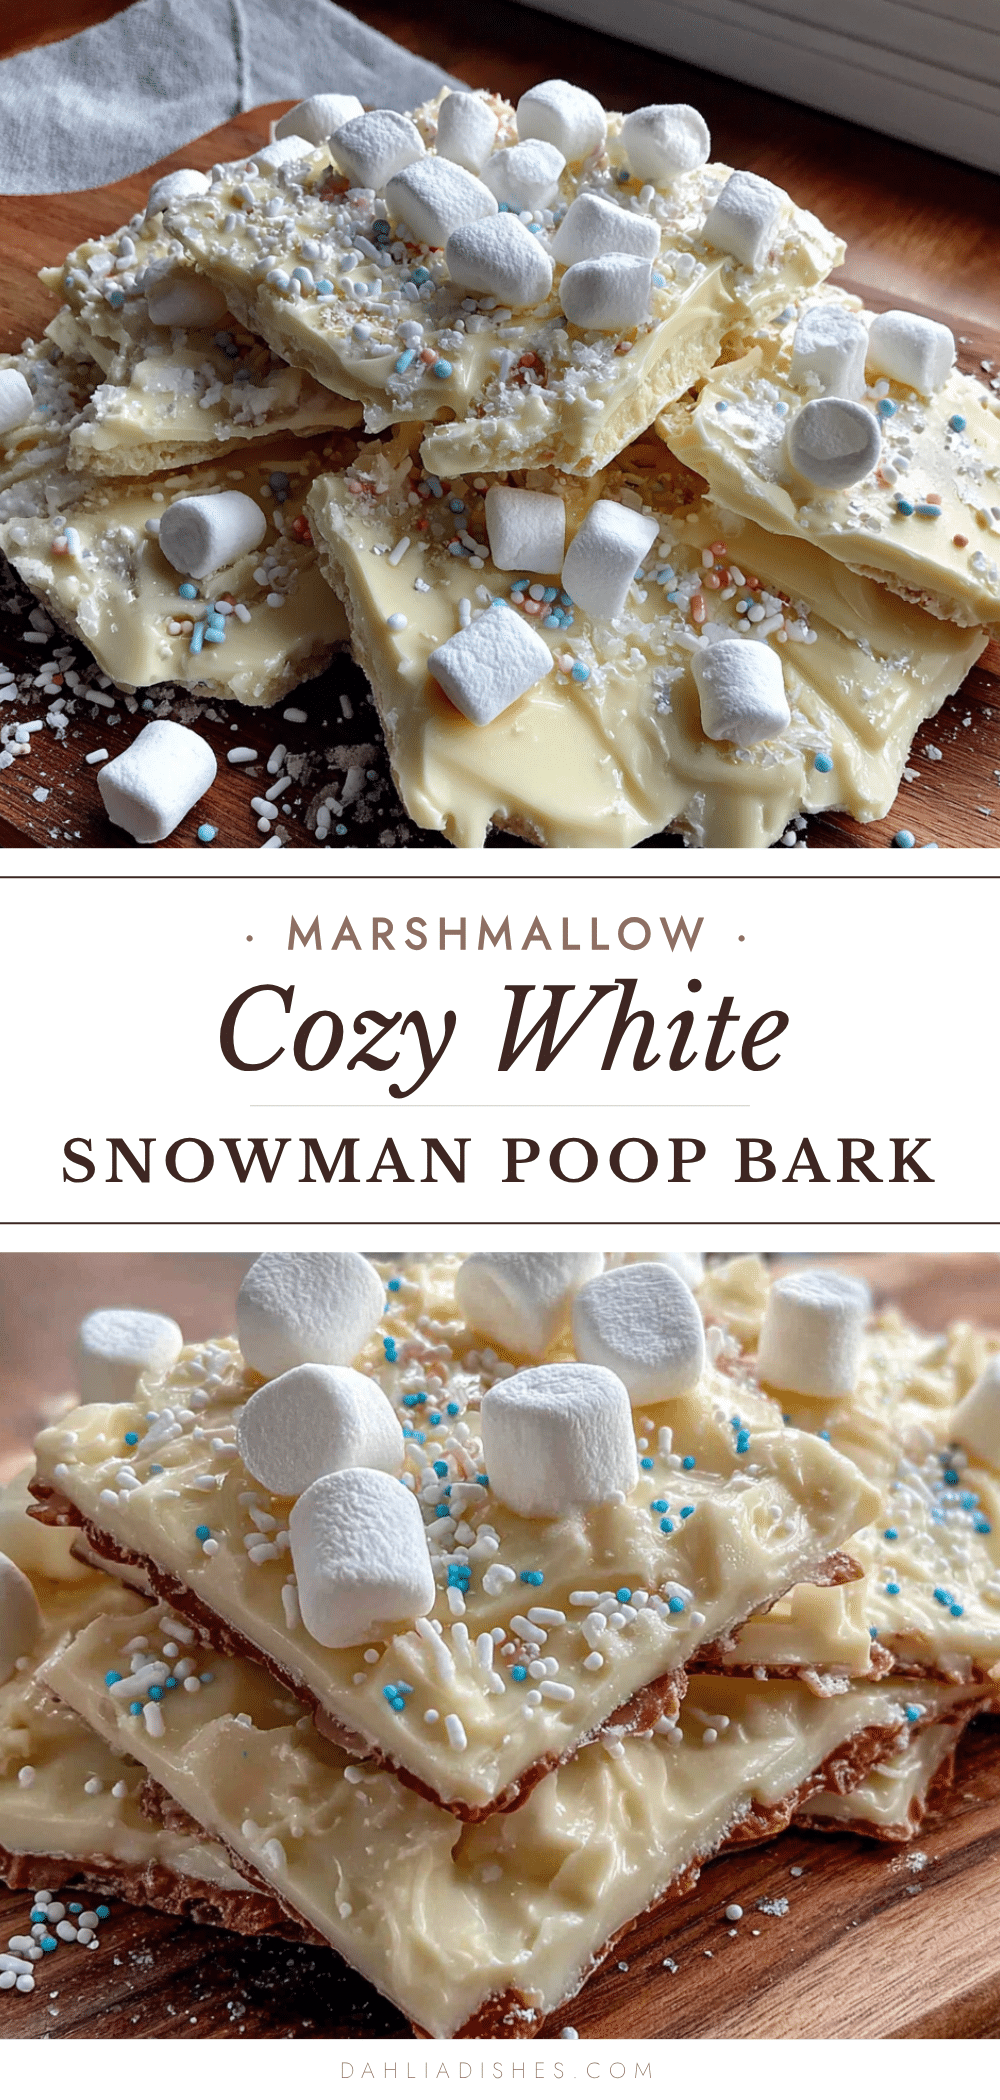
Cozy White Chocolate Snowman Poop Bark with Marshmallows
A quick and easy holiday treat made with white chocolate, mini marshmallows, and snowman-themed sprinkles. Perfect for last-minute parties, cookie swaps, or cozy nights in.
- Prep Time: 15 minutes
- Cook Time: 0 minutes
- Total Time: 45 minutes (includes chilling time)
- Yield: 12 servings 1x
- Category: Dessert
- Cuisine: American
Ingredients
- 16 ounces white chocolate melting wafers or white chocolate chips
- 1 teaspoon coconut oil (optional)
- 1 ½ cups mini marshmallows
- ¼ cup snowman-themed sprinkles
- 1 tablespoon white sanding sugar or edible glitter (optional)
- Pinch of salt
Instructions
- Line a baking sheet with parchment paper, extending it up the sides for easy removal.
- Place white chocolate and coconut oil in a microwave-safe bowl. Microwave in 30-second intervals at 50% power, stirring thoroughly between each interval, until smooth and glossy.
- Stir in a pinch of salt.
- Fold in 1 cup of mini marshmallows gently, reserving the remaining ½ cup for the top.
- Pour the mixture onto the prepared baking sheet and spread into an even layer about ¼ to ½ inch thick.
- While the chocolate is still wet, sprinkle the remaining ½ cup of marshmallows, snowman sprinkles, and sanding sugar evenly over the top. Press gently to adhere.
- Refrigerate for at least 30 minutes, or until completely firm.
- Lift the bark out of the pan using the parchment paper. Break into irregular pieces by hand or cut with a knife.
- Serve immediately or store in an airtight container at room temperature for up to a week.
Notes
White chocolate seizes if it contacts water; ensure all equipment is dry. For best texture, use fresh mini marshmallows. The bark tastes better the day after it’s made. If your kitchen is warm (above 75°F), chill longer. For a vegan version, use dairy-free white chocolate and vegan marshmallows.
Nutrition
- Serving Size: 1 ounce (about 2 pie
- Calories: 160
- Sugar: 16
- Sodium: 25
- Fat: 9.5
- Saturated Fat: 5.5
- Carbohydrates: 19
- Protein: 1.5
Keywords: white chocolate bark, snowman poop, holiday treat, easy dessert, last-minute recipe, marshmallow bark, Christmas bark


