Love this? Save it for later!
Share the inspiration with your friends
It was 11:47 PM on a Tuesday that felt like it had lasted a week, and I had a very specific, almost violent craving for a warm chocolate chip cookie. Not the kind you buy in a pack, not the kind that sits under a plastic dome at the gas station, but the real deal—golden edges, a gooey center, and that salty-sweet thing that makes you close your eyes. The only problem? I didn’t have the energy for a full batch, and honestly, I didn’t have the eggs. I had exactly one, and it was looking a little lonely in the carton. I also had a half-stick of butter that was more “slightly melted from sitting out” than “properly softened,” and a bag of chocolate chips that was suspiciously light.
But here’s the thing about late-night cooking—the rules get a little fuzzy. You stop caring about what the recipe “should” be and start caring about what’s possible. So I grabbed my smallest mixing bowl, the one I usually use for salad dressing, and I just started throwing things together. I used that single egg, a splash of vanilla that was definitely past its “best by” date, and I swapped half the butter for a spoonful of plain Greek yogurt I found hiding in the back of the fridge. I mean, what was the worst that could happen? It was 11:47 PM. No one was watching. The kitchen was dark except for the stove light, and the only sound was the hum of the fridge. I baked just four cookies on a tiny sheet pan, and let me tell you—when I pulled them out, golden and imperfect, I felt like I had discovered something. They were chewy, they were rich, and they had this tangy little something from the yogurt that made them taste almost like a secret. Maybe you’ve been there—standing in your kitchen at an hour that feels both wrong and absolutely right, making something that shouldn’t work but absolutely does. That’s the cookie I’m sharing with you today. It’s the one I keep making, even when the sun is up.
Why You’ll Love This Recipe
This isn’t just another chocolate chip cookie recipe. This is the one you make when you want the satisfaction of a warm, homemade cookie without committing to three dozen of them. It’s small-batch perfection, tested in the weirdest of conditions (my 11:47 PM experiment has been repeated at least a dozen times since, and it works every single time).
- Quick & Easy: From start to finish, you’re looking at about 20 minutes. No chill time required. Yes, you read that right—no chilling.
- Simple Ingredients: You probably have everything already. Butter, sugar, one egg, flour, chocolate chips. The Greek yogurt is optional but highly recommended.
- Perfect for a Cozy Night: This is the cookie for when you’re curled up on the couch, it’s raining outside, or you just need a little pick-me-up after a long day.
- Crowd-Pleaser: I’ve made these for exactly two people (me and my neighbor, Carol) and for a small dinner party. They disappear every time.
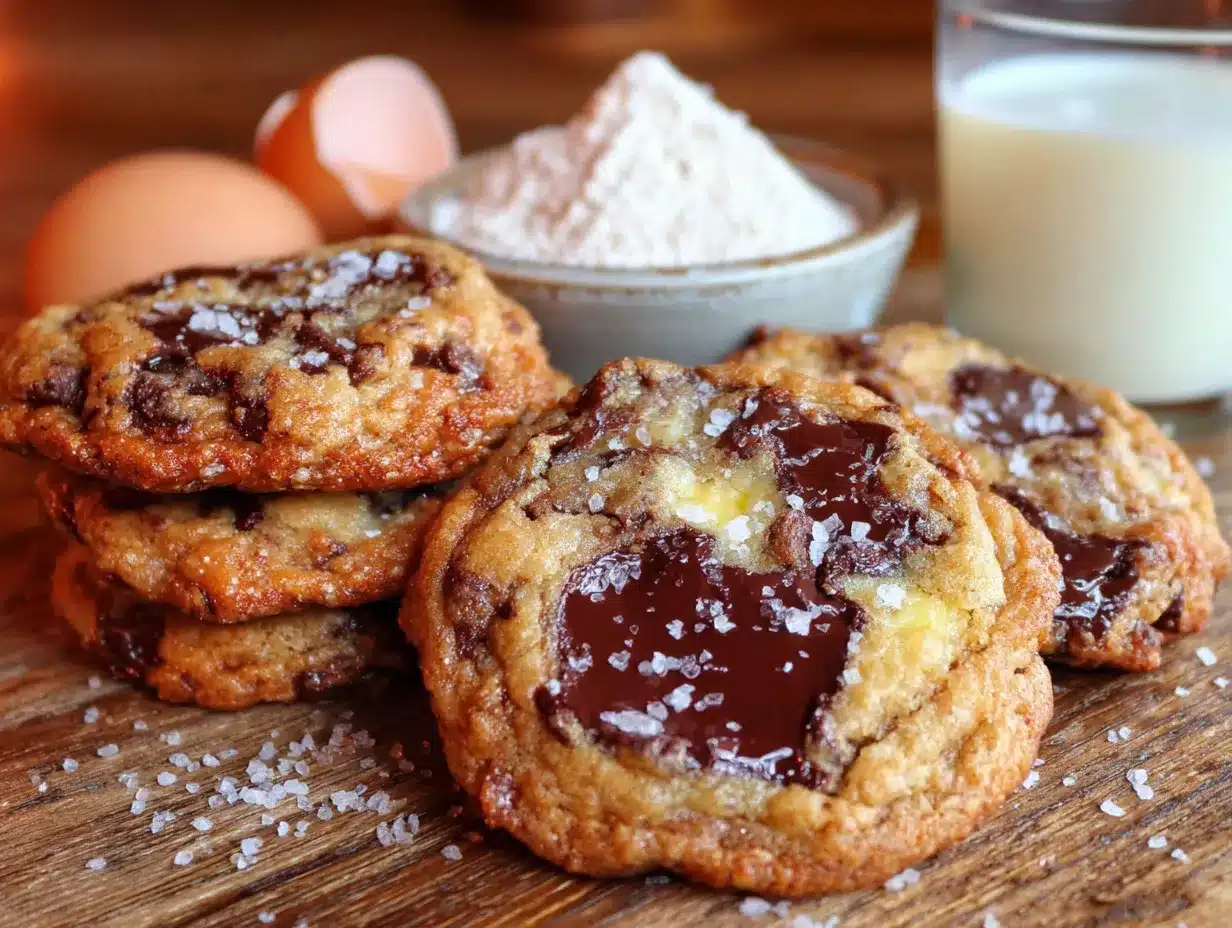
- Unbelievably Delicious: The texture is the star here—crispy on the edges, soft and almost gooey in the center. The Greek yogurt trick gives them a tenderness that’s hard to describe but easy to love.
What makes this recipe different from every other chocolate chip cookie recipe out there? It’s the yogurt. It adds moisture without making the cookie cakey, and it gives the dough a slight tang that balances the sweetness of the chocolate. I tested this with regular butter, with browned butter, with all yogurt and no butter—and this version, the half-and-half version, won every single time. It’s comfort food reimagined: faster, more forgiving, but with the same soul-soothing satisfaction. Perfect for when you want to impress yourself without any stress.
What Ingredients You Will Need
This recipe uses simple, everyday ingredients to deliver a cookie that tastes like it came from a fancy bakery. No weird stuff, no specialty flours—just good, honest ingredients that work together beautifully.
- Unsalted butter, 2 tablespoons (28g), slightly softened but still cool to the touch. I prefer Kerrygold for the richness, but any good unsalted butter works.
- Plain Greek yogurt, 1 tablespoon (15g). This is my secret weapon. Use full-fat for the best texture, but 2% works too. It adds moisture and a subtle tang.
- Granulated sugar, 2 tablespoons (25g). Just regular white sugar. It helps with the crispy edges.
- Light brown sugar, 2 tablespoons (25g), packed. This gives the cookie its chewiness and that deep, almost caramel-like flavor. I use Domino, but any brand is fine.
- One large egg yolk. Yes, just the yolk. The white gets saved for an omelet or scrambled eggs the next morning. The yolk adds richness and tenderness without making the dough too wet.
- Vanilla extract, 1/2 teaspoon. Pure vanilla is best, but imitation works in a pinch. I’ve used both and honestly, the cookies are still delicious.
- All-purpose flour, 1/3 cup (42g). Spoon and level it—don’t scoop directly from the bag or you’ll end up with dry cookies.
- Baking soda, 1/4 teaspoon. This is what gives the cookies a little spread and a soft center.
- Salt, 1/8 teaspoon. I use fine sea salt. If you only have kosher, use a pinch more.
- Chocolate chips or chunks, 1/3 cup (60g). I prefer a mix of semi-sweet and dark chocolate chunks. Ghirardelli is my go-to, but use whatever you love. You can even chop up a good quality chocolate bar for those melty pools of chocolate.
- Flaky sea salt (optional), for sprinkling on top. Maldon is my favorite. It’s not necessary, but it takes the cookie from great to unforgettable.
Ingredient Notes: If you don’t have Greek yogurt, you can use an extra tablespoon of butter (so 3 tablespoons total) or even a tablespoon of sour cream. The texture will be slightly different—less tangy, a bit more buttery—but still good. For a dairy-free version, use vegan butter and a dairy-free yogurt. I’ve tried it with Miyoko’s butter and it worked surprisingly well.
Equipment Needed
You don’t need a fancy kitchen to make these cookies. In fact, I made them the first time with a fork and a cereal bowl. But if you want to make it easy on yourself, here’s what I recommend:
- Small mixing bowl (a cereal bowl works perfectly)
- Whisk or fork for mixing the wet ingredients
- Rubber spatula or wooden spoon for folding in the dry ingredients
- Measuring spoons and cups (a kitchen scale is even better for accuracy)
- Small baking sheet (a quarter-sheet pan is ideal, but a regular half-sheet pan works too)
- Parchment paper or silicone baking mat (parchment is cheaper and gives crisper bottoms)
- Cookie scoop or two spoons for portioning the dough
- Cooling rack (optional, but helps the bottoms stay crisp)
If you don’t have a baking sheet, you can use a cast iron skillet or even a small oven-safe frying pan. Just adjust the baking time slightly—cast iron holds heat, so the bottoms might brown faster. I’ve also baked these in a toaster oven with great results. Just keep an eye on them, because toaster ovens run hot.
Preparation Method
This is the easy part. Follow these steps, and you’ll have warm cookies in about 20 minutes. Trust the process—especially the part where the dough looks a little dry. It’s supposed to.
- Preheat your oven to 350°F (175°C). Line a small baking sheet with parchment paper. If you’re using a silicone mat, that’s fine too, but the bottoms might be slightly less crispy.
- Melt the butter slightly. In a small microwave-safe bowl, melt the 2 tablespoons of butter for about 15-20 seconds. You don’t want it fully liquid—just soft enough that you can stir it easily. A few small lumps are fine. If you accidentally melt it completely, let it cool for a minute before moving on.
- Mix the wet ingredients. To the bowl with the butter, add the Greek yogurt, granulated sugar, brown sugar, egg yolk, and vanilla extract. Whisk with a fork or a small whisk until everything is combined and smooth. It should look like a thick, pale caramel. This takes about 30 seconds of vigorous mixing.
- Add the dry ingredients. Sprinkle the flour, baking soda, and salt over the wet mixture. Use a rubber spatula or a wooden spoon to fold everything together until just combined. Do not overmix—stop as soon as you no longer see streaks of flour. The dough will look a little dry and crumbly at this point, and that’s exactly what you want. Overmixing leads to tough cookies.
- Fold in the chocolate chips. Add the chocolate chips or chunks and fold them in gently. The dough might seem like it won’t come together, but keep pressing it gently with the spatula. It will eventually form a shaggy dough. If it’s really not holding together, you can add a tiny splash of milk (like 1 teaspoon), but I’ve never needed it.
- Portion the dough. Use a cookie scoop or two spoons to divide the dough into 4 equal portions. Each portion should be about 2 tablespoons of dough. Roll them into balls with your hands—the warmth of your hands will help them come together. Place them on the prepared baking sheet, spacing them about 2 inches apart. They will spread, but not too much.
- Bake. Bake for 10-12 minutes, or until the edges are golden brown and the centers look just set and slightly puffy. The tops should be lightly browned but still soft. For a gooier cookie, bake for 9-10 minutes. For a crisper cookie, go the full 12 minutes. My sweet spot is 11 minutes.
- Cool slightly. Let the cookies cool on the baking sheet for 5 minutes. This is important—they are very fragile when they come out of the oven. After 5 minutes, transfer them to a cooling rack. If you want to add flaky sea salt, sprinkle it on right when they come out of the oven, while the tops are still warm and slightly melty.
Pro tip: If you want thicker cookies, chill the dough balls in the freezer for 10 minutes before baking. This solidifies the butter and prevents too much spread. I do this when I want a more bakery-style cookie.
Cooking Tips & Techniques
I’ve made these cookies more times than I can count, and I’ve learned a few things along the way. Here are the tips I wish someone had told me earlier.
Don’t overmix the dough. This is the number one mistake people make with small-batch cookies. The dough is already low in moisture, so overmixing develops the gluten and makes the cookies tough. Mix until you see the last streak of flour disappear, then stop. I once kept mixing because the dough looked dry, and the cookies came out like little hockey pucks. Learn from my failure.
Use a kitchen scale if you have one. I know, I know—measuring cups are easier. But flour is notoriously inconsistent when measured by volume. A cup of flour can weigh anywhere from 120g to 150g depending on how you scoop it. For this recipe, 42g of flour is the sweet spot. If you don’t have a scale, spoon the flour into your measuring cup and level it off with a knife. No scooping directly from the bag.
Let the cookies cool on the pan. I know it’s tempting to move them to a rack immediately, but those 5 minutes on the hot pan are crucial. The residual heat continues to cook the centers gently, setting the structure without drying them out. If you move them too soon, they will fall apart. I speak from experience—I once tried to move a cookie after 2 minutes and ended up with a pile of crumbs.
Room temperature ingredients matter, but not that much. The original version of this recipe was made with a cold egg and slightly melted butter, and it still worked. That said, if you want the best texture, let your egg yolk come to room temperature for about 15 minutes before starting. It emulsifies better with the butter and sugar, giving you a smoother dough.
Multitask wisely. While the cookies are baking, clean up your mixing bowl and utensils. The dough is forgiving, but you don’t want to be scrambling to find a cooling rack when the timer goes off. I like to set up my cooling rack and sprinkle of salt before I even preheat the oven.
Variations & Adaptations
This recipe is a base, and bases are meant to be played with. Here are a few variations I’ve tried and loved.
Double Chocolate Chip: Replace 1 tablespoon of the flour with 1 tablespoon of unsweetened cocoa powder. Use white chocolate chips or dark chocolate chips. The result is a deeply chocolatey cookie with a fudgy center. I made these for a friend who claimed she didn’t like chocolate chip cookies, and she ate three.
Brown Butter Version: Brown the 2 tablespoons of butter in a small saucepan over medium heat until it turns golden brown and smells nutty. Let it cool for 5 minutes before using. This adds a toasty, almost caramel flavor that pairs beautifully with the chocolate. The texture will be slightly chewier because the browning process removes some moisture.
Gluten-Free Adaptation: Substitute the all-purpose flour with a 1:1 gluten-free baking flour blend (I like King Arthur’s). Add an extra tablespoon of the blend because gluten-free flours absorb more liquid. The cookies will be slightly more crumbly but still delicious. I tested this for a friend with celiac disease, and she said they were better than the “real” version.
Add-In Variations: Fold in 1/4 cup of chopped toasted walnuts or pecans along with the chocolate chips. Or swap half the chocolate chips for dried cherries or cranberries for a tart contrast. I once added a pinch of cinnamon and a dash of cayenne pepper for a Mexican hot chocolate vibe—it was weirdly amazing.
Vegan Version: Use 2 tablespoons of vegan butter (I like Miyoko’s) and 1 tablespoon of aquafaba (the liquid from a can of chickpeas) instead of the egg yolk. The texture is a bit more cakey, but the flavor is spot on. I made these for a vegan potluck and they were gone in 10 minutes.
Serving & Storage Suggestions
These cookies are best served warm, straight from the oven, with a cold glass of milk or a hot cup of coffee. The contrast between the warm, gooey center and the cold milk is pure comfort. I also love serving them with a scoop of vanilla ice cream for an impromptu ice cream sandwich—just press a scoop of ice cream between two cookies and enjoy immediately.
For presentation, I like to arrange the cookies on a small plate with a sprinkle of flaky sea salt and a few extra chocolate chips scattered around. It looks intentional and pretty, even if it took 30 seconds.
Storage: Store leftover cookies in an airtight container at room temperature for up to 3 days. They will lose some of their crispiness but will still be delicious. To revive them, pop one in the microwave for 10 seconds or in a 300°F oven for 3-4 minutes. The microwave makes them soft and gooey; the oven makes them crispy again.
Freezing: You can freeze the baked cookies for up to 3 months. Wrap each cookie individually in plastic wrap, then place them in a freezer bag. Thaw at room temperature for about 30 minutes, or reheat directly from frozen in a 350°F oven for 5-6 minutes. I also freeze the raw dough balls—just portion them onto a baking sheet, freeze until solid, then transfer to a freezer bag. Bake from frozen, adding 2-3 minutes to the baking time.
Flavor Development: Honestly, these cookies are best on the first day, when the edges are crispy and the centers are soft. But I have to admit, day-old cookies are pretty great too—the flavors meld together, and the texture becomes uniformly chewy. If you can resist eating them all on day one, you’re a stronger person than I am.
Nutritional Information & Benefits
Let’s be real—these are cookies, not a health food. But they are a small batch, which means you’re only making four of them, not three dozen. That alone is a win for portion control. Here’s the approximate nutritional breakdown per cookie (based on using unsalted butter, full-fat Greek yogurt, and semi-sweet chocolate chips):
| Nutrient | Amount per Cookie |
|---|---|
| Calories | 220 |
| Total Fat | 12g |
| Saturated Fat | 7g |
| Cholesterol | 45mg |
| Sodium | 95mg |
| Total Carbohydrates | 28g |
| Dietary Fiber | 1g |
| Sugars | 18g |
| Protein | 3g |
Health Highlights: The Greek yogurt adds a small amount of protein and probiotics, which is a nice bonus. Dark chocolate contains antioxidants and can be part of a balanced diet. And because this is a small batch, you’re less likely to overindulge compared to a full recipe. Plus, making cookies from scratch means you control the ingredients—no preservatives, no artificial flavors, just real food.
Dietary Considerations: This recipe is vegetarian. For gluten-free, vegan, or dairy-free options, see the variations section above. The cookies contain wheat, dairy, and eggs, so they are not suitable for those with allergies to those ingredients.
Conclusion
This cozy small-batch chocolate chip cookie recipe is proof that you don’t need a lot of ingredients or a lot of time to create something truly special. It’s the kind of recipe that feels like a warm hug on a cold day, a little moment of joy in the middle of a busy week, or a quiet celebration of something small and good. Whether you’re making them at 11:47 PM on a Tuesday or on a lazy Sunday afternoon, these cookies deliver exactly what you need—comfort, flavor, and a little bit of magic.
I love this recipe because it’s forgiving. It doesn’t demand perfection. It lets you use what you have and still rewards you with something delicious. And honestly, that’s the kind of cooking I want to do more of—the kind that feels less like a chore and more like a gift to myself.
I’d love to hear how your cookies turn out! Did you try a variation? Did you add something unexpected? Drop a comment below and let me know. And if you loved this recipe, share it with a friend who needs a little cozy comfort in their life. Happy baking!
Frequently Asked Questions
Can I double this recipe?
Absolutely! This recipe scales perfectly. Just double all the ingredients and use a whole egg instead of just the yolk. You’ll get about 8 cookies. The baking time might increase by a minute or two, so keep an eye on them.
Why did my cookies turn out flat?
Flat cookies usually mean the butter was too warm or the dough wasn’t chilled. Make sure your butter is just slightly softened, not melted. If your kitchen is warm, chill the dough balls for 10 minutes in the freezer before baking. Also, check your baking soda—if it’s old, it won’t provide enough lift.
Can I use all brown sugar instead of white?
Yes, but the cookies will be softer and chewier, with a deeper molasses flavor. They will also spread a bit more. I’ve tried it, and it’s delicious, but the texture is noticeably different. If you like a softer cookie, go for it.
How do I make these cookies dairy-free?
Use vegan butter (like Miyoko’s or Earth Balance) and a dairy-free yogurt (like coconut or almond-based). The texture will be slightly different—more cakey and less crispy—but the flavor is still great. I recommend adding an extra tablespoon of brown sugar to compensate for the lack of dairy fat.
Can I use a different type of chocolate?
Definitely! Try white chocolate chips, milk chocolate chunks, or even a chopped-up chocolate bar. I love using a mix of semi-sweet and dark chocolate for a more complex flavor. You can also use chocolate chips that are flavored, like mint or orange-infused. Just be careful with flavored chips—they can be very sweet.
Pin This Recipe!

Cozy Small-Batch Chocolate Chip Cookies: Best Easy Recipe

This small-batch chocolate chip cookie recipe is perfect for when you crave a warm, homemade cookie without committing to a full batch. Made with a secret ingredient—Greek yogurt—these cookies have crispy edges, a gooey center, and a delightful salty-sweet flavor, ready in about 20 minutes with no chill time required.
- Prep Time: 10 minutes
- Cook Time: 10-12 minutes
- Total Time: 20-22 minutes
- Yield: 4 cookies 1x
- Category: Dessert
- Cuisine: American
Ingredients
- 2 tablespoons (28g) unsalted butter, slightly softened
- 1 tablespoon (15g) plain Greek yogurt (full-fat preferred)
- 2 tablespoons (25g) granulated sugar
- 2 tablespoons (25g) light brown sugar, packed
- 1 large egg yolk
- 1/2 teaspoon vanilla extract
- 1/3 cup (42g) all-purpose flour, spooned and leveled
- 1/4 teaspoon baking soda
- 1/8 teaspoon fine sea salt
- 1/3 cup (60g) chocolate chips or chunks (semi-sweet and dark mix recommended)
- Flaky sea salt (optional, for sprinkling)
Instructions
- Preheat your oven to 350°F (175°C). Line a small baking sheet with parchment paper.
- In a small microwave-safe bowl, melt the butter for 15-20 seconds until slightly softened but not fully liquid. Let cool slightly if melted completely.
- To the bowl with butter, add Greek yogurt, granulated sugar, brown sugar, egg yolk, and vanilla extract. Whisk with a fork until smooth and combined, about 30 seconds.
- Sprinkle flour, baking soda, and salt over the wet mixture. Fold with a rubber spatula until just combined—do not overmix. The dough will look dry and crumbly.
- Fold in chocolate chips gently until evenly distributed. The dough should come together into a shaggy dough.
- Divide dough into 4 equal portions (about 2 tablespoons each). Roll into balls and place on prepared baking sheet, spacing 2 inches apart.
- Bake for 10-12 minutes, until edges are golden brown and centers are just set and slightly puffy. For gooier cookies, bake 9-10 minutes; for crisper, 12 minutes.
- Let cookies cool on baking sheet for 5 minutes (they are fragile). Transfer to a cooling rack. If using flaky sea salt, sprinkle on immediately after removing from oven.
Notes
For thicker cookies, chill dough balls in freezer for 10 minutes before baking. If dough is too dry, add 1 teaspoon of milk. Greek yogurt can be substituted with 1 extra tablespoon of butter or sour cream. For dairy-free, use vegan butter and dairy-free yogurt. Cookies are best served warm but can be stored in an airtight container for up to 3 days. To revive, microwave for 10 seconds or reheat in 300°F oven for 3-4 minutes.
Nutrition
- Serving Size: 1 cookie
- Calories: 220
- Sugar: 18
- Sodium: 95
- Fat: 12
- Saturated Fat: 7
- Carbohydrates: 28
- Fiber: 1
- Protein: 3
Keywords: small-batch chocolate chip cookies, easy cookie recipe, no chill cookies, Greek yogurt cookies, quick dessert, cozy cookies


