Love this? Save it for later!
Share the inspiration with your friends
Last November, I was at the farmers’ market, gripping a sugar pumpkin like it held the secrets to a perfect holiday. An older woman named Gladys, who ran the honey stand next to the pumpkin pile, watched me struggle to pick one. She didn’t say anything at first. Then she reached over, handed me a smaller, uglier pumpkin, and said, “That one’s sweeter. Trust me.” I laughed, thanked her, and we got to talking about pie—her favorite subject. She told me about her grandmother’s gingersnap crust, made from cookies that were always a little too hard to eat plain. That conversation, standing between crates of apples and winter squash, is where this recipe really started. I went home, roasted that ugly pumpkin, and started crushing cookies. The pie that came out of my oven that night was a total revelation—spicy, creamy, and nothing like the usual holiday fare.
Let me tell you, I’ve made a lot of pumpkin pies in my time. The standard version is fine—good, even—but it has never felt like *mine*. I mean, honestly, how many times can you make the same flaky crust before you start craving something with a little more personality? This pie, though? This one has soul. The gingersnap crust is crunchy, warm, and just the right amount of snappy, while the filling is silky and rich with classic pumpkin spice. And that maple whipped cream on top? It’s the kind of finishing touch that makes people close their eyes and sigh. If you’ve ever felt like your pumpkin pie was missing a little something—a little crunch, a little kick, a little *cozy*—then you’re in the right place. This is the pie that finally made me stop searching for the perfect recipe.
Why You’ll Love This Recipe
I’ve tested this pie more times than I care to admit—through burnt crusts, runny fillings, and one particularly sad attempt that involved a store-bought crust and a lot of regret. This version is the one that finally worked. It’s the one I bring to every Friendsgiving, the one my family requests for Thanksgiving, and the one that disappears before the regular pumpkin pie even gets sliced. Here’s why I think you’ll feel the same way:
- Quick & Easy: The crust comes together in about 10 minutes with just a food processor and some melted butter. No chilling, no rolling, no fuss.
- Simple Ingredients: You probably already have most of these in your pantry—canned pumpkin, eggs, cream, and a box of gingersnaps. No weird specialty items.
- Perfect for the Holidays: This pie is a showstopper for Thanksgiving, Christmas, or any cozy fall gathering. It feels special without being complicated.
- Crowd-Pleaser: I’ve served it to spice skeptics and pumpkin purists, and every single person has asked for the recipe. It’s that good.
- Unbelievably Delicious: The combination of the spicy, crunchy crust with the smooth, creamy filling is next-level comfort food. The maple whipped cream just seals the deal.
What really sets this recipe apart is the crust. Most pumpkin pies rely on a standard pastry crust, which can be bland or soggy. Here, the gingersnaps bring a bold, molasses-y warmth that perfectly complements the pumpkin. It’s not just a pie—it’s an experience. The first bite hits you with that spicy crunch, then melts into the velvety filling. It’s the kind of dessert that makes you slow down and savor every forkful. Honestly, this isn’t just a recipe—it’s the one that finally made me proud to bring a pumpkin pie to the table.
What Ingredients You Will Need
This recipe uses simple, wholesome ingredients to deliver bold flavor and satisfying texture without the fuss. Most of these are pantry staples, especially during the fall baking season. Let me walk you through what you’ll need and why each one matters.
For the Gingersnap Crust
- 2 cups (about 200g) gingersnap cookies, crushed – I recommend using store-bought gingersnaps for convenience. Look for a brand that’s firm and snappy, not too soft. My personal favorite is Anna’s Ginger Thins, but any sturdy gingersnap will work. You can crush them in a food processor or by sealing them in a bag and using a rolling pin. (Pro tip: pulse them in the food processor until they’re fine crumbs—no big chunks.)
- 5 tablespoons (70g) unsalted butter, melted – This binds the crumbs together. Use unsalted butter so you can control the salt level. If you only have salted butter, just skip the pinch of salt below.
- 2 tablespoons (25g) granulated sugar – A little extra sweetness helps the crust hold together and adds a subtle crunch. You can use brown sugar for a deeper molasses flavor if you like.
- Pinch of salt – Just a tiny bit to balance the sweetness and enhance the spice.
For the Pumpkin Filling
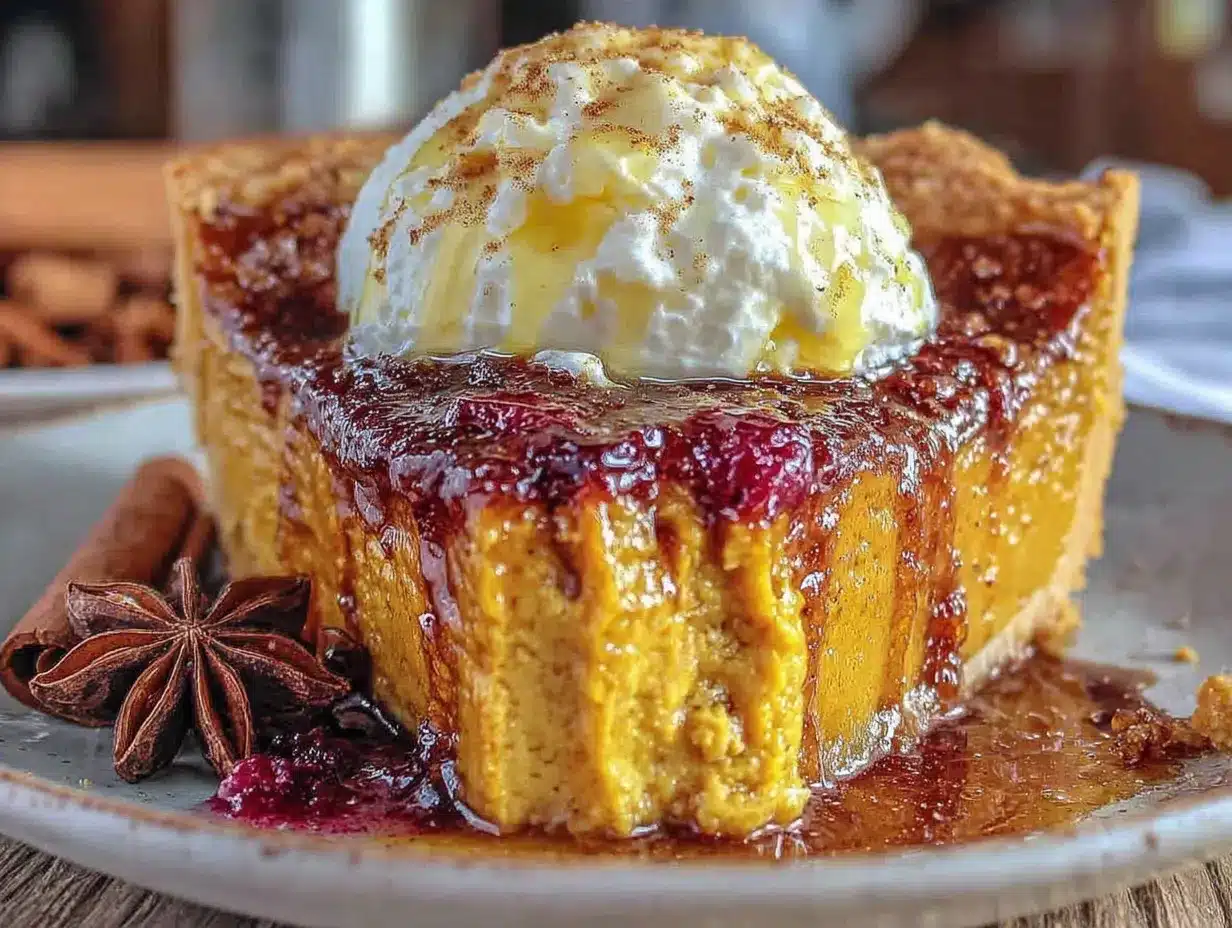
- 1 can (15 oz or 425g) pumpkin puree – Not pumpkin pie filling! Make sure you get 100% pure pumpkin. I like Libby’s for its consistent texture and flavor, but any brand works.
- 1 can (14 oz or 397g) sweetened condensed milk – This is the secret to a silky, sweet filling that sets perfectly. Don’t substitute with evaporated milk—it won’t give you the same creamy result.
- 2 large eggs, at room temperature – Room temperature eggs incorporate more smoothly into the filling, giving you a smoother texture. Take them out of the fridge about 30 minutes before you start.
- 1 teaspoon ground cinnamon – The backbone of pumpkin pie spice. Use a good-quality cinnamon for the best flavor.
- 1/2 teaspoon ground ginger – Adds a little warmth that echoes the crust.
- 1/4 teaspoon ground nutmeg – Freshly grated is amazing if you have it, but pre-ground works perfectly fine.
- 1/4 teaspoon ground cloves – A little goes a long way. It adds that deep, aromatic holiday flavor.
- 1/2 teaspoon salt – Balances the sweetness and brings out the pumpkin flavor.
For the Maple Whipped Cream
- 1 cup (240ml) heavy cream, cold – Cold cream whips up better and holds its shape longer. Stick it in the freezer for 10 minutes before whipping for extra stability.
- 2 tablespoons (30ml) pure maple syrup – Use real maple syrup, not pancake syrup. Grade A dark amber has a stronger maple flavor that stands up to the pie.
- 1/2 teaspoon vanilla extract – A little vanilla rounds out the maple flavor beautifully.
Equipment Needed
You don’t need a fancy kitchen to make this pie, but a few key tools will make the process much smoother. Here’s what I recommend:
- 9-inch pie dish – A standard glass or ceramic pie dish works great. I prefer glass because you can see when the crust is golden brown on the bottom.
- Food processor – This makes crushing the gingersnaps a breeze. If you don’t have one, you can use a rolling pin and a zip-top bag—just be prepared for a little arm workout!
- Mixing bowls – You’ll need a medium bowl for the crust and a large bowl for the filling.
- Whisk – A good whisk is essential for getting the filling smooth and lump-free.
- Electric mixer – For the whipped cream. A hand mixer or stand mixer both work. You can also whip by hand with a whisk, but it’ll take some elbow grease.
- Measuring cups and spoons – For accuracy. I’ve learned the hard way that eyeballing ingredients in baking rarely ends well.
- Rubber spatula – For scraping every last bit of filling into the pie dish. Waste not, want not!
I’ve made this pie with just a bowl and a whisk before, and it turned out fine. But the food processor really does save time on the crust. If you’re on a budget, a simple rolling pin and a sturdy bag will get the job done—just make sure the crumbs are uniform.
Preparation Method
Let’s get baking! I’ve broken this down into clear steps so you can follow along without any stress. Take your time, and remember—even if something goes slightly wrong, it’ll still taste delicious.
Step 1: Make the Crust
Preheat your oven to 350°F (175°C). In your food processor, pulse the gingersnap cookies until they become fine crumbs. You should have about 2 cups. If you’re using a bag and rolling pin, crush them until no large pieces remain. Transfer the crumbs to a medium bowl. Add the melted butter, sugar, and salt, and stir with a fork until the mixture looks like wet sand. It should hold together when you squeeze a handful. Press the mixture firmly into the bottom and up the sides of your 9-inch pie dish. Use the bottom of a measuring cup to really pack it down—this helps prevent crumbling later. Bake for 10 minutes, then set aside to cool slightly. The crust will firm up as it cools.
Step 2: Make the Filling
In a large bowl, whisk together the pumpkin puree and sweetened condensed milk until smooth. Add the eggs one at a time, whisking well after each addition. Sprinkle in the cinnamon, ginger, nutmeg, cloves, and salt, and whisk until everything is fully combined. The mixture should be thick, glossy, and a beautiful deep orange color. Don’t overmix—just whisk until it’s smooth. Pour the filling into the slightly cooled crust. It will fill the dish almost to the brim, which is exactly what you want.
Step 3: Bake the Pie
Place the pie dish on a baking sheet—this catches any spills and makes it easier to handle. Bake at 350°F (175°C) for 50 to 60 minutes. The pie is done when the edges are set and slightly puffed, but the center still jiggles just a little when you gently shake the dish. A knife inserted about 1 inch from the edge should come out clean. Don’t worry if the center looks a bit wobbly—it will firm up as it cools. If the crust edges start browning too quickly, tent them with foil or a pie shield around the 30-minute mark.
Step 4: Cool the Pie
Let the pie cool on a wire rack for at least 2 hours at room temperature. Then transfer it to the refrigerator and chill for at least 4 hours, or overnight. I know it’s hard to wait, but this step is crucial. A fully chilled pie slices cleanly and has the perfect texture. Patience, my friend—it’s worth it.
Step 5: Make the Maple Whipped Cream
Just before serving, pour the cold heavy cream into a large bowl. Add the maple syrup and vanilla extract. Using an electric mixer, beat on medium-high speed until soft peaks form—about 2 to 3 minutes. Be careful not to overbeat, or you’ll end up with butter! The whipped cream should be light, fluffy, and hold its shape. Dollop it generously on each slice of pie.
Cooking Tips & Techniques
Over the years, I’ve made every mistake you can imagine with pumpkin pie. Here are the lessons I learned the hard way so you don’t have to.
Don’t skip pre-baking the crust. I tried once to save time by not pre-baking, and the result was a soggy, sad bottom. Pre-baking for just 10 minutes ensures that the crust stays crisp and holds up against the wet filling. Trust me on this one.
Room temperature ingredients matter. Cold eggs can make the filling lumpy and prevent it from setting evenly. I learned this after pulling a pie out of the oven that had weird, eggy pockets. Let your eggs sit on the counter for 30 minutes before you start.
Watch the jiggle. The biggest mistake people make is overbaking pumpkin pie. It should still have a slight wobble in the center when you take it out. It will continue to cook from residual heat and set as it cools. An overbaked pie will crack and turn rubbery—nobody wants that.
Chill it thoroughly. I know you’ll be tempted to slice into it after an hour, but please don’t. A fully chilled pie cuts cleanly and holds its shape. I once served a slightly warm pie and ended up with a puddle of filling on the plate. Learn from my impatience!
Make the whipped cream fresh. Maple whipped cream is best made right before serving. It can deflate if it sits too long, and nobody wants flat cream on their pie. If you need to make it ahead, you can re-whip it briefly with a whisk.
Variations & Adaptations
One of the things I love about this recipe is how easy it is to tweak. Here are a few variations I’ve tried and loved.
Gluten-Free Version: Use gluten-free gingersnap cookies for the crust. Many brands are naturally gluten-free, but check the label to be sure. The rest of the recipe is naturally gluten-free, so this is an easy swap.
Dairy-Free Adaptation: Substitute the butter in the crust with coconut oil or a dairy-free butter alternative. For the filling, use a dairy-free sweetened condensed milk (there are good brands available) and replace the heavy cream with full-fat coconut cream for the whipped topping. Just chill the coconut cream overnight and whip it the same way.
Spice It Up: If you love heat, add a pinch of cayenne pepper or a dash of black pepper to the filling. It sounds weird, but it actually enhances the pumpkin flavor and gives the pie a subtle kick. I tried this on a whim one year, and it was a hit at my spicy-food-loving friend’s house.
Make It a Tart: Use a 9-inch tart pan with a removable bottom instead of a pie dish. The crust will be thinner and crunchier, and the slices look elegant. Just adjust the baking time for the crust to about 12 minutes.
Pumpkin Spice Whipped Cream: Add 1/4 teaspoon of pumpkin pie spice to the whipped cream along with the maple syrup. It adds an extra layer of warmth that’s perfect for the holidays.
Serving & Storage Suggestions
This pie is best served cold, straight from the fridge, with a generous dollop of maple whipped cream. I like to add a light dusting of cinnamon or a few crushed gingersnap crumbs on top for a little extra crunch and visual appeal. It’s a simple touch that makes it look like you spent way more effort than you actually did.
For a full dessert spread, serve this pie alongside a warm apple crisp or a slice of pound cake. It also pairs beautifully with a cup of hot coffee, spiced chai, or even a cold glass of milk. If you’re feeling fancy, drizzle a little extra maple syrup over the whipped cream just before serving.
Storage: Leftover pie can be stored in the refrigerator, covered loosely with plastic wrap or foil, for up to 4 days. The crust will soften slightly over time, but it will still taste amazing. I actually think the flavors meld together even more after a day or two.
Freezing: You can freeze the baked, cooled pie (without the whipped cream) for up to 2 months. Wrap it tightly in plastic wrap, then a layer of foil. To serve, thaw it in the refrigerator overnight. Make fresh whipped cream just before serving. I’ve done this for holiday prep, and it works like a charm.
Reheating: This pie is meant to be served cold, but if you prefer it warm, you can pop individual slices in a 300°F (150°C) oven for 5 to 10 minutes. Just be careful not to overheat it, or the filling can become runny.
Nutritional Information & Benefits
Let’s be real—this is a holiday dessert, so it’s not exactly health food. But it does have some redeeming qualities! Here’s an approximate breakdown per slice (based on 8 servings, without whipped cream):
- Calories: 380
- Fat: 18g
- Carbohydrates: 50g
- Protein: 6g
- Fiber: 3g
- Sugar: 35g
Pumpkin is packed with vitamin A, which is great for your eyes and immune system. It’s also a good source of fiber and potassium. The ginger in the crust and filling has anti-inflammatory properties, and cinnamon can help regulate blood sugar. So while this pie is definitely a treat, it’s not totally devoid of nutritional value. Plus, the maple syrup in the whipped cream contains antioxidants and minerals like zinc and manganese. I say enjoy it guilt-free—it’s the holidays, after all!
FAQs
Can I use fresh pumpkin instead of canned?
Absolutely! Roast a small sugar pumpkin at 400°F (200°C) until tender, then scoop out the flesh and puree it in a food processor. Just make sure to drain any excess liquid through a cheesecloth or fine-mesh sieve. Fresh pumpkin has more water than canned, so you might need to cook the filling a little longer.
Why did my crust fall apart?
This usually happens if the crust wasn’t pressed firmly enough into the dish, or if there wasn’t enough butter to bind the crumbs. Make sure your crumbs are fine and the mixture holds together when you squeeze it. Pack it down firmly with a measuring cup or glass.
Can I make this pie ahead of time?
Yes! This pie is actually perfect for making a day or two in advance. Bake and cool it completely, then refrigerate it covered. Make the whipped cream fresh on the day you serve it. I’ve even frozen the baked pie (without whipped cream) for up to 2 months.
How do I know when the pie is done?
The edges should be set and slightly puffed, and the center should jiggle just a little when you shake the dish. A knife inserted about an inch from the edge should come out clean. Don’t insert the knife in the center, or you’ll get a crack.
Can I use a different cookie for the crust?
Sure! Speculoos cookies, graham crackers, or even shortbread cookies would work. Just keep in mind that the flavor will change. Speculoos would add a similar spiced flavor, while graham crackers would make it milder and sweeter.
Conclusion
This cozy gingersnap crust pumpkin pie with maple whipped cream is more than just a recipe—it’s the one that finally made me feel like I had a signature holiday dessert. It’s the pie I bring to every gathering, the one that gets asked for year after year, and the one that makes me feel like a real baker, even on my laziest days. The crust is crunchy and spicy, the filling is creamy and smooth, and that maple whipped cream is the kind of finishing touch that makes people close their eyes and sigh with happiness. Honestly, it’s everything I want in a fall dessert.
I hope you give this recipe a try and make it your own. Maybe you’ll add a little extra ginger, or top it with candied pecans, or serve it with a scoop of vanilla ice cream instead of whipped cream. Whatever you do, I’d love to hear about it. Drop a comment below and tell me how it turned out—did your family love it? Did you make any fun tweaks? Your stories make my day, and they help other readers discover new ways to enjoy this pie. Happy baking, friends! Here’s to cozy kitchens, full bellies, and the best pumpkin pie you’ll ever make.
Pin This Recipe!
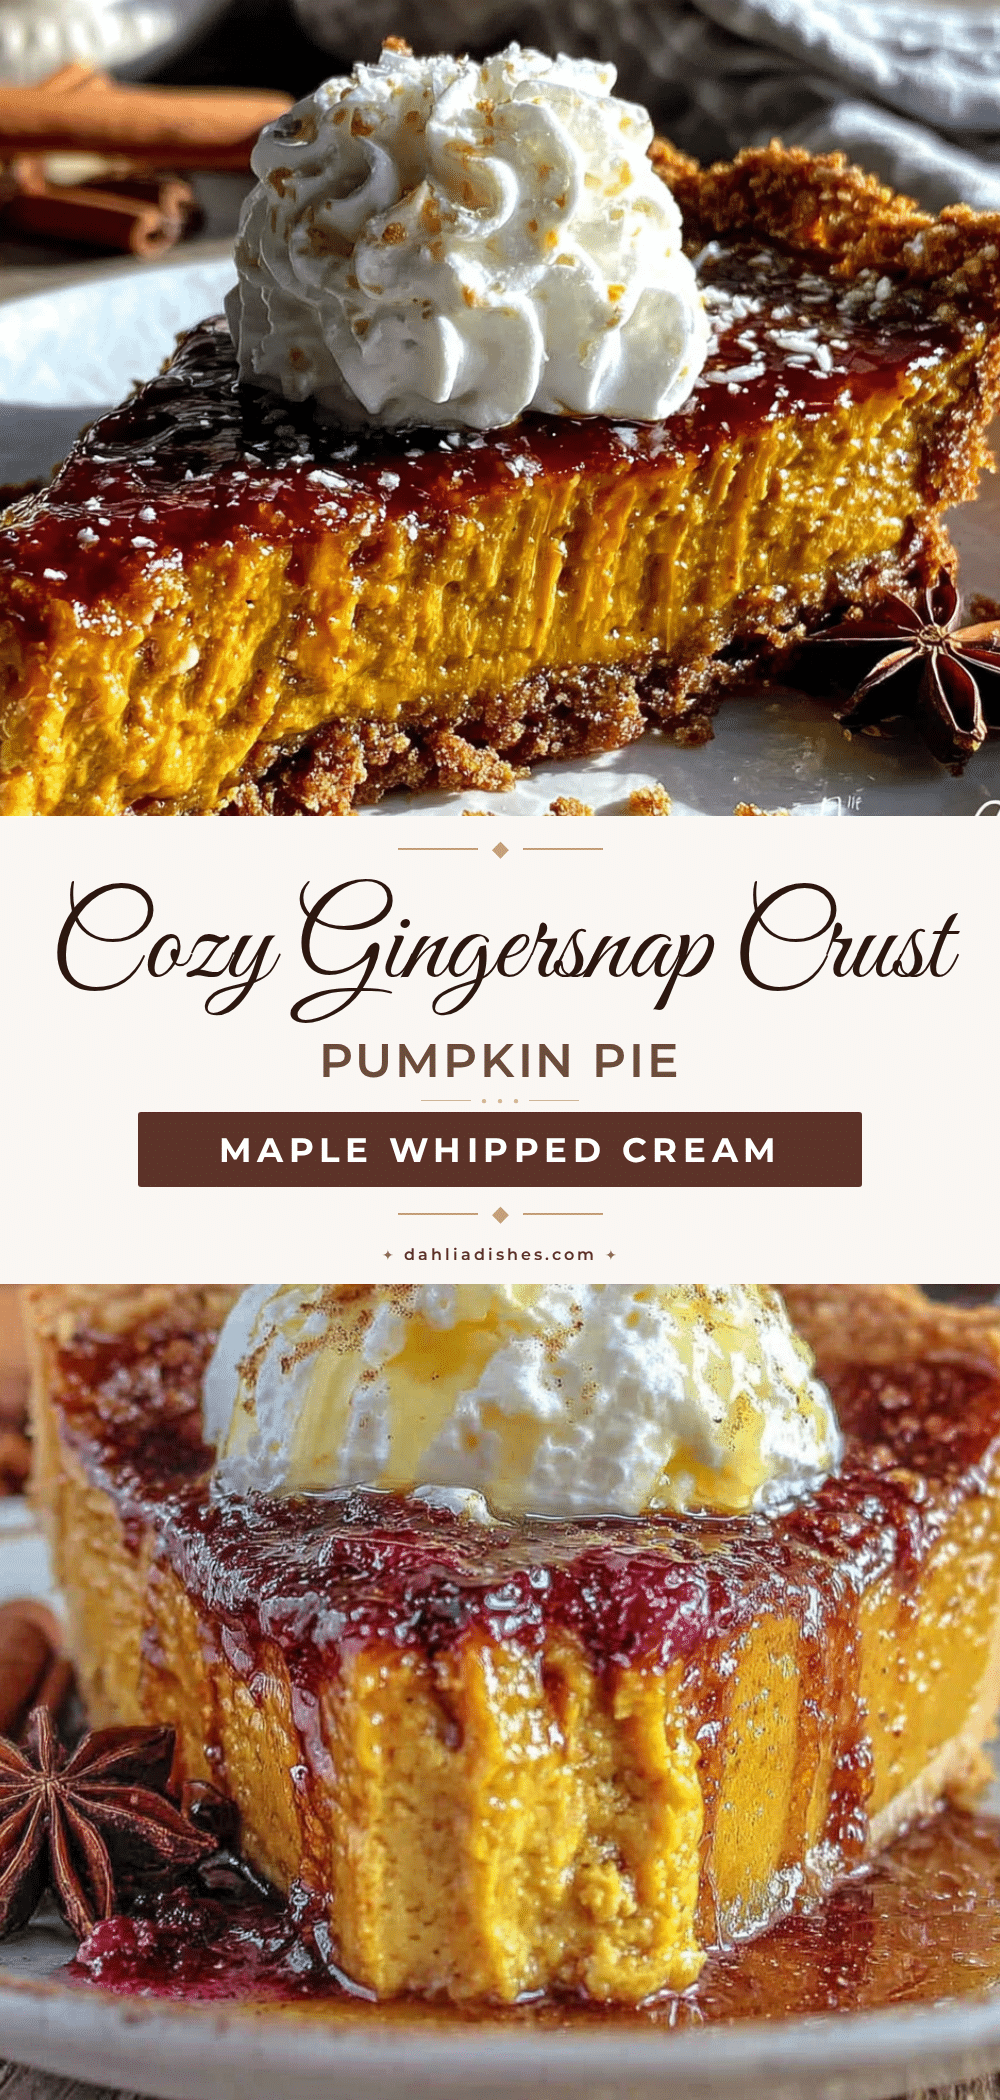
Cozy Gingersnap Crust Pumpkin Pie with Maple Whipped Cream

A cozy pumpkin pie with a crunchy, spicy gingersnap crust and silky pumpkin filling, topped with maple whipped cream. This showstopper is perfect for Thanksgiving, Christmas, or any fall gathering.
- Prep Time: 15 minutes
- Cook Time: 60 minutes
- Total Time: 5 hours 15 minutes (includes cooling and chilling)
- Yield: 8 servings 1x
- Category: Dessert
- Cuisine: American
Ingredients
- 2 cups (about 200g) gingersnap cookies, crushed
- 5 tablespoons (70g) unsalted butter, melted
- 2 tablespoons (25g) granulated sugar
- Pinch of salt
- 1 can (15 oz or 425g) pumpkin puree
- 1 can (14 oz or 397g) sweetened condensed milk
- 2 large eggs, at room temperature
- 1 teaspoon ground cinnamon
- 1/2 teaspoon ground ginger
- 1/4 teaspoon ground nutmeg
- 1/4 teaspoon ground cloves
- 1/2 teaspoon salt
- 1 cup (240ml) heavy cream, cold
- 2 tablespoons (30ml) pure maple syrup
- 1/2 teaspoon vanilla extract
Instructions
- Preheat your oven to 350°F (175°C). In a food processor, pulse the gingersnap cookies until they become fine crumbs. Transfer to a medium bowl. Add melted butter, sugar, and salt; stir with a fork until the mixture looks like wet sand. Press firmly into the bottom and up the sides of a 9-inch pie dish. Bake for 10 minutes, then set aside to cool slightly.
- In a large bowl, whisk together pumpkin puree and sweetened condensed milk until smooth. Add eggs one at a time, whisking well after each. Sprinkle in cinnamon, ginger, nutmeg, cloves, and salt; whisk until fully combined. Pour the filling into the slightly cooled crust.
- Place the pie dish on a baking sheet. Bake at 350°F (175°C) for 50 to 60 minutes, until edges are set and slightly puffed but the center still jiggles slightly. If crust edges brown too quickly, tent with foil around the 30-minute mark.
- Let the pie cool on a wire rack for at least 2 hours at room temperature. Then refrigerate for at least 4 hours, or overnight, until fully chilled.
- Just before serving, pour cold heavy cream into a large bowl. Add maple syrup and vanilla extract. Beat with an electric mixer on medium-high speed until soft peaks form, about 2 to 3 minutes. Dollop generously on each slice of pie.
Notes
Pre-bake the crust to prevent sogginess. Use room temperature eggs for a smooth filling. The pie is done when the center jiggles slightly; it will set as it cools. Chill thoroughly for clean slices. Make whipped cream fresh for best results. For gluten-free, use gluten-free gingersnaps. For dairy-free, substitute butter with coconut oil, use dairy-free sweetened condensed milk, and replace heavy cream with full-fat coconut cream.
Nutrition
- Serving Size: 1 slice (1/8 of pie)
- Calories: 380
- Sugar: 35
- Sodium: 320
- Fat: 18
- Saturated Fat: 10
- Carbohydrates: 50
- Fiber: 3
- Protein: 6
Keywords: pumpkin pie, gingersnap crust, maple whipped cream, Thanksgiving dessert, fall dessert, holiday pie


