Love this? Save it for later!
Share the inspiration with your friends
I was at the hardware store, of all places, picking up a new drill bit on a rainy Saturday morning. The guy behind the counter, an older fella named Carl with sawdust on his flannel shirt, was helping someone with a plumbing question. When the customer left, Carl just looked at me and said, “You bake?” I blinked. “Uh, sometimes?” He nodded like that was the answer he expected. “My wife makes these cookies every Christmas. Peanut butter with a chocolate kiss on top. People lose their minds over them.” He didn’t give me the recipe then—he made me come back the next day for it, handwritten on the back of a receipt. Honestly, I thought he’d forget. But there it was, waitin’ for me. That was ten years ago, and I’ve made these classic peanut butter blossom cookies every single holiday season since. They’re the first thing to disappear from any cookie tray, and I’m pretty sure that’s why Carl’s wife never gave the recipe to anyone else in town.
Why You’ll Love This Recipe
Let me tell you why these cookies have earned a permanent spot in my baking rotation. I’ve tested at least a dozen versions over the years, and this one wins every single time.
- Simple Ingredients: You probably have most of this stuff in your pantry right now. No weird extracts or hard-to-find specialty items.
- Quick & Easy: From start to finish, you’re looking at about 30 minutes. Perfect for when you realize you need a dessert for tonight’s dinner party.
- Perfect for Hosting: These cookies look impressive but require zero fancy decorating skills. Your guests will think you spent hours on them.
- Crowd-Pleaser: I’ve brought these to potlucks, holiday parties, and casual get-togethers. They’re always the first plate emptied.
- Unbelievably Delicious: That combo of soft peanut butter cookie with the melty chocolate kiss? It’s next-level comfort food.
What makes this version different? It’s the texture. The cookies stay soft and tender for days, not dry and crumbly like some recipes. The secret is in how you cream the butter and sugars—I’ll show you exactly what to look for. And honestly, the ratio of peanut butter to sugar is just right. Not too sweet, not too savory. It’s the kind of cookie that makes you close your eyes after the first bite.
Perfect for impressing guests without stress, or turning a simple Tuesday into something memorable. Trust me, you’ll want these in your hosting arsenal.
What Ingredients You Will Need
This recipe uses simple, wholesome ingredients to deliver that classic flavor and perfect texture. Most of these are pantry staples, which makes these cookies dangerously easy to whip up on a whim.
For the Cookie Dough
- 1/2 cup unsalted butter, softened (I use Land O’Lakes—consistent results every time)
- 1/2 cup creamy peanut butter (Jif or Skippy work great; avoid natural peanut butter as it separates and changes the texture)
- 1/2 cup granulated sugar, plus extra for rolling
- 1/2 cup packed light brown sugar (adds moisture and a hint of molasses flavor)
- 1 large egg, room temperature (cold eggs can seize the butter mixture)
- 2 tablespoons milk (whole milk preferred, but 2% works fine)
- 1 teaspoon vanilla extract (pure vanilla, not imitation, if you can swing it)
- 1 and 3/4 cups all-purpose flour (spooned and leveled—don’t scoop directly from the bag)
- 1 teaspoon baking soda (check the expiration date, old baking soda won’t give you proper lift)
- 1/2 teaspoon salt (if using salted butter, reduce this to 1/4 teaspoon)
For the Topping
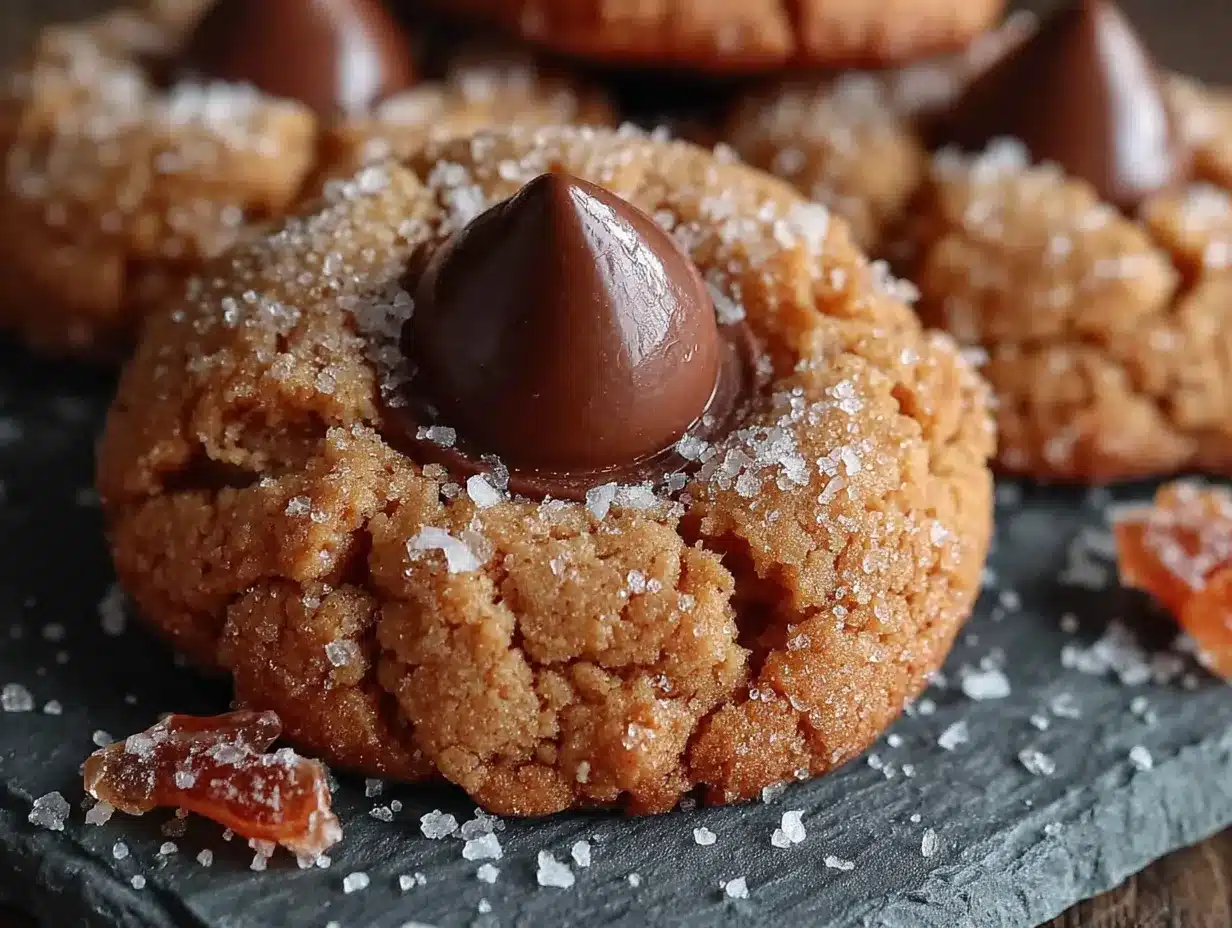
- 36-40 milk chocolate Hershey’s Kisses, unwrapped (the classic choice—dark chocolate or white chocolate work too)
I’ve tried this recipe with crunchy peanut butter, and honestly, it doesn’t work as well. The chunks interfere with the cookie’s structure, and you lose that smooth, melt-in-your-mouth texture. Stick with creamy for these classic peanut butter blossom cookies.
For the milk, I’ve used almond milk in a pinch, and it was fine. But whole milk gives you a richer cookie. If you’re dairy-free, use full-fat oat milk—it has a similar consistency.
One more thing about the chocolate kisses. Unwrap them while the cookies are baking. Trust me on this. You don’t want to be frantically peeling foil while your cookies are cooling and the chocolate needs to go on while they’re still warm.
Equipment Needed
- Electric mixer (stand mixer or hand mixer—I’ve used both and prefer my KitchenAid for this, but a hand mixer works perfectly fine)
- Large mixing bowl
- Medium mixing bowl (for dry ingredients)
- Baking sheets (I recommend rimmed baking sheets—they prevent cookies from sliding off)
- Parchment paper or silicone baking mats (parchment paper is cheaper and gives slightly crisper bottoms)
- Cookie scoop (a 1-tablespoon scoop makes perfectly uniform cookies—I use my OXO one constantly)
- Small bowl (for the extra granulated sugar for rolling)
- Wire cooling racks (essential for proper cooling)
- Measuring cups and spoons
If you don’t have a cookie scoop, use a regular tablespoon and roll the dough into balls by hand. It takes a bit longer but works just as well. Just make sure they’re all roughly the same size so they bake evenly.
For the baking sheets, avoid dark non-stick pans if possible. They absorb more heat and can cause the bottoms of your cookies to brown too quickly. Light-colored aluminum pans are your best bet.
Preparation Method
- Preheat your oven to 375°F (190°C). Line two baking sheets with parchment paper or silicone mats. This is important—don’t skip the lining. The cookies will spread slightly and you want easy removal.
- Cream the butter and peanut butter together. In a large mixing bowl, beat the softened butter and peanut butter on medium speed until smooth and well combined, about 1 minute. Scrape down the sides and bottom of the bowl with a rubber spatula.
- Add the sugars. Add the granulated sugar and packed brown sugar to the butter mixture. Beat on medium speed until light and fluffy, about 2-3 minutes. The mixture should look noticeably lighter in color and texture. This is where the magic happens—proper creaming gives you that soft, tender cookie.
- Incorporate the wet ingredients. Add the egg, milk, and vanilla extract. Beat on low speed until just combined. Don’t overmix here—you don’t want to incorporate too much air. Scrape the bowl again.
- Mix the dry ingredients. In a separate medium bowl, whisk together the flour, baking soda, and salt. Whisking ensures the baking soda is evenly distributed. Nobody wants a pocket of baking soda in one cookie.
- Combine wet and dry. Gradually add the dry ingredients to the wet mixture, mixing on low speed until just combined. Stop when you no longer see streaks of flour. Overmixing at this stage develops gluten and makes tough cookies. We want tender, not tough.
- Chill the dough (optional but recommended). Cover the bowl with plastic wrap and refrigerate for 30 minutes. This step isn’t strictly necessary, but it makes the dough easier to handle and helps the cookies hold their shape better. If you’re in a rush, skip it—the cookies will just spread a bit more.
- Shape the cookies. Place about 1/4 cup of granulated sugar in a small bowl. Using a 1-tablespoon cookie scoop or your hands, roll the dough into 1-inch balls. Roll each ball in the sugar to coat completely. Place them on the prepared baking sheets, spacing them about 2 inches apart. You should get about 36-40 cookies.
- Bake. Bake for 10-12 minutes, or until the cookies are lightly golden brown around the edges but still soft in the center. The tops might look slightly cracked—that’s normal. Don’t overbake! They’ll continue to set as they cool.
- Add the chocolate kisses. Remove the baking sheets from the oven. While the cookies are still hot, press one chocolate kiss into the center of each cookie, pushing gently until the cookie cracks slightly around the edges. The heat will soften the chocolate perfectly.
- Cool completely. Let the cookies cool on the baking sheets for 5 minutes before transferring them to wire cooling racks. This allows the chocolate to set slightly. Don’t try to move them too early—they’re delicate when warm.
Sensory cue: When the cookies are done, your kitchen will smell like warm peanut butter and vanilla. The edges should be a light golden brown, and the centers will look slightly puffy and soft. If you gently touch the top, it should spring back slightly.
Cooking Tips & Techniques
I’ve made these classic peanut butter blossom cookies more times than I can count, and I’ve learned a few things the hard way. Let me save you some trouble.
Don’t overbake. This is the number one mistake. The cookies will look underdone when you pull them out—that’s exactly what you want. They continue baking on the hot pan for those first few minutes of cooling. Overbaked cookies are dry and crumbly, and the chocolate kiss will slide right off instead of sticking.
Room temperature ingredients matter. I know, I know, nobody plans ahead. But cold butter doesn’t cream properly, and a cold egg can cause the butter mixture to seize. If you forget to take the egg out, place it in a bowl of warm water for 5 minutes. For the butter, cut it into small cubes and let it sit for 15 minutes—it’ll soften faster.
Measure your flour correctly. Spoon it into the measuring cup and level it off with a knife. Scooping directly from the bag compacts the flour, and you’ll end up with up to 25% more flour than the recipe calls for. That means dry, dense cookies. I learned this lesson after a particularly sad batch of hockey pucks.
Unwrap the kisses before you start baking. I cannot stress this enough. The window between “cookie is hot enough to soften the chocolate” and “cookie has cooled too much” is about 2-3 minutes. You don’t want to be wrestling with foil wrappers during that time. I set up a little assembly line—unwrapped kisses in a bowl, ready to go.
Press the kisses in gently but firmly. You want them to sink into the cookie about halfway. If you push too hard, the cookie will crack too much and fall apart. If you don’t push enough, the kiss will fall off when you move the cookie. Aim for a gentle, steady pressure.
Let them cool properly. Those 5 minutes on the baking sheet are crucial. The chocolate needs time to set so it doesn’t slide off when you transfer the cookies. I’ve lost many a chocolate kiss to impatience.
Variations & Adaptations
One of the best things about this recipe is how versatile it is. Here are some variations I’ve tried and loved.
Chocolate Variations
Swap the milk chocolate kisses for dark chocolate, white chocolate, or even caramel-filled kisses. Dark chocolate gives a lovely bitter-sweet contrast to the sweet peanut butter cookie. White chocolate makes it extra indulgent. I did a batch with dark chocolate kisses last Christmas, and my sister-in-law claimed they were “the best version yet.”
Holiday Twist
Use seasonal Hershey’s Kisses—the candy cane ones for Christmas, the pink ones for Valentine’s Day, or the pumpkin spice ones for fall. The red and green striped kisses around the holidays make these cookies look extra festive on a cookie tray.
Nut-Free Option
Substitute the peanut butter with sunflower seed butter (like SunButter). The cookies will be slightly darker in color and have a different flavor profile, but they’re still delicious. Make sure your sunflower seed butter is well-stirred before using it. This is perfect for school events or parties where nut allergies are a concern.
Gluten-Free Adaptation
Use a 1:1 gluten-free baking flour blend. I’ve had good results with Bob’s Red Mill Gluten-Free 1-to-1 Baking Flour. The cookies might spread a bit more, so chill the dough for a full hour before baking. Nobody will know the difference.
Extra Crunchy Version
For those who love texture, mix 1/4 cup of finely chopped salted peanuts into the dough before shaping. It adds a nice crunch that contrasts with the soft cookie and smooth chocolate. Just make sure the peanuts are chopped small enough that they don’t interfere with the cookie’s structure.
Serving & Storage Suggestions
These cookies are best served at room temperature, about 30 minutes after they’ve cooled completely. The chocolate should be set but still soft, and the cookie should be tender.
For a dinner party or gathering, arrange them on a pretty platter or tiered stand. They look gorgeous alongside other classic cookies like chocolate chip cookies or soft sugar cookies. A glass of cold milk is the obvious beverage pairing, but they’re also fantastic with coffee or hot cocoa.
Storage: Store the cookies in an airtight container at room temperature for up to 5 days. Layer them between sheets of wax paper or parchment to prevent the chocolate kisses from sticking together. I use a glass cookie jar with a tight-fitting lid—they stay soft for days.
Freezer instructions: You can freeze the baked cookies for up to 3 months. Place them in a single layer on a baking sheet and freeze until solid, then transfer to a freezer-safe bag or container. Thaw at room temperature for about 30 minutes before serving. The chocolate might develop a slight white bloom from condensation, but they’ll still taste perfect.
Freeze the dough instead: Roll the dough into balls and place them on a baking sheet lined with parchment paper. Freeze until solid, then transfer to a freezer bag. You can bake them directly from frozen—just add 2-3 minutes to the baking time. This is my secret weapon for last-minute hosting emergencies.
The flavors actually develop and deepen after a day or two. I honestly think these cookies taste even better on day two, if you can manage to keep them around that long.
Nutritional Information & Benefits
Per cookie (based on 36 cookies), here’s the estimated nutritional breakdown:
| Nutrient | Amount |
|---|---|
| Calories | 135 |
| Total Fat | 7g |
| Saturated Fat | 3.5g |
| Cholesterol | 15mg |
| Sodium | 95mg |
| Total Carbohydrates | 16g |
| Dietary Fiber | 1g |
| Sugars | 11g |
| Protein | 3g |
While these are definitely a treat, the peanut butter does provide some protein and healthy fats. Peanut butter is a good source of vitamin E, magnesium, and potassium. The milk chocolate contains antioxidants from cocoa, though let’s be honest—we’re eating these for the joy, not the health benefits.
These cookies contain dairy, eggs, wheat (gluten), and peanuts. If you’re serving a crowd with allergies, make sure to label them clearly or offer the variations mentioned above.
I believe in balance. These cookies are part of a happy life, not a daily staple. Enjoy them at gatherings, share them with people you love, and don’t feel guilty about having a second one.
Conclusion
These classic peanut butter blossom cookies are more than just a recipe—they’re a tradition waiting to happen. They’re the cookies that make people’s eyes light up when they see them on the dessert table. They’re the ones your friends will ask you to bring to every party. And honestly, they’re the ones you’ll find yourself making just because it’s Tuesday and you want something wonderful.
I still think about Carl at the hardware store sometimes. I wonder if he knows how many cookie trays his wife’s recipe has graced over the years. Probably not. But every time I press a chocolate kiss into a warm peanut butter cookie, I smile a little, remembering that rainy Saturday morning.
Now it’s your turn. Make these cookies. Share them with your people. And if you come up with a fun variation, I’d love to hear about it. Drop a comment below and tell me how they turned out. Happy baking, friend!
Frequently Asked Questions
Why are my peanut butter blossom cookies dry?
You likely overbaked them or used too much flour. Remember to pull them out when the edges are just barely golden and the centers still look soft. Also, measure your flour by spooning it into the cup and leveling it off.
Can I use natural peanut butter?
I don’t recommend it. Natural peanut butter separates easily and has a different fat content, which can make the cookies greasy and cause them to spread too much. Stick with processed creamy peanut butter like Jif or Skippy for the best results.
How do I keep the chocolate kisses from falling off?
Press them in while the cookies are still hot from the oven, and let the cookies cool on the baking sheet for a full 5 minutes before moving them. The heat softens the chocolate and helps it adhere to the cookie.
Can I make these cookies ahead of time?
Absolutely! You can make the dough up to 3 days ahead and keep it refrigerated. Or freeze the baked cookies for up to 3 months. They’re perfect for holiday prep or party planning.
How many cookies does this recipe make?
This recipe yields about 36-40 cookies, depending on how big you roll the dough balls. I usually get 36 using a 1-tablespoon scoop. Perfect for a party platter or cookie exchange.
Pin This Recipe!
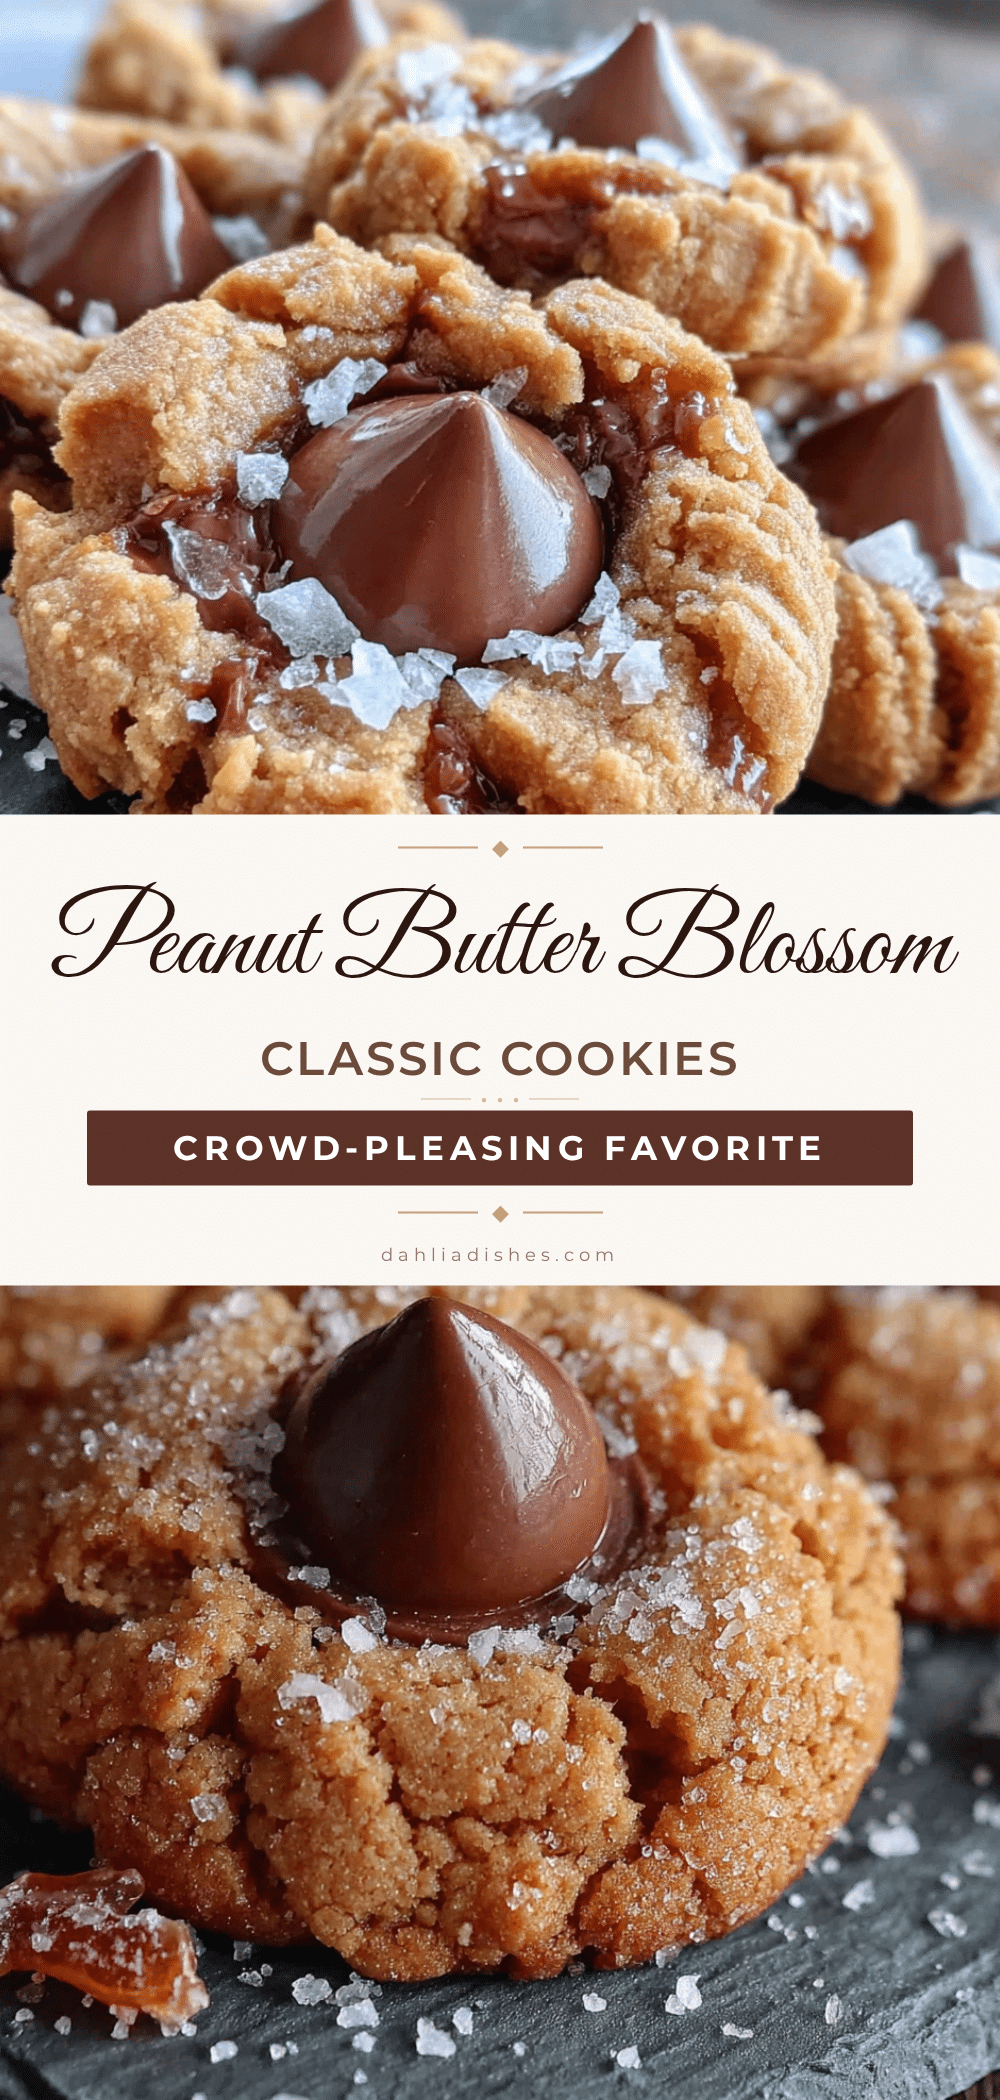
Classic Peanut Butter Blossom Cookies: Easy Crowd-Pleasing Recipe
These classic peanut butter blossom cookies feature a soft, tender peanut butter cookie topped with a milk chocolate Hershey’s Kiss. They’re quick to make, perfect for holiday cookie trays, and always the first to disappear at any gathering.
- Prep Time: 15 minutes
- Cook Time: 12 minutes
- Total Time: 27 minutes
- Yield: 36-40 cookies 1x
- Category: Dessert
- Cuisine: American
Ingredients
- 1/2 cup unsalted butter, softened
- 1/2 cup creamy peanut butter (Jif or Skippy recommended)
- 1/2 cup granulated sugar, plus extra for rolling
- 1/2 cup packed light brown sugar
- 1 large egg, room temperature
- 2 tablespoons milk (whole milk preferred)
- 1 teaspoon vanilla extract
- 1 and 3/4 cups all-purpose flour, spooned and leveled
- 1 teaspoon baking soda
- 1/2 teaspoon salt (reduce to 1/4 teaspoon if using salted butter)
- 36–40 milk chocolate Hershey’s Kisses, unwrapped
Instructions
- Preheat your oven to 375°F (190°C). Line two baking sheets with parchment paper or silicone mats.
- In a large mixing bowl, beat the softened butter and peanut butter on medium speed until smooth and well combined, about 1 minute. Scrape down the sides and bottom of the bowl.
- Add the granulated sugar and packed brown sugar to the butter mixture. Beat on medium speed until light and fluffy, about 2-3 minutes.
- Add the egg, milk, and vanilla extract. Beat on low speed until just combined. Scrape the bowl again.
- In a separate medium bowl, whisk together the flour, baking soda, and salt.
- Gradually add the dry ingredients to the wet mixture, mixing on low speed until just combined. Do not overmix.
- Cover the bowl with plastic wrap and refrigerate for 30 minutes (optional but recommended).
- Place about 1/4 cup of granulated sugar in a small bowl. Using a 1-tablespoon cookie scoop or your hands, roll the dough into 1-inch balls. Roll each ball in the sugar to coat completely. Place them on the prepared baking sheets, spacing them about 2 inches apart. You should get about 36-40 cookies.
- Bake for 10-12 minutes, or until the cookies are lightly golden brown around the edges but still soft in the center.
- Remove the baking sheets from the oven. While the cookies are still hot, press one chocolate kiss into the center of each cookie, pushing gently until the cookie cracks slightly around the edges.
- Let the cookies cool on the baking sheets for 5 minutes before transferring them to wire cooling racks to cool completely.
Notes
Don’t overbake; cookies should look slightly underdone when removed. Use room temperature ingredients for best results. Measure flour correctly by spooning and leveling. Unwrap chocolate kisses before baking to save time. Press kisses in gently but firmly. Let cookies cool on baking sheet for 5 minutes before transferring.
Nutrition
- Serving Size: 1 cookie
- Calories: 135
- Sugar: 11
- Sodium: 95
- Fat: 7
- Saturated Fat: 3.5
- Carbohydrates: 16
- Fiber: 1
- Protein: 3
Keywords: peanut butter blossom cookies, classic peanut butter cookies, chocolate kiss cookies, holiday cookies, easy cookie recipe


