Love this? Save it for later!
Share the inspiration with your friends
There used to be this tiny French bistro on Fillmore Street in San Francisco called Le Petit Jardin. It had this green bean dish—bundled up like little gifts, wrapped in bacon, with this garlicky parmesan situation going on—that I still dream about. When they closed in 2019 (the landlord raised the rent, a classic San Francisco story), I literally stood outside their door on their last day, trying to memorize the smell coming through the vents. Pathetic? Maybe. But you know how it is when a dish just gets its hooks in you.
After twelve tries—twelve, let me tell you, my family was sick of green beans—I finally cracked it. The secret wasn’t in some fancy technique I learned at a cooking school. It was simpler than that. It was about the garlic. Not just any garlic, but spring garlic, that sweet, mild stuff that shows up at farmers markets for like five minutes each year. And it was about not overcooking the beans. Honestly, I ruined three batches before I figured that out. I’d get distracted, answer a text, and boom—mushy beans. Not cute.
The first time I got it right, I actually teared up a little. My husband walked in and asked if someone died. No, I said, someone lived. The bistro’s spirit, anyway. These Spring Garlic Parmesan Green Bean Bundles with Bacon are my love letter to that little restaurant. And I’m pretty sure you’re going to love them too. Maybe you’ve been there—chasing a memory through your own kitchen, burning things, starting over, until finally, that first bite takes you right back. That’s what this recipe is for me. Let me show you how to get there.
Why You’ll Love This Recipe
These aren’t your grandma’s green bean casserole, okay? These bundles are a whole different vibe. They’re fancy enough for Easter dinner but easy enough for a random Tuesday when you just need something green on your plate that doesn’t feel like a chore.
- Quick & Easy : From start to table in about 30 minutes. Seriously. The bacon does most of the heavy lifting while you prep the garlic butter glaze.
- Simple Ingredients : You probably have everything except maybe the spring garlic. And if you can’t find spring garlic, regular garlic works fine—I’ll show you how to adjust.
- Perfect for Spring Occasions : Easter brunch, Mother’s Day dinner, spring garden parties—these bundles look like you spent hours when you really didn’t.
- Crowd-Pleaser : I’ve served these to picky kids, vegan-curious friends, and my uncle who “doesn’t eat vegetables.” They disappear every time.
- Unbelievably Delicious : The combination of crispy bacon, tender-crisp green beans, melty parmesan, and that sweet spring garlic butter? It’s the kind of thing that makes you close your eyes after the first bite.
What makes these different from every other green bean bundle recipe out there is the spring garlic. Most recipes just use regular garlic powder or minced garlic from a jar. But spring garlic—it’s milder, sweeter, almost like a cross between garlic and a leek. It doesn’t overpower the dish. It just whispers garlic, you know? And the technique of blanching the beans first, then roasting them with the bacon? That’s the move. It keeps the beans bright green and crisp while the bacon gets perfectly crispy. No soggy beans here, I promise.
This recipe is comfort food reimagined for spring. It’s lighter than the heavy casseroles of winter, but still has that soul-soothing satisfaction. Perfect for impressing guests without stress, or turning a simple weeknight dinner into something memorable.
What Ingredients You Will Need
This recipe uses simple, wholesome ingredients that come together to create something truly special. Most of these are pantry staples or easy to find at any grocery store. Here’s what you’ll need:
For the Green Bean Bundles
- Fresh green beans, 1 pound (450g) — Look for bright, firm beans with no brown spots. I prefer thin haricots verts if you can find them, but regular green beans work great too.
- Thick-cut bacon, 8 slices — Don’t use thin bacon here. It’ll shrink too much and won’t hold the bundles together. I like Wright Brand or Nueske’s for the best smoky flavor.
- Spring garlic, 4 to 5 bulbs — This is the star. Spring garlic looks like a skinny leek with green tops and a slight purple tint at the base. If you can’t find it, use 4 regular garlic cloves, minced. (I’ll note the difference in the tips section.)
- Fresh parmesan cheese, 1/2 cup (50g), finely grated — Please, for the love of all things cheesy, grate it yourself. The pre-shredded stuff has anti-caking agents that prevent it from melting smoothly. Parmigiano-Reggiano is worth the splurge here.
- Unsalted butter, 3 tablespoons (42g), melted — Salted butter works too, just reduce the added salt later.
- Olive oil, 1 tablespoon (15ml) — A good extra virgin olive oil adds richness to the garlic butter glaze.
- Salt, 1/2 teaspoon — I use fine sea salt. Adjust based on your bacon’s saltiness.
- Black pepper, 1/4 teaspoon, freshly ground — Freshly ground makes a difference here.
- Red pepper flakes, 1/4 teaspoon (optional) — Adds a tiny kick that plays nicely with the sweet spring garlic.
For the Garlic Butter Glaze
- Spring garlic, 2 bulbs, finely minced — The whites and light green parts only. Save the dark green tops for garnish.
- Melted butter, 2 tablespoons (28g) — This gets brushed on before roasting.
- Lemon zest, from 1 lemon — Brightens everything up. Don’t skip this.
- Fresh parsley, 2 tablespoons, chopped — For color and freshness at the end.
Equipment Needed
You don’t need a lot of fancy equipment for this recipe, which is part of why I love it. Here’s what you’ll need:
- Large pot for blanching — Any 4 to 6 quart pot works. You just need enough water to cover the beans.
- Baking sheet, 13×18 inch (half-sheet pan) — A rimmed baking sheet catches any bacon drippings and prevents a mess in your oven. I use Nordic Ware because they don’t warp.
- Wire rack — This fits inside the baking sheet and lets the bacon crisp up evenly on all sides. If you don’t have one, you can use a cooling rack that’s oven-safe.
- Tongs — For flipping the bacon and handling the hot bundles. Silicone-tipped ones won’t scratch your pans.
- Small bowl — For mixing the garlic butter glaze.
- Pastry brush — For brushing the glaze onto the bundles. A silicone brush is easier to clean than natural bristles.
- Sharp knife and cutting board — For mincing the spring garlic and chopping parsley.
If you don’t have a wire rack, don’t worry. You can place the bundles directly on the baking sheet, just flip them halfway through cooking. The bottoms won’t be quite as crispy, but they’ll still be delicious. I’ve done it that way when my rack was in the dishwasher, and honestly, nobody complained.
Preparation Method
Let’s get cooking. This comes together faster than you think, so read through the steps once before you start. Trust me, I learned that lesson the hard way—burnt garlic is not a good look.
- Preheat your oven to 400°F (200°C). Position a rack in the middle of the oven. While it’s heating, line your baking sheet with foil for easy cleanup (optional but recommended). Place the wire rack on top if you’re using one.
- Bring a large pot of salted water to a boil. Add enough salt that it tastes like the sea—about 1 tablespoon per quart of water. While you wait, fill a large bowl with ice water. This is your ice bath, and it’s crucial for stopping the cooking process.
- Trim the green beans. Snap or cut off the stem ends. Don’t bother with the pointy tips—they’re perfectly edible and look nice. You want all the beans roughly the same length, about 4 to 5 inches. If some are significantly longer, just trim them down.
- Blanch the green beans. Drop the trimmed beans into the boiling water. Set a timer for exactly 2 minutes. No more, no less. The beans should turn bright green and become just slightly tender. Use tongs or a slotted spoon to transfer them immediately to the ice bath. Let them sit for 2 minutes, then drain well and pat dry with a clean kitchen towel. This step is non-negotiable—blanching sets the color and ensures the beans cook evenly with the bacon.
- Prepare the spring garlic. While the beans cool, trim the root ends and any tough dark green tops from the spring garlic bulbs. Peel away any papery outer layers. Finely mince the white and light green parts. You should have about 2 to 3 tablespoons. Set aside 2 tablespoons for the glaze and reserve the rest.
- Make the garlic butter glaze. In a small bowl, combine the 2 tablespoons of minced spring garlic, 2 tablespoons melted butter, lemon zest, and a pinch of salt and pepper. Stir to combine. Set aside.
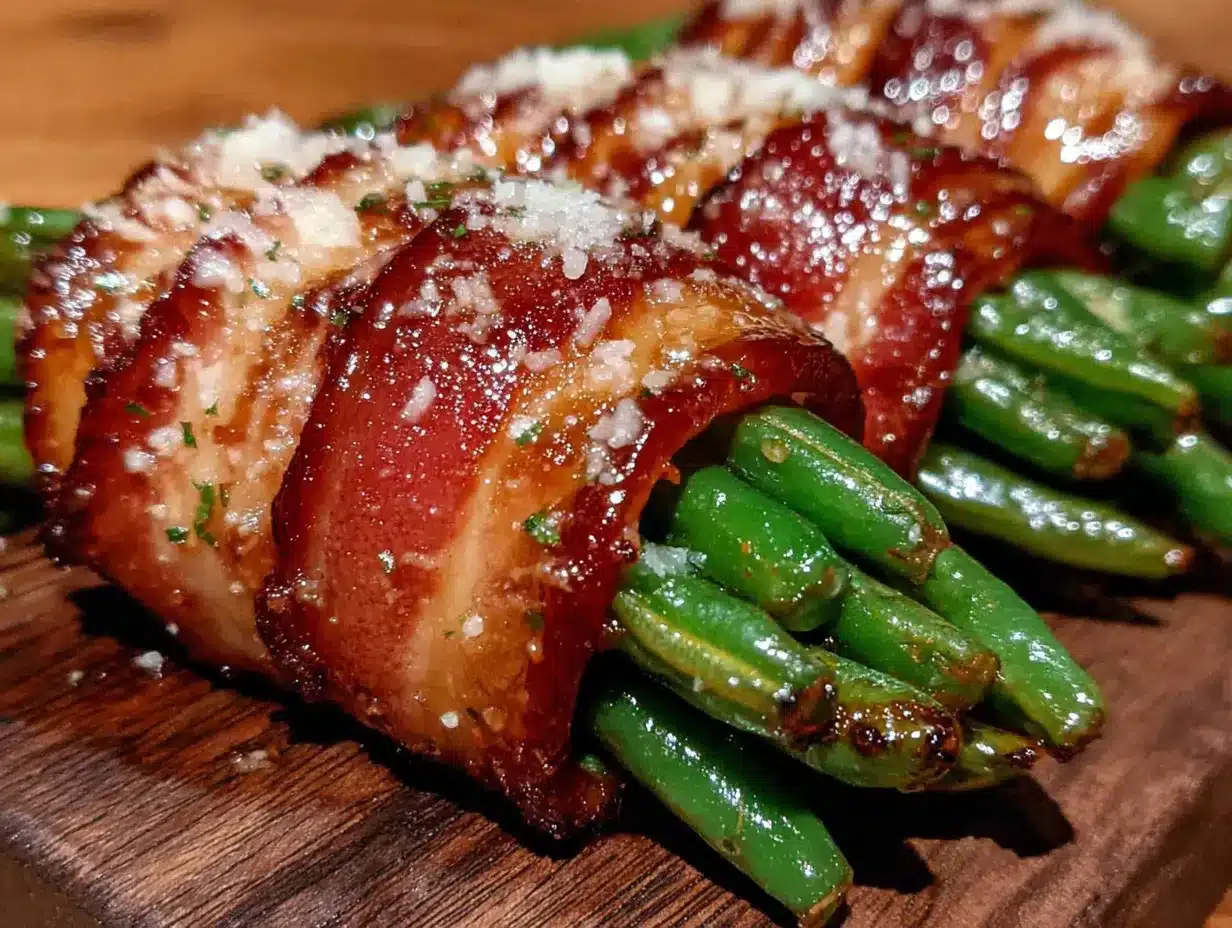
- Assemble the bundles. Gather 8 to 10 blanched green beans into a neat bundle. Wrap one slice of bacon around the middle, overlapping the ends slightly on the bottom. Place the bundle seam-side down on the wire rack or baking sheet. Repeat with the remaining beans and bacon. You should get 8 bundles.
- Brush with glaze. Using your pastry brush, generously brush each bundle with the spring garlic butter glaze. Reserve any leftover glaze for basting later. Sprinkle each bundle with a pinch of salt, pepper, and red pepper flakes if using.
- Roast for 15 minutes. Place the baking sheet in the preheated oven. Roast for 15 minutes, then remove from the oven. Brush the bundles with the remaining glaze (or spoon the pan drippings over them). Sprinkle the grated parmesan cheese evenly over the tops of the bundles.
- Roast for 5 to 7 more minutes. Return to the oven and roast until the bacon is crispy and the cheese is melted and golden. Keep an eye on them—bacon can go from perfect to burnt in about 30 seconds. The internal temperature should be sizzling hot.
- Rest and garnish. Remove from the oven and let the bundles rest on the pan for 2 minutes. This lets the bacon set so the bundles hold their shape when you move them. Transfer to a serving platter, sprinkle with the reserved minced spring garlic tops and fresh parsley. Serve immediately.
A quick note: If your bacon isn’t getting crispy enough, you can finish the bundles under the broiler for 1 to 2 minutes. Watch them like a hawk—broilers are unforgiving. I may have set off the smoke detector once. Or twice.
Cooking Tips & Techniques
After twelve attempts, I’ve collected some hard-won wisdom. Here’s what I wish someone had told me before I started:
Don’t skip the blanching. I know it’s an extra step, but it’s the difference between bright, crisp-tender beans and sad, olive-green mush. The ice bath is equally important—it stops the cooking immediately so the beans keep that gorgeous color. I once got distracted by a phone call and left the beans in the ice bath for 10 minutes. They were fine. But if you skip the ice bath entirely, they’ll keep cooking from residual heat.
Pat the beans completely dry. Water is the enemy of crispy bacon. If the beans are still wet when you wrap them, the bacon will steam instead of crisp. Use a clean dish towel and really press the moisture out. This was my biggest mistake in the early attempts—I’d rush through drying, and my bacon would come out flabby and sad.
Spring garlic vs. regular garlic. Spring garlic is milder and sweeter, so you can use more of it without it becoming harsh. If you’re using regular garlic, mince it very fine and use 4 cloves instead of 4 bulbs. Also, add the regular garlic to the butter glaze just before brushing—if it sits too long, the raw garlic can become bitter. Spring garlic is more forgiving.
Bacon thickness matters. Thin bacon will shrink and may not hold the bundles together. Standard thick-cut is perfect. I’ve also used center-cut bacon, which has less fat and gets crispier. Both work, just adjust cooking time slightly—center-cut may need a minute or two less.
Make extra glaze. I always double the garlic butter glaze recipe. You can brush it on the bundles halfway through cooking, and any leftovers are amazing drizzled over roasted potatoes or tossed with pasta the next day. Waste not, want not.
Variations & Adaptations
This recipe is flexible, which is one of the reasons I keep coming back to it. Here are some ways to make it your own:
Bacon Alternatives: For a lighter version, try turkey bacon or prosciutto. Turkey bacon needs about 5 extra minutes to get crispy, and prosciutto should be wrapped in a single layer (it’s thinner and crisps faster). For a vegetarian version, use thin strips of roasted red pepper or zucchini ribbons to wrap the bundles. They won’t get crispy, but they look beautiful and add a different texture.
Cheese Swaps: Parmesan is classic, but Gruyère adds a nutty, melty quality that’s incredible. Pecorino Romano is saltier and sharper—use half the amount if you’re watching sodium. For a dairy-free option, try nutritional yeast mixed with a little almond flour for a cheesy, crispy topping. It’s not the same, but it’s surprisingly good.
Seasonal Twists: In summer, swap the spring garlic for a minced shallot and add fresh basil to the glaze. In fall, use a pinch of nutmeg and swap the parsley for sage. I made a fall version with pancetta and sage for Thanksgiving last year, and it was the first side dish to disappear.
Spice It Up: Add a pinch of cayenne to the garlic butter glaze, or sprinkle the finished bundles with smoked paprika. My husband loves a version with a drizzle of sriracha honey—sweet, spicy, and completely addictive.
Make It a Meal: These bundles are fantastic as a side dish, but I’ve also chopped them up and tossed them with pasta, cherry tomatoes, and extra parmesan for a quick dinner. Or serve them over a bed of arugula with a lemon vinaigrette for a warm salad. The possibilities are endless.
Serving & Storage Suggestions
These bundles are best served hot, straight from the oven. The contrast between the crispy bacon, the bright green beans, and the melted cheese is at its peak within the first 10 minutes. Transfer them to a warm platter (I pop mine in the microwave for 30 seconds) and serve immediately.
For presentation, arrange the bundles in a single layer on a large white platter. Sprinkle with fresh parsley and a few extra grinds of black pepper. If you’re feeling fancy, add a few lemon wedges around the edges—they look beautiful and let guests add a squeeze of fresh lemon if they want.
These pair beautifully with roasted chicken, grilled steak, or pan-seared salmon. For a spring menu, serve them alongside a simple lemon-herb roasted chicken and some roasted new potatoes. The garlic butter from the bundles is amazing drizzled over the potatoes.
Storage: Leftover bundles (if you have any) can be stored in an airtight container in the refrigerator for up to 3 days. The bacon will lose its crispness, but the flavor is still fantastic. To reheat, place them on a baking sheet in a 350°F (175°C) oven for 5 to 7 minutes. The microwave works in a pinch, but the bacon will be soft. I actually love the leftovers chopped up and tossed into a frittata the next morning.
Freezing: You can freeze the assembled but unbaked bundles. Arrange them on a baking sheet and freeze until solid, then transfer to a freezer bag. When you’re ready to cook, bake from frozen, adding 5 to 7 minutes to the cooking time. The texture won’t be quite as perfect as fresh, but it’s a great make-ahead option for busy weeks.
Nutritional Information & Benefits
Per serving (2 bundles): Approximately 280 calories, 18g fat, 12g protein, 14g carbohydrates, 5g fiber, 6g sugar. These numbers will vary based on your bacon and cheese choices.
These bundles are surprisingly nutritious for how indulgent they taste. Green beans are packed with vitamin K (great for bone health), vitamin C, and fiber. Spring garlic is rich in antioxidants and has anti-inflammatory properties—it’s also gentler on the digestive system than mature garlic, which is why I love it for spring cooking. The parmesan adds calcium and protein, while the bacon… well, the bacon adds happiness. Everything in moderation, right?
If you’re watching your sodium, use low-sodium bacon and reduce the added salt. The lemon zest and fresh herbs add so much flavor that you won’t miss the salt. For a lower-fat option, use turkey bacon and reduce the butter to 1 tablespoon.
This recipe is naturally gluten-free and can be made dairy-free with the substitutions mentioned above. It’s also keto-friendly if you skip the lemon zest (minimal carbs anyway) and use full-fat cheese.
Conclusion
These Spring Garlic Parmesan Green Bean Bundles with Bacon are more than just a side dish—they’re a little piece of culinary nostalgia that I get to share with you. Every time I make them, I think about that tiny bistro on Fillmore Street and the way the spring light would filter through their windows. And I think about how lucky we are that we can recreate the flavors we love in our own kitchens.
I hope you’ll try these bundles and make them your own. Maybe you’ll use a different cheese, or add a pinch of something spicy, or serve them at your own spring gathering. That’s the beauty of cooking—each version is a little different, and each one is perfect in its own way.
If you make these, I’d love to hear about it. Drop a comment below and tell me how they turned out, or tag me in your photos on Pinterest. Did you try a variation? Did your family devour them? Did you, like me, burn the first batch and have to start over? All of it is welcome here.
Now go get yourself some spring garlic and make something beautiful. You’ve got this.
Frequently Asked Questions
Can I use frozen green beans instead of fresh?
I wouldn’t recommend it for this recipe. Frozen green beans release a lot of water as they thaw, which will make the bacon steam instead of crisp. If you’re in a pinch, thaw them completely and pat them extremely dry before using. But fresh green beans really do make a difference here.
How do I know when the bundles are done?
The bacon should be crispy and browned, and the cheese should be melted and slightly golden. The green beans should be tender but still have a slight crunch when you bite into them. If you’re unsure, cut into one bundle to check—the beans should be bright green and easy to pierce with a fork.
Can I make these ahead of time?
You can assemble the bundles (steps 1 through 7) up to 24 hours in advance. Keep them covered in the refrigerator, then brush with the glaze and bake when you’re ready. You may need to add 2 to 3 minutes to the baking time since the bundles will be cold from the fridge.
What if I can’t find spring garlic?
No problem! Use 4 regular garlic cloves, minced very fine. The flavor will be stronger and more pungent, so I recommend adding the regular garlic to the butter glaze just before brushing (don’t let it sit). You can also use 2 tablespoons of chopped garlic scapes if you find those instead—they have a similar mild, sweet flavor.
How do I keep the bacon from unrolling during cooking?
Make sure the bacon overlaps on the bottom of the bundle and place the bundle seam-side down on the wire rack or baking sheet. The weight of the bundle and the heat of the oven will help seal it. If you’re really worried, you can secure each bundle with a toothpick—just remember to remove them before serving!
Pin This Recipe!
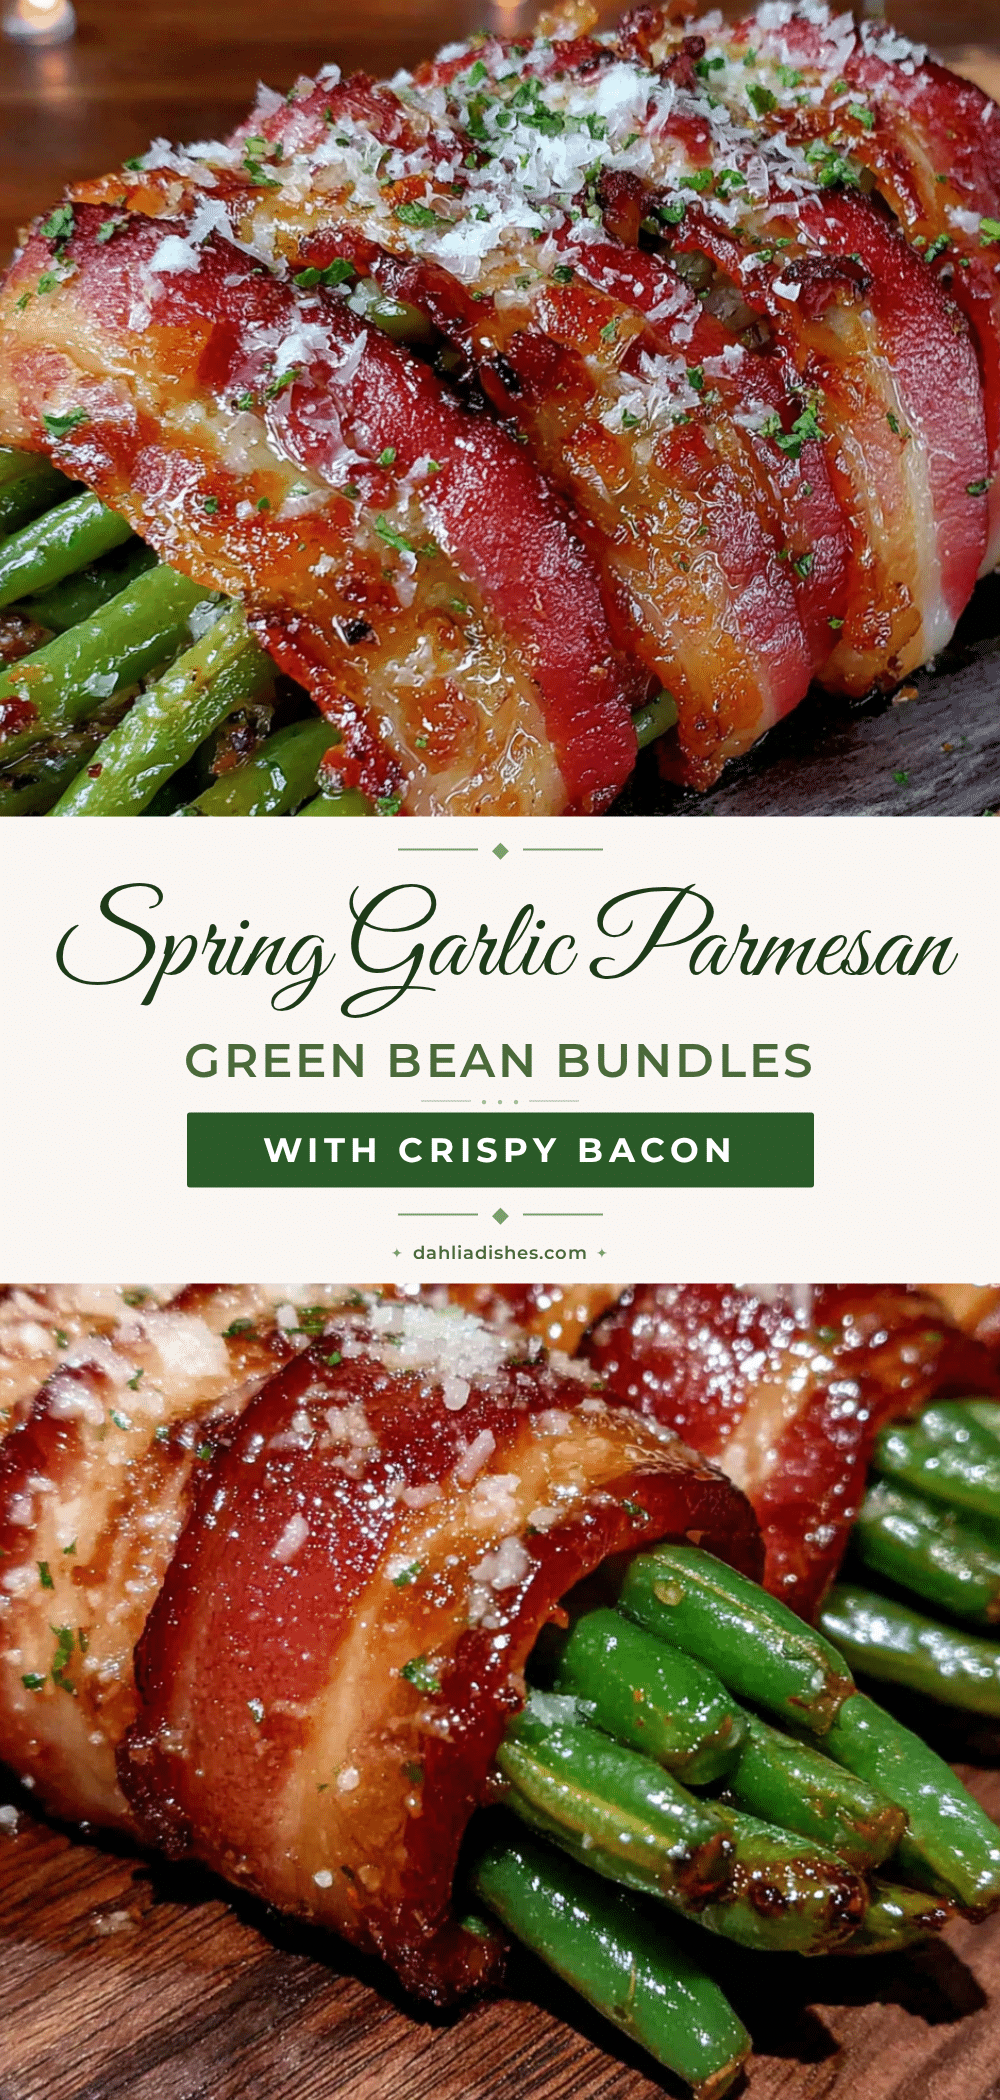
Best Spring Garlic Parmesan Green Bean Bundles with Bacon
These Spring Garlic Parmesan Green Bean Bundles with Bacon are a love letter to a tiny French bistro in San Francisco. Tender-crisp green beans are wrapped in thick-cut bacon, brushed with a sweet spring garlic butter glaze, and roasted until the bacon is crispy and the parmesan is melted and golden. Ready in about 30 minutes, they’re fancy enough for Easter dinner but easy enough for a weeknight.
- Prep Time: 15 minutes
- Cook Time: 22 minutes
- Total Time: 37 minutes
- Yield: 4 servings 1x
- Category: Side Dish
- Cuisine: American
Ingredients
- 1 pound (450g) fresh green beans
- 8 slices thick-cut bacon
- 4 to 5 bulbs spring garlic (or 4 regular garlic cloves, minced)
- 1/2 cup (50g) fresh parmesan cheese, finely grated
- 3 tablespoons (42g) unsalted butter, melted
- 1 tablespoon (15ml) olive oil
- 1/2 teaspoon fine sea salt
- 1/4 teaspoon freshly ground black pepper
- 1/4 teaspoon red pepper flakes (optional)
- 2 bulbs spring garlic, finely minced (for glaze)
- 2 tablespoons (28g) melted butter (for glaze)
- Zest of 1 lemon
- 2 tablespoons fresh parsley, chopped
Instructions
- Preheat your oven to 400°F (200°C). Position a rack in the middle of the oven. Line a baking sheet with foil (optional) and place a wire rack on top if using.
- Bring a large pot of salted water to a boil (about 1 tablespoon salt per quart of water). Fill a large bowl with ice water for an ice bath.
- Trim the stem ends of the green beans, keeping them roughly 4 to 5 inches long.
- Blanch the green beans in the boiling water for exactly 2 minutes. Transfer immediately to the ice bath for 2 minutes, then drain well and pat completely dry with a clean kitchen towel.
- Trim the root ends and tough dark green tops from the spring garlic bulbs. Peel away papery layers and finely mince the white and light green parts. Set aside 2 tablespoons for the glaze and reserve the rest.
- In a small bowl, combine 2 tablespoons minced spring garlic, 2 tablespoons melted butter, lemon zest, and a pinch of salt and pepper. Stir to combine.
- Gather 8 to 10 blanched green beans into a neat bundle. Wrap one slice of bacon around the middle, overlapping the ends slightly on the bottom. Place seam-side down on the wire rack or baking sheet. Repeat to make 8 bundles.
- Brush each bundle generously with the spring garlic butter glaze. Sprinkle with salt, pepper, and red pepper flakes (if using).
- Roast for 15 minutes. Remove from oven, brush with remaining glaze or pan drippings, and sprinkle grated parmesan evenly over the tops.
- Roast for 5 to 7 more minutes until bacon is crispy and cheese is melted and golden. Watch closely to prevent burning.
- Let bundles rest on the pan for 2 minutes. Transfer to a serving platter, sprinkle with reserved minced spring garlic tops and fresh parsley. Serve immediately.
Notes
Don’t skip blanching—it ensures bright green, crisp-tender beans. Pat beans completely dry to avoid soggy bacon. Spring garlic is milder and sweeter than regular garlic; if substituting, use 4 minced regular garlic cloves and add to glaze just before brushing. Bacon thickness matters: use thick-cut for best results. For extra crispy bacon, finish under the broiler for 1-2 minutes, watching carefully. Leftover bundles can be stored in an airtight container in the refrigerator for up to 3 days; reheat in a 350°F oven for 5-7 minutes.
Nutrition
- Serving Size: 2 bundles
- Calories: 280
- Sugar: 6
- Sodium: 680
- Fat: 18
- Saturated Fat: 8
- Carbohydrates: 14
- Fiber: 5
- Protein: 12
Keywords: green bean bundles, bacon wrapped green beans, spring garlic, parmesan green beans, Easter side dish, Mother's Day recipe, spring vegetables, easy side dish