Love this? Save it for later!
Share the inspiration with your friends
I swore I hated gingerbread cookies. For years. I’d pick them up, admire the cute little snowman or star shape, take one polite bite, and then quietly set it down. Too hard. Too spicy. Too dry—like eating a gingerbread-scented cardboard cutout. Then last December, my friend Jenna showed up at my door with a plate of these soft iced gingerbread cutout cookies “just for the kids,” she said. I found myself standing in the kitchen an hour later, reaching for a fourth one, catching my own hand in the act. She caught me. I mean, caught me red-handed with crumbs on my sweater.
That moment was a little embarrassing, honestly. But it also changed everything. These cookies are the opposite of everything I thought gingerbread had to be. They’re pillowy soft in the center with just the slightest chew at the edges. The spice blend is warm and cozy without being aggressive. And that icing? It sets up perfectly glossy and crackles just a little when you bite into it. I asked Jenna for the recipe right there, standing over her kitchen island with powdered sugar dusting my jeans.
You know that feeling when you discover a recipe that makes you question every version you’ve ever had before? That’s this one. I’ve been making them every holiday season since, and I honestly look forward to the baking day more than the actual holiday sometimes. There’s something about rolling out that soft dough, pressing in the cookie cutters, and watching them puff up just slightly in the oven. These soft iced gingerbread cutout cookies became my holiday non-negotiable. And if you’ve been burned by dry, disappointing gingerbread before—I see you. This one’s different.
Why You’ll Love This Recipe
Let me tell you why these soft iced gingerbread cutout cookies have earned a permanent spot in my holiday rotation. I’ve tested this recipe at least a dozen times across three different kitchens, at sea level and high altitude, and it delivers every single time.
- Soft-Baked Perfection: Unlike traditional gingerbread that snaps when you bend it, these cookies stay tender and cake-like for days. The secret is in the butter-to-molasses ratio and a touch of cornstarch that keeps gluten development in check.
- No Chill Dough: I’m not kidding. You can roll and cut these bad boys immediately. No waiting around for the dough to firm up in the fridge. This was a game-changer for me because I have zero patience when cookie cravings hit.
- Simple Pantry Ingredients: Flour, butter, sugar, molasses, eggs, and a few spices. You probably have everything already unless you’re out of molasses from last year’s baking spree.
- Holds Shape Beautifully: The edges stay crisp and clean during baking. Your snowmen won’t turn into blobs. Your stars will actually look like stars. I’ve tested this with over twenty different cookie cutter shapes and they all held up.
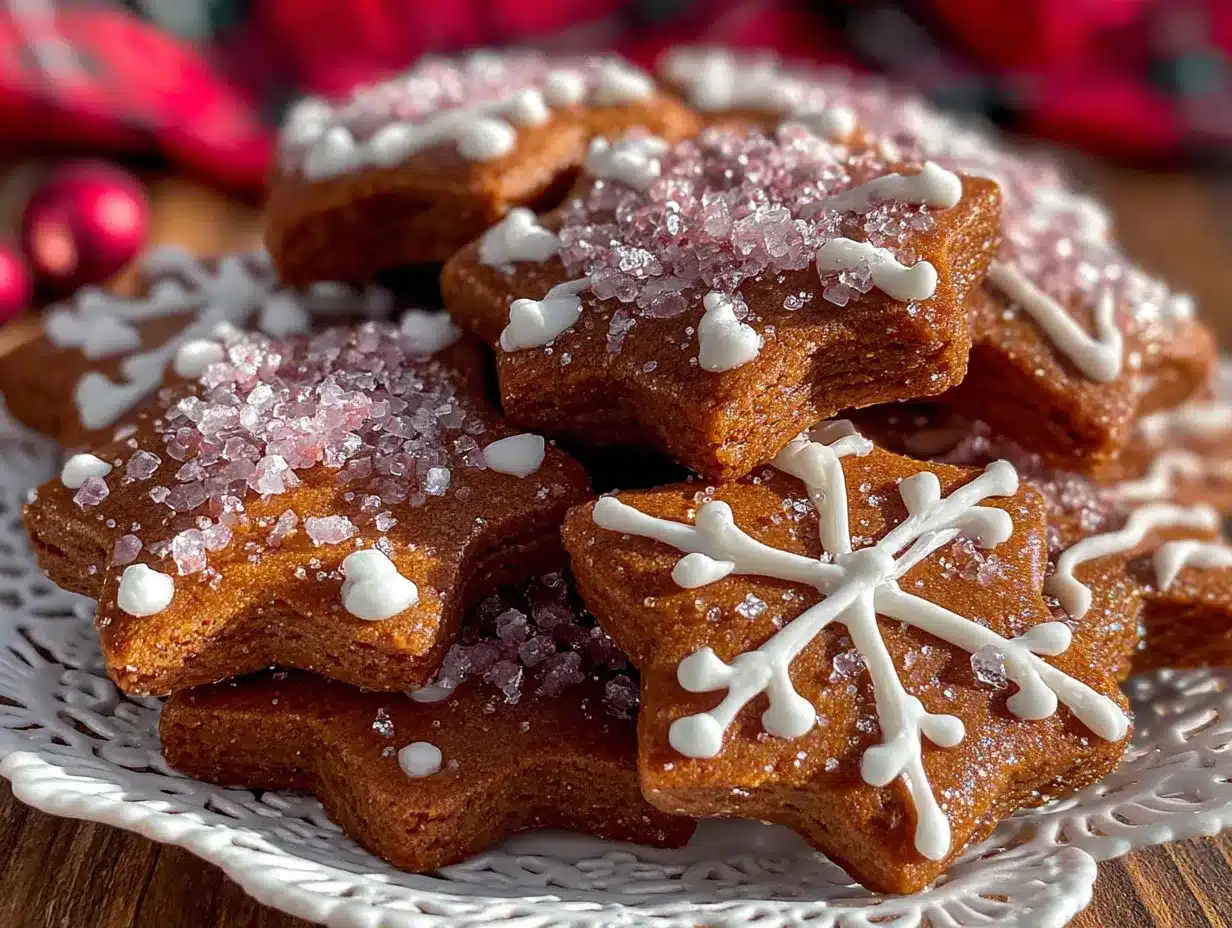
- Customizable Icing: The royal icing recipe included here is foolproof. It sets hard enough for stacking but stays soft enough to bite through without shattering everywhere.
What makes these different from every other gingerbread recipe out there? It’s the technique. Most recipes overbake gingerbread because they’re trying to make it crisp. This one pulls the cookies at exactly the right moment—when the edges are just set but the centers still look slightly underdone. They finish baking on the hot sheet pan. That’s the trick. That’s what gives you that cloud-like interior with a perfectly set exterior.
These cookies are the kind that make you close your eyes after the first bite. They’re comfort food reimagined—faster, softer, and somehow even more satisfying than the nostalgic version you remember from childhood. Perfect for cookie exchanges, holiday platters, or just eating over the sink at 11 PM when you’re supposed to be wrapping presents.
What Ingredients You Will Need
This recipe uses simple, wholesome ingredients to deliver that signature soft texture and bold spice flavor. Most of these are pantry staples, but I’ve included a few notes based on what I’ve learned through trial and error.
For the Cookies
- 3 cups all-purpose flour (375g) — Spoon and level your flour. Scooping directly from the bag packs in too much and makes cookies dense. I use King Arthur Flour for consistent results.
- 1 teaspoon baking soda — Make sure it’s fresh. Old baking soda won’t give you that soft lift.
- 2 teaspoons cornstarch — This is the secret ingredient for softness. It inhibits gluten formation and keeps the crumb tender.
- 2 teaspoons ground ginger — Use a good quality spice. I’ve found that McCormick and Simply Organic have the brightest flavor. Old ginger loses its punch.
- 1 ½ teaspoons ground cinnamon — The backbone of the spice blend. Ceylon cinnamon is milder and sweeter; Cassia is bolder and more traditional for gingerbread.
- ½ teaspoon ground cloves — A little goes a long way. Cloves can overpower if you’re heavy-handed.
- ½ teaspoon ground nutmeg — Freshly grated if you have it. The difference is subtle but real.
- ½ teaspoon salt — Fine sea salt works best. It balances the sweetness and enhances the spices.
- ½ cup unsalted butter (113g), softened to room temperature — Don’t microwave it. Let it sit out for about an hour. Softened butter creams better and gives you a more even texture.
- ½ cup packed dark brown sugar (100g) — Dark brown sugar has more molasses content, which adds moisture and depth. Light brown sugar works in a pinch but the cookies won’t be as soft.
- ½ cup unsulphured molasses (170g) — Do not use blackstrap molasses. It’s too bitter and will make your cookies taste like medicine. Grandma’s Original or Brer Rabbit are my go-tos.
- 1 large egg, room temperature — Cold egg can seize the butter mixture. Let it sit on the counter for 15 minutes.
- 1 teaspoon vanilla extract — Pure vanilla extract, not imitation. The flavor is noticeably better.
For the Icing
- 2 cups powdered sugar (240g), sifted — Sifting removes lumps that clog piping tips. Trust me on this one.
- 2-3 tablespoons milk — Whole milk gives a creamier consistency, but any milk works. Add it gradually—you can always add more but you can’t take it out.
- ½ teaspoon vanilla extract — Or clear vanilla extract if you want a pure white icing.
- Food coloring (optional) — Gel food coloring is better than liquid. It doesn’t thin out the icing. I use Wilton brand.
Ingredient Selection Tips
For the best results, use unsalted butter so you control the salt level. If you only have salted butter, reduce the added salt to ¼ teaspoon. The molasses should be fresh and pourable—if it’s crystallized or thick like tar, it’s too old. And please, please use room temperature ingredients. I learned this the hard way when my dough turned into a greasy mess because my butter was still cold. The egg and butter need to emulsify properly for that soft texture.
For a dairy-free version, swap the butter with a high-quality vegan butter stick like Earth Balance. The texture is nearly identical. Just make sure it’s the stick form, not the spreadable tub version.
Equipment Needed
You don’t need a professional bakery setup for these soft iced gingerbread cutout cookies. Here’s what I use and what you can substitute if you’re working with a minimal kitchen.
- Electric mixer — A stand mixer with the paddle attachment is ideal, but a hand mixer works perfectly fine. I’ve made this recipe with both. The hand mixer takes a little longer to cream the butter and sugar, but the results are the same.
- Rolling pin — A standard rolling pin works. I prefer a French rolling pin (the tapered one without handles) because it gives me better control over even thickness. If you don’t have one, a wine bottle works in a pinch. I’ve done it.
- Cookie cutters — Any shape works. My most-used set is a basic 10-piece metal set from Amazon that cost twelve dollars. They’ve lasted five years. Avoid plastic cutters if possible—they don’t cut as cleanly through the dough.
- Baking sheets — Light-colored aluminum baking sheets are best. Dark sheets absorb more heat and can over-brown the bottoms of your cookies. I use Nordic Ware half-sheet pans.
- Parchment paper — Non-negotiable for easy cleanup and preventing sticking. Silpat mats work too, but I find parchment gives slightly crisper edges.
- Cooling rack — Wire cooling racks allow air to circulate so the cookies cool evenly. If you don’t have one, transfer the cookies to a clean cutting board after they’ve set for 5 minutes.
- Piping bags or squeeze bottles — For the icing. I actually prefer squeeze bottles for flooding cookies because they give you more control. Wilton squeeze bottles are cheap and reusable. You can also use a zip-top bag with the corner snipped off.
- Offset spatula — Not essential, but helpful for transferring baked cookies from the sheet to the rack. A thin metal spatula works too.
One tip: invest in a good rolling pin with thickness rings if you make cutout cookies often. They snap onto the ends of the pin and guarantee perfectly even dough every time. I resisted buying them for years and now I feel silly for waiting so long.
Preparation Method
Let’s walk through this step by step. I’ve included every little detail I wish someone had told me the first time I made these.
Step 1: Prepare the Dry Ingredients
In a medium bowl, whisk together the 3 cups all-purpose flour, 1 teaspoon baking soda, 2 teaspoons cornstarch, 2 teaspoons ground ginger, 1 ½ teaspoons ground cinnamon, ½ teaspoon ground cloves, ½ teaspoon ground nutmeg, and ½ teaspoon salt. Whisk for about 20 seconds to distribute everything evenly. Set this aside.
Step 2: Cream the Butter and Sugar
In a large mixing bowl, beat the ½ cup softened unsalted butter and ½ cup packed dark brown sugar together on medium speed until light and fluffy. This takes about 3 minutes with a stand mixer, or 4-5 minutes with a hand mixer. Scrape down the sides and bottom of the bowl halfway through. You want the mixture to look pale and aerated—this is what gives the cookies their soft texture.
Step 3: Add the Wet Ingredients
Add the ½ cup molasses, 1 large egg, and 1 teaspoon vanilla extract to the butter mixture. Beat on medium speed until fully combined. The mixture might look slightly curdled at this point—that’s normal. The molasses is heavier than the butter and they need a minute to get along. Scrape the bowl again.
Step 4: Combine Wet and Dry
Gradually add the dry ingredients to the wet mixture, mixing on low speed. Add it in three additions, mixing just until the flour disappears after each one. Overmixing at this stage develops gluten and makes tough cookies. Stop the mixer when you still see a few streaks of flour. Finish folding by hand with a rubber spatula. The dough will be soft and slightly sticky—that’s exactly what you want.
Step 5: Roll and Cut
Lightly flour your work surface and rolling pin. Take about half the dough and place it on the floured surface. Sprinkle a little flour on top of the dough too. Roll it out to about ¼-inch thickness. Don’t go thinner than ⅛-inch or the cookies will bake up crispy. Use your cookie cutters to press out shapes, re-rolling the scraps once. I usually get about 24-30 cookies depending on the size of my cutters.
Place the cut cookies about 1 inch apart on parchment-lined baking sheets. They don’t spread much, so you can fit quite a few on one sheet. I usually get 12 per standard half-sheet pan.
Step 6: Bake
Preheat your oven to 350°F (175°C). Bake one sheet at a time in the center rack. Bake for 8-10 minutes. The exact time depends on your oven and the size of your cookies. You want the edges to look set and the centers to look slightly puffy and just barely underdone. They should not be brown on the edges. If they’re browning, your oven runs hot—reduce the temperature to 325°F next time.
Let the cookies cool on the baking sheet for exactly 5 minutes. This is crucial. The residual heat finishes baking the centers while the edges set. After 5 minutes, transfer them to a wire cooling rack to cool completely before icing. If you try to move them too soon, they’ll fall apart. I learned this the messy way.
Step 7: Make the Icing
In a small bowl, whisk together the 2 cups sifted powdered sugar, 2-3 tablespoons milk, and ½ teaspoon vanilla extract. Start with 2 tablespoons of milk. Whisk until smooth. The icing should be thick enough to hold its shape for a few seconds when you drizzle it back into the bowl, but thin enough to flow smoothly through a piping tip. If it’s too thick, add milk a few drops at a time. If it’s too thin, add more powdered sugar a tablespoon at a time.
Step 8: Decorate
Transfer the icing to a piping bag or squeeze bottle. Pipe outlines around the edges of each cookie, then flood the centers with a slightly thinner consistency of icing. Use a toothpick to spread the icing into corners and pop any air bubbles. Let the icing set completely before stacking the cookies—about 2 hours at room temperature.
Cooking Tips & Techniques
I’ve made every mistake in the book with these soft iced gingerbread cutout cookies so you don’t have to. Here’s what I’ve learned.
Don’t overbake. This is the number one rule. Gingerbread continues to bake after it comes out of the oven. If the cookies look done in the oven, they’ll be overdone on the counter. Pull them when the centers still look slightly soft and underdone. I’ve ruined entire batches by leaving them in for two extra minutes because I was answering a text. Set a timer and don’t wander off.
Use a light hand with flour. When rolling out the dough, use just enough flour to prevent sticking. Too much flour gets incorporated into the dough and makes the cookies dry and crumbly. I keep a small bowl of flour nearby and dip my rolling pin in it rather than dumping flour all over the surface.
Chill if you need to. While this dough doesn’t require chilling, it becomes much easier to handle if it’s been in the fridge for 15 minutes. On hot summer days when I’m testing recipes, I pop the rolled-out dough in the freezer for 10 minutes before cutting. The cutters glide through like butter.
Work in batches. Only roll out as much dough as you can cut and bake in one round. The scraps get tougher each time you re-roll them because you’re working the gluten. I aim for two re-rolls maximum. Any more than that and the cookies start to get tough.
Parchment paper is your friend. I cannot stress this enough. Not only does it prevent sticking, but it also helps the cookies bake more evenly. I reuse the same sheet of parchment for multiple batches—just let the pan cool completely between batches. A hot pan will melt the butter in the dough and cause the cookies to spread.
Timing your multitasking. While one batch is baking, I’m cutting the next batch. While the cookies cool, I’m making the icing. This keeps the whole process moving and prevents that feeling of being stuck in the kitchen for hours. The total active time is about 45 minutes, but it feels much faster when you’re in a rhythm.
Variations & Adaptations
One of the best things about this recipe is how adaptable it is. Here are some variations I’ve tried and loved.
Gluten-Free Version: Substitute the all-purpose flour with a 1:1 gluten-free baking flour blend that contains xanthan gum. I’ve used Bob’s Red Mill 1-to-1 Baking Flour with excellent results. The texture is slightly more tender and the cookies spread just a tiny bit more, but the flavor is identical. Let the dough rest for 10 minutes after mixing to allow the gluten-free flour to hydrate fully.
Vegan Version: Replace the butter with vegan butter sticks and the egg with a flax egg (1 tablespoon ground flaxseed mixed with 3 tablespoons water, let sit for 5 minutes). The cookies will be slightly less tender but still delicious. Use plant-based milk in the icing. I’ve made this version for my vegan sister-in-law and she couldn’t tell the difference.
Spice Variations: Play with the spice blend to suit your taste. Add ¼ teaspoon cardamom for a floral note, or ½ teaspoon allspice for warmth. I once made a batch with 1 teaspoon of Chinese five-spice powder instead of the individual spices and it was surprisingly good—the star anise and fennel gave it a unique twist.
Citrus Zest Addition: Add 1 tablespoon of orange or lemon zest to the dough along with the wet ingredients. The citrus brightens the molasses and makes the cookies taste more complex. I do this when I want a slightly more grown-up version for holiday parties.
Chocolate Dip: Skip the royal icing and dip half of each cooled cookie in melted dark chocolate. Let the chocolate set on parchment paper. This is my personal favorite variation because chocolate and gingerbread are a match made in heaven. Use 70% dark chocolate for the best balance of sweetness.
Spiced Icing: Add ¼ teaspoon of ground ginger or cinnamon to the powdered sugar before mixing the icing. It gives the decoration an extra layer of flavor that complements the cookie beautifully.
Serving & Storage Suggestions
These soft iced gingerbread cutout cookies are best served at room temperature. The icing should be fully set—usually after about 2 hours—so it doesn’t smudge when you stack them on a platter. I like to arrange them on a large wooden board or a white cake stand for maximum visual impact. The contrast between the dark cookie and bright white icing is just gorgeous.
For a cookie platter, pair these with classic sugar cookies, chocolate crinkles, and peppermint bark. The spicy gingerbread balances beautifully with sweeter, milder cookies. They also make fantastic gifts. I pack them in clear cellophane bags tied with red ribbon and hand them out to neighbors and coworkers. Everyone loves receiving homemade cookies, and these travel exceptionally well because they’re sturdy once the icing sets.
Storage Instructions: Store the cookies in an airtight container at room temperature for up to 5 days. Place a sheet of parchment paper between layers to prevent the icing from sticking. Do not refrigerate them—the fridge dries out baked goods and makes the cookies hard. I learned this the hard way when I stored a batch in the fridge and they turned into hockey pucks overnight.
Freezer Instructions: These cookies freeze beautifully. Freeze the un-iced cookies in a single layer on a baking sheet, then transfer them to a freezer-safe bag or container. They’ll keep for up to 3 months. When you’re ready to serve, thaw them at room temperature for about 30 minutes, then ice them fresh. The icing does not freeze well, so always add it after thawing. I usually bake double batches in November and freeze half for December—it makes the holiday season so much less stressful.
Reheating: If you want that just-baked warmth, pop an un-iced cookie in a 300°F oven for 3-4 minutes. Do not microwave them—it makes the texture rubbery. Iced cookies should not be reheated as the icing will melt and become a sticky mess.
The flavors actually improve after a day or two. The spices mellow and meld together, and the molasses deepens. Day-old gingerbread is often better than fresh-baked. So don’t stress about making these a day ahead—they’ll thank you for it.
Nutritional Information & Benefits
Here’s the approximate nutritional breakdown for one soft iced gingerbread cutout cookie (based on a 3-inch cookie with icing):
- Calories: 145
- Total Fat: 5g
- Saturated Fat: 3g
- Cholesterol: 20mg
- Sodium: 95mg
- Total Carbohydrates: 24g
- Dietary Fiber: 0.5g
- Sugars: 15g
- Protein: 2g
While these are definitely a treat, there are a few redeeming qualities. Molasses contains iron, calcium, magnesium, and potassium—more than refined sugar. Ginger is known for its anti-inflammatory properties and can help with digestion. Cinnamon has antioxidants and may help regulate blood sugar. So while I wouldn’t call these health food, they’re not empty calories either.
These cookies are vegetarian and can easily be made vegan or gluten-free with the substitutions mentioned earlier. They contain dairy (butter, milk), eggs, and gluten in the standard version. If you’re baking for someone with allergies, the vegan and gluten-free variations work beautifully and taste almost identical.
I personally believe that holiday baking is about joy, connection, and tradition—not counting calories. One cookie won’t derail your wellness goals, and the happiness it brings is worth every bite. That’s my philosophy, anyway.
Conclusion
These soft iced gingerbread cutout cookies are everything I never knew I wanted in a holiday cookie. They’re soft without being cakey, spicy without being harsh, and sweet without being cloying. The dough comes together in minutes, requires no chilling, and bakes up perfectly every single time. The icing sets to a beautiful glossy finish that makes even my sloppy piping look professional.
I’ve made these for cookie exchanges, holiday parties, and quiet nights by the tree with a mug of tea. They’ve become my signature holiday bake, and I’m honestly proud of that. There’s something special about pulling a tray of these out of the oven—the kitchen smells like Christmas, the kids’ faces light up, and for a few minutes, everything feels right in the world.
I want you to make these your own. Add extra ginger if you like things spicy. Use star-shaped cutters instead of snowmen. Dye the icing green and red for a festive look. The recipe is a starting point, not a rulebook. I’d love to hear how they turn out for you. Drop a comment below and let me know what variations you tried, or tag me in your photos if you share them online. Happy baking, friend.
Frequently Asked Questions
Can I make the dough ahead of time?
Yes! You can prepare the dough up to 3 days in advance. Wrap it tightly in plastic wrap and store it in the refrigerator. Let it sit at room temperature for about 15 minutes before rolling—it will be too firm to work with straight from the fridge.
Why did my cookies spread too much?
This usually happens if the butter was too soft or the dough was too warm. Make sure your butter is softened but not melted. If your kitchen is warm, chill the cut cookies on the baking sheet for 10 minutes before baking. Also check that your baking soda is fresh—expired leavener can cause spreading.
Can I use blackstrap molasses instead of regular molasses?
I don’t recommend it. Blackstrap molasses is much more bitter and less sweet than regular molasses. It will make your cookies taste harsh and dark. Stick with unsulphured molasses like Grandma’s Original or Brer Rabbit for the best flavor and texture.
How do I get clean edges on my cutout cookies?
Dip your cookie cutters in flour before each cut. This prevents the dough from sticking to the cutter and pulling the edges. Also, press straight down without twisting—twisting seals the edges and prevents the cookies from rising evenly. Use a sharp, clean cutter for the best results.
Can I freeze the baked cookies?
Absolutely. Freeze un-iced cookies in an airtight container with parchment paper between layers for up to 3 months. Thaw at room temperature for 30 minutes before icing. Do not freeze cookies that are already iced—the icing will become sticky and lose its gloss when thawed.
Pin This Recipe!
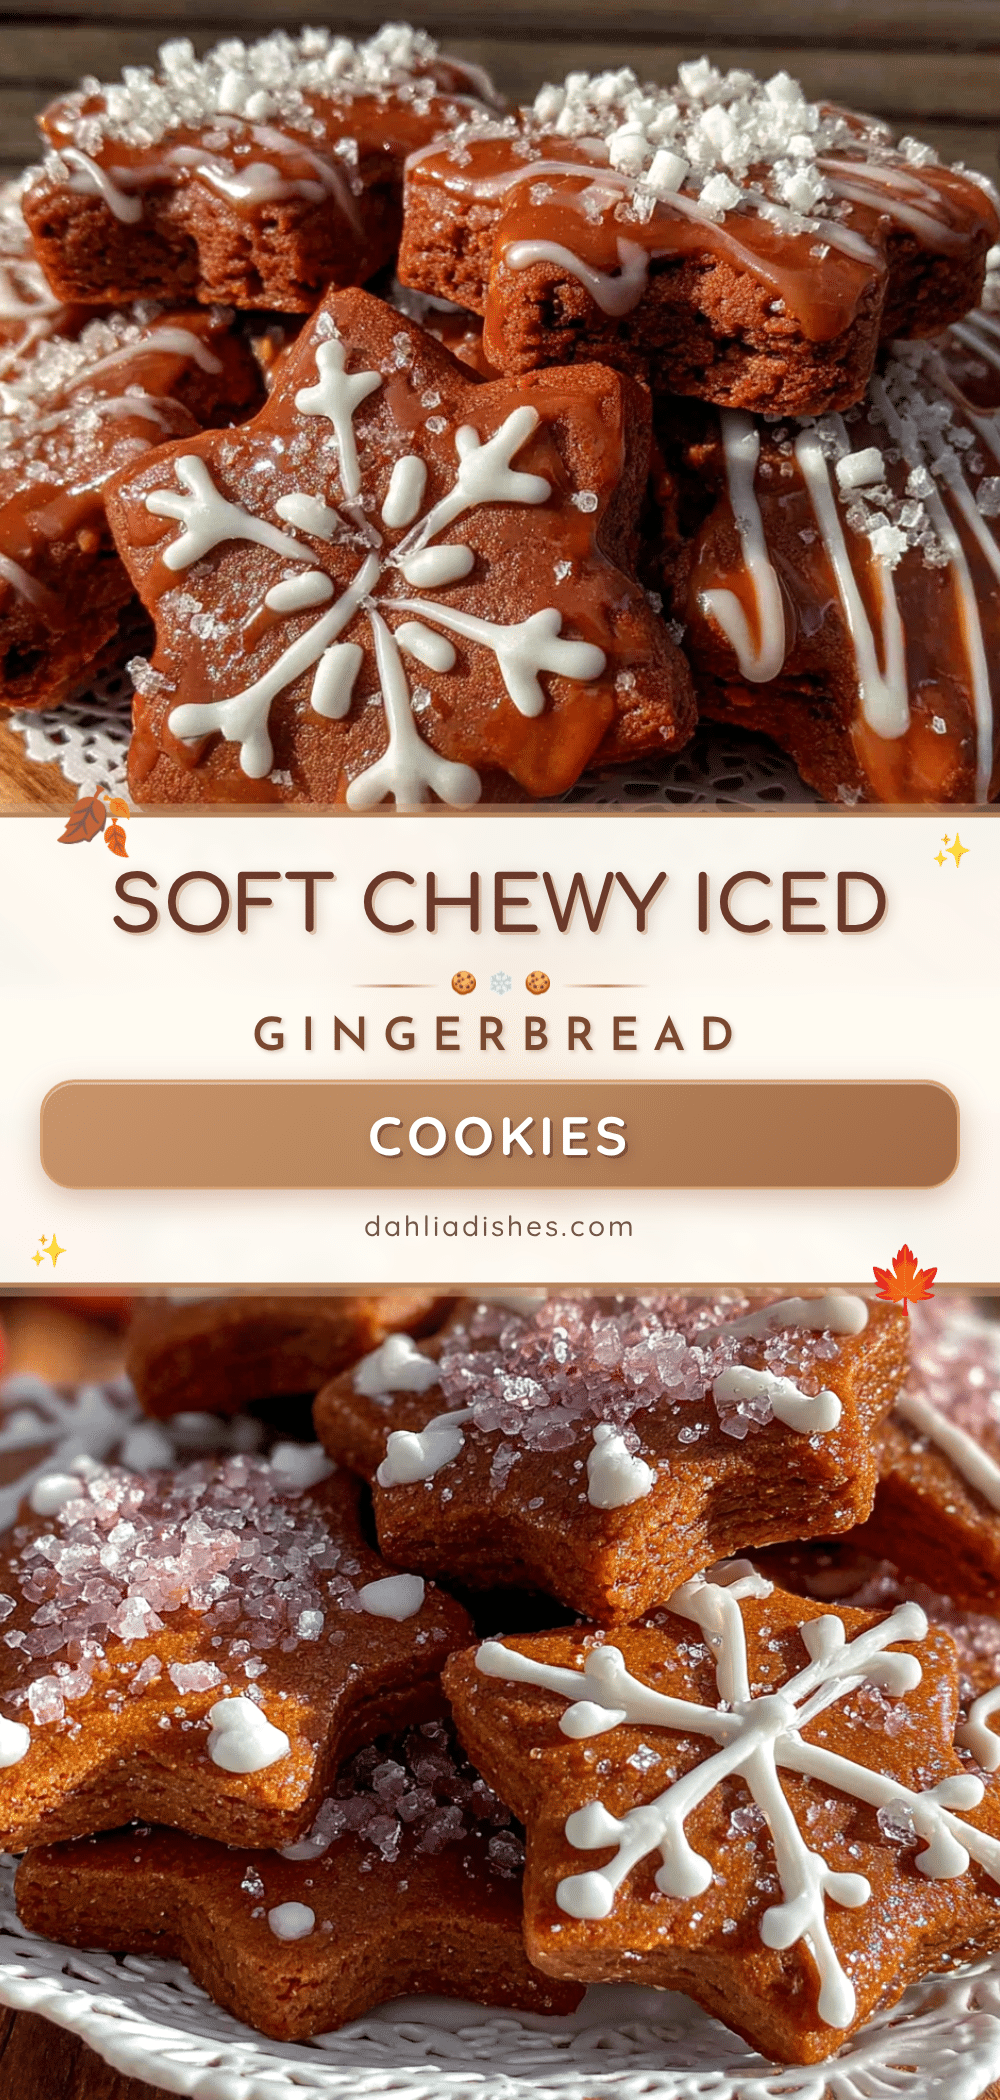
Best Soft Iced Gingerbread Cutout Cookies Recipe

These soft iced gingerbread cutout cookies are pillowy in the center with a slight chew at the edges, featuring a warm spice blend and a glossy royal icing that sets perfectly. They require no chill time and hold their shape beautifully during baking.
- Prep Time: 15 minutes
- Cook Time: 10 minutes
- Total Time: 45 minutes
- Yield: 24-30 cookies 1x
- Category: Dessert
- Cuisine: American
Ingredients
- 3 cups all-purpose flour (375g)
- 1 teaspoon baking soda
- 2 teaspoons cornstarch
- 2 teaspoons ground ginger
- 1 ½ teaspoons ground cinnamon
- ½ teaspoon ground cloves
- ½ teaspoon ground nutmeg
- ½ teaspoon salt
- ½ cup unsalted butter (113g), softened to room temperature
- ½ cup packed dark brown sugar (100g)
- ½ cup unsulphured molasses (170g)
- 1 large egg, room temperature
- 1 teaspoon vanilla extract
- 2 cups powdered sugar (240g), sifted
- 2–3 tablespoons milk
- ½ teaspoon vanilla extract
- Food coloring (optional)
Instructions
- In a medium bowl, whisk together the flour, baking soda, cornstarch, ginger, cinnamon, cloves, nutmeg, and salt. Set aside.
- In a large mixing bowl, beat the softened butter and brown sugar together on medium speed until light and fluffy, about 3-5 minutes. Scrape down the sides.
- Add the molasses, egg, and vanilla extract to the butter mixture. Beat on medium speed until fully combined. The mixture may look slightly curdled.
- Gradually add the dry ingredients to the wet mixture in three additions, mixing on low speed just until the flour disappears. Finish folding by hand with a rubber spatula. The dough will be soft and slightly sticky.
- Lightly flour your work surface and rolling pin. Roll out half the dough to about ¼-inch thickness. Use cookie cutters to press out shapes, re-rolling scraps once. Place cut cookies about 1 inch apart on parchment-lined baking sheets.
- Preheat oven to 350°F (175°C). Bake one sheet at a time on the center rack for 8-10 minutes, until edges are set and centers look slightly puffy and underdone. Do not let edges brown.
- Let cookies cool on the baking sheet for exactly 5 minutes, then transfer to a wire cooling rack to cool completely before icing.
- For the icing: In a small bowl, whisk together sifted powdered sugar, 2 tablespoons milk, and ½ teaspoon vanilla extract until smooth. Add more milk a few drops at a time if needed. The icing should be thick enough to hold its shape briefly but flow smoothly.
- Transfer icing to a piping bag or squeeze bottle. Pipe outlines around each cookie, then flood the centers. Use a toothpick to spread icing and pop air bubbles. Let icing set completely, about 2 hours at room temperature.
Notes
Don’t overbake; cookies continue to bake after removal. Use a light hand with flour when rolling. Dough can be chilled for 15 minutes if too sticky. Work in batches and limit re-rolling to two times. Parchment paper is essential for even baking and easy cleanup.
Nutrition
- Serving Size: 1 cookie (3-inch wit
- Calories: 145
- Sugar: 15
- Sodium: 95
- Fat: 5
- Saturated Fat: 3
- Carbohydrates: 24
- Fiber: 0.5
- Protein: 2
Keywords: soft gingerbread cookies, cutout cookies, holiday cookies, gingerbread, royal icing, no chill dough


