Love this? Save it for later!
Share the inspiration with your friends
I was standing in the spice aisle of my local grocery store last Tuesday when a woman walked past me, and the air shifted. It was the faintest trace of ginger, clove, and molasses—that warm, almost peppery sweetness that doesn’t belong in March. And just like that, I was seven years old, sitting on a cold metal folding chair in Mrs. Gable’s drafty church basement, watching her pass around a plate of cookies that looked like little brown pillows with white caps. I can still hear the way her bracelets clanked against the tin. I can still see the way the icing dripped off the sides and pooled on the napkin. I never got her name right—I called her Mrs. Table for a whole year—but I never forgot those cookies.
Honestly, I’ve been chasing that specific cookie for decades. Not the ones from the bakery, not the ones from the box, not even the ones my aunt tried to replicate one Thanksgiving when she forgot the baking soda and we ended up with gingerbread pancakes. There’s a difference between a gingerbread cookie that’s good and one that stops you mid-conversation. The good ones are crisp. The great ones? They give a little when you bite them. They’re soft-batch, almost tender, with an edge that’s just barely firm enough to hold the icing.
Maybe you’ve been there—you spend years trying to recreate a taste from your past, and every version is close but not quite. You add more ginger, you swap the butter, you chill the dough longer. And then one afternoon, for no particular reason, you try something different. For me, it was swapping out half the brown sugar for a specific brand of molasses and refusing to overmix. The first batch came out of the oven, and I actually laughed out loud. That church basement feeling was back. Let me tell you, that’s the kind of win you want to share.
Why You’ll Love This Recipe
These are not your average gingerbread cookies. I tested this recipe seven times before I felt confident enough to hand it to my neighbor, who runs a small catering business out of her house. She called me later that night and said, “These are the ones.” That’s the kind of feedback that sticks with you. Here’s what makes them stand out:
- Perfect for Hosting: If you’re throwing a holiday party or a cozy winter gathering, these cookies are a showstopper. They look impressive on a tiered stand, they travel well, and they don’t crumble into a million pieces the moment someone reaches for one.
- Soft-Batch Texture: The secret is in the ratio of butter to molasses and a slightly shorter bake time. You get a cookie that’s tender in the center with just enough structure to hold a generous layer of icing.
- Simple Pantry Ingredients: No hunting for obscure spices or specialty flours. You probably have most of this in your kitchen right now.
- Crowd-Pleaser: I brought a batch to a friend’s potluck last December, and they were gone before the main course hit the table. Kids, adults, even my friend who “doesn’t like gingerbread” ate three.
- Make-Ahead Friendly: The dough freezes beautifully, and the cookies actually taste better the next day. That’s a game-changer when you’re hosting.
This isn’t just another gingerbread cookie recipe. The technique here—creaming the butter longer than you think you need to, then adding the molasses in a slow stream—creates a texture that’s almost cake-like without being fluffy. It’s the kind of cookie that makes people close their eyes after the first bite. And when you’re the host, that’s exactly the reaction you want.
What Ingredients You Will Need
This recipe relies on a handful of core ingredients that do the heavy lifting. Each one plays a specific role, so here’s what to look for and why it matters.
- Unsalted Butter (1 cup, 226g, softened): I use unsalted so I can control the salt level. Let it sit out for about 45 minutes before you start. It should be soft enough that your finger leaves an indent but not so soft that it’s greasy.
- Dark Brown Sugar (1 cup, 200g, packed): Dark brown sugar has more molasses content than light, which adds depth. If you only have light brown sugar, it’ll still work, but the flavor won’t be as rich.
- Molasses (¾ cup, 240g): This is non-negotiable for that deep, slightly bitter sweetness. I prefer Grandma’s Molasses (the original, not the robust) for a balanced flavor. Avoid blackstrap molasses here—it’s too intense and can make the cookies taste metallic.
- Large Egg (1): Bring it to room temperature by placing it in a bowl of warm water for 5 minutes if you forgot to take it out earlier.
- All-Purpose Flour (3 cups, 360g): Spoon and level your flour—don’t scoop directly from the bag. Too much flour makes cookies dry.
- Baking Soda (1½ teaspoons): This gives the cookies their spread and softness. Make sure it’s fresh—test it by dropping a pinch into vinegar; it should fizz immediately.
- Ground Ginger (2 teaspoons): Use fresh ground ginger if you can. Spices lose potency over time, and ginger is the star here.
- Ground Cinnamon (1½ teaspoons): Adds warmth without overpowering the ginger.
- Ground Cloves (½ teaspoon): A little goes a long way. Too much clove can make the cookies taste like holiday potpourri.
- Salt (½ teaspoon): Balances the sweetness and enhances the spices.
- For the Icing: Powdered sugar (2 cups, 240g), milk (3 tablespoons, 45ml), and vanilla extract (½ teaspoon). You can adjust the milk to get the right consistency—you want it thick enough to hold its shape but thin enough to drizzle.
Equipment Needed
You don’t need a professional kitchen to pull this off, but a few tools make the process smoother.
- Stand Mixer or Hand Mixer: A stand mixer with the paddle attachment is ideal for creaming the butter and sugar properly. A hand mixer works fine, but you’ll need to hold the bowl steady.
- Baking Sheets (2): Light-colored, rimmed baking sheets work best. Dark sheets absorb more heat and can cause the bottoms to burn.
- Parchment Paper or Silicone Baking Mats: These prevent sticking and make cleanup a breeze. I’ve tried greasing the sheets directly, and the cookies spread too much.
- Cooling Rack: Essential for even cooling. If you let the cookies cool on the hot baking sheet, they’ll continue to cook and dry out.
- Cookie Scoop (1½ tablespoon size): This ensures uniform cookies that bake evenly. A spoon works, but you’ll get inconsistent sizes.
- Piping Bag or Ziploc Bag: For the icing. Snip a tiny corner off the bag to control the flow.
Preparation Method
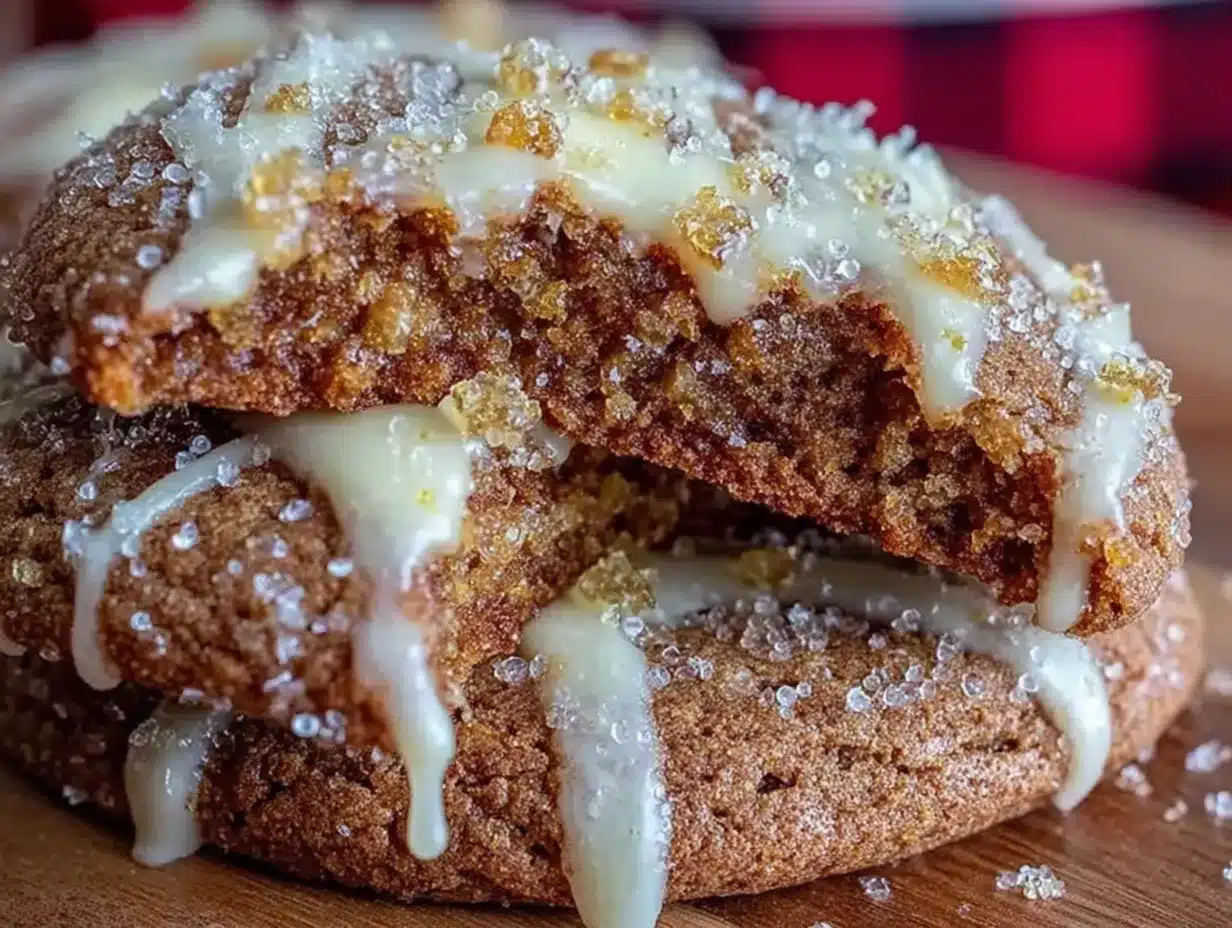
- Preheat and Prep: Preheat your oven to 350°F (175°C). Line two baking sheets with parchment paper. This is one of those steps you don’t want to skip—parchment paper helps the cookies bake evenly and prevents the bottoms from getting too dark.
- Cream the Butter and Sugar: In the bowl of your stand mixer, beat the softened butter and dark brown sugar together on medium speed for 3 to 4 minutes. You’re looking for a light, fluffy texture. Scrape down the sides of the bowl halfway through. This step is where the soft-batch magic starts—don’t rush it.
- Add the Molasses and Egg: With the mixer on low, slowly pour in the molasses. I mean slowly—like a thin, steady stream. If you dump it all in at once, the mixture can separate. Once the molasses is incorporated, add the egg and beat until just combined. The mixture should look smooth and glossy.
- Combine the Dry Ingredients: In a separate bowl, whisk together the flour, baking soda, ginger, cinnamon, cloves, and salt. Whisking ensures the spices are evenly distributed. Nobody wants a bite that’s pure clove.
- Mix the Dough: Add the dry ingredients to the wet mixture in two additions. Mix on low speed until just combined. You’ll see a few streaks of flour—that’s fine. Overmixing at this stage develops gluten and makes the cookies tough.
- Chill the Dough: Cover the bowl with plastic wrap and refrigerate for at least 1 hour. This is crucial. Chilled dough spreads less and produces a thicker, softer cookie. I’ve skipped this step before, and the cookies turned into flat, crispy discs—still tasty, but not what we’re going for.
- Scoop and Bake: Use your cookie scoop to portion the dough into 1½-tablespoon balls. Place them 2 inches apart on the prepared baking sheets. Bake for 9 to 11 minutes. The cookies will look puffy and slightly cracked on top. They should be set around the edges but still soft in the center. Don’t wait for them to look fully done—they’ll continue to set as they cool.
- Cool Completely: Let the cookies rest on the baking sheet for 3 minutes. This allows them to firm up enough to transfer. Then move them to a cooling rack and let them cool completely. I know it’s tempting to ice them while they’re warm, but the icing will melt and slide right off.
- Make the Icing: In a small bowl, whisk together the powdered sugar, milk, and vanilla extract until smooth. The consistency should be thick but pourable—think heavy cream. If it’s too thick, add milk a teaspoon at a time. If it’s too thin, add more powdered sugar.
- Ice the Cookies: Transfer the icing to a piping bag or a Ziploc bag with a tiny corner snipped off. Drizzle the icing over the cooled cookies in a zigzag pattern. Let the icing set for at least 20 minutes before stacking or serving.
Cooking Tips & Techniques
The first time I made these, I forgot to chill the dough. I was in a hurry, thinking, “How much difference can one hour really make?” A lot, apparently. The cookies spread into thin, lacy disks that looked more like gingerbread lace than cookies. They tasted fine, but they lacked that soft, pillowy texture I was after. Lesson learned.
Another thing I’ve learned the hard way: measure your molasses correctly. Molasses is sticky and thick, and it’s easy to end up with too much. Spray your measuring cup with a little non-stick spray before you pour—it slides right out. And if you accidentally add too much, your cookies will be overly soft and almost fudge-like. Still edible, but not ideal for a cookie platter.
For the best results, use a kitchen scale for the flour. Volume measurements can vary wildly depending on how you scoop. I’ve tested this recipe with both, and the scale always wins. If you don’t have one, spoon the flour into your measuring cup and level it off with a knife. No tapping or shaking—that compacts the flour.
When you’re baking for a crowd, timing is everything. You can make the dough up to three days in advance and keep it in the fridge. Or freeze the dough balls on a baking sheet, then transfer them to a freezer bag. Bake them straight from frozen—just add 2 minutes to the bake time. That way, you can have fresh cookies in under 15 minutes when guests arrive.
Variations & Adaptations
One of my favorite variations happened by accident. I was out of all-purpose flour and used a blend of whole wheat pastry flour and spelt flour instead. The cookies came out nuttier and slightly more rustic, which actually worked beautifully with the spices. If you’re looking for a whole-grain option, try swapping half the all-purpose flour for whole wheat pastry flour.
For a dairy-free version, use vegan butter or coconut oil (solid, not melted). I’ve tested this with Miyoko’s vegan butter, and the texture was nearly identical. Just make sure your vegan butter is softened to the same consistency as regular butter.
If you’re hosting a party and want to offer a gluten-free option, use a 1-to-1 gluten-free flour blend that contains xanthan gum. I’ve had good luck with Bob’s Red Mill. The cookies will be slightly more delicate, so handle them gently when transferring to the cooling rack.
For a flavor twist, add ½ teaspoon of black pepper to the dry ingredients. It sounds strange, but it adds a subtle warmth that plays off the ginger. I tried this on a whim after reading about it in an old cookbook, and it’s become my go-to for adult gatherings.
You can also skip the icing entirely and roll the dough balls in coarse sugar before baking. They’ll have a sparkly, crackled top that’s beautiful on its own. That’s my lazy-day version.
Serving & Storage Suggestions
These cookies are best served at room temperature, ideally within a day or two of baking. The icing should be fully set, so they’re easy to stack on a platter or arrange in a cookie tin. If you’re hosting, arrange them on a tiered stand with a few sprigs of rosemary and some cranberries for a festive look. They also pair beautifully with a cup of chai, spiced cider, or even a dark stout if you’re serving adults.
For storage, keep the cookies in an airtight container at room temperature for up to 5 days. Layer them with parchment paper between each layer to prevent the icing from sticking. Do not refrigerate them—the fridge dries them out and makes the cookies hard.
You can freeze the baked cookies (without icing) for up to 3 months. Wrap them tightly in plastic wrap, then place them in a freezer-safe bag. When you’re ready to serve, thaw them at room temperature, then ice them fresh. The flavors actually deepen after freezing, so they might taste even better.
One thing I’ve noticed: these cookies are even better the day after baking. The spices mellow and meld together, and the texture softens slightly. So if you’re planning a party, bake them a day ahead. Your future self will thank you.
Nutritional Information & Benefits
Per cookie (based on 24 cookies): approximately 180 calories, 7g fat, 28g carbohydrates, 2g protein, 1g fiber, 15g sugar. These numbers are estimates and will vary based on exact ingredients and portion sizes.
Ginger is the real star here from a health perspective. It’s known for its anti-inflammatory properties and can help with digestion—perfect after a heavy holiday meal. Molasses is a surprisingly good source of iron, calcium, and potassium. It’s not a health food by any means, but it’s nice to know there’s a little something extra in that sweet, spiced bite.
These cookies contain gluten, dairy, and eggs. For allergen-friendly versions, check the variations section above. If you’re watching your sugar intake, you can reduce the icing or skip it entirely—the cookies are flavorful enough on their own.
Conclusion
These soft-batch iced gingerbread cookies are the ones I keep coming back to, year after year. They’re the ones I make for holiday parties, for cookie swaps, for those quiet December evenings when I just want something warm and familiar. They’re not complicated, and they don’t require fancy techniques. But they deliver that exact feeling I was chasing in the spice aisle that Tuesday—the one that takes you back to a cold church basement with a napkin full of icing.
I’d love to hear how they turn out for you. Did you add a twist? Did you double the batch for a party? Drop a comment below and let me know. And if you’re looking for another crowd-pleaser, try my soft-batch chocolate chip cookies or my spiced apple cider scones for your next gathering. Happy baking!
Frequently Asked Questions
Can I use light brown sugar instead of dark brown sugar?
Yes, you can. The cookies will be slightly less rich and molasses-forward, but they’ll still taste great. If you have light brown sugar on hand, go ahead and use it—just don’t expect the same depth of flavor.
Why did my cookies spread too much?
This usually happens for one of three reasons: the dough wasn’t chilled long enough, the butter was too soft, or the flour was under-measured. Make sure you chill the dough for at least an hour, and use a kitchen scale for the flour if you have one.
Can I make the dough ahead of time?
Absolutely. The dough can be refrigerated for up to 3 days or frozen for up to 3 months. If freezing, scoop the dough into balls first, then freeze them on a baking sheet before transferring to a bag. Bake from frozen, adding 2 minutes to the bake time.
How do I get the icing to set properly?
Make sure the cookies are completely cool before you ice them. The icing should be thick enough to hold its shape—if it’s too runny, add more powdered sugar. Let the iced cookies sit at room temperature for at least 20 minutes before stacking or storing.
Can I use blackstrap molasses?
I don’t recommend it. Blackstrap molasses is much stronger and less sweet than regular molasses. It can make the cookies taste bitter and slightly metallic. Stick with regular molasses for the best flavor and texture.
Pin This Recipe!
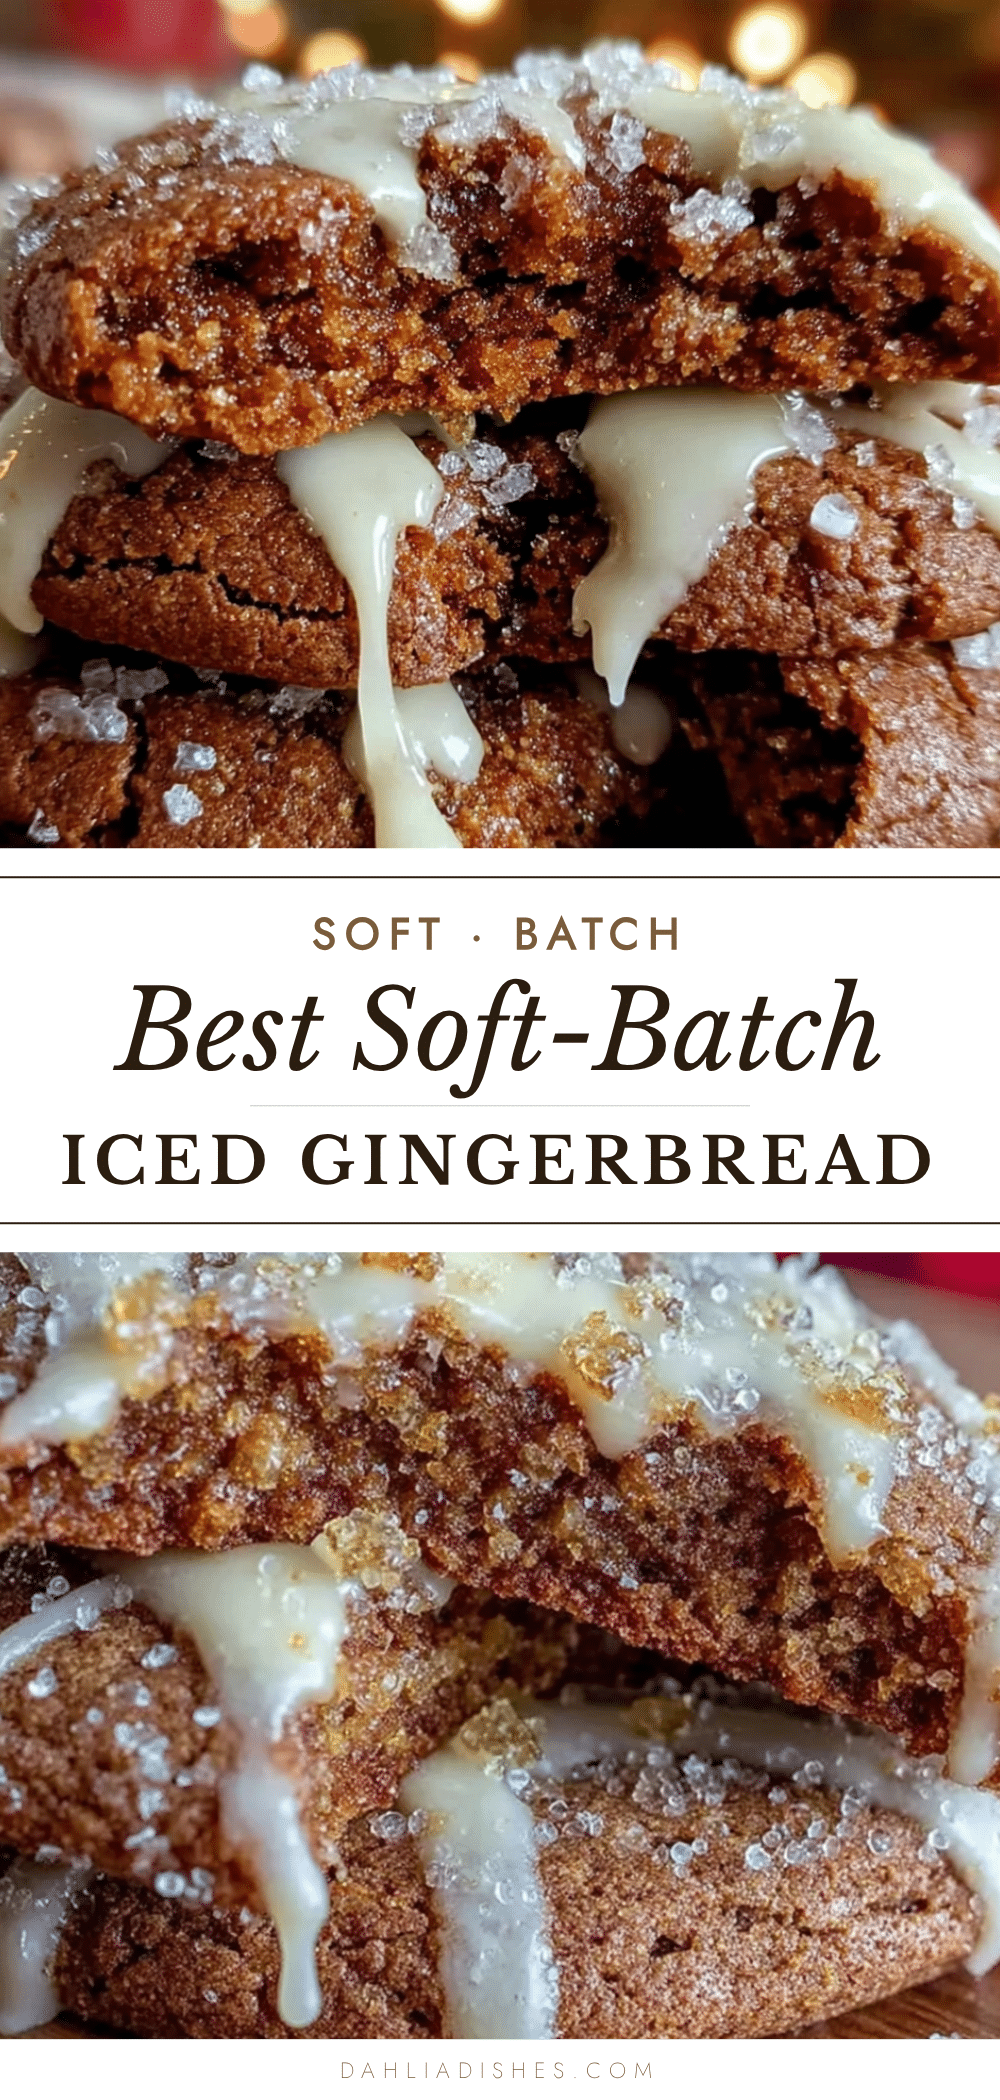
Best Soft-Batch Iced Gingerbread Cookies Easy Recipe
These soft-batch iced gingerbread cookies are tender, spiced, and topped with a simple vanilla icing. Perfect for holiday gatherings or cozy winter evenings, they deliver that nostalgic, pillowy texture with deep molasses flavor.
- Prep Time: 15 minutes
- Cook Time: 10 minutes
- Total Time: 1 hour 25 minutes (includes 1 hour chilling)
- Yield: 24 cookies 1x
- Category: Dessert
- Cuisine: American
Ingredients
- 1 cup (226g) unsalted butter, softened
- 1 cup (200g) dark brown sugar, packed
- 3/4 cup (240g) molasses (not blackstrap)
- 1 large egg, room temperature
- 3 cups (360g) all-purpose flour, spooned and leveled
- 1 1/2 teaspoons baking soda
- 2 teaspoons ground ginger
- 1 1/2 teaspoons ground cinnamon
- 1/2 teaspoon ground cloves
- 1/2 teaspoon salt
- For the icing:
- 2 cups (240g) powdered sugar
- 3 tablespoons (45ml) milk
- 1/2 teaspoon vanilla extract
Instructions
- Preheat oven to 350°F (175°C). Line two baking sheets with parchment paper.
- In a stand mixer bowl, beat softened butter and dark brown sugar on medium speed for 3-4 minutes until light and fluffy. Scrape down sides halfway through.
- With mixer on low, slowly pour in molasses in a thin, steady stream. Add egg and beat until just combined. Mixture should be smooth and glossy.
- In a separate bowl, whisk together flour, baking soda, ginger, cinnamon, cloves, and salt.
- Add dry ingredients to wet mixture in two additions, mixing on low until just combined. A few streaks of flour are fine; do not overmix.
- Cover bowl with plastic wrap and refrigerate dough for at least 1 hour.
- Using a 1 1/2-tablespoon cookie scoop, portion dough into balls and place 2 inches apart on prepared baking sheets.
- Bake for 9-11 minutes. Cookies should look puffy and slightly cracked on top, set around edges but still soft in center.
- Let cookies rest on baking sheet for 3 minutes, then transfer to a cooling rack to cool completely.
- For icing: In a small bowl, whisk together powdered sugar, milk, and vanilla until smooth. Consistency should be thick but pourable (like heavy cream).
- Transfer icing to a piping bag or Ziploc bag with a tiny corner snipped off. Drizzle over cooled cookies in a zigzag pattern. Let icing set for at least 20 minutes before stacking or serving.
Notes
Chill dough for at least 1 hour to prevent spreading. Use a kitchen scale for flour for best results. Cookies taste even better the next day. For dairy-free, use vegan butter. For gluten-free, use a 1-to-1 gluten-free flour blend with xanthan gum. Store in an airtight container at room temperature for up to 5 days. Freeze baked cookies (without icing) for up to 3 months.
Nutrition
- Serving Size: 1 cookie
- Calories: 180
- Sugar: 15
- Sodium: 120
- Fat: 7
- Saturated Fat: 4
- Carbohydrates: 28
- Fiber: 1
- Protein: 2
Keywords: gingerbread cookies, soft-batch cookies, iced cookies, holiday cookies, Christmas cookies, molasses cookies


