Love this? Save it for later!
Share the inspiration with your friends
My friend Carla watched me fumbling with a piping bag at her Halloween party, my hands shaking as I tried to make perfect little ghosts out of buttercream. She didn’t say anything at first. Then she walked over, gently took the bag from me, and said, “You’re overthinking it. Let me show you something easier.” She pulled out a tray of brownie bites from her oven, each one topped with a tiny chocolate stem and a smear of orange frosting. They looked like miniature pumpkins sitting in a patch. I laughed out loud. Here I was, stressing over fancy piping techniques, and she had created the cutest fall dessert I had ever seen using nothing but a spoon and her hands. I mean, honestly, that moment changed my whole approach to holiday baking.
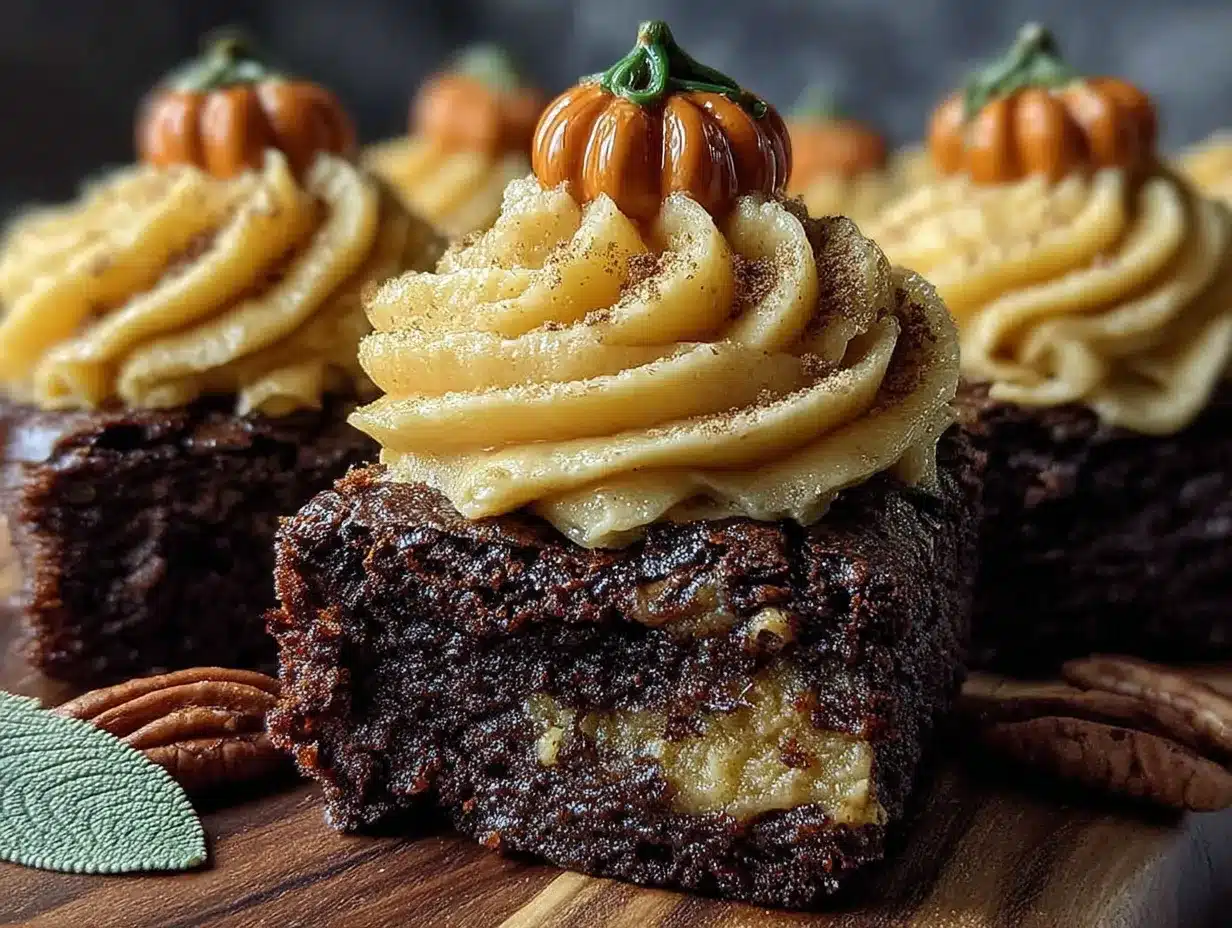
That was three autumns ago, and I haven’t stopped making these Best Pumpkin Patch Brownie Bites since. They are the kind of recipe that makes you look like a kitchen wizard without actually having to be one. You know that feeling when you want to bring something impressive to a gathering but don’t have hours to spare? These little guys are the answer. They start with a rich, fudgy brownie base—the kind that cracks slightly on top and stays perfectly moist in the middle. Then comes the fun part: turning each bite into a tiny pumpkin with a dollop of orange-tinted frosting and a pretzel stem. The whole process takes maybe thirty minutes of active work, and the result is something that makes people stop and smile.
I’ll be honest with you—I’ve burned my fair share of brownies over the years. I once forgot a batch so badly that the smoke alarm went off during a dinner party. But these pumpkin patch brownie bites are forgiving. They are simple enough for a beginner but charming enough to impress your mother-in-law. The combination of deep chocolate and sweet, creamy frosting with that little salty crunch from the pretzel? It’s the kind of flavor that makes you close your eyes after the first bite. This recipe stayed with me because it reminded me that the best desserts don’t come from perfection—they come from sharing something made with your own two hands.
Why You’ll Love This Recipe
Let me tell you why these pumpkin patch brownie bites have become my go-to fall dessert, year after year. I’ve tested this recipe at least a dozen times, tweaking the brownie texture and the frosting consistency until everything came together just right. Here is what makes them stand out:
- Quick & Easy: From start to finish, you are looking at about 35 minutes of active work. The brownies bake in under 20 minutes, and the decorating takes maybe fifteen. Perfect for those busy weeknights when you still want to bring something homemade to the school bake sale or the office potluck.
- Simple Ingredients: No fancy grocery trips required. You probably have most of these items in your pantry right now—cocoa powder, butter, sugar, eggs, and flour. The frosting uses cream cheese and powdered sugar, which are pretty standard baking staples. Even the pretzel stems are just regular pretzel sticks you can grab at any store.
- Perfect for Fall Gatherings: These little bites are made for Halloween parties, Thanksgiving dessert tables, or even just a cozy weekend treat. They look like tiny pumpkins sitting in a patch, which makes them instantly festive without being over-the-top.
- Crowd-Pleaser: I have brought these to at least five different gatherings, and they always disappear first. Kids love the cute shape, and adults appreciate that they aren’t overly sweet. The combination of rich chocolate and creamy frosting hits that perfect comfort food spot.
- Unbelievably Delicious: The texture is what gets me every time. The brownie base is fudgy and dense, with that slight crackle on top that signals a perfect brownie. Then you get the smooth, tangy cream cheese frosting and the little salty crunch from the pretzel. It’s a flavor and texture party in your mouth.
What makes these pumpkin patch brownie bites different from every other fall dessert out there? It’s the balance. Most pumpkin desserts lean hard on pumpkin spice and can get a bit one-note. These brownie bites let the chocolate shine while the frosting and pretzel add just enough seasonal flair. They are not trying to be a pumpkin pie or a pumpkin roll—they are their own thing, and that thing is delicious.
This recipe is the kind that makes you feel good about sharing it. It is comfort food reimagined—faster than a traditional pumpkin dessert, but with the same soul-soothing satisfaction. Perfect for impressing guests without stress, or turning a simple Tuesday evening into something memorable.
What Ingredients You Will Need
This recipe uses simple, wholesome ingredients to deliver bold chocolate flavor and that adorable pumpkin look without any fuss. Most of these are pantry staples, which makes these pumpkin patch brownie bites perfect for spontaneous baking sessions.
For the Brownie Base
- 1/2 cup (1 stick or 113g) unsalted butter, melted and slightly cooled (I always use salted butter in a pinch and just skip the added salt—works fine)
- 1 cup (200g) granulated sugar (adds sweetness and helps create that crackly top)
- 2 large eggs, room temperature (cold eggs can seize the batter, so let them sit out for 15 minutes)
- 1 teaspoon vanilla extract (pure vanilla makes a difference, but imitation works too)
- 1/3 cup (40g) unsweetened cocoa powder (I prefer Dutch-process for a deeper flavor, but regular works great)
- 1/2 cup (65g) all-purpose flour (spoon and level it—don’t scoop directly from the bag)
- 1/4 teaspoon salt (enhances the chocolate flavor)
- 1/4 teaspoon baking powder (gives a slight lift without making them cakey)
For the Cream Cheese Frosting
- 4 ounces (113g) cream cheese, softened (full-fat gives the best texture, but low-fat works if that’s what you have)
- 2 tablespoons (28g) unsalted butter, softened
- 1 cup (120g) powdered sugar, sifted (sifting prevents lumps—trust me on this one)
- 1/2 teaspoon vanilla extract
- Orange gel food coloring (gel is better than liquid because it doesn’t thin out the frosting)
For the Pumpkin Patch Decoration
- Pretzel sticks, broken into small pieces (about 1/2 inch each) for the stems
- Green candy melts or green frosting for the little leaves (optional, but they add a nice touch)
- Orange sanding sugar or sprinkles (optional, for a little sparkle)
When it comes to ingredient selection, here is what I have learned from my kitchen trials. For the cocoa powder, I really recommend using a brand like Ghirardelli or Hershey’s Special Dark if you want that rich, almost fudgy taste. The darker the cocoa, the more intense the brownie flavor. For the cream cheese, Philadelphia is my go-to because it has a consistent texture that blends smoothly. If you are dairy-free, you can use a plant-based cream cheese alternative, but make sure it is the block style, not the spreadable kind—the spreadable ones have too much water and can make your frosting runny.
Substitution guidance: If you want a gluten-free version, swap the all-purpose flour with a 1:1 gluten-free baking flour blend. I’ve used Bob’s Red Mill with great results. For a lower sugar option, you can reduce the granulated sugar to 3/4 cup, but the brownies will be slightly less crackly on top. And if you don’t have pretzel sticks, small pieces of chocolate wafer cookies or even thin mint sticks work beautifully for the stems.
Equipment Needed
You don’t need a fully stocked bakery to make these pumpkin patch brownie bites. Here is what you will need:
- 9×9-inch baking pan (an 8×8 works too, but the brownies will be slightly thicker and need a couple extra minutes of baking time)
- Parchment paper (non-negotiable—it makes lifting the brownies out so much easier, and cleanup is a breeze)
- Mixing bowls (one large for the brownie batter, one medium for the frosting)
- Whisk and rubber spatula (the spatula is crucial for scraping every bit of batter)
- Electric hand mixer or stand mixer (for the frosting—you can do it by hand, but your arm will get a workout)
- Small round cookie cutter or a knife (to cut the brownies into rounds; a 1.5-inch cutter is ideal)
- Piping bag or zip-top bag (for applying the frosting in a neat little swirl)
- Cooling rack (speeds up the cooling process so you can start decorating sooner)
I have made these with a cheap $5 cookie cutter from the grocery store, and they turned out just as cute as when I used my fancy Wilton set. If you don’t have a round cutter, just use a sharp knife to cut the brownies into squares—they still look adorable. For the piping bag, I usually just snip the corner off a zip-top bag. Works perfectly and saves on cleanup.
One tip: if you use a metal baking pan, keep an eye on the baking time because metal conducts heat faster than glass. I burned my first batch because I didn’t adjust the timing. Learn from my mistake!
Preparation Method
Let’s get into the actual process of making these pumpkin patch brownie bites. I have broken this down into clear steps so you can follow along without any confusion.
- Preheat your oven to 350°F (175°C). Line your 9×9-inch baking pan with parchment paper, leaving some overhang on two sides. This creates little handles that make lifting the brownies out super easy later. Lightly grease the parchment with cooking spray or a little butter.
- Make the brownie batter. In a large mixing bowl, whisk together the melted butter and granulated sugar until they are well combined. The mixture should look smooth and slightly glossy. Add the eggs one at a time, whisking well after each addition. Stir in the vanilla extract. The batter will look a bit thin at this point—that’s normal.
- Add the dry ingredients. Sift the cocoa powder, flour, salt, and baking powder directly into the wet mixture. Use a rubber spatula to fold everything together gently. Do not overmix—stop as soon as you no longer see streaks of flour. Overmixing can make the brownies tough instead of fudgy. The batter will be thick and shiny.
- Bake the brownies. Pour the batter into your prepared pan and spread it evenly with the spatula. Bake for 18 to 22 minutes. You will know they are done when the edges look set and a toothpick inserted into the center comes out with a few moist crumbs attached—not wet batter, but not completely clean either. If the toothpick is clean, you have overbaked them. Let the brownies cool in the pan for about 10 minutes, then use the parchment handles to lift them out and transfer to a cooling rack. Let them cool completely. This is important—warm brownies will crumble when you try to cut them.
- Make the cream cheese frosting. While the brownies are cooling, beat the softened cream cheese and butter together in a medium bowl using an electric mixer on medium speed. Beat until smooth and fluffy, about 2 minutes. Add the sifted powdered sugar and vanilla extract, then beat on low speed until combined. Increase the speed to medium and beat for another minute until the frosting is light and creamy. Add orange gel food coloring one drop at a time, mixing after each drop, until you reach your desired pumpkin shade. I usually use about 4 to 5 drops for a nice warm orange.
- Cut the brownies into rounds. Once the brownies are completely cool, use your round cookie cutter to cut out circles. Press straight down and twist slightly to release. If you don’t have a cutter, cut the brownies into 1.5-inch squares. You will get about 16 to 20 rounds depending on the size of your cutter. Save the scraps for snacking—they make a great ice cream topping.
- Assemble the pumpkin patch brownie bites. Transfer the orange frosting to a piping bag or a zip-top bag with a small corner snipped off. Pipe a small swirl of frosting onto each brownie round, starting from the center and spiraling outward. The swirl should look like the top of a pumpkin. Don’t worry about making it perfect—rustic pumpkins are charming.
- Add the stems and leaves. Gently press a small piece of pretzel stick into the center of each frosting swirl to create the stem. If you are using green candy melts, melt them according to the package directions and use a toothpick to draw a tiny leaf shape next to the stem. You can also pipe a small green leaf using green frosting. This step is optional but adds that extra “pumpkin patch” feel.
- Let the frosting set. Place the finished pumpkin patch brownie bites in the refrigerator for about 15 to 20 minutes. This helps the frosting firm up so it doesn’t smudge when you stack or transport them. They are now ready to serve!
One thing I learned the hard way: do not skip the cooling step. I was impatient once and tried to cut warm brownies. They turned into a crumbly mess, and I ended up with brownie rubble instead of cute little rounds. Patience pays off here.
Cooking Tips & Techniques
Over the years, I have picked up a few tricks that make these pumpkin patch brownie bites turn out perfectly every time. Let me share what I have learned through both success and failure.
Get that crackly top. The secret to a shiny, crackly brownie top is beating the eggs and sugar together for a full minute before adding the other ingredients. This creates a little meringue-like structure that forms that beautiful crust. I whisk mine vigorously by hand for about 60 seconds, and it works like a charm.
Don’t overbake. This is the most common mistake I see. Brownies continue to cook from residual heat even after you take them out of the oven. Pull them when the center still looks slightly underdone and a toothpick comes out with moist crumbs. If you wait until the toothpick is clean, you will have dry, cakey brownies instead of fudgy ones. I have made this mistake more times than I care to admit.
Room temperature ingredients matter. For the frosting, make sure your cream cheese and butter are truly softened. Cold cream cheese creates lumps that are nearly impossible to beat out. I leave mine on the counter for about 30 minutes before starting. If you forget, you can microwave the cream cheese in 10-second bursts, but be careful—melted cream cheese is a whole different problem.
Use a wet knife for clean cuts. When cutting your brownies into rounds, dip your cookie cutter in warm water and wipe it dry between cuts. This prevents the brownie from sticking to the cutter and gives you cleaner edges. I discovered this trick after struggling with sticky, ragged edges on my first batch.
Work in batches. If you are making these for a party, bake the brownies a day ahead and store them in an airtight container. Then make the frosting and decorate them the day of your event. This spreads out the work and ensures the brownies are completely cool before you cut them. Trust me, rushing leads to crumbs.
Timing strategy. I like to start the brownies first, then make the frosting while they bake and cool. This way, by the time the brownies are cool enough to cut, the frosting is ready to go. It makes the whole process feel faster and more efficient.
Variations & Adaptations
One of the best things about these pumpkin patch brownie bites is how adaptable they are. Here are some variations I have tried and loved:
Gluten-Free Version: Swap the all-purpose flour with a 1:1 gluten-free baking flour blend. I have used King Arthur Measure for Measure with excellent results. The texture is slightly more tender, but the flavor is just as rich. Make sure your pretzel sticks are gluten-free too—some brands use wheat flour.
Vegan Adaptation: Use a vegan butter substitute and a flax egg (1 tablespoon ground flaxseed mixed with 3 tablespoons water, let sit for 5 minutes) in place of the eggs. For the frosting, use a vegan cream cheese like Miyoko’s or Kite Hill. The brownies will be a bit denser but still delicious. I brought a vegan batch to a friend’s gathering, and no one could tell the difference.
Spiced Pumpkin Twist: Add 1/4 cup of pumpkin puree and 1 teaspoon of pumpkin pie spice to the brownie batter. Reduce the butter to 1/3 cup to compensate for the extra moisture. This gives the brownies a subtle pumpkin flavor that pairs beautifully with the chocolate. My sister-in-law requests this version every year.
Dark Chocolate Lovers: Use dark cocoa powder instead of regular, and add 1/2 cup of dark chocolate chips to the batter. The bitterness of the dark chocolate balances the sweet frosting perfectly. This is my personal favorite for adult gatherings.
Mini Muffin Pan Method: Instead of baking a full pan and cutting rounds, pour the batter into a greased mini muffin pan and bake for 10 to 12 minutes. You get perfectly portioned brownie bites without any cutting. Just pipe the frosting directly onto each mini brownie. This saves time and reduces waste.
Flavor Variations for the Frosting: Add a pinch of cinnamon or pumpkin pie spice to the frosting for a warm, seasonal flavor. Or swap the vanilla extract for maple extract for a completely different vibe. I tried a maple cream cheese frosting once, and it was incredible—like a pancake breakfast in dessert form.
Serving & Storage Suggestions
These pumpkin patch brownie bites are best served at room temperature or slightly chilled. The frosting firms up nicely in the fridge, which makes them easy to handle and stack on a serving platter.
Presentation Ideas: Arrange the brownie bites on a large platter in a circular pattern to mimic a pumpkin patch. Sprinkle some orange and green sprinkles around the edges for a festive look. You can also place them in individual mini cupcake liners for easy grabbing at parties. For a fun touch, arrange them on a bed of crushed chocolate cookies to look like dirt.
Complementary Dishes: These pair wonderfully with a hot cup of apple cider or a pumpkin spice latte. For a full fall dessert spread, serve them alongside my crispy garlic chicken for a sweet and savory combo that always impresses. They also work great on a dessert board with caramel apples, mini pies, and chocolate-covered pretzels.
Storage Instructions: Store the decorated brownie bites in an airtight container in the refrigerator for up to 5 days. The brownies stay moist, and the frosting holds its shape well. If you are stacking them, place a sheet of parchment paper between layers to prevent the frosting from sticking.
Freezing Tips: You can freeze the undecorated brownie rounds for up to 3 months. Wrap them tightly in plastic wrap and place them in a freezer-safe bag. When you are ready to serve, thaw them in the refrigerator overnight, then make the frosting and decorate. I do this all the time for holiday prep—it is a lifesaver.
Reheating: These are meant to be served cold or at room temperature, so no reheating is needed. If you prefer a slightly warm brownie, pop an undecorated round in the microwave for 10 seconds, then add the frosting. The warm brownie with cold frosting is a lovely contrast.
One note about flavor development: these actually taste better the next day. The brownie gets even fudgier as it sits, and the flavors meld together beautifully. So don’t hesitate to make them a day ahead.
Nutritional Information & Benefits
Here are the approximate nutritional values for one pumpkin patch brownie bite (based on 16 servings):
- Calories: 185
- Total Fat: 10g
- Saturated Fat: 6g
- Cholesterol: 45mg
- Sodium: 95mg
- Total Carbohydrates: 23g
- Dietary Fiber: 1g
- Sugars: 18g
- Protein: 3g
These are estimates and will vary based on your specific ingredients and portion sizes. If you use reduced-fat cream cheese or a sugar substitute, the numbers will change accordingly.
Health Benefits: While these are definitely a treat, they do offer a few small benefits. Cocoa powder is rich in antioxidants called flavonoids, which can support heart health. Cream cheese provides a bit of calcium and protein. And hey, dark chocolate has been shown to improve mood—so consider these little bites a happiness boost!
Dietary Considerations: This recipe contains gluten, dairy, and eggs. For gluten-free and vegan options, see the variations section above. If you are watching your sugar intake, you can reduce the sugar in the brownies to 3/4 cup and use a sugar-free powdered sugar substitute in the frosting. The texture will be slightly different, but the taste is still great.
Allergen Warning: This recipe contains wheat, dairy, and eggs. The pretzel sticks may contain gluten. If you are serving these at a gathering, always label them clearly for guests with allergies.
From a personal wellness perspective, I believe in enjoying treats in moderation. These pumpkin patch brownie bites are a special occasion dessert, not an everyday snack. But when you do indulge, make it count—use good ingredients, savor every bite, and share them with people you love.
Conclusion
These pumpkin patch brownie bites have become a staple in my fall baking rotation, and I think they deserve a spot in yours too. They are simple enough for a beginner baker but charming enough to steal the show at any gathering. The combination of fudgy chocolate, creamy orange frosting, and that little salty pretzel crunch is just irresistible.
I love how customizable this recipe is. You can make them gluten-free, vegan, or add a pumpkin spice twist. You can go all out with the decorations or keep them simple. The base recipe is forgiving and always delivers. That is the kind of recipe I want in my back pocket—reliable, adaptable, and genuinely fun to make.
So here is my challenge to you: try making these for your next fall gathering. Bring them to a Halloween party, a Thanksgiving dinner, or just make them for a cozy weekend at home. Pay attention to how people react when they see those little pumpkin shapes. Then watch them take a bite and close their eyes for a second. That is the moment that makes all the baking worth it.
I would love to hear how yours turn out! Leave a comment below and tell me about your decorating adventures. Did you add leaves? Use a different frosting color? Find a brilliant shortcut? Share your stories and photos—I read every single one. And if you loved this recipe, pass it along to a friend who needs a little fall cheer. Happy baking, friends!
Frequently Asked Questions
Can I use a boxed brownie mix instead of making from scratch?
Absolutely! If you are short on time, a boxed mix works perfectly. Just prepare the brownies according to the package directions for a 9×9 pan, let them cool, and proceed with the frosting and decorating. The flavor will be slightly different, but the cute pumpkin look is still there.
How do I prevent the frosting from sliding off the brownies?
Make sure your brownies are completely cool before you add the frosting. Warm brownies will melt the cream cheese frosting and cause it to slide. Also, let the frosted bites sit in the refrigerator for 15 to 20 minutes to firm up before serving or stacking.
Can I make these without a round cookie cutter?
Yes! If you don’t have a round cutter, simply cut the brownies into 1.5-inch squares using a sharp knife. They will look like little pumpkin patches instead of round pumpkins, but they taste just as good. You can also use a small biscuit cutter or even the rim of a drinking glass.
How far in advance can I make these for a party?
You can bake the brownies up to 3 days in advance and store them in an airtight container at room temperature. Make the frosting and decorate them the day of your event for the freshest look. If you need to decorate a day ahead, store the finished bites in the refrigerator and let them sit at room temperature for 15 minutes before serving.
What can I use instead of pretzel sticks for the stems?
If you don’t have pretzel sticks, try using small pieces of chocolate wafer cookies, thin mint sticks, or even a small piece of a chocolate bar. You can also use a green candy melt or a piece of a licorice twist. The stem is mostly decorative, so get creative with what you have on hand.
Pin This Recipe!
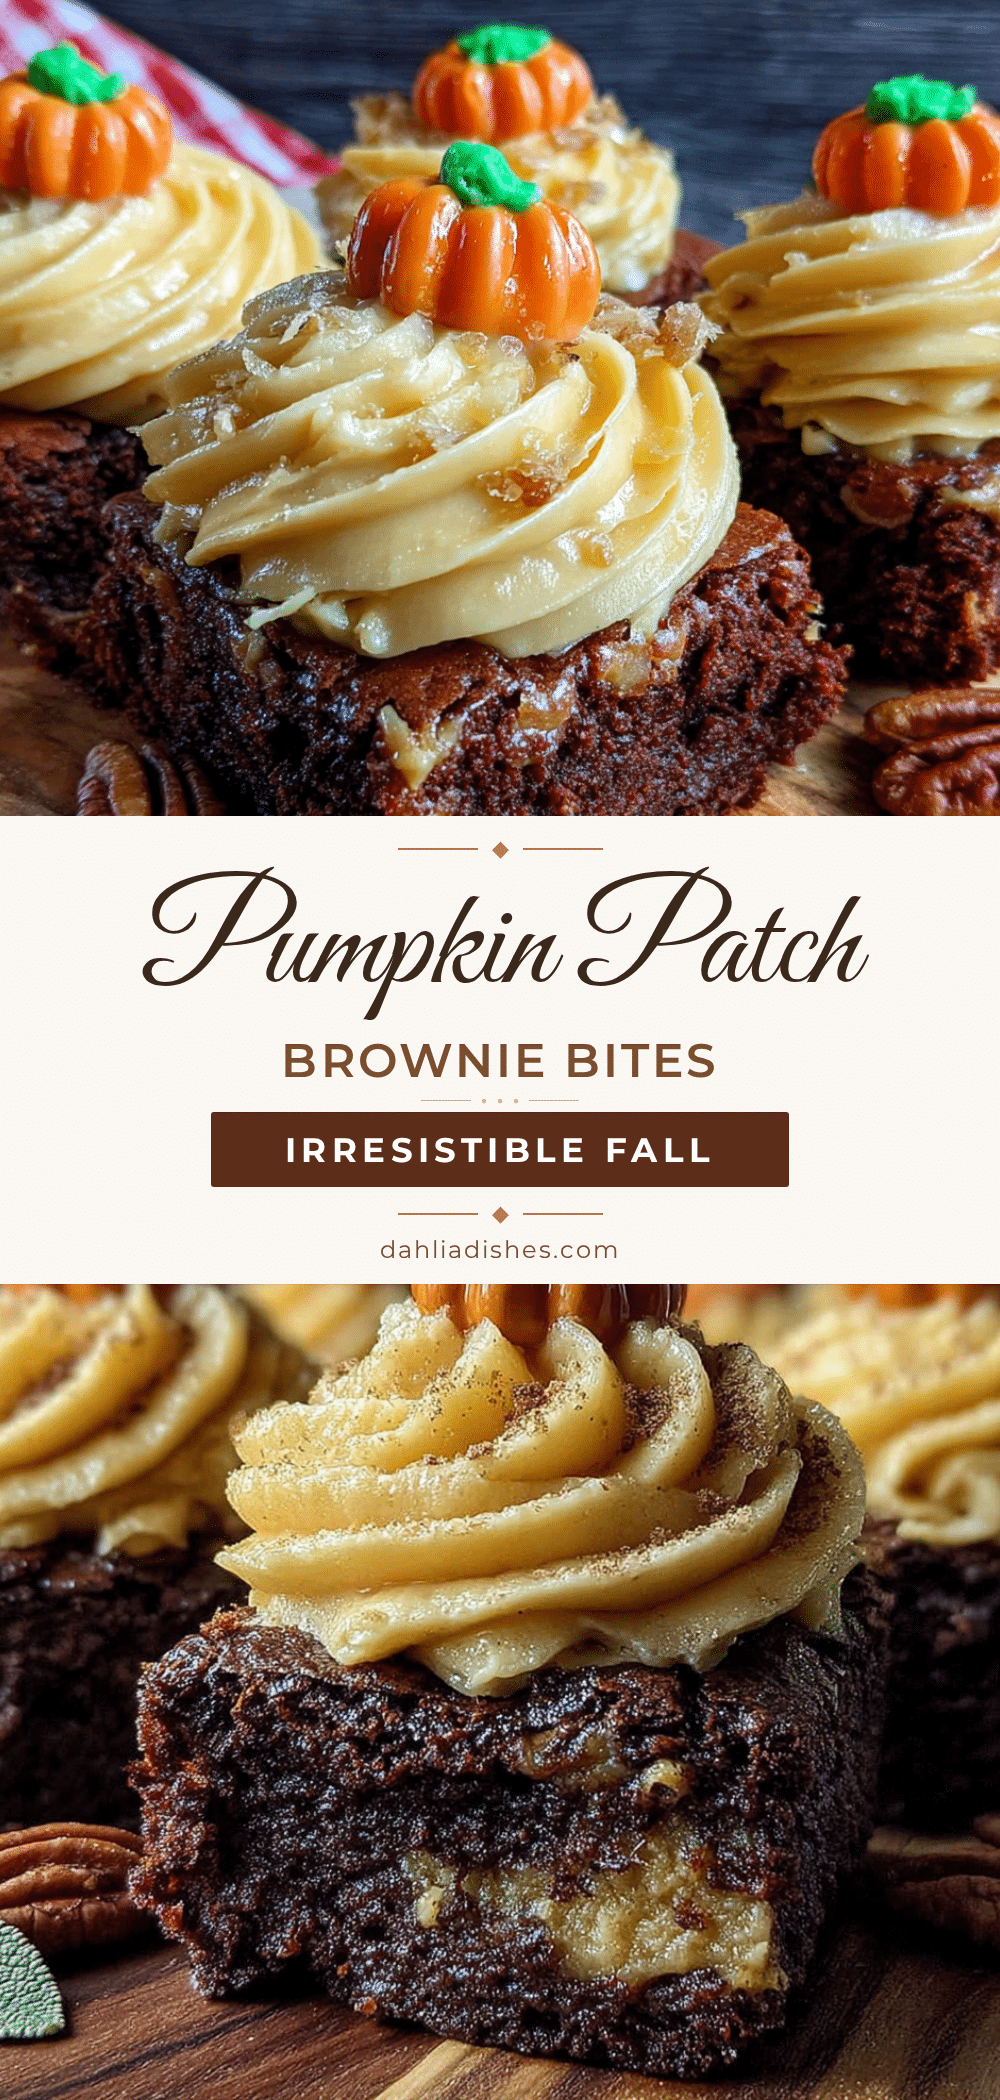
Best Pumpkin Patch Brownie Bites: Easy Fall Dessert
Rich, fudgy brownie bites topped with orange cream cheese frosting and a pretzel stem, creating adorable miniature pumpkins. An easy, crowd-pleasing fall dessert that comes together in about 35 minutes.
- Prep Time: 15 minutes
- Cook Time: 20 minutes
- Total Time: 35 minutes
- Yield: 16 servings 1x
- Category: Dessert
- Cuisine: American
Ingredients
- 1/2 cup (1 stick or 113g) unsalted butter, melted and slightly cooled
- 1 cup (200g) granulated sugar
- 2 large eggs, room temperature
- 1 teaspoon vanilla extract
- 1/3 cup (40g) unsweetened cocoa powder
- 1/2 cup (65g) all-purpose flour
- 1/4 teaspoon salt
- 1/4 teaspoon baking powder
- 4 ounces (113g) cream cheese, softened
- 2 tablespoons (28g) unsalted butter, softened
- 1 cup (120g) powdered sugar, sifted
- 1/2 teaspoon vanilla extract
- Orange gel food coloring
- Pretzel sticks, broken into small pieces (about 1/2 inch each)
- Green candy melts or green frosting (optional)
- Orange sanding sugar or sprinkles (optional)
Instructions
- Preheat your oven to 350°F (175°C). Line your 9×9-inch baking pan with parchment paper, leaving some overhang on two sides. Lightly grease the parchment with cooking spray or a little butter.
- In a large mixing bowl, whisk together the melted butter and granulated sugar until well combined and slightly glossy. Add the eggs one at a time, whisking well after each addition. Stir in the vanilla extract.
- Sift the cocoa powder, flour, salt, and baking powder directly into the wet mixture. Use a rubber spatula to fold everything together gently until no streaks of flour remain. Do not overmix.
- Pour the batter into the prepared pan and spread evenly. Bake for 18 to 22 minutes, until the edges look set and a toothpick inserted into the center comes out with a few moist crumbs. Let cool in the pan for 10 minutes, then transfer to a cooling rack to cool completely.
- While the brownies cool, beat the softened cream cheese and butter together with an electric mixer on medium speed until smooth and fluffy, about 2 minutes. Add the sifted powdered sugar and vanilla extract, beat on low until combined, then increase to medium and beat for another minute. Add orange gel food coloring one drop at a time until desired shade is reached.
- Once the brownies are completely cool, use a round cookie cutter (about 1.5 inches) to cut out circles. Press straight down and twist slightly to release. You should get about 16 to 20 rounds.
- Transfer the orange frosting to a piping bag or a zip-top bag with a small corner snipped off. Pipe a small swirl of frosting onto each brownie round, starting from the center and spiraling outward.
- Gently press a small piece of pretzel stick into the center of each frosting swirl to create the stem. Optionally, add a small green leaf using melted green candy melts or green frosting.
- Place the finished pumpkin patch brownie bites in the refrigerator for about 15 to 20 minutes to let the frosting set. Serve at room temperature or slightly chilled.
Notes
Do not skip the cooling step—warm brownies will crumble when cut. For a crackly top, beat eggs and sugar together for a full minute. Brownies continue to cook from residual heat, so pull them when the center still looks slightly underdone. Use a wet knife or cookie cutter for clean cuts. These taste even better the next day.
Nutrition
- Serving Size: 1 brownie bite
- Calories: 185
- Sugar: 18
- Sodium: 95
- Fat: 10
- Saturated Fat: 6
- Carbohydrates: 23
- Fiber: 1
- Protein: 3
Keywords: pumpkin patch brownie bites, fall dessert, Halloween brownies, easy brownie recipe, cream cheese frosting brownies


