Love this? Save it for later!
Share the inspiration with your friends
I was standing in a parking lot last October, fumbling for my keys after a grocery run, when a gust of wind carried the unmistakable scent of cinnamon and clove from somewhere—maybe a nearby bakery, maybe someone’s open car window. And just like that, I was eight years old, sitting on a worn wooden stool in my Aunt Lena’s tiny kitchen, watching her pull a loaf of pumpkin bread from the oven. She’d tap the top with her knuckle—a quick, confident thump—and nod, satisfied. I can still see the steam rising, the way the walnuts peeked out like little treasures. She passed away a few years ago, and I never got her exact recipe. She was the kind of cook who measured with her heart, not a set of spoons.
So I’ve spent the last few autumns trying to recreate that exact feeling—not just the taste, but the warmth of that kitchen, the way she’d let me lick the spatula, the smell that meant company was coming. This one-bowl pumpkin walnut bread? It’s the closest I’ve gotten. Honestly, it might even be better. I mean, maybe you know that kind of longing—the one where you’re chasing a memory you can almost hold, but not quite. This recipe is my best attempt to grab it.
It’s also become my secret weapon for fall gatherings. The first time I made it for a dinner party, I was nervous—what if it was too dry? What if the spices were off? But that loaf disappeared before the main course even hit the table. Someone asked for the recipe before they’d even finished their slice. And the best part? It all comes together in one bowl. No mixer, no fuss, no pile of dishes. Just a wooden spoon, a few pantry staples, and a promise of something that tastes like a hug.
Why You’ll Love This Recipe
This isn’t just another pumpkin bread recipe. I’ve tested versions with too much sugar, not enough spice, and the dreaded dry crumb. This one hits every note just right. Here’s why it’s earned a permanent spot in my fall rotation:
- One Bowl, No Mixer: You don’t need a stand mixer or even a hand mixer. Just a bowl and a spoon. Less cleanup means more time with your guests.
- Simple Ingredients: Canned pumpkin, flour, sugar, eggs, oil, walnuts. You probably have most of this in your pantry right now.
- Perfect for Hosting: It scales beautifully for a crowd—double the recipe and bake two loaves. One for the table, one for guests to take home.
- Crowd-Pleaser: I’ve served this at potlucks, Thanksgiving dinners, and casual brunches. It’s always the first thing to go. Kids love it, adults sneak seconds.
- Unbelievably Moist: The combination of pumpkin and oil creates a texture that stays tender for days. No dry corners here.
What makes this different from the dozens of pumpkin breads out there? It’s the balance. The cinnamon and nutmeg are warm but not overwhelming. The walnuts add a crunch that cuts through the soft crumb. And the sugar? Just enough to feel like a treat without being cloying. This is the kind of bread that makes you close your eyes after the first bite—not because it’s fancy, but because it tastes like the best parts of fall.
For hosts, this is a lifesaver. You can bake it the night before, wrap it up, and pull it out when guests arrive. It looks impressive on a cake stand, slices beautifully, and pairs with almost anything—coffee, tea, a smear of butter, or a dollop of whipped cream. It’s comfort food you can be proud to serve.
What Ingredients You Will Need
This recipe relies on simple, everyday ingredients that come together to create something special. The pumpkin does double duty—it adds moisture and a subtle earthiness that lets the spices shine. Here’s what you’ll need:
- Canned pumpkin puree (425g / 15 oz): Not pumpkin pie filling! Make sure it’s 100% pure pumpkin. Libby’s is my go-to for consistent texture, but store brands work fine too. If you’re using homemade pumpkin puree, drain it slightly on paper towels to remove excess water.
- Granulated sugar (200g / 1 cup): Adds sweetness and helps create that tender crumb. You can reduce it to ¾ cup if you prefer a less sweet loaf, but don’t go lower—sugar also affects moisture.
- Brown sugar (100g / ½ cup, packed): This is where the depth comes from. The molasses in brown sugar adds a warm, almost caramel-like flavor. Light or dark brown sugar both work; dark gives a richer taste.
- Vegetable oil (120ml / ½ cup): Keeps the bread incredibly moist without making it greasy. Canola or avocado oil are great substitutes. Melted coconut oil works too, but use a neutral one so it doesn’t overpower the spices.
- Large eggs (2): Room temperature is best—they incorporate more evenly. If you forget to take them out ahead of time, place them in a bowl of warm water for 5 minutes.
- All-purpose flour (240g / 2 cups): Spoon and level your flour—don’t scoop directly from the bag or you’ll end up with a dense loaf. For a whole wheat version, substitute half the flour with whole wheat pastry flour.
- Baking soda (1 teaspoon): Works with the acidity in the pumpkin to help the bread rise. Make sure it’s fresh—test it by dropping a bit into vinegar; it should fizz.
- Salt (½ teaspoon): Balances the sweetness and enhances the spices. I use fine sea salt.
- Ground cinnamon (2 teaspoons): The backbone of the spice blend. I prefer Saigon cinnamon for its bold, sweet heat.
- Ground nutmeg (½ teaspoon): Adds a warm, nutty note. Freshly grated is amazing if you have it.
- Ground ginger (½ teaspoon): A little kick that brightens everything up. Skip it if you’re not a fan, but it really rounds out the flavor.
- Ground cloves (¼ teaspoon): Just a pinch—it’s potent. This gives that classic “pumpkin spice” depth.
- Chopped walnuts (120g / 1 cup): Toast them first for extra flavor! Spread on a baking sheet at 350°F (175°C) for 5-7 minutes until fragrant. Let them cool before folding into the batter. Pecans work beautifully too.
Equipment Needed
You don’t need a fancy kitchen to pull this off. Here’s what you’ll need:
- Large mixing bowl: Any bowl works, but a wide one makes mixing easier. I use a ceramic one that belonged to my grandmother—it’s chipped on the edge, but it holds memories along with batter.
- Wooden spoon or rubber spatula: A wooden spoon is great for mixing the dry ingredients, and a spatula helps scrape the sides. If you only have a whisk, that works too—just be gentle to avoid overmixing.
- 9×5-inch loaf pan: This is the standard size. If you use an 8×4-inch pan, your bread will be taller and need a few extra minutes in the oven. Grease it well with butter or non-stick spray, then line with parchment paper for easy removal.
- Measuring cups and spoons: For accuracy, especially with the baking soda and spices. I’ve learned the hard way that “a pinch” isn’t reliable when you’re baking for guests.
- Cooling rack: Essential for even cooling. If you don’t have one, you can use the oven grates (just make sure they’re clean).
- Optional but helpful: A kitchen scale for measuring flour by weight (it’s more precise), and a toothpick for testing doneness.
Preparation Method
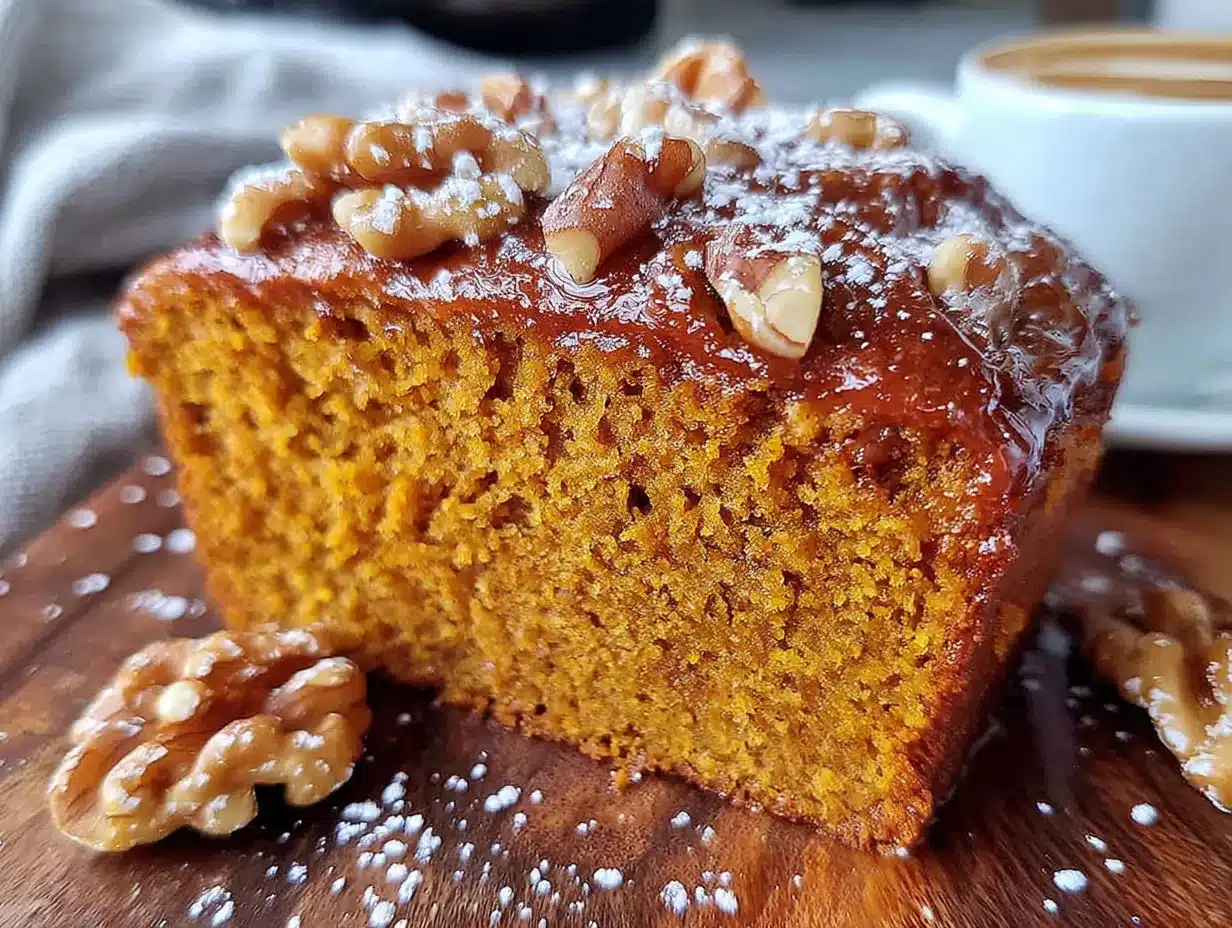
Preheat your oven to 350°F (175°C). Grease your 9×5-inch loaf pan with butter or non-stick spray, then line it with a strip of parchment paper that hangs over the long sides—this makes lifting the bread out a breeze later.
- Mix the wet ingredients: In your large bowl, combine the pumpkin puree, granulated sugar, brown sugar, vegetable oil, and eggs. Whisk or stir with your wooden spoon until everything is smooth and well combined. It should look like a thick, glossy orange batter. Don’t worry if it seems a bit loose—that’s normal.
- Add the dry ingredients: Sprinkle the flour, baking soda, salt, cinnamon, nutmeg, ginger, and cloves directly over the wet mixture. Yes, right on top. This is the one-bowl magic. Stir gently until just combined—stop as soon as you no longer see streaks of flour. Overmixing will make the bread tough. A few lumps are fine; they’ll bake out.
- Fold in the walnuts: Add the toasted, cooled walnuts and fold them in with a few gentle strokes. Reserve a handful to sprinkle on top if you want a pretty, crunchy crust. At this point, the batter will be thick and smell incredible—like autumn in a bowl.
- Pour into the pan: Scrape the batter into your prepared loaf pan and spread it evenly. If you reserved some walnuts, sprinkle them over the top and press them in lightly so they stick. Tap the pan on the counter a couple of times to release any air bubbles.
- Bake: Place the pan in the center of the oven and bake for 55-65 minutes. Start checking at 50 minutes—insert a toothpick into the center; if it comes out clean or with a few moist crumbs, it’s done. If it’s still wet, give it 5 more minutes. The top should be golden brown and cracked in a few places. That’s a good sign.
- Cool: Let the bread cool in the pan for 10-15 minutes. Then use the parchment paper to lift it out and transfer it to a cooling rack. Let it cool completely before slicing—at least an hour. I know it’s hard to wait, but slicing too early will make it crumble. Trust me, I’ve been there.
Cooking Tips & Techniques
I’ve made this bread more times than I can count, and I’ve learned a few things the hard way. Here’s what I wish someone had told me:
- Don’t overmix the batter. Seriously. Stir just until the flour disappears. Overworking the gluten makes the bread dense and rubbery. A few lumps are your friends.
- Toast your walnuts. This is a game-changer. Raw walnuts are fine, but toasting brings out their oils and makes them nuttier and crunchier. Just watch them closely—they burn fast.
- Check your oven temperature. Ovens run hot or cold. An oven thermometer is a cheap investment that saves a lot of heartache. If your bread is browning too quickly on top but still raw in the middle, tent it loosely with foil for the last 15 minutes.
- Let it cool completely. I know, I said it already, but it bears repeating. The bread continues to set as it cools. Cutting into it warm is tempting, but you’ll end up with a crumbly mess. Patience pays off.
- Make it ahead. This bread actually tastes better the next day. The flavors meld and deepen overnight. Bake it the day before your gathering, wrap it tightly in plastic wrap, and store it at room temperature. Your future self will thank you.
One mistake I made early on? I used a metal pan without greasing it properly. Half the bread stuck to the bottom. Now I always line it with parchment paper—no fuss, no stress. Another time, I forgot the baking soda. The bread came out flat and dense. It still tasted okay, but it wasn’t the showstopper I wanted. So double-check your ingredients before you start.
Variations & Adaptations
This recipe is a great base for experimentation. Here are a few ways to make it your own:
- Chocolate Chip Pumpkin Bread: Swap the walnuts for 1 cup of semi-sweet chocolate chips. The combination of pumpkin and chocolate is surprisingly good—rich and cozy. My niece requests this version every Thanksgiving.
- Gluten-Free Option: Use a 1:1 gluten-free all-purpose flour blend that contains xanthan gum. I’ve had good results with King Arthur’s measure-for-measure blend. The texture will be slightly more tender, but it still holds together beautifully.
- Dairy-Free Adaptation: This recipe is already dairy-free since it uses oil instead of butter. Just make sure your chocolate chips (if using) are dairy-free too.
- Spice It Up: Add ½ teaspoon of cardamom or allspice for a more complex flavor profile. I once added a pinch of cayenne pepper for a subtle heat—it was a hit at a Halloween party.
- Muffin Version: Divide the batter into a 12-cup muffin tin lined with paper cups. Bake at 350°F (175°C) for 18-22 minutes. Perfect for brunch buffets or grab-and-go breakfasts.
- Nut-Free: Skip the walnuts and add dried cranberries, raisins, or pepitas (pumpkin seeds) instead. The pepitas add a nice crunch and stay on theme.
I once tried a version with cream cheese swirl—just drop spoonfuls of softened cream cheese mixed with a little sugar into the batter before baking and swirl with a knife. It was decadent and perfect for a holiday brunch. Go ahead, get creative.
Serving & Storage Suggestions
This bread is versatile enough for any occasion. Here’s how to serve and store it like a pro:
- Serving temperature: Room temperature is ideal. The flavors are most pronounced, and the texture is at its peak. If you’re serving it warm, pop slices in a 300°F (150°C) oven for 5 minutes—not the microwave, which can make it rubbery.
- Presentation: Place the whole loaf on a wooden board or cake stand. Dust with powdered sugar for a pretty finish. Slice it at the table for a dramatic reveal. Your guests will love it.
- Pairings: Serve with coffee, chai, or apple cider. A smear of salted butter or a dollop of mascarpone takes it over the top. For a dessert option, add a scoop of vanilla ice cream and a drizzle of caramel sauce.
- Storage: Wrap the cooled bread tightly in plastic wrap or aluminum foil and store at room temperature for up to 4 days. Do not refrigerate—it will dry out the bread. For longer storage, slice the loaf, wrap individual slices in plastic wrap, and place them in a freezer bag. Freeze for up to 3 months.
- Reheating from frozen: Thaw a slice at room temperature for about 30 minutes, then warm in a toaster oven or low oven. It will taste almost freshly baked.
The flavors actually develop over time. Day two is often better than day one. If you’re hosting, bake it two days ahead—the spices mellow and blend, and the texture becomes even more tender. Just keep it wrapped tightly so it doesn’t dry out.
Nutritional Information & Benefits
Per slice (based on 12 slices):
- Calories: 290
- Fat: 14g
- Carbohydrates: 38g
- Fiber: 2g
- Sugar: 21g
- Protein: 5g
This bread isn’t health food, but it does have some redeeming qualities. Pumpkin is packed with vitamin A and fiber, which supports eye health and digestion. Walnuts are a great source of omega-3 fatty acids and antioxidants. Using oil instead of butter keeps the saturated fat lower than traditional recipes.
If you’re watching your sugar intake, you can reduce it to ¾ cup total (using all granulated or a mix with a sugar substitute like Swerve). The texture will be slightly less tender, but it still works. For a lower-carb option, try almond flour—but that’s a whole different recipe. This version is meant to be a treat, and it delivers on that promise.
Conclusion
This one-bowl pumpkin walnut bread is more than just a recipe—it’s a way to bring people together. Every time I make it, I think of Aunt Lena’s kitchen and the way she’d beam when someone asked for seconds. That’s the magic of sharing food, isn’t it? It’s not about perfection; it’s about the moment.
I hope you’ll try this for your next gathering. Whether it’s a cozy dinner party, a festive potluck, or just a Tuesday that needs a little warmth, this bread delivers. Customize it with your favorite add-ins, serve it with pride, and don’t be surprised if your guests start asking for the recipe before they’ve finished their first slice.
If you make this, I’d love to hear about it. Drop a comment below and tell me how it turned out—did you add chocolate chips? Did you double the walnuts? Your twists are what make this recipe yours. And if you’re looking for more fall favorites, check out our cozy fall desserts roundup for more inspiration. Happy baking!
Frequently Asked Questions
Can I use fresh pumpkin instead of canned?
Yes, but you’ll need to roast and puree it first. Make sure to drain the puree well—fresh pumpkin has more water than canned, which can make the bread soggy. Place the puree in a cheesecloth-lined strainer over a bowl for 30 minutes to remove excess liquid.
Why did my pumpkin bread sink in the middle?
This usually happens if the bread is underbaked or if you opened the oven door too early. The sudden temperature change causes the center to collapse. Bake until a toothpick comes out clean, and resist the urge to peek for the first 40 minutes.
Can I make this recipe without eggs?
Absolutely. Substitute each egg with a flax egg (1 tablespoon ground flaxseed mixed with 3 tablespoons water, let sit for 5 minutes). The texture will be slightly denser, but it still works well. Applesauce (¼ cup per egg) is another option, but it adds sweetness.
How do I know when the bread is done?
Insert a toothpick or skewer into the center. If it comes out clean or with a few moist crumbs attached, it’s done. If there’s wet batter on it, bake for another 5-10 minutes. The top should also spring back when lightly pressed.
Can I freeze this pumpkin walnut bread?
Yes, and it freezes beautifully. Let the bread cool completely, then wrap it tightly in plastic wrap, followed by a layer of aluminum foil. Freeze for up to 3 months. Thaw at room temperature overnight before serving. For individual slices, wrap each one separately for easy grab-and-go.
Pin This Recipe!
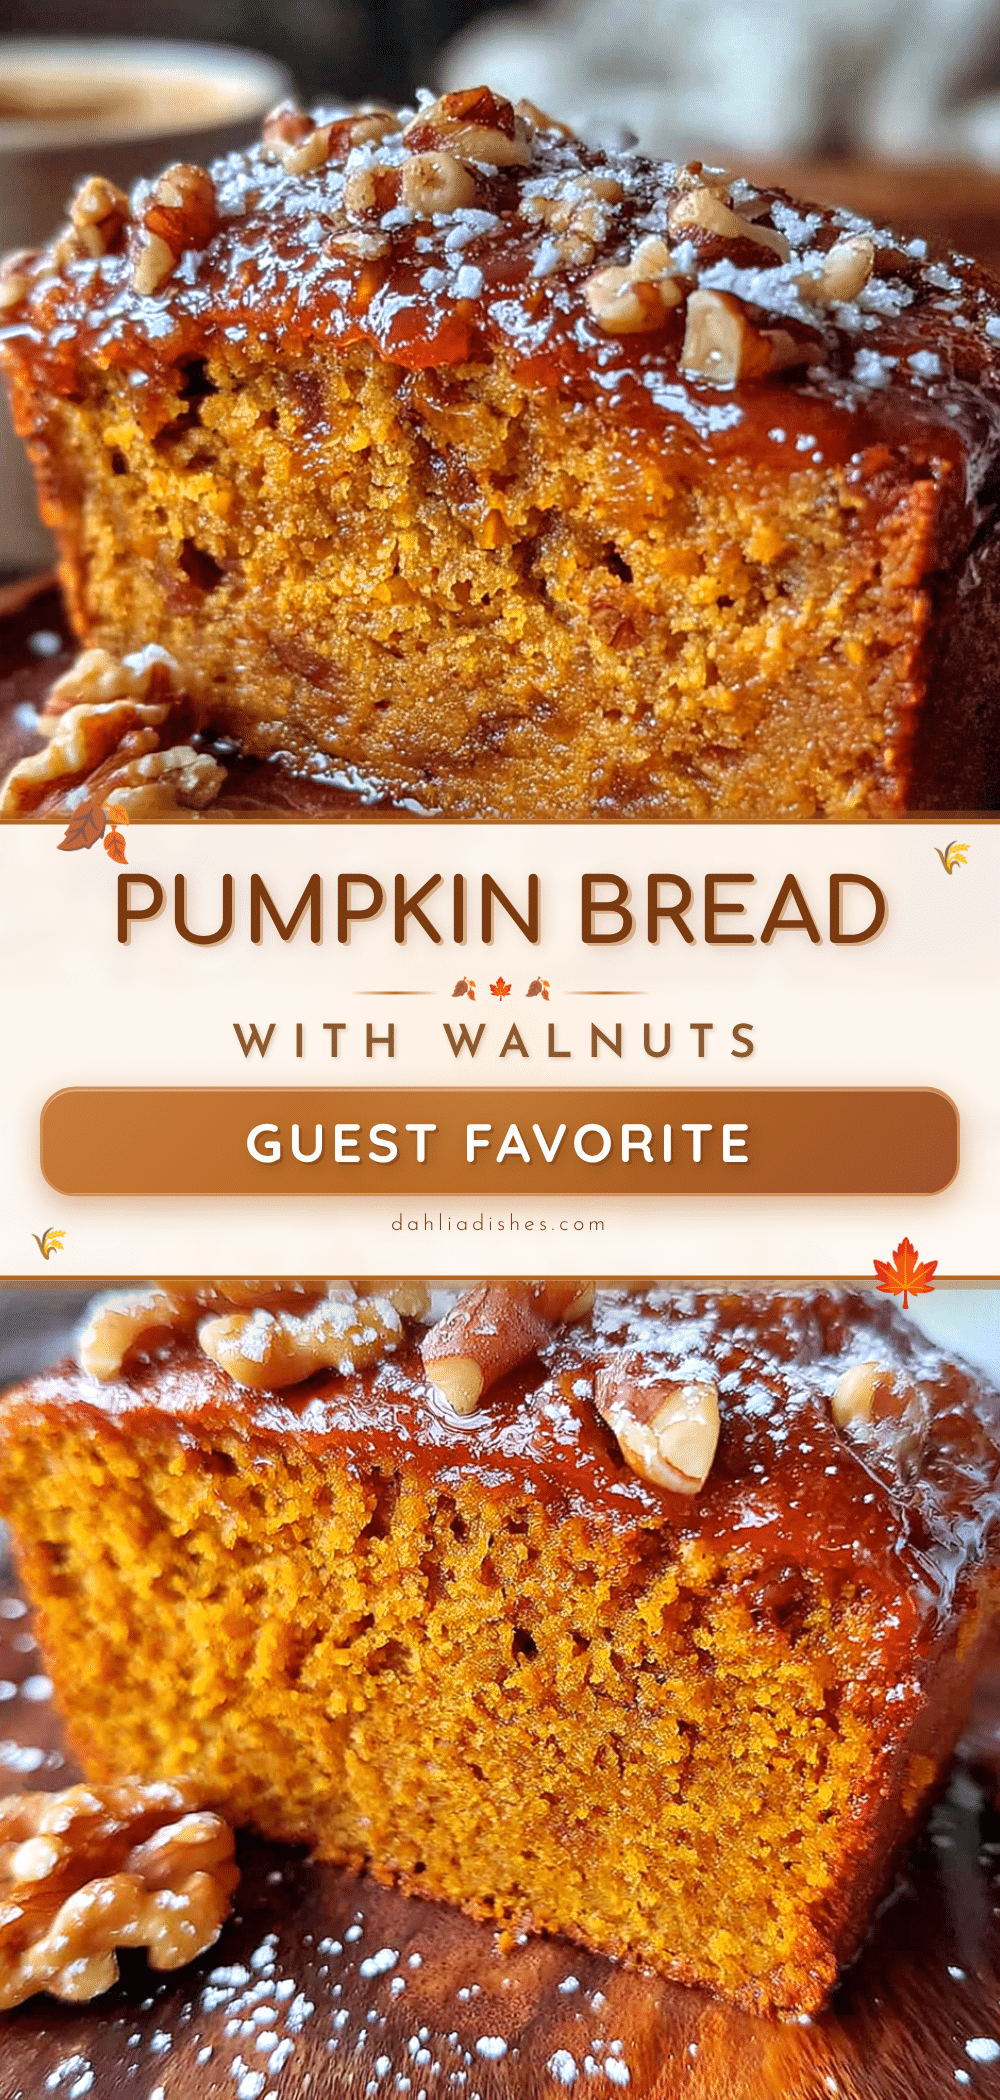
Best One-Bowl Pumpkin Walnut Bread Recipe
This one-bowl pumpkin walnut bread is incredibly moist, perfectly spiced, and studded with crunchy walnuts. It’s a simple, no-mixer recipe that tastes like a warm hug and is perfect for fall gatherings.
- Prep Time: 15 minutes
- Cook Time: 60 minutes
- Total Time: 1 hour 15 minutes
- Yield: 12 servings 1x
- Category: Dessert
- Cuisine: American
Ingredients
- 1 can (15 oz / 425g) canned pumpkin puree (not pumpkin pie filling)
- 1 cup (200g) granulated sugar
- 1/2 cup (100g) packed brown sugar (light or dark)
- 1/2 cup (120ml) vegetable oil (or canola, avocado, or melted coconut oil)
- 2 large eggs, room temperature
- 2 cups (240g) all-purpose flour (spooned and leveled)
- 1 teaspoon baking soda
- 1/2 teaspoon fine sea salt
- 2 teaspoons ground cinnamon (preferably Saigon)
- 1/2 teaspoon ground nutmeg (freshly grated if possible)
- 1/2 teaspoon ground ginger
- 1/4 teaspoon ground cloves
- 1 cup (120g) chopped walnuts, toasted and cooled
Instructions
- Preheat oven to 350°F (175°C). Grease a 9×5-inch loaf pan with butter or non-stick spray, then line with parchment paper, leaving overhang on the long sides.
- In a large bowl, combine pumpkin puree, granulated sugar, brown sugar, vegetable oil, and eggs. Whisk or stir until smooth and well combined.
- Sprinkle flour, baking soda, salt, cinnamon, nutmeg, ginger, and cloves directly over the wet mixture. Stir gently until just combined (do not overmix; a few lumps are fine).
- Fold in the toasted walnuts with a few gentle strokes. Reserve a handful to sprinkle on top if desired.
- Pour batter into prepared loaf pan and spread evenly. If using reserved walnuts, sprinkle on top and press lightly. Tap pan on counter to release air bubbles.
- Bake for 55-65 minutes, or until a toothpick inserted in the center comes out clean or with a few moist crumbs. If browning too quickly, tent loosely with foil for the last 15 minutes.
- Let bread cool in pan for 10-15 minutes, then lift out using parchment and transfer to a cooling rack. Cool completely before slicing (at least 1 hour).
Notes
For best results, toast walnuts before adding. Bread tastes even better the next day. Store wrapped at room temperature for up to 4 days, or freeze for up to 3 months. Do not refrigerate.
Nutrition
- Serving Size: 1 slice
- Calories: 290
- Sugar: 21
- Sodium: 210
- Fat: 14
- Saturated Fat: 2
- Carbohydrates: 38
- Fiber: 2
- Protein: 5
Keywords: pumpkin bread, walnut bread, one-bowl recipe, fall baking, pumpkin walnut bread, easy pumpkin bread


