Love this? Save it for later!
Share the inspiration with your friends
The neighborhood Halloween block party was in four hours and I’d completely forgotten. Everyone else would be bringing Pinterest-worthy treats—elaborate cake pops shaped like ghosts, a punch bowl with dry ice smoke spilling over the edges, hand-painted sugar cookies that looked like tiny works of art. I had a box of chocolate pudding mix, some Oreos I’d bought on sale, and a bag of gummy worms my kid had talked me into at the grocery checkout. Honestly, I was ready to just grab a bag of candy from the gas station and call it a day. But my daughter gave me that look—you know the one—and said, “Mom, you can do better.”
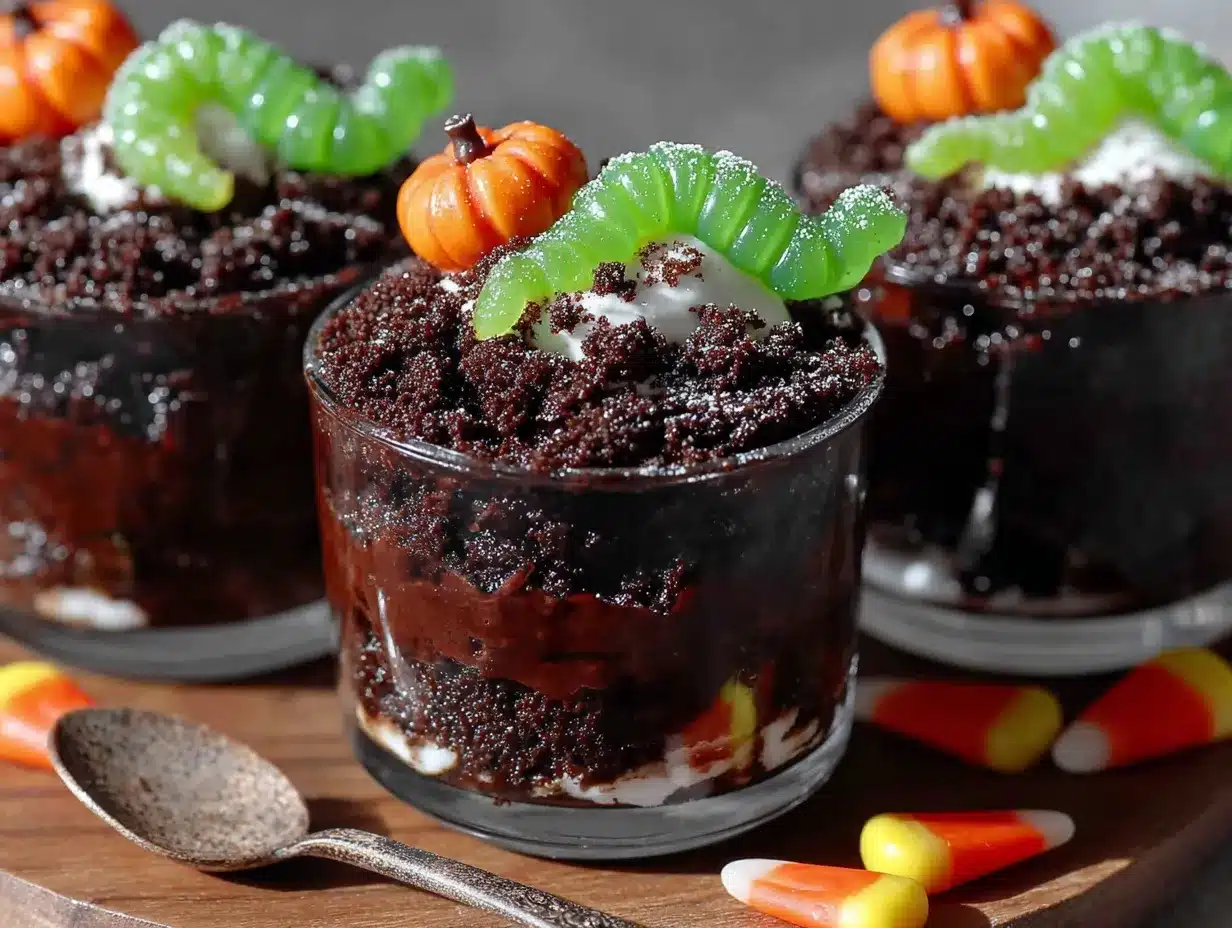
So I stood in my kitchen, staring at those ingredients like they were going to magically transform themselves. And then it hit me. I mean, dirt cups are a classic, right? Everyone loves them, they’re ridiculously simple, and they look like you actually tried. I grabbed some clear plastic cups from the back of the cabinet—the ones I’d been saving for who-knows-what—and started layering. Crushed Oreos for the dirt, chocolate pudding for the mud, and those gummy worms poking out like they were escaping from underground. It was messy, a little frantic, and I may have gotten chocolate on my favorite shirt. But thirty minutes later, I had twenty mini dirt cups lined up on my counter, looking almost too cute to eat.
The thing is, I didn’t expect them to be the hit of the party. I figured they’d be the “cute but simple” option that people grabbed after they’d tried everything else. But let me tell you—those little cups disappeared faster than anything else on the table. People were asking for the recipe, taking pictures, and one neighbor actually asked if I’d cater her kid’s birthday party. I just laughed and told her the truth: it was a happy accident born from panic and a well-stocked pantry. And that’s why I keep making them, honestly. Because sometimes the best recipes come from the moments when you’re sure you’ve messed up, and they turn out to be the thing everyone remembers.
Why You’ll Love This Recipe
These Mini Halloween Dirt Cups with Gummy Worms are the kind of dessert that makes you look like a Halloween hero without breaking a sweat. I’ve tested this recipe more times than I can count—for my own kids’ parties, for friend gatherings, and even for a last-minute office potluck where I needed something that traveled well. And every single time, they get the same reaction: a surprised laugh, a double-take, and then a request for the recipe. Here’s why they work so well:
- Quick & Easy: These come together in about 30 minutes of active time. If you’re short on time, you can even use pre-made pudding cups and skip the mixing entirely.
- Simple Ingredients: You probably already have most of what you need in your pantry. No special trips to a fancy grocery store—just pudding mix, Oreos, cream cheese, and gummy worms.
- Perfect for Halloween Parties: Whether it’s a school classroom celebration, a neighborhood potluck, or a spooky dinner party, these little cups fit right in. They’re portable, individual-sized, and everyone loves the surprise of finding a gummy worm in the “dirt.”
- Crowd-Pleaser: Kids go crazy for them, and adults secretly love them too. I’ve seen grown men giggle when they pull out a gummy worm from their cup.
- Unbelievably Delicious: The creamy, rich pudding combined with the crunch of crushed Oreos and the chewy gummy worms creates a texture combo that’s just next-level comfort food. It’s like a grown-up version of the pudding cups you had as a kid, but way better.
What makes this recipe different from all the other dirt cup recipes out there? It’s the cream cheese. I add a block of softened cream cheese to the pudding mixture, and it gives the whole thing this velvety, almost cheesecake-like richness that you just don’t get from plain pudding. Plus, I’ve perfected the “dirt” texture—not too fine, not too chunky—so it really looks like soil. This isn’t just another version of dirt cups; it’s the one I’d bring to any gathering where I want to impress without stress. And honestly, it’s the kind of dessert that makes you close your eyes after the first bite because it tastes like childhood, but better.
What Ingredients You Will Need
This recipe uses simple, wholesome ingredients to create a dessert that’s both nostalgic and impressive. Most of these are pantry staples, but I’ve included a few tips to help you pick the best options for the best results.
For the Pudding Layer
- 1 package (3.9 oz) instant chocolate pudding mix (I prefer Jell-O brand for the smoothest texture, but any brand works fine)
- 2 cups cold milk (whole milk gives the richest flavor, but 2% works too. For a dairy-free version, use oat milk or almond milk)
- 4 oz cream cheese, softened (this is my secret ingredient—it adds a tangy richness that makes the pudding taste homemade. Let it sit out for 30 minutes before using)
- 1/4 cup powdered sugar (optional, for sweetness. If you like your pudding less sweet, you can skip this)
- 1/2 teaspoon vanilla extract (pure vanilla extract is best, but imitation works in a pinch)
For the “Dirt” Layer
- 1 package (14.3 oz) Oreo cookies (regular or Double Stuf—both work great. You’ll need about 20 cookies total)
- 2 tablespoons melted butter (optional, but it helps the Oreo crumbs stick together and gives them a slightly richer flavor)
For the Decoration
- 1 bag (4 oz) gummy worms (I recommend Trolli or Black Forest brand for the brightest colors and best chew. You’ll need about 2-3 worms per cup)
- Optional: Halloween sprinkles, candy eyeballs, or small plastic spiders (for extra spooky flair)
Ingredient Tips: When picking your Oreos, look for a package that isn’t crushed already—you want whole cookies so you can control the texture. For the gummy worms, I’ve found that the sour ones add a nice tangy contrast to the sweet pudding, but regular ones are great too. If you’re making these for a school party, check if anyone has nut allergies—most gummy worms are nut-free, but always read the label.
Substitution Guidance: For a gluten-free version, use gluten-free chocolate sandwich cookies (like Glutino or Kinnikinnick brand) and ensure your pudding mix is gluten-free. For a vegan option, use dairy-free cream cheese, plant-based milk, and vegan chocolate pudding mix. The gummy worms should be checked for gelatin—some brands use pectin instead, which is vegan-friendly.
Equipment Needed
You don’t need fancy equipment for this recipe, which is part of why I love it. Here’s what you’ll need:
- 12-16 small clear plastic cups (4-6 ounce size works best. I use the ones from the party supply store, but you can also use small mason jars or even shot glasses for a mini version)
- Electric hand mixer or stand mixer (for blending the cream cheese and pudding. You can do it by hand with a whisk, but it takes more elbow grease)
- Large mixing bowl (for the pudding mixture)
- Medium mixing bowl (for crushing the Oreos)
- Rolling pin or food processor (for crushing the Oreos into fine crumbs. A zip-top bag and a rolling pin works great if you don’t have a food processor—just be careful not to tear the bag)
- Spatula (for scraping the bowl and layering)
- Measuring cups and spoons
- Small spoon or piping bag (for layering the pudding neatly. A piping bag makes it look cleaner, but a spoon works just fine)
Personal Note: I’ve made these with everything from fancy piping bags to a zip-top bag with the corner snipped off, and honestly, the zip-top bag method is my go-to. It’s less cleanup and works just as well. Also, if you’re making these for a party, I recommend buying extra cups because someone will inevitably drop one or want to take extras home.
Preparation Method
Alright, let’s get to the fun part. Here’s how to make these Mini Halloween Dirt Cups step by step. I’ve included all the little tricks I’ve learned from making these dozens of times.
- Make the “dirt” first. Place the Oreo cookies in a zip-top bag (I use a gallon-size bag) and crush them with a rolling pin until they resemble fine soil. You want a mix of fine crumbs and small pebbly pieces—not completely powdered, but not chunky either. If you’re using a food processor, pulse them about 10-12 times. Set aside about 1/4 cup of the crumbs for topping later.
- Prepare the cream cheese base. In a large mixing bowl, beat the softened cream cheese with the powdered sugar (if using) and vanilla extract until smooth and fluffy. This takes about 2-3 minutes with an electric mixer. Make sure there are no lumps—this is what gives the pudding that silky texture.
- Make the pudding. In a separate bowl, whisk the instant chocolate pudding mix with 2 cups of cold milk for about 2 minutes until it starts to thicken. It should be slightly thicker than heavy cream but not fully set yet. If you’re using a hand mixer, you can do this right in the same bowl as the cream cheese after it’s mixed—just be careful not to overmix.
- Combine the cream cheese and pudding. Add the pudding mixture to the cream cheese mixture and beat on low speed until fully combined. The mixture should be smooth, thick, and a little glossy. Taste it here—if you want it sweeter, add a bit more powdered sugar. If you want it more tangy, add a splash more vanilla.
- Start layering. Spoon about 1 tablespoon of the crushed Oreo crumbs into the bottom of each cup. Press them down gently with the back of a spoon—this creates a solid “dirt” base that prevents the pudding from soaking through too much.
- Add the pudding layer. Spoon or pipe the pudding mixture into each cup, filling them about halfway. If you’re using a piping bag, it’s easier to control the amount and keep the sides clean. Tap the cups gently on the counter to settle the pudding and remove any air bubbles.
- Add the gummy worms. Take 2-3 gummy worms and gently press them into the pudding so they’re partially submerged. Let the ends stick out like they’re trying to escape from the dirt. This is the fun part—get creative with the positioning. Some worms can be fully buried with just a tail poking out, others can be halfway out.
- Top with more pudding. Add another layer of pudding on top of the worms, filling the cups almost to the top. Leave about 1/4 inch of space for the final dirt layer.
- Finish with the dirt layer. Sprinkle the reserved Oreo crumbs over the top of each cup, covering the pudding completely. You want a thick, even layer that looks like fresh soil. Don’t skimp here—the dirt is what makes them look like the real deal.
- Add final decorations. If you’re using them, place a few extra gummy worms on top, add candy eyeballs, or stick a small plastic spider into the dirt. This is where you can really make them spooky or cute, depending on your vibe.
- Chill before serving. Refrigerate the cups for at least 2 hours before serving. This allows the pudding to set completely and the Oreo crumbs to soften slightly, giving everything a perfect texture. If you’re making them the night before, cover them with plastic wrap and they’ll keep beautifully overnight.
Prep Note: The pudding will set faster if you use cold milk and cold cream cheese. If you’re in a hurry, you can pop the cups in the freezer for 30 minutes instead of the fridge for 2 hours, but don’t leave them longer than that or the texture will change.
Cooking Tips & Techniques
After making these dirt cups more times than I care to count, I’ve picked up a few tricks that make the process smoother and the results better. Here are my best tips:
Don’t overmix the pudding. I learned this the hard way when I made a batch that turned out runny because I kept whisking, thinking it would get thicker. Instant pudding needs just 2 minutes of mixing—any more and it starts to break down. Stop when it’s slightly thickened, and let the fridge do the rest.
Crush Oreos in batches. If you’re making a large batch for a party, crush the Oreos in two or three separate bags. One bag can get overloaded and you’ll end up with uneven crumbs. Also, remove the white filling before crushing if you want a darker “dirt”—but honestly, I leave it in because it adds a subtle sweetness.
Use a piping bag for the pudding. This is my number one tip for clean, professional-looking cups. A piping bag (or a zip-top bag with the corner snipped) lets you control exactly how much pudding goes in each cup, and it keeps the sides clean. If you’re spooning it in, use a small spoon and wipe the edges with a paper towel after each layer.
Let the cups sit before serving. I know it’s tempting to serve them right away, but the texture is so much better after a few hours in the fridge. The Oreo crumbs soften just enough to feel like real dirt, and the pudding firms up to the perfect creamy consistency. Trust me on this one—patience pays off.
Make extra “dirt.” I always crush a few extra Oreos because someone will inevitably want more topping, or you’ll spill some, or you’ll realize you want a thicker dirt layer. Better to have too much than not enough.
Variations & Adaptations
One of the best things about this recipe is how easy it is to customize. Here are some variations I’ve tried and loved:
Peanut Butter Dirt Cups: Add 2 tablespoons of creamy peanut butter to the cream cheese mixture before combining with the pudding. It adds a rich, nutty flavor that pairs perfectly with the chocolate. Just make sure no one has peanut allergies if you’re serving these at a party.
Pumpkin Spice Dirt Cups: Swap the chocolate pudding for vanilla or butterscotch pudding, and add 1 teaspoon of pumpkin pie spice to the cream cheese mixture. Use crushed graham crackers instead of Oreos for the “dirt,” and top with candy corn instead of gummy worms. These are perfect for a fall-themed party.
Vegan Dirt Cups: Use dairy-free cream cheese (I like Tofutti or Kite Hill), plant-based milk (oat milk works best), and vegan chocolate pudding mix. For the dirt, use vegan chocolate sandwich cookies (like Oreos, which are actually vegan). Check that your gummy worms are gelatin-free—some brands like Surf Sweets use pectin instead.
Spider Web Dirt Cups: After the final dirt layer, drizzle a thin line of white chocolate or melted marshmallow in a spiral pattern on top, then drag a toothpick from the center outward to create a spider web effect. Add a plastic spider in the center for extra creepiness.
Mini Cheesecake Dirt Cups: For a richer version, double the cream cheese and skip the milk. Mix the pudding powder directly into the cream cheese with a splash of vanilla. The result is a thick, cheesecake-like filling that’s incredibly decadent. You’ll need to press the Oreo crumbs down firmly to create a sturdy crust.
Serving & Storage Suggestions
These Mini Halloween Dirt Cups are best served cold, straight from the fridge. The contrast between the cool, creamy pudding and the slightly softened Oreo crumbs is what makes them so satisfying. If you’re serving them at a party, take them out about 10 minutes before guests arrive so they’re not too cold, but don’t let them sit out for more than 30 minutes or the texture will suffer.
Presentation Tips: Arrange the cups on a large platter or tray lined with fake spider webs or orange and black napkins. You can also place them in a cupcake stand for a tiered display that looks impressive. For a spooky touch, put a few extra gummy worms crawling up the sides of the cups or dangling over the edges.
What to Serve Alongside: These dirt cups pair beautifully with other Halloween treats like caramel apples, pumpkin cookies, or a warm mug of apple cider. If you’re hosting a full party, consider serving them alongside a savory option like chili or baked brie to balance out the sweetness.
Storage: Store any leftover cups in the refrigerator, covered with plastic wrap or a lid, for up to 3 days. The Oreo crumbs will continue to soften over time, so they’re best within the first 24 hours. Do not freeze them—the pudding will become watery when thawed.
Reheating: These are meant to be eaten cold, so no reheating needed. If the cups have been in the fridge for more than a day and the dirt seems too soft, you can sprinkle a fresh layer of crushed Oreos on top just before serving.
Nutritional Information & Benefits
While these dirt cups are definitely a treat, they do offer a few surprising benefits. Here’s a rough estimate per serving (based on 16 cups):
| Nutrient | Amount Per Serving |
|---|---|
| Calories | 220-250 |
| Total Fat | 12g |
| Saturated Fat | 6g |
| Carbohydrates | 30g |
| Sugar | 22g |
| Protein | 4g |
| Calcium | 6% DV |
Health Highlights: The cream cheese adds a small amount of protein and calcium, and the milk contributes to your daily calcium intake. If you use low-fat milk and reduced-fat cream cheese, you can cut the calories and fat by about 30%. For a lower-sugar version, use sugar-free pudding mix and skip the powdered sugar—the gummy worms will still provide sweetness.
Dietary Considerations: This recipe contains dairy, gluten (from the Oreos), and may contain traces of soy. For gluten-free, dairy-free, or vegan options, see the variations section above. Always check the labels on your gummy worms and pudding mix for potential allergens.
Personal Note: I’m not one to pretend desserts are health foods, but I do feel better about serving these at a party because they’re portion-controlled. Each cup is just the right size for a satisfying treat without going overboard. And honestly, seeing the joy on people’s faces when they pull out a gummy worm is worth every calorie.
Conclusion
If you’re looking for a Halloween dessert that’s equal parts fun, delicious, and ridiculously easy, these Mini Halloween Dirt Cups with Gummy Worms are your answer. They’re the recipe that saved me from showing up to a block party empty-handed, and they’ve become my go-to for every spooky gathering since. The best part? You can make them your own. Swap the gummy worms for candy spiders, use different pudding flavors, or get creative with the decorations—the possibilities are endless.
I’d love to hear how yours turn out. Did you add a special twist? Did the kids go crazy for them? Drop a comment below and let me know—I read every single one. And if you’re looking for more Halloween inspiration, don’t forget to share this recipe with a friend who needs a last-minute party idea. Because honestly, we’ve all been there, and this recipe is the lifesaver you didn’t know you needed.
Happy Halloween, and happy snacking!
Frequently Asked Questions
Can I make these dirt cups ahead of time?
Absolutely! These are perfect for making the night before a party. Just assemble them as directed, cover with plastic wrap, and refrigerate. The flavors actually meld together beautifully overnight. Just add any extra gummy worms or decorations right before serving so they stay fresh and visible.
Can I use homemade pudding instead of instant?
You can, but the texture will be different. Homemade pudding is thinner and won’t set as firmly as instant pudding, so the layers might blend together more. If you want to use homemade, cook it until it’s very thick and chill it completely before layering. I’ve done it before, and it works, but instant is definitely easier and more reliable for this recipe.
How many cups does this recipe make?
This recipe makes about 12-16 mini cups, depending on the size of your cups. If you’re using 4-ounce cups, you’ll get closer to 16. For 6-ounce cups, you’ll get about 12. If you need more for a bigger party, simply double the recipe.
Can I use something other than Oreos for the dirt?
Definitely! Chocolate graham crackers, chocolate wafer cookies, or even crushed chocolate cereal like Cocoa Puffs work great. If you want a different color “dirt,” try vanilla wafers or crushed pretzels for a sandy look. Just make sure whatever you use is finely crushed so it looks like real soil.
How do I keep the gummy worms from sinking to the bottom?
The trick is to add a layer of pudding first, press the worms in gently, then add the remaining pudding on top. The first layer of pudding acts as a “bed” that holds the worms in place. If you push them all the way to the bottom, they’ll sink and you won’t see them. Partial submersion is the key to that “escaping” look.
Pin This Recipe!
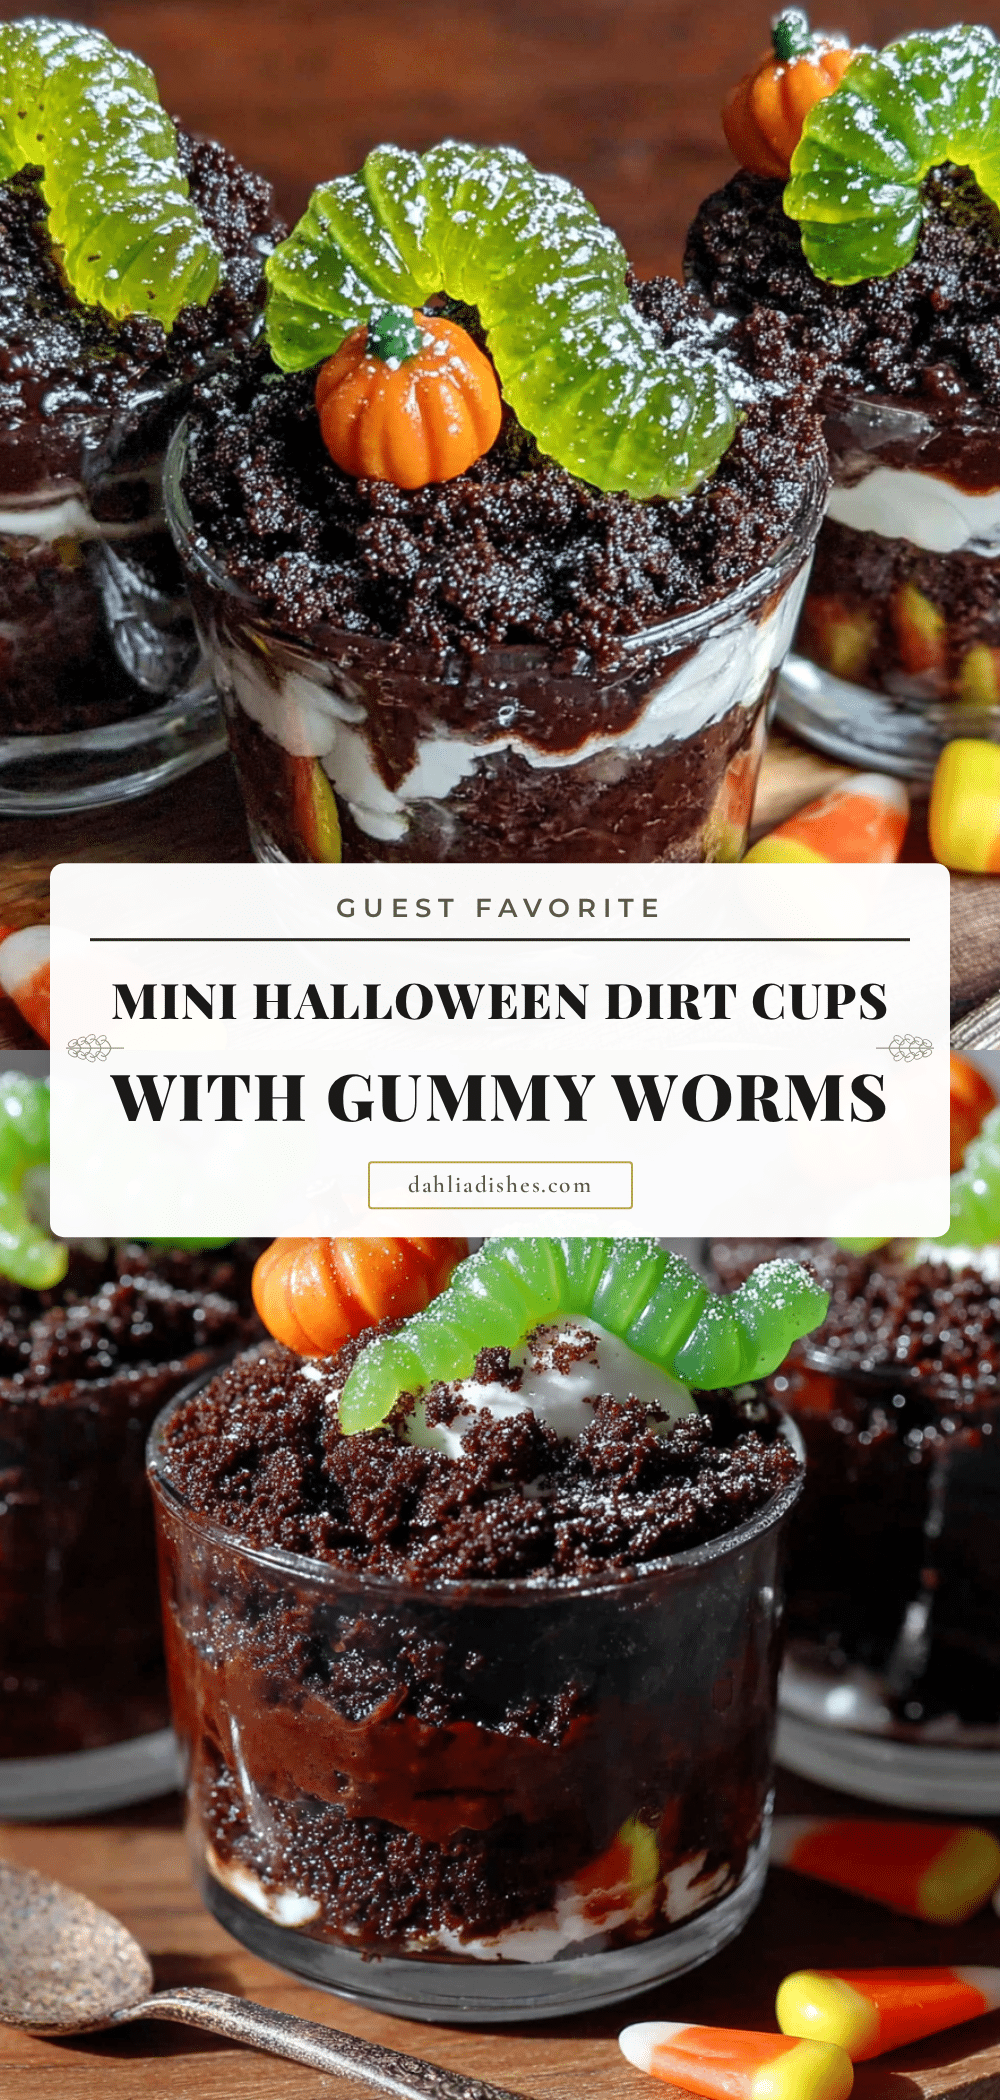
Best Mini Halloween Dirt Cups with Gummy Worms
These Mini Halloween Dirt Cups with Gummy Worms are a quick and easy no-bake dessert that looks like a spooky masterpiece. Layers of creamy chocolate pudding, crushed Oreo ‘dirt,’ and gummy worms create a fun, crowd-pleasing treat perfect for Halloween parties.
- Prep Time: 30 minutes
- Cook Time: 0 minutes
- Total Time: 2 hours 30 minutes (includes chilling)
- Yield: 12-16 servings 1x
- Category: Dessert
- Cuisine: American
Ingredients
- 1 package (3.9 oz) instant chocolate pudding mix
- 2 cups cold milk
- 4 oz cream cheese, softened
- 1/4 cup powdered sugar (optional)
- 1/2 teaspoon vanilla extract
- 1 package (14.3 oz) Oreo cookies (about 20 cookies)
- 2 tablespoons melted butter (optional)
- 1 bag (4 oz) gummy worms
- Optional: Halloween sprinkles, candy eyeballs, or small plastic spiders
Instructions
- Make the ‘dirt’ first. Place the Oreo cookies in a zip-top bag and crush them with a rolling pin until they resemble fine soil. Set aside about 1/4 cup of the crumbs for topping later.
- Prepare the cream cheese base. In a large mixing bowl, beat the softened cream cheese with the powdered sugar (if using) and vanilla extract until smooth and fluffy, about 2-3 minutes.
- Make the pudding. In a separate bowl, whisk the instant chocolate pudding mix with 2 cups of cold milk for about 2 minutes until it starts to thicken.
- Combine the cream cheese and pudding. Add the pudding mixture to the cream cheese mixture and beat on low speed until fully combined and smooth.
- Start layering. Spoon about 1 tablespoon of the crushed Oreo crumbs into the bottom of each cup. Press them down gently with the back of a spoon.
- Add the pudding layer. Spoon or pipe the pudding mixture into each cup, filling them about halfway. Tap the cups gently on the counter to settle the pudding.
- Add the gummy worms. Take 2-3 gummy worms and gently press them into the pudding so they are partially submerged, with ends sticking out.
- Top with more pudding. Add another layer of pudding on top of the worms, filling the cups almost to the top, leaving about 1/4 inch of space.
- Finish with the dirt layer. Sprinkle the reserved Oreo crumbs over the top of each cup, covering the pudding completely.
- Add final decorations. If using, place a few extra gummy worms on top, add candy eyeballs, or stick a small plastic spider into the dirt.
- Chill before serving. Refrigerate the cups for at least 2 hours before serving.
Notes
For best texture, chill at least 2 hours. The cream cheese adds a velvety richness. For a gluten-free version, use gluten-free chocolate sandwich cookies. For vegan, use dairy-free cream cheese, plant-based milk, and vegan pudding mix. Gummy worms can be sour for a tangy contrast.
Nutrition
- Serving Size: 1 mini cup
- Calories: 235
- Sugar: 22
- Sodium: 280
- Fat: 12
- Saturated Fat: 6
- Carbohydrates: 30
- Fiber: 1
- Protein: 4
Keywords: Halloween, dirt cups, gummy worms, chocolate pudding, Oreo, no-bake, kid-friendly, party dessert


