Love this? Save it for later!
Share the inspiration with your friends
It was 11:47 PM on a random Wednesday in late September, and I was supposed to be meal-prepping for the week. Honestly, I was avoiding it. The craving hit me out of nowhere — not for the healthy grain bowls I had planned, but for something deeply chocolatey and a little bit ridiculous. I didn’t have the energy for a full layer cake or a complicated pie, but I had a block of dark chocolate that was begging to be melted and a piping bag I’d washed and forgotten about. The idea arrived like a little sugar-fueled gremlin in my brain: what if I made the fudgiest, most decadent brownie bites I could manage, and then turned them into tiny edible spiders’ webs? I mean, Halloween was technically still a month away, but who was I to argue with a 11 PM kitchen inspiration?
I grabbed my favorite mixing bowl — the one with the tiny chip in the rim — and got to work. I’ll be honest, my first attempt at the spiderweb design was a lopsided mess. The white chocolate drizzle was too thick, and I ended up with what looked like a sad, melted ghost instead of a web. But that’s the thing about late-night cooking; the rules loosen up. You stop being precious about perfection and start having fun. I thinned the chocolate, breathed deeply, and tried again. The second attempt looked like a proper web, and I let out a little victory laugh that probably scared my cat.
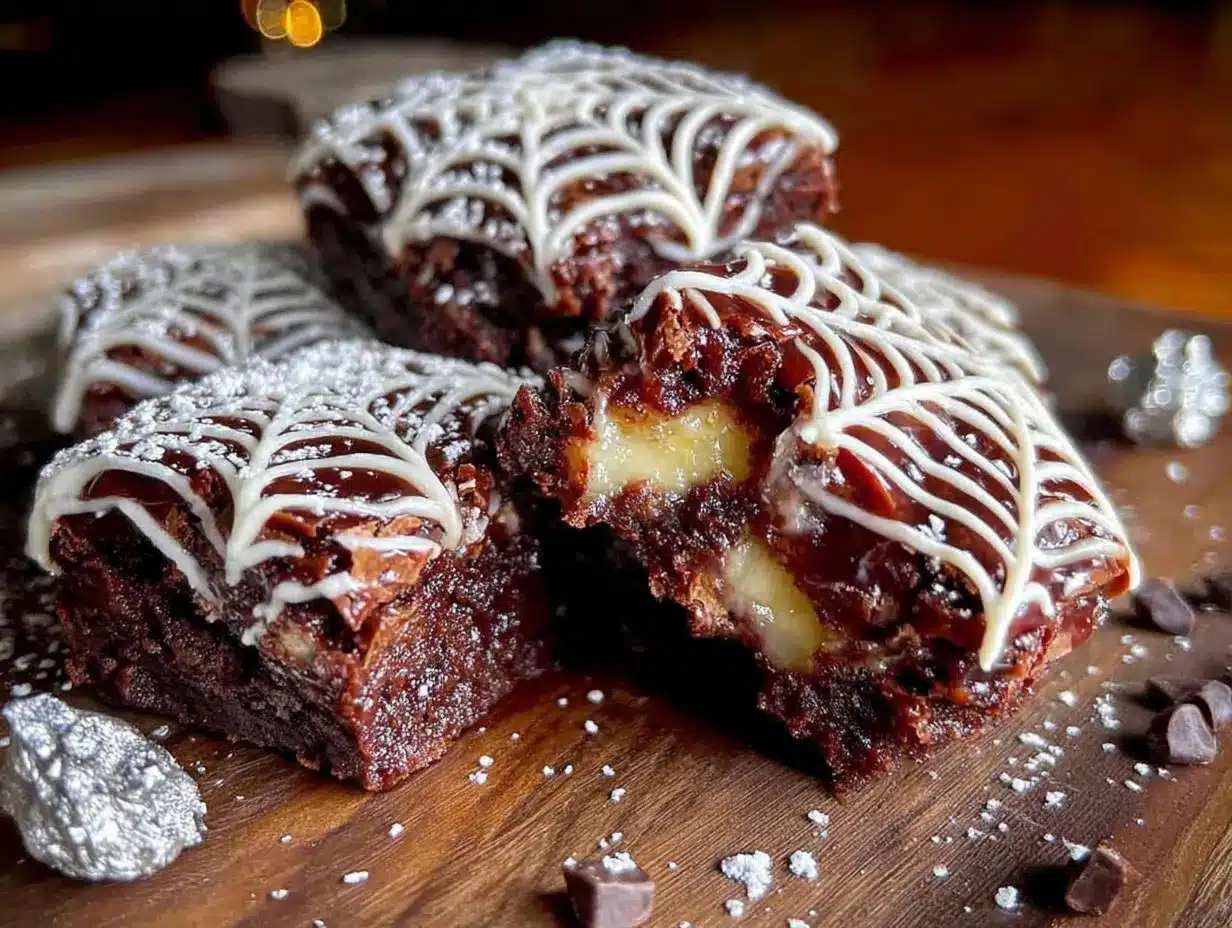
These Spooky Fudgy Spiderweb Brownie Bites are now my go-to for every Halloween gathering, horror movie marathon, or just a Tuesday that needs a little dark magic. They’re intensely fudgy, not cakey at all, and the white chocolate web on top is just the right amount of extra. Maybe you’ve been there — staring into the pantry, needing a dessert that feels special but doesn’t take all night. These are that recipe. Let’s make some spooky magic.
Why You’ll Love This Recipe
You know that feeling when you want a show-stopping Halloween dessert but don’t want to spend hours in the kitchen? These brownie bites are the answer. I’ve tested this recipe about six times to get the perfect fudgy-to-spiderweb ratio, and let me tell you, the results are worth every single melted chocolate smudge on my counter.
- Quick & Easy: From start to finish, these come together in under 45 minutes. Perfect for last-minute Halloween parties or when the sugar craving strikes unexpectedly.
- Simple Ingredients: You probably have most of these in your pantry right now. No weird specialty items, just good old-fashioned brownie basics.
- Perfect for Halloween: These are the star of any spooky spread. Kids and adults alike go crazy for the spiderweb design — it’s impressive without being fussy.
- Crowd-Pleaser: I brought these to a neighbor’s Halloween potluck last year, and they vanished in fifteen minutes. Someone actually asked if I bought them from a bakery, which is the ultimate home baker compliment.
- Unbelievably Fudgy: The texture is what makes these special. We’re using melted chocolate and a specific fat-to-flour ratio that guarantees that dense, melt-in-your-mouth fudginess. Not a dry brownie in sight.
What makes this version different from every other Halloween brownie recipe? It’s the technique. Instead of a dry, cakey base, we’re using a higher proportion of butter and chocolate to flour, plus an extra egg yolk for richness. The spiderweb is made with a simple white chocolate drizzle that sets firm but stays slightly soft — so it cracks beautifully when you bite into it. This isn’t just another Halloween dessert; it’s the one you’ll make every year. Honestly, the first time I bit into one, I closed my eyes. It’s comfort food with a spooky twist — faster, richer, and way more fun than anything you’d buy at the store.
What Ingredients You Will Need
This recipe uses simple, everyday ingredients to create something truly special. The magic is in the technique and the ratios, not in hard-to-find items. Here’s what you’ll need:
For the Brownie Bites
- 1/2 cup (113g) unsalted butter — I use Land O’Lakes for consistent results. Cut into cubes for even melting.
- 4 oz (113g) dark chocolate (60-70% cocoa) — Ghirardelli or Baker’s brand works beautifully. Don’t use chocolate chips here; they have stabilizers that affect the melt.
- 3/4 cup (150g) granulated sugar — Regular white sugar gives the best texture.
- 1/4 cup (50g) light brown sugar, packed — Adds moisture and a hint of caramel depth.
- 2 large eggs, room temperature — Cold eggs can seize the chocolate mixture. Leave them on the counter for 30 minutes.
- 1 large egg yolk — This is my secret for extra fudginess. Trust me on this one.
- 1 teaspoon vanilla extract — Pure vanilla, not imitation, makes a difference here.
- 1/2 cup (60g) all-purpose flour — Spoon and level it; don’t scoop directly from the bag.
- 2 tablespoons (15g) unsweetened cocoa powder — Dutch-processed gives a deeper color, but natural works fine.
- 1/4 teaspoon salt — Balances the sweetness and enhances the chocolate flavor.
For the Spiderweb Decoration
- 1/2 cup (90g) white chocolate chips — Ghirardelli white chocolate chips melt smoothly. Avoid white candy melts if possible.
- 1 teaspoon coconut oil or vegetable shortening — This thins the chocolate for a perfect drizzling consistency.
- Optional: 8-10 small candy spiders for garnish — I found some at Target in the Halloween baking aisle; they’re totally optional but very fun.
Equipment Needed
You don’t need a professional bakery setup for these. Here’s what I use in my own kitchen:
- Mini muffin tin (24-cup) — This is non-negotiable for the bite-size shape. I use a standard non-stick Wilton pan.
- Mini muffin liners — Paper or foil both work. The spiderweb shows up better on foil liners, honestly.
- Medium saucepan — For melting the butter and chocolate. A double boiler works too, but I’m lazy and the saucepan method is fine if you’re careful.
- Large mixing bowl — Glass or stainless steel works best.
- Whisk — A balloon whisk for the eggs and sugar.
- Rubber spatula — For folding the flour in without overmixing.
- Small piping bag or zip-top bag — For the white chocolate web. A zip-top bag with a tiny corner snipped off works perfectly.
- Toothpick — This is the secret tool for creating the spiderweb pattern.
- Cooling rack — Essential for even cooling before decorating.
If you don’t have a mini muffin tin, you can use a standard 12-cup muffin tin and bake for a few minutes longer — just adjust the time. My first batch was made with a borrowed pan that was slightly warped, and they still turned out great.
Preparation Method
Let’s get baking. I’ll walk you through this step by step, including all the little things I’ve learned from making these about a dozen times.
- Preheat and prepare: Preheat your oven to 350°F (175°C). Line your mini muffin tin with 24 paper liners. This is important — don’t skip the liners, or the brownie bites will stick like glue.
- Melt the butter and chocolate: In a medium saucepan over low heat, combine the cubed butter and chopped dark chocolate. Stir constantly with a rubber spatula until completely smooth and glossy. This takes about 3-4 minutes. Remove from heat immediately — you don’t want the chocolate to scorch. Let it cool for 5 minutes while you do the next step.
- Whisk the eggs and sugars: In your large mixing bowl, whisk together the granulated sugar, brown sugar, eggs, and egg yolk. Whisk vigorously for about 2 minutes until the mixture is pale, thick, and falls in ribbons. This is where the fudgy texture starts — don’t rush it. The mixture should look like thick, pale caramel.
- Combine the mixtures: Pour the warm (not hot) chocolate mixture into the egg mixture. Add the vanilla extract. Fold gently with your rubber spatula until just combined. The batter will look dark, glossy, and smell incredible.
- Add the dry ingredients: In a small bowl, whisk together the flour, cocoa powder, and salt. Sift this over the wet batter — this prevents lumps. Fold gently with your spatula until you see no more streaks of flour. Stop as soon as it comes together. Overmixing makes tough brownies, and nobody wants that.
- Fill the liners: Using a small cookie scoop or a teaspoon, divide the batter evenly among the 24 mini muffin cups. Fill each about 3/4 full — they will rise slightly but won’t overflow. The batter is thick and fudgy, so don’t worry if it looks a bit messy.
- Bake: Bake for 11-13 minutes. The edges should look set and slightly cracked, but the centers should still look slightly underdone and shiny. This is the key to fudgy brownie bites. A toothpick inserted in the center should come out with a few moist crumbs, not clean batter. My oven runs hot, so I start checking at 10 minutes.
- Cool completely: Let the brownie bites cool in the pan for 5 minutes, then transfer them to a cooling rack. They must be completely cool before you add the spiderweb — warm brownies will melt the white chocolate into a puddle. I usually wait about 20-30 minutes.
- Make the white chocolate web: In a small microwave-safe bowl, combine the white chocolate chips and coconut oil. Microwave in 20-second bursts, stirring between each, until smooth. This usually takes about 40-60 seconds total. Don’t overheat, or the chocolate will seize into a grainy mess — I’ve done that, and it’s heartbreaking.
- Create the spiderweb pattern: Transfer the melted white chocolate to your piping bag or zip-top bag. Snip off a tiny corner. Working with one brownie bite at a time, pipe a small circle in the center. Then pipe 4-5 concentric circles around it, like a target. Working quickly while the chocolate is still wet, drag a toothpick from the center outward through all the circles. Repeat this 4-5 times around the circle, spacing the drags evenly. This creates the classic spiderweb pattern. Wipe the toothpick clean between each brownie to keep the lines sharp.
- Set the webs: Let the spiderwebs set completely at room temperature, about 15 minutes. If you’re impatient (like me), you can pop them in the fridge for 5 minutes. Add a candy spider on top of each web if you’re using them, pressing gently so they stick.
And there you have it — 24 perfectly spooky, intensely fudgy spiderweb brownie bites. The first time I made these, I forgot to add the extra egg yolk and they were slightly less fudgy. Still delicious, but not perfect. Learn from my mistake!
Cooking Tips & Techniques
After making these more times than I care to admit, here are the things I wish someone had told me:
- Don’t overbake — seriously. The biggest mistake people make with brownie bites is leaving them in the oven too long. They continue to cook from residual heat after you take them out. Pull them when the centers look slightly underdone, and you’ll get that perfect fudgy texture. I once left them in for 15 minutes thinking “just a little longer,” and they came out cakey. Lesson learned.
- Room temperature eggs are not optional. Cold eggs will seize the warm chocolate mixture and give you a grainy, separated batter. Leave your eggs on the counter for at least 30 minutes before starting. If you forget, place them in a bowl of warm water for 5 minutes.
- The toothpick technique takes practice. Your first few spiderwebs might look a bit wonky. That’s okay. The trick is to drag the toothpick from the center outward in one smooth motion, not a jerky one. Wipe the toothpick clean between each drag. I ruined my first three brownies before I got the hang of it.
- Work in batches with the white chocolate. If you pipe all the circles on every brownie before dragging the toothpick, the chocolate will start to set and the web won’t form properly. Pipe one brownie at a time and drag immediately.
- Use coconut oil for the white chocolate. This is a game-changer. White chocolate alone is too thick for a clean web. A tiny bit of coconut oil or shortening thins it to the perfect consistency without affecting the taste.
Variations & Adaptations
One of the best things about this recipe is how easily it adapts. Here are a few versions I’ve tried and loved:
- Gluten-Free Version: Substitute the all-purpose flour with a 1:1 gluten-free baking flour blend. I’ve used King Arthur Measure for Measure with excellent results. The texture is slightly more tender, but the fudginess remains intact.
- Peanut Butter Spiderweb: Instead of white chocolate, use melted peanut butter chips mixed with a teaspoon of coconut oil. The salty-sweet combination with the dark chocolate brownie is absolutely addictive. I made this version for a Halloween party and they disappeared first.
- Mint Chocolate Twist: Add 1/2 teaspoon of peppermint extract to the brownie batter along with the vanilla. The cool mint with the rich chocolate is a classic combination that screams Halloween. Top with green-tinted white chocolate webs for extra festivity.
- Vegan Adaptation: Use vegan butter (I like Miyoko’s), dark chocolate that’s dairy-free, and replace the eggs with 2 tablespoons of aquafaba (chickpea brine) plus 1 tablespoon of ground flaxseed mixed with 3 tablespoons of water. The texture is slightly less fudgy but still delicious.
- Extra Spooky Version: Add 1/4 teaspoon of black food coloring gel to the white chocolate before piping to create gray or black webs. It looks incredible against the dark brownie.
My personal favorite variation is the peanut butter one — I made it last October when I realized I was out of white chocolate chips, and it was a happy accident that became a new tradition.
Serving & Storage Suggestions
These spiderweb brownie bites are best served at room temperature, which lets the fudgy texture shine. The white chocolate web should be fully set but still slightly soft to the bite — that contrast with the dense brownie is pure magic.
For a Halloween spread, I arrange them on a black platter or a cake stand with a few fake spiderwebs draped around. They pair beautifully with a cold glass of milk, a warm mug of spiced apple cider, or even a scoop of vanilla ice cream if you’re feeling extra indulgent. I once served them alongside a pumpkin spice latte at a Halloween brunch, and it was a perfect fall pairing.
Storage: Store the brownie bites in an airtight container at room temperature for up to 4 days. The spiderweb pattern will stay intact if you layer them with wax paper between each layer. Do not refrigerate — the cold dries out the brownies and makes the white chocolate web crack and separate. I learned this the hard way when I stored a batch in the fridge and they lost all their fudgy glory.
Freezing: These freeze beautifully! Place the undecorated brownie bites in a single layer on a baking sheet and freeze for 1 hour. Transfer to a freezer-safe bag or container for up to 3 months. When you’re ready to serve, thaw at room temperature for about 30 minutes, then add the spiderweb decoration. The white chocolate web doesn’t freeze well, so add it fresh.
The flavors actually deepen and meld together after a day — if you can resist eating them all immediately, they’re even better on day two.
Nutritional Information & Benefits
Let’s be real — these are a treat, not a health food. But here’s what you can expect per brownie bite (based on 24 servings):
| Nutrient | Amount per Bite |
|---|---|
| Calories | 145 |
| Total Fat | 9g |
| Saturated Fat | 5g |
| Carbohydrates | 16g |
| Sugar | 12g |
| Protein | 2g |
| Fiber | 1g |
Dark chocolate does offer some antioxidant benefits — it’s rich in flavonoids that can support heart health in moderation. The eggs provide high-quality protein and essential vitamins like B12 and D. I personally love that these are portion-controlled; the mini size means you can enjoy one (or two) without going overboard.
These brownie bites are naturally vegetarian and can be made gluten-free and vegan with the substitutions mentioned above. They contain dairy, eggs, and gluten in their standard form, so keep that in mind for allergies. If you’re watching your sugar intake, you could reduce the sugar by 2 tablespoons without drastically affecting the texture.
Frequently Asked Questions
Can I use a regular muffin tin instead of a mini one?
Yes, you can! Use a standard 12-cup muffin tin and fill each cup about 2/3 full. Bake for 18-22 minutes instead of 11-13. The spiderweb design will be larger and more dramatic, which is honestly pretty cool.
Why did my white chocolate seize up?
White chocolate is sensitive to heat and moisture. If it gets too hot or comes into contact with even a drop of water, it can turn grainy and thick. Always microwave in short bursts and stir between each. Add the coconut oil to help stabilize it.
Can I make these ahead of time for a party?
Absolutely. Bake the brownie bites up to 2 days in advance and store them in an airtight container at room temperature. Add the spiderweb decoration on the day of your party for the best appearance. The webs are best when fresh.
My brownie bites turned out cakey instead of fudgy. What went wrong?
This usually means they were overbaked. Next time, pull them out when the centers still look slightly underdone and shiny. Also, make sure you’re using the correct fat-to-flour ratio — too much flour creates a cakey texture. Double-check your measurements.
Can I use milk chocolate instead of dark chocolate?
You can, but the brownies will be much sweeter and less intensely chocolatey. If you do swap, reduce the granulated sugar by 1/4 cup to balance the sweetness. I personally prefer dark chocolate for that rich, deep flavor that contrasts so well with the sweet white web.
Conclusion
These Spooky Fudgy Spiderweb Brownie Bites are everything I want in a Halloween dessert — rich, indulgent, fun to make, and absolutely gorgeous on a party table. They’re the recipe I come back to year after year, the one that makes people ask for the recipe before they’ve even finished chewing. Honestly, there’s something deeply satisfying about pulling a perfect spiderweb out of melted white chocolate, even if your first few attempts look like abstract art.
I hope you give these a try, whether it’s for a Halloween bash, a cozy movie night, or just because you deserve a little spooky sweetness in your life. Don’t be afraid to make them your own — swap in your favorite chocolate, experiment with the toppings, and have fun with the process. That’s what cooking is all about.
I’d love to hear how yours turn out! Drop a comment below and tell me about your spiderweb victories (or your hilarious first attempts). Share a photo on Pinterest and tag me — I’m always looking for new baking friends. Until next time, happy Halloween and happy baking!
Pin This Recipe!
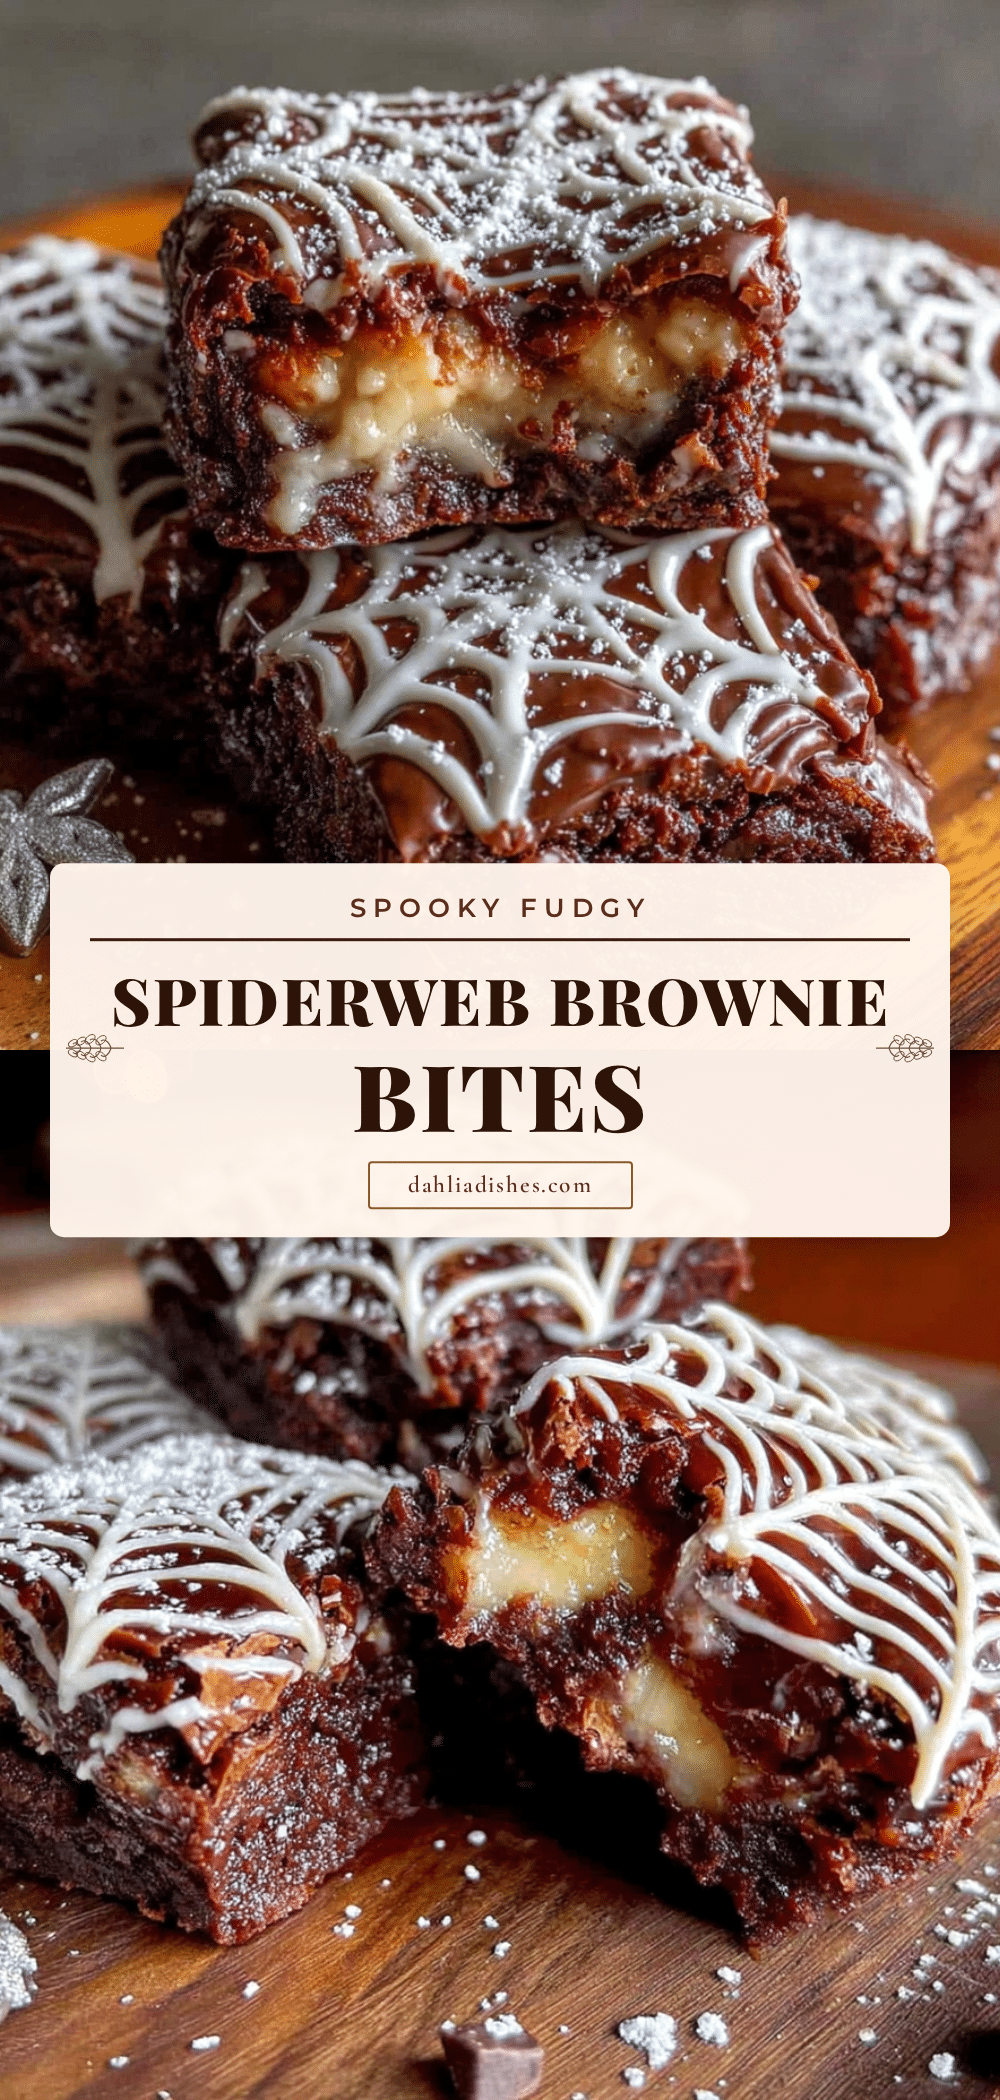
Best Fudgy Spiderweb Brownie Bites Recipe for Halloween
These intensely fudgy brownie bites are topped with a white chocolate spiderweb design, making them the perfect spooky treat for Halloween parties or any occasion that needs a little dark magic.
- Prep Time: 15 minutes
- Cook Time: 13 minutes
- Total Time: 45 minutes
- Yield: 24 servings 1x
- Category: Dessert
- Cuisine: American
Ingredients
- 1/2 cup (113g) unsalted butter, cubed
- 4 oz (113g) dark chocolate (60-70% cocoa), chopped
- 3/4 cup (150g) granulated sugar
- 1/4 cup (50g) light brown sugar, packed
- 2 large eggs, room temperature
- 1 large egg yolk
- 1 teaspoon vanilla extract
- 1/2 cup (60g) all-purpose flour
- 2 tablespoons (15g) unsweetened cocoa powder
- 1/4 teaspoon salt
- 1/2 cup (90g) white chocolate chips
- 1 teaspoon coconut oil or vegetable shortening
- Optional: 8-10 small candy spiders for garnish
Instructions
- Preheat oven to 350°F (175°C). Line a 24-cup mini muffin tin with paper liners.
- In a medium saucepan over low heat, melt butter and dark chocolate together, stirring constantly until smooth. Remove from heat and let cool for 5 minutes.
- In a large bowl, whisk together granulated sugar, brown sugar, eggs, and egg yolk for about 2 minutes until pale, thick, and ribbon-like.
- Pour the warm chocolate mixture into the egg mixture. Add vanilla extract and fold gently with a rubber spatula until just combined.
- In a small bowl, whisk together flour, cocoa powder, and salt. Sift over the wet batter and fold until no streaks remain. Do not overmix.
- Divide batter evenly among the 24 mini muffin cups, filling each about 3/4 full.
- Bake for 11-13 minutes, until edges are set and centers look slightly underdone and shiny. Cool in pan for 5 minutes, then transfer to a cooling rack and cool completely (about 20-30 minutes).
- For the spiderweb: In a small microwave-safe bowl, combine white chocolate chips and coconut oil. Microwave in 20-second bursts, stirring between each, until smooth.
- Transfer melted white chocolate to a piping bag or zip-top bag with a tiny corner snipped off. Working one brownie at a time, pipe a small circle in the center, then 4-5 concentric circles around it.
- While the chocolate is still wet, drag a toothpick from the center outward through all the circles. Repeat 4-5 times around the circle to create a spiderweb pattern. Wipe toothpick clean between each brownie.
- Let spiderwebs set at room temperature for about 15 minutes (or 5 minutes in the fridge). If using, press a candy spider onto each web.
Notes
Don’t overbake; pull when centers look slightly underdone. Use room temperature eggs to prevent seizing. Work in batches with white chocolate to keep it fluid. Store in an airtight container at room temperature for up to 4 days. Freeze undecorated brownie bites for up to 3 months.
Nutrition
- Serving Size: 1 brownie bite
- Calories: 145
- Sugar: 12
- Sodium: 50
- Fat: 9
- Saturated Fat: 5
- Carbohydrates: 16
- Fiber: 1
- Protein: 2
Keywords: Halloween brownies, spiderweb brownies, fudgy brownie bites, Halloween dessert, easy Halloween treat


