Love this? Save it for later!
Share the inspiration with your friends
It was 10:47 PM on a random Wednesday, and I had a very specific, almost aggressive craving for pumpkin cheesecake. The kind that doesn’t let you just go to sleep. The problem? I didn’t have a springform pan, I didn’t have the energy for a water bath, and I definitely didn’t have the patience for a crust that requires chilling for an hour. But I had a box of gingersnaps that were getting stale, a block of cream cheese, and a can of pumpkin that had been staring at me from the pantry for weeks. So, standing there in my pajamas, I decided to just go for it. I crushed those cookies with the bottom of a measuring cup—honestly, it was a little violent, but it felt good—and I figured, if this fails, I’ll just eat the filling with a spoon and call it a night. No one was watching, so the stakes were low.
What happened next was one of those happy accidents. The bars came together in about fifteen minutes of active work, and the smell that filled my kitchen was so good, my roommate actually came out of her room to ask if I was baking a “real dessert” at 11 PM. The gingersnap crust, usually a supporting player, became the star. It was spicy, crunchy, and didn’t need to be pre-baked perfectly to hold together. The pumpkin layer was creamy without being heavy, and the whole thing felt like a cheat code—all the flavor of a fussy cheesecake with almost none of the work. I pulled them out of the fridge the next morning, cut a perfect square, and took a bite. Honestly, I almost cried. Maybe you’ve been there—that moment when a desperate, late-night experiment turns into something you’ll make for the rest of your life. These Quick Pumpkin Cheesecake Bars with Gingersnap Crust are exactly that. They’re the recipe I keep coming back to, and I think you will too.
Why You’ll Love This Recipe
Let me tell you, I have tested a lot of cheesecake recipes in my time. Some require a stand mixer, a springform pan, and a whole afternoon. These bars are not those. These bars are the weeknight hero you didn’t know you needed. I developed this recipe specifically for the times when you want a show-stopping dessert but have zero energy left to give.
- Quick & Easy : Comes together in under 20 minutes of active prep time. The oven does the rest of the work, and you can go fold laundry or, let’s be real, just sit down.
- Simple Ingredients : No fancy grocery trips needed. Gingersnaps, cream cheese, pumpkin puree, eggs, sugar, and spices. You probably have most of this in your pantry right now.
- Perfect for Fall Weeknights : Great for when you need a taste of autumn without spending your whole evening in the kitchen. It’s like a warm hug on a plate, but faster.
- Crowd-Pleaser : I brought these to a potluck last month, and they disappeared before the main course was even served. Kids and adults alike go crazy for the crunchy, spicy crust and the silky pumpkin filling.
- Unbelievably Delicious : The texture is the real magic here. The crust stays perfectly crunchy, and the filling is dense but melts in your mouth. It’s next-level comfort food.
What makes this recipe different from the rest? It’s the crust. Most pumpkin cheesecake bars use a graham cracker base, which is fine, but it’s a little boring. By using gingersnaps, you get a built-in layer of ginger, clove, and molasses flavor that pairs perfectly with the pumpkin pie spice. It’s not just another version—it’s my best version. This recipe is the kind that makes you close your eyes after the first bite. It’s comfort food reimagined—faster, easier, but with the same soul-soothing satisfaction. Perfect for impressing guests without stress, or turning a simple Tuesday into something memorable.
What Ingredients You Will Need
This recipe uses simple, wholesome ingredients to deliver bold flavor and satisfying texture without the fuss. Most of these are pantry staples, especially if you do any fall baking at all. I’ve tested this with a few different brands, so I’ll share what works best.
- For the Gingersnap Crust:
- 2 cups gingersnap cookie crumbs (about 8 ounces of cookies) – I recommend Nabisco or a store-brand version from a bakery section. You want a sturdy cookie that isn’t too fine.
- 5 tablespoons unsalted butter, melted – This binds the crust. Use salted butter if that’s all you have, just skip the added salt.
- 2 tablespoons granulated sugar – Just a touch to balance the spice.
- Pinch of salt – Only if your butter is unsalted.
- For the Pumpkin Cheesecake Filling:
- 16 ounces (2 blocks) cream cheese, softened to room temperature – Full-fat is best for texture. I use Philadelphia, but any block-style cream cheese works.
- 3/4 cup granulated sugar – You can reduce this to 1/2 cup if you like a less sweet bar.
- 1 cup pumpkin puree – Not pumpkin pie filling. Make sure it’s 100% pure pumpkin. Libby’s is my go-to.
- 2 large eggs, room temperature – Cold eggs can make the filling lumpy. Let them sit on the counter for 30 minutes.
- 1 teaspoon vanilla extract – Pure vanilla, not imitation, for the best flavor.
- 1 1/2 teaspoons pumpkin pie spice – Or make your own with 1 teaspoon cinnamon, 1/2 teaspoon ginger, 1/4 teaspoon nutmeg, and a pinch of cloves.
- 1/2 teaspoon ground cinnamon – Extra warmth.
Ingredient Selection Tips: Look for cream cheese that feels cool to the touch but not cold. If you forget to soften it, microwave it in 10-second bursts until it’s soft but not melted. For the gingersnaps, avoid the super thin, crispy ones—they don’t crush well. You want a thicker, chewier cookie. If you’re in a pinch, you can use graham crackers and add 1/2 teaspoon of ground ginger and 1/4 teaspoon of cloves to the crust mixture.
Equipment Needed
You don’t need a professional bakery setup for these bars. I’ve made them in three different kitchens, and the tools are pretty standard.
- 8×8-inch baking pan – A metal or glass pan works. Glass takes a little longer to bake, so keep an eye on it. A 9×9 pan will work, but the bars will be thinner and bake faster.
- Parchment paper – Non-negotiable for easy removal. Leave a 2-inch overhang on two sides.
- Mixing bowls – One medium, one large.
- Hand mixer or stand mixer – A hand mixer is perfect. A whisk will work, but you’ll need strong arms to get the cream cheese smooth.
- Measuring cups and spoons – For accuracy.
- Rolling pin or food processor – For crushing the gingersnaps. A food processor is faster, but a zip-top bag and a rolling pin is a great arm workout.
- Spatula – A rubber spatula for scraping the bowl clean.
Budget-Friendly Tip: If you don’t have a food processor, put the cookies in a zip-top bag, remove the air, and crush them with a heavy pan. It’s messy but effective. I’ve done it many times.
Preparation Method
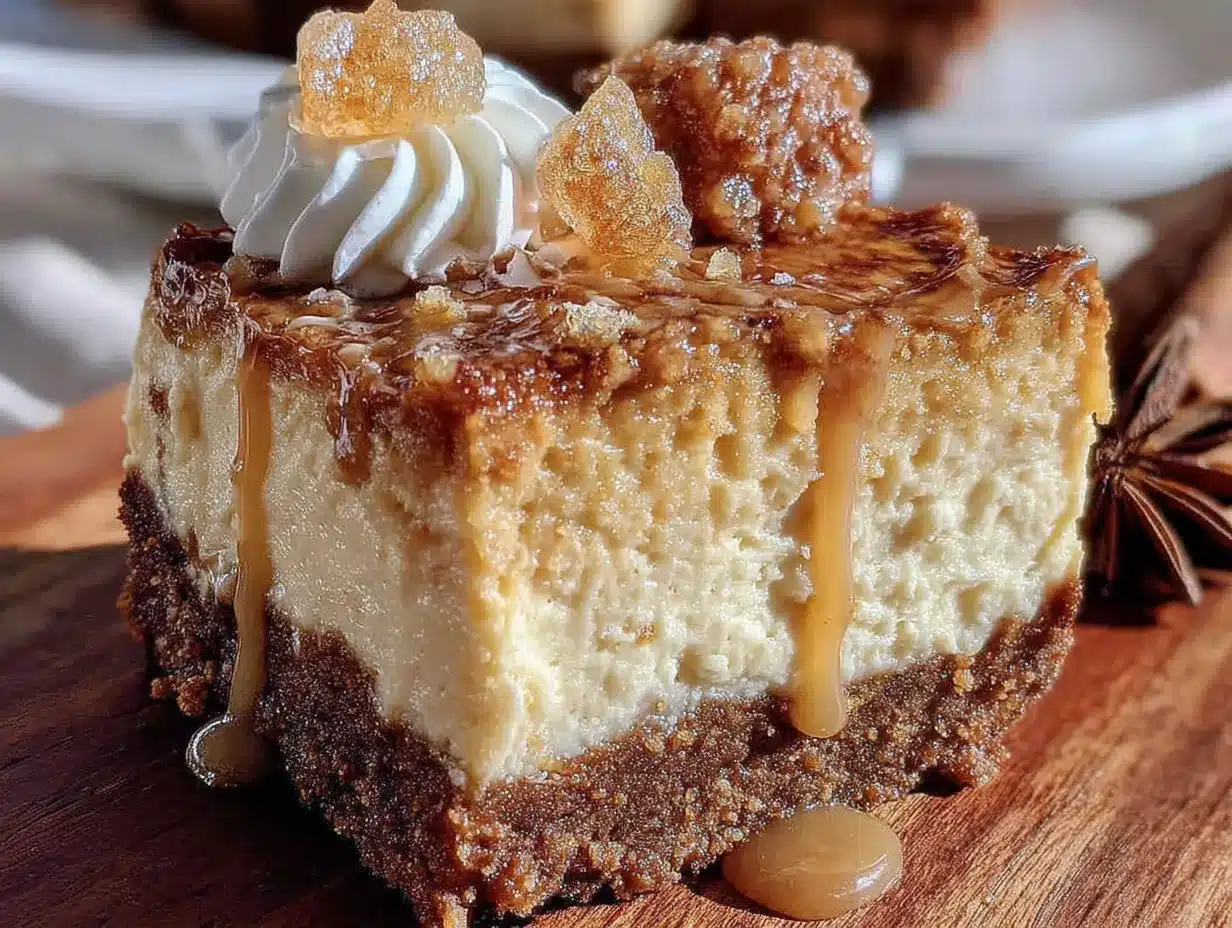
Let’s get to the fun part. This method is broken down into simple steps. I’ll tell you exactly what to look for at each stage, so you don’t have to guess.
- Preheat and Prep the Pan: Preheat your oven to 350°F (175°C). Line your 8×8-inch baking pan with parchment paper, leaving an overhang on two opposite sides. This is your handle for lifting the bars out later. Lightly spray the parchment with non-stick spray, just to be safe.
- Make the Gingersnap Crust: Crush your gingersnaps until you have 2 cups of fine crumbs. You want a mix of fine powder and small pebbles—not a uniform dust. In a medium bowl, combine the crumbs, 2 tablespoons of sugar, and a pinch of salt. Pour in the 5 tablespoons of melted butter and stir with a fork until every crumb is coated. It should look like wet sand.
- Press the Crust: Dump the crumb mixture into your prepared pan. Use the bottom of a measuring cup or a flat glass to press it down firmly and evenly. Press hard—this is what keeps the crust from crumbling when you cut the bars. Bake for 10 minutes, then set it aside to cool slightly. The crust will be fragrant and just starting to darken at the edges.
- Make the Cheesecake Filling: In a large mixing bowl, beat the softened cream cheese with a hand mixer on medium speed until it’s completely smooth. This takes about 2 minutes. Scrape the sides and bottom of the bowl with your spatula. Add the sugar and beat for another minute until fluffy. Add the pumpkin puree, vanilla, pumpkin pie spice, and cinnamon. Beat on low until combined—don’t overmix. Add the eggs one at a time, beating on low just until the yolk disappears. Overmixing at this stage can introduce too much air and cause cracks.
- Assemble and Bake: Pour the filling over the warm crust. Spread it gently into an even layer with your spatula. Give the pan a few gentle taps on the counter to release any air bubbles. Bake at 350°F for 35-40 minutes. The edges should look set and slightly puffed, but the center should jiggle like Jell-O when you gently shake the pan. That’s the sweet spot. If the center is liquidy, give it 5 more minutes.
- Cool and Chill: Let the bars cool on a wire rack for 1 hour at room temperature. Then, cover the pan loosely with plastic wrap and refrigerate for at least 4 hours, but overnight is best. This step is crucial—chilling allows the bars to set firmly so you can cut clean squares. I know it’s hard to wait, but trust me.
- Cut and Serve: Once fully chilled, lift the bars out of the pan using the parchment overhang. Place on a cutting board. Use a sharp, thin-bladed knife to cut into 16 squares. Wipe the knife clean between cuts for the neatest edges. Serve cold or let them sit at room temperature for 10 minutes for a softer texture.
Personal Tip: I always set a timer for 35 minutes and check the jiggle test. If I’m unsure, I insert a toothpick near the edge—it should come out clean. The center might look underdone, but it will set as it cools.
Cooking Tips & Techniques
I’ve made this recipe about a dozen times, and I’ve learned a few things the hard way. Here are my best tips to make sure your bars come out perfect every time.
- Room Temperature is Real: Don’t skip letting your cream cheese and eggs come to room temperature. Cold cream cheese creates lumps that are nearly impossible to beat out, and cold eggs can seize the batter. Set them out 30-45 minutes before you start.
- Don’t Overbake: This is the number one mistake I made early on. A slightly jiggly center is what you want. Overbaking dries out the cheesecake and causes cracks. The residual heat will finish the cooking process as it cools.
- Press the Crust Firmly: I cannot stress this enough. If your crust is too loose, it will fall apart when you cut the bars. Use a flat-bottomed glass and really lean into it. I once used my fingers and ended up with a crumbly mess—never again.
- Use a Water Bath (Optional): For an extra silky texture, you can place the baking pan inside a larger roasting pan and pour hot water halfway up the sides of the 8×8 pan. This prevents cracking, but honestly, for these bars, it’s not necessary. The short bake time and the crust help keep things moist.
- Clean Cuts: For those beautiful, Instagram-worthy squares, use a knife dipped in hot water and wiped dry between each cut. It makes a world of difference.
Variations & Adaptations
One of the best things about this recipe is how flexible it is. Here are a few ways I’ve adapted it depending on what I have in the fridge or who I’m feeding.
- Gluten-Free Version: Use gluten-free gingersnaps or a combination of gluten-free graham crackers and ground ginger. The rest of the ingredients are naturally gluten-free. I’ve tested this with Schär brand cookies, and it works beautifully.
- Dairy-Free / Vegan Option: Substitute the cream cheese with a high-quality vegan cream cheese (like Kite Hill or Tofutti). Use a flax egg (1 tablespoon ground flaxseed + 3 tablespoons water per egg) and vegan butter for the crust. The texture will be slightly softer, but the flavor is still fantastic.
- Spice It Up: For a more intense flavor, add 1/4 teaspoon of cayenne pepper or a pinch of black pepper to the filling. It gives a subtle warmth that pairs beautifully with the pumpkin. I tried this on a whim last fall, and it was a hit at a Friendsgiving party.
- Chocolate Drizzle: Once the bars are chilled, drizzle melted dark chocolate over the top. Let it set in the fridge for 10 minutes before cutting. The bitterness of the chocolate cuts through the sweetness perfectly.
- Mini Bars: Make these in a mini muffin tin for bite-sized treats. Line the tin with mini paper liners, press a teaspoon of crust into each, and fill with a tablespoon of filling. Bake for 12-15 minutes. Perfect for parties!
Serving & Storage Suggestions
These bars are delicious straight from the fridge, but they also shine at room temperature. Here’s how to serve and store them for the best experience.
- Serving Temperature: I prefer them cold, straight from the fridge. The texture is dense and fudgy. If you like a softer, creamier bite, let them sit on the counter for 15-20 minutes before serving.
- Presentation: Serve on a simple plate with a dollop of whipped cream and a light dusting of cinnamon. For a fancy touch, add a few candied pecans or a drizzle of salted caramel sauce. The contrast of crunchy nuts and creamy cheesecake is divine.
- Complementary Dishes: These bars pair beautifully with a hot cup of coffee, a spiced chai latte, or a glass of cold milk. If you’re serving them as part of a dessert spread, they go well with a simple apple crisp or a dark chocolate tart.
- Storage: Store leftovers in an airtight container in the refrigerator for up to 5 days. The crust will stay crunchy for about 2 days, then soften slightly. I actually like the softer crust after a day or two—it’s like a different dessert.
- Freezing: These freeze like a dream. Wrap individual bars tightly in plastic wrap, then place them in a freezer-safe bag. They’ll keep for up to 3 months. Thaw in the refrigerator overnight or at room temperature for 30 minutes. I always keep a stash for emergency dessert cravings.
- Flavor Development: Honestly, these bars taste even better on day two. The spices meld together, and the texture becomes perfectly uniform. If you can wait that long, you’ll be rewarded.
Nutritional Information & Benefits
While these are definitely a treat, they do have some redeeming qualities thanks to the pumpkin. Here’s a rough estimate per bar (based on 16 servings).
| Nutrient | Amount Per Bar |
|---|---|
| Calories | 245 |
| Total Fat | 14g |
| Saturated Fat | 8g |
| Cholesterol | 65mg |
| Sodium | 210mg |
| Total Carbohydrates | 27g |
| Dietary Fiber | 1g |
| Sugars | 18g |
| Protein | 4g |
| Vitamin A | 45% DV |
| Calcium | 4% DV |
| Iron | 6% DV |
Health Benefits: Pumpkin is packed with Vitamin A, which is great for your eyes and immune system. The gingersnaps provide a small amount of ginger, which can aid digestion. Cream cheese adds calcium and protein. Of course, this is still a dessert, but it’s a slightly more nutritious choice than a lot of other options. I feel good about serving these to my family because they’re made with real ingredients, and I know exactly what’s in them. For a lower-sugar version, you can reduce the sugar to 1/2 cup and use a sugar substitute like monk fruit in the crust.
Conclusion
So, there you have it—my late-night, pajama-clad, slightly desperate experiment that turned into a staple recipe. These Quick Pumpkin Cheesecake Bars with Gingersnap Crust are everything I want in a fall dessert: easy, impressive, and deeply satisfying. They don’t require a special occasion, a fancy pan, or hours of your time. They just require a craving and a little bit of trust in the process.
I really hope you give these a try. Make them for a weeknight dinner, a holiday gathering, or just because you have a can of pumpkin and a box of gingersnaps staring at you. Play around with the spices, try the vegan version, or just follow the recipe exactly as written. I promise you’ll be happy you did. And when you make them, come back and let me know how it went. Did you add a chocolate drizzle? Did you double the batch? I’d love to hear your twist. Leave a comment below or tag me in your photos—I can’t wait to see your creations. Happy baking, friends!
Frequently Asked Questions
Can I use a different cookie for the crust?
Absolutely! Graham crackers are the classic substitute, but you can also use shortbread cookies, vanilla wafers, or even Oreos (remove the filling first). Just keep in mind that the flavor profile will change. If you use a less-spicy cookie, you might want to add an extra 1/2 teaspoon of ginger to the crust mixture.
Why is my cheesecake filling lumpy?
This usually happens if your cream cheese is too cold. Make sure it’s at room temperature before you start beating it. If you do end up with lumps, you can try to beat them out on high speed for 30 seconds, but it’s better to avoid them in the first place. Another culprit is overmixing after adding the eggs—mix just until combined.
Can I make these bars ahead of time?
Yes, and I actually recommend it! These bars need at least 4 hours to chill, but they’re even better after 24 hours. You can make them up to 2 days in advance and store them in the refrigerator. They also freeze well for up to 3 months, so you can make a batch now and save some for later.
How do I know when the bars are done baking?
The edges should look set and slightly puffed, but the center should still jiggle when you gently shake the pan. This is the famous “jiggle test.” If the center looks liquidy, give it 5 more minutes. If it’s completely firm, it’s overbaked. Remember, the bars will continue to set as they cool.
Can I use a different size pan?
You can, but you’ll need to adjust the baking time. A 9×9-inch pan will yield thinner bars that bake faster—check them at 25 minutes. A 9×13-inch pan will make very thin bars, and you’ll need to reduce the baking time to about 20 minutes. For a deeper bar, use a 7×11-inch pan and increase the baking time to 40-45 minutes. Always use the jiggle test to determine doneness.
Pin This Recipe!
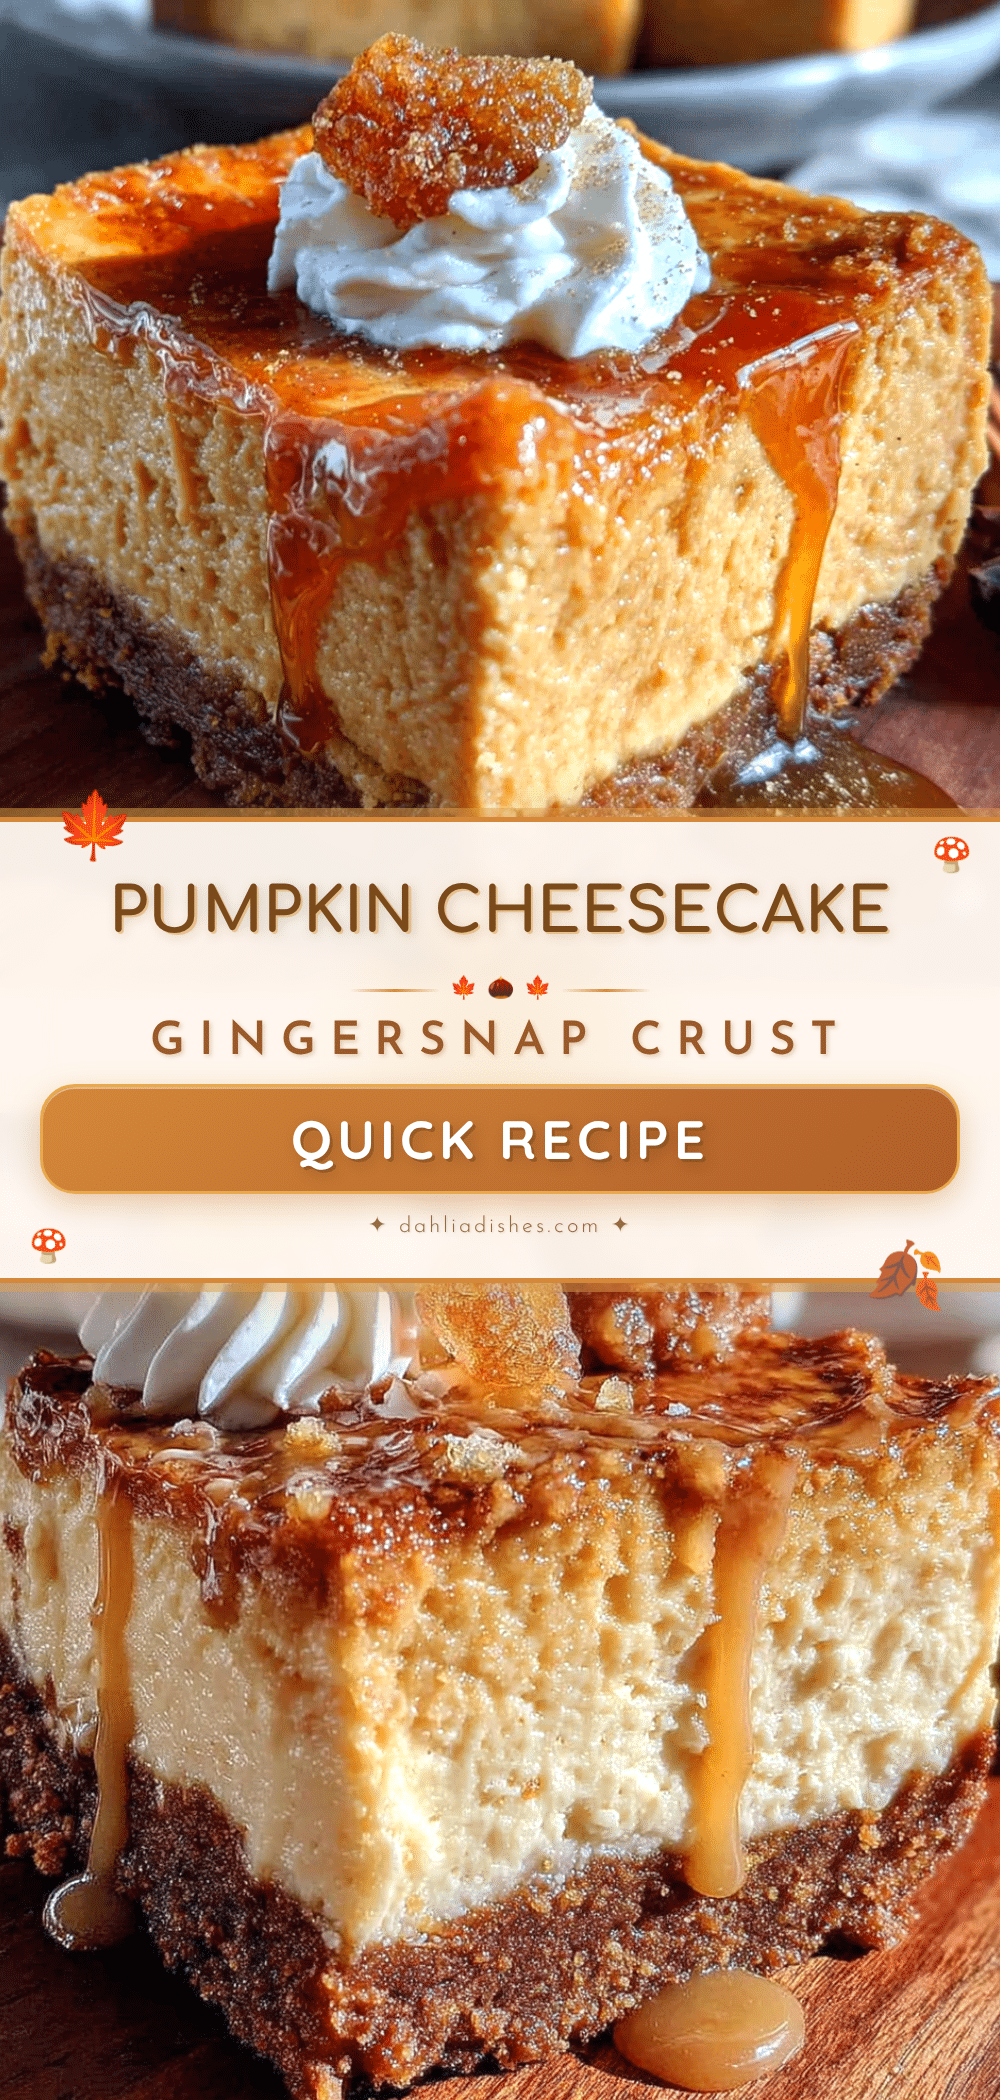
Best Easy Pumpkin Cheesecake Bars with Gingersnap Crust
These quick and easy pumpkin cheesecake bars feature a spicy gingersnap crust and a creamy pumpkin filling. They come together in under 20 minutes of active prep time and are perfect for fall weeknights or any time you crave a comforting dessert without the fuss.
- Prep Time: 15 minutes
- Cook Time: 35 minutes
- Total Time: 4 hours 50 minutes (includes chilling)
- Yield: 16 bars 1x
- Category: Dessert
- Cuisine: American
Ingredients
- 2 cups gingersnap cookie crumbs (about 8 ounces of cookies)
- 5 tablespoons unsalted butter, melted
- 2 tablespoons granulated sugar
- Pinch of salt (if using unsalted butter)
- 16 ounces (2 blocks) cream cheese, softened to room temperature
- 3/4 cup granulated sugar
- 1 cup pumpkin puree (not pumpkin pie filling)
- 2 large eggs, room temperature
- 1 teaspoon vanilla extract
- 1 1/2 teaspoons pumpkin pie spice
- 1/2 teaspoon ground cinnamon
Instructions
- Preheat your oven to 350°F (175°C). Line an 8×8-inch baking pan with parchment paper, leaving an overhang on two opposite sides. Lightly spray the parchment with non-stick spray.
- Crush the gingersnaps until you have 2 cups of fine crumbs. In a medium bowl, combine the crumbs, 2 tablespoons of sugar, and a pinch of salt. Pour in the melted butter and stir with a fork until every crumb is coated.
- Dump the crumb mixture into the prepared pan. Use the bottom of a measuring cup or a flat glass to press it down firmly and evenly. Bake for 10 minutes, then set aside to cool slightly.
- In a large mixing bowl, beat the softened cream cheese with a hand mixer on medium speed until completely smooth (about 2 minutes). Scrape the sides and bottom of the bowl. Add the sugar and beat for another minute until fluffy.
- Add the pumpkin puree, vanilla, pumpkin pie spice, and cinnamon. Beat on low until combined. Add the eggs one at a time, beating on low just until the yolk disappears.
- Pour the filling over the warm crust. Spread it gently into an even layer. Give the pan a few gentle taps on the counter to release any air bubbles.
- Bake at 350°F for 35-40 minutes. The edges should look set and slightly puffed, but the center should jiggle like Jell-O when you gently shake the pan.
- Let the bars cool on a wire rack for 1 hour at room temperature. Then, cover the pan loosely with plastic wrap and refrigerate for at least 4 hours, but overnight is best.
- Once fully chilled, lift the bars out of the pan using the parchment overhang. Place on a cutting board. Use a sharp, thin-bladed knife to cut into 16 squares. Wipe the knife clean between cuts for the neatest edges.
Notes
For best results, use room temperature cream cheese and eggs. Do not overbake; the center should jiggle slightly. For cleaner cuts, dip the knife in hot water and wipe dry between cuts. These bars taste even better on day two.
Nutrition
- Serving Size: 1 bar
- Calories: 245
- Sugar: 18
- Sodium: 210
- Fat: 14
- Saturated Fat: 8
- Carbohydrates: 27
- Fiber: 1
- Protein: 4
Keywords: pumpkin cheesecake bars, gingersnap crust, easy pumpkin dessert, fall dessert, quick cheesecake bars


