Love this? Save it for later!
Share the inspiration with your friends
I was standing in the middle of a hardware store last October—looking for a specific size of paintbrush, not pumpkin—when the smell hit me. It wasn’t coming from anywhere obvious. No candle display, no bakery aisle. Just this faint, warm whisper of cinnamon, nutmeg, and something deeper, earthier, drifting through the air near the lumber section. And just like that, I was eight years old again, sitting on a wobbly stool at my neighbor Mrs. Kowalski’s kitchen counter, watching her pull a pan of pumpkin cheesecake bars out of her ancient oven. The way the afternoon light caught the steam rising off them, the way she’d tap the pan gently on the stovetop to settle the filling—I hadn’t thought about any of it in decades. But there I was, holding a paintbrush I didn’t need, completely lost in a memory I’d forgotten I had.
Mrs. Kowalski wasn’t my grandmother. She was just the lady next door who let me hang around while my mom worked late. She made these bars every fall, and I never once asked her for the recipe. I mean, what kid thinks about that? You just eat the bars and assume they’ll appear forever. Then you grow up, she moves away, and you spend years trying to chase that exact flavor again. Honestly, I’ve made a lot of terrible pumpkin desserts in that pursuit—some so dry they crumbled into dust, others so soggy they basically wept on the plate. Maybe you’ve been there, too, chasing a taste you can almost remember but can’t quite recreate.
This version of perfect pumpkin cheesecake bars with graham cracker crust is my best attempt at capturing that afternoon light. It took me three falls and about twelve test batches to get the texture right—not too dense, not too airy, with a crust that actually stays crisp instead of turning into mush. I finally cracked it by paying attention to things I used to rush through, like letting the cream cheese come to real room temperature and toasting the graham cracker crumbs just slightly before pressing them in. It’s the kind of recipe that made me close my eyes on the first successful bite. And honestly? That’s why I keep making it.
Why You’ll Love This Recipe
Let me tell you why these pumpkin cheesecake bars have become my most-requested fall dessert. I’ve tested this recipe about a dozen times—and by tested, I mean I’ve made versions that were too runny, too crumbly, and one memorable batch that somehow tasted like pumpkin spice and regret. This one is the keeper.
- Quick & Easy: Unlike a full cheesecake that needs a water bath and hours of cooling, these bars come together in about 20 minutes of active prep time. They’re perfect for busy weeknights when you need a dessert that looks impressive without the drama.
- Simple Ingredients: You likely have most of these in your kitchen already. No fancy grocery trips needed—just standard baking staples plus canned pumpkin and cream cheese.
- Perfect for Fall Gatherings: These bars are great for Thanksgiving, Friendsgiving, potlucks, or just a cozy Sunday afternoon. They travel well and don’t require last-minute assembly.
- Crowd-Pleaser: I’ve brought these to four different gatherings this season, and every single time, someone asks for the recipe. Kids love them, adults love them, and even the pumpkin skeptics in my family go back for seconds.
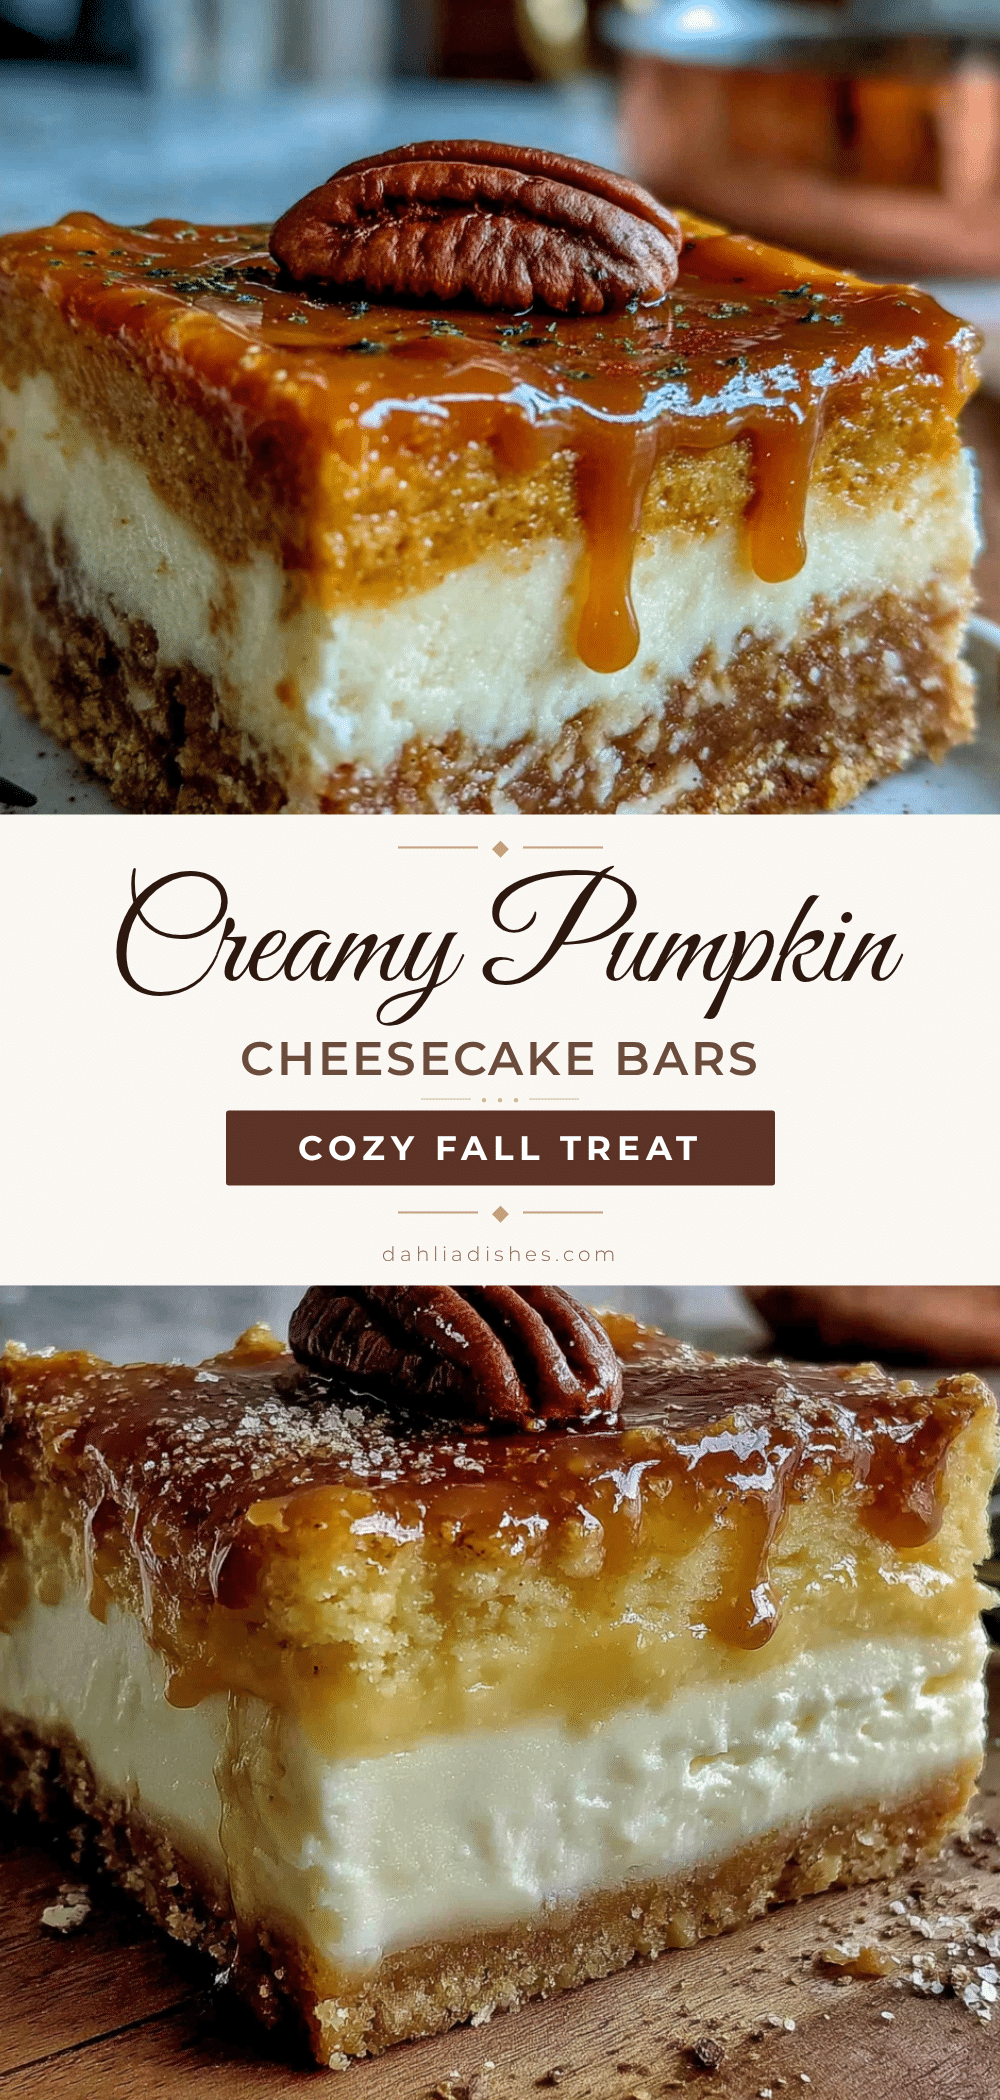
- Unbelievably Delicious: The texture is what sets these apart—a creamy, tangy cheesecake layer swirled with spiced pumpkin, all sitting on a buttery graham cracker crust that stays crunchy. It’s next-level comfort food in bar form.
What makes this recipe different from the rest is the technique. I blend the cream cheese and sugar until it’s truly silky—no lumps allowed—and I use a slightly higher ratio of pumpkin to cream cheese than most recipes call for. This gives you that bold pumpkin flavor without losing the rich, creamy cheesecake texture. It’s not just another pumpkin bar recipe. It’s the one that makes people close their eyes after the first bite.
This is comfort food reimagined—faster, easier, but with the same soul-soothing satisfaction. Perfect for impressing guests without stress, or turning a simple Tuesday into something memorable.
What Ingredients You Will Need
This recipe uses simple, wholesome ingredients to deliver that perfect balance of creamy cheesecake and spiced pumpkin flavor. Most of these are pantry staples, which makes these bars incredibly easy to whip up on a whim.
For the Graham Cracker Crust
- Graham cracker crumbs, 1 ½ cups (180g) – You can buy pre-crushed crumbs or crush about 12 full sheets yourself. I actually prefer crushing them myself because you get a more varied texture—some fine crumbs, some slightly coarser bits—which makes the crust more interesting. If you’re using pre-crushed, look for the plain variety, not honey-flavored.
- Granulated sugar, ¼ cup (50g) – Just enough to sweeten the crust without making it candy-like.
- Unsalted butter, ½ cup (113g), melted – I use salted butter in a pinch and just reduce the added salt slightly. Melt it gently—you don’t want it bubbling or browned.
- Pinch of salt – Only if using unsalted butter. Salt balances the sweetness and makes the crust taste more buttery.
For the Cheesecake Layer
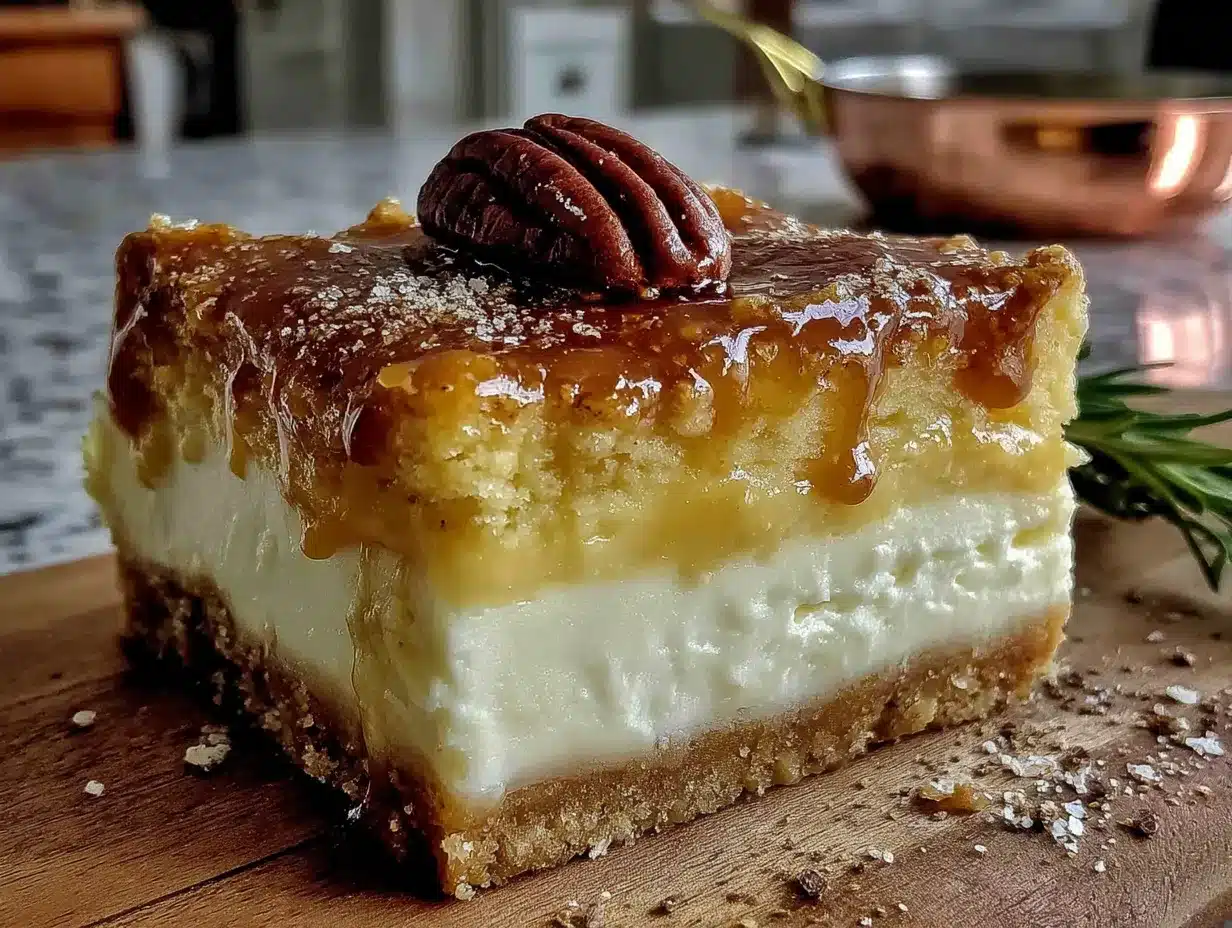
- Cream cheese, 16 oz (450g), softened – Full-fat is non-negotiable here. Low-fat cream cheese has too much water and will make your bars weepy. Let it sit on the counter for at least an hour—cold cream cheese creates lumps that no amount of mixing can fix.
- Granulated sugar, ½ cup (100g) – Sweetens the cheesecake layer without overpowering the tanginess.
- Large eggs, 2, at room temperature – Room temperature eggs blend more smoothly into the batter. If you forgot to take them out, place them in a bowl of warm water for 5 minutes.
- Vanilla extract, 1 teaspoon – Pure vanilla extract makes a difference here. The artificial stuff has a chemical aftertaste that’s noticeable in a simple cheesecake.
For the Pumpkin Layer
- Pumpkin puree, 1 cup (245g) – Not pumpkin pie filling. Make sure you grab the 100% pure pumpkin puree. Libby’s is my go-to brand because it’s consistently thick and not watery. If your pumpkin puree looks watery, blot it with paper towels before using.
- Brown sugar, ½ cup (100g), packed – Light or dark brown sugar works. Dark brown sugar gives a deeper molasses flavor that I personally love with the pumpkin spice.
- Large egg, 1, at room temperature – Helps bind the pumpkin layer.
- Pumpkin pie spice, 2 teaspoons – You can use store-bought or make your own: 1 teaspoon cinnamon, ½ teaspoon ginger, ¼ teaspoon nutmeg, ¼ teaspoon allspice, and a tiny pinch of cloves.
- Ground cinnamon, 1 teaspoon – I add extra cinnamon because I think pumpkin desserts need more than what’s in the standard spice blend.
Equipment Needed
You don’t need a professional bakery setup for these pumpkin cheesecake bars. Here’s what you’ll actually use:
- 9×9-inch baking pan – An 8×8 pan works too, but your bars will be slightly thicker and need a few extra minutes of baking time. I’ve used a metal pan and a glass one—metal gives a crisper crust.
- Parchment paper – Cut two strips to create a sling so you can lift the bars out cleanly. Trust me on this. The first time I made these, I didn’t use parchment and spent 20 minutes chiseling bars out of the pan.
- Electric hand mixer or stand mixer – You can mix by hand, but you’ll get a smoother texture with a mixer. I’ve done both, and the mixer saves about 10 minutes of arm fatigue.
- Large mixing bowls – One for the crust, one for the cheesecake layer, one for the pumpkin layer. Yes, that’s three bowls, but it makes layering so much easier.
- Measuring cups and spoons – For accuracy. Baking is science, after all.
- Spatula – A rubber spatula for scraping every bit of batter. Waste not.
- Sharp knife – For clean cuts. A dull knife will drag through the layers and make a mess.
If you don’t have a 9×9 pan, you can use a 9×13 pan—just reduce the baking time and expect thinner bars. I’ve also used a springform pan in a pinch, but the bars tend to be less even in thickness.
Preparation Method
Let’s get into the actual making of these pumpkin cheesecake bars. I’ve broken this down step by step, with all the little details I wish someone had told me the first time.
- Preheat your oven to 350°F (175°C). Line your 9×9 baking pan with parchment paper, leaving overhang on two opposite sides. This creates your sling for lifting the bars out later. Lightly grease the parchment with butter or non-stick spray.
- Make the crust. In a medium bowl, combine the graham cracker crumbs, ¼ cup granulated sugar, and a pinch of salt. Pour in the melted butter and stir with a fork until all the crumbs are moistened. The mixture should look like wet sand and hold together when you squeeze it. If it’s too dry, add another tablespoon of melted butter.
- Press the crust into the pan. Dump the crumb mixture into your prepared pan. Use the bottom of a measuring cup or a flat-bottomed glass to press it down firmly and evenly. I press the edges slightly higher than the center—this creates a little lip that holds the cheesecake filling in place. Bake the crust for 10 minutes, then set it aside to cool slightly while you make the fillings.
- Make the cheesecake layer. In a large bowl, beat the softened cream cheese with an electric mixer on medium speed until smooth and creamy—about 2 minutes. Scrape down the sides of the bowl. Add ½ cup granulated sugar and beat until combined, about 1 minute more. Add the 2 room-temperature eggs one at a time, beating on low after each addition just until incorporated. Don’t overmix here—too much air creates cracks. Stir in the vanilla extract.
- Make the pumpkin layer. In a separate bowl, whisk together the pumpkin puree, packed brown sugar, 1 egg, pumpkin pie spice, and extra cinnamon until smooth. The mixture should be thick and fragrant. If your pumpkin puree was watery, this is where you’ll notice—if it looks loose, don’t panic, it’ll still bake up fine.
- Assemble the layers. Pour the cheesecake mixture over the pre-baked crust and spread it evenly with a spatula. Drop spoonfuls of the pumpkin mixture on top of the cheesecake layer—about 6 to 8 dollops. Use a butter knife or a skewer to gently swirl the two layers together. Don’t over-swirl or you’ll lose the distinct layers. I do about 5 figure-eight motions and stop.
- Bake the bars. Place the pan on the middle rack of your preheated oven. Bake for 35 to 40 minutes, or until the edges are set and the center jiggles just slightly when you gently shake the pan. It should look matte on top, not glossy. A toothpick inserted 1 inch from the edge should come out clean, but the center will still look a bit soft—that’s okay, it will set as it cools.
- Cool completely. Place the pan on a wire rack and let it cool to room temperature—this takes about 1 to 2 hours. Then cover the pan with plastic wrap and refrigerate for at least 4 hours, preferably overnight. This step is crucial. The bars need time to set properly. I know it’s hard to wait, but cutting them too early results in a messy, gooey disaster.
- Slice and serve. Once fully chilled, use the parchment sling to lift the entire block of bars out of the pan. Place it on a cutting board. Use a sharp knife to slice into 16 even squares. Wipe the knife clean between cuts for the neatest edges.
Cooking Tips & Techniques
Over the years, I’ve made just about every mistake you can make with pumpkin cheesecake bars. Here’s what I’ve learned so you don’t have to repeat my failures.
Room temperature ingredients matter. I cannot stress this enough. Cold cream cheese creates lumps that survive even the most aggressive mixing. Cold eggs can cause the batter to separate. Set everything out on the counter at least an hour before you start. If you’re short on time, cut the cream cheese into small cubes and let it sit for 30 minutes—it helps.
Don’t overmix the cheesecake batter. Once you add the eggs, mix on low speed just until they disappear into the batter. Overmixing incorporates too much air, which expands during baking and then collapses, leaving you with cracks on the surface. A few tiny cracks are fine—they add character—but big fissures are a sign of overmixing or overbaking.
Watch the baking time closely. Every oven runs differently. My old oven baked these in 35 minutes flat. My current oven takes closer to 40. Start checking at the 30-minute mark. The bars are done when the edges are set and the center has a slight jiggle—like firm Jell-O, not like liquid. Overbaked bars become dry and crumbly around the edges.
Cool gradually. Sudden temperature changes cause cracking. Let the bars cool on the counter before moving them to the fridge. If you’re in a hurry, you can speed this up by placing the pan on a wire rack and pointing a fan at it—but don’t put a hot pan directly in the fridge. The condensation will make the crust soggy.
Use a wet knife for clean cuts. Run your knife under hot water, wipe it dry, then slice. Repeat between cuts. This gives you those beautiful, clean edges that make the bars look bakery-worthy. I learned this trick after years of dragging a dry knife through cheesecake and ending up with smeared edges.
Variations & Adaptations
One of the best things about this recipe is how adaptable it is. Here are some variations I’ve tried and loved.
Gluten-Free Version: Substitute the graham cracker crumbs with gluten-free graham crackers or crushed gluten-free cookies. I’ve used gluten-free digestive biscuits with great success. Just make sure your pumpkin pie spice blend is also certified gluten-free.
Dairy-Free Adaptation: Use dairy-free cream cheese—I’ve had good results with the Kite Hill brand, though the texture is slightly softer. Substitute the butter in the crust with melted coconut oil or a plant-based butter. The bars will be a bit more delicate, so handle them gently.
Spice It Up: If you like a bolder pumpkin flavor, add an extra teaspoon of pumpkin pie spice and a pinch of black pepper. The pepper doesn’t make it spicy—it just enhances the other spices in a way that’s hard to describe but delicious.
Chocolate Swirl: Melt ¼ cup of semi-sweet chocolate chips and drizzle it over the pumpkin layer before swirling. The chocolate and pumpkin combination is surprisingly good—like a pumpkin chocolate chip cookie in bar form.
Nutty Crust: Add ½ cup of finely chopped pecans or walnuts to the graham cracker crust. Toast them first for extra flavor. This adds a lovely crunch and pairs beautifully with the creamy filling.
Maple Pumpkin Variation: Replace the brown sugar in the pumpkin layer with maple sugar, or add 2 tablespoons of pure maple syrup. Reduce the granulated sugar in the cheesecake layer by 2 tablespoons to balance the sweetness. The maple flavor is subtle but adds a wonderful autumnal depth.
Serving & Storage Suggestions
These pumpkin cheesecake bars are versatile when it comes to serving. Here’s how I handle them.
Serving Temperature: I prefer them cold, straight from the fridge. The texture is firm and creamy, and the flavors are more pronounced. Some people like them at room temperature, which makes the cheesecake layer softer and more luscious. Try both and see which you prefer.
Presentation Ideas: Arrange the bars on a platter and dust with a light sprinkle of cinnamon or nutmeg. A dollop of whipped cream on top adds a nice touch for a more formal presentation. For Thanksgiving, I sometimes drizzle a little caramel sauce over the top—it looks gorgeous and adds another layer of flavor.
Complementary Dishes: These bars pair beautifully with a cup of hot coffee or spiced chai. For a dessert spread, serve them alongside apple crisp or pecan pie bars. They also work well as a lighter alternative to traditional pumpkin pie on the Thanksgiving table.
Storage Instructions: Store the bars in an airtight container in the refrigerator for up to 5 days. Place a layer of parchment paper between stacked bars to prevent sticking. The flavors actually improve after a day or two as they meld together.
Freezing Instructions: These bars freeze beautifully. Wrap individual bars tightly in plastic wrap, then place them in a freezer-safe bag or container. They’ll keep for up to 3 months. To thaw, transfer to the refrigerator overnight. I often make a double batch and freeze half for unexpected guests or late-night cravings.
Reheating: I don’t recommend reheating these bars—they’re meant to be served cold or at room temperature. If you prefer a warm dessert, let a bar sit at room temperature for 20 minutes before serving.
Nutritional Information & Benefits
Here’s the approximate nutritional breakdown for one bar (based on 16 servings):
- Calories: 285
- Fat: 18g
- Saturated Fat: 10g
- Carbohydrates: 28g
- Sugar: 20g
- Protein: 5g
- Fiber: 1g
- Sodium: 220mg
These numbers are estimates and will vary based on your specific ingredients and portion sizes.
Health Benefits: Pumpkin is packed with vitamin A, which supports eye health and immune function. It’s also a good source of fiber and antioxidants. Cream cheese provides calcium and protein, though it’s higher in saturated fat—so these bars are best enjoyed as an occasional treat rather than a daily indulgence.
Dietary Considerations: This recipe contains gluten (from graham crackers), dairy (from cream cheese and butter), and eggs. It can be adapted for gluten-free or dairy-free diets as mentioned in the variations section. It is not suitable for vegan diets without significant modifications.
Personal Wellness Perspective: I believe in balance. These bars are a dessert, not a health food, and that’s okay. They’re made with real ingredients, and they bring joy to the people who eat them. For me, that’s a form of wellness in itself.
Conclusion
These perfect pumpkin cheesecake bars with graham cracker crust are everything I wanted them to be—and then some. They’re creamy without being heavy, spiced without being overpowering, and that buttery crust stays crisp in a way that feels almost magical. Every time I make them, I think about Mrs. Kowalski and her ancient oven, and I feel like I’ve finally done her recipe justice.
I hope you’ll make these bars your own. Maybe you’ll add extra spice, or swap in a different crust, or serve them with a drizzle of caramel. That’s the beauty of a good base recipe—it’s a starting point, not a rulebook. Don’t be afraid to experiment and find the version that makes you close your eyes on the first bite.
If you try these pumpkin cheesecake bars, I’d love to hear how they turned out. Drop a comment below and let me know if you made any changes or if they reminded you of someone special. And if you share a photo on social media, tag me—I honestly get so excited seeing your creations. Happy baking, friends. This one’s a keeper.
Frequently Asked Questions
Can I use fresh pumpkin instead of canned?
Yes, you can use fresh pumpkin puree, but you’ll need to strain it first. Fresh pumpkin has more water than canned, which can make your bars soggy. Roast the pumpkin, puree it, then let it drain in a cheesecloth-lined strainer for at least an hour. You’ll end up with about 25% less volume, so adjust accordingly.
Why did my cheesecake layer crack?
Cracks usually happen from overmixing the batter, overbaking, or sudden temperature changes. Make sure your cream cheese and eggs are at room temperature, mix on low speed after adding eggs, and don’t overbake. Cool the bars gradually on the counter before refrigerating. A few small cracks are normal and add character.
Can I make these bars ahead of time?
Absolutely. These bars actually taste better after a day or two in the fridge—the flavors meld together beautifully. You can make them up to 3 days in advance. Just keep them covered in the refrigerator and add any toppings right before serving.
How do I get clean, neat slices?
Use a sharp knife and wipe it clean between each cut. For the cleanest edges, run the knife under hot water, dry it, then slice. Repeat this process for every cut. Chilling the bars completely—at least 4 hours, preferably overnight—is essential for clean slices.
Can I freeze these pumpkin cheesecake bars?
Yes, they freeze wonderfully. Wrap individual bars tightly in plastic wrap, then place them in a freezer-safe bag or container. They’ll keep for up to 3 months. Thaw overnight in the refrigerator before serving. I don’t recommend freezing them with any toppings like whipped cream or caramel sauce—add those after thawing.
Pin This Recipe!
Best Easy Pumpkin Cheesecake Bars Recipe
These pumpkin cheesecake bars feature a creamy, tangy cheesecake layer swirled with spiced pumpkin on a buttery graham cracker crust. They’re quick to make, perfect for fall gatherings, and taste even better after a day in the fridge.
- Prep Time: 20 minutes
- Cook Time: 35-40 minutes
- Total Time: 4 hours 55 minutes (includes chilling)
- Yield: 16 bars 1x
- Category: Dessert
- Cuisine: American
Ingredients
- 1 ½ cups (180g) graham cracker crumbs
- ¼ cup (50g) granulated sugar
- ½ cup (113g) unsalted butter, melted
- Pinch of salt (if using unsalted butter)
- 16 oz (450g) cream cheese, softened
- ½ cup (100g) granulated sugar
- 2 large eggs, at room temperature
- 1 teaspoon vanilla extract
- 1 cup (245g) pumpkin puree (not pumpkin pie filling)
- ½ cup (100g) brown sugar, packed
- 1 large egg, at room temperature
- 2 teaspoons pumpkin pie spice
- 1 teaspoon ground cinnamon
Instructions
- Preheat your oven to 350°F (175°C). Line a 9×9-inch baking pan with parchment paper, leaving overhang on two opposite sides. Lightly grease the parchment with butter or non-stick spray.
- Make the crust: In a medium bowl, combine graham cracker crumbs, ¼ cup granulated sugar, and a pinch of salt. Pour in melted butter and stir with a fork until all crumbs are moistened. The mixture should look like wet sand and hold together when squeezed.
- Press the crust into the prepared pan using the bottom of a measuring cup or flat-bottomed glass. Press edges slightly higher than the center. Bake for 10 minutes, then set aside to cool slightly.
- Make the cheesecake layer: In a large bowl, beat softened cream cheese with an electric mixer on medium speed until smooth and creamy, about 2 minutes. Scrape down sides. Add ½ cup granulated sugar and beat until combined, about 1 minute. Add 2 room-temperature eggs one at a time, beating on low after each addition just until incorporated. Stir in vanilla extract.
- Make the pumpkin layer: In a separate bowl, whisk together pumpkin puree, packed brown sugar, 1 egg, pumpkin pie spice, and extra cinnamon until smooth.
- Assemble the layers: Pour cheesecake mixture over pre-baked crust and spread evenly. Drop spoonfuls of pumpkin mixture on top (6-8 dollops). Gently swirl with a butter knife or skewer using about 5 figure-eight motions.
- Bake on the middle rack for 35-40 minutes, until edges are set and center jiggles slightly when shaken. The top should look matte, not glossy.
- Cool completely on a wire rack (1-2 hours), then cover with plastic wrap and refrigerate for at least 4 hours, preferably overnight.
- Once fully chilled, use parchment sling to lift bars out of pan. Place on cutting board and slice into 16 even squares with a sharp knife, wiping clean between cuts.
Notes
Room temperature ingredients are crucial for a smooth texture. Don’t overmix the cheesecake batter to avoid cracks. Cool gradually to prevent cracking. For clean cuts, use a wet knife and wipe between slices. Bars can be stored in the refrigerator for up to 5 days or frozen for up to 3 months.
Nutrition
- Serving Size: 1 bar
- Calories: 285
- Sugar: 20
- Sodium: 220
- Fat: 18
- Saturated Fat: 10
- Carbohydrates: 28
- Fiber: 1
- Protein: 5
Keywords: pumpkin cheesecake bars, pumpkin dessert, fall dessert, cheesecake bars, graham cracker crust, easy pumpkin recipe


