Love this? Save it for later!
Share the inspiration with your friends
My sister had claimed to hate pumpkin for thirty-two years. Thirty-two years of wrinkling her nose at Thanksgiving pies, pushing aside pumpkin-spice lattes, and making that little gagging sound whenever someone mentioned the word “squash” in a dessert context. It was practically a personality trait at that point. Then last October, I caught her standing in front of my open refrigerator at ten o’clock at night, spoon in hand, eating one of these custard cups directly from the ramekin. She didn’t even look guilty. She just pointed the spoon at me and said, “This doesn’t count. This is something else entirely.”
I’d made them that afternoon on a whim, mostly because I had half a can of pumpkin puree taking up space in my fridge and a serious craving for something warm and sweet that wouldn’t blow my carb count for the week. Honestly, I wasn’t expecting much. Low-carb desserts can be, well, you know how they can be. Gritty. Artificial. The kind of thing you eat while sighing and telling yourself it’s “close enough.” But these little cups of pumpkin custard were different. They were silky. They were spiced just right. They tasted like the filling of a perfect pumpkin pie, minus the crust and the sugar crash.
I pulled them out of the oven, let them cool for maybe ten minutes, and ate one standing at the counter. That was when my sister walked in, asked what smelled so good, and I made the mistake of offering her a taste. The rest is history. Or, you know, a very one-sided intervention about her lifelong pumpkin boycott. Maybe you’ve been there — stuck in a food rut, convinced you hate something, only to discover you just hadn’t had the right version yet. That’s what these custard cups are. The right version.
Why You’ll Love This Recipe
Let me tell you why these little custard cups have become my weeknight dessert hero. First off, they come together in about five minutes of active prep time. I mean it. Five minutes. You dump everything in a bowl, whisk it until smooth, pour it into ramekins, and let the oven do the rest. For someone who walks through the kitchen door at 6:45 PM with a headache and a growling stomach, that kind of efficiency is basically a love language.
- Quick & Easy: Five minutes of prep, about 30 minutes in the oven. You can make these while your dinner is cooking and have dessert ready by the time you clear the plates.
- Simple Ingredients: No weird low-carb specialty ingredients that require a trip to three different stores. Eggs, cream, pumpkin puree, sweetener, and pantry spices. That’s it.
- Perfect for Weeknights: These are portion-controlled, satisfying, and don’t leave you with a giant cake to stare at for the next four days. One cup, done.
- Crowd-Pleaser: I’ve served these to pumpkin lovers and pumpkin skeptics alike. They disappear. Every single time.
- Unbelievably Delicious: The texture is what gets people. It’s not rubbery or eggy. It’s silky, almost like a pumpkin crème brûlée without the fussy torch step.
What makes this recipe different from every other low-carb pumpkin dessert out there? It’s the ratio. I spent three batches tweaking the egg-to-cream ratio until the custard set up perfectly without turning into a soufflé or a puddle. The result is a custard that’s firm enough to hold its shape but still melts on your tongue. Plus, the spice blend is dialed in — warm, aromatic, and just sweet enough to feel indulgent without any actual sugar.
This is the kind of dessert that makes you close your eyes after the first bite. It’s comfort food reimagined — lower in carbs, faster to make, but with the same soul-soothing satisfaction as your grandmother’s pumpkin pie. Perfect for impressing guests without stress, or turning a regular Tuesday night into something a little special.
What Ingredients You Will Need
This recipe uses simple, wholesome ingredients to deliver that classic pumpkin pie flavor without the sugar crash or the complicated shopping list. Most of these are probably in your kitchen right now.
- Pumpkin puree (1 cup / 245g) — Make sure you’re using 100% pure pumpkin puree, not pumpkin pie filling. The pie filling already has sugar and spices mixed in, which will throw off the sweetness and texture. I prefer Libby’s for consistent results, but any brand works.
- Large eggs (2 whole eggs plus 1 egg yolk) — The combination of whole eggs and an extra yolk gives the custard its rich, silky texture. The yolk adds fat and emulsifiers that prevent the custard from feeling watery or egg-white-rubbery.
- Heavy cream (1 cup / 240ml) — Full-fat heavy cream is non-negotiable here for the best texture. It creates that luxurious mouthfeel. If you need a dairy-free option, full-fat canned coconut milk works surprisingly well, though the flavor will shift slightly.
- Low-carb sweetener (1/3 cup / 65g granulated erythritol or allulose) — I’ve tested this with both erythritol and allulose. Allulose gives a slightly better texture because it doesn’t recrystallize the same way erythritol can. If you use erythritol, make sure it’s a granulated variety that measures like sugar. Powdered erythritol can make the custard grainy.
- Vanilla extract (1 teaspoon) — Pure vanilla extract makes a difference here. The artificial stuff has a chemical aftertaste that doesn’t play well with the warm pumpkin spices.
- Pumpkin pie spice (1 1/2 teaspoons) — You can use store-bought or make your own blend. I usually mix cinnamon, ginger, nutmeg, and a tiny pinch of cloves. If you’re making your own, the ratio I use is 1 teaspoon cinnamon, 1/4 teaspoon ginger, 1/4 teaspoon nutmeg, and a pinch of cloves.
- Cinnamon (1/2 teaspoon) — Extra cinnamon on top of the pumpkin pie spice because, honestly, you can never have too much cinnamon in a pumpkin dessert.
- Salt (1/4 teaspoon) — Don’t skip this. Salt doesn’t make the custard salty; it enhances the sweetness and deepens the spice flavors.
Equipment Needed
You don’t need much for this recipe, which is part of the appeal. Here’s what you’ll want to have on hand.
- 4 (6-ounce) ramekins — These are the perfect size for individual servings. If you don’t have ramekins, you can use a single 8×8 baking dish and adjust the baking time. The custard will just take a bit longer to set.
- Medium mixing bowl — Any bowl you’d use for whisking eggs will work. Nothing fancy needed.
- Whisk — A balloon whisk is ideal for getting the eggs and cream fully incorporated without over-beating. A fork works in a pinch but takes more elbow grease.
- Large baking dish or roasting pan — For the water bath. This needs to be big enough to hold all four ramekins without them touching each other.
- Kettle or pot for hot water — You’ll need boiling water for the water bath. An electric kettle makes this step effortless.
I’ve made these custard cups in a toaster oven before, and it works fine. Just keep an eye on them because toaster ovens tend to run hot. The water bath is important even in a toaster oven — it helps the custard cook gently and evenly.
Preparation Method
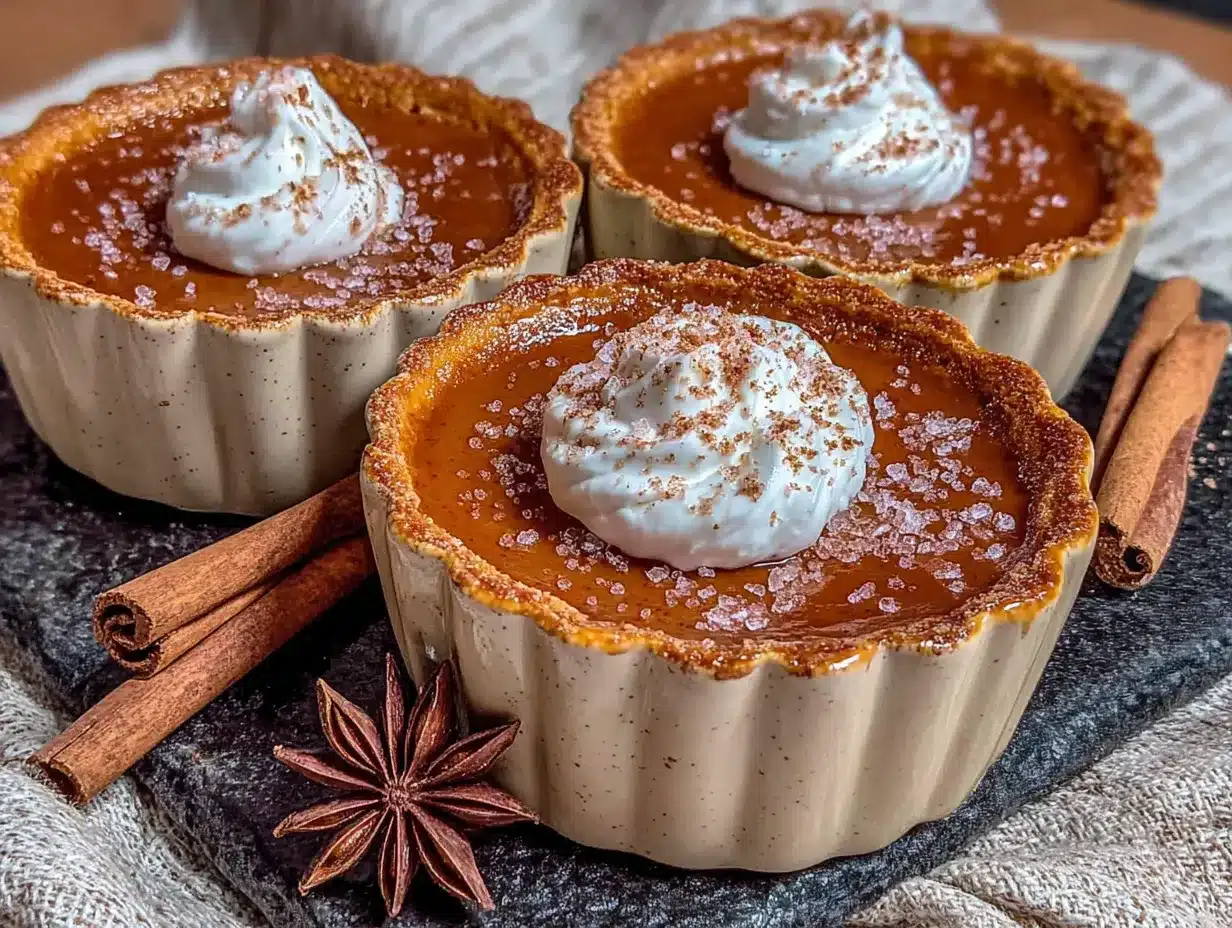
Preheat your oven to 350°F (175°C). While it’s heating up, put a kettle of water on to boil. You’ll need it for the water bath in a few minutes.
In your medium mixing bowl, crack the 2 whole eggs and add the extra egg yolk. Whisk them together until they’re fully combined and slightly frothy — about 30 seconds of vigorous whisking. You’re not trying to incorporate air like you would for a soufflé; you just want the yolks and whites to be completely blended.
Add the cup of pumpkin puree to the bowl. Whisk until the pumpkin is fully incorporated into the eggs. The mixture will look thick and slightly grainy at this point — that’s normal. The pumpkin needs a moment to hydrate and loosen up.
Pour in the heavy cream, sweetener, vanilla extract, pumpkin pie spice, extra cinnamon, and salt. Whisk everything together until the sweetener has dissolved and the mixture is smooth. This takes about a minute. If you’re using erythritol, you might feel a slight grittiness at the bottom of the bowl even after whisking. That’s okay — it will dissolve during baking. With allulose, it should dissolve completely at this stage.
Give the mixture a final taste. I know, I know — you’re tasting raw egg. But just a tiny dab on your fingertip will tell you if the sweetness level is right. It should taste slightly too sweet, because the sweetness will mellow as it bakes. If it tastes just right now, it will be too bland after cooking.
Divide the custard mixture evenly among your four ramekins. I use a 1/3-cup measuring scoop and it fills each ramekin almost perfectly. Place the filled ramekins into your large baking dish. Carefully pour the hot water from your kettle into the baking dish, taking care not to splash water into the custards. Fill the water until it comes about halfway up the sides of the ramekins.
Bake for 28 to 35 minutes, depending on your oven. The custards are done when the edges are set and the centers still jiggle slightly when you gently shake the pan. They should look like firm Jell-O, not liquid. If the centers are still sloshing around, give them another 3 to 5 minutes.
Remove the baking dish from the oven and let the ramekins sit in the water bath for 5 minutes. Then transfer them to a wire rack to cool completely. The custards will continue to set as they cool. You can serve them warm, at room temperature, or chilled. I actually prefer them chilled — the texture firms up beautifully and the flavors meld overnight.
Cooking Tips & Techniques
The water bath is your best friend here. I know it seems fussy, but it’s the difference between a silky custard and a rubbery, curdled mess. The hot water insulates the custards so they cook gently and evenly. If you skip the water bath, the outsides will overcook before the centers are set, and you’ll end up with that unappealing, weepy texture.
I learned this the hard way. The first time I made these, I was in a hurry and thought, “Eh, I’ll just put them in the oven directly.” The result was edible but sad. The edges were firm and the centers were still liquid, and there was this weird layer of watery separation on top. Not cute. Don’t be like me. Use the water bath.
Another mistake I made early on was over-whisking the eggs. You want them combined, but you don’t want to whip a ton of air into them. Air bubbles in custard create a spongy texture, and we’re going for silky here. Whisk until just combined, then stop.
For the most consistent results, bring your eggs and cream to room temperature before starting. Cold ingredients don’t emulsify as well, and you’ll end up with a slightly greasy texture. If you’re short on time, place the eggs in a bowl of warm water for 5 minutes and microwave the cream for 15 seconds.
If you’re unsure whether the custards are done, use the jiggle test. Gently shake the baking dish. The centers should wobble like a firm gelatin, not slosh like soup. They will continue to set as they cool, so it’s better to pull them out slightly underdone than slightly overdone.
Variations & Adaptations
This recipe is surprisingly flexible. Here are a few ways I’ve adapted it depending on what I have on hand or who I’m serving.
Dairy-Free Version: Replace the heavy cream with full-fat canned coconut milk. The texture will be slightly less rich, but still very good. The coconut flavor is subtle and actually pairs nicely with the pumpkin and spices. I’ve also used unsweetened almond milk in a pinch, but the custard was noticeably thinner and less satisfying.
Nut-Free Topping: If you want a little crunch on top, skip the pecans and use toasted pumpkin seeds instead. They add a nice savory contrast to the sweet custard. Just sprinkle them on after baking, right before serving.
Spice Variations: I sometimes add a pinch of cardamom or a tiny scrape of fresh nutmeg for a more complex flavor profile. In the fall, I’ll add a tablespoon of bourbon or dark rum to the custard mixture. It adds warmth without making the dessert boozy.
Single Large Custard: If you don’t have ramekins, pour the mixture into a greased 8×8 baking dish and bake for 35 to 40 minutes. The texture will be slightly less uniform, but it works perfectly for scooping into bowls.
Savory Twist: I once made a version with half the sweetener, added a teaspoon of sage and a pinch of cayenne, and served it alongside roast chicken. It was weirdly good. Don’t knock it till you try it.
Serving & Storage Suggestions
These custard cups are delicious at any temperature. Warm from the oven, they’re soft and almost pudding-like. At room temperature, the texture firms up to something closer to a traditional custard. Chilled, they become dense and creamy — my personal favorite way to eat them.
For serving, I like to top each custard with a dollop of lightly sweetened whipped cream and a dusting of cinnamon. If I’m feeling fancy, I’ll add a few toasted pecans or a drizzle of sugar-free caramel sauce. They’re also wonderful plain — the flavor is strong enough to stand on its own.
These pair beautifully with a hot cup of coffee or a chai latte. For a full fall dessert spread, serve them alongside a slice of low-carb pound cake or a handful of fresh apple slices.
Storage is straightforward. Cover the ramekins with plastic wrap or transfer them to an airtight container. They’ll keep in the refrigerator for up to 5 days. The texture actually improves after a day or two as the flavors meld together.
You can freeze these custards for up to 3 months. Wrap each ramekin tightly in plastic wrap, then foil. Thaw overnight in the refrigerator before serving. The texture will be slightly icier than fresh, but still very good. I don’t recommend microwaving them to reheat — the custard can curdle. If you want them warm, place the ramekin in a 300°F oven for 10 minutes.
Nutritional Information & Benefits
Each custard cup (made with erythritol and heavy cream) contains approximately 210 calories, 18 grams of fat, 5 grams of total carbohydrates, 2 grams of fiber, and 3 grams of net carbs. They also provide 7 grams of protein and a good dose of vitamin A from the pumpkin.
Pumpkin is packed with beta-carotene, which your body converts into vitamin A. It’s also a great source of fiber and antioxidants. The eggs provide high-quality protein and healthy fats that keep you satisfied. This is a dessert that actually has some nutritional merit — not that I’m saying you need to justify eating it.
This recipe is naturally gluten-free, grain-free, and low-carb. It’s suitable for keto, paleo (with maple syrup or honey instead of low-carb sweetener), and diabetic-friendly diets. The main allergens are eggs and dairy, so adjust accordingly if needed.
I love that I can eat one of these after dinner and feel satisfied, not stuffed or guilty. It hits that pumpkin pie craving without the sugar spike and crash. For me, that’s a win.
Conclusion
These Quick Low Carb Pumpkin Pie Custard Cups are proof that dessert doesn’t have to be complicated or carb-heavy to be deeply satisfying. They’re the kind of recipe that makes you feel like you’re getting away with something — all that creamy, spiced, pumpkin flavor in under 30 minutes, with ingredients you probably already have.
I keep coming back to this recipe because it works. It works when I’m tired, it works when I’m craving something sweet, and it works when I need to impress someone without spending hours in the kitchen. My sister, the former pumpkin hater, now requests these for every family gathering. She brings her own ramekins. That’s the kind of endorsement you can’t fake.
Try them this week. Play with the spices, top them with whatever you have on hand, and let me know how they turn out. Did you add something unexpected? Did you serve them to a pumpkin skeptic? Drop a comment below and tell me about it. I read every single one, and honestly, your stories are my favorite part of this whole thing.
Frequently Asked Questions
Can I use pumpkin pie filling instead of pure pumpkin puree?
I wouldn’t recommend it. Pumpkin pie filling already has sugar and spices mixed in, which will throw off the sweetness and texture of the custard. Stick with 100% pure pumpkin puree for the best results. If that’s all you have, reduce the sweetener by half and skip the added spices.
Why did my custard turn out watery?
Watery custard usually means one of two things: either it was underbaked, or the eggs weren’t fully incorporated into the mixture. Make sure you whisk the eggs thoroughly before adding the other ingredients, and always use the jiggle test to check for doneness. The water bath also helps prevent this issue.
Can I make these custard cups in a microwave?
Technically yes, but the texture won’t be as good. Microwave the mixture in a microwave-safe bowl at 50% power in 30-second increments, stirring between each, until the custard is set. It will be more like a pudding than a baked custard. It’s fine in a pinch, but the oven version is worth the wait.
How do I prevent a skin from forming on top?
A skin forms when the custard is exposed to dry heat. To prevent it, place a piece of plastic wrap directly on the surface of the custard while it cools. If you’re serving them warm, just stir the skin back in before adding your topping. It’s harmless, just not pretty.
Can I use a different low-carb sweetener?
Absolutely. Allulose gives the smoothest texture, but erythritol, monk fruit, or stevia blends all work. Just be aware that erythritol can recrystallize slightly as the custard cools, giving it a faintly grainy texture. If that bothers you, stick with allulose or a monk fruit blend that doesn’t contain erythritol.
Pin This Recipe!
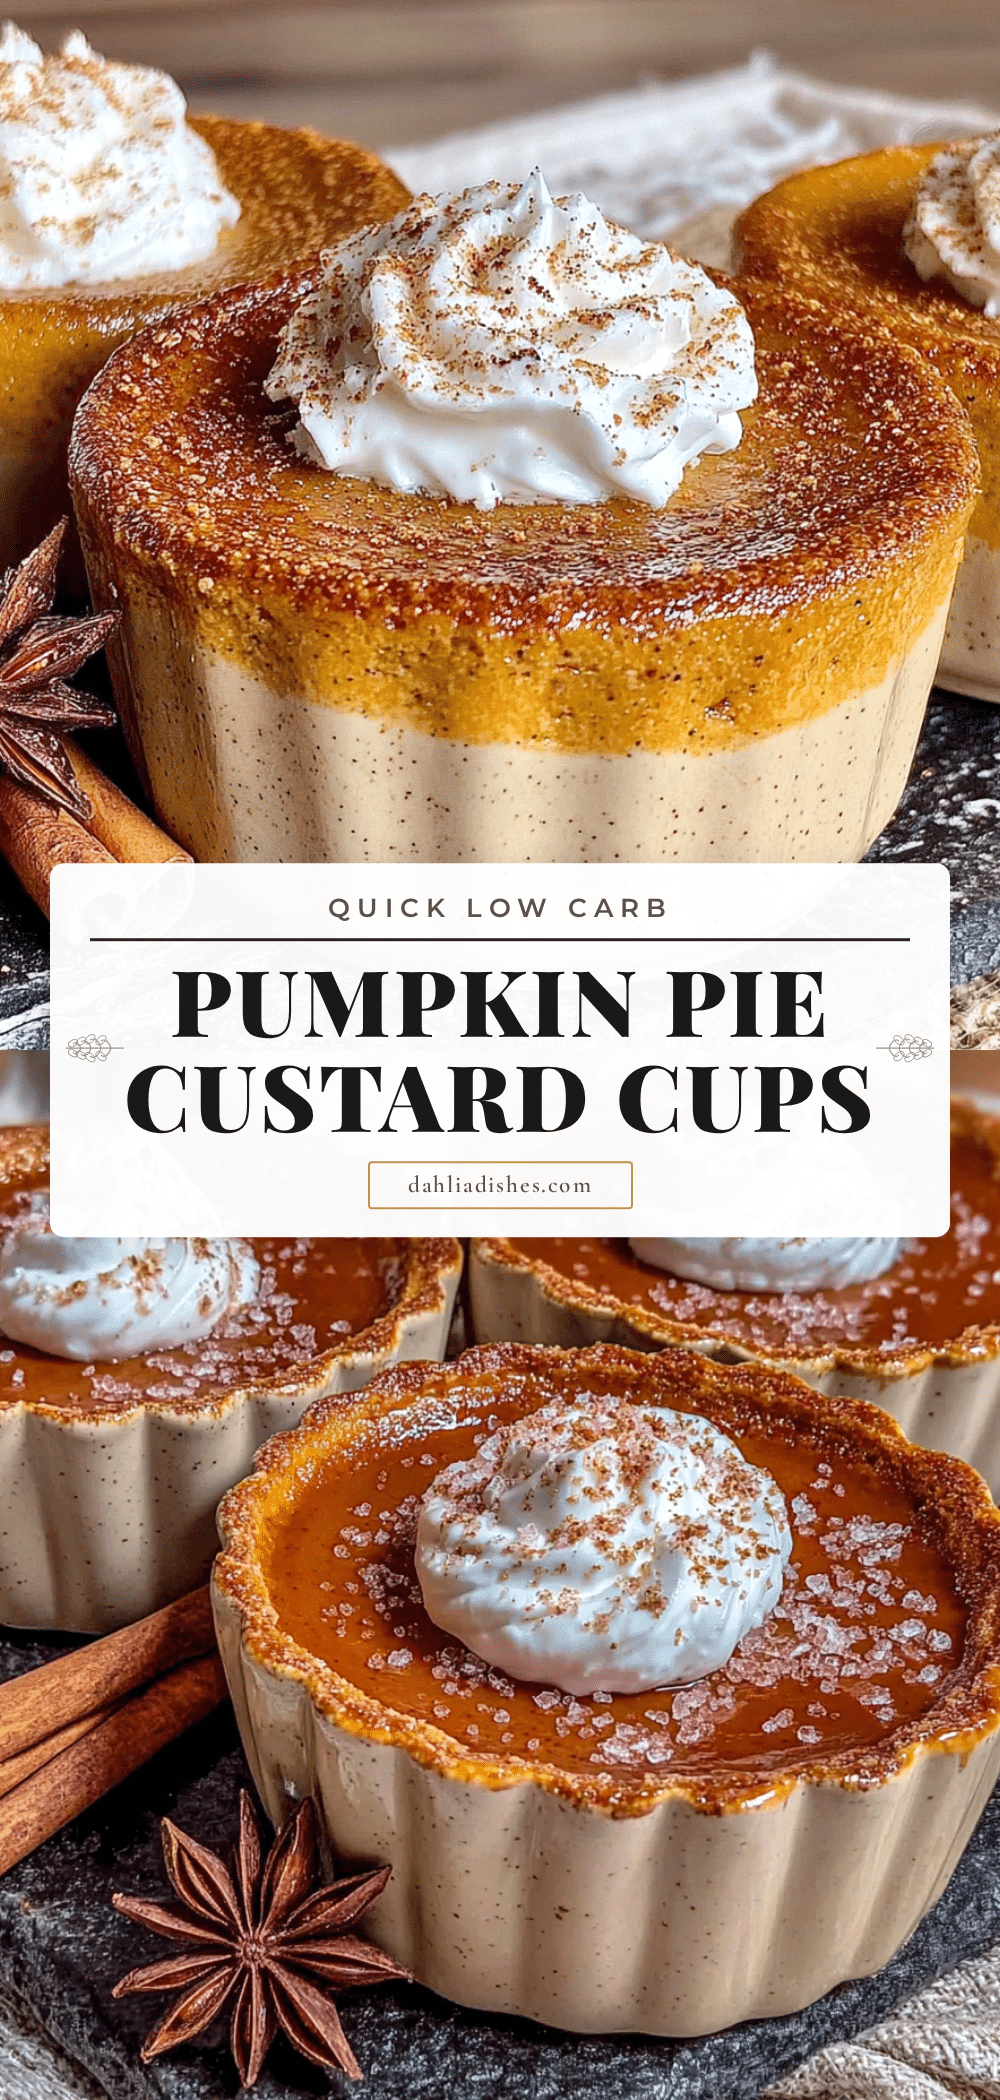
Quick Low Carb Pumpkin Pie Custard Cups – Easy 5-Minute Dessert
These silky, spiced pumpkin custard cups come together in just 5 minutes of prep and taste like the filling of a perfect pumpkin pie, minus the crust and sugar crash. Perfect for a quick weeknight dessert that satisfies pumpkin cravings without the carbs.
- Prep Time: 5 minutes
- Cook Time: 30 minutes
- Total Time: 35 minutes
- Yield: 4 servings 1x
- Category: Dessert
- Cuisine: American
Ingredients
- 1 cup (245g) pumpkin puree (100% pure, not pumpkin pie filling)
- 2 large eggs plus 1 egg yolk
- 1 cup (240ml) heavy cream
- 1/3 cup (65g) granulated erythritol or allulose
- 1 teaspoon vanilla extract
- 1 1/2 teaspoons pumpkin pie spice
- 1/2 teaspoon cinnamon
- 1/4 teaspoon salt
Instructions
- Preheat oven to 350°F (175°C). Put a kettle of water on to boil for the water bath.
- In a medium mixing bowl, whisk 2 whole eggs and 1 egg yolk until fully combined and slightly frothy, about 30 seconds.
- Add pumpkin puree and whisk until fully incorporated. The mixture will look thick and slightly grainy.
- Add heavy cream, sweetener, vanilla extract, pumpkin pie spice, cinnamon, and salt. Whisk until sweetener is dissolved and mixture is smooth, about 1 minute. Taste a tiny dab to check sweetness—it should taste slightly too sweet as it will mellow during baking.
- Divide custard mixture evenly among four 6-ounce ramekins.
- Place ramekins in a large baking dish. Carefully pour hot water into the dish until it reaches halfway up the sides of the ramekins.
- Bake for 28 to 35 minutes, until edges are set and centers jiggle slightly when shaken (like firm Jell-O).
- Remove from oven and let ramekins sit in water bath for 5 minutes, then transfer to a wire rack to cool completely. Serve warm, at room temperature, or chilled.
Notes
The water bath is essential for a silky texture—do not skip it. For best results, bring eggs and cream to room temperature before starting. Custards can be stored in the refrigerator for up to 5 days or frozen for up to 3 months. To reheat, place in a 300°F oven for 10 minutes (do not microwave).
Nutrition
- Serving Size: 1 custard cup
- Calories: 210
- Sugar: 2
- Sodium: 180
- Fat: 18
- Saturated Fat: 10
- Carbohydrates: 5
- Fiber: 2
- Protein: 7
Keywords: low carb pumpkin dessert, keto pumpkin custard, sugar free pumpkin pie, quick pumpkin dessert, easy pumpkin custard


