Love this? Save it for later!
Share the inspiration with your friends
The man at the flea market stall watched me eyeing his overripe bananas for a solid minute before he spoke. “You’re not going to eat those today,” he said, not unkindly. He was right—they were practically liquid inside their speckled skins. I was about to walk away, embarrassed, when he reached under his table and pulled out a crumpled index card. “My wife’s banana bread. No mixer needed. You mash them with a fork until your arm hurts, and you get the best loaf of your life.”
I laughed, bought the bananas for a quarter, and took that stained card home like it was treasure. That was maybe eight years ago, and I’ve made this classic banana bread with walnuts at least twice a month ever since. The first time I tried it, I honestly thought I’d messed something up—the batter was lumpy, the walnuts kept sinking to the bottom, and my kitchen looked like a flour bomb had gone off. But the smell. Oh, the smell. That warm, brown-sugar-and-cinnamon aroma filled every corner of my apartment, and by the time I pulled the loaf out of the oven, golden and cracked on top, I knew I’d found something special.
Let me tell you, there’s a reason this one-bowl banana bread has stayed in my rotation all these years. It’s not fancy. It’s not fussy. It’s just honest, comforting, and deeply satisfying. You don’t need a stand mixer, a hand mixer, or any special tools—just a bowl, a fork, and a little patience. Maybe you’ve been there, staring at sad, spotty bananas on your counter, wondering what to do before they turn into science experiments. This is the answer. And honestly, it’s the kind of recipe that makes you feel like a kitchen pro even on your laziest Sunday afternoon.
I’ve tweaked it over the years—added a pinch more salt here, swapped oil for butter there—but the heart of it remains exactly what that man’s wife wrote on her card. Simple ingredients, real technique, and no shortcuts that compromise flavor. It’s the banana bread I bring to potlucks, the one I bake when friends are coming over for coffee, and the one I make just for myself on a quiet rainy afternoon. Every time I mash those bananas, I think of that flea market conversation. Some recipes arrive through a screen. This one arrived through a stranger’s kindness and a crumpled piece of paper.
Why You’ll Love This Recipe
I’ve tested a lot of banana bread recipes over the years—some that required three bowls, some that called for buttermilk I never had, and some that just fell flat, literally and figuratively. This one is different. It’s the version I keep coming back to, and here’s why I think you’ll love it too.
- No mixer required – You don’t need any fancy equipment. Just a fork, a bowl, and your own two hands. It’s almost meditative, mashing those bananas and stirring everything together by hand.
- Simple, pantry-friendly ingredients – Butter, sugar, eggs, flour, baking soda, salt, bananas, and walnuts. That’s it. No weird extracts, no specialty flours, no trips to three different stores.
- Perfect for using up ripe bananas – You know those bananas that are practically begging to be baked? The ones with black spots and a super-sweet aroma? Those are exactly what this recipe needs. It turns kitchen waste into something wonderful.
- Incredibly moist with a tender crumb – The combination of melted butter and well-mashed bananas creates a texture that’s soft, moist, and absolutely melt-in-your-mouth. It stays that way for days, too.
- Walnuts add the perfect crunch – The toasted walnuts provide a lovely contrast to the soft bread. They add texture, flavor, and a little bit of healthy fat that makes each slice more satisfying.
- Foolproof for beginners – If you’ve never baked banana bread before, this is the recipe to start with. The method is forgiving, and even if you overmix a little (don’t worry, we all do sometimes), it still turns out delicious.
What really sets this classic banana bread apart is the technique. Melting the butter instead of creaming it with sugar creates a denser, more tender loaf—almost like a quick bread crossed with a cake. And mixing by hand means you’re less likely to overwork the gluten, which keeps the crumb soft and delicate. I’ve made this for brunches, bake sales, and quiet Tuesday mornings, and it never disappoints. It’s the kind of recipe that makes you close your eyes after the first bite, not because it’s fancy, but because it tastes exactly like home should taste.
What Ingredients You Will Need
This recipe uses simple, everyday ingredients that work together to create something truly special. Here’s what you’ll need and why each one matters.
For the Banana Bread
- 3 to 4 ripe bananas, mashed (about 1 ½ cups / 340g) – The riper, the better. Look for bananas with brown spots on the peel—they’re sweeter and easier to mash. If your bananas aren’t ripe enough, you can speed things up by baking them at 300°F (150°C) for 15-20 minutes until the skins turn black.
- ⅓ cup (75g) unsalted butter, melted – I prefer unsalted butter so I can control the salt level. Melt it gently in the microwave or on the stovetop and let it cool slightly before using. If you only have salted butter, reduce the added salt to ¼ teaspoon.
- ¾ cup (150g) granulated sugar – Regular white sugar works perfectly here. It dissolves easily into the melted butter and adds just the right amount of sweetness. You can substitute coconut sugar for a deeper flavor, though the texture will be slightly denser.
- 1 large egg, at room temperature – Room-temperature egg incorporates more evenly into the batter. If you forgot to take it out of the fridge, place it in a bowl of warm water for 5 minutes.
- 1 teaspoon vanilla extract – Pure vanilla extract adds warmth and depth. Avoid imitation vanilla if you can—it makes a noticeable difference in the final flavor.
- 1 ½ cups (190g) all-purpose flour – Spoon and level your flour for the most accurate measurement. Scooping directly from the bag can pack in too much flour and make the bread dry. For a whole wheat version, substitute up to half the flour with whole wheat pastry flour.
- 1 teaspoon baking soda – This is the only leavening agent you need. Make sure it’s fresh—test it by dropping a little into vinegar; if it fizzes vigorously, it’s good to go.
- ½ teaspoon salt – Salt enhances all the other flavors and balances the sweetness. Don’t skip it, even if you’re using salted butter.
- ½ teaspoon ground cinnamon (optional) – I almost always add this. It complements the banana flavor beautifully and makes the kitchen smell incredible while baking.
- ½ cup (60g) chopped walnuts – Toast them lightly in a dry skillet over medium heat for 3-4 minutes before adding to the batter. It brings out their nutty flavor and keeps them crunchier in the finished bread. Pecans work wonderfully too.
Ingredient Selection Tips
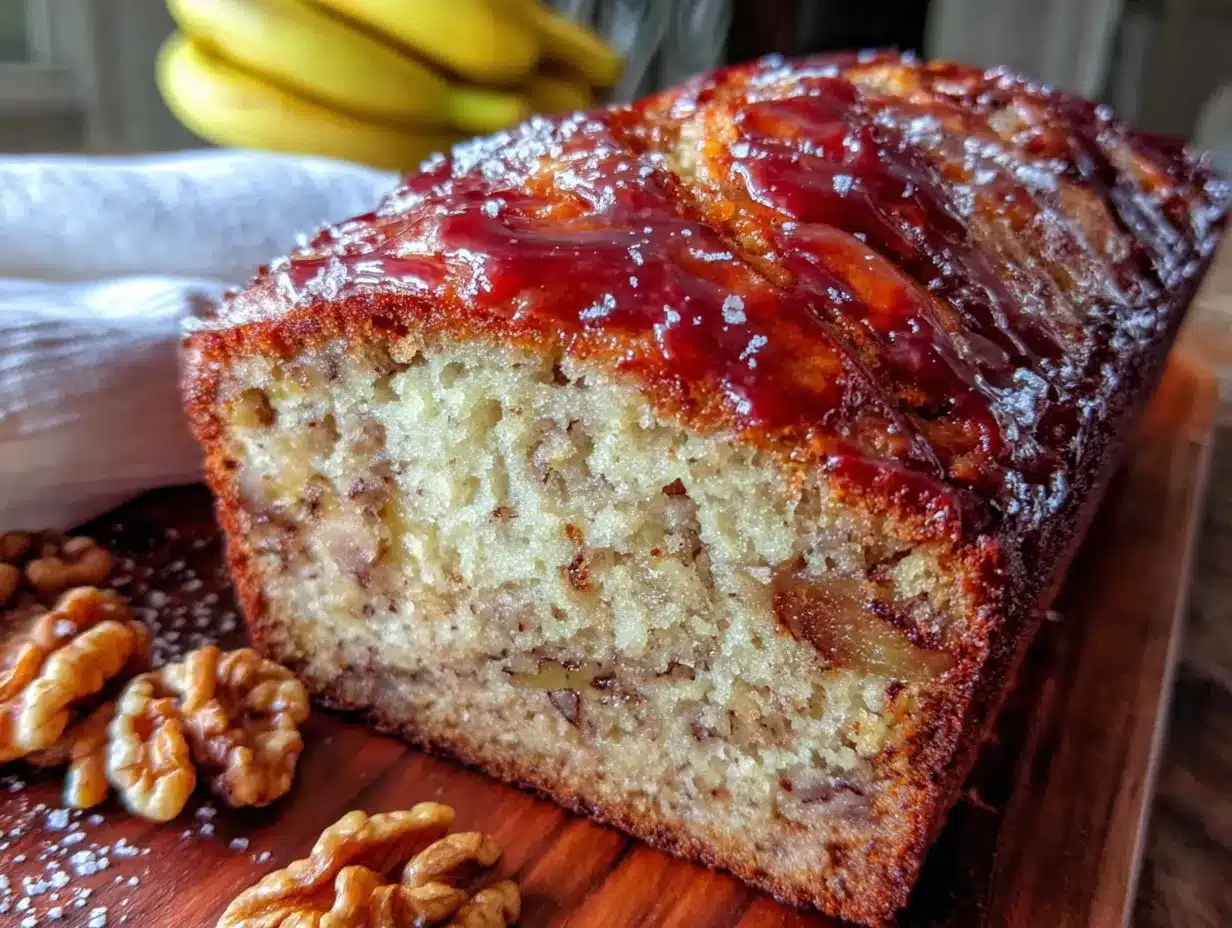
For the best results, I recommend using bananas that are heavily speckled with brown spots—the kind that might look “too ripe” for eating. They mash easily and provide natural sweetness, which means you can use slightly less sugar if you prefer. For the walnuts, look for raw, unsalted pieces. I’ve tried this with pre-chopped walnuts from a bag, and while they work fine, chopping your own from whole halves gives you more control over the size and ensures fresher flavor. My favorite brand for walnuts is Diamond of California, but any fresh, crisp walnut will do.
Equipment Needed
One of the best things about this recipe is how little equipment it requires. You probably already have everything you need in your kitchen.
- Large mixing bowl – Any medium-to-large bowl works. I use a ceramic one because it doesn’t slide around on the counter.
- Fork or potato masher – A fork is perfectly fine for mashing bananas, but a potato masher makes the job faster and gives you a smoother consistency.
- Wooden spoon or rubber spatula – For mixing the batter. A spatula is great for scraping the sides of the bowl.
- 9×5-inch (23x13cm) loaf pan – Standard size for banana bread. If you use an 8×4-inch pan, your loaf will be taller and可能需要增加 baking time by 5-10 minutes.
- Parchment paper – Not strictly necessary, but it makes lifting the finished loaf out of the pan so much easier. I always line my pan with a sling of parchment paper.
- Cooling rack – Allows air to circulate around the loaf so it cools evenly and doesn’t get soggy on the bottom.
- Measuring cups and spoons – For accurate measurements. A kitchen scale is even better, especially for flour.
If you don’t have a loaf pan, you can bake this batter in a 9-inch round cake pan or even as muffins (bake muffins at 350°F for 18-22 minutes). I’ve done both, and they work great. For a budget-friendly option, look for a basic loaf pan at a thrift store—I found my favorite one for two dollars, and it’s been going strong for years.
Preparation Method
Let’s get to the fun part. This recipe comes together in about 10 minutes of active work, and the rest is just waiting for that golden, fragrant loaf to emerge from the oven.
- Preheat your oven to 350°F (175°C). Position a rack in the center of the oven. While it’s heating, grease a 9×5-inch loaf pan with butter or nonstick spray, then line it with a strip of parchment paper that hangs over the two long sides. This creates handles for easy removal later.
- Mash the bananas. In your large mixing bowl, add the peeled bananas. Use a fork or potato masher to mash them until they’re mostly smooth with a few small lumps remaining. You want some texture—completely smooth puree can make the bread a bit dense. It should look like a chunky applesauce consistency. This takes about 2 minutes of steady mashing.
- Add the melted butter and sugar. Pour the slightly cooled melted butter over the mashed bananas, then add the granulated sugar. Stir with your wooden spoon or spatula until everything is well combined. The mixture will look a bit grainy from the sugar, and that’s perfectly fine. Stir for about 30 seconds until it’s uniform.
- Mix in the egg and vanilla. Crack the room-temperature egg into the bowl and add the vanilla extract. Stir until the egg is fully incorporated and you can’t see any streaks of yolk. The batter will look smooth and glossy at this point. Don’t overmix—just stir until it comes together.
- Add the dry ingredients. Sprinkle the flour, baking soda, salt, and cinnamon (if using) over the wet mixture. Use a gentle hand here. Stir slowly, folding the flour into the wet ingredients. Stop as soon as you no longer see dry flour—there should be no streaks of white. A few small lumps are okay. Overmixing at this stage develops gluten and can make your banana bread tough and rubbery.
- Fold in the walnuts. Add the chopped walnuts to the batter and fold them in with just a few strokes. Try to distribute them evenly, but don’t stir more than necessary. If you’re worried about walnuts sinking to the bottom (a common issue), toss them in a tablespoon of flour before adding—this helps them stay suspended in the batter.
- Pour the batter into the prepared pan. Scrape every last bit of batter into the loaf pan using your spatula. Spread it into an even layer. Tap the pan gently on the counter a couple of times to release any air bubbles. The batter should fill the pan about two-thirds full.
- Bake for 55-65 minutes. Place the pan in the preheated oven and bake until the top is deep golden brown and a toothpick inserted into the center comes out clean or with just a few moist crumbs. Start checking at 50 minutes. If the top is browning too quickly (after about 40 minutes), tent the pan loosely with aluminum foil. Every oven is different, so trust your senses—your kitchen will smell amazing when it’s close to done.
- Cool in the pan for 10 minutes. Set the pan on a cooling rack and let it rest. This allows the bread to set and makes it easier to remove without breaking.
- Remove and cool completely. Use the parchment paper sling to lift the loaf out of the pan and transfer it to the cooling rack. Let it cool completely before slicing—about 1 hour. I know it’s tempting to cut into it warm, but slicing too early can make the bread crumbly and gummy. Patience pays off here.
Cooking Tips & Techniques
Over the years, I’ve learned a few things the hard way so you don’t have to. Here are my best tips for perfect banana bread every time.
Don’t overmix the batter. This is the most important tip I can give you. Once you add the flour, mix only until it disappears. Overmixing develops gluten, which leads to a tough, dense loaf instead of a tender, fluffy one. I learned this lesson when I made a brick-like loaf for a book club meeting—still edible, but definitely not my finest moment.
Use room-temperature ingredients. Cold egg can seize the melted butter and create a lumpy batter. Take your egg out of the fridge 30 minutes before you start, or warm it in a bowl of hot water for 5 minutes. Your bananas should also be at room temperature—if they’ve been in the fridge, let them sit out for a while before mashing.
Toast your walnuts. This step takes just a few minutes but makes a huge difference. Spread the walnuts on a baking sheet and toast at 350°F for 5-7 minutes, or until they smell fragrant and are slightly darkened. Let them cool before chopping and adding to the batter. Toasted walnuts stay crunchier in the finished bread and have a deeper, richer flavor.
Check for doneness properly. A toothpick test is reliable, but also look for visual cues. The loaf should be golden brown on top and pulling away slightly from the edges of the pan. If you press the center gently with your finger, it should spring back. If it leaves an indent, it needs more time.
Let it cool completely. I know, I know—warm banana bread with a pat of butter is one of life’s simple pleasures. But cutting into it too soon releases steam that hasn’t finished redistributing, which can make the center gummy. Give it at least an hour on the cooling rack. If you absolutely must have warm banana bread, pop a slice in the microwave for 10 seconds after it’s fully cooled.
Measure flour correctly. Use the spoon-and-level method: fluff the flour in its container, spoon it into your measuring cup, then level it off with a flat edge. Scooping directly from the bag can pack in up to 25% more flour, which will dry out your bread. A kitchen scale is the most accurate option—190 grams is the sweet spot.
Variations & Adaptations
This classic banana bread is wonderfully adaptable. Here are some of my favorite ways to change it up.
Chocolate Chip Banana Bread
Fold in ½ cup (90g) of semi-sweet or dark chocolate chips along with the walnuts. The chocolate melts into little pockets of richness throughout the loaf. I like to reserve a tablespoon of chips and press them into the top of the batter before baking for a pretty presentation.
Vegan Banana Bread
Replace the butter with ⅓ cup (80ml) melted coconut oil or vegetable oil. Use a flax egg (1 tablespoon ground flaxseed mixed with 3 tablespoons water, let sit for 5 minutes) instead of the chicken egg. The texture will be slightly denser but still deliciously moist. Make sure your sugar is vegan-friendly (most granulated sugar is, but some brands use bone char).
Gluten-Free Banana Bread
Substitute the all-purpose flour with a 1:1 gluten-free baking flour blend that contains xanthan gum. I’ve had great results with Bob’s Red Mill Gluten-Free 1-to-1 Baking Flour. The texture is slightly more crumbly but still tender and satisfying. Let the batter rest for 10 minutes before baking to allow the flour to hydrate fully.
Spiced Banana Bread
Add ½ teaspoon ground nutmeg, ¼ teaspoon ground ginger, and a pinch of ground cloves along with the cinnamon. This gives the bread a warm, chai-like flavor that’s especially cozy in fall and winter. I made this version for a Thanksgiving brunch, and it disappeared in minutes.
Nut-Free Option
Simply omit the walnuts. The bread will still be delicious on its own. You can replace the nuts with an equal amount of raisins, dried cranberries, or even shredded coconut for texture. If you’re avoiding nuts due to allergies, make sure all your other ingredients are certified nut-free.
Serving & Storage Suggestions
This banana bread is wonderful in so many ways. Here’s how to enjoy it at its best.
At room temperature – Slice and serve as is. It’s perfect with a cup of coffee or tea in the morning or as an afternoon snack. The flavor actually improves after the first day as the banana flavor deepens.
Warm with butter – Toast a slice lightly and spread with salted butter. The contrast of warm, soft bread and melting butter is absolutely irresistible. I do this on cold mornings when I need a little extra comfort.
With cream cheese frosting – For a dessert-worthy treat, top a slice with a dollop of cream cheese frosting (4 oz cream cheese, 2 tablespoons butter, 1 cup powdered sugar, ½ teaspoon vanilla). It turns banana bread into banana cake, and it’s amazing.
Storage – Wrap the cooled loaf tightly in plastic wrap or aluminum foil and store at room temperature for up to 4 days. Do not refrigerate—it dries out the bread faster. If your kitchen is very warm, you can store it in the fridge, but let slices come to room temperature before eating.
Freezing – Banana bread freezes beautifully. Wrap the completely cooled loaf (or individual slices) tightly in plastic wrap, then in aluminum foil, and place in a freezer-safe bag. It keeps for up to 3 months. To thaw, leave it at room temperature for a few hours or microwave a slice for 20-30 seconds.
Flavor development – Here’s a little secret: this banana bread actually tastes better on day two. The flavors meld and mellow overnight, and the texture becomes even more moist. If you can resist, bake it a day ahead and let it rest wrapped on the counter before serving.
Nutritional Information & Benefits
While banana bread is definitely a treat, it does have some redeeming qualities. Here’s a rough breakdown per slice (based on 10 slices).
- Calories: Approximately 280-320 per slice
- Fat: 12-15g (mostly from butter and walnuts)
- Carbohydrates: 38-42g
- Fiber: 2-3g
- Protein: 4-6g
- Sugar: 18-22g (naturally occurring plus added)
Health benefits of key ingredients: Bananas are rich in potassium, vitamin B6, and vitamin C. They also contain resistant starch, which can support gut health. Walnuts provide omega-3 fatty acids, antioxidants, and magnesium. Using whole wheat pastry flour (if you choose to substitute) adds extra fiber and nutrients.
Dietary considerations: This recipe can be made gluten-free, vegan, or dairy-free with simple substitutions (see Variations section). It contains wheat, eggs, dairy, and tree nuts (walnuts) in its standard form. For a lower-sugar version, reduce the sugar to ½ cup (100g) and use very ripe bananas for natural sweetness.
I personally love that this banana bread feels indulgent but isn’t loaded with refined ingredients. It’s the kind of treat I feel good about eating for breakfast—especially when I’ve packed in those walnuts for healthy fats and protein. Balance, right?
Conclusion
This classic banana bread with walnuts has been a staple in my kitchen for years, and I hope it becomes one in yours too. It’s the recipe I turn to when I need something reliable, something that never fails to make me feel like a capable baker. No mixer, no fuss, no stress—just simple ingredients and a little bit of love.
What I love most about this bread is how forgiving it is. You can use slightly more or less banana, swap the walnuts for chocolate chips, or forget to add the cinnamon, and it still turns out delicious. It’s a recipe that invites you to make it your own. Maybe you’ll add a handful of dried cherries next time, or a swirl of peanut butter through the batter. The possibilities are endless, and that’s the beauty of a good basic recipe.
I’d love to hear how yours turns out. Did you try a variation? Did your family gobble it up in one sitting? Drop a comment below and let me know—I read every single one. And if you’re looking for another easy, no-mixer recipe to add to your rotation, you might enjoy my soft oatmeal chocolate chip cookies or this simple lemon loaf cake for when you’re craving something bright and citrusy. Happy baking, friend. You’ve got this.
Frequently Asked Questions
Can I use frozen bananas for this recipe?
Absolutely! Frozen bananas work great. Thaw them completely at room temperature, then drain off any excess liquid before mashing. The texture will be slightly softer, but the flavor is just as good. Some bakers actually prefer frozen bananas because they break down more easily.
Why did my banana bread sink in the middle?
A sunken center usually means the bread was underbaked. Make sure your oven temperature is accurate (an oven thermometer helps) and that you’re baking long enough. It could also mean too much leavening—double-check that you’re using exactly 1 teaspoon of baking soda. Opening the oven door too early can also cause sinking.
Can I make this into muffins instead of a loaf?
Yes, and they’re wonderful. Grease a 12-cup muffin tin or line with paper liners. Fill each cup about two-thirds full and bake at 350°F for 18-22 minutes, or until a toothpick comes out clean. This recipe makes about 12 standard muffins. They freeze beautifully too.
How do I know when my bananas are ripe enough?
Look for bananas with brown spots or patches on the yellow peel. They should be soft to the touch and have a strong, sweet aroma. If they’re mostly black, they’re still fine—actually ideal for baking. Green or barely yellow bananas won’t have enough sweetness or moisture for good banana bread.
Can I reduce the sugar in this recipe?
Yes, you can reduce the sugar to ½ cup (100g) without major issues, especially if your bananas are very ripe and sweet. The texture will be slightly less tender, and the top may not brown as deeply, but it will still taste great. I’ve made it with ½ cup sugar many times and been perfectly happy with the result.
Pin This Recipe!
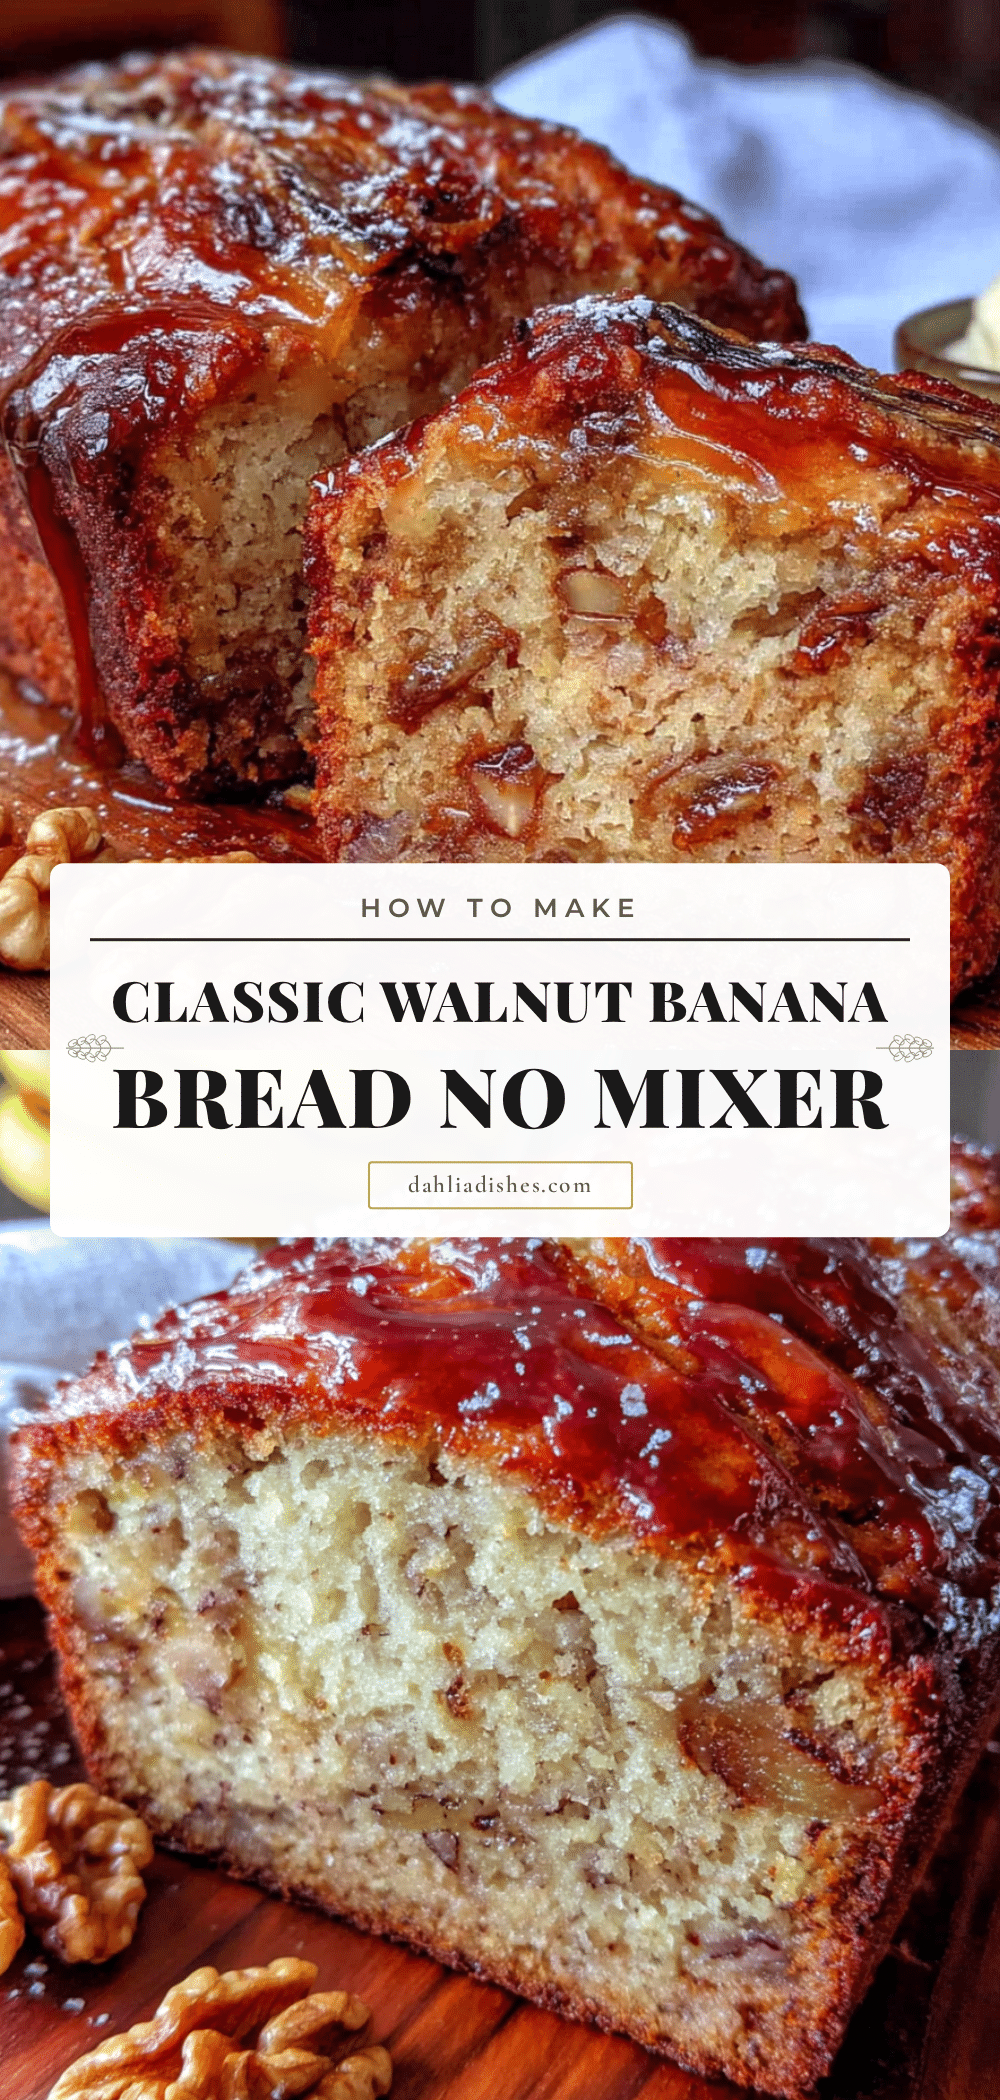
Easy One-Bowl Banana Bread with Walnuts (No Mixer)
This classic banana bread with walnuts is made in one bowl with no mixer required. It’s incredibly moist, tender, and packed with banana flavor and crunchy walnuts.
- Prep Time: 10 minutes
- Cook Time: 55-65 minutes
- Total Time: 1 hour 15 minutes
- Yield: 10 servings 1x
- Category: Dessert
- Cuisine: American
Ingredients
- 3 to 4 ripe bananas, mashed (about 1 ½ cups / 340g)
- ⅓ cup (75g) unsalted butter, melted
- ¾ cup (150g) granulated sugar
- 1 large egg, at room temperature
- 1 teaspoon vanilla extract
- 1 ½ cups (190g) all-purpose flour
- 1 teaspoon baking soda
- ½ teaspoon salt
- ½ teaspoon ground cinnamon (optional)
- ½ cup (60g) chopped walnuts
Instructions
- Preheat your oven to 350°F (175°C). Grease a 9×5-inch loaf pan with butter or nonstick spray, then line it with a strip of parchment paper that hangs over the two long sides.
- In a large mixing bowl, mash the bananas with a fork or potato masher until mostly smooth with a few small lumps remaining.
- Add the melted butter and granulated sugar to the mashed bananas. Stir until well combined.
- Mix in the room-temperature egg and vanilla extract until fully incorporated.
- Sprinkle the flour, baking soda, salt, and cinnamon (if using) over the wet mixture. Stir gently until no dry flour remains. Do not overmix.
- Fold in the chopped walnuts with just a few strokes.
- Pour the batter into the prepared loaf pan and spread into an even layer. Tap the pan gently on the counter to release air bubbles.
- Bake for 55-65 minutes, until a toothpick inserted into the center comes out clean or with a few moist crumbs. If the top browns too quickly, tent with foil after 40 minutes.
- Cool in the pan for 10 minutes, then use the parchment sling to lift the loaf onto a cooling rack. Cool completely before slicing, about 1 hour.
Notes
For best results, use very ripe bananas with brown spots. Toast walnuts before adding for extra crunch. Let the bread cool completely before slicing to avoid a gummy texture. The flavor improves on day two.
Nutrition
- Serving Size: 1 slice
- Calories: 300
- Sugar: 20
- Sodium: 280
- Fat: 13.5
- Saturated Fat: 5
- Carbohydrates: 40
- Fiber: 2.5
- Protein: 5
Keywords: banana bread, easy banana bread, one bowl banana bread, no mixer banana bread, walnut banana bread, classic banana bread


