Love this? Save it for later!
Share the inspiration with your friends
It was 10:47 PM on a rainy Thursday, and the kind of craving that doesn’t ask permission hit me hard. I wanted something warm, something with that unmistakable fall feeling, but I was fresh out of the usual cookie suspects. I didn’t have enough butter for a standard batch, but I had a half-stick of unsalted butter, a can of pumpkin puree that had been hiding in the back of the pantry since October, and a wild idea that arrived with the next clap of thunder: brown the butter first. Honestly, I wasn’t sure if it would work. Pumpkin and brown butter felt like a gamble, but at that hour, I was willing to take it. I mean, what’s the worst that could happen—a midnight baking failure? I’ve had plenty of those.
The kitchen smelled like a weird science experiment for the first few minutes. The butter sizzled and popped, going from yellow to that perfect amber hue, and suddenly the whole room smelled like toasted nuts and caramel. I poured it into the mixing bowl, still warm, and added the pumpkin with a little hope and a lot of faith. The dough came together sticky and fragrant, and I scooped it onto a baking sheet, sliding it into the oven with my fingers crossed. When the timer went off, I pulled out a tray of golden, crackly cookies that looked nothing like I expected—they were puffy, almost cake-like, with edges that crinkled like fall leaves. That first bite? Let me tell you, it was worth every bit of the mess I made on the counter.
Maybe you’ve been there—standing in your kitchen late at night, convinced that you can make something delicious out of almost nothing. That’s how these Cozy Brown Butter Pumpkin Chocolate Chip Cookies were born. They’re the kind of cookie that feels like a hug on a chilly evening, and I’ve been making them ever since, tweaking the recipe until it was just right. The browned butter adds this deep, nutty richness that plays off the earthy pumpkin and the sweet chocolate chips in a way that’s honestly addictive. I keep making them because they remind me that sometimes the best recipes come from the weirdest moments. This one stayed with me, and I think it’ll stay with you too.
Why You’ll Love This Recipe
After testing this recipe about a dozen times—yes, I ate that many cookies in the name of research—I can confidently say these are not your average pumpkin cookies. They have a texture that’s almost magical: soft and tender in the middle with slightly crisp edges, thanks to the brown butter. I’ve brought them to potlucks and family dinners, and they disappear faster than anything else on the table. Here’s why they stand out:
- Quick & Easy: From start to finish, these cookies take about 30 minutes. Perfect for when that pumpkin craving sneaks up on you.
- Simple Ingredients: You probably have most of these in your pantry already. No fancy trips to specialty stores required.
- Perfect for Fall Gatherings: Whether it’s a Halloween party, Thanksgiving dessert table, or just a cozy night in, these cookies fit right in.
- Crowd-Pleaser: I’ve yet to meet someone who doesn’t go back for a second cookie. Kids love them, adults love them—they’re universal.
- Unbelievably Delicious: The combination of nutty brown butter, earthy pumpkin, and melty chocolate chips is next-level comfort food.
What makes this recipe different from the rest is the brown butter technique. Most pumpkin cookie recipes skip this step, but browning the butter first adds a depth of flavor that transforms the entire cookie. It’s not just another pumpkin cookie—it’s the one you’ll crave all season long. Honestly, it’s the kind of cookie that makes you close your eyes after the first bite, savoring that perfect balance of sweet, salty, and nutty. And let’s face it, we all need more of those moments.
What Ingredients You Will Need
This recipe uses simple, wholesome ingredients to deliver bold flavor and satisfying texture without the fuss. Most of these are pantry staples, but a few key players make all the difference. Let’s break down what you’ll need.
For the Cookies
- Unsalted butter, 1/2 cup (1 stick or 113 grams) – Browning this is the star of the show. I recommend using a good quality butter like Kerrygold for the richest flavor.
- Pumpkin puree, 1/2 cup (120 grams) – Make sure it’s 100% pure pumpkin, not pumpkin pie filling. Libby’s is my go-to brand for consistent texture.
- Light brown sugar, 1/2 cup (100 grams), packed – Adds moisture and that deep molasses note that pairs beautifully with pumpkin.
- Granulated sugar, 1/4 cup (50 grams) – Helps with spreading and gives the edges a slight crispness.
- Large egg, 1, at room temperature – Room temperature egg blends more evenly into the batter.
- Vanilla extract, 1 teaspoon – Pure vanilla extract makes a noticeable difference here.
- All-purpose flour, 1 1/2 cups (190 grams) – Spoon and level it for accuracy; don’t scoop directly from the bag.
- Baking soda, 1/2 teaspoon – Helps the cookies puff up nicely.
- Baking powder, 1/2 teaspoon – Adds a little extra lift.
- Ground cinnamon, 1 teaspoon – The warm spice that makes fall baking feel right.
- Ground nutmeg, 1/4 teaspoon – Freshly grated if you have it, but pre-ground works fine.
- Ground ginger, 1/4 teaspoon – Adds a subtle warmth that complements the pumpkin.
- Salt, 1/2 teaspoon – Balances the sweetness and enhances the brown butter flavor.
- Semi-sweet chocolate chips, 1 cup (175 grams) – I prefer Ghirardelli for their rich flavor and melty texture. You can also use dark chocolate chips if you like a less sweet cookie.
Optional Add-Ins
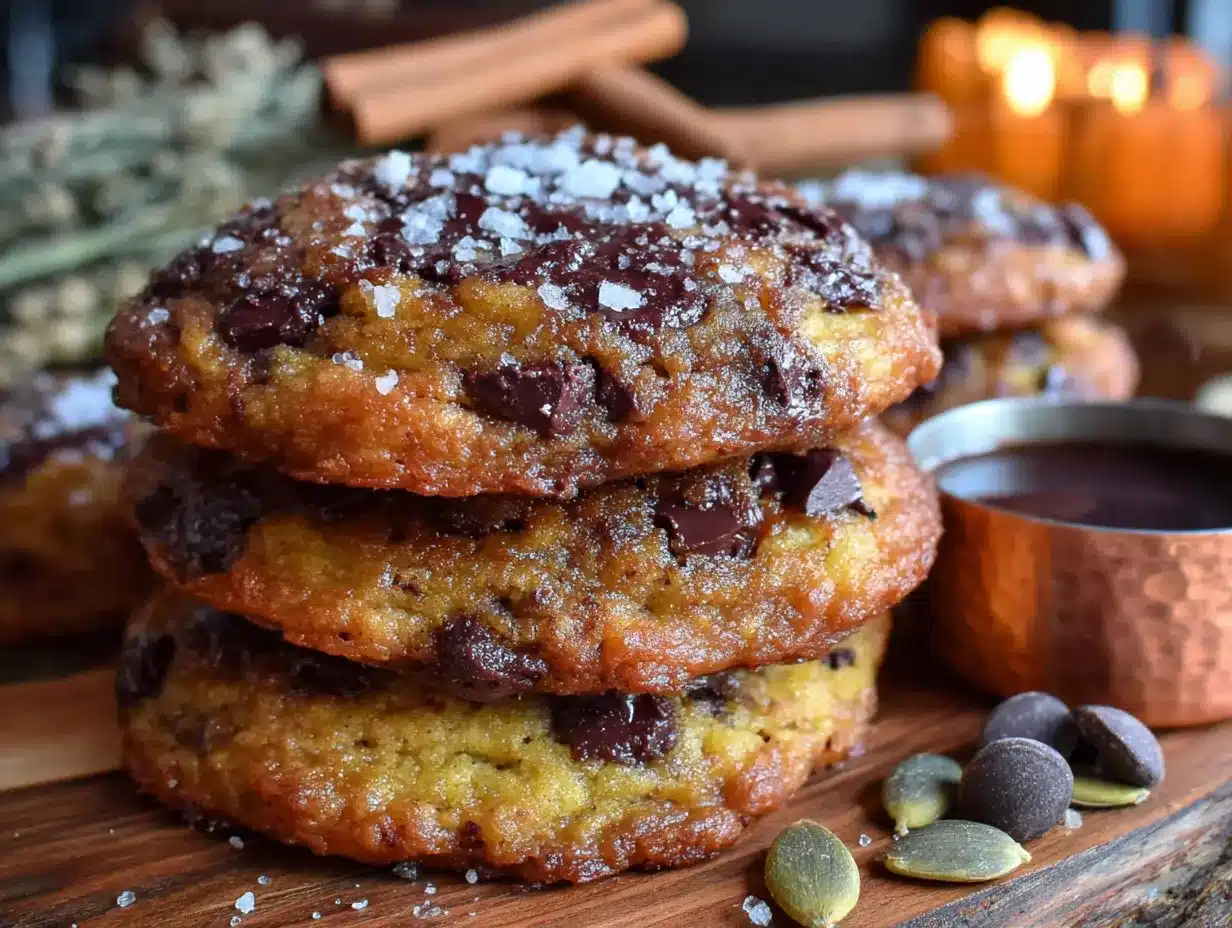
- Chopped pecans or walnuts, 1/2 cup (60 grams) – Adds a lovely crunch if you’re into that.
- White chocolate chips, 1/2 cup (90 grams) – Swap half the semi-sweet chips for a sweeter twist.
- Flaky sea salt, for sprinkling on top – A pinch right before baking takes these to another level.
For the pumpkin, look for a can that’s pure pumpkin puree—not the pre-spiced pie filling. The texture should be thick and smooth, not watery. If you’re using homemade pumpkin puree, make sure to drain it well through a cheesecloth or paper towels to remove excess moisture. Too much water in the pumpkin will make your cookies spread too thin.
As for substitutions, you can use gluten-free all-purpose flour blend (like Bob’s Red Mill 1-to-1) if needed. For a dairy-free option, use vegan butter sticks—just note that the browning process may take a bit longer and the flavor won’t be as nutty. And if you’re out of brown sugar, mix 1/2 cup granulated sugar with 1 tablespoon molasses. It works in a pinch!
Equipment Needed
You don’t need a fancy kitchen to make these cookies, but a few key tools will make the process smoother. Here’s what I use:
- Light-colored saucepan – Essential for browning the butter. A dark pan makes it hard to see the color change, and you might end up with burnt butter. Trust me, I learned this the hard way.
- Mixing bowls – One medium and one large. Glass or stainless steel works best.
- Whisk – For combining the dry ingredients evenly.
- Rubber spatula – For folding everything together without overmixing.
- Baking sheets – Two if you want to bake all the cookies at once. I use Nordic Ware aluminum sheets for even heat distribution.
- Parchment paper or silicone baking mat – Prevents sticking and makes cleanup a breeze.
- Cookie scoop – A 1.5-tablespoon scoop gives you uniform cookies that bake evenly. If you don’t have one, use two spoons.
- Cooling rack – Lets the cookies cool without getting soggy bottoms.
If you don’t have a cookie scoop, no worries. Just use a tablespoon to portion out the dough and roll it into rough balls with your hands. The cookies won’t be perfectly round, but they’ll taste just as good. I’ve also used a fork to flatten them slightly before baking, which gives them that classic crinkled look.
Preparation Method
Let’s get baking! Follow these steps carefully, and you’ll have a batch of these cozy cookies in no time. I’ve included little notes from my own trials so you can avoid the mistakes I made.
- Brown the butter: Place the 1/2 cup unsalted butter in a light-colored saucepan over medium heat. Stir constantly with a rubber spatula or wooden spoon. The butter will melt, then foam, then start to sizzle. After about 4-5 minutes, you’ll see golden brown specks forming at the bottom. The butter will smell nutty and toasty—that’s your cue. Immediately remove it from the heat and pour it into a heatproof bowl to stop the cooking process. Let it cool for 10 minutes. Don’t skip the cooling step, or the hot butter will cook the egg later.
- Mix the wet ingredients: In a large bowl, whisk together the cooled brown butter, 1/2 cup packed light brown sugar, and 1/4 cup granulated sugar until well combined. It should look like a thick, sandy paste. Add the 1/2 cup pumpkin puree, 1 large egg (room temperature), and 1 teaspoon vanilla extract. Whisk until smooth. The mixture might look a little separated at first—that’s normal. Keep whisking until it comes together.
- Combine the dry ingredients: In a medium bowl, whisk together 1 1/2 cups all-purpose flour, 1/2 teaspoon baking soda, 1/2 teaspoon baking powder, 1 teaspoon ground cinnamon, 1/4 teaspoon ground nutmeg, 1/4 teaspoon ground ginger, and 1/2 teaspoon salt. Make sure there are no lumps, especially from the baking soda. I like to sift it if I’m feeling extra thorough.
- Fold it all together: Pour the dry ingredients into the wet ingredients. Using a rubber spatula, fold gently until just combined. A few streaks of flour are okay—overmixing will make the cookies tough. Then fold in 1 cup semi-sweet chocolate chips until evenly distributed. The dough will be soft and slightly sticky, almost like a thick cake batter. Don’t worry, that’s how it should be.
- Chill the dough (optional but recommended): Cover the bowl with plastic wrap and refrigerate for 30 minutes. This step firms up the dough, making it easier to scoop and preventing the cookies from spreading too much. If you’re in a hurry, you can skip this, but your cookies will be flatter. I always chill it—the texture is worth the wait.
- Preheat the oven: While the dough chills, preheat your oven to 350°F (175°C). Line two baking sheets with parchment paper or silicone baking mats.
- Scoop and bake: Using a 1.5-tablespoon cookie scoop, portion out the dough and place it on the prepared baking sheets, spacing them about 2 inches apart. If you want, sprinkle a tiny pinch of flaky sea salt on top of each dough ball. Bake for 10-12 minutes, or until the edges are set and lightly golden. The centers will look slightly underdone—that’s perfect. They’ll continue to set as they cool.
- Cool and enjoy: Let the cookies cool on the baking sheet for 5 minutes. This is crucial—they’re fragile right out of the oven. Then transfer them to a cooling rack to cool completely. Or, you know, eat one while it’s still warm. I won’t judge.
One thing I learned the hard way: don’t overcrowd the baking sheet. I tried baking 12 cookies on one sheet once, and they all merged into one giant cookie pancake. Delicious, sure, but not what we’re going for here. Stick to 6-8 cookies per sheet for best results.
Cooking Tips & Techniques
After making these cookies more times than I care to count, I’ve picked up a few tricks that make a real difference. Let me share them with you.
Master the brown butter. This is the most important step, and it’s easy to mess up. Keep the heat at medium—not high—and stir constantly. The butter can go from perfectly browned to burnt in about 30 seconds. If you see black specks, you’ve gone too far. Start over. It’s frustrating, but burnt butter tastes bitter and will ruin the cookies. Also, use a light-colored pan so you can actually see the color change. I use a stainless steel saucepan, and it works like a charm.
Don’t overmix the dough. I know it’s tempting to keep stirring until everything looks perfectly smooth, but that develops the gluten and makes the cookies tough. Stop mixing as soon as the flour disappears. A few streaks are fine. The dough should look a little shaggy—that’s your sign to stop.
Room temperature ingredients matter. I’ve baked with cold eggs straight from the fridge, and the batter doesn’t come together as smoothly. The pumpkin also blends better if it’s not ice-cold. Take everything out of the fridge about 30 minutes before you start. If you forget, place the egg in a bowl of warm water for 5 minutes to bring it up to temperature.
Chill the dough for better texture. I know I mentioned this, but it’s worth repeating. Chilling the dough for at least 30 minutes solidifies the fat and prevents the cookies from spreading into flat discs. The result is a thicker, softer cookie with a better crumb. If you’re planning ahead, you can chill the dough for up to 48 hours. The flavors actually develop more over time.
Use a cookie scoop for even baking. Uniform-sized cookies bake at the same rate. If you use two spoons, try to make each portion roughly the same size. I’ve had batches where some cookies were underdone and others were overdone just because I eyeballed the portions. A scoop is a small investment that pays off.
Let them cool on the sheet. This was a hard lesson for me. I used to transfer cookies immediately to a cooling rack, and they’d fall apart. The cookies need those 5 minutes on the hot sheet to set properly. Be patient—they’ll be worth it.
Variations & Adaptations
One of the best things about this recipe is how customizable it is. I’ve tried several variations, and they’ve all been delicious in their own way. Here are some ideas to make these cookies your own.
Gluten-Free Version: Swap the all-purpose flour with a 1-to-1 gluten-free baking flour blend. I’ve used Bob’s Red Mill and King Arthur Flour blends with great results. The texture will be slightly more tender, but the flavor is spot on. Just make sure the blend contains xanthan gum for structure.
Vegan Adaptation: Use vegan butter sticks (like Miyoko’s or Earth Balance) for browning, and replace the egg with a flax egg (1 tablespoon ground flaxseed mixed with 3 tablespoons water, let sit for 5 minutes). The cookies will be a bit softer and won’t spread as much, but they’re still delicious. I made this version for a vegan friend, and she asked for the recipe immediately.
Spice It Up: If you love warm spices, add 1/4 teaspoon ground cloves and 1/8 teaspoon ground allspice to the dry ingredients. It gives the cookies a chai-like flavor that’s perfect for fall. I did this on a whim one rainy afternoon, and it’s become my favorite variation.
Chocolate Swap: Not a fan of semi-sweet? Use milk chocolate chips for a sweeter cookie, or dark chocolate chips (60-70% cacao) for a more intense flavor. White chocolate chips also work beautifully with the pumpkin and brown butter—it’s a dreamy combination.
Add Some Crunch: Fold in 1/2 cup of chopped pecans or walnuts along with the chocolate chips. Toast them first in a dry pan for 3-4 minutes to bring out their flavor. The crunch contrasts nicely with the soft cookie texture.
Pumpkin Spice Latte Twist: Add 1 tablespoon of instant espresso powder dissolved in 1 teaspoon of hot water to the wet ingredients. The coffee flavor enhances the pumpkin and chocolate without making the cookies taste like coffee. It’s subtle but noticeable.
Serving & Storage Suggestions
These cookies are best enjoyed warm, when the chocolate chips are still melty and the brown butter flavor is at its peak. But they’re pretty fantastic at room temperature too. Here’s how to serve and store them.
Serving Temperature: Serve them slightly warm or at room temperature. If you’ve stored them, pop one in the microwave for 10-15 seconds to bring back that just-baked feel. I’ve also been known to eat them straight from the freezer—don’t knock it till you try it.
Presentation Ideas: Arrange them on a rustic wooden board or a simple white platter. Sprinkle a little flaky sea salt on top right before serving for a professional touch. They also look beautiful stacked in a mason jar tied with a ribbon—perfect for gifting during the holidays.
Complementary Pairings: These cookies pair wonderfully with a hot cup of chai tea, a pumpkin spice latte, or a cold glass of milk. For a grown-up treat, serve them with a scoop of vanilla ice cream and a drizzle of caramel sauce. It’s dessert heaven.
Storage Instructions: Store the cookies in an airtight container at room temperature for up to 5 days. Place a piece of bread in the container to keep them soft—the cookies will absorb the moisture from the bread. I learned this trick from my grandmother, and it works like magic.
Freezing Instructions: These cookies freeze beautifully. You can freeze the baked cookies in a freezer-safe bag for up to 3 months. Thaw at room temperature for about 30 minutes. Alternatively, freeze the dough balls on a baking sheet, then transfer them to a bag. Bake from frozen, adding 2-3 minutes to the baking time. This way, you can have fresh cookies anytime the craving hits.
Flavor Development: Honestly, these cookies taste even better the next day. The flavors meld together overnight, and the texture becomes even more tender. So if you can resist eating them all on day one, you’re in for a treat on day two.
Nutritional Information & Benefits
While these cookies are definitely a treat, they do offer some nutritional benefits thanks to the pumpkin and wholesome ingredients. Here’s a rough estimate per cookie (based on 24 cookies):
| Nutrient | Amount per Cookie |
|---|---|
| Calories | 145 |
| Total Fat | 7g |
| Saturated Fat | 4g |
| Cholesterol | 20mg |
| Sodium | 85mg |
| Total Carbohydrates | 20g |
| Dietary Fiber | 1g |
| Sugars | 12g |
| Protein | 2g |
| Vitamin A | 15% DV |
Pumpkin is packed with vitamin A, which supports eye health and immune function. It’s also a good source of fiber, which aids digestion. The brown butter adds healthy fats, and the chocolate chips provide a little antioxidant boost from the cocoa. Of course, these are still cookies—enjoy them in moderation as part of a balanced diet.
Dietary Considerations: This recipe contains dairy (butter), eggs, and gluten (flour). For a dairy-free version, use vegan butter. For a gluten-free version, use a gluten-free flour blend. The recipe is naturally nut-free if you skip the optional pecans or walnuts.
Potential Allergens: Wheat, dairy, eggs. If you’re serving these at a gathering, it’s always a good idea to label them so guests with allergies can make informed choices.
From my perspective, I love that these cookies use real, recognizable ingredients. There’s nothing artificial here—just butter, sugar, pumpkin, and chocolate. It’s comfort food made with love, and that counts for something.
Conclusion
These Cozy Brown Butter Pumpkin Chocolate Chip Cookies are more than just a recipe—they’re a little piece of fall you can hold in your hand. The nutty brown butter, the earthy pumpkin, the melty chocolate chips—every bite is a reminder that the best things in life are often the simplest. I’ve made these cookies for friends, family, and even just for myself on a quiet Tuesday night, and they never disappoint.
I hope you’ll give them a try and make them your own. Maybe you’ll add a pinch of extra cinnamon, swap the chocolate for white chocolate, or sprinkle them with sea salt. Whatever you do, don’t be afraid to experiment. That’s how the best recipes are born—in late-night kitchen experiments and happy accidents.
If you make these cookies, I’d love to hear about it. Leave a comment below and tell me how they turned out, or share your own twist on the recipe. Tag me in your photos on social media—I’m always looking for baking inspiration. And if you’re craving more cozy fall recipes, check out my pumpkin bread recipe or these apple cider donuts for more seasonal treats.
Happy baking, my friend. May your kitchen smell like browned butter and your heart feel full.
Frequently Asked Questions
Can I use pumpkin pie filling instead of pumpkin puree?
No, I wouldn’t recommend it. Pumpkin pie filling is pre-sweetened and spiced, which will throw off the sugar and spice balance in this recipe. Stick with 100% pure pumpkin puree for the best results. If you only have pie filling, reduce the sugar by half and skip the added spices, but the texture may still be off.
Why did my cookies turn out flat?
Flat cookies usually happen for a few reasons: the butter was too warm when you mixed it, the dough wasn’t chilled, or you used too much pumpkin puree. Make sure to cool the browned butter for at least 10 minutes, and chill the dough for 30 minutes before baking. Also, measure your pumpkin carefully—too much moisture will cause spreading.
Can I make the dough ahead of time?
Absolutely! You can refrigerate the dough for up to 48 hours. Just cover it tightly with plastic wrap. The flavors will actually deepen over time. You can also freeze the dough balls for up to 3 months. Bake from frozen, adding 2-3 minutes to the baking time.
How do I know when the cookies are done baking?
Look for set edges that are lightly golden, while the centers still look slightly soft and underdone. They’ll continue to bake on the hot sheet as they cool. If you wait until the centers look fully set, the cookies will be overbaked and dry. Trust the 10-12 minute mark and the visual cues.
Can I use whole wheat flour instead of all-purpose flour?
You can, but the cookies will be denser and less tender. I’d recommend using half whole wheat and half all-purpose flour for a better texture. Whole wheat flour absorbs more liquid, so you may need to add an extra tablespoon of pumpkin puree if the dough seems too dry.
Pin This Recipe!
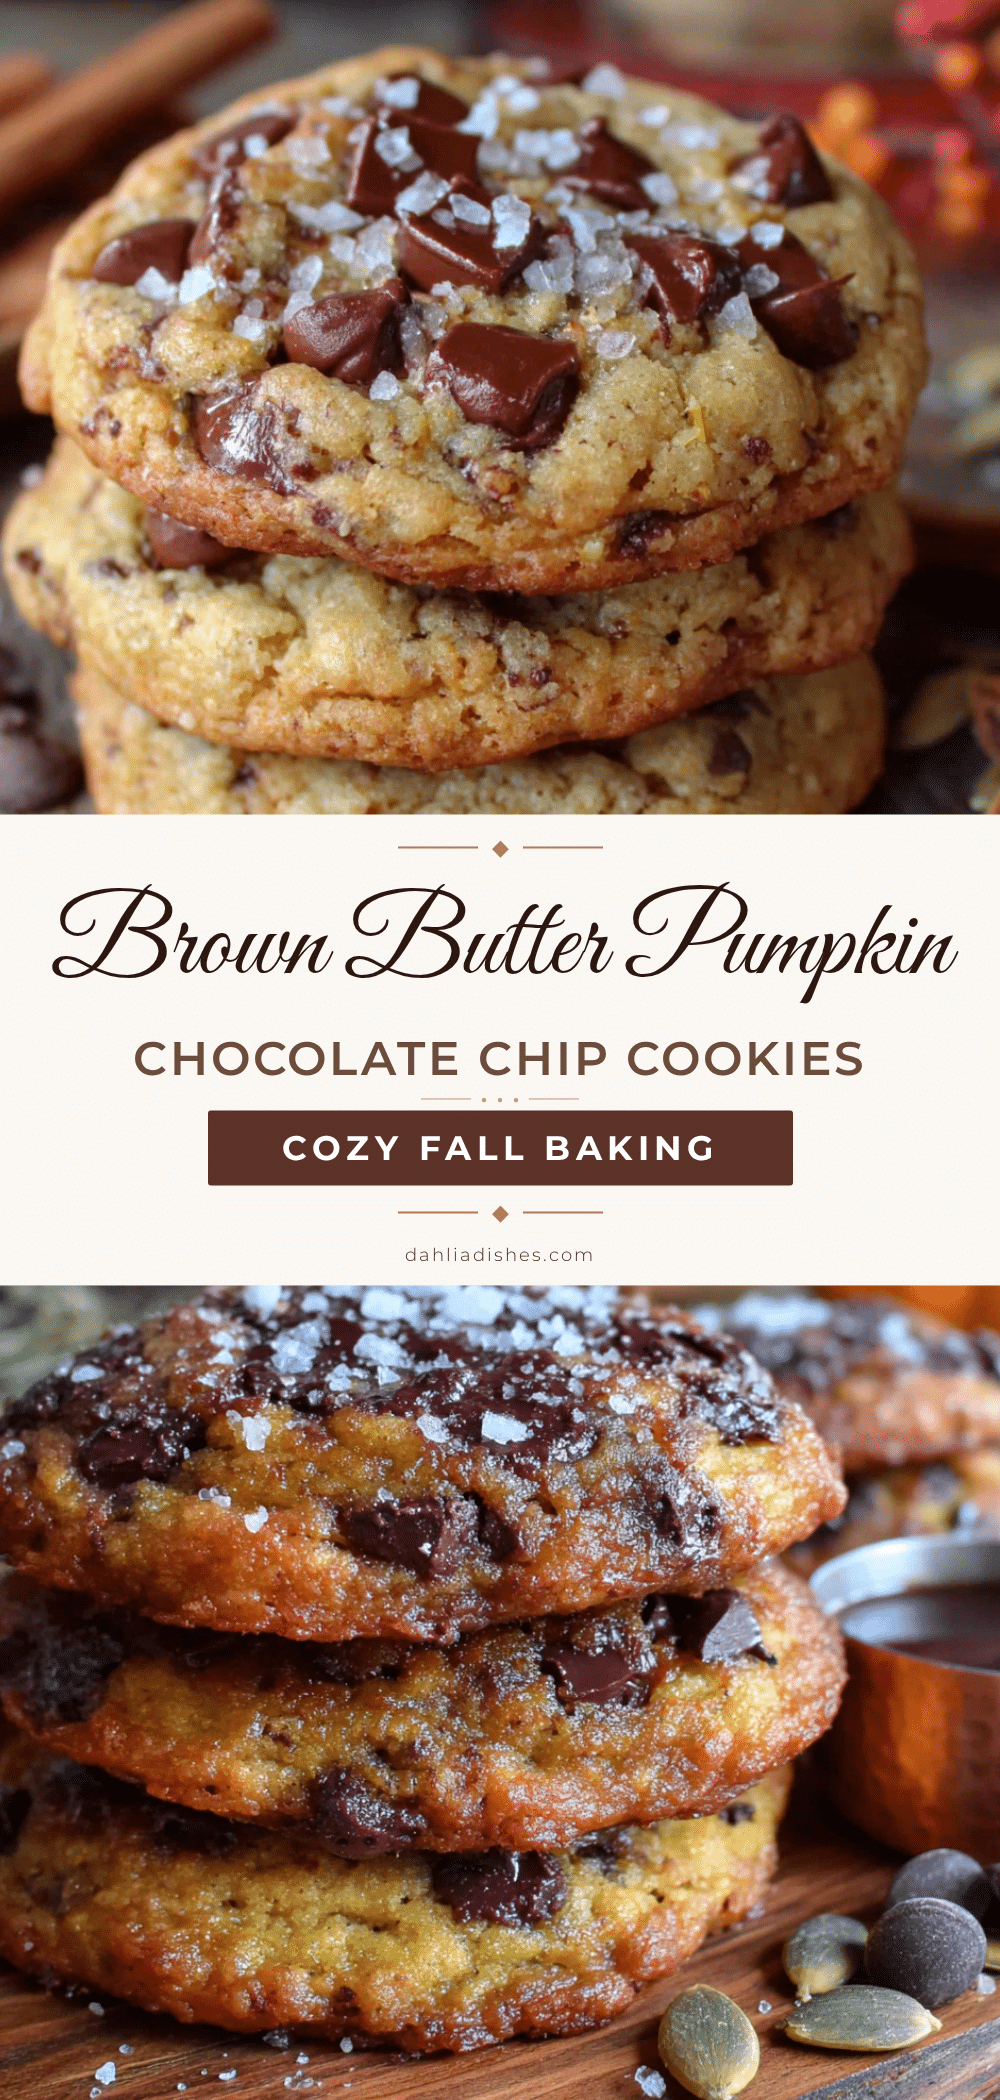
Cozy Brown Butter Pumpkin Chocolate Chip Cookies
These soft, cake-like cookies combine nutty browned butter with earthy pumpkin and melty chocolate chips for a cozy fall treat that’s quick and easy to make.
- Prep Time: 15 minutes
- Cook Time: 12 minutes
- Total Time: 30 minutes (plus optional 30 minutes chilling)
- Yield: 24 cookies 1x
- Category: Dessert
- Cuisine: American
Ingredients
- 1/2 cup (1 stick or 113 grams) unsalted butter
- 1/2 cup (120 grams) pumpkin puree (100% pure, not pie filling)
- 1/2 cup (100 grams) packed light brown sugar
- 1/4 cup (50 grams) granulated sugar
- 1 large egg, at room temperature
- 1 teaspoon vanilla extract
- 1 1/2 cups (190 grams) all-purpose flour
- 1/2 teaspoon baking soda
- 1/2 teaspoon baking powder
- 1 teaspoon ground cinnamon
- 1/4 teaspoon ground nutmeg
- 1/4 teaspoon ground ginger
- 1/2 teaspoon salt
- 1 cup (175 grams) semi-sweet chocolate chips
- Optional: 1/2 cup (60 grams) chopped pecans or walnuts
- Optional: 1/2 cup (90 grams) white chocolate chips
- Optional: flaky sea salt for sprinkling
Instructions
- Brown the butter: Place 1/2 cup unsalted butter in a light-colored saucepan over medium heat. Stir constantly until the butter melts, foams, and turns golden brown with a nutty aroma (about 4-5 minutes). Immediately remove from heat and pour into a heatproof bowl. Let cool for 10 minutes.
- Mix the wet ingredients: In a large bowl, whisk together the cooled brown butter, 1/2 cup packed light brown sugar, and 1/4 cup granulated sugar until well combined. Add 1/2 cup pumpkin puree, 1 large egg (room temperature), and 1 teaspoon vanilla extract. Whisk until smooth.
- Combine the dry ingredients: In a medium bowl, whisk together 1 1/2 cups all-purpose flour, 1/2 teaspoon baking soda, 1/2 teaspoon baking powder, 1 teaspoon ground cinnamon, 1/4 teaspoon ground nutmeg, 1/4 teaspoon ground ginger, and 1/2 teaspoon salt.
- Fold it all together: Pour the dry ingredients into the wet ingredients. Fold gently with a rubber spatula until just combined. Fold in 1 cup semi-sweet chocolate chips until evenly distributed. The dough will be soft and slightly sticky.
- Chill the dough (optional but recommended): Cover the bowl with plastic wrap and refrigerate for 30 minutes.
- Preheat the oven to 350°F (175°C). Line two baking sheets with parchment paper or silicone baking mats.
- Scoop and bake: Using a 1.5-tablespoon cookie scoop, portion out the dough and place on prepared baking sheets, spacing 2 inches apart. Optionally sprinkle with flaky sea salt. Bake for 10-12 minutes, until edges are set and lightly golden; centers will look slightly underdone.
- Cool and enjoy: Let cookies cool on the baking sheet for 5 minutes, then transfer to a cooling rack to cool completely.
Notes
For best results, chill the dough for 30 minutes to prevent spreading. Use a light-colored pan to monitor browning. Do not overmix the dough. Let cookies cool on the baking sheet for 5 minutes before transferring.
Nutrition
- Serving Size: 1 cookie
- Calories: 145
- Sugar: 12
- Sodium: 85
- Fat: 7
- Saturated Fat: 4
- Carbohydrates: 20
- Fiber: 1
- Protein: 2
Keywords: pumpkin cookies, brown butter cookies, chocolate chip cookies, fall cookies, easy pumpkin cookies


