Love this? Save it for later!
Share the inspiration with your friends
My sister-in-law, Jen, wasn’t trying to win any awards that Tuesday. I’d stopped by to drop off a book I’d borrowed, and the smell of something warm and cheesy hit me before I even got my coat off. It wasn’t quite pizza, and it wasn’t quite a quesadilla—it was this beautiful, crispy hybrid sitting on her counter, cut into neat little wedges. She just shrugged and said, “Oh, it’s just what the kids are eating for lunch.”
Honestly, it stopped me cold. Here I was, struggling every morning to pack a lunch that my own little one would actually eat, and Jen had just whipped up this genius pizza quesadilla like it was nothing. The cheese was perfectly melted, the tortilla was shatteringly crisp, and it was packed with all the familiar flavors of a pizza my kid usually pushes around on her plate. I mean, maybe you’ve been there—staring at a lunchbox full of returned food, wondering what magic other parents are using.
That Tuesday changed my lunch-packing game forever. This easy pizza quesadilla lunchbox for picky eaters became my secret weapon. It takes ten minutes, uses ingredients I always have on hand, and it never comes back home uneaten. That’s the kind of recipe that stays with you, you know?
Why You’ll Love This Recipe
Let’s be real—getting a lunchbox to come back empty can feel like a small miracle. This recipe makes that miracle happen over and over. I’ve tested it on my own kids, my neighbor’s kids, and even a few skeptical adults at a playdate. It’s that good.
- Quick & Easy: From start to finish, this comes together in under 15 minutes. Perfect for those chaotic mornings when you’re already running late.
- Simple Ingredients: No fancy grocery trips. You likely have tortillas, cheese, sauce, and a few toppings in your kitchen right now.
- Perfect for Lunchboxes: It travels beautifully, stays crispy (if packed right), and is just as delicious cold or at room temperature.
- Crowd-Pleaser: Even the pickiest eaters gobble these up. It’s pizza they can hold, dip, and enjoy without the fuss of a crust.
- Unbelievably Delicious: The texture is the real star—crispy on the outside, gooey on the inside, with that familiar pizza flavor that hits every time.
What makes this different from just another quesadilla? It’s the technique. I use a dry pan to get that extra-crisp tortilla without any oil, and I layer the cheese directly on the tortilla so it acts like glue. This isn’t just another version—it’s the best version I’ve found after many, many trials.
This recipe isn’t just good—it’s the kind that makes you close your eyes after the first bite. It’s comfort food reimagined for the lunchbox set, and it works like a charm.
What Ingredients You Will Need
This recipe uses simple, pantry-friendly ingredients to deliver that classic pizza flavor without any stress. You can mix and match based on what your kids actually like.
- Flour tortillas (2 per quesadilla) – I prefer medium-sized (8-inch) for the perfect lunchbox portion. Corn tortillas work too, but they’re smaller and a bit less flexible.
- Pizza sauce (about 2 tablespoons per quesadilla) – Look for a brand with lower sugar if you’re watching that. I like Rao’s or Muir Glen for clean ingredients.
- Shredded mozzarella cheese (about 1/3 cup per quesadilla) – Freshly shredded melts better than pre-shredded, which has anti-caking agents. But honestly, pre-shredded works in a pinch.
- Pepperoni slices (optional, about 6-8 per quesadilla) – I use turkey pepperoni for a lighter option. You can also leave these out entirely.
- Butter or olive oil (optional, for brushing the pan) – I actually skip this most of the time to keep them less greasy for lunchboxes.
- Optional toppings: Diced bell peppers, mushrooms, olives, cooked sausage crumbles, or even a sprinkle of Italian seasoning.
I always recommend using a good-quality tortilla—store-brand ones can be a bit thin and tear easily. Mission or La Banderita are my go-to brands for that perfect fold without cracking.
Equipment Needed
You don’t need a fancy kitchen to pull this off. Most of this is probably already in your drawers.
- Non-stick skillet or griddle (10 or 12-inch works best)
- Spatula – A thin, flexible one helps flip without breaking the quesadilla.
- Butter knife or pizza cutter – For slicing into wedges.
- Cutting board – To rest the quesadilla before cutting.
- Lunchbox container – A wide, shallow one keeps the wedges from getting squished.
If you don’t have a non-stick pan, a well-seasoned cast iron skillet works beautifully. Just make sure it’s hot enough before you add the tortilla.
Preparation Method
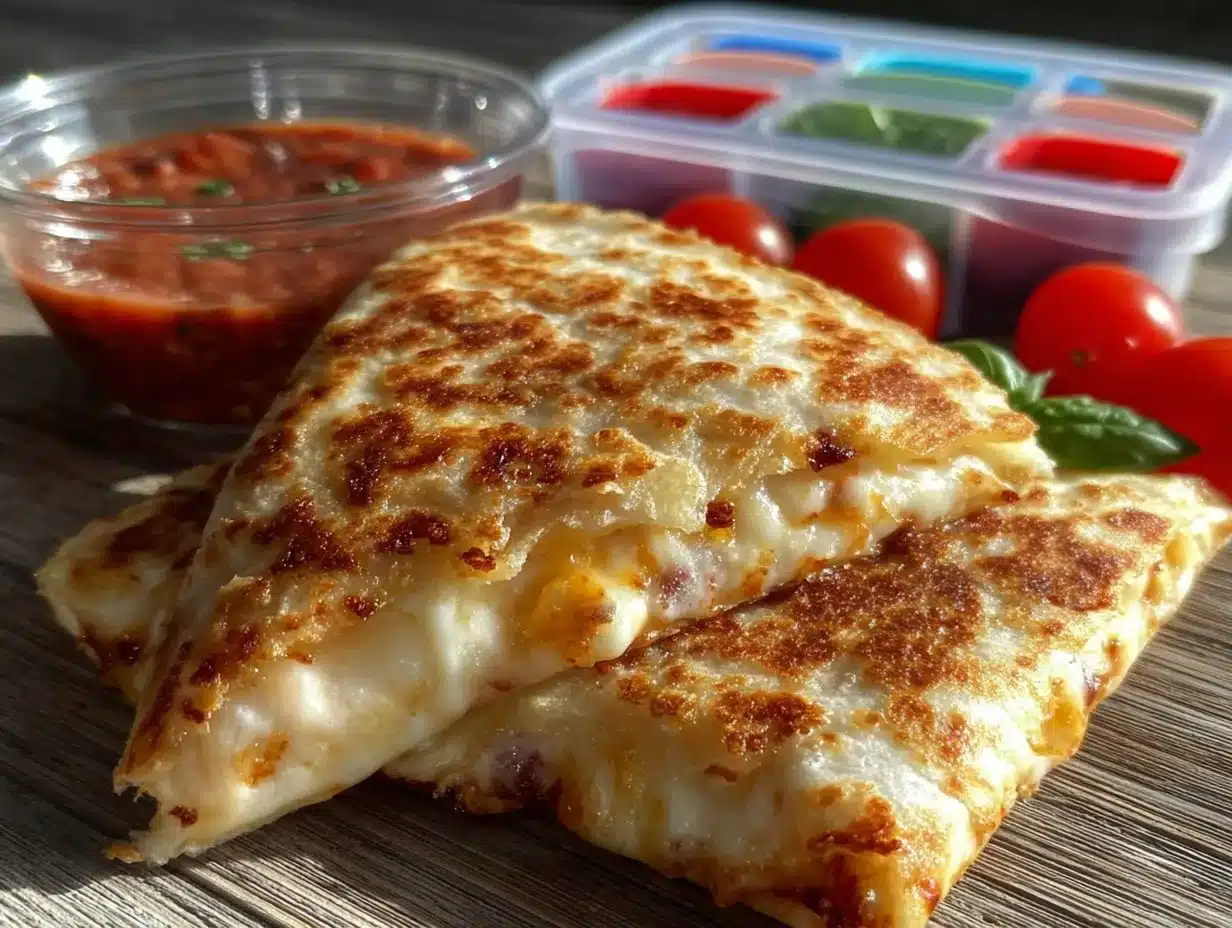
- Heat your pan. Place your non-stick skillet over medium heat. Let it warm up for about 2 minutes. You want it hot enough to sizzle, but not smoking.
- Assemble the quesadilla. Lay one tortilla flat on a clean surface. Spread about 2 tablespoons of pizza sauce evenly over the entire surface, leaving a small border around the edge. Sprinkle a generous layer of shredded mozzarella (about 1/4 cup) over the sauce. Add your pepperoni slices or any other toppings. Top with another thin layer of cheese—this helps glue the top tortilla on. Place the second tortilla on top and press down gently.
- Cook the first side. Carefully transfer the assembled quesadilla to the hot pan. Let it cook for 3-4 minutes, or until the bottom is golden brown and crispy. You’ll see the cheese starting to melt around the edges.
- Flip carefully. Use your spatula to gently lift one edge. If it’s not golden yet, give it another minute. Slide the spatula under the entire quesadilla and flip it quickly but gently. Cook the other side for another 2-3 minutes, until golden and the cheese is fully melted.
- Rest and slice. Transfer the cooked quesadilla to a cutting board. Let it rest for 1-2 minutes—this keeps the cheese from sliding out when you cut. Use a pizza cutter or sharp knife to slice into 4 or 6 wedges.
- Pack for lunch. Let the wedges cool completely before packing. Place them in a single layer in your lunchbox container. If you stack them, put a piece of parchment paper between layers to keep them from sticking.
Pro tip: For extra crispy results, don’t butter the pan. The dry heat creates that shatteringly crisp exterior without any greasiness. I learned this the hard way after a few soggy attempts!
Cooking Tips & Techniques
I’ve made more of these than I can count, and I’ve learned a few things along the way. Here’s what works best.
Don’t overstuff. It’s tempting to pile on the toppings, but too much filling makes the quesadilla hard to flip and the tortilla can tear. Stick to a thin, even layer.
Low and slow is a myth here. Medium heat is your friend. Too low and the tortilla will dry out before the cheese melts. Too high and you’ll burn the outside while the inside stays cold.
Let it rest. I cannot stress this enough. Cutting into a hot quesadilla immediately is a recipe for a cheesy mess. That one-minute rest is crucial for clean slices.
Make them ahead. You can cook these in the morning and let them cool completely before packing. They actually taste great at room temperature, and the texture holds up surprisingly well.
One of my biggest failures? I once tried to microwave a leftover quesadilla for a quick lunch. Disaster. The tortilla turned to rubber. Always reheat in a dry pan or toaster oven for that crispy texture.
Variations & Adaptations
This recipe is endlessly adaptable. Here are a few ways I’ve changed it up depending on what’s in my fridge.
- Vegetarian version: Load it up with sautéed mushrooms, bell peppers, onions, and olives. My kids actually love the “rainbow” version with colorful peppers.
- Gluten-free option: Use gluten-free tortillas (I like Siete brand) and check your pizza sauce label. They cook up just as crispy.
- Breakfast twist: Swap the pizza sauce for a thin layer of scrambled eggs and add crumbled bacon. My husband calls these “breakfast pizzadillas” and they’re a weekend favorite.
- Dairy-free: Use dairy-free shredded cheese (Violife or Daiya melt beautifully) and skip the pepperoni if it contains dairy.
- Mini versions: Use small corn tortillas to make bite-sized pizza quesadillas. Perfect for toddler hands or party snacks.
I once tried a version with pesto instead of pizza sauce. It was delicious, but my kids looked at me like I’d lost my mind. Stick with the classic for picky eaters!
Serving & Storage Suggestions
These pizza quesadillas are incredibly versatile. Here’s how to serve and store them.
Serving: Serve warm, at room temperature, or even cold straight from the lunchbox. They’re perfect with a side of extra pizza sauce for dipping, a handful of baby carrots, or some apple slices. For a hot lunch, pack them in a thermos or insulated container.
Storage: Refrigerate leftover wedges in an airtight container for up to 4 days. They freeze beautifully too. Place cooled wedges in a single layer on a baking sheet, freeze until solid, then transfer to a freezer bag. They’ll keep for up to 3 months.
Reheating: The best way to reheat is in a dry skillet over medium heat for 2-3 minutes per side. A toaster oven or air fryer works too. Avoid the microwave unless you’re okay with a soft, chewy texture.
The flavors actually meld together after a day in the fridge. I’ve packed these on a Sunday for Monday’s lunch, and they taste even better the next day.
Nutritional Information & Benefits
Here’s an approximate breakdown per quesadilla (using two 8-inch flour tortillas, mozzarella, and pepperoni):
- Calories: 320-350
- Protein: 18g
- Carbohydrates: 28g
- Fat: 16g
- Fiber: 2g
- Sodium: 680mg
These numbers will vary based on your specific ingredients and toppings. Using whole wheat tortillas adds fiber, and turkey pepperoni cuts the fat and sodium.
The mozzarella provides calcium and protein, while the pizza sauce offers a serving of vegetables (yes, tomatoes count!). This is a balanced lunch option that keeps kids full and satisfied without weighing them down.
For lower sodium, look for reduced-sodium pizza sauce and skip the pepperoni. You can also use part-skim mozzarella to cut a few calories.
Conclusion
This easy pizza quesadilla lunchbox for picky eaters has saved me from countless morning struggles. It’s quick, it’s simple, and it actually gets eaten. I love that I can customize it based on what my kids are into that week, and that it travels so well.
Honestly, this is one of those recipes that makes you feel like a superhero parent—even on the chaotic mornings. Give it a try, and don’t be afraid to play with the fillings. Your kids will love it, and you’ll love how easy it is.
I’d love to hear how it goes! Drop a comment below and tell me what toppings your family loved best. And if you’ve got a picky eater who surprised you, I want to hear that story too. Happy lunch packing!
Frequently Asked Questions
Can I make these ahead of time for the whole week?
Absolutely! Cook them on Sunday, let them cool completely, and store them in the fridge. They’ll stay fresh for up to 4 days. Just pack them in the morning and you’re good to go.
How do I keep the quesadilla from getting soggy in the lunchbox?
Let the wedges cool completely before packing. If you’re stacking them, place a piece of parchment paper between layers. Avoid adding any wet ingredients like fresh tomatoes until right before serving.
Can I use corn tortillas instead of flour?
Yes! Corn tortillas are smaller and have a different texture, but they work well. Use two per quesadilla and cook them the same way. They’ll be a bit crunchier and have a more authentic Mexican flavor.
My child is allergic to dairy. What can I use instead of cheese?
Dairy-free shredded cheese works great. Violife and Daiya are my top picks for melting. You can also skip the cheese entirely and just use sauce and toppings—it’s more like a flatbread, but still delicious.
How do I pack these so they stay crispy until lunchtime?
Pack them in a wide, shallow container in a single layer. If you must stack, use parchment paper between layers. Avoid sealing them in a plastic bag, which traps steam and makes them soft. An insulated lunchbox with an ice pack works perfectly.
Pin This Recipe!
Easy Pizza Quesadilla Lunchbox for Picky Eaters

A quick and easy pizza quesadilla that’s perfect for lunchboxes, featuring a crispy tortilla, melted cheese, and classic pizza flavors. It’s a crowd-pleaser that even picky eaters will love.
- Prep Time: 5 minutes
- Cook Time: 8 minutes
- Total Time: 13 minutes
- Yield: 4 servings 1x
- Category: Lunch
- Cuisine: American
Ingredients
- 2 flour tortillas (8-inch)
- 2 tablespoons pizza sauce
- 1/3 cup shredded mozzarella cheese
- 6–8 pepperoni slices (optional)
- Butter or olive oil (optional, for brushing pan)
- Optional toppings: diced bell peppers, mushrooms, olives, cooked sausage crumbles, Italian seasoning
Instructions
- Heat a non-stick skillet over medium heat for about 2 minutes.
- Lay one tortilla flat. Spread 2 tablespoons pizza sauce evenly, leaving a small border. Sprinkle 1/4 cup mozzarella over sauce. Add pepperoni and other toppings. Top with a thin layer of cheese. Place second tortilla on top and press gently.
- Transfer assembled quesadilla to hot pan. Cook 3-4 minutes until bottom is golden brown and crispy.
- Flip carefully with a spatula. Cook other side 2-3 minutes until golden and cheese is melted.
- Transfer to cutting board. Let rest 1-2 minutes. Slice into 4 or 6 wedges with pizza cutter or knife.
- Let wedges cool completely before packing in lunchbox. Place in single layer; use parchment paper between layers if stacking.
Notes
For extra crispy results, don’t butter the pan. Let quesadilla rest before cutting to prevent cheese from sliding out. Reheat in a dry skillet or toaster oven for best texture.
Nutrition
- Serving Size: 1 quesadilla (4 wedg
- Calories: 335
- Sugar: 3
- Sodium: 680
- Fat: 16
- Saturated Fat: 6
- Carbohydrates: 28
- Fiber: 2
- Protein: 18
Keywords: pizza quesadilla, lunchbox, picky eaters, easy lunch, kid-friendly


